Who wouldn’t want their pictures to always come out crisp and clear? We’ve all had moments where an awesome image turns out to be a bit too soft upon closer inspection. Luckily, a technique known as focus stacking can play a huge role in cutting down focus errors.
In short, focus stacking takes the sharpest parts of a few similar photographs to create a composition with greater clarity. And, while the process may sound time-consuming, it actually only takes a few minutes to implement. Here’s what you need to know to start focus stacking in Lightroom and Photoshop today!
Focus Stacking Q&A
What is Focus Stacking?
Composite photography – or focus stacking – is a technique in which multiple images are combined to create a single image. How can Focus Stacking improve my photography?
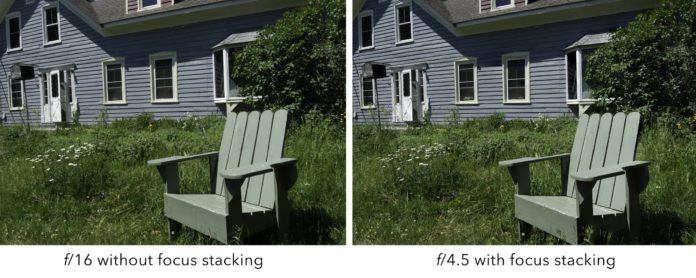
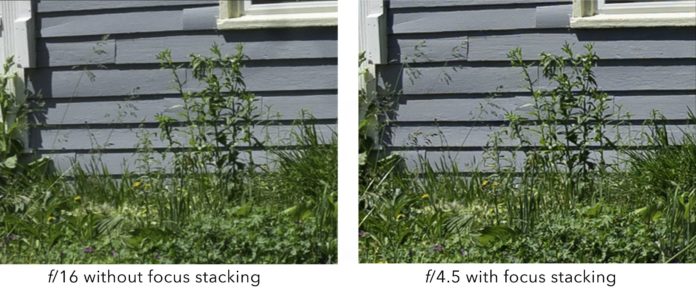
Not every aspect in a single image can be rendered perfectly in focus, even if you are shooting at the narrowest aperture your camera has to offer.
Compositing allows you to create an image where objects on multiple planes are rendered in focus. This, in turn, creates the illusion of depth.
What types of photography use Focus Stacking?
Focus stacking is especially effective when you’re in a situation that requires you to work with a shallow depth of field or a longer focal length.
For instance, night photography lends itself well to focus stacking because there’s a lot to focus on between the stars and the landscape. When you focus on specific areas piece by piece rather than try to capture everything in one frame, you end up with a crisper shot with less digital noise.
Landscape and macro photographers often take advantage of focus stacking. It’s also a useful technique for product photography, as it gives everything a more polished, professional look.
Step-by-Step Stacking in Lightroom
As uber-professional as focus-stacked images appear to be, the process itself is fairly straightforward. With the help of Lightroom and Photoshop, focus stacking takes a few simple steps:
Total Time: 10 minutes
Compile your composite images
Take a series of images, taking care to keep the frame stationary and to focus on different areas of the composition as you go. A tripod will be your best friend during this initial step.
Upload and select the photos in Lightroom
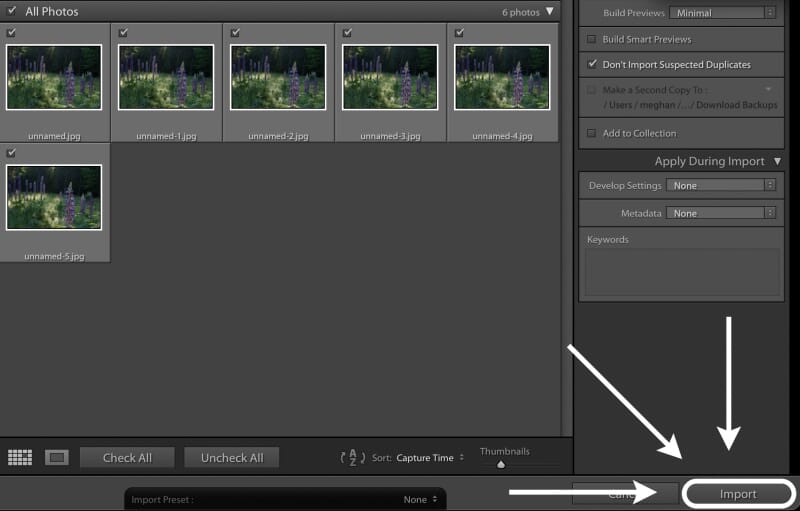
Using the grid or filmstrip view in the Library module, select all of the images that you want to stack together.
Transfer the photographs to Photoshop

Select Photo and Edit Open as Layers in Photoshop. Your images will then be ordered and transferred to Photoshop document, where each frame will be represented as a unique layer.
Auto-align your layers
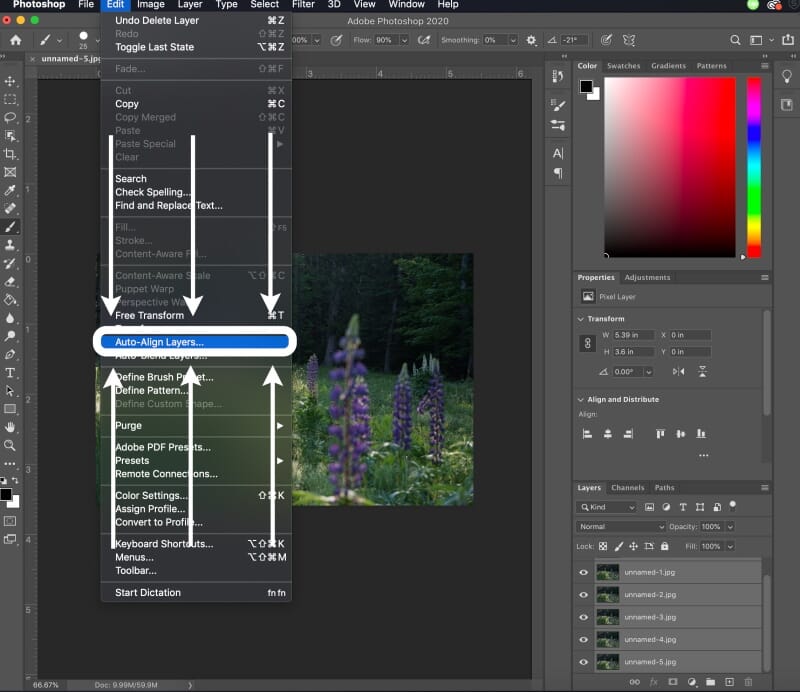
In the Layers panel, select all of your frames. Then, in the Edit drop-down menu, select Auto-Align Layers. A dialog box will appear. Be sure to check Auto before pressing OK.
Auto-blend your layers
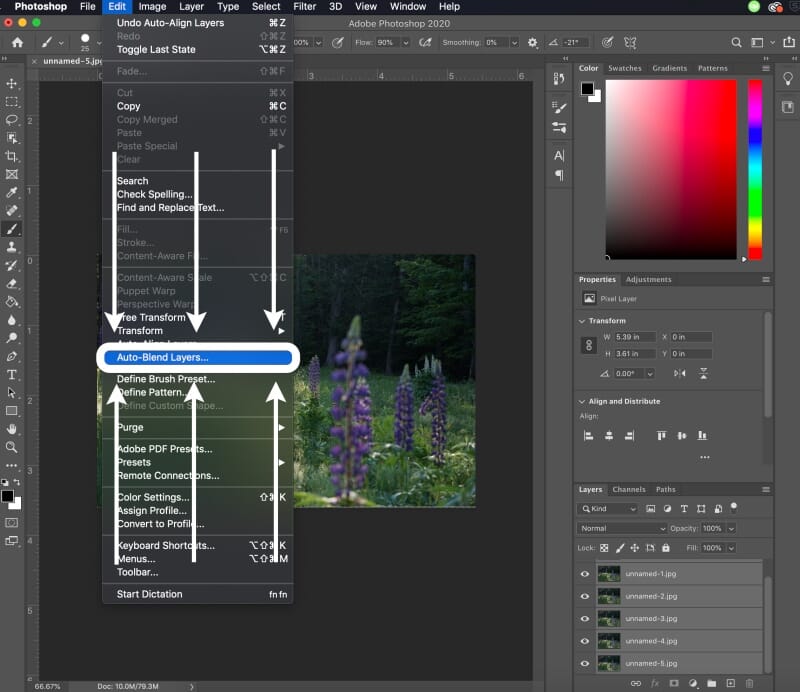
Select all of the layers that you just aligned. Go back to the Edit drop down menu, but this time select Auto-Blend Layers. In the dialog box, select the Stack Images option before pressing OK. Once you’ve completed these steps, the focus-stacked image will appear as a layer mask!
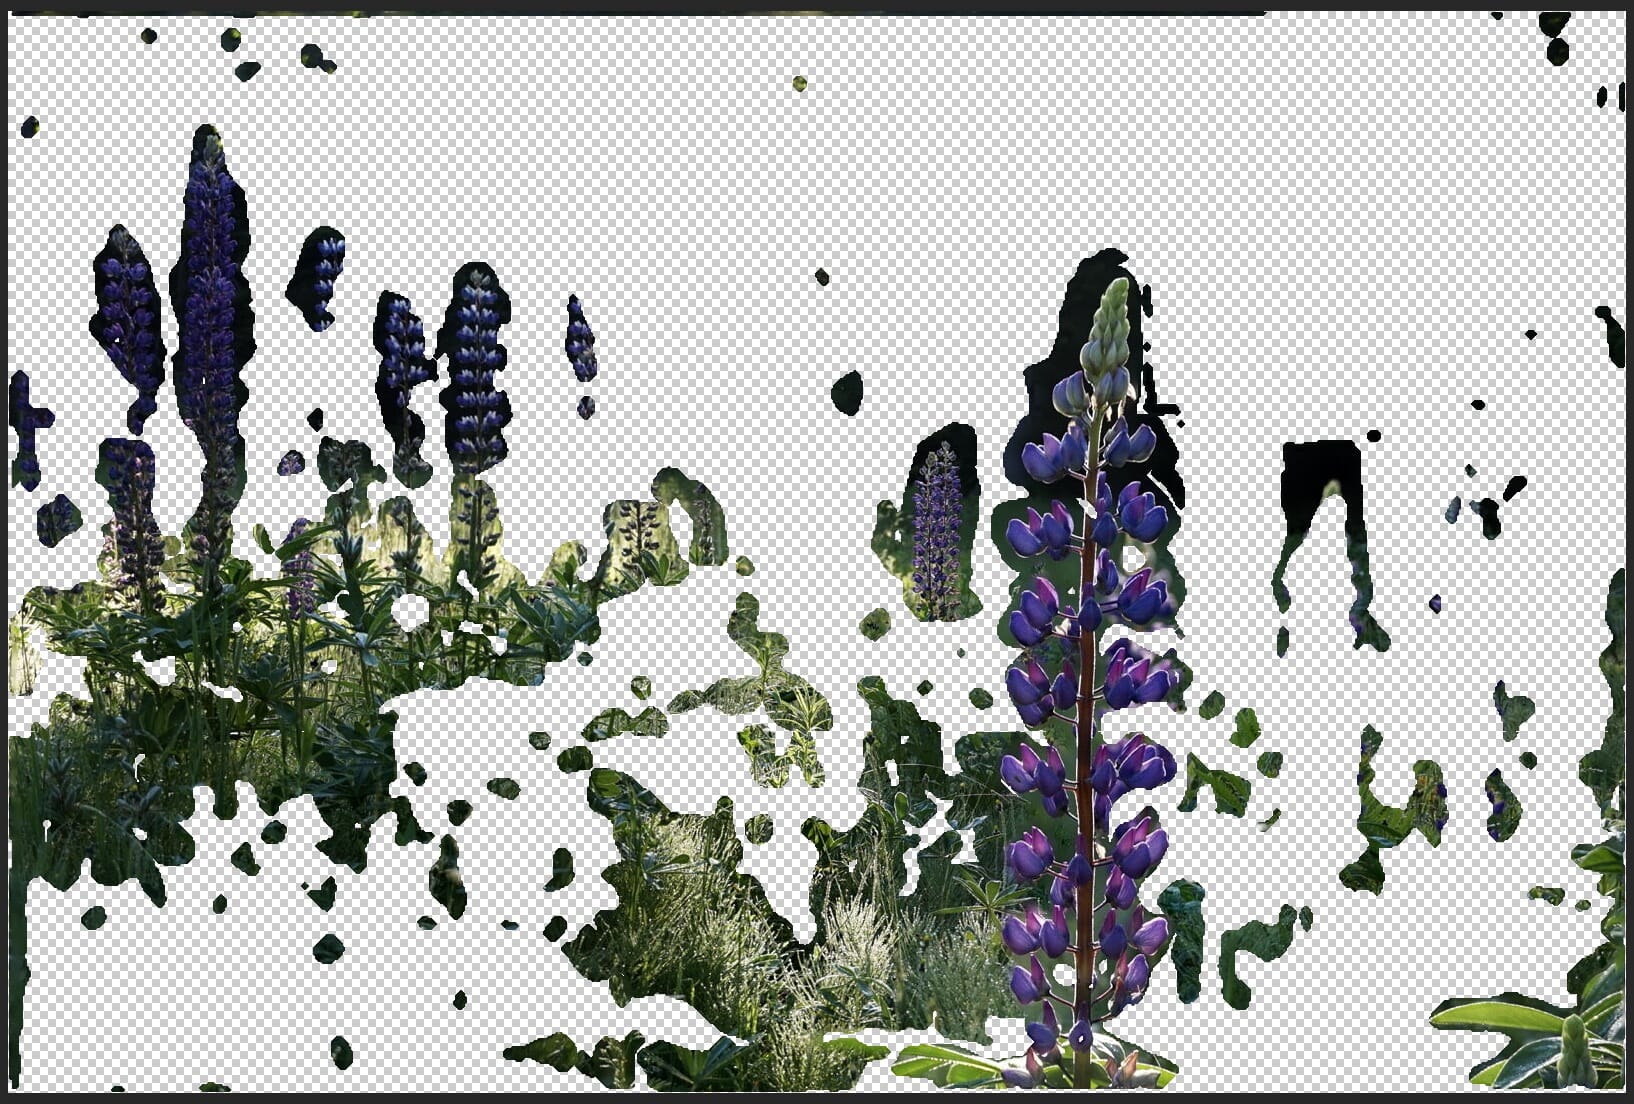
Essentially, the Auto-Blend tool will go through each of your layers and pick out the areas with the largest leaps in color and tonality. The majority of the time, a significant contrast between pixels correlates with the sharpest area of an image. Once Photoshop identifies which segments have the “sharpest” details, it masks out blurrier details layer by layer.
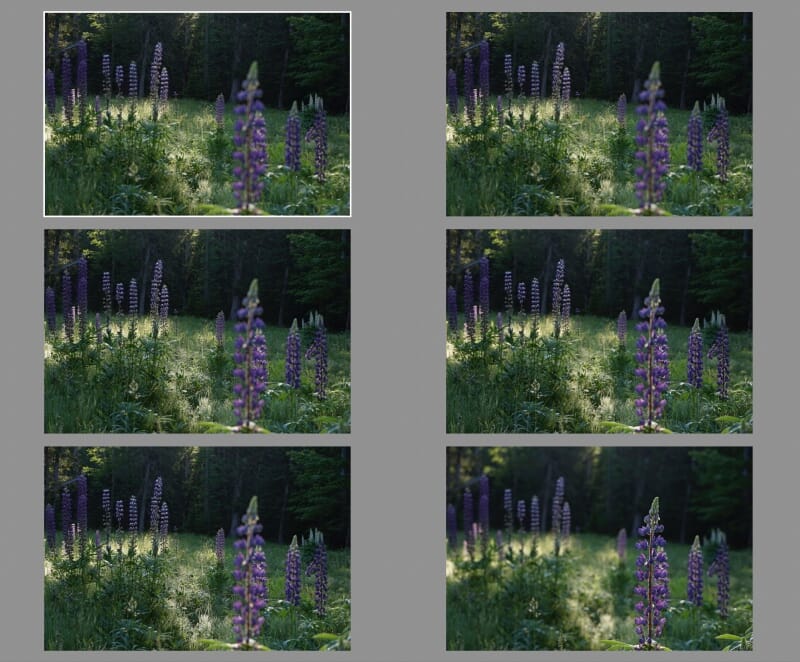
Individually, a single layer might wind up looking something like this:
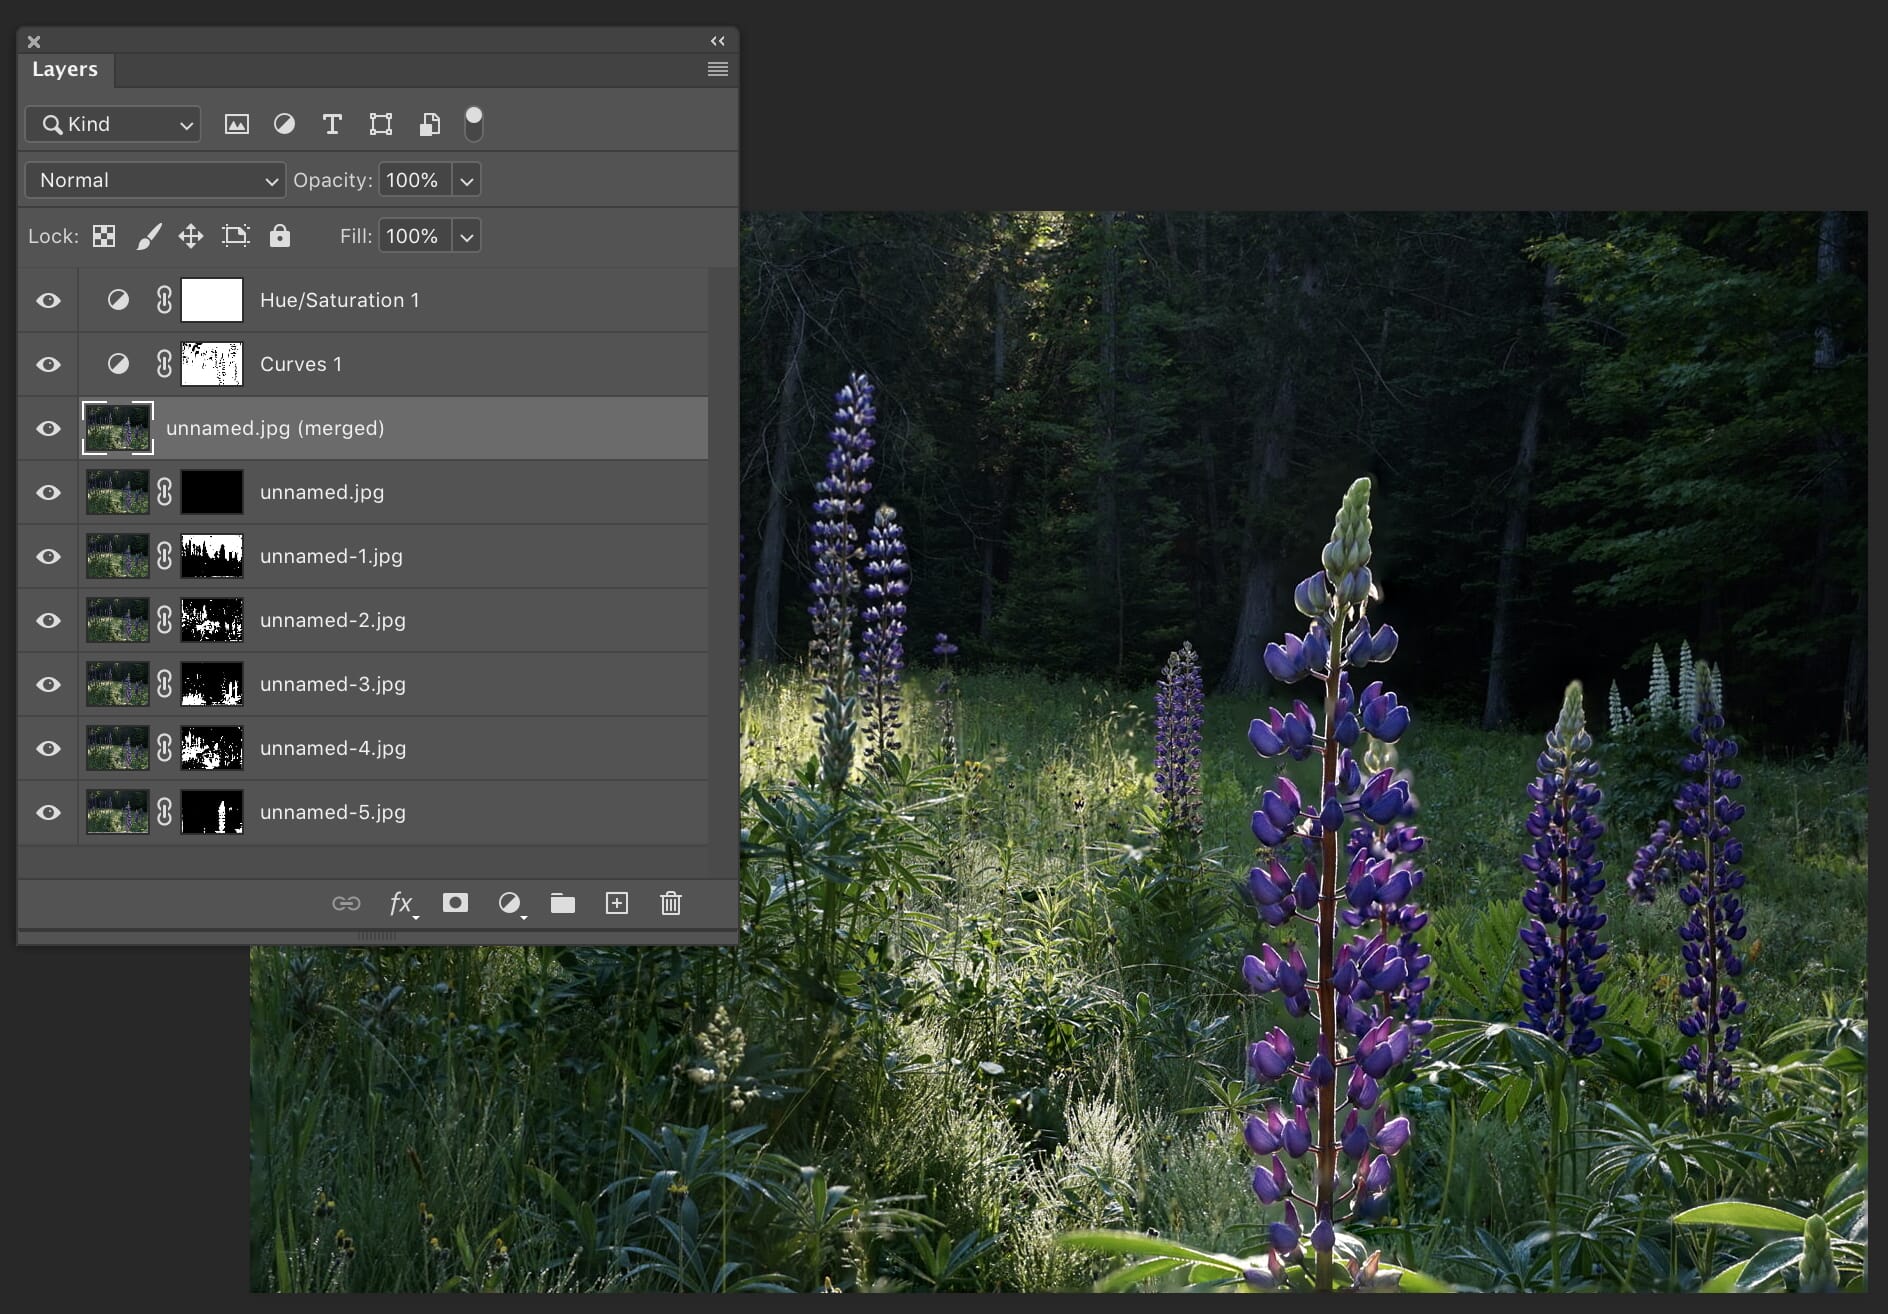
However, the layers combine to create a full image. With the sharpest parts cherry-picked from each layer, you wind up with a composite more detailed than its individual parts.
And that’s all there is to it! With a little bit of extra toning, color correction, and some other small tweaks, you’ll end up with an end product that looks something like this:
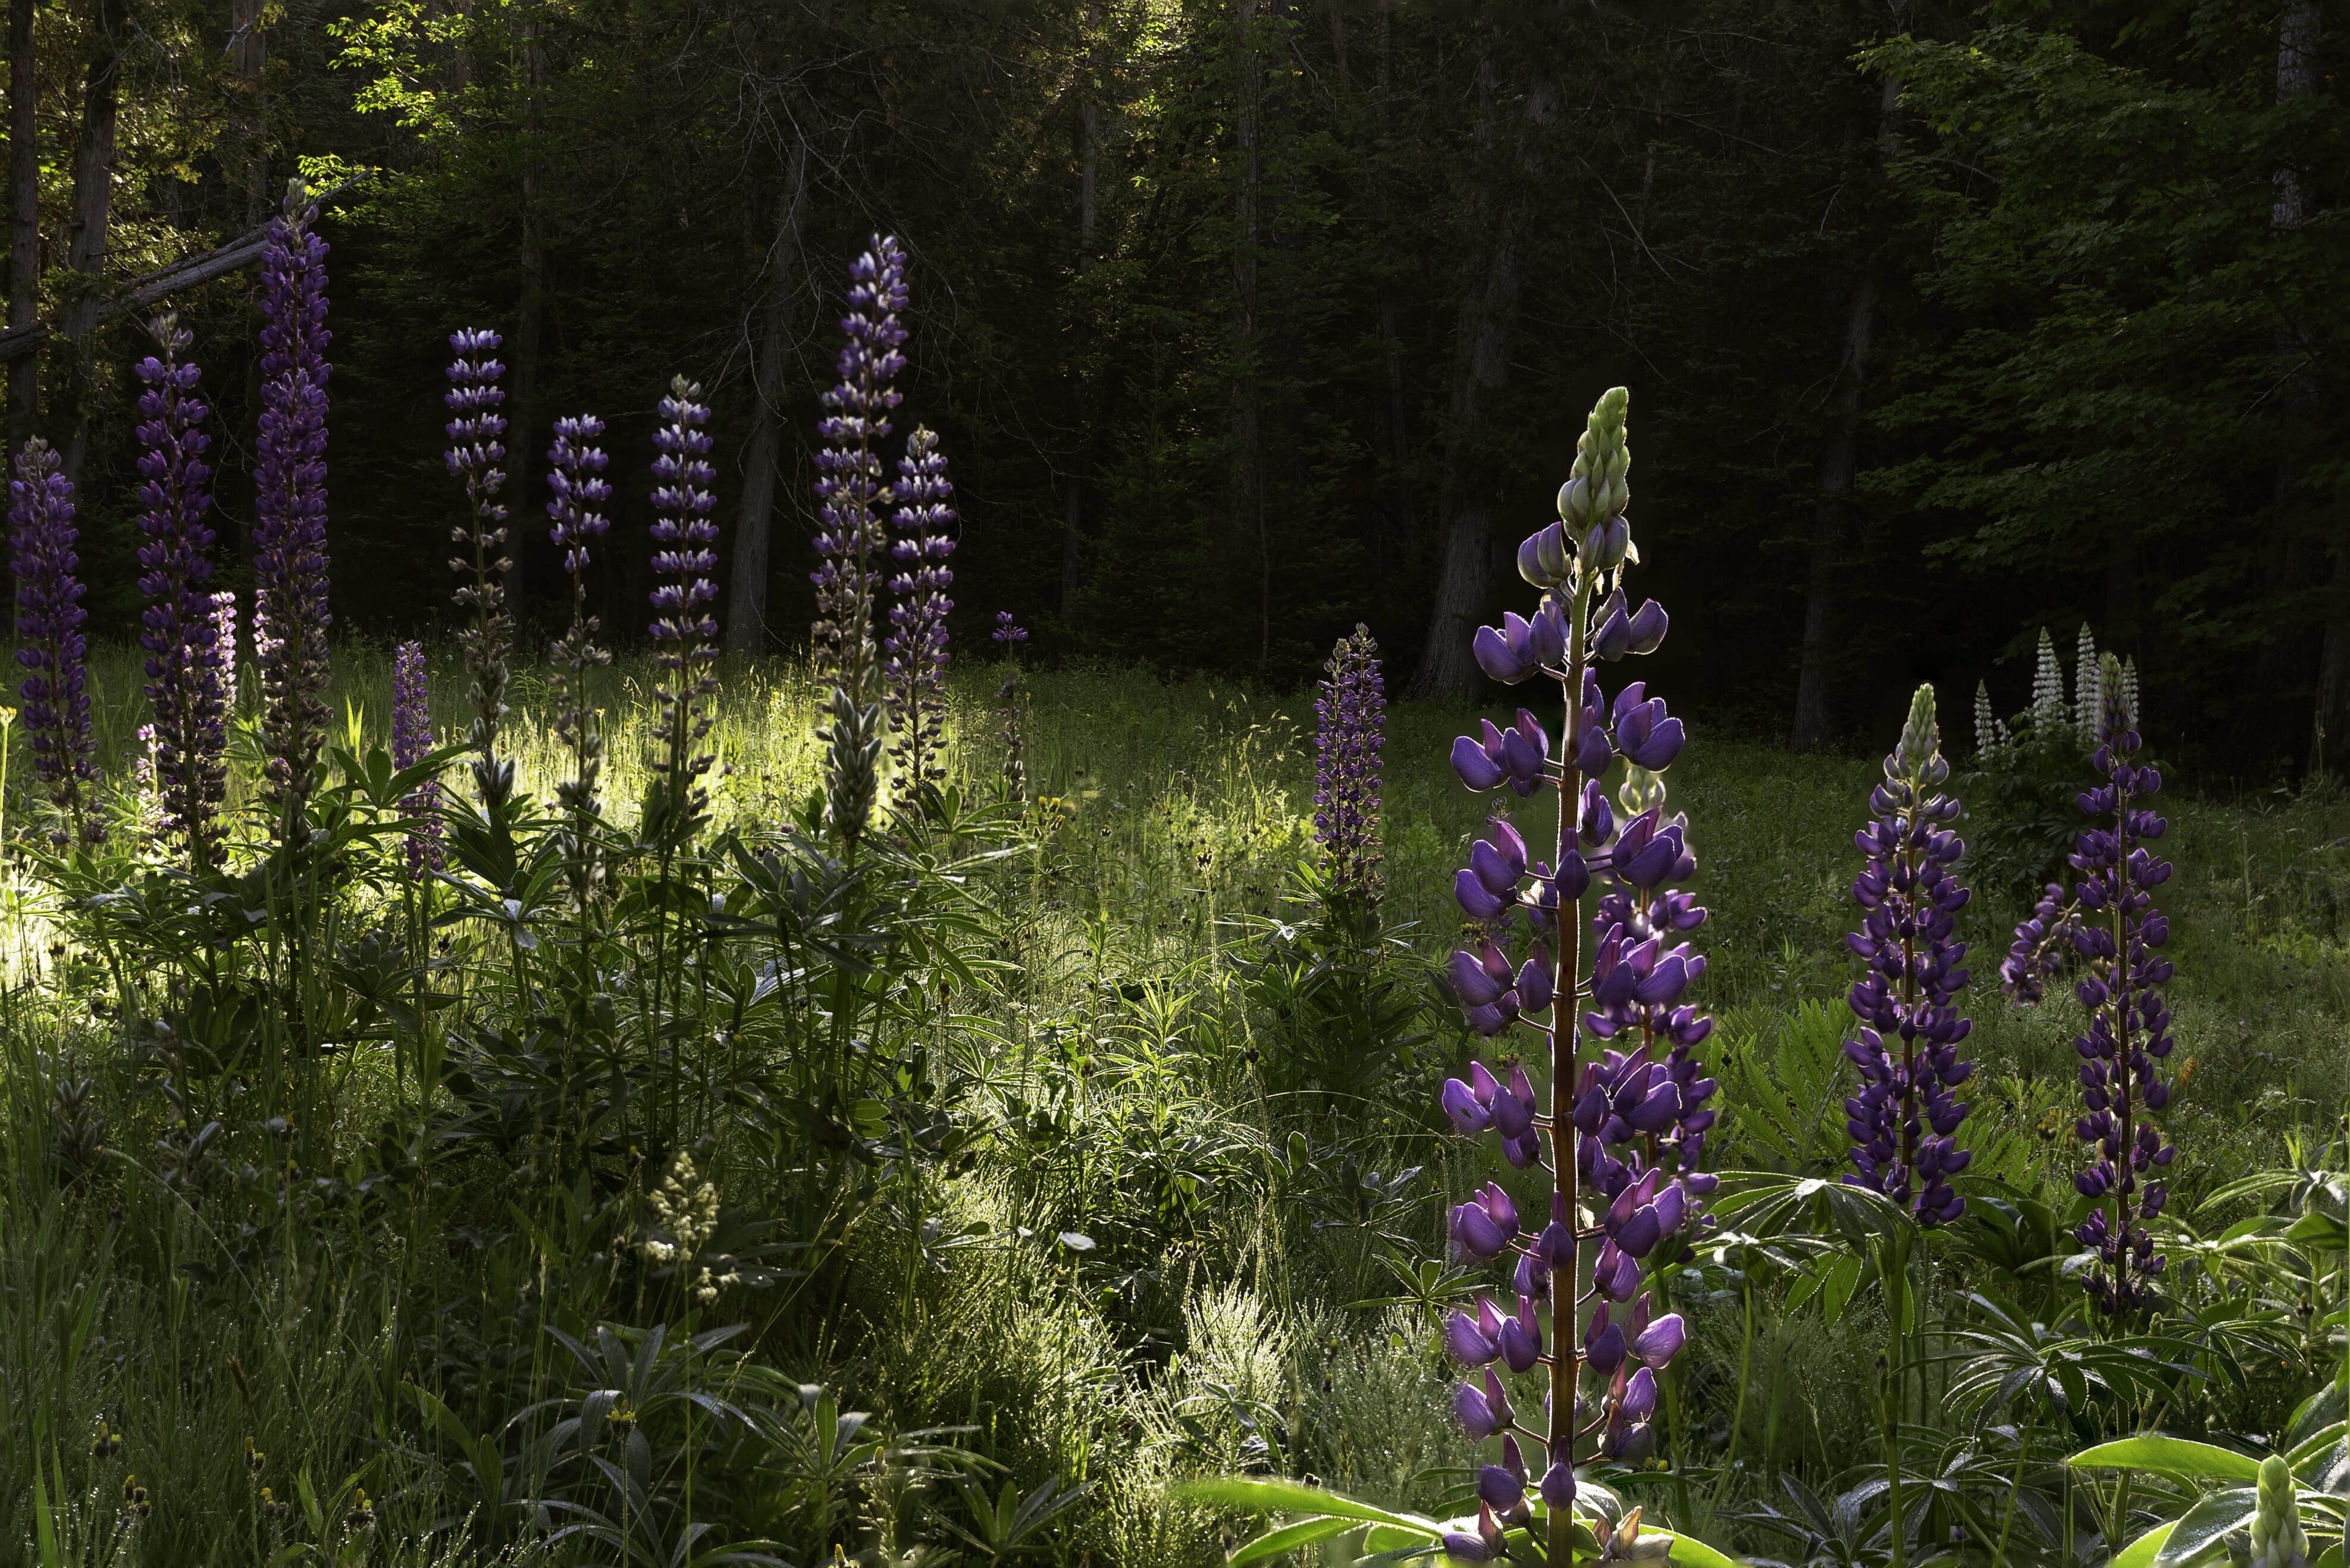
Not bad for a few minutes of effort! Though the results often look great, learning to focus stack your images couldn’t be much easier.
Helpful Hints
Photoshop does a lot of the heavy lifting for this technique, but there is a slight learning curve to getting focus stacked photos just right. Here are a few points to consider while gathering your exposures and piecing together your composite image.
Movement Makes a Difference
As I mentioned earlier, a tripod is a must-have to get your images stacked properly. Even the slightest shift in your camera’s position will make alignment nearly impossible. On top of that, you also need to consider movement happening within your environment when choosing a scene for focus stacking.
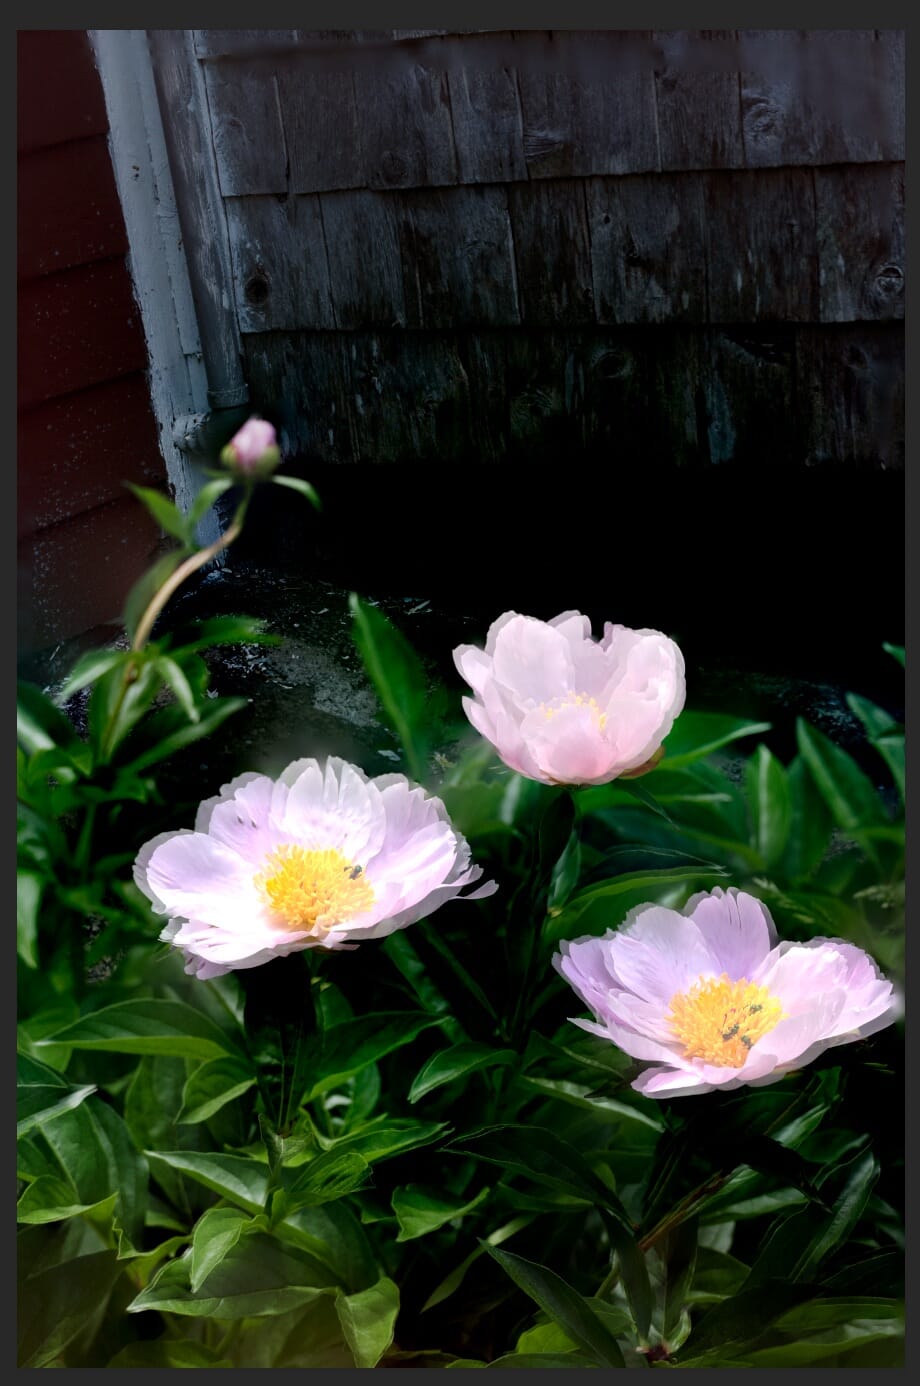
I thought that these peonies growing against an old wooden barn would work well for this particular demo. And had their not been a slight breeze that afternoon, they might have. I hardly noticed the wind, and when I uploaded the frames to Lightroom, I didn’t notice any changes in each flower’s position.
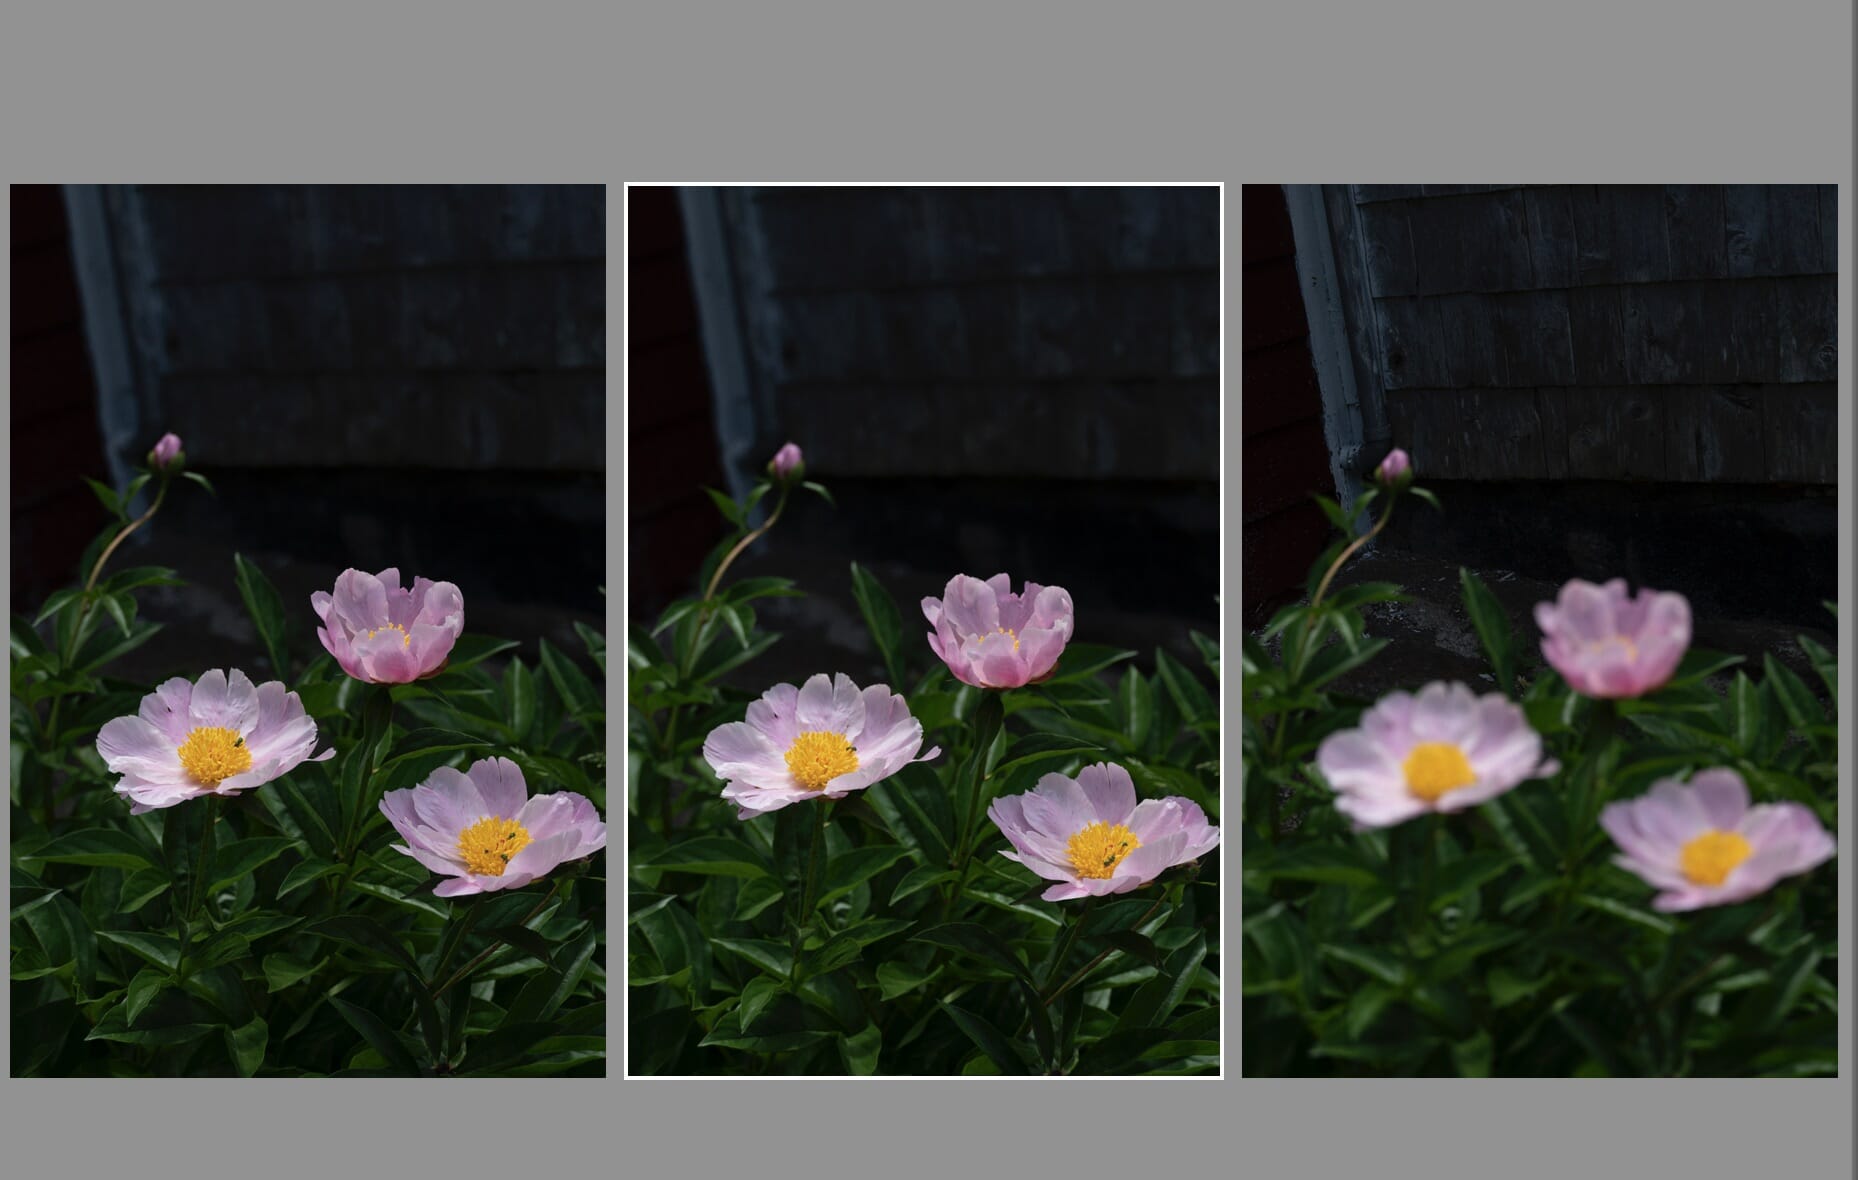
However, once I blended the exposures, it became clear that the breeze caused more than enough movement to totally throw off my image.
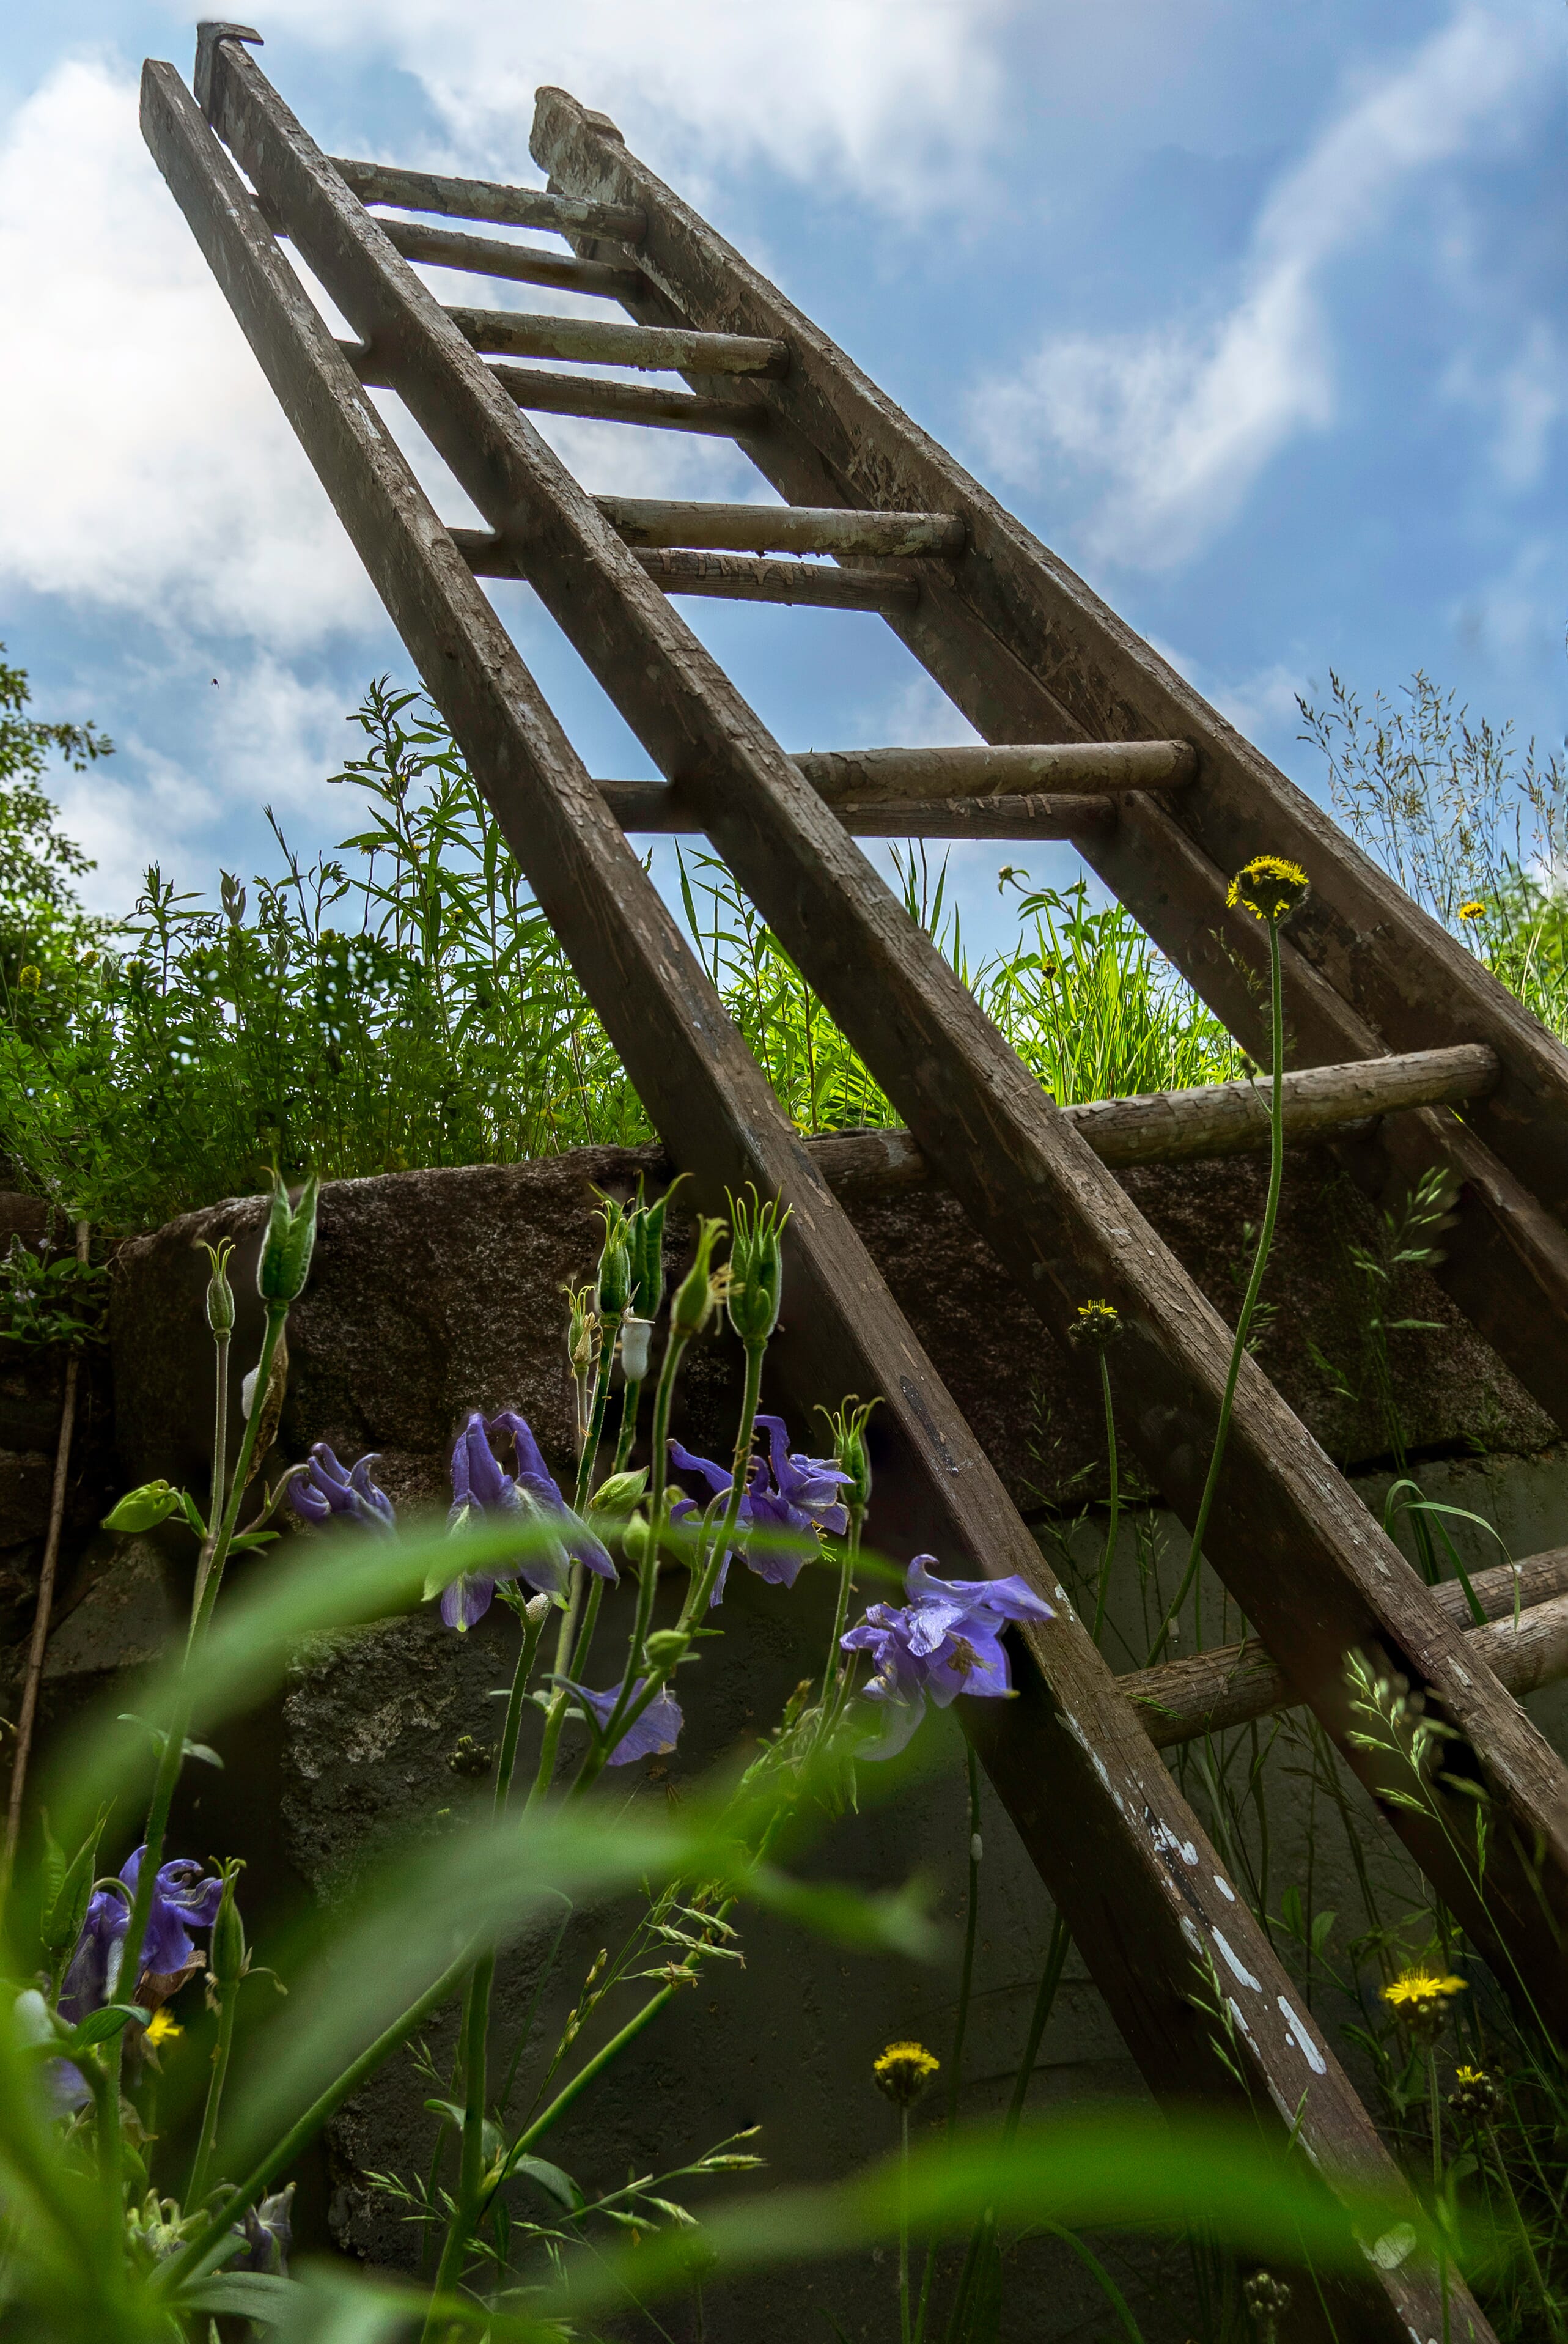
Check the Fine Details
Photoshop’s auto-align and auto-blending tools are powerful. But it’s important to remember that, being automated, it won’t always produce perfect results. This farmhouse composite came out distorted, even though the same focus stacking technique worked fine in other instances.
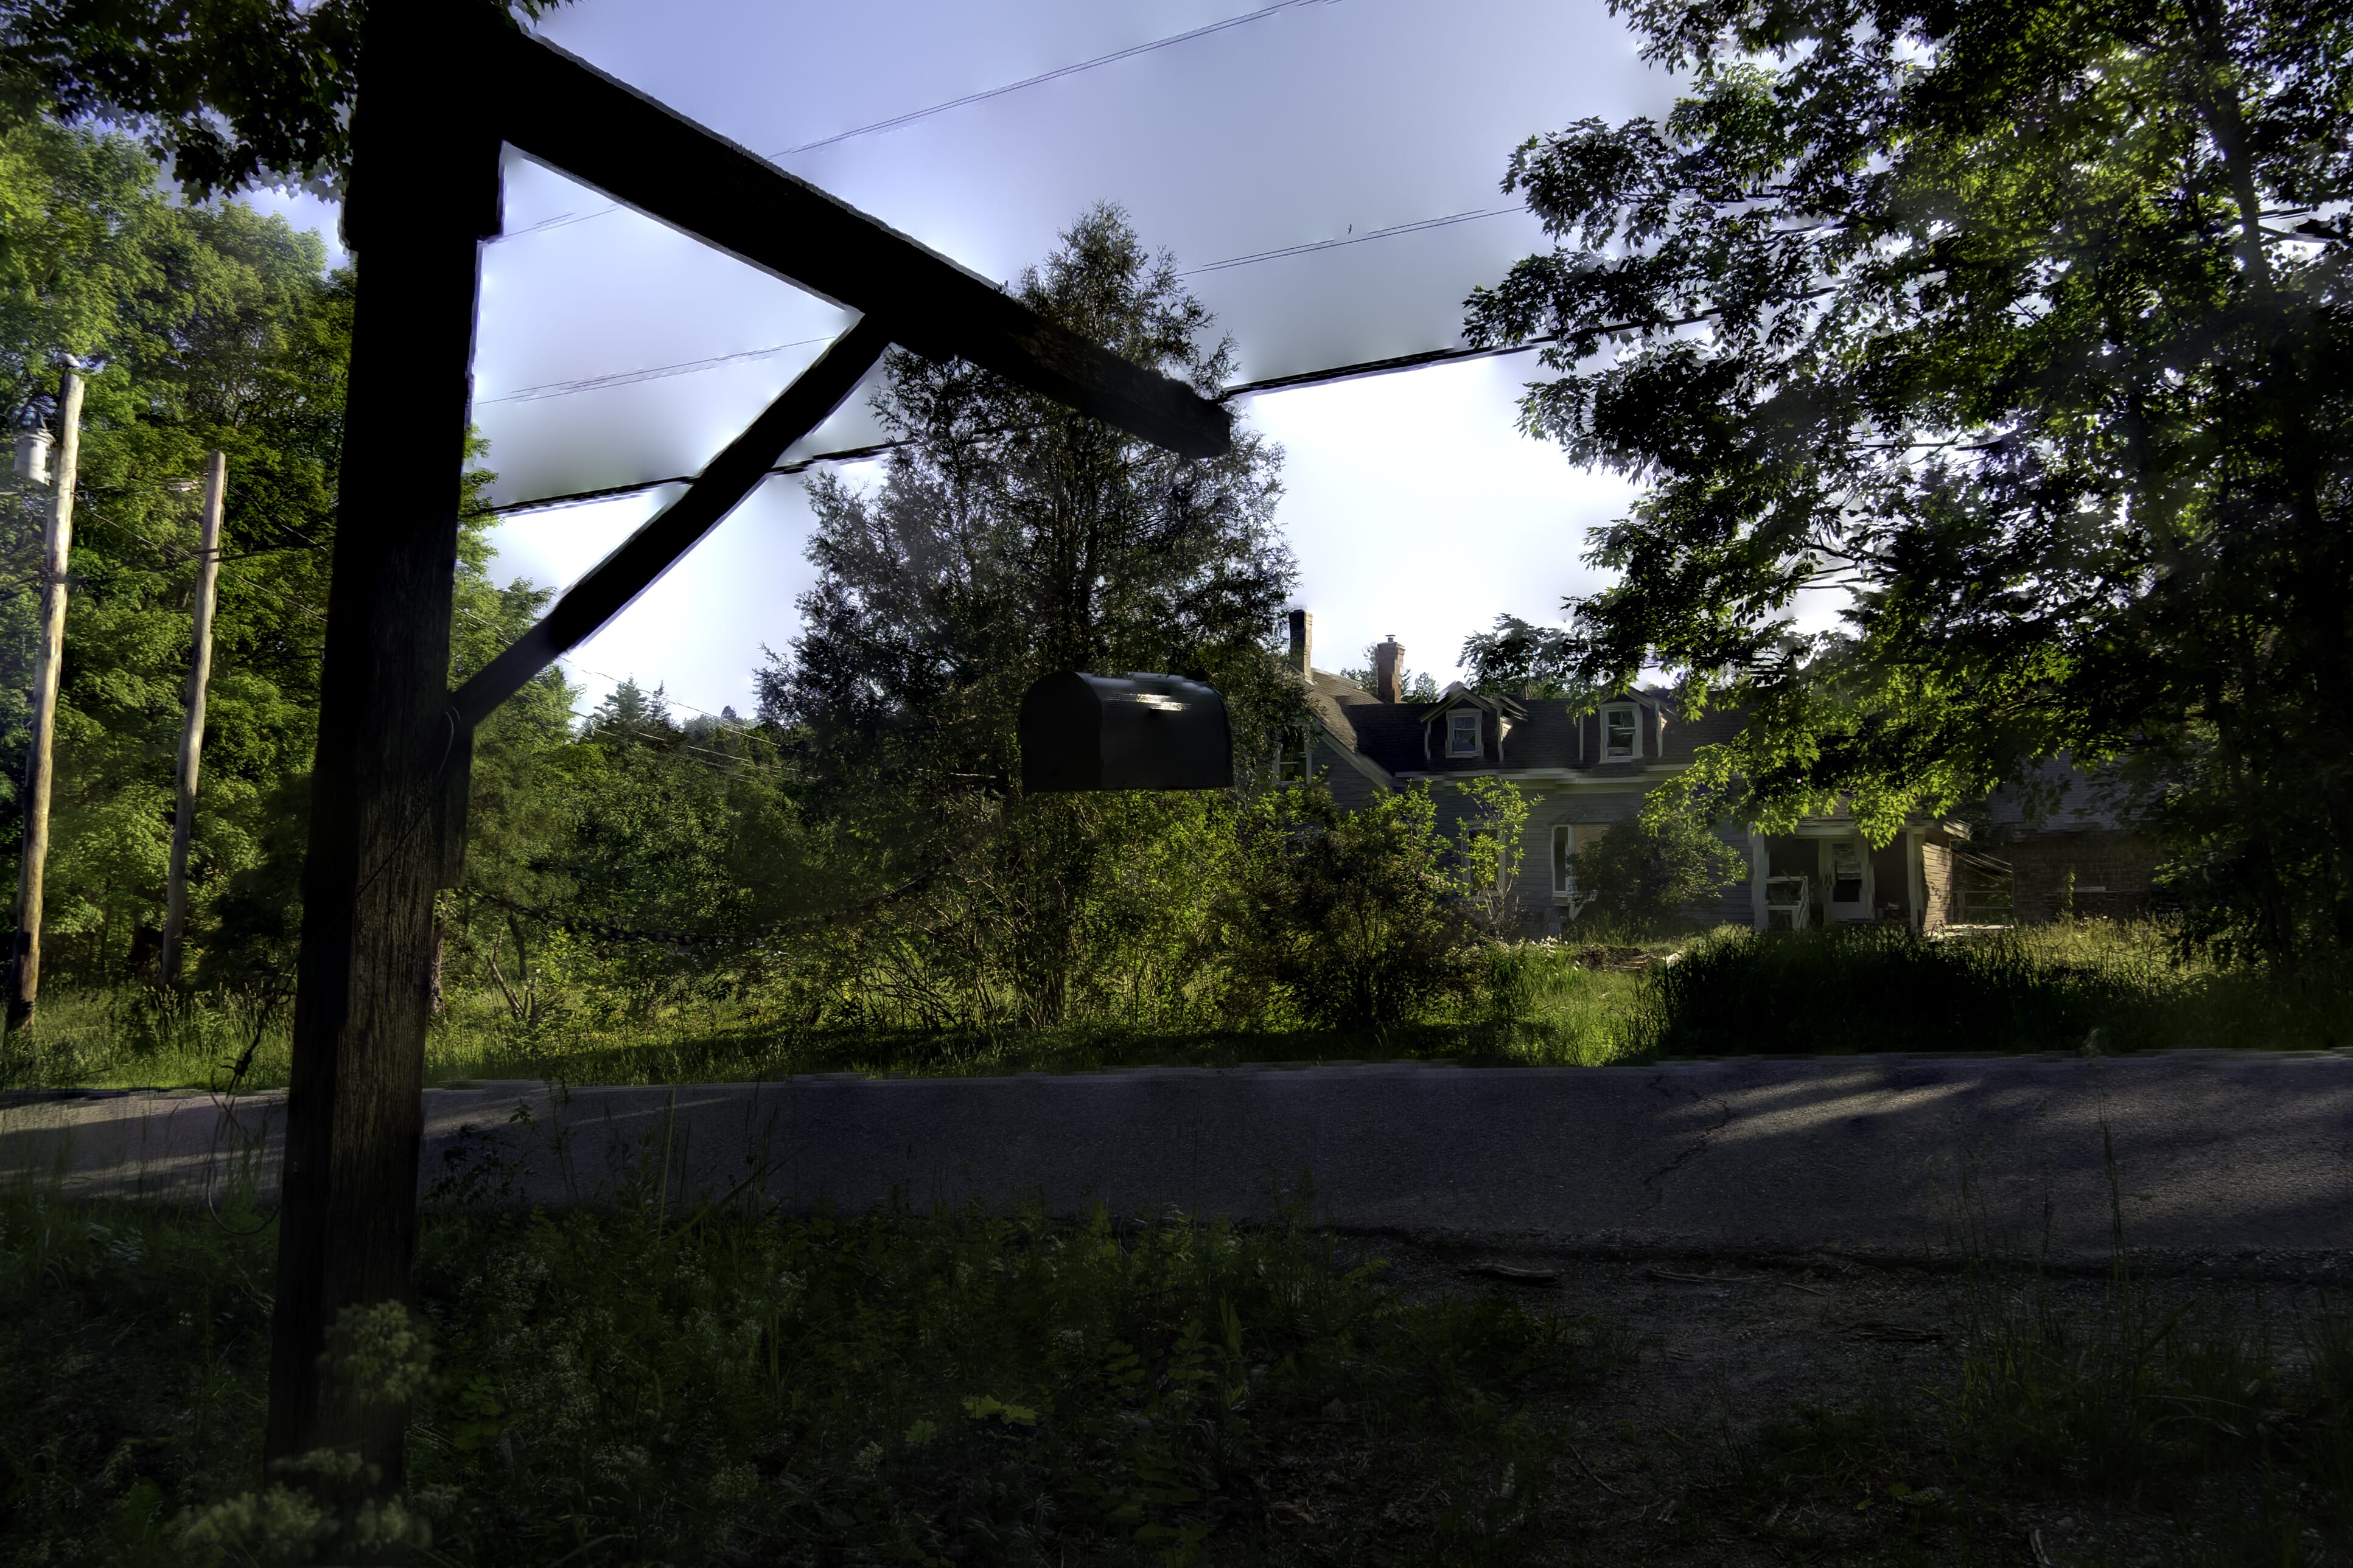
Most of the time, Photoshop’s missteps won’t be this apparent. Be sure to take a close look at finer details that may not have rendered properly. Automatic tools generally yield good results, but sometimes it’s necessary to make minor adjustments by hand!
Do Your Best to Keep Settings Consistent
Keep in mind that focus stacking does not take into account exposure differences. This technique only deals with focus, and will not “fix” over or underexposed areas
For the composites below, I used multiple exposures to try to capture the bright morning sky and treetop details. When rendered as an HDR composite, you can see blue skies and branches. The same cannot be said for the blown-out sunlight in my focus-stacked composite. Both composites use the same set of base images, but it’s easy to see the differences between the end products.
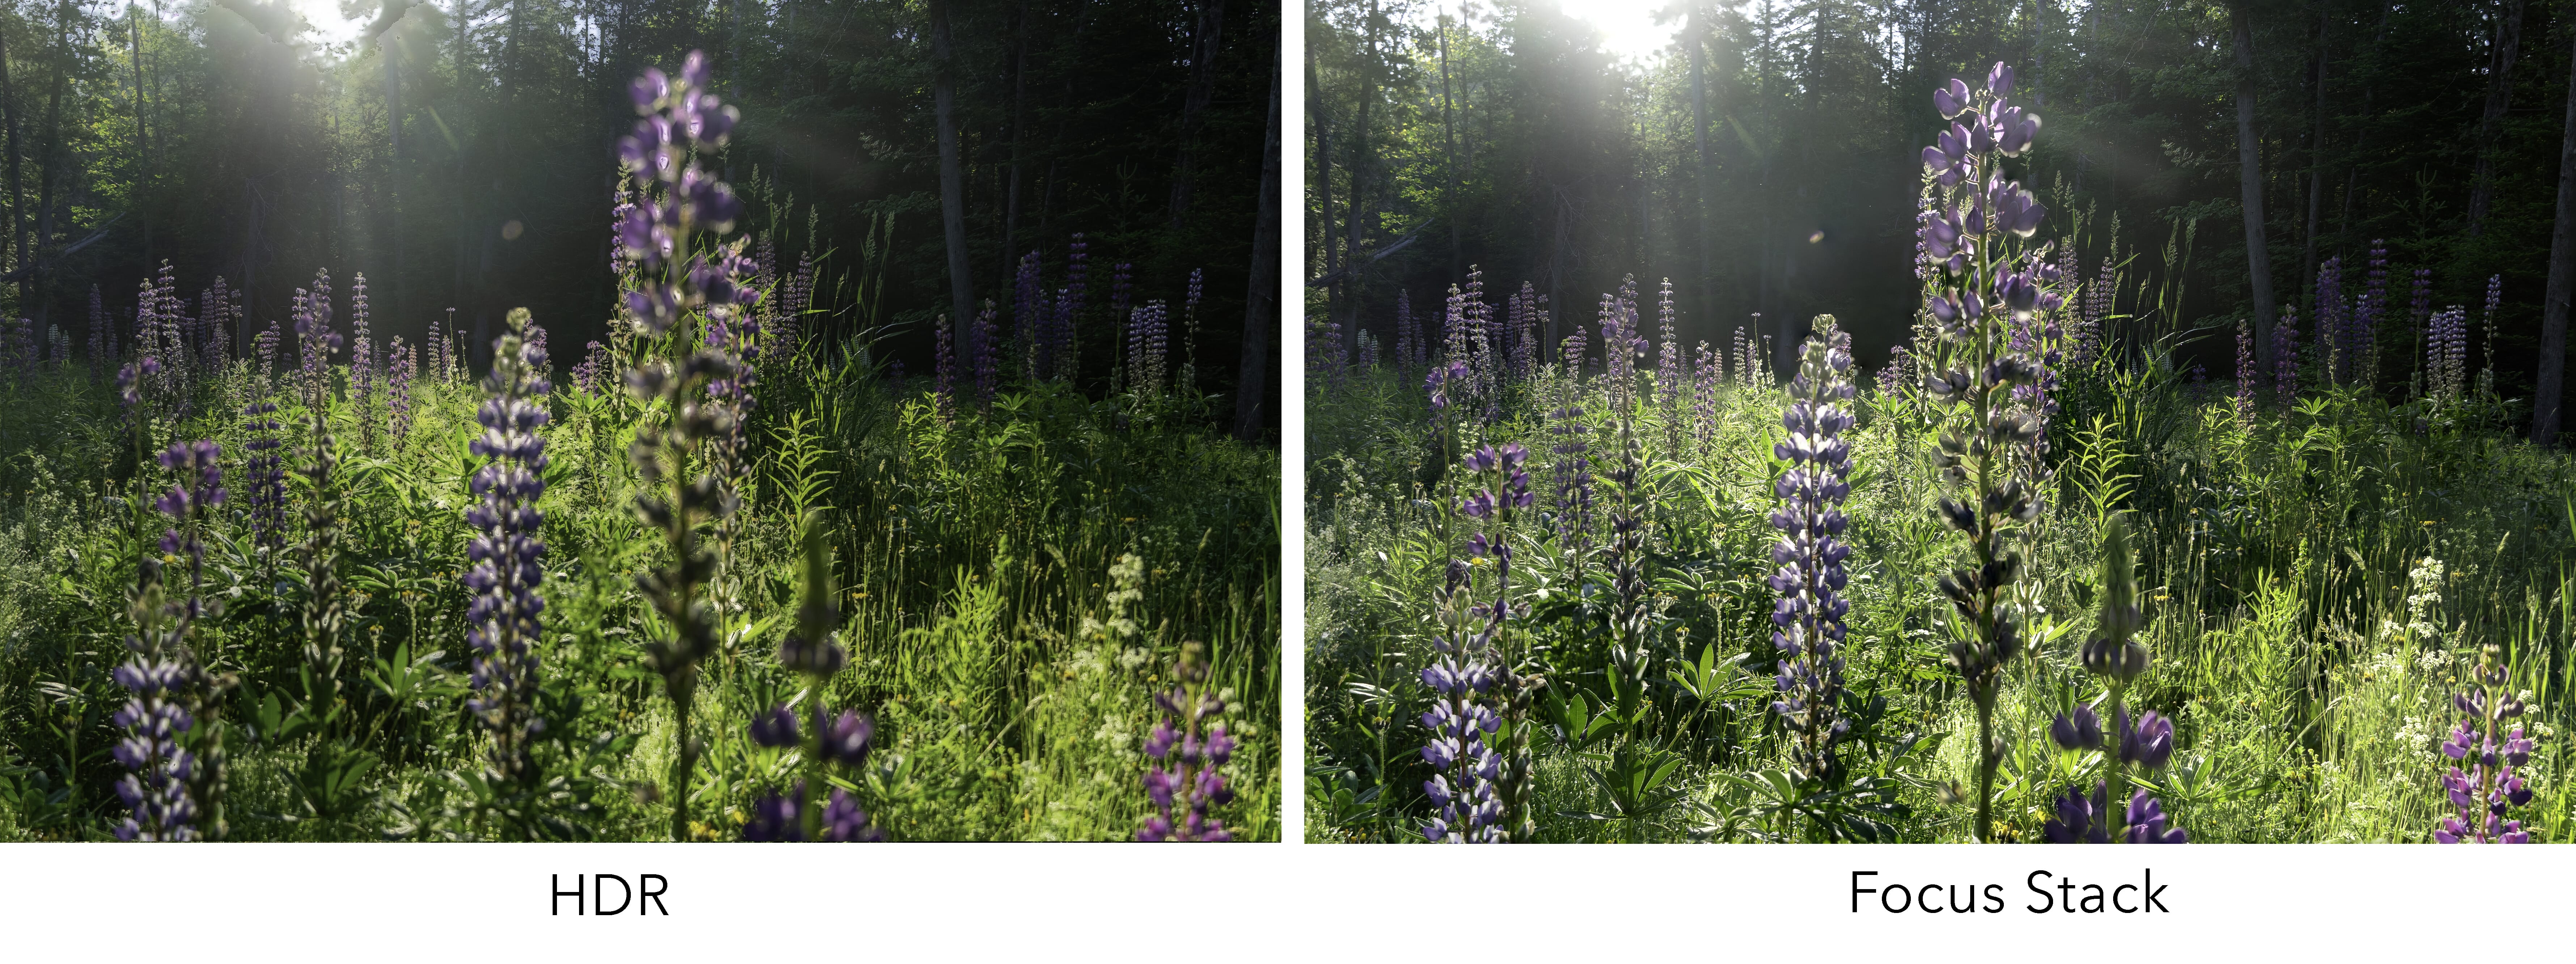
When you’re composing your shot, your best bet is to shoot RAW and slightly underexpose if your camera can’t capture every detail. You can always go in, recover some shadow details in post, then sync the settings across the images in your series.
Breathtaking photography doesn’t have to be a strenuous, stressful ordeal. This easy-to-implement technique may not be perfect, but it’s a great starting point to work with. Rather than settling for a few good images, use focus stacking to create a single great image in just a few clicks!