Modern digital photo editing has provided us with a myriad of possibilities. We can turn a simple digital photograph into something completely mind-blowing. We can change colors, add brush strokes, and even add filters to transform the photo into a masterpiece.
One such effect that we often desire is a painting effect such as a watercolor or oil painting. This article looks at why we would do this, and how to make a photo look like a painting – enjoy!
When you buy through links on our site, we may earn a commission at no cost to you. We evaluate products independently. Commissions do not affect our evaluations.
Best Software to Convert a Photo into a Painting:
- Adobe Photoshop – Filter Gallery
- GIMP – Artistic / Oily filter
- BeFunky Browser Application
- Tuxpi Online Photo Editor
- GetPaint.net (only for Windows Users)
- Luncapic – another Fee Photo Editor
Why Would You Want to Make a Photo Look Like a Painting?
Before we look at how to make a photo look like a painting, we will quickly discuss why. Why on earth would you want to do this? There are several reasons actually.
Firstly, you may simply want to test your creativity and have some fun. Programs such as Photoshop and GIMP allow us to create things with images and photos that were never possible before. In short, we may want to because we can. Secondly, you may have a design project or presentation that calls for this type of photo.
Thirdly, you may have a client who has asked specifically for this style of the photo to be printed as a canvas for example. Whatever the reason, it is possible, and we will show you how!
What Other Types of Effect Can You Apply to a Photo?
Turning a photo into a painting is just one of the many effects you can use. As you will see below, many editing programs offer a wide variety of photo effects and transformations. Adobe Photoshop, for example, has a whole library full of “filters” – different effects you can add to your snaps. The following are some common effects and filters you can apply to a photo:
- Black and white (removes all color from a photo except black & white)
- Watercolor (makes a photo look like a watercolor painting)
- Fresco (makes a photo look like a fresco painting)
- Neon Glow (adds a bright glow on any lines within the photo)
- Plastic Wrap (makes the photo look as if it is wrapped in plastic)
Why not have some fun and see what you can turn your photo into? You may be surprised at the creations you can make!
How to Turn Photos into Paintings
Now we come to the actual programs and website applications you can use. There are potentially hundreds of apps available; we have selected the best on the market, however. Photoshop undoubtedly provides the most flexibility and options with GIMP following as the best free Photoshop alternative. The other websites and programs can create fantastic painting effects however too – any one of the six below will create a superb painting effect!
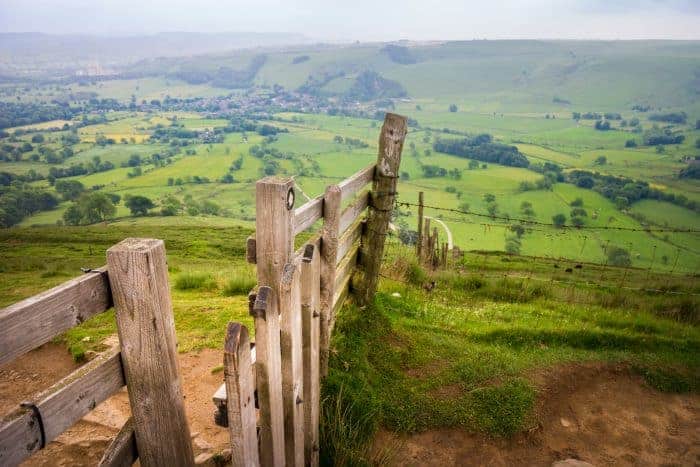
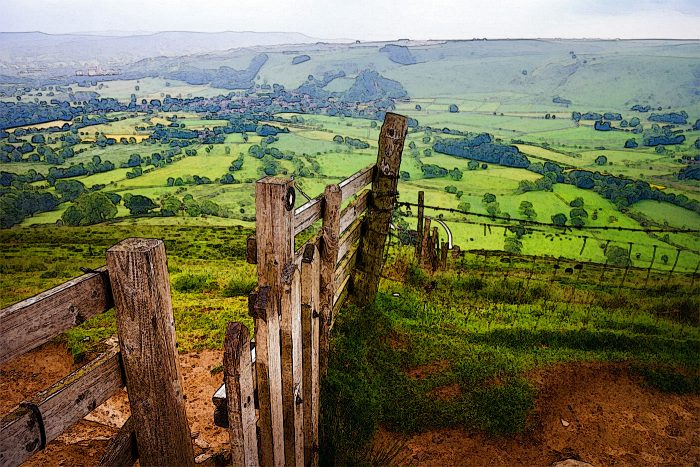
In this guide, we have run one of our own images through the filter process using each one of the listed programs/websites. This photo is just a simple JPEG image that was taken in the Peak District – the landmark is called Mam Tor if anyone is interested! Below is the original image without any painting effect applied for reference:
1. Adobe Photoshop – Filter Gallery
- Link – Photoshop.com
- Type – Graphic design and editing software
- Cost – Variable depending on monthly Adobe subscription
- Notable Feature – Can save the image in various different formats
Product Review
Photoshop is obviously the most well-known product on this list. Millions of people are the world use Photoshop. It has so many different purposes – graphic design, photo editing, marketing publications. You can do practically anything using this advanced editing program! The range of Photoshop filters is also extensive.
Examples of some filters include noise, pixelated, palette knife, brush stroke, watercolor, and lens flare to name a few. Using this program you can easily manipulate your photos and create stunning end products. The only downside to Photoshop is that it isn’t free and that it is not as straightforward to use as the other products on this list. There are plenty of tutorials available, however. Moreover, as you will see, the filters are easy to use.
Editing Process
- Obviously, you have to have Photoshop installed on your computer.
- Once you have it installed, you can then open an image or create a new one.
- Go to File in the top menu and then either Open or New.
- Now that your image is open, you can then select the filters menu.
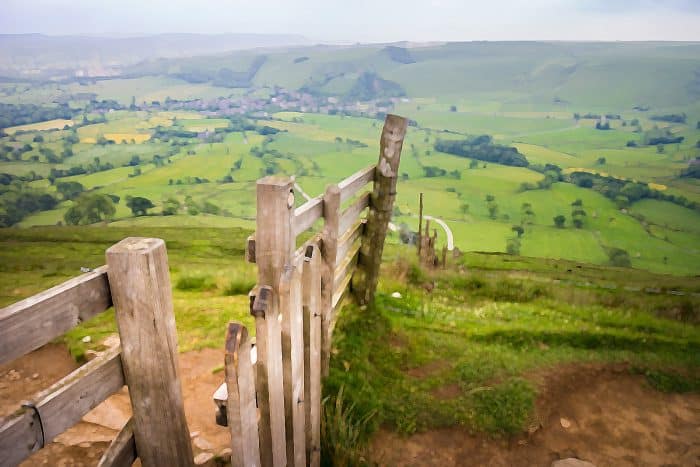
- This menu contains all the various effects you can apply to your image. For the example, below we went into the “artistic” subcategory and chose “paint daubs”.
- Other suitable painting style filters include Colored Pencil, Watercolor, Fresco, and Underpainting. Simply select the filter and choose your desired parameters – simple!
2. GIMP – Artistic / Oily filter
Link – Gimp.org
Type – Free graphics manipulation program
Cost – N/A
Notable Feature – Features just as many filters as Photoshop
Product Review
GIMP is basically the free version of Photoshop. If you can’t afford to splash out on Adobe’s premier editing program then GIMP can fulfill your needs. GIMP is highly advanced and has a plethora of features. It has a similar layout and tool style to Photoshop, but plenty of its own features too. The GIMP filter library has some wonderful additions. Moreover, you are given full control over the filters. GIMP also benefits from a huge community of artists and developers who create brushes and plugins to enhance your photo editing capabilities.
Editing Process
GIMP is a free download. The EXE file is approximately 172MB to download. Once you have installed GIMP you can then open your photo.
- Simply click on the “file” button in the top menu and click open.
- Select your image and it will appear on the editing screen.
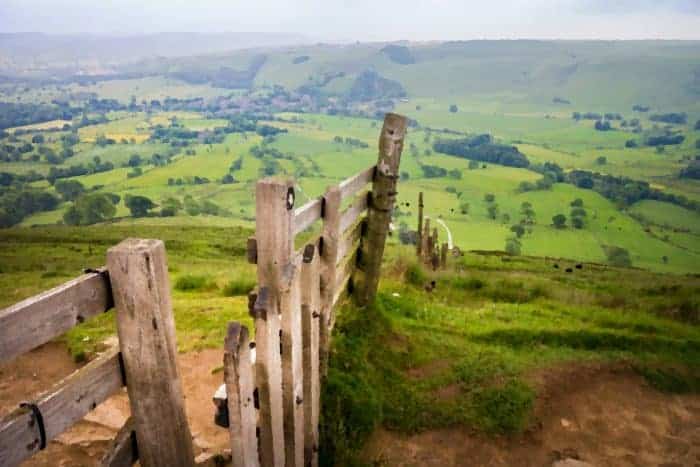
- Once open, you can then click on the “filter” menu and select from one of the many different effects available. For the example below, we used the “Oilify” filter which can be found in the Artistic subcategory – other suitable filters include “Waterpixels”, “Apply canvas” and, “Cartoon”.
3. BeFunky Browser Application
Link – BeFunky.com
Type – web-based photo editor
Cost – $2.91 per month
Notable Feature – in-depth settings adjustment for painting filters
Product Review
BeFunky is an exceptional photo editor with some excellent features. Aside from Photoshop, this is the only other paid editor we have featured. The cost is relatively small for just $2.91 per month. Is it worth it? Certainly! The quality of the filters is spectacular as you will see from the below example.
Moreover, the editor brings many contemporary filters that could be used for promotional shots or marketing work. It is even possible to add a range of textures such as bokeh, grunge, metal, and paper – the quality is amazing!
Editing Process
The BeFunky editor can be accessed within a web browser – as can the collage maker and designer.
- Once you have opened the website, click on the “photo editor” button at the top of the page.
- You must then upload your photo using the “open” button at the top of the editor.
- From here you can start to edit the photo as you wish.
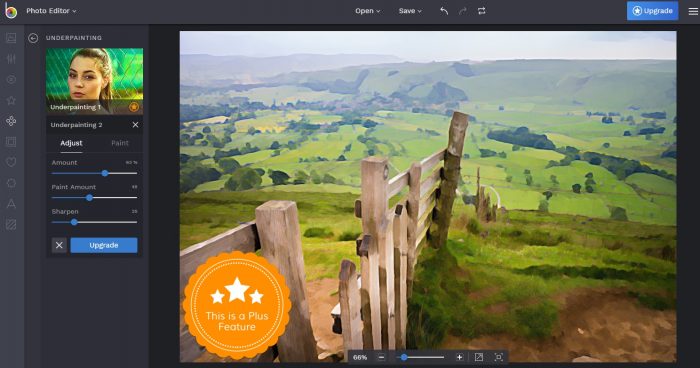
- To select a filter, hover over the nav bar on the left-hand side and select the desired category. For the below photo we chose the “artsy” category and the “underpainting” sub-filter.
- You can then simply select the filter and then change the parameters as you see fit (you can only save an image if you have subscribed):
4. Tuxpi Online Photo Editor
Link – Tuxpi.com
Type – web-based photo editor
Cost – N/A
Notable Feature – Ability to edit the strength and color of applied filters
Product Review
Tupixi is a basic web-based photo editor that offers over 60 different filters and effects. This is certainly one of the simplest editors we trialed – you can upload and edit your photo in a matter of seconds.
The web interface is so easy to use. Although the features are limited, you can change the color and contrast. Moreover, you can also crop and resize your photo if required. We like the fact that you can change the strength of each filter. Additionally, the social media share function is cool too – you can share your edited shots to Twitter and Facebook instantly!
Editing Process
To start creating your painting style photo, you must first open Tupixi in your web browser.
- Once you have done this, simply click the “start photo editing” button in the left-hand corner – you can’t miss it, it’s huge!
- You will then be presented with a pop-up box where you can select the photo you wish to edit.
- Once you have uploaded the file, you must then select the filter you wish to apply – there should be a list of categories and individual filters below.
- You will then be taken to a preview page.
- From here you can customize the filter settings. In the example below, we used the “Photo to painting” filter with a strength of 70% and a color boost of 30%:
5. GetPaint.net (only for Windows Users)
Link – GetPaint.net/download.html
Type – Free photo editing software download
Cost – N/A (you can upgrade to a premium version with more features)
Notable Feature – Large active community to help with guides and tutorials
Product Review
GetPaint.net is certainly not known for its beauty or elegance but it gets the job done. This retro photo editing program has been around for years. It is completely free to download. What do you get in return? A fantastic no-frills photo editor. This program has a plethora of features and you can do pretty much anything that Photoshop or GIMP could. You can add layers to your images for example and use the drawing too. The filters available are not as extensive as Photoshop; however, there are still some standout choices.
Related Post: Best Windows Photo Management Software
Editing Process
- First, you must download and install the program.
- You must have Win RAR to extract the file.
- When you have installed Paint.net, you can then open your chosen photo.
- Select “File”, and then click on “open”.
- Located your file and open it.
- From here you can use the “Effects” tab in the top menu and choose the style you wish. In the example below, we used the “Oil Painting” effect and increased the brush size slightly:

6. Luncapic – Another Free Photo Editor
Link – Lunapic.com
Type – web-based photo editor
Cost – N/A
Notable Feature – Quick upload from Facebook, Twitter or Instagram
Product Review
Lunapic is a basic web editor that has a ton of different filters and effects. The interface is basic, but this is what makes it appealing. It is easy to use and you can transform your images in a few clicks. To say that this is a web-based app, it has a surprising amount of features and tools. For example, you can draw and paint on an image and add gradients too. In terms of effects, Lunapic really does excel. It has several categories of effects including borders, filters, effects, art, and animation. Each of these categories has a large selection of individual filters.
Editing Process
After opening the website, you must then upload your photo.
- There is an upload button on the right-hand side of the screen.
- You can upload directly from your computer, or from an external source such as Twitter or Instagram.
- Once the file has been uploaded, you can then select one of the filters or effects from the top menu bar.
- Simply hover over the menu and click on the desired filter – it will then be applied to your photo. The image below has been processed using the “painted” effect from the “effects” tab:

Conclusion: Turning a Photo into a Painting
We hope you have found this guide useful! You should now understand how to make a photo look like a painting.
Furthermore, you should now have insight into the different types of photo effects you can create. What you can achieve is only really limited by your imagination and creativity. As a photographer, editing is a vital skill that can really help your career. Why not try some of these filters out today and share with us your painting-effect photos?