
8 Best Apps to Change the Background of a Photo in 2026
The best apps to change photo backgrounds with AI. Compare PhotoRoom, Remove.bg, LightX and more — one-tap background removal and replacement.
Photo editing software, AI tools, and organization apps for desktop and mobile. Comparisons, tutorials, and recommendations for every workflow.
The best apps to change photo backgrounds with AI. Compare PhotoRoom, Remove.bg, LightX and more — one-tap background removal and replacement.

Accidentally deleted photos? These 6 best photo recovery apps for Android can help you recover lost images from internal storage and SD cards. All apps work without rooting.

Blackmagic Design unveiled DaVinci Resolve 21 at NAB 2026 with a brand-new Photo page for RAW editing, node-based grading, tethered shooting, and AI masking — and the core version is free.

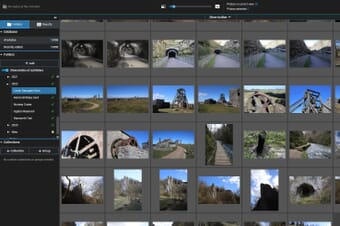
Learn how to organize your photo library effectively in 2026. From simple folder structures to AI-powered tools like Google Photos and professional DAM software like Lightroom—find the right approach for your needs.
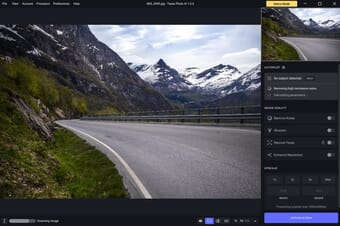
Topaz Photo Pro (v1.4.1) combines 11 AI-powered tools with Wonder 2 one-step processing and NeuroStream local VRAM optimization. Our hands-on review covers features, pricing (Personal vs Pro tiers), performance, and whether the subscription is worth it for photographers.

Topaz Labs releases five new AI models: Gaia 2 for animation upscaling, two faster Starlight video models for Pro users, Starlight 2.5 for making AI video look real, and True Detection for catching false resolution in photos.

Master Snapseed photo editing with this step-by-step guide. Covers the 3.0 redesign, basic and advanced editing tools, the new film camera, and how Snapseed compares to built-in AI editors like Google Photos and Apple Photos.

Compare the 13 best stock photo sites for photographers and creators. Covers premium platforms (Adobe Stock, Shutterstock, iStock), free libraries (Unsplash, Pexels, Pixabay), and AI-generated stock options with current pricing.

Compare the 6 best focus stacking software options for macro and landscape photography. From dedicated tools like Helicon Focus and Zerene Stacker to all-in-one editors like Photoshop and Affinity Photo 2.

The best AI photo editing software in 2026: Adobe Photoshop with Generative Fill, Luminar Neo, Topaz Photo, Pixlr, DxO PhotoLab, Imagen AI, and more. Compare features, pricing, and find the right AI editor for your workflow.

DxO PureRAW 6 brings DeepPRIME XD3 to all cameras, Hi-Fi DNG compression, AI dust removal, and faster batch processing. Use exclusive code PHOTOWORKOUT for 15% off.

11 best photo sticks for iPhone—expert analysis based on specs. Top pick: SanDisk 256GB Creator Phone (85/100). Free space offline, skip iCloud fees now.

Find the best photo enlargement software for 2026. We compare AI-powered upscalers including Topaz Gigapixel, ON1 Resize AI, Upscayl (free), and more.

Learn how to back up your Lightroom photos using the 3-2-1 rule, organize folders and Collections, set up catalog backups, enable XMP sidecars, and choose between cloud and NAS storage.
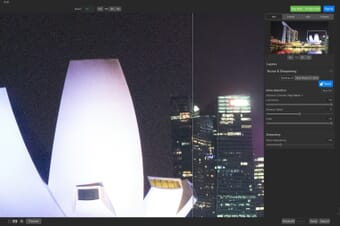
The best noise reduction software for photographers in 2026 – from AI-powered tools like DxO PureRAW 5 and Topaz Photo to budget options like ON1 NoNoise AI and Neat Image.

Learn how to edit photos in Photoshop with this complete guide covering layers, masks, adjustment layers, and the latest AI-powered tools like Generative Fill, Remove Tool, and Neural Filters.

Our in-depth ON1 Photo RAW 2026 review covers everything: AI masking, RAW processing, layers, pricing, and how it compares to Lightroom, Luminar Neo, and Capture One.

An honest review of InPixio Photo Studio — its AI-powered editing tools, pricing, pros and cons, and how it compares to Lightroom, Luminar Neo, and other alternatives.

Learn how to edit photos with Google Gemini’s Nano Banana Pro AI engine. Step-by-step demos with exact prompts for relighting, season swaps, day-to-night conversions, and more.
Luminar Neo 1.19.9: Elevate your photo editing with advanced AI tools and seamless functionality.
An in-depth review of Excire Foto’s tools, performance, and more. Can it improve your photo organization workflow?

Editor’s Key Takeaways: Find the Best AI Photo Editing Tool for Your Workflow AI-powered photo editing tools have become essential for photographers who want to

Discover the best photo organization software for Windows PCs in 2026, featuring AI-powered organizers, professional DAM solutions, and free alternatives. Compare Adobe Lightroom, ACDSee, Capture One, and more with our comprehensive guide.

A detailed comparison of the 12 best stock video websites in 2026, covering free and paid options from Shutterstock and Adobe Stock to Pexels and Artlist. Includes current pricing, AI footage tools, and tips for choosing the right platform.

Turn ordinary drone clips into pro-quality videos with the best drone video editing software. Here are 10 of the top programs in 2024 compared.

How do you edit photos to create something incredible? In this article, discover the secrets to amazing photo editing. An ultimate guide.

We compared the top 10 photo portfolio websites and analyzed their features. See the pros and cons of these top-rated website builders!

If you’re looking to understand photo editing for beginners, then this article is all you need. Discover how to create stunning edits, fast!

Keeping your digital photos safe is a tricky task. Find out the best way to store digital photos so you don’t have to worry about losing your photos.

The best manual camera apps for iPhone in 2026, including Halide Mark II, Blackmagic Camera (free), Camera+, ProCamera, and more. Full manual controls, RAW capture, and pro video features.

The 13 best photo organizing programs for Mac users (including free options). Effectively file, categorize, and manage your digital assets.

Do you want to know how to edit photos in Lightroom for gorgeous results? This article shares a quick-and-easy process for beautiful Lightroom edits.

Discover the best photo scanning apps for iPhone and Android in 2026. From AI-powered Photomyne to free options like Google PhotoScan, these apps turn your smartphone into a professional photo scanner for preserving family memories.

Discover the best photo editing software for real estate photography in 2026. From HDR processing with Photomatix Pro to AI-powered editing in Luminar Neo, plus Adobe Lightroom workflows—find the right tools for stunning property photos.

Turn your smartphone into a reliable light meter with these top-rated apps. Whether you shoot film or just want a backup for your camera, these apps deliver accuracy within 1/10th of a stop.

Want to convert your RAW photos to JPEGs? This comprehensive guide covers every method—from free built-in tools on Mac and Windows to professional software like Lightroom, Luminar Neo, and Photoshop, plus free alternatives like darktable.

Discover the best panorama stitching software in 2026, including free options like Affinity Photo and Hugin, AI-powered tools like Luminar Neo, and professional-grade PTGui Pro.

Discover the best sky replacement software in 2026. We compare Luminar Neo, Adobe Photoshop, ON1 Photo RAW, LandscapePro, and more—with current pricing, AI features, and honest pros/cons to help you choose.

Comparing the best HDR software in 2024 for landscape, real estate, and more. Including Photomatix Pro, HDR Merge, and Adobe programs.

Want to create beautiful prints? We share the best photo printing software for standard prints, canvas prints, and more.

The best HEIC to JPG converters for 2026: iMazing for batch desktop conversions, FreeConvert for online use, CloudConvert for developers, and more free options.

Looking for free Luminar Neo presets? We picked the 12 best free Templates including Creative, Kyoto, Film Noir, and more to speed up your editing workflow.

Looking for the best AI photo organizer? We compare Excire Foto 2025, ON1 Keyword AI, Mylio Photos, Immich, and more to help you manage your photo collection.

The best face filter apps for iPhone and Android — smooth skin, reshape features, whiten teeth, and add AR effects. Free and paid picks compared.

Skip the drugstore. These 10 passport photo apps use AI to create compliant photos from your phone, with options for every budget.
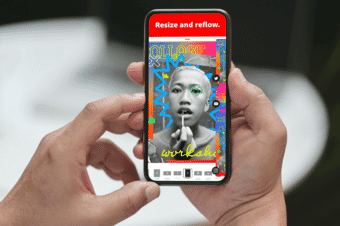
The best free collage maker apps for iPhone compared — Canva, PicCollage, Picsart and 7 more. AI layouts, templates, and easy grid makers.