
- The eclipse happened: The March 3 total lunar eclipse delivered stunning blood moon photos from around the world — totality lasted 58 minutes.
- How it unfolded — Full timeline from first contact to last, with the Moon glowing copper-red in Leo near Regulus.
- Best photos — Highlights from top eclipse photographers and links to the best galleries.
- Camera settings guide — ISO, aperture, and shutter speed recommendations for every eclipse phase.
- Next opportunity — The next total lunar eclipse is December 31, 2028.
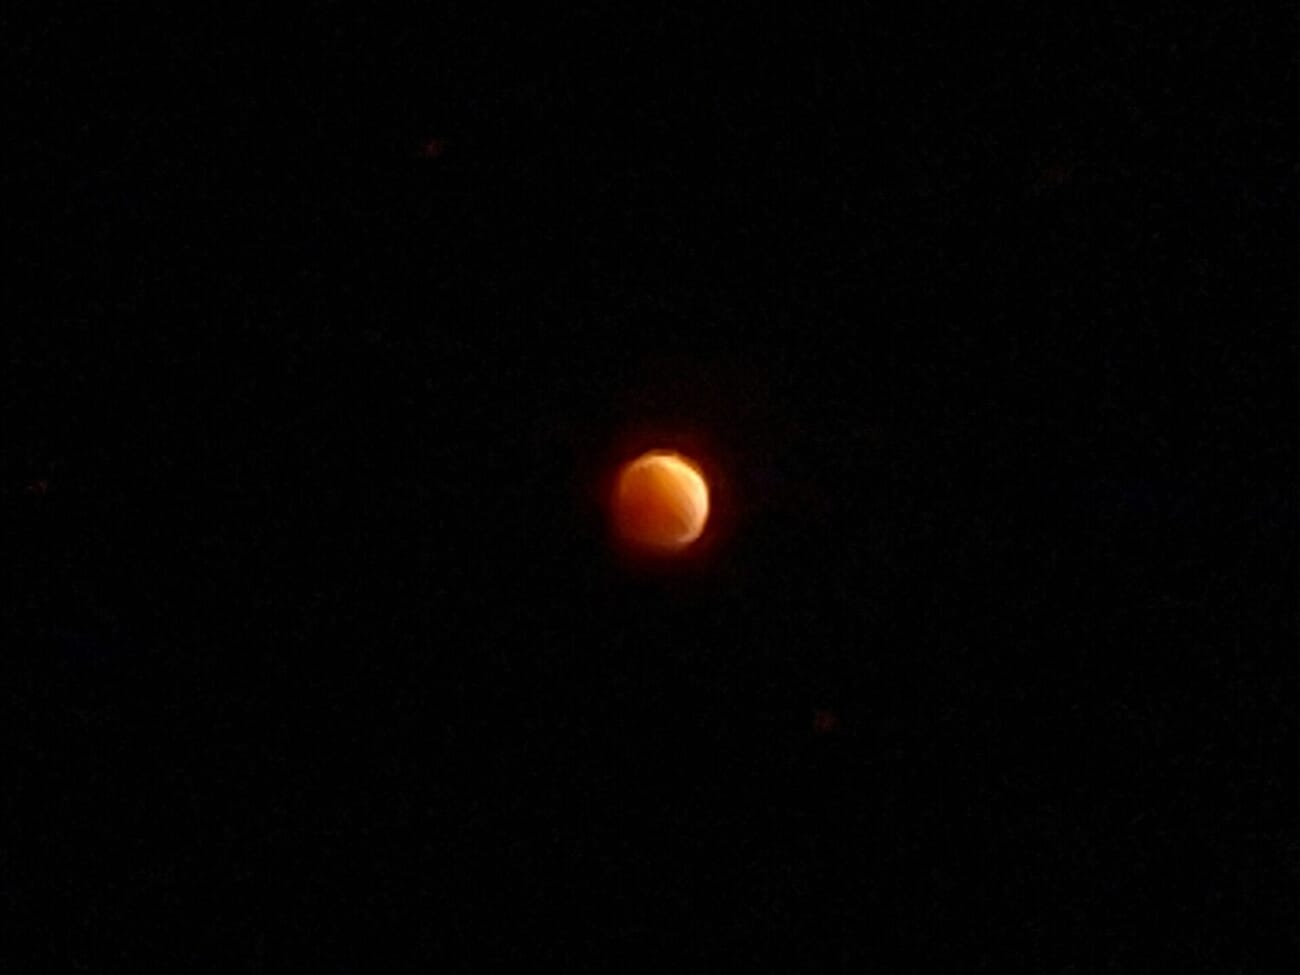
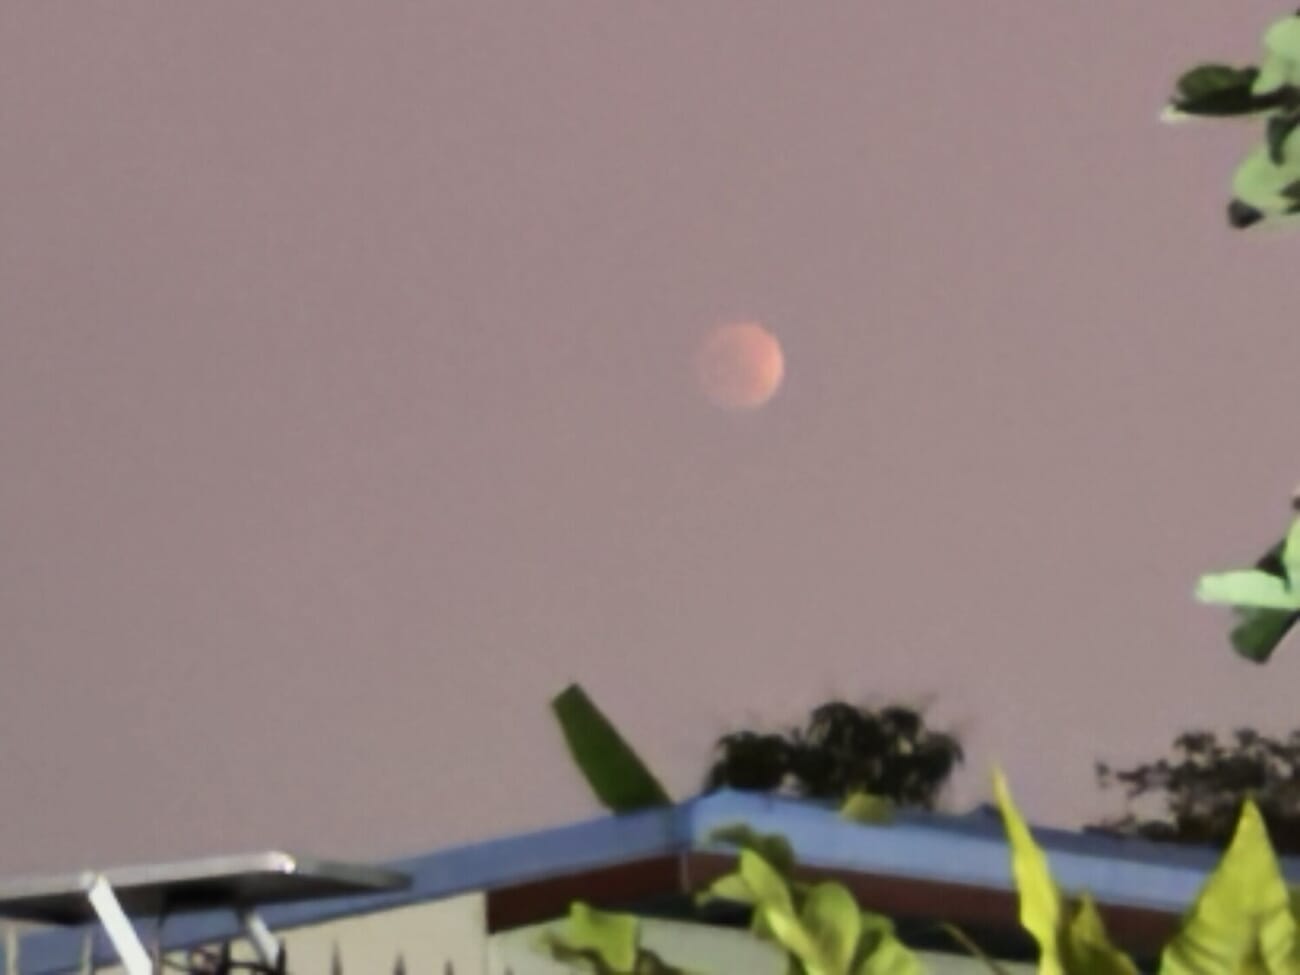
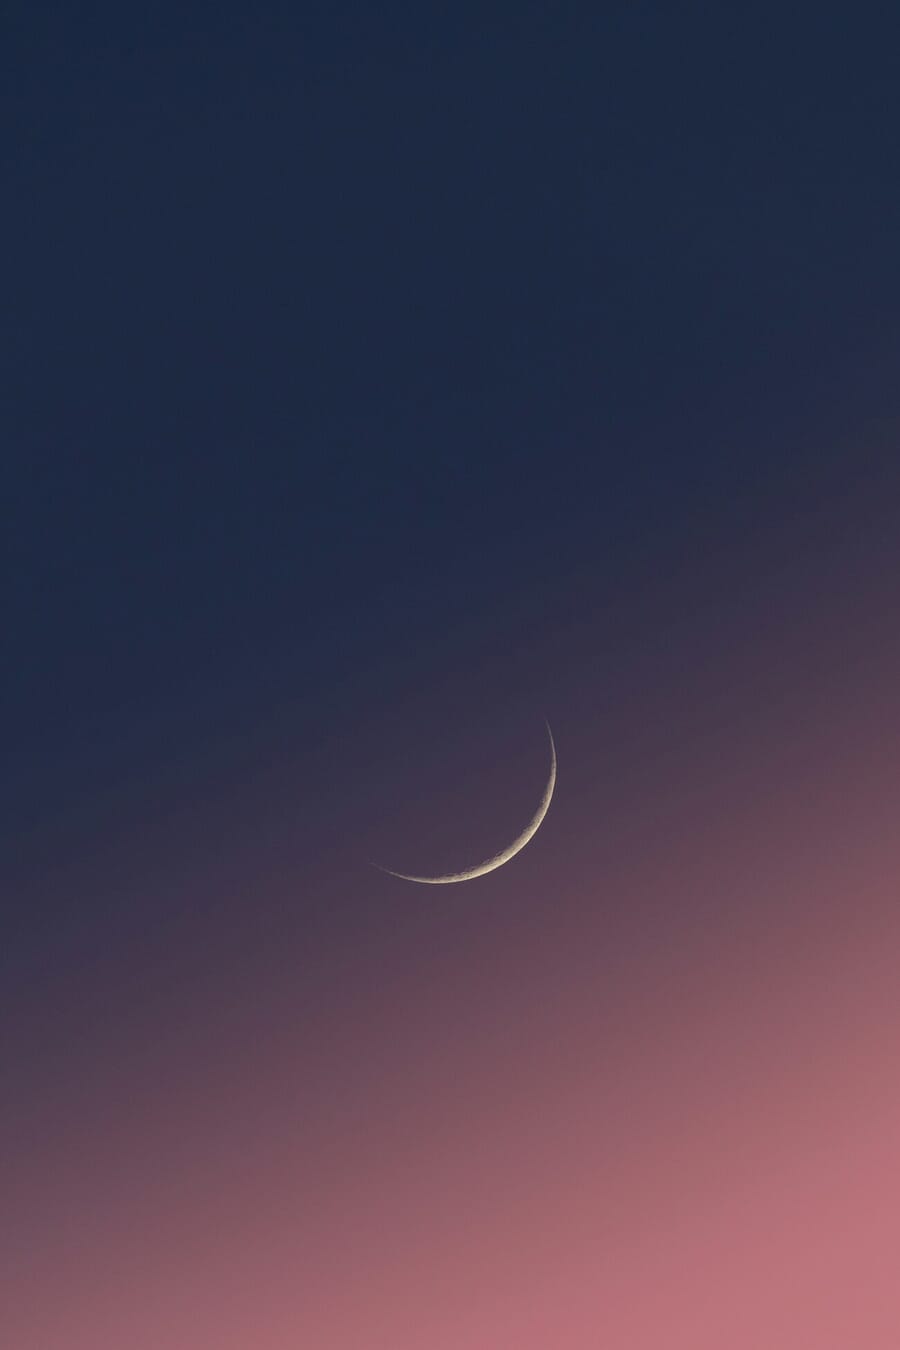
The blood moon delivered. In the early morning hours of March 3, 2026, the Moon slid into Earth’s shadow and turned a deep, glowing copper-red — the last total lunar eclipse until 2028. Photographers across the globe captured the event, from detailed telephoto close-ups of the crimson surface to dramatic composites showing the Moon’s journey through Earth’s umbral shadow.
Below, we’ve collected the best photos and photo galleries from the event, followed by the complete photography guide with camera settings, gear recommendations, and techniques. Whether you caught this eclipse or are preparing for the next one, everything you need is here.
Blood Moon Over Earth: How the Eclipse Unfolded
The March 2026 total lunar eclipse — the third consecutive total lunar eclipse following March 2025 and September 2025 — played out over roughly five and a half hours. Here’s how the key moments unfolded:
- Penumbral eclipse began: 08:44 UTC — the Moon entered Earth’s faint outer shadow. Most observers couldn’t see any change yet.
- Partial eclipse began: 09:50 UTC — Earth’s dark umbral shadow started biting into the lunar disk. This is when the eclipse became visible to the naked eye.
- Totality began: 11:04 UTC — the Moon was fully immersed in Earth’s umbra. The surface turned blood red.
- Maximum eclipse: 11:33 UTC — the deepest point of totality, with an umbral magnitude of 1.15.
- Totality ended: 12:03 UTC — the Moon began emerging from Earth’s shadow after 58 minutes of totality.
- Eclipse ended: 14:23 UTC — the Moon fully exited the penumbral shadow.
The Moon sat in the constellation Leo during the eclipse, near the bright star Regulus — creating excellent opportunities for wide-field compositions that captured both the blood moon and the surrounding starfield. Photographers in the western US, Hawaii, and across the Pacific had prime viewing conditions with the Moon high in the sky. East Coast observers faced a tighter window as the Moon set during totality, while viewers in eastern Asia and Australia watched the eclipse unfold in the evening sky.
This was the “Worm Moon” — the traditional name for March’s full moon, named for earthworms emerging as the ground thaws. It also coincided with the Lantern Festival, the first time since 2017.
Best Photos From the Blood Moon Eclipse
Photographers around the world shared stunning images of the blood moon. Here are some of the best galleries and standout shots:

Highlights From the Night
- John Ashley in Tucson, Arizona captured the eclipse in 2-minute intervals behind the 90-foot bell tower of Santa Cruz Catholic Church — a stunning composite blending the blood moon with Spanish Colonial Revival architecture.
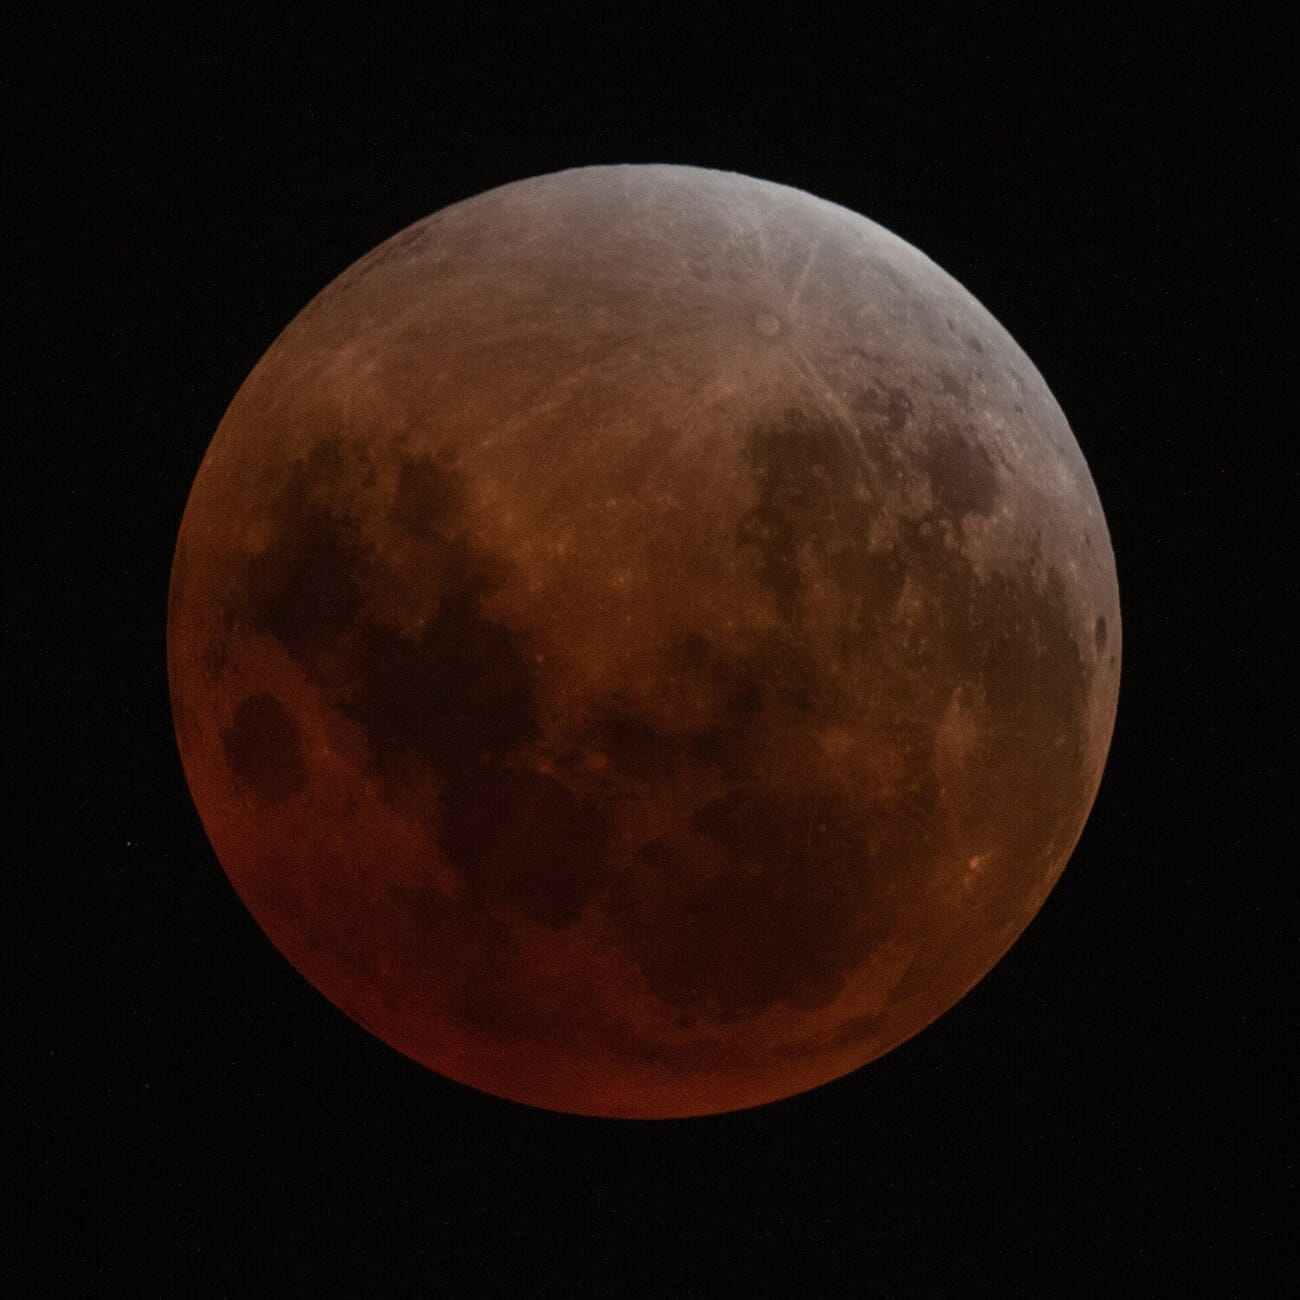
- Catherine Hyde in Cambria, California shot a detailed telescopic view of the fully eclipsed Moon, revealing the rich copper-red surface in fine detail.
- Larry Isenberg from Ocala, Florida caught a jet flying in front of the eclipsed Moon — a perfectly timed silhouette that went viral.
- Greg Skyles in Western Australia framed the blood moon low on the eastern horizon between eucalyptus branches, incorporating haze and clouds for a moody, atmospheric shot.
- Observers in Nova Scotia captured a rare selenelion — the “impossible” phenomenon where both the eclipsed Moon and the rising Sun are visible simultaneously, made possible by atmospheric refraction.
Photo Galleries Worth Browsing
These galleries showcase the full range of eclipse photography — from smartphone snapshots to professional telescope setups:
- Space.com: First Photos of the Blood Moon — curated gallery of the best early submissions from professional and amateur photographers.
- EarthSky: Community Eclipse Photos — growing collection from the EarthSky community, including composites, landscape shots, and artistic interpretations.
- CNN: March Blood Moon in Pictures — photos from La Paz to Auckland, showing the eclipse from multiple continents.
- BBC Sky at Night Magazine: Blood Moon Pictures — images from photographers across North America, Asia, and Australia.
If you photographed the eclipse yourself, the camera settings and techniques used by these photographers align closely with the recommendations in our settings guide below. Most of the best totality shots used ISOs between 800–1600, apertures of f/4–f/5.6, and shutter speeds of 1–4 seconds — exactly what we recommended in our original pre-event guide.
The Complete Lunar Eclipse Photography Guide
The following guide covers everything you need to photograph a total lunar eclipse — the gear, settings, and techniques that produced the stunning photos above. This section was originally published before the March 2026 eclipse and remains fully relevant for future events, including the next total lunar eclipse on December 31, 2028.
What Makes This Eclipse Special
This isn’t just another lunar eclipse. The March 3, 2026 event is the last total lunar eclipse until December 31, 2028 — more than two and a half years away. If you miss this one, you’ll be waiting a while.
During totality, the Moon doesn’t simply disappear. Instead, it turns a striking reddish-orange color — the famous “blood moon” effect. This happens because Earth’s atmosphere bends sunlight around the planet and filters it, projecting the combined light of every sunrise and sunset on Earth onto the lunar surface simultaneously. As NASA explains, “It’s as if all of the world’s sunrises and sunsets are projected onto the Moon.”
The eclipse’s visibility footprint is massive. According to NASA, totality will be visible “in the evening from eastern Asia and Australia, throughout the night in the Pacific, and in the early morning in North and Central America.”
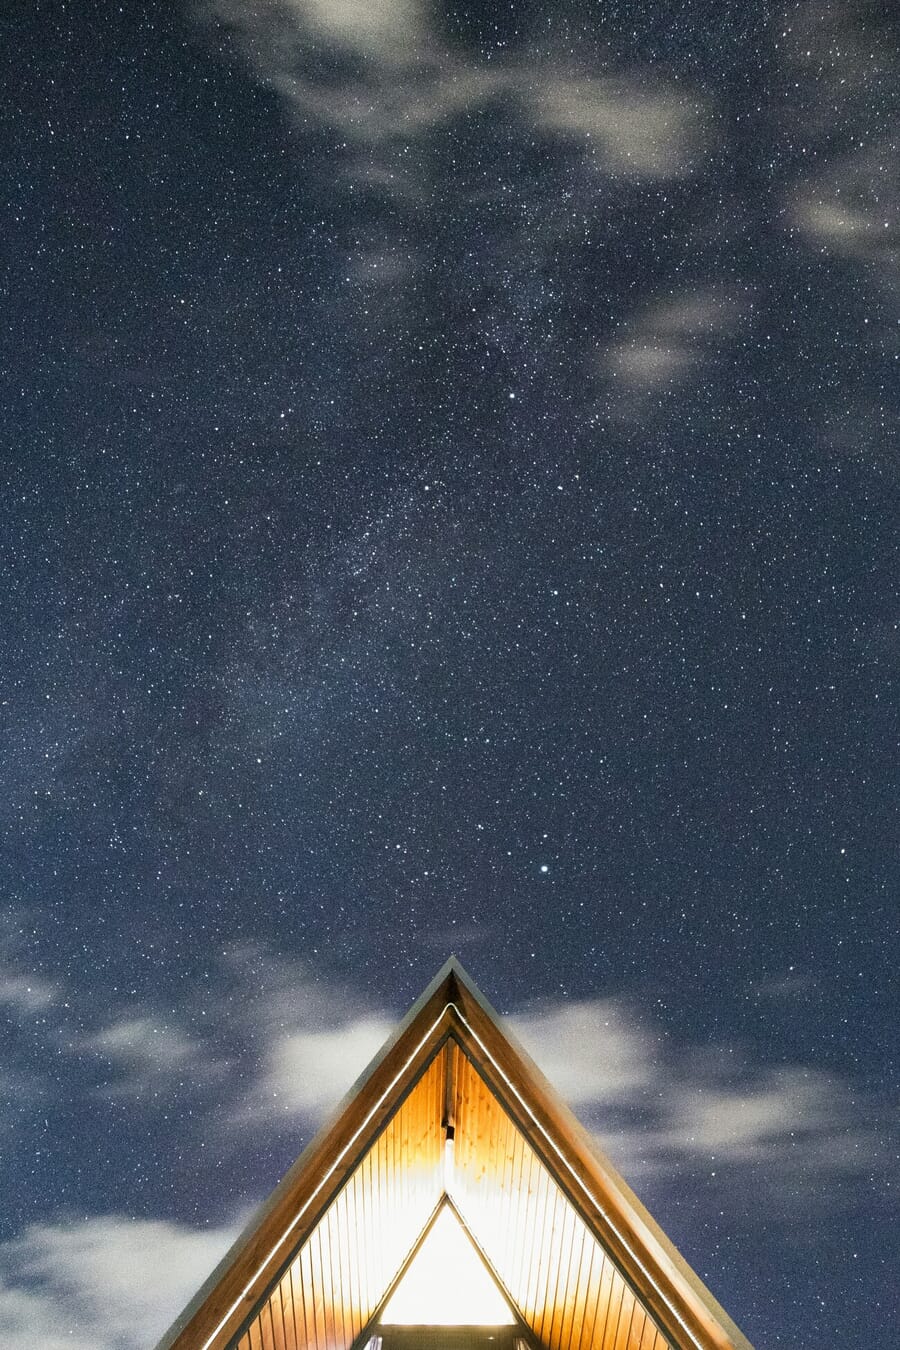
Another bonus: the Moon will be positioned in the constellation Leo during the eclipse. As Earth’s shadow dims the lunar surface, the surrounding stars become easier to spot — a great opportunity for wide-field compositions that include both the blood moon and the starfield behind it.
Eclipse Timeline: Key Times by Time Zone
A lunar eclipse unfolds in stages over several hours. Here are the key moments for the March 3, 2026 eclipse, converted into major time zones. All times are based on TimeandDate.com and NASA data.
United States (March 3):
- Penumbral eclipse begins: 12:44 AM PST / 1:44 AM MST / 2:44 AM CST / 3:44 AM EST
- Partial eclipse begins: 1:50 AM PST / 2:50 AM MST / 3:50 AM CST / 4:50 AM EST
- Totality begins: 3:04 AM PST / 4:04 AM MST / 5:04 AM CST / 6:04 AM EST
- Maximum eclipse: 3:33 AM PST / 4:33 AM MST / 5:33 AM CST / 6:33 AM EST
- Totality ends: 4:03 AM PST / 5:03 AM MST / 6:03 AM CST / 7:03 AM EST
- Partial eclipse ends: 5:17 AM PST / 6:17 AM MST / 7:17 AM CST / 8:17 AM EST
Asia & Australia (March 3):
- Tokyo, Japan: Totality 8:04 PM – 9:03 PM JST (evening — ideal viewing)
- Shanghai, China: Totality 7:04 PM – 8:03 PM CST
- Sydney, Australia: Totality 10:04 PM – 11:03 PM AEDT
- Honolulu, Hawaii: Totality 1:04 AM – 2:03 AM HST
Key takeaway for photographers: If you’re on the US West Coast, set your alarm for 2:30 AM. The partial phase starts around 1:50 AM PST and totality runs from 3:04–4:03 AM. East Coast photographers face a tighter window — totality begins at 6:04 AM EST, just as the Moon is getting low on the western horizon before moonset. West Coast and Pacific time zones have the best viewing conditions in the US.
For precise local timing based on your exact location, check The Eclipse App — a free browser-based tool that shows the eclipse angle and timing for any location on Earth.
Essential Gear for Lunar Eclipse Photography
You don’t need exotic equipment to photograph a lunar eclipse, but the right gear makes a significant difference. Here’s what to bring:
Camera body: Any camera with manual exposure control works — DSLR, mirrorless, or even an advanced compact. The key requirement is the ability to set ISO, aperture, and shutter speed independently. Full-frame sensors perform better at higher ISOs needed during totality, but APS-C and Micro Four Thirds cameras work well too (and the crop factor gives you extra reach).
Telephoto lens (200mm minimum): The Moon appears surprisingly small in photos — only about 0.5° of sky. At 200mm on a full-frame camera, the Moon fills roughly 4% of the frame. At 400mm–600mm, you’ll get detailed surface textures and clearly visible color gradations during totality. If you shoot on an APS-C body, a 200mm lens gives you an effective 300mm field of view. Consider lenses like the Canon RF 100-400mm or similar telephoto zooms.
Sturdy tripod: Non-negotiable. You’ll be shooting exposures up to 4 seconds during totality. Even the slightest vibration ruins a telephoto shot at these focal lengths. A quality travel tripod or beginner-friendly tripod with a ball head works — just make sure it’s stable and can point nearly straight up depending on your location.
Remote shutter release or 2-second timer: Pressing the shutter button introduces camera shake, especially at long focal lengths. Use a wired/wireless remote release or set your camera’s self-timer to 2 seconds.
Extra batteries: Cold night air drains batteries faster than normal. Bring at least two fully charged spares. Keep extras in an inside pocket close to your body to keep them warm.
Memory cards: If you’re shooting RAW (and you should be), files add up quickly over a 5-hour event. Bring at least 64GB of storage.
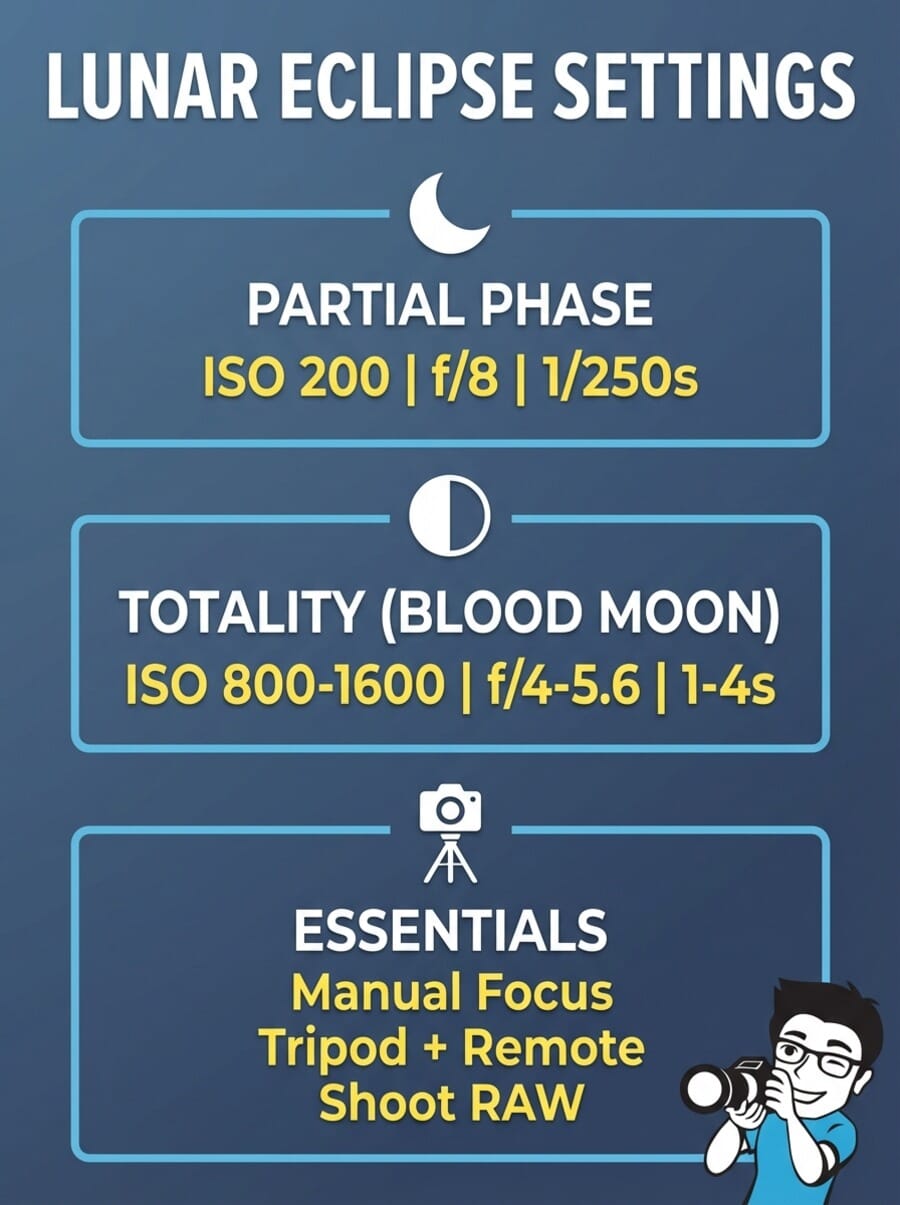
Camera Settings for Each Eclipse Phase
This is the section that separates good lunar eclipse photos from bad ones. The Moon’s brightness drops by roughly 10,000x between a normal full Moon and totality. Your settings must change accordingly.
Shoot in RAW format throughout the entire eclipse. This gives you maximum flexibility in post-processing, especially for recovering color detail during totality. Set your white balance to Daylight (5200K) for consistent color across all phases — you can fine-tune it later in editing.
Partial Phase (Bright Moon)
During the partial phase, the uneclipsed portion of the Moon is still very bright — essentially full-Moon brightness.
- ISO: 200
- Aperture: f/8
- Shutter speed: 1/250 second
These settings follow the “Looney 11” rule — a variation of the Sunny 16 rule adapted for moonlight. The Moon is reflecting direct sunlight, so it’s much brighter than you might expect. Overexposing here is the most common beginner mistake.
Totality / Blood Moon Phase
Once the Moon is fully inside Earth’s umbral shadow, its brightness plummets. The surface turns red-orange and becomes roughly 10 stops darker than the partial phase. You need to compensate dramatically:
- ISO: 800–1600 (start at 800 and increase if needed)
- Aperture: f/4 to f/5.6 (open up as wide as your lens allows while maintaining sharpness)
- Shutter speed: 1–4 seconds
Why the settings change so dramatically: During the partial phase, the Moon reflects direct sunlight — it’s essentially a sunlit object. During totality, the only light reaching the Moon is filtered through Earth’s atmosphere. That filtered light is dimmer by a factor of roughly 10,000. You need to open up the aperture, raise ISO, and extend shutter speed to compensate.
Watch your shutter speed carefully. At focal lengths above 200mm, the Moon moves fast enough to blur during long exposures. The rough rule: your maximum shutter speed in seconds ≈ 500 ÷ (focal length × crop factor). At 400mm on full-frame, that’s about 1.25 seconds before trailing appears. If you need more light, increase ISO rather than extending the exposure further.
Transition Phases
The transitions between partial and total eclipse happen gradually. Don’t wait until totality to change your settings. Start adjusting as the shadow covers more of the Moon’s surface. A good approach: take test shots every 5 minutes during the partial phase and adjust exposure to keep the histogram centered.
Step-by-Step: Shooting the Eclipse
Here’s a practical workflow for eclipse night, from setup to the final frame.
Before the Eclipse (Setup)
- Scout your location in advance. You need a clear view of the Moon’s position in the sky — check the direction and elevation for your location using The Eclipse App. Avoid areas with significant light pollution if possible.
- Arrive 30–60 minutes early. Set up your tripod, mount your camera, and frame the Moon while it’s still bright and easy to find.
- Focus manually. Switch your lens to manual focus. Use Live View at maximum zoom to focus on the Moon’s edge — you should see sharp craters and the terminator line. Once focused, tape your focus ring in place so it doesn’t shift during the night. Autofocus will hunt in the dark and ruin shots during totality.
- Turn off image stabilization. When mounted on a tripod, IS/VR can actually introduce micro-vibrations. Switch it off.
- Set your camera to RAW, manual mode. Start with the partial phase settings: ISO 200, f/8, 1/250s.
During the Eclipse
- Shoot throughout every phase. Don’t wait for totality — the partial phases produce dramatic images of the curved Earth shadow creeping across the lunar surface.
- Bracket your exposures. Take 3–5 shots at different exposures (±1 stop) during each phase. This gives you options in post-processing and material for HDR composites.
- Adjust settings gradually. As the shadow advances, open your aperture first (f/8 → f/5.6 → f/4), then increase ISO (200 → 400 → 800), then lengthen shutter speed as a last resort.
- Check your histogram. The Moon should be exposed to the right of center — bright but not clipping highlights during partial phases. During totality, aim for a centered histogram.
Composition Ideas
- Tight crop: Use your longest focal length for frame-filling detail. Great for showing surface texture and the red/orange color gradients during totality.
- Wide-field with landscape: Switch to a wider lens (24–70mm) and include foreground elements — a city skyline, tree line, or landmark. The blood moon will be smaller but contextualizes the scene beautifully.
- Time-lapse composite: Plan to combine multiple frames showing the Moon’s progression through Earth’s shadow into a single composite image. Shoot one frame every 5–10 minutes with consistent framing.
Common Mistakes to Avoid
Even experienced photographers trip up during eclipses. Here are the most common errors and how to avoid them:
- Overexposing during totality. The blood moon looks bright to your eyes because they’ve adapted to the dark. Your camera hasn’t. If you use partial-phase settings during totality, you’ll get a washed-out, featureless blob. Switch to your totality settings as soon as the shadow is fully covering the Moon.
- Forgetting to adjust settings between phases. The eclipse transitions gradually over about 75 minutes from partial to total. Set a timer to check and adjust exposure every 5 minutes. Chimping (reviewing shots on your LCD) is actually good practice here.
- Leaving autofocus on. Once you’ve nailed manual focus on the Moon, don’t touch it. AF systems struggle to lock onto the dim blood moon during totality and will rack the focus ring back and forth, ruining shots.
- Unstable tripod. Wind, soft ground, or accidentally bumping a tripod leg can introduce shake. Hang your camera bag from the center column for added weight. Don’t extend the center column if you can avoid it — it reduces stability.
- Not shooting RAW. JPEG compression destroys the subtle red/orange color gradients that make blood moon photos compelling. Always shoot RAW for maximum editing flexibility.
- Running out of battery. March nights are cold in much of North America. Cold drains lithium-ion batteries fast. Bring spares and keep them warm in your pocket.
Post-Processing Tips
Even with perfect in-camera technique, lunar eclipse photos benefit from careful editing.
White balance adjustment: If you shot in RAW with Daylight white balance (as recommended), you’ll have a good starting point. In Lightroom or Camera Raw, fine-tune the temperature slider to bring out the rich copper-red tones of the blood moon. Typically a slight push toward warmer (higher Kelvin) values enhances the effect.
Noise reduction: Totality shots at ISO 800–1600 will have visible noise, especially in the dark sky surrounding the Moon. Apply luminance noise reduction carefully — too much and you’ll lose surface detail on the Moon itself. Consider masking the Moon separately from the sky background.
Image stacking: If you shot multiple frames during totality, you can stack them in software like Sequator (free) or DeepSkyStacker to significantly reduce noise while preserving detail. Align the frames on the Moon’s surface features, then average them together.
Composite sequences: One of the most popular eclipse images is a composite showing multiple phases side by side in a single frame. Shoot consistently spaced frames (every 5–10 minutes) without moving your camera, then blend them in Photoshop using layers and masking. The result: a dramatic arc showing the Moon’s journey through Earth’s shadow.
Sharpening: Apply capture sharpening to bring out crater detail. Use the Detail panel in Lightroom with Amount around 60–80, Radius 1.0, and a luminance mask to avoid sharpening noise in the sky.
Looking Ahead: Next Lunar Eclipses
The March 2026 blood moon was the last total lunar eclipse for a while. Here’s what’s coming next:
- August 28, 2026: A partial lunar eclipse visible from eastern Asia, Australia, the Pacific, and western Americas. Not a total eclipse, but the Moon will pass partially through Earth’s umbral shadow.
- February 20, 2027: A penumbral lunar eclipse (subtle dimming only — not visually dramatic).
- December 31, 2028: The next total lunar eclipse — sometimes called the “New Year’s Blood Moon.” Visible from Europe, Africa, Asia, and the Americas. This is the next opportunity to photograph a full blood moon using the techniques in this guide.
Save the camera settings from this guide — they’ll work for any total lunar eclipse. The Moon’s brightness during totality is consistent enough that ISO 800–1600, f/4–5.6, and 1–4 second exposures will serve you well every time.
Featured image: Lunar eclipse by Erika Löwe on Unsplash. Used under Unsplash license.
Sources and references:
Related Posts
Get the Weekly Photography News Digest
Join photographers who get our top stories delivered every Monday morning. No spam, unsubscribe anytime.
