
- Evaluative/matrix metering is the best default — it analyzes the entire scene and handles most lighting situations well
- Spot metering reads only 2-3% of the frame, making it ideal for backlit subjects and wildlife
- Center-weighted metering prioritizes the middle of the frame — useful for centered subjects against bright or dark backgrounds
- Modern mirrorless cameras use AI-powered metering that recognizes subjects (faces, eyes, animals) and biases exposure toward them
- When meters fail (snow, night scenes), use exposure compensation to override — add +1 to +2 stops for bright scenes, reduce for dark ones
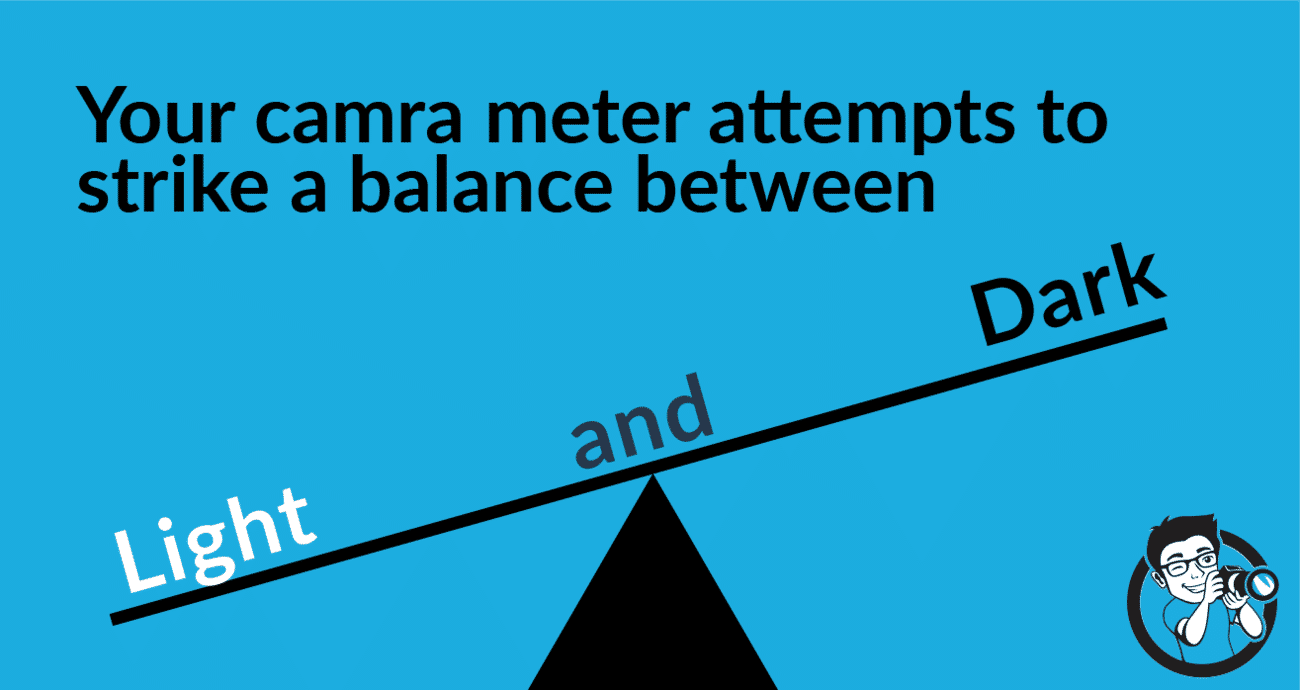
Understanding metering modes is essential for consistent exposure control. While modern cameras are remarkably intelligent, they can still be fooled by challenging lighting — backlit subjects, snow scenes, or high-contrast situations. Knowing when to override the camera’s default metering gives photographers creative control over their exposures.
This guide covers how metering works, the three main metering modes, when to use each one, how AI-based metering has changed the game in modern mirrorless cameras, and how to handle situations where the meter gets it wrong.
What Are Metering Modes and How Do They Work?
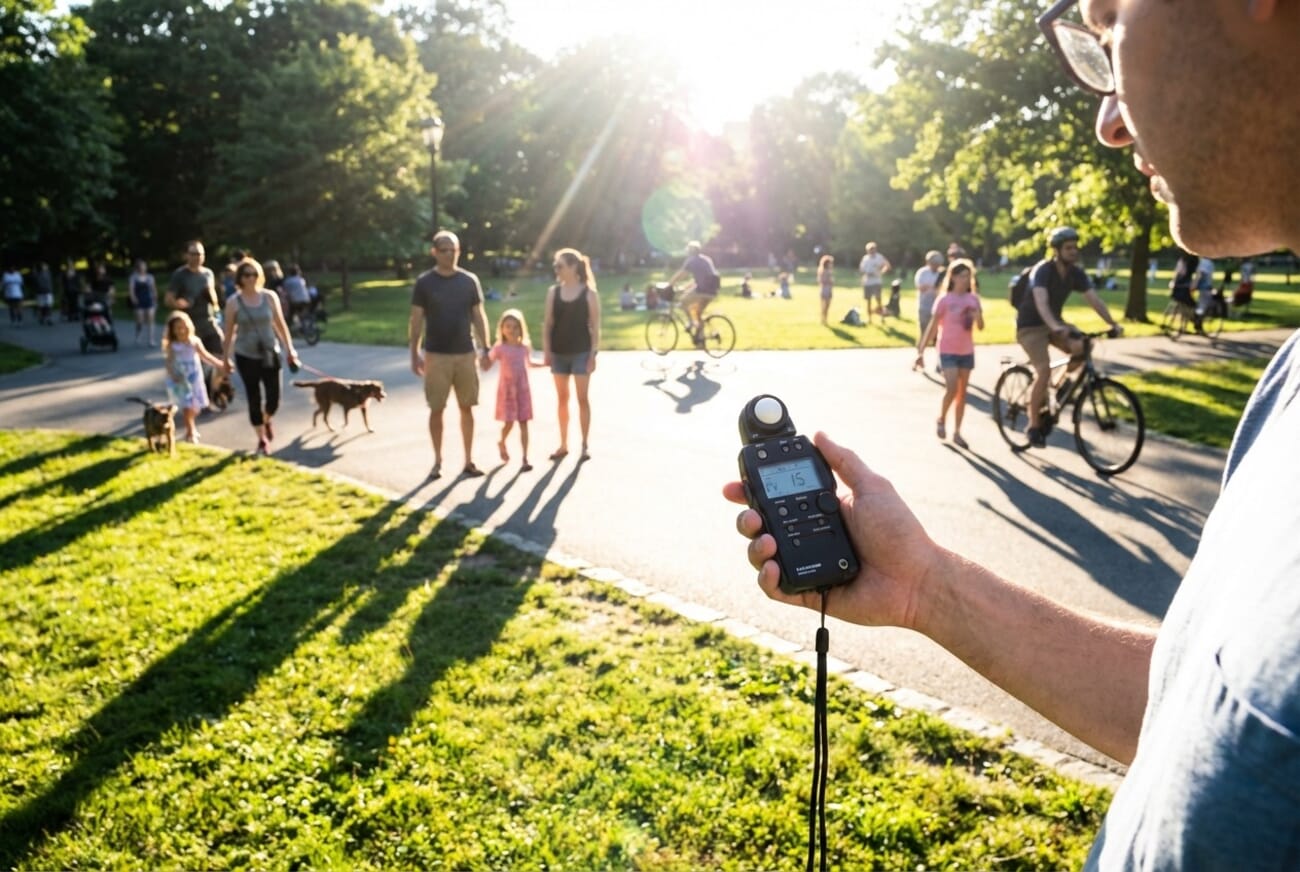
Every digital camera has a built-in light meter. This meter measures the amount of light reflected off a scene — bright sunny days register lots of light, while dark cloudy evenings register very little.
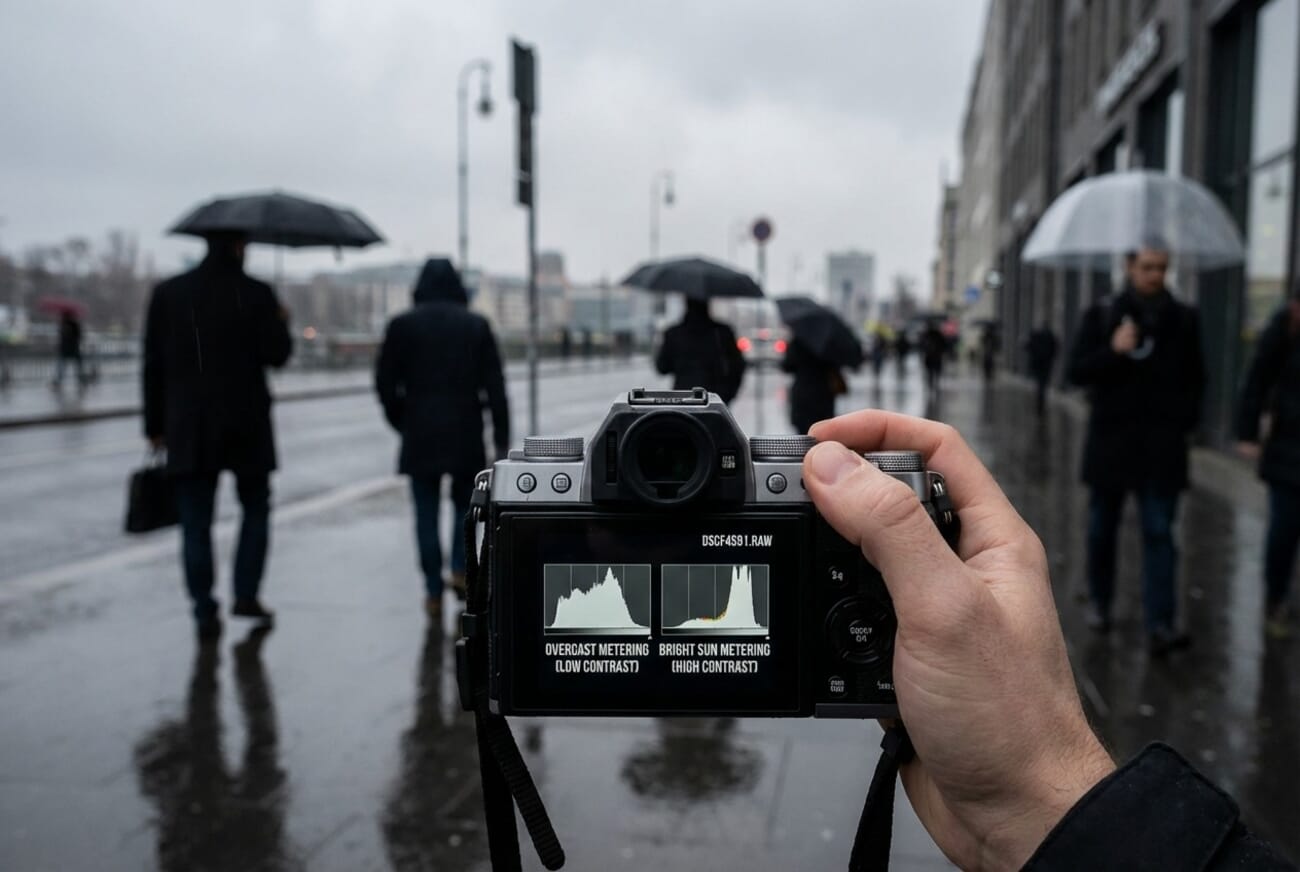
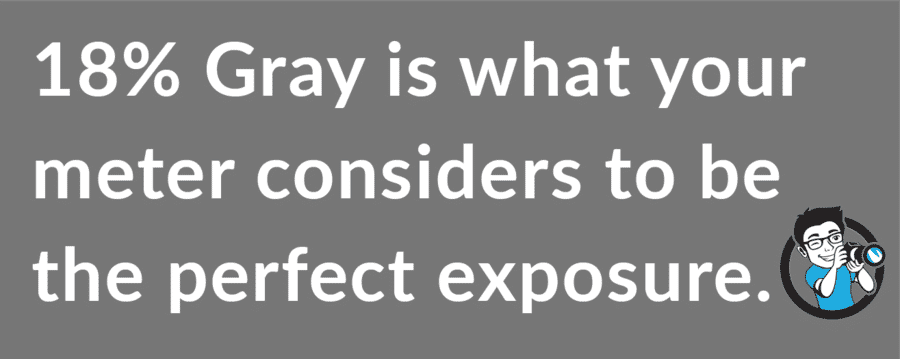
Based on this measurement, the meter calculates the right combination of aperture and shutter speed (and ISO) to produce a well-exposed photo. The camera’s goal is to render the scene as a neutral middle tone — 18% gray, also known as middle gray.
This works perfectly for scenes with relatively even tones — a brick wall, a uniformly lit room, a subject under flat lighting. The meter sees the scene, aims for middle gray, and nails the exposure.
The problem arises when a scene isn’t uniform. A child standing against a black background, for example, throws off a basic meter. The meter sees all that darkness and overcompensates, brightening the entire image until the background turns medium gray — and the child becomes a blown-out white blob.
That’s where metering modes come in. They control which part of the scene the camera prioritizes when calculating exposure.
The Three Types of Metering Modes
Most digital cameras offer three primary metering modes:
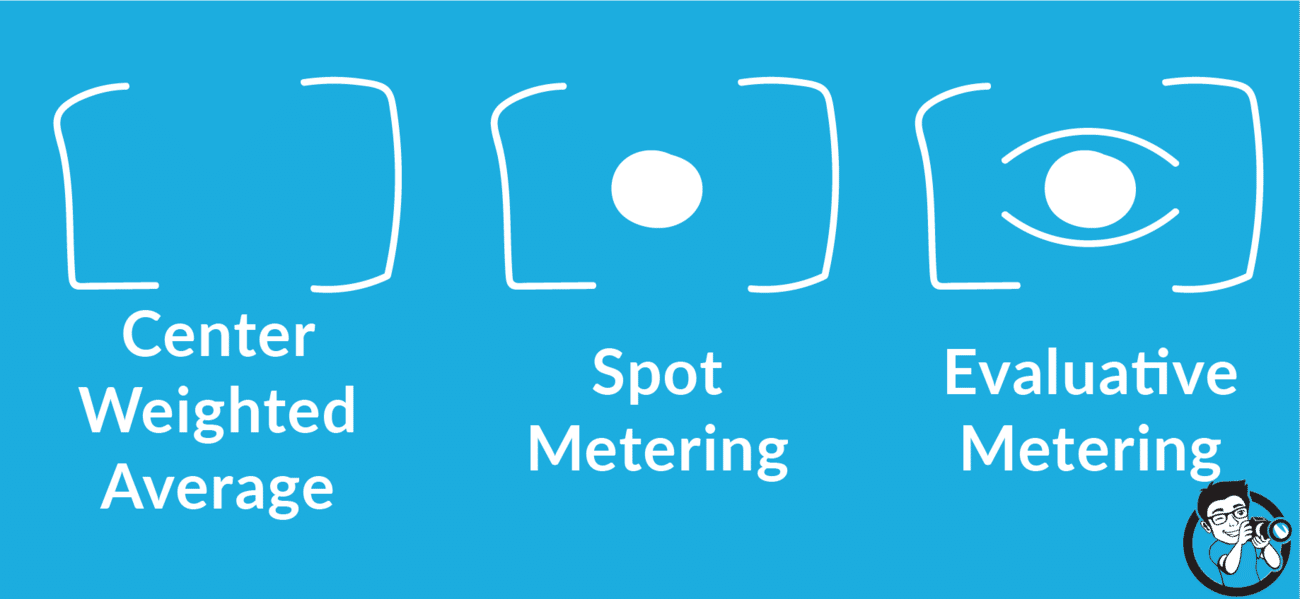
- Evaluative/Matrix metering — analyzes the entire scene intelligently
- Center-weighted average metering — prioritizes the center while considering edges
- Spot metering — measures only a tiny circle (2-3% of the frame)
Evaluative/Matrix Metering
Canon calls it evaluative metering, Nikon calls it matrix metering, and other manufacturers use terms like multi-pattern or multi-segment. Regardless of the name, the concept is the same: the camera divides the frame into many zones (often 1,000+), measures light in each zone, and uses algorithms to determine the best overall exposure.
Modern evaluative metering systems also factor in the active autofocus point, giving extra weight to the area where the subject is detected. Some systems compare the scene against a database of thousands of reference images to recognize common shooting scenarios — a sunset, a backlit portrait, a snowy landscape — and adjust accordingly.

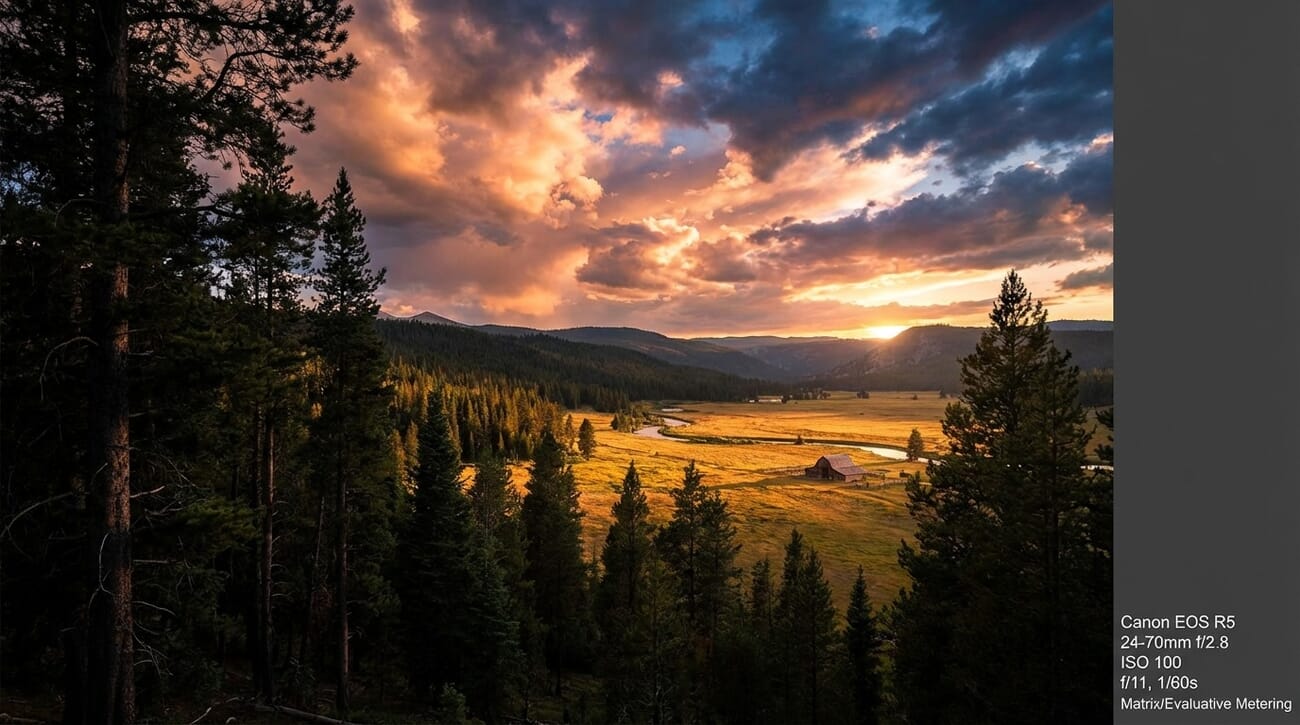
Evaluative metering is the best default choice. It handles the widest variety of scenes with the least intervention, making it ideal for landscapes, street photography, events, and any situation where the overall scene matters.
Center-Weighted Average Metering
Center-weighted metering measures light across the entire frame but gives significantly more importance to a large area in the center — typically around 60-80% of the weighting goes to the middle third of the frame.
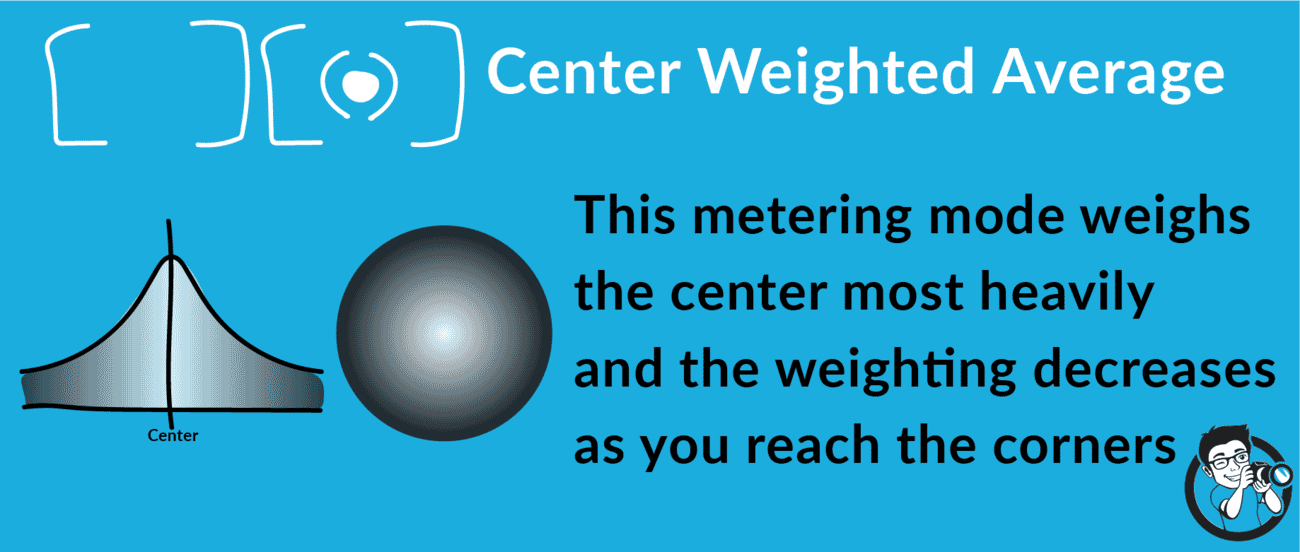
This mode works well when the subject fills most of the center of the frame. A headshot portrait, a sports player running toward the camera, or a flower close-up — in these situations, center-weighted metering gives a reliable reading because the subject is the center.
The drawback is precision. Because center-weighted metering still accounts for the surrounding areas, it can be thrown off by very bright or very dark backgrounds. It’s a middle ground between evaluative and spot metering — more targeted than evaluative, but less precise than spot.
Spot Metering
Spot metering measures light from a tiny circle — typically just 2-3% of the frame, centered on the active focus point. Everything outside that circle is completely ignored.
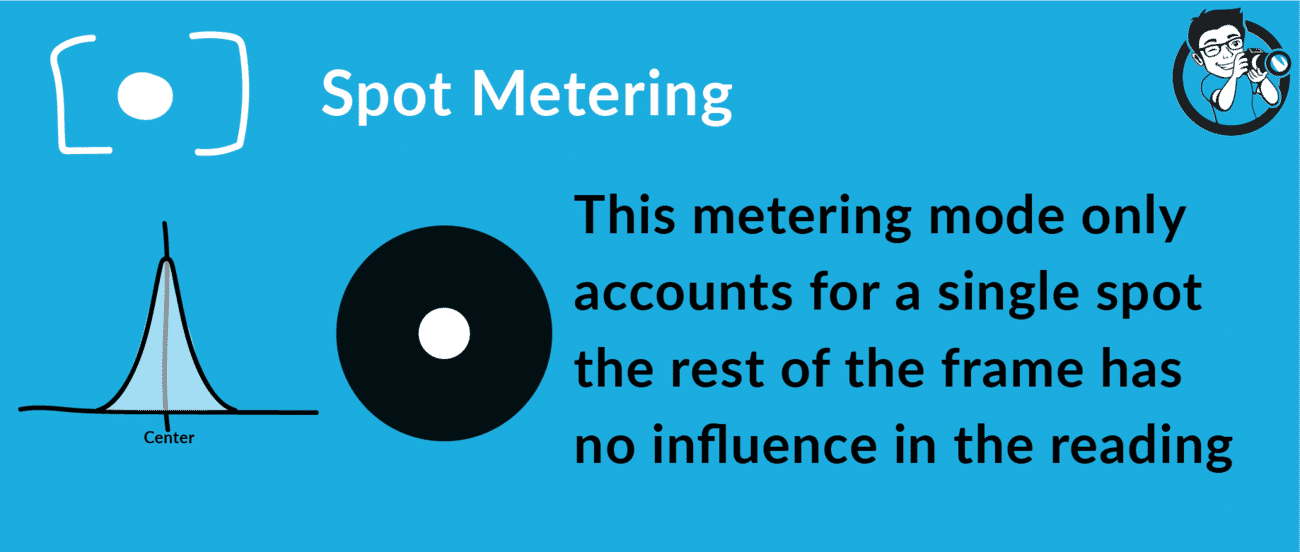
This makes spot metering extremely precise. When photographing a bird against a bright sky, spot metering on the bird ensures it’s properly exposed — even if the sky blows out completely. For backlit portraits, spot metering on the subject’s face delivers accurate skin tones regardless of the bright light behind.
Some cameras also offer partial metering, which works like spot metering but covers a larger area — around 6-10% of the frame. Canon’s higher-end bodies typically include this as an additional option between center-weighted and spot.
Which Metering Mode to Use: Quick Reference
Here’s a practical breakdown of when each metering mode works best:
| Situation | Best Mode | Why |
|---|---|---|
| Landscapes | Evaluative/Matrix | Balances sky, foreground, and shadows across the entire frame |
| Street photography | Evaluative/Matrix | Fast-changing scenes need the camera to adapt automatically |
| Events & weddings | Evaluative/Matrix | Lighting changes constantly; evaluative handles variety best |
| Centered portraits | Center-weighted | Subject fills the middle; background exposure matters less |
| Sports (subject centered) | Center-weighted | Quick, reliable readings when the athlete is in the middle of frame |
| Backlit portraits | Spot | Meters only the face, ignoring the bright background |
| Birds & wildlife | Spot | Small subject against sky or foliage — only the animal matters |
| Moon photography | Spot | The moon is a tiny bright object surrounded by darkness |
| Stage & concerts | Spot | Performer lit by spotlight against dark background |
How to Choose the Right Metering Mode
The simplest approach: start with evaluative/matrix metering and only switch when the situation demands it.
Evaluative metering excels when the entire frame matters equally. In landscape photography, detail needs to be preserved in both shadows and highlights across the whole scene:
It also works well for evenly lit scenes where there are no extreme highlights or shadows:

Switch to center-weighted metering when the main subject takes up much of the center of the frame and the edges don’t matter as much. Portraits with a bright background are a textbook case:

Switch to spot metering when only the subject’s exposure matters — and the subject is small relative to the frame or surrounded by very different tones. Birds are a classic example:

Spot metering also excels with backlit subjects — a common challenge in portrait and window-lit photography. The bright light behind the subject would fool evaluative metering into underexposing the face, but spot metering reads only the face:

One caveat with spot metering: it reads from the active AF point (or the center of the frame on older cameras). If the subject moves off that point, the meter will read the wrong area. For fast-moving subjects, evaluative metering is usually more reliable.
AI Metering in Modern Mirrorless Cameras
Traditional metering modes divide the frame into zones and measure brightness without understanding what is in the scene. A face, a wall, and a bright sky are all just patches of light to a conventional meter.
Modern mirrorless cameras have changed this fundamentally. Using dedicated AI processors, they now recognize subjects — human faces and eyes, animals, birds, vehicles — and automatically bias the exposure toward what matters. This is a genuine leap beyond traditional evaluative metering.
Here’s how the major manufacturers implement AI-powered metering:
Sony (a1 II, a7R V, a9 III): Sony’s Real-Time Recognition AF system feeds directly into the metering engine. When the camera detects and tracks a subject — whether a human eye, an animal, or a vehicle — it biases the multi-segment meter toward that subject. The result: even if a subject moves from shade into bright sunlight, the camera adjusts exposure to keep skin tones or fur detail consistent. This integration between AF tracking and metering is seamless, particularly in the a1 II’s high-speed shooting modes.
Nikon (Z9, Z8, Zf): Nikon’s EXPEED 7 processor uses deep learning for subject detection across 9 categories (people, dogs, cats, birds, airplanes, trains, bicycles, motorcycles, cars). When 3D Tracking AF locks onto a subject, the metering system weights exposure toward that subject. The Z9 and Z8 also factor in the subject’s predicted movement, making exposure adjustments before the subject even reaches a brighter or darker area of the scene.
Canon (R5 II, R1, R6 III): Canon’s Dual Pixel CMOS AF II with deep learning detects and tracks subjects (people, animals, vehicles, aircraft) and feeds that data to the metering system. The EOS R1 takes this further with a dedicated AI processor for stacked-sensor readout, enabling exposure priority based on the tracked subject even at 40fps burst shooting.
Fujifilm (X-T5, GFX100 II): Fujifilm’s scene recognition uses the X-Processor 5 to detect subject types and lighting patterns, then applies what Fujifilm calls Dynamic Range Priority — an automated blend of highlight and shadow protection biased toward the detected subject. This pairs with Fujifilm’s film simulations to deliver not just correct exposure, but exposure that matches the chosen aesthetic.
What AI Metering Means for Photographers
For most shooting situations, AI-powered metering in evaluative/matrix mode handles exposures that previously required switching to spot metering or dialing in manual exposure compensation. A backlit portrait that once demanded spot metering on the face? The camera recognizes the face and biases the meter automatically.
That said, AI metering isn’t infallible. It works best when the camera can clearly identify a subject. Abstract compositions, macro photography, and unusual subjects (glass, reflective surfaces, smoke) still benefit from manual metering mode selection and exposure compensation. The traditional three metering modes remain relevant — AI just makes the default evaluative mode significantly smarter.
When Meters Fail: Exposure Compensation
Even with AI assistance, camera meters can be fooled. The fundamental limitation remains: meters aim for middle gray. When a scene should be brighter or darker than middle gray, the meter gets it wrong.
The two classic failure scenarios:
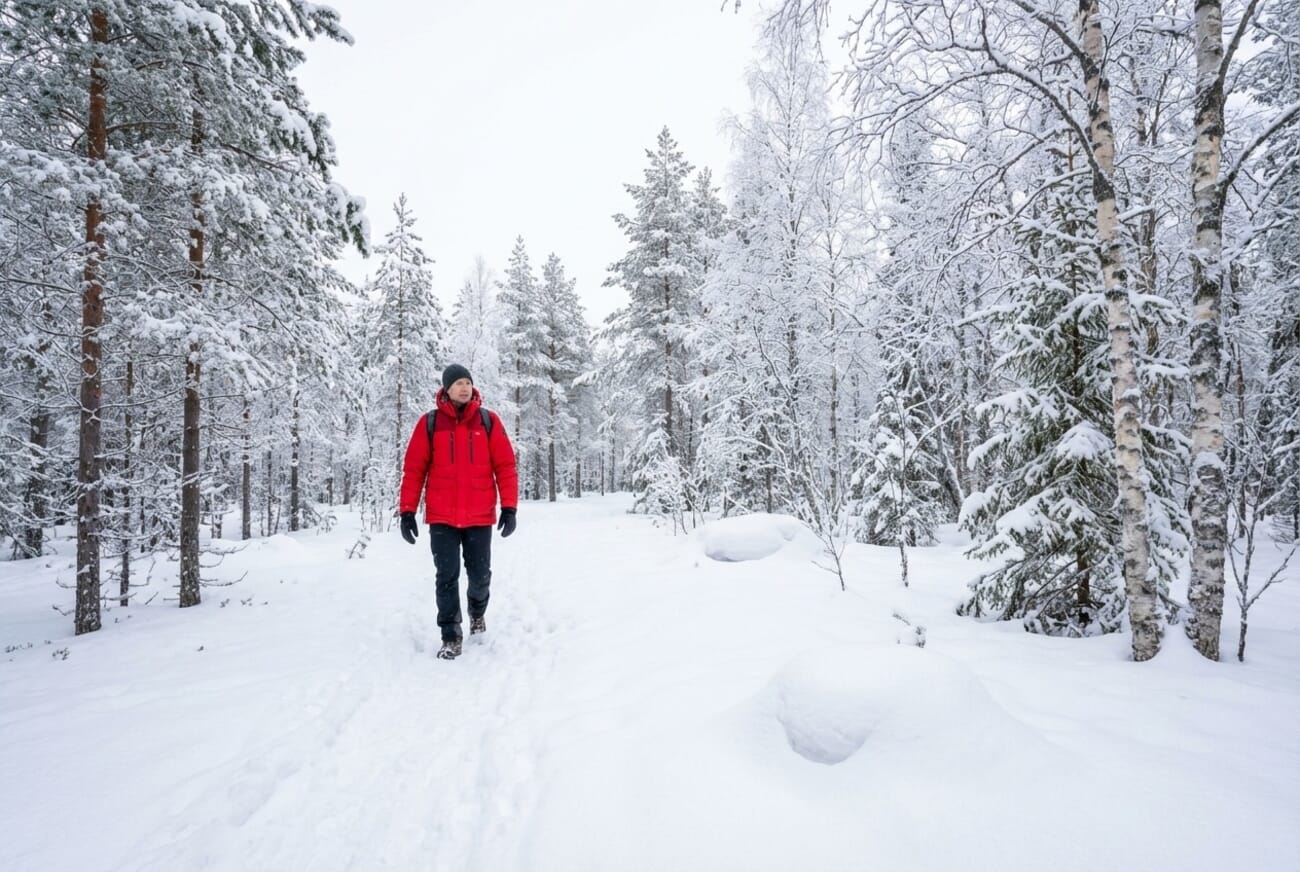
Very bright scenes (snow, white sand, fog): The camera sees overwhelming brightness and assumes “too bright!” — so it underexposes, turning white snow into muddy gray. The fix: dial in +1 to +2 stops of exposure compensation to tell the camera “yes, it really is that bright.”
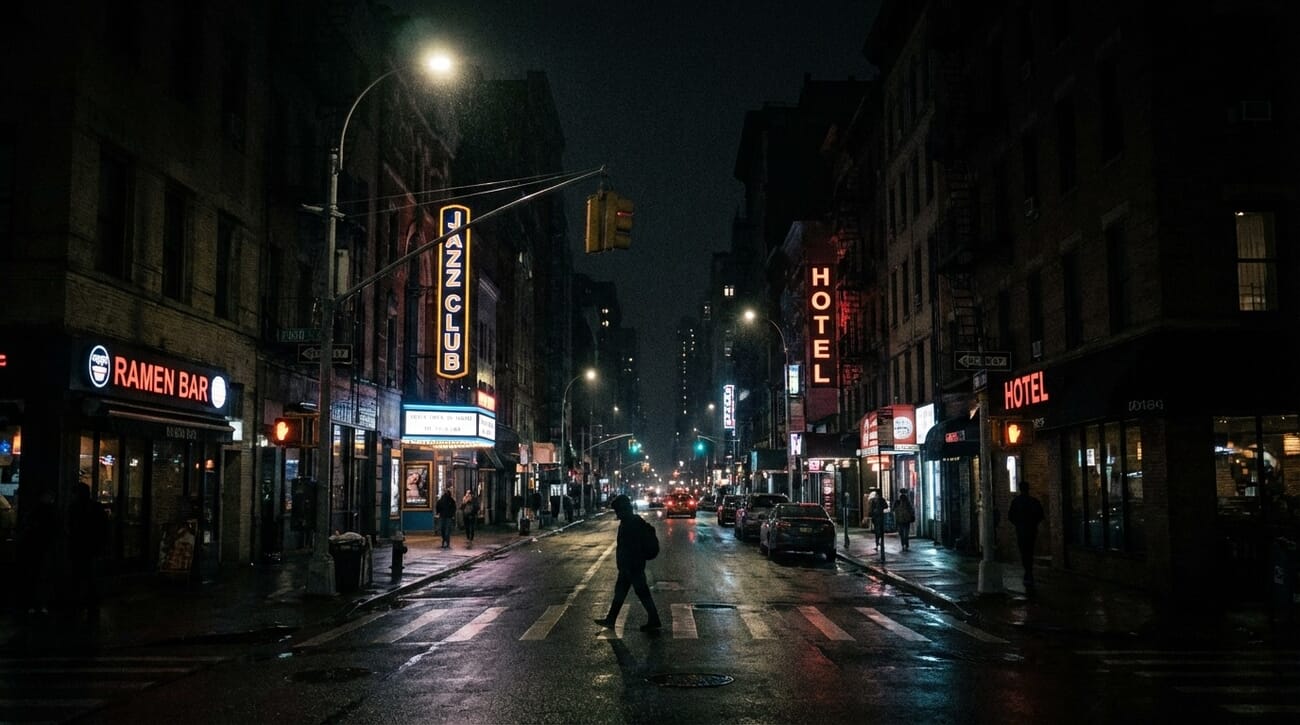
Very dark scenes (night, black backgrounds, low-key portraits): The camera sees darkness and overcompensates, brightening the image until it reaches middle gray — ruining the moody atmosphere. The fix: dial in -1 to -2 stops of exposure compensation to keep the scene appropriately dark.
A useful rule of thumb: “bright = add, dark = subtract.” If the scene is predominantly bright, add positive exposure compensation. If it’s predominantly dark, subtract. Check the histogram after each shot to confirm — understanding exposure fundamentals makes this intuitive over time.
Exposure compensation works in all metering modes and is the single most important override tool available. Learning to read a scene and instinctively add or subtract a stop of compensation separates good exposure technique from great.
Frequently Asked Questions
What is the best metering mode for landscape photography?
Evaluative (Canon) or matrix (Nikon) metering is the best choice for landscapes. It analyzes the entire frame — sky, midground, foreground — and balances the exposure to preserve detail throughout. Only switch to spot metering if there’s a specific element (like a sunlit rock face) that needs precise exposure priority.
What is the best metering mode for sports photography?
Evaluative/matrix metering works best for sports because subjects move unpredictably through the frame. If the athlete stays centered and the background is consistently bright or dark, center-weighted metering can also work. Avoid spot metering for moving subjects — it’s too easy to meter the wrong area when the subject moves off the metering point.
When should I use spot metering?
Spot metering works best when only the subject’s exposure matters and the subject is small relative to the frame or surrounded by very different tones. Classic use cases: birds against bright sky, a performer lit by a spotlight, backlit portraits, and moon photography. In each case, the surrounding tones would throw off evaluative metering.
Do I still need to choose metering modes with modern mirrorless cameras?
AI-powered evaluative metering in modern mirrorless cameras handles many scenarios that previously required switching modes. Backlit portraits, for example, are now handled automatically because the camera recognizes the face and biases exposure toward it. However, understanding metering modes remains valuable for situations where AI can’t help — macro, abstract compositions, reflective surfaces — and for using older cameras that lack subject recognition.
What is 18% gray and why does it matter for metering?
18% gray (also called middle gray) is the reflectance level that camera meters use as their target. The meter assumes any scene should average to this tone. When a scene is naturally brighter (snow) or darker (black cat on dark couch), the meter pushes it toward middle gray — producing incorrect exposure. This is why exposure compensation exists: to tell the camera when middle gray isn’t the right target.
Conclusion
Metering modes give photographers control over how the camera evaluates a scene’s brightness. Start with evaluative/matrix metering as the default — it handles the widest range of situations. Switch to spot metering for backlit subjects, wildlife, or any scene where only the subject’s exposure matters. Use center-weighted metering when the subject fills the center and the edges aren’t important.
Modern AI-powered metering in cameras like the Sony a1 II, Nikon Z8, Canon R5 II, and Fujifilm X-T5 has made evaluative mode smarter than ever, but understanding how meters work — and when they fail — remains essential for any photographer who wants consistent, intentional exposures.
The most important skill isn’t choosing the right metering mode — it’s learning to recognize when the meter is wrong and confidently applying exposure compensation to fix it.
Image credit: example photos via PhotoWorkout.
This article was researched using the following sources:


