Key Takeaways: Mastering Diagonals: Elevate Your Photography Compositions
In photography, careful composition is crucial. One way to create powerful compositions is through the use of diagonals. In this blog post, the author explores the concepts of diagonals and their benefits in photography.
- What Are Diagonals in Photography? Diagonals refer to tilted lines in an image. They can begin at the edges of the frame moving towards centre or start in the middle. The key is they must be slanted. Diagonals offer a different technique compared to straight lines.
- Why Are Diagonals Useful? Diagonals create visual flow, guiding the viewer’s eye through the frame. They capture the viewer’s attention and engages them with the photo for longer. If a diagonal starts at the edge of a composition, it draws the viewer in and guides them towards the other end.
This guide also discusses finding diagonals, the Golden Triangle, and leading lines, along with the difference between diagonals and the Rule of Thirds. Additionally, the author offers tips on how to create dynamic and unique compositions using diagonals and triangles.
Introduction
Careful composition is an essential part of good photography, but even once you understand the image-arrangement fundamentals, you may struggle to capture shots that are sufficiently striking.
If you feel that your images are bland and/or unoriginal, then I highly recommend you learn how to work with diagonals, which can dramatically improve your compositions. With the proper application of this technique, you can create breathtaking photos that are full of movement – and because diagonals aren’t a commonly used image element, they can help your shots stand out from the crowd.
In this article, I discuss everything you need to know about diagonal arrangements, and I offer plenty of tips and examples along the way!
What Are Diagonals in Photography?
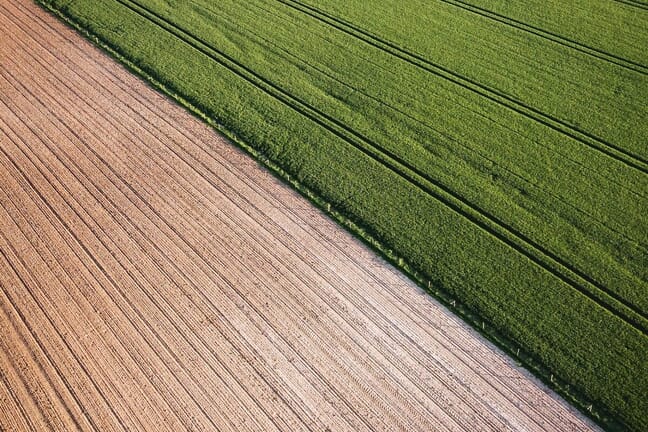
Diagonals refer to tilted lines in your images, like this:

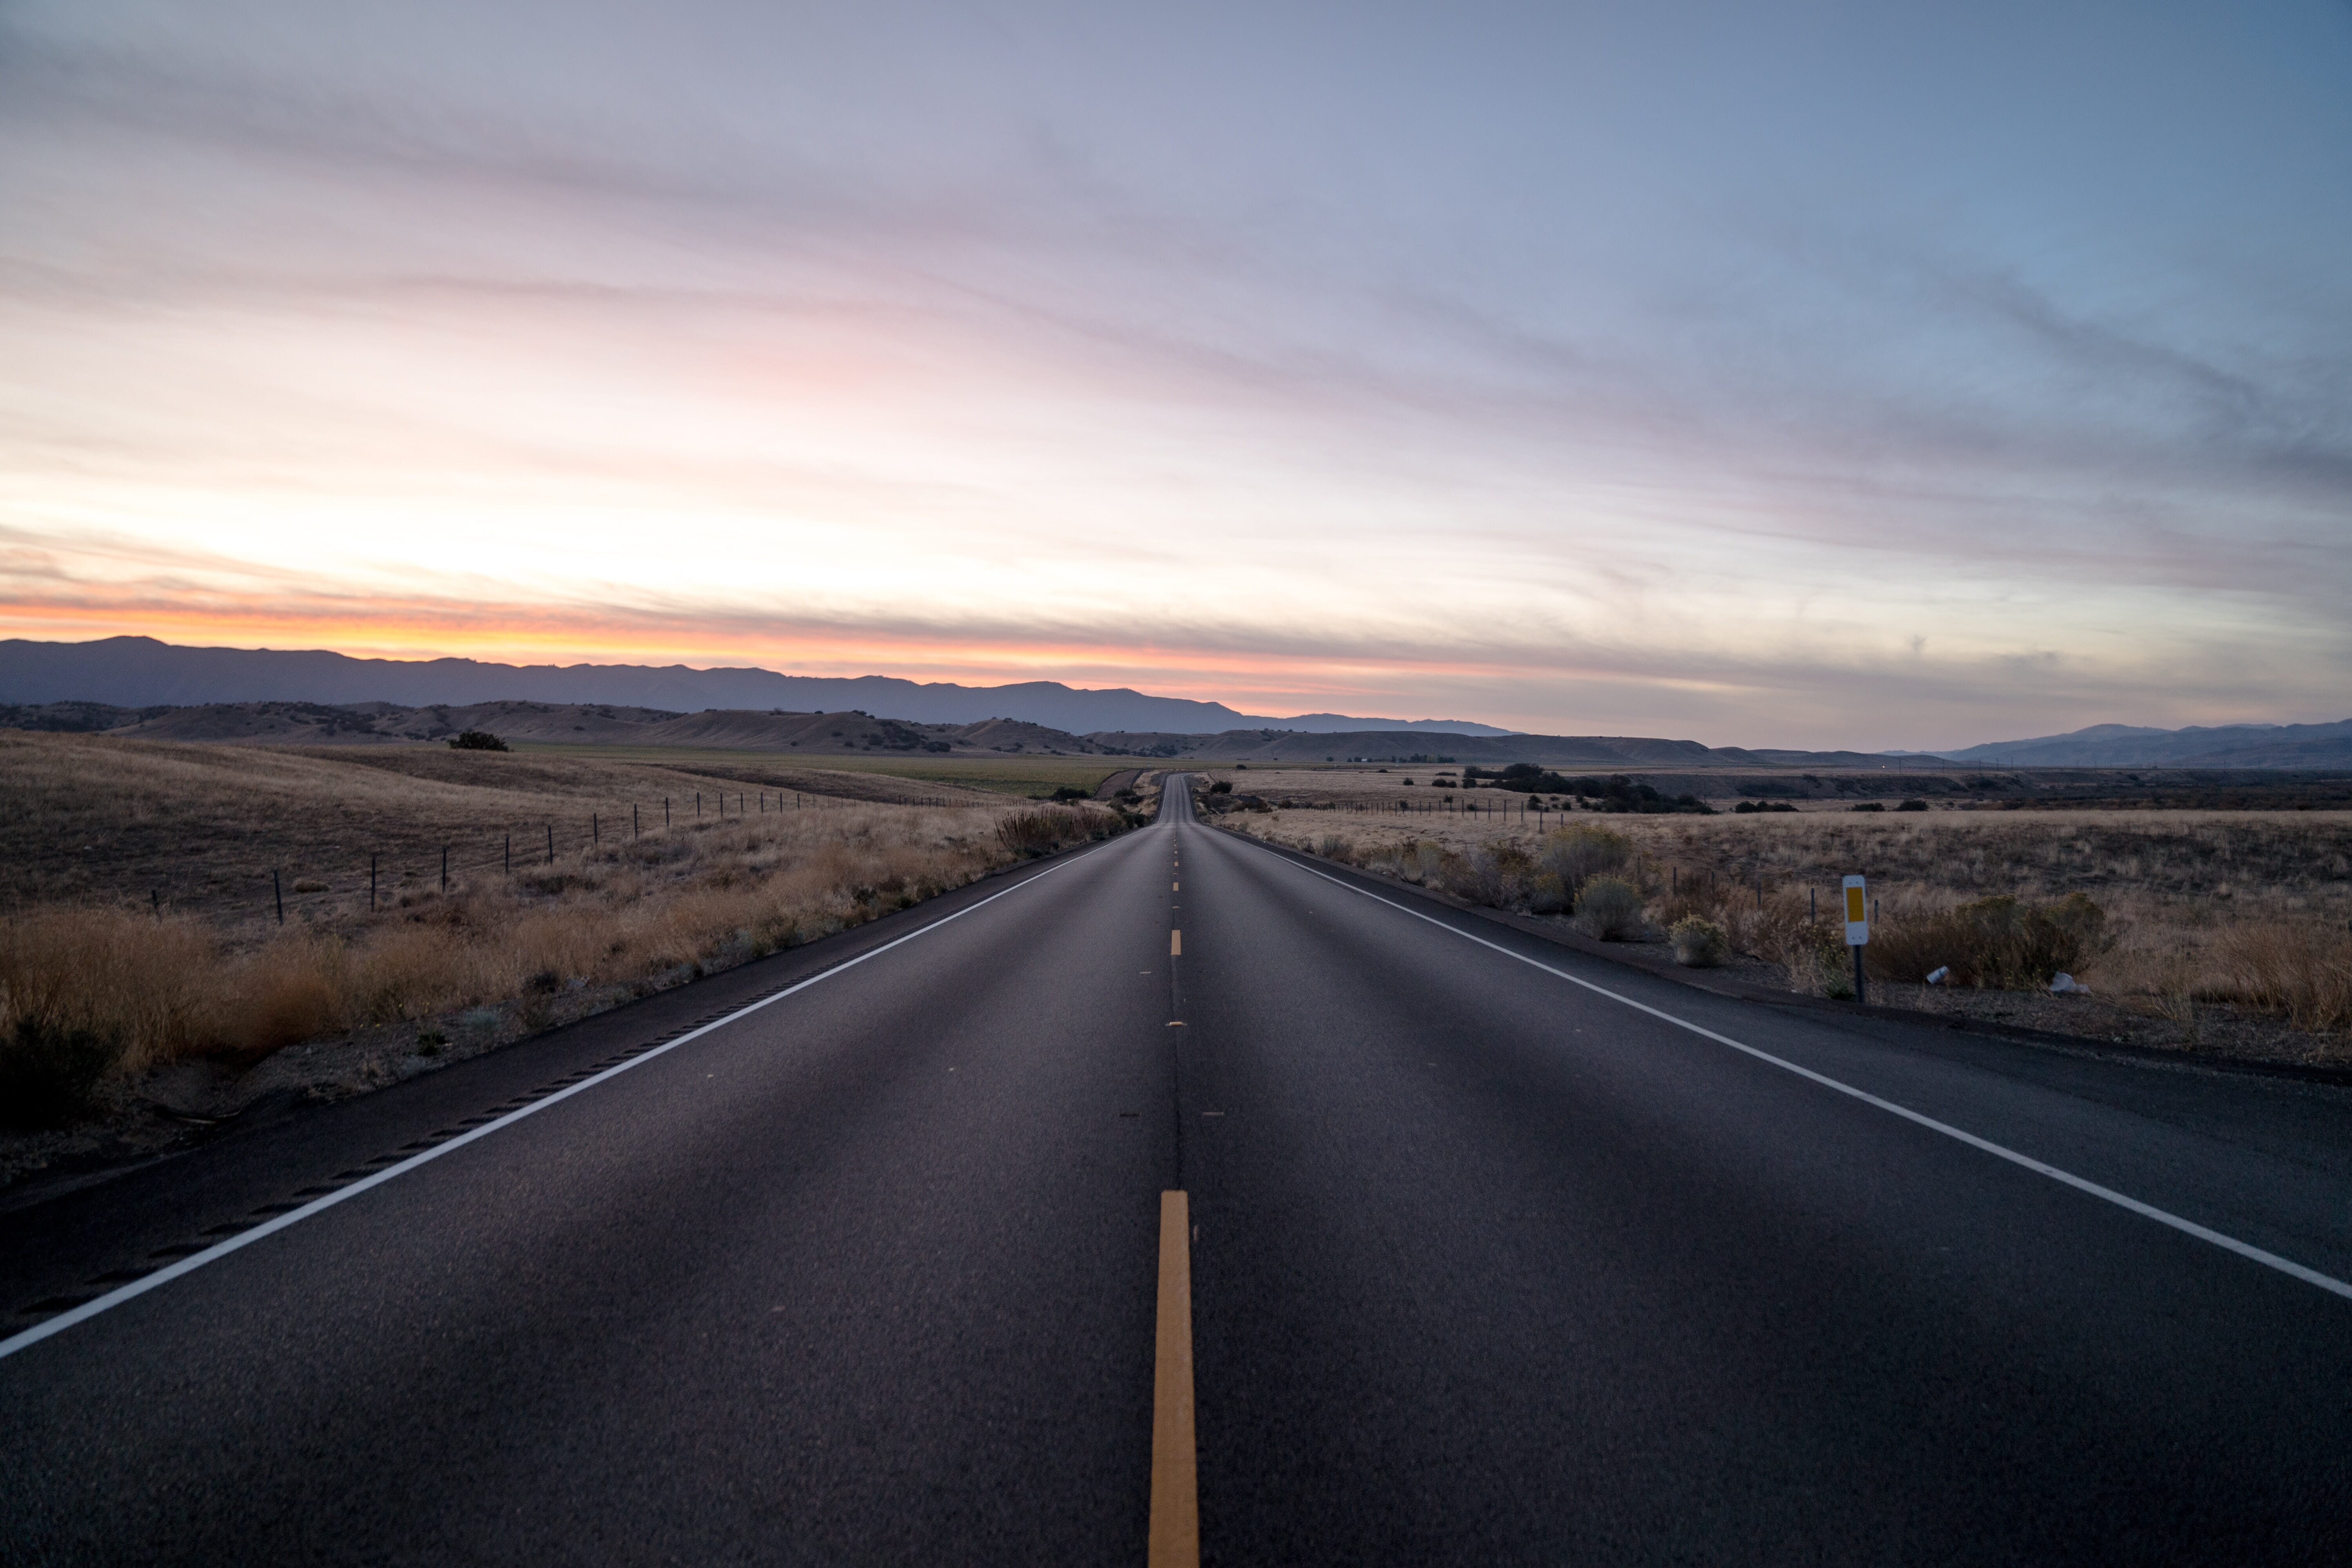
They can begin at the edges of the frame and move toward the center:
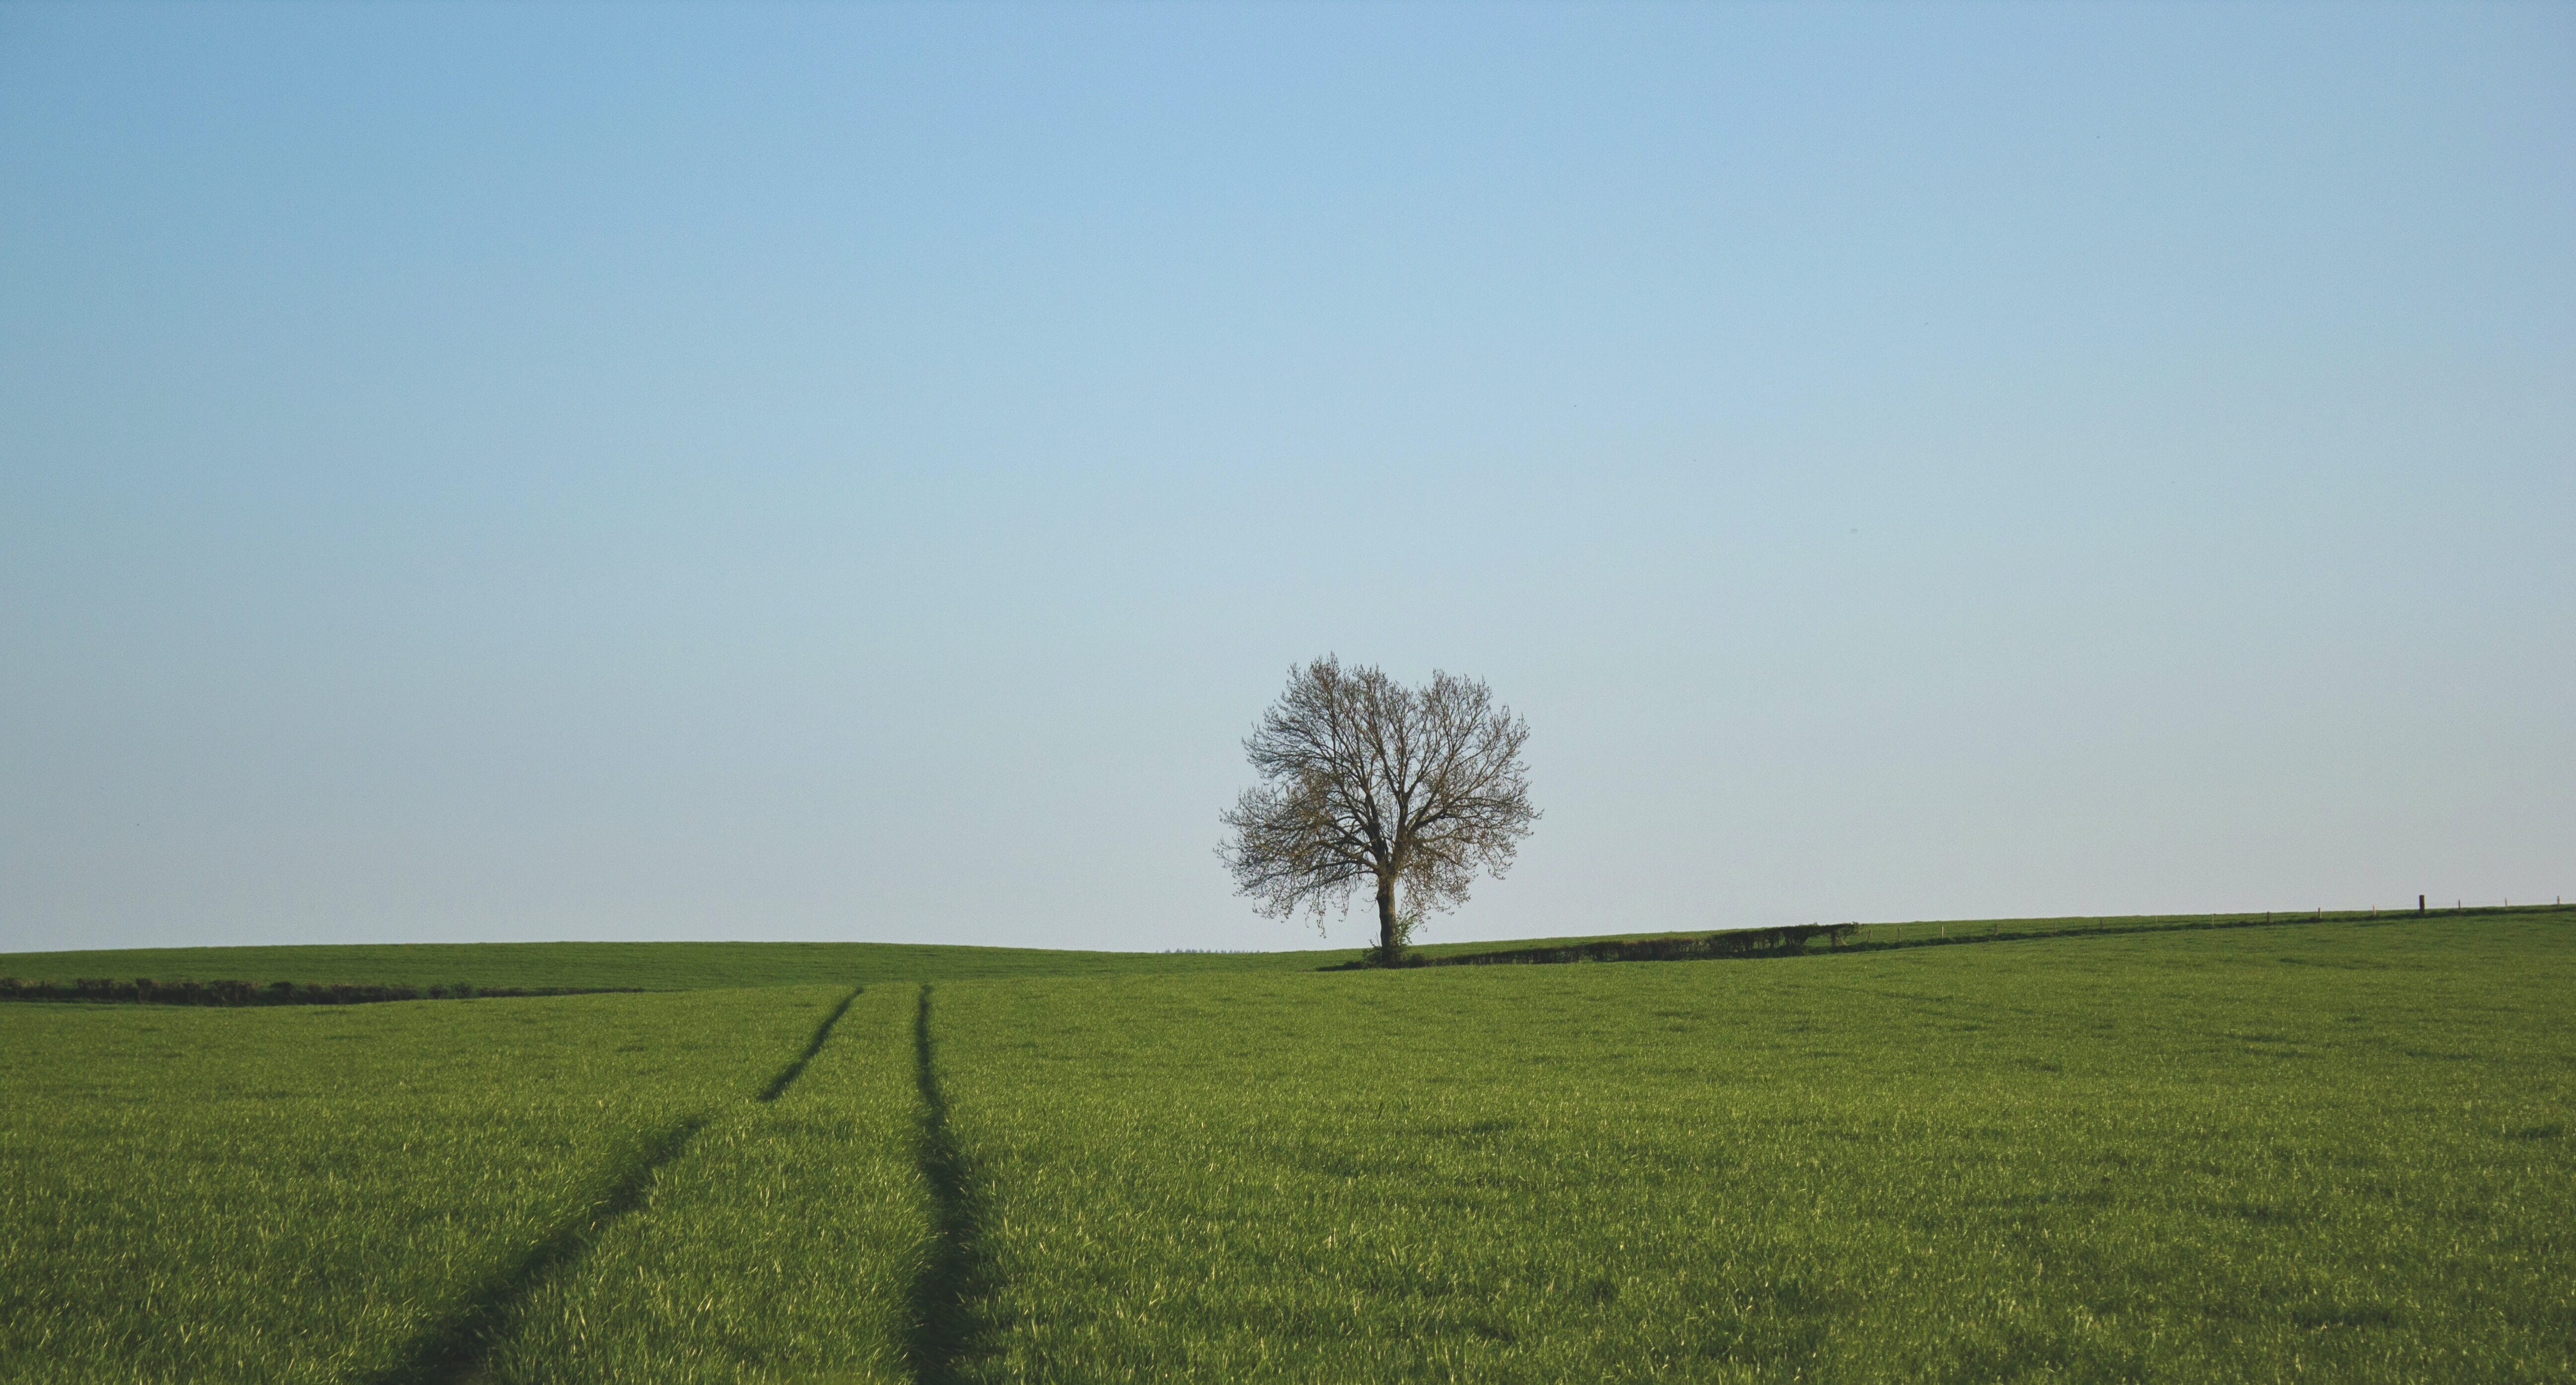
Or they can begin in the middle of the frame and stay firmly within the center of the composition:

The key thing to remember is that diagonals must be slanted. While straight lines can make for very compelling photography, slanted lines offer something different – which is why it’s worth drawing a distinction between the two.
Why Are Diagonals Useful?
Slanted lines are powerful compositional elements because they create visual flow. In other words, they move the viewer’s eye through the frame (from one end of the line to the other).
So if a diagonal begins at the edge of a composition, it draws the viewer in, and then it takes them on a journey all the way to the other end.
Now, you might be wondering: What’s so great about visual flow?
Visual flow is a fundamental part of photographic composition. If you can move the viewer through the frame, they’ll engage with the photo for longer, they’ll appreciate it more, and they’ll become (hopefully) rather captivated.
Visual flow is also important for another reason: It directs the viewer toward the most essential part of the photo while keeping them away from the less essential parts. Put another way, visual flow helps focus the viewer so that they’re able to understand a photo and what it’s about.
Related Posts
And that’s why diagonals in photography are so useful; they guide the viewer, keep them engaged, and take the viewer where you – the photographer – want them to go!
Finding Diagonals

You might be wondering: Where do diagonals actually come from? Well, if you look carefully enough, you can find them everywhere – especially because a straight line, positioned properly within the frame, automatically becomes a diagonal.
For instance, you might find a fallen tree in a forest, which initially presents itself as a straight line. But if you change your angle, it immediately becomes a compelling diagonal, stretching from the bottom corner of the frame to the top opposite corner of the frame.
You can even use horizon lines to produce the same effect. Simply find a flat horizon, then tilt your camera for a tense, disorienting, dutch-angle look!
You don’t need slanted lines in every one of your photos. But they do enhance the composition by keeping the viewer both focused and engaged, so if you get the chance to incorporate diagonals into a shot, do it!
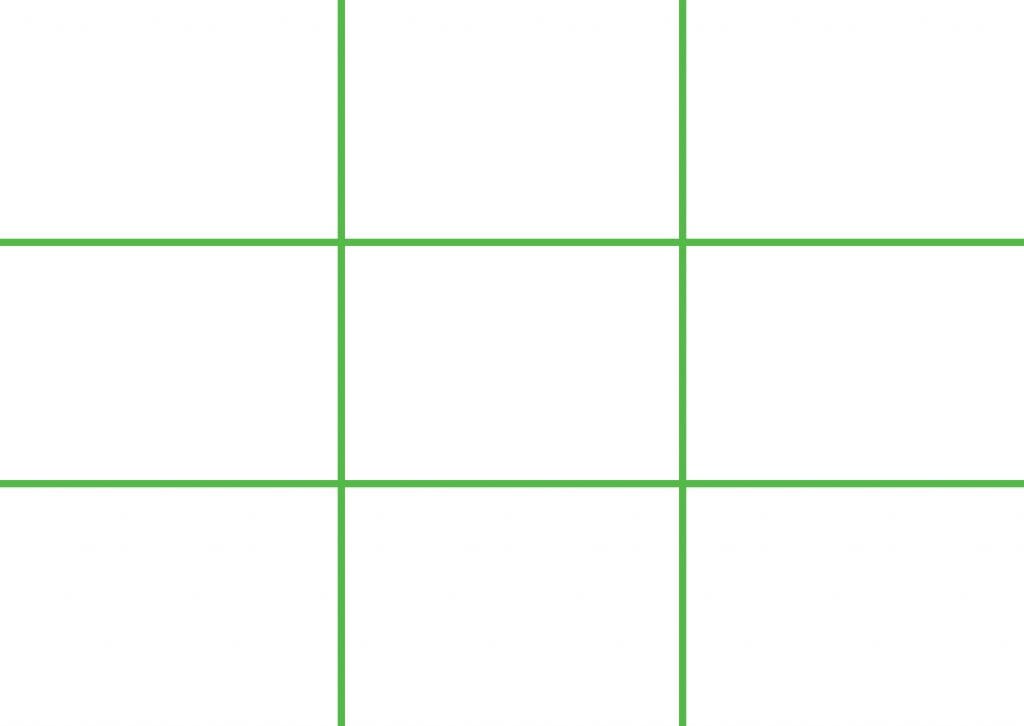
The Golden Triangle
You may be familiar with the golden triangle compositional overlay, which encourages you to place key elements of your composition along these gridlines:

As you can see, the golden triangle overlay incorporates several very clear diagonals, from the strong line down the middle to the smaller lines coming from the other corners.
Note that you can use any part of the golden triangle overlay to place tilted lines in your compositions. There are a number of powerful approaches you can try, and you don’t always have to include elements that run the entire length of the shot.
Really, I’d urge you to experiment with positioning diagonals in different places. You can start with a slanted line that’s positioned straight through the middle of the shot – running from corner to corner – but then try moving the line more toward the middle of the frame; you can also see what happens when you let the line start outside the frame versus inside the frame (both effects are interesting!).
Leading Lines
Leading lines are a popular photographic composition element, especially among landscape photographers (though plenty of other photographers also use leading lines to great effect).
The idea is that a line leads the viewer up from the foreground and toward a compelling background, which creates the illusion of depth while also focusing and engaging the viewer.
Now, not all leading lines are diagonals. For instance, S-curves are a famous example of powerful leading lines, which wind their way up toward the back of the shot in a meandering fashion. And some leading lines are completely straight, taking the viewer up and back.
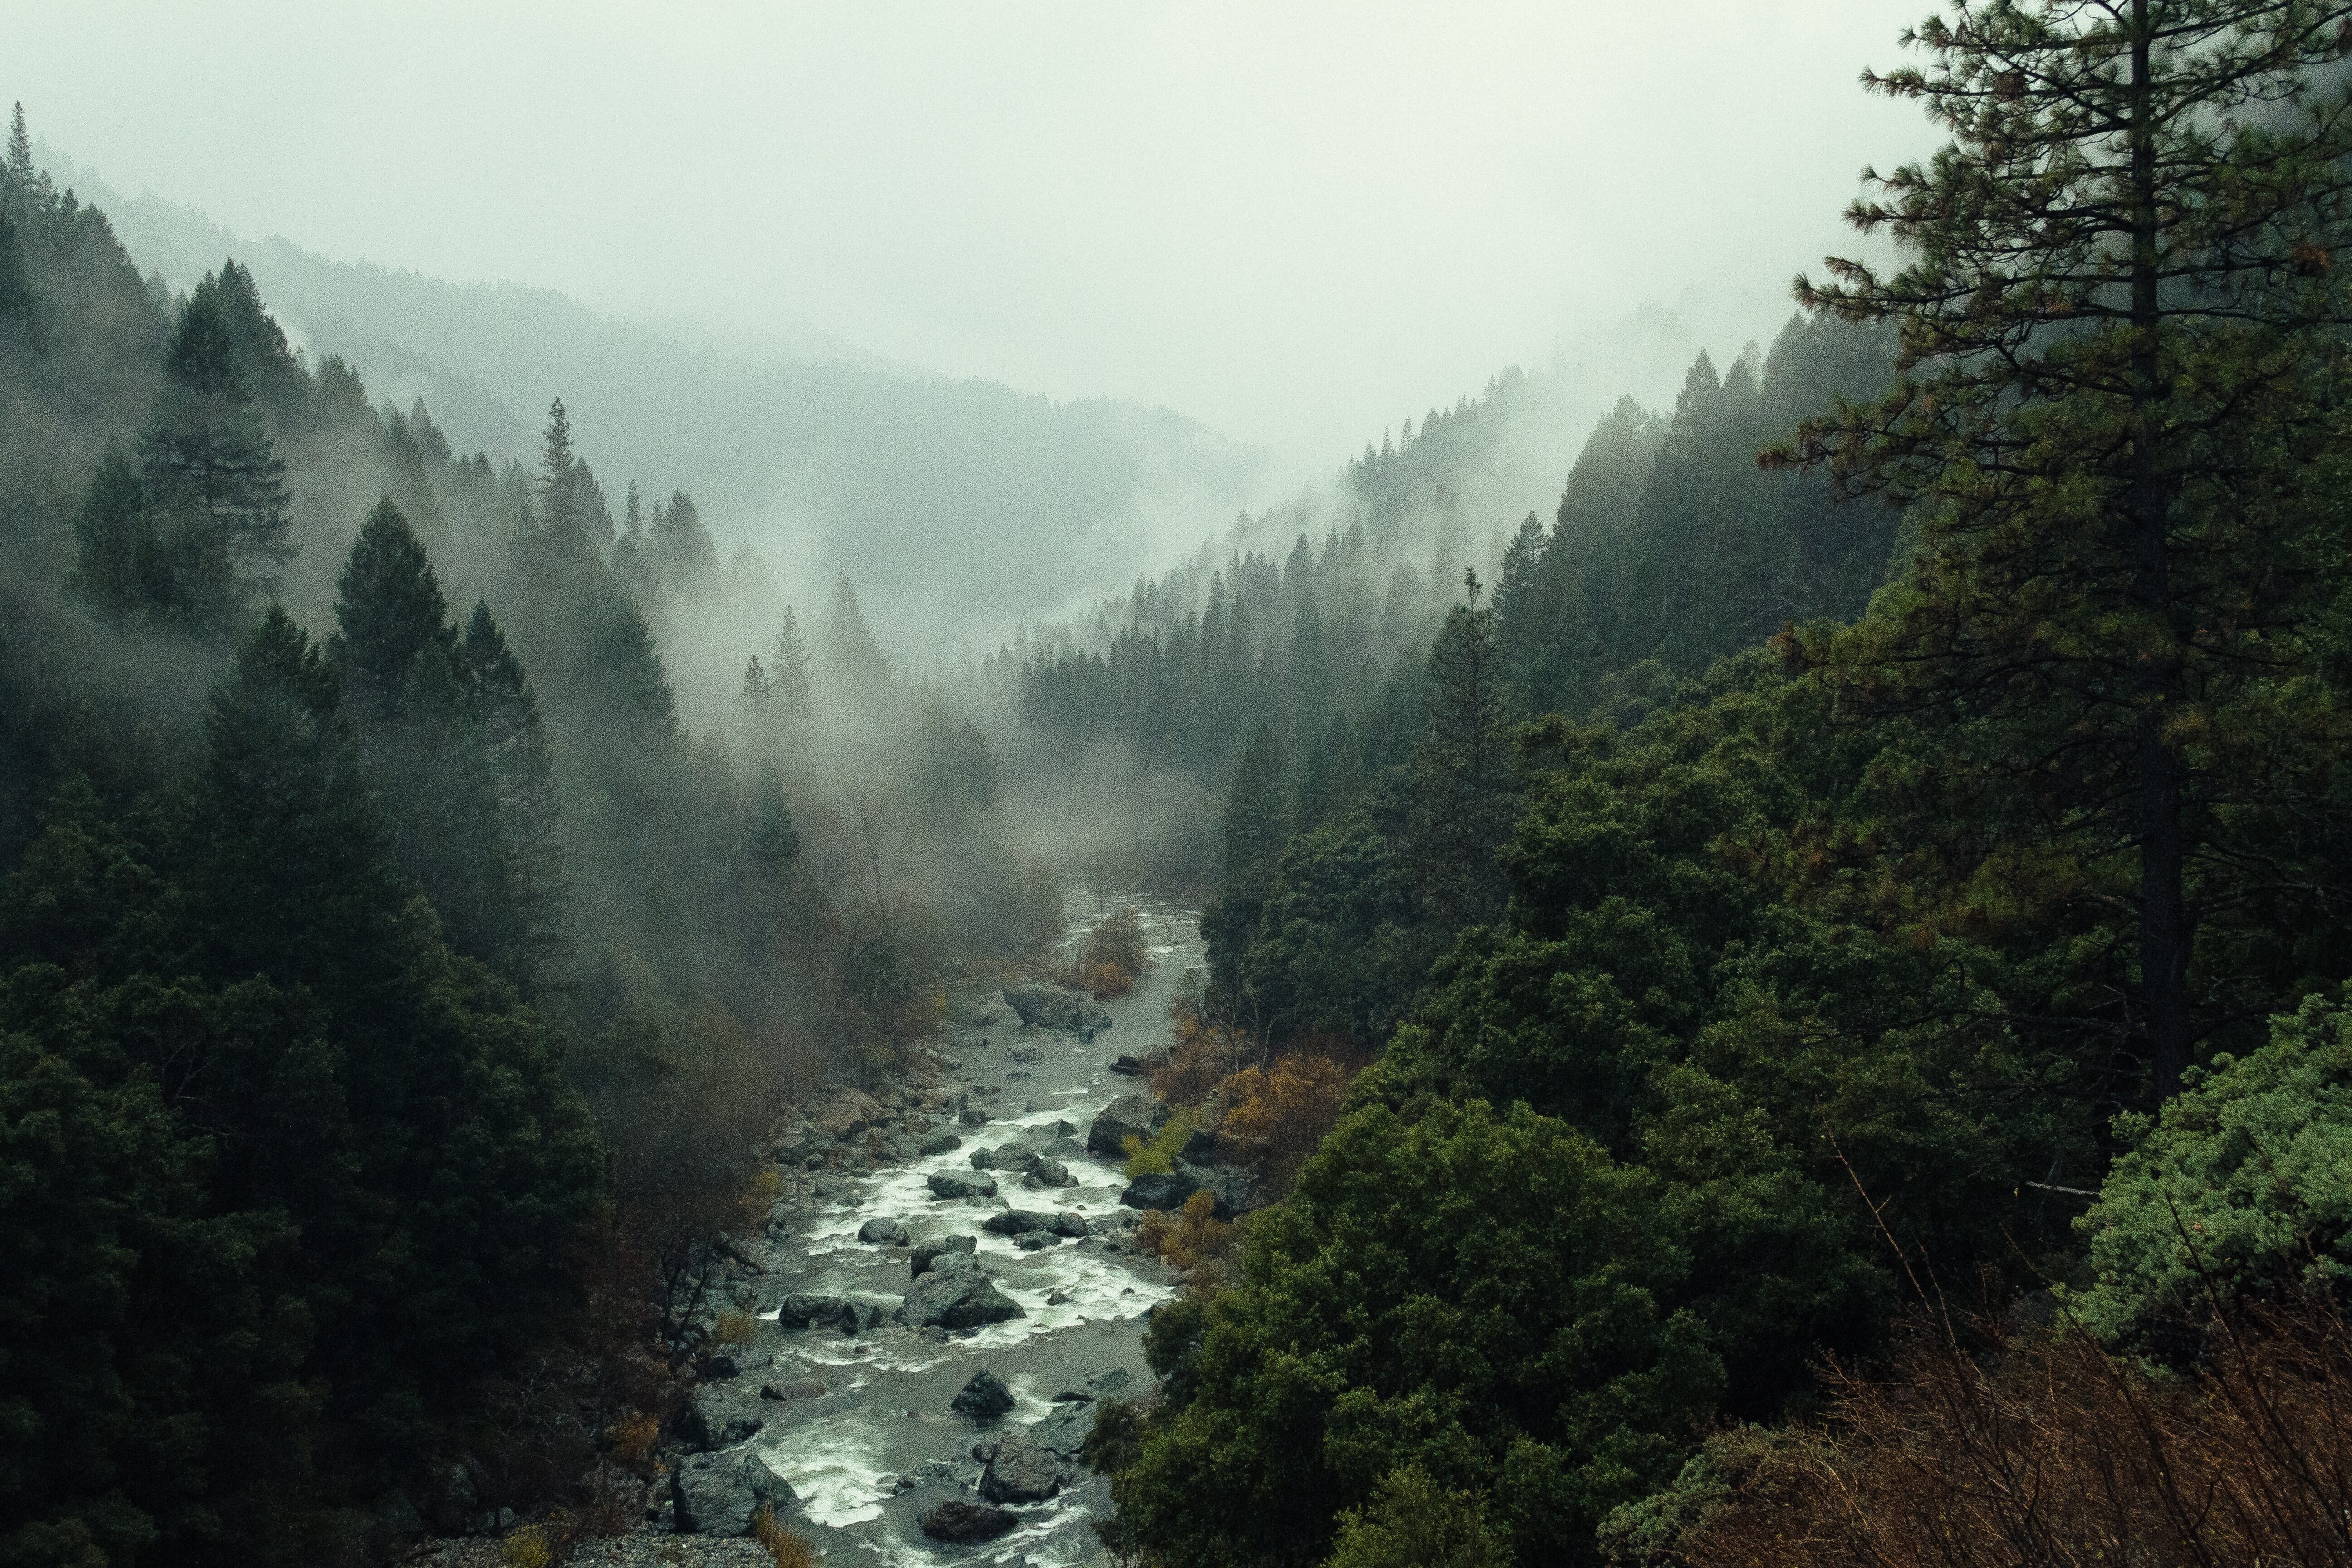
But diagonals in photography are frequently featured as leading lines, and they’re extremely compelling. For instance, check out how these trees cut through the shot in order to take the viewer toward the background:

That’s what diagonals can do. Don’t you feel pulled along?
Diagonals vs the Rule of Thirds
Diagonals run through the frame, well, diagonally. Whereas the rule of thirds states that the best compositions include key elements a third of the way into the frame.
Take a look at the rule of thirds gridlines, and you’ll notice something interesting: There are no slanted lines!
And it’s true: The rule of thirds doesn’t say anything at all about diagonals. But this isn’t because tilted lines are bad; it’s because the rule of thirds is not the only useful compositional guideline that you should follow.
In fact, when you combine the rule of thirds and diagonals together, you get especially compelling images. For instance, you might position your main subject at one of the rule of thirds intersection points and then include a leading line running through as a diagonal (straight toward the main subject).
Or you could put your main subject around the top-third gridline, but then include several diagonal leading lines running up from the bottom of the frame. As long as you think carefully about your subject and line positioning, the results are bound to look good!

Diagonals and Triangles
I’ve talked all about diagonals and how they can help your images, but triangles are where things really come together – because triangles are diagonals arranged in a stable shape!
And triangles are very stable indeed, which is what makes them so great for photography; they combine the motion of diagonals with the stability of a fully formed shape. That’s why I recommend you incorporate strong triangles into your photography whenever possible.

Note that you don’t have to find full triangles to include in your compositions. You can also work with partial triangles or implied triangles, which can still result in beautiful compositions. So whenever you see the opportunity to work with triangles, take it!
Create Dynamic and Unique Compositions!
Diagonals aren’t the most talked-about compositional element out there, but they play a key role in creating dynamic, focused images.
That’s why I recommend using them whenever you can. Just experiment with positioning tilted lines at different edges of the frame as well as toward the middle, and see how your images turn out!

Diagonals in Photography FAQ
What are diagonals?
Diagonals refer to slanted lines in an image. They’re a fantastic composition element, so I recommend you use them whenever possible!
Should you use diagonals or the rule of thirds?
You can use either one, though you can also use both diagonals and the rule of thirds together to create ultra-powerful shots!
Should you use diagonals or triangles in photography?
Diagonals are naturally a part of triangles, so the two elements go very well together. While it’s true that diagonals work well on their own, you can also create triangles out of your diagonals!
Why are diagonals good for photography?
Diagonals are great for photography because they move the eye through the frame, and this movement helps the viewer engage with the photos.
