Key Takeaways: Mastering Symmetry: Elevate Your Photography Composition

Symmetry in photography refers to the reflection of objects across an imaginary line. This powerful composition technique can produce balanced and bold photos that grab and maintain the viewer’s attention. There are three types of symmetry including true reflections where a reflective surface creates symmetry, false balance where different elements appear to be reflections of each other and radial reflections around a single point often found in macro photography.
- True reflections are the most common type of symmetry and occur when reflective surfaces like water or glass windows create symmetry.
- False balance involves making two distinct elements appear as reflections of each other. This requires keen observation but can result in great photos.
- Radial reflection is common in macro photography, where the focus is on close-ups of plants and flowers, emphasizing reflections around the frame.
Symmetry works well in photography because it creates a balancing effect that makes both sides of the photo appear equally weighted. This gives the best compositions, as ideally, the right side of the photo should feel as heavy as the left side.
Introduction
Symmetry in photography may seem difficult to create, but it’s not as tough as you might think, and it’s very powerful.
With this effect, you can produce in-your-face photos that feel both bold and balanced. You can catch the viewer’s attention and keep them engaged. That’s why every photographer should spend time really exploring the symmetrical composition technique: what it is, how it works, and how you can use it for amazing results.
In this article, I share all the basics, and I also offer plenty of tips and examples along the way!
What Is Symmetry in Photography?
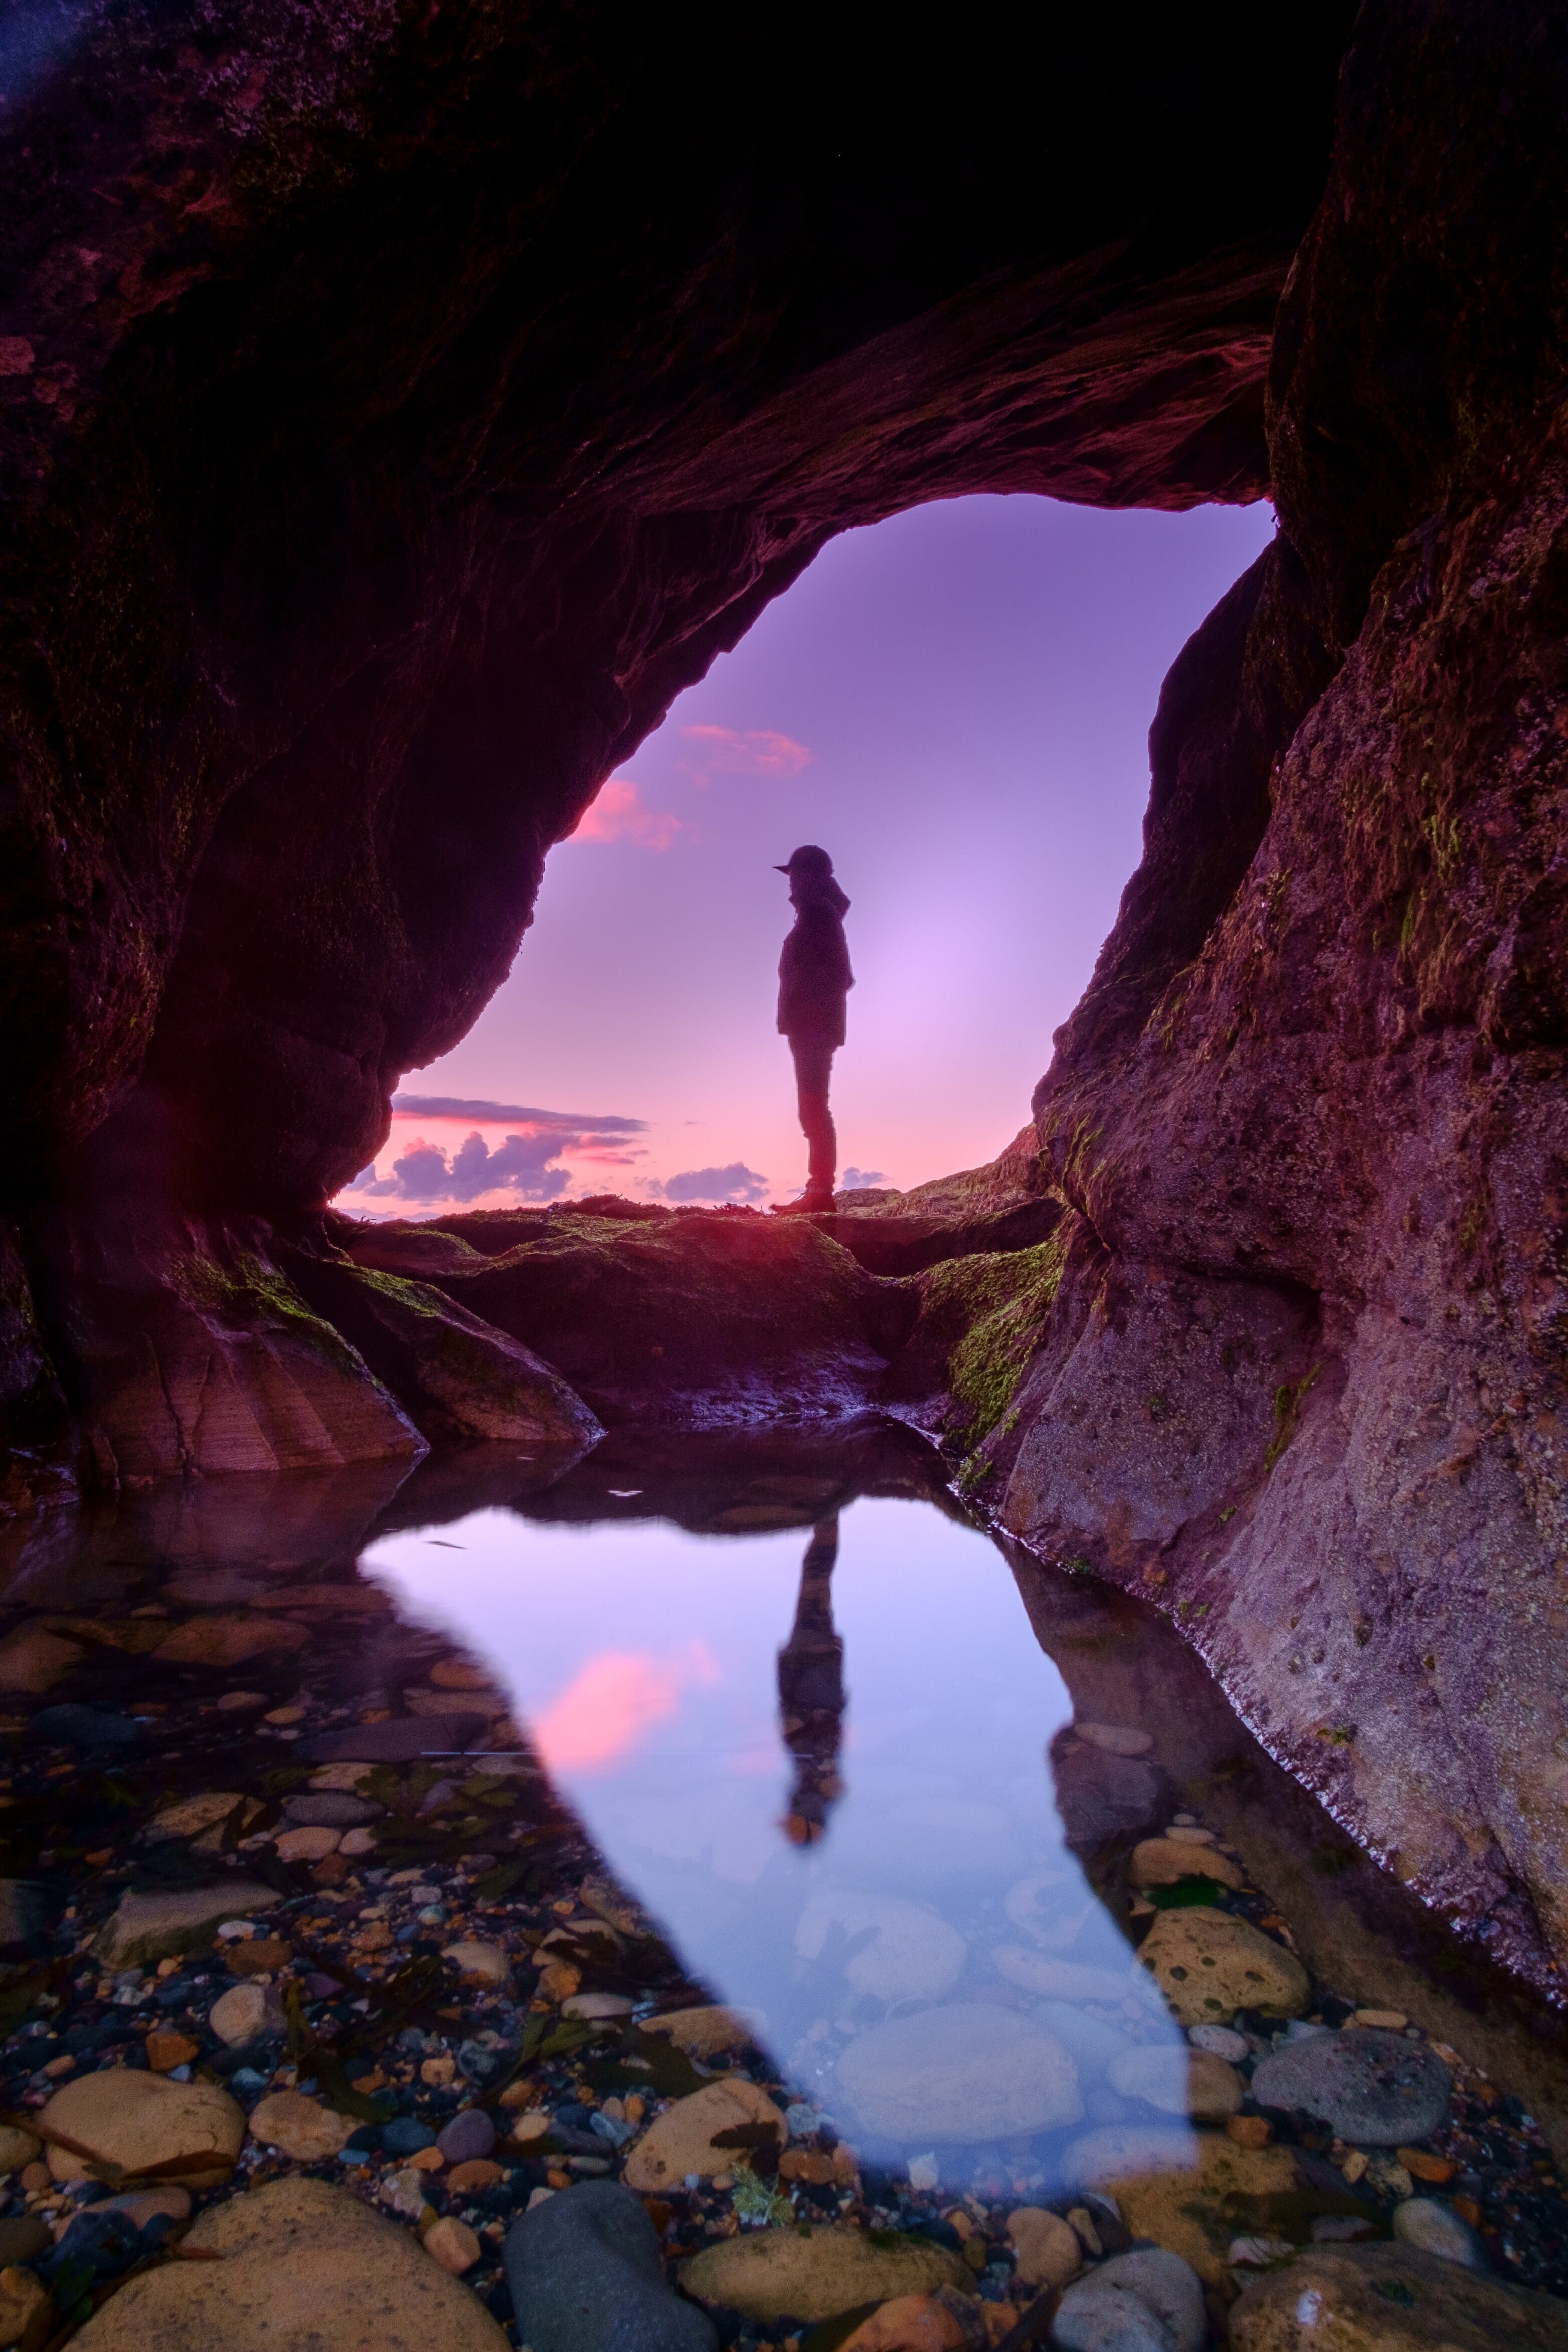
Symmetry refers to any sort of reflection across an imaginary line. This includes true reflections, where a reflective surface creates symmetry:
Because they’re both interesting and highly noticeable, true reflections are the most common type of symmetry in photographic compositions. Photographers often gravitate toward reflections in water and in glass windows.
But symmetry also includes situations where two distinct elements appear to be reflections of one another, like this:
Creating such “false” balance requires an eagle eye, but if you can find it, you’ll often come away with a great photo.
Finally, symmetry includes situations where an element is reflected around a single point:
You’ll often find this in macro photography, where flower and plant close-ups emphasize radial reflections around the frame.
Why Does Symmetry Work?
Symmetry makes for stunning photos primarily due to its compositional balancing effect, which causes both sides of the frame to seem equally weighted.
You see, the best compositions tend to be balanced across the vertical axis, which means that the right side of the frame should feel as “heavy” as the left side of the frame. (Here, I’m referring to the weight of the visual elements, rather than any actual weight; this mostly has to do with size and color, where larger and more noticeable items “weigh” more than smaller and less noticeable items.)
Related Posts
Therefore, vertical symmetry makes for nicely balanced images where both sides of the frame are equally heavy:
From a compositional perspective, horizontal symmetry tends to be less important because we don’t really evaluate weight along the horizontal axis. But it does matter, if only a little, so it pays to think about horizontal balance, too.
By the way, balance isn’t the only reason why it’s a good idea to include symmetry in your photos. It also creates a level of compositional intensity, which makes for very bold results.
Of course, creating intense compositions isn’t always the goal. But when intensity is what you’re after, symmetry is a great technique to try!
Types of Symmetry
Let’s take a more detailed look at the different types of symmetry and where you might find them.
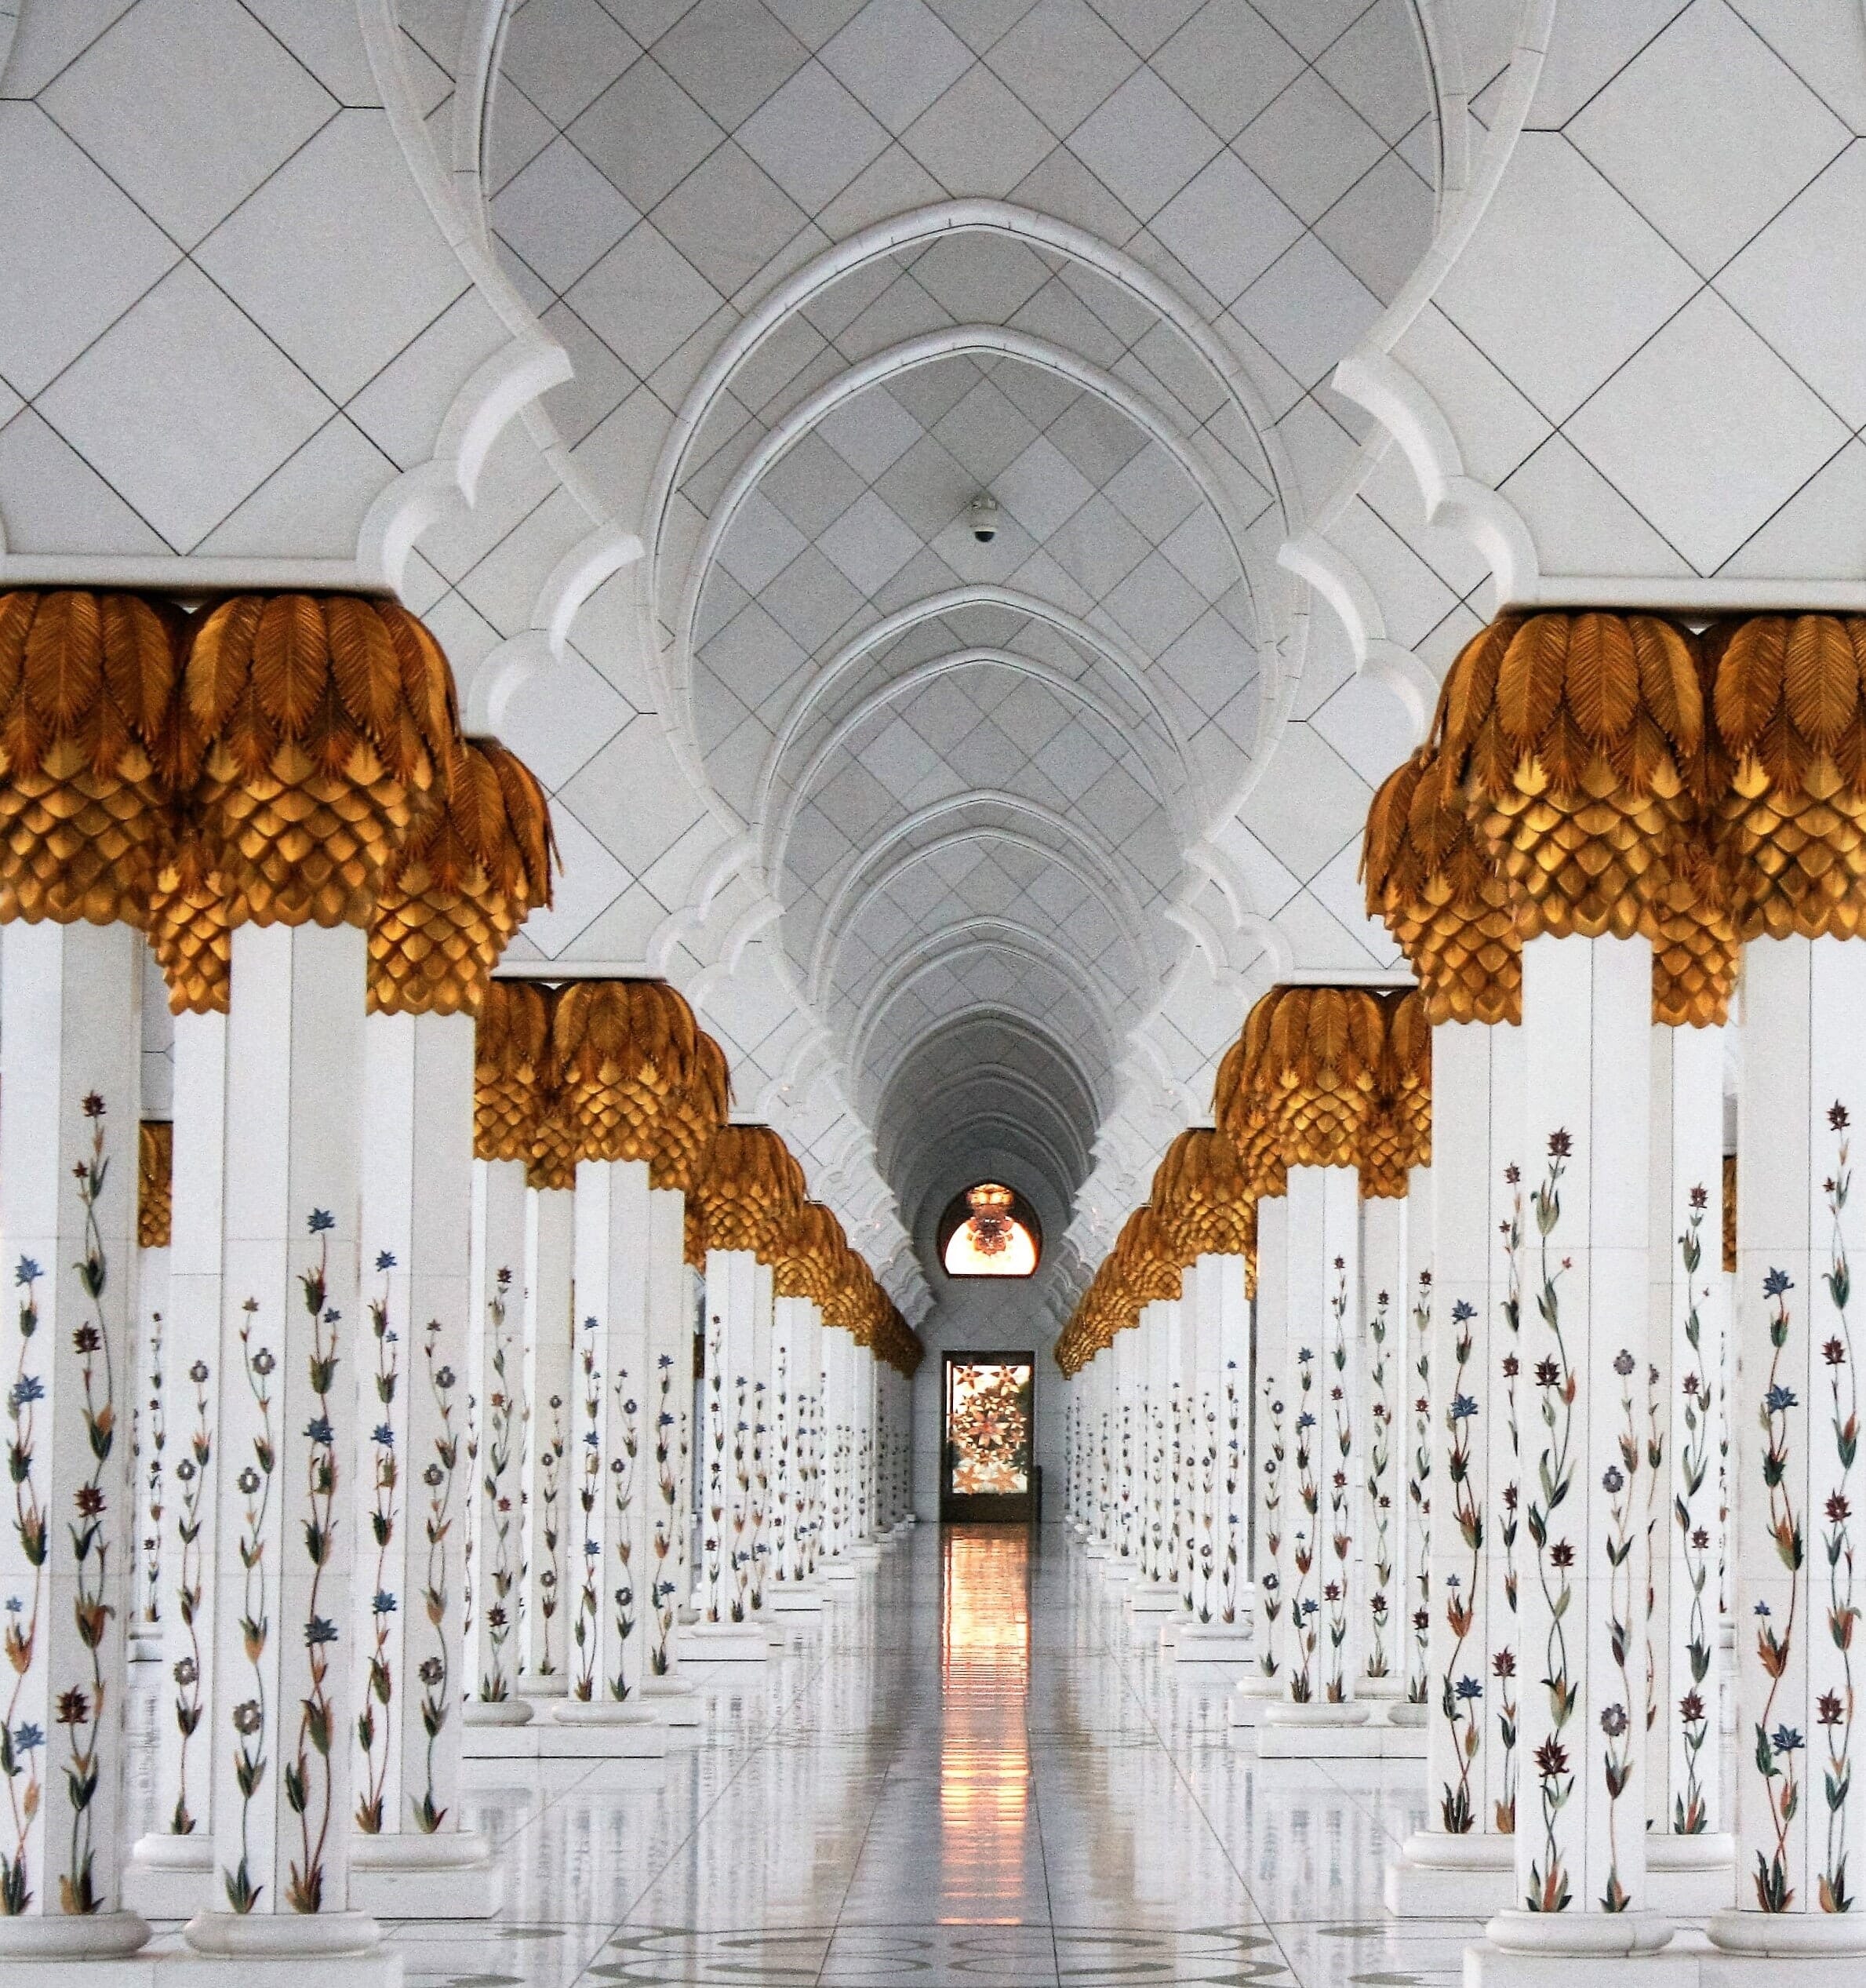
Vertical Symmetry
Vertical symmetry is a reflection across the vertical axis (i.e., the right/left sides of the frame):
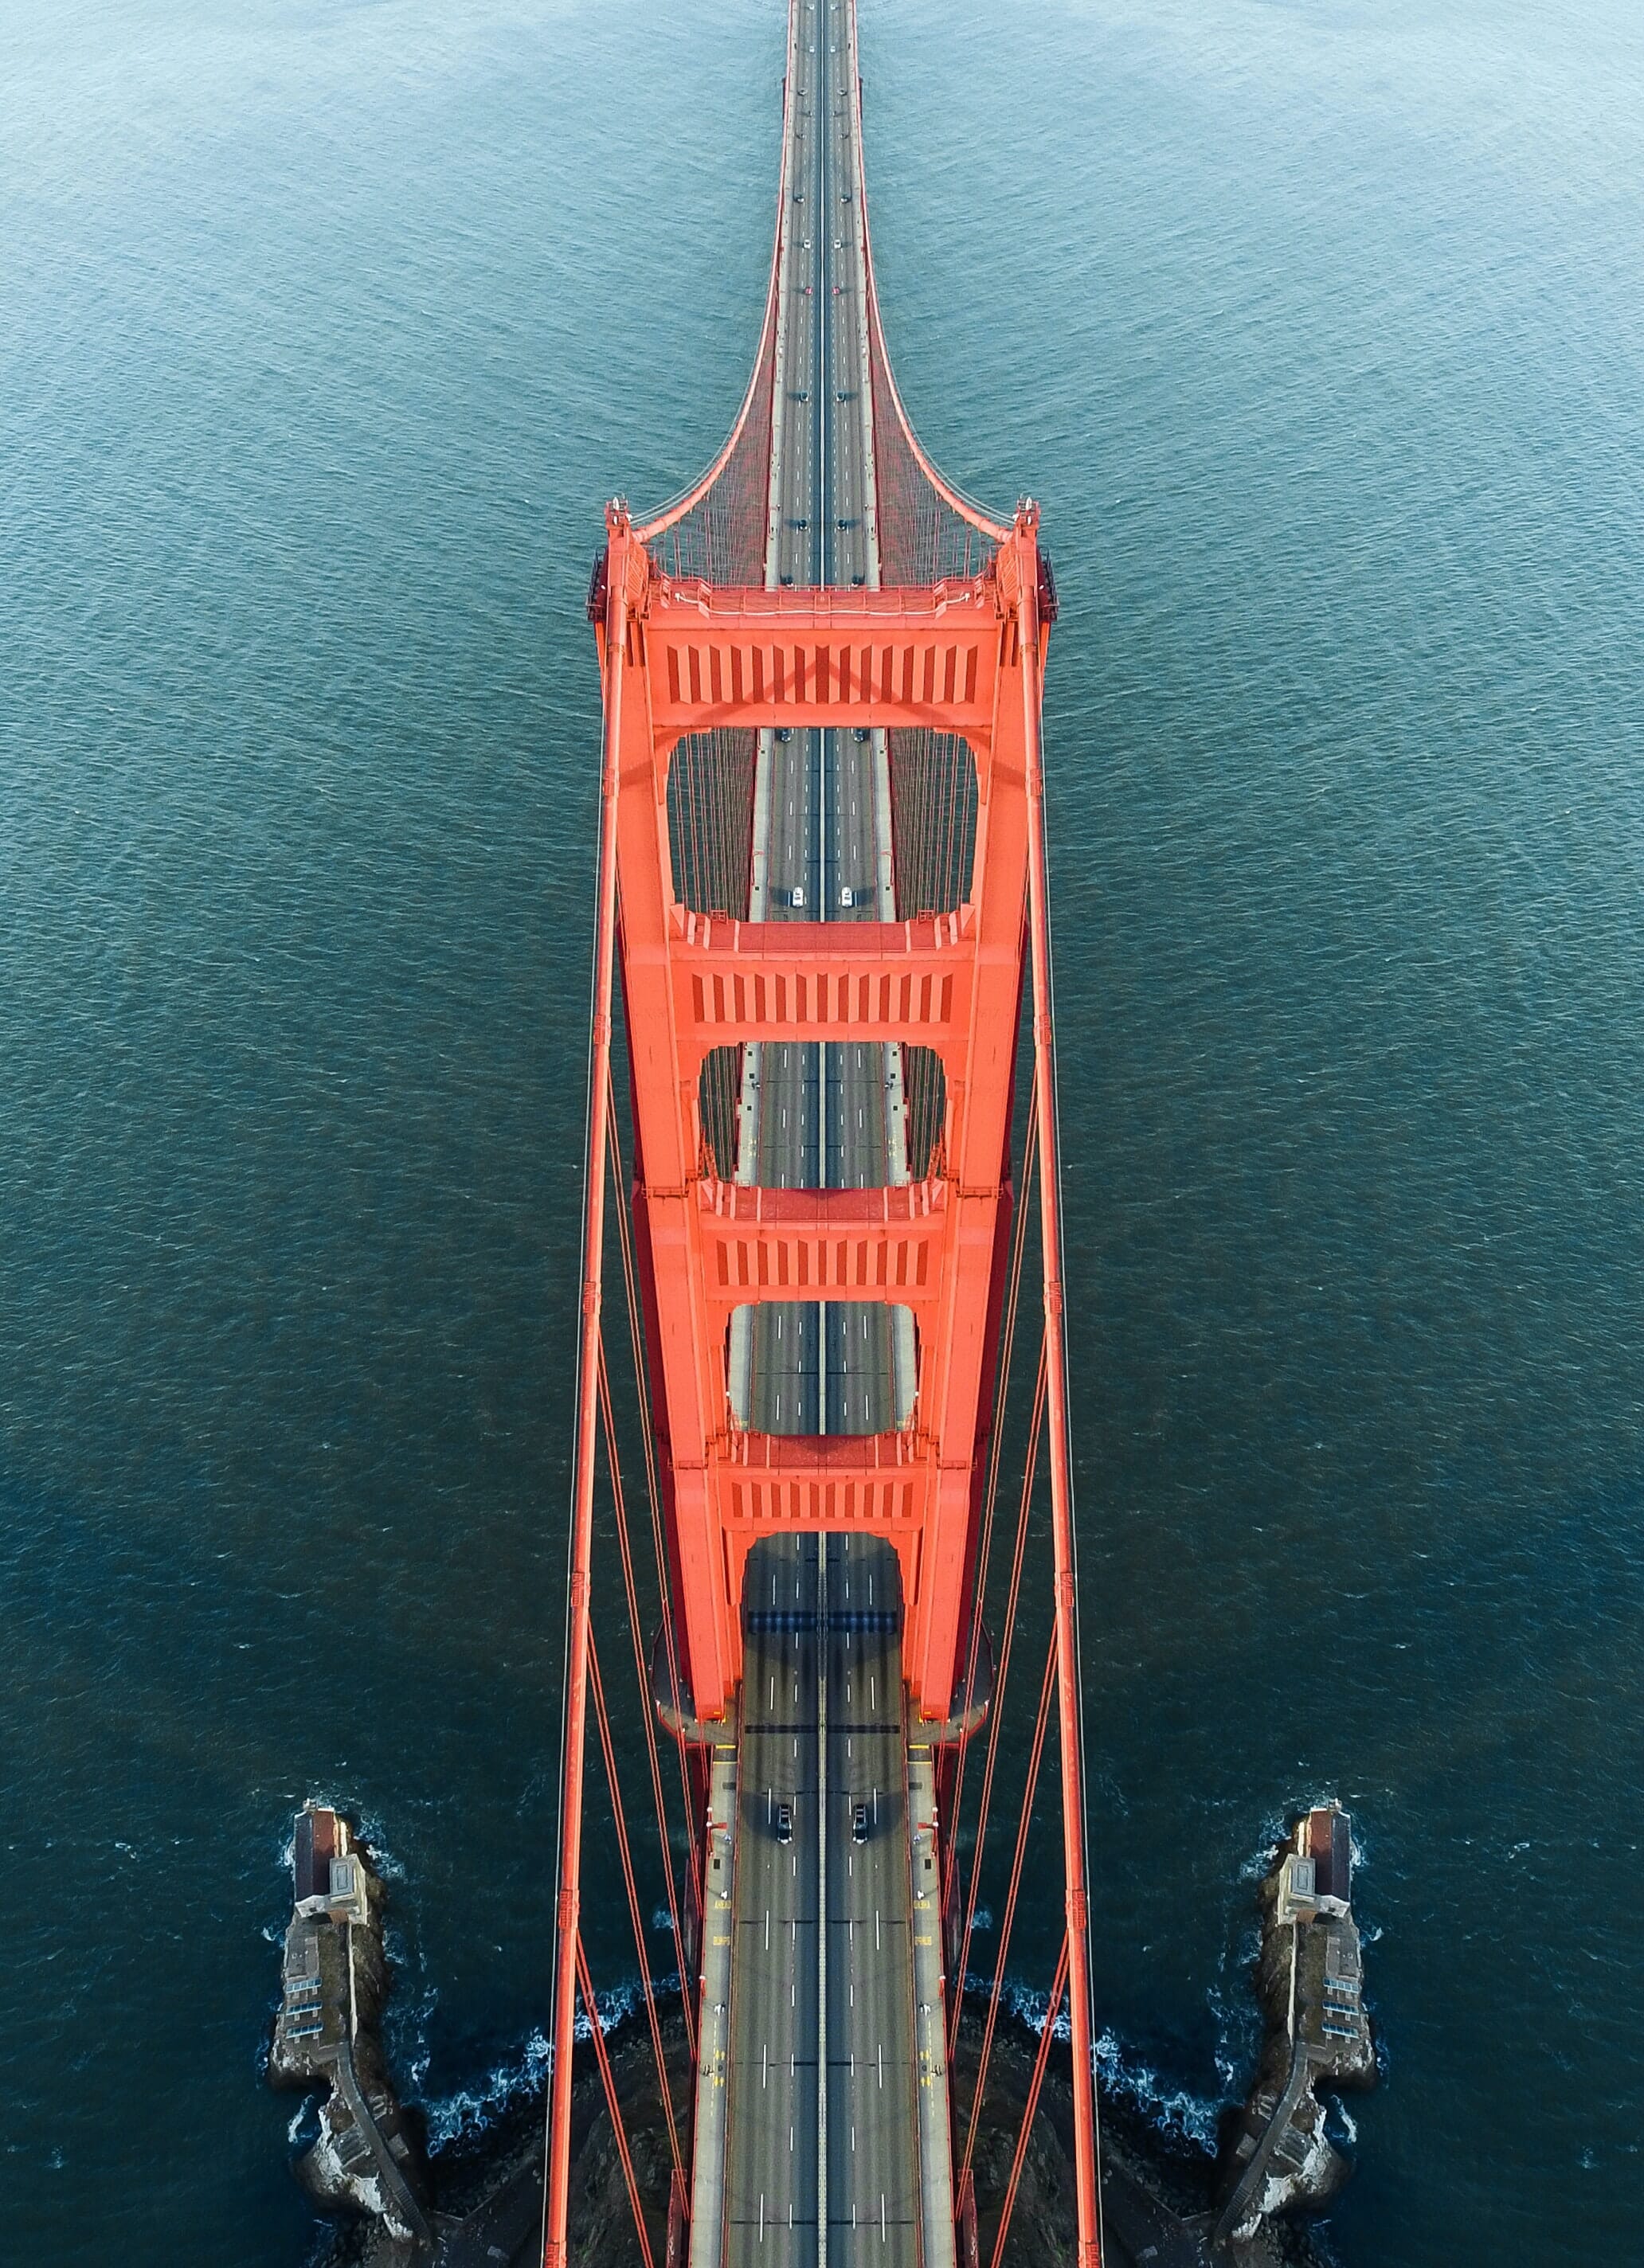
As you can see in the image above, the right side perfectly mirrors the left, creating a great sense of balance. If I could only ever use one type of symmetry in my photos, I’d go for vertical. It’s just that useful!
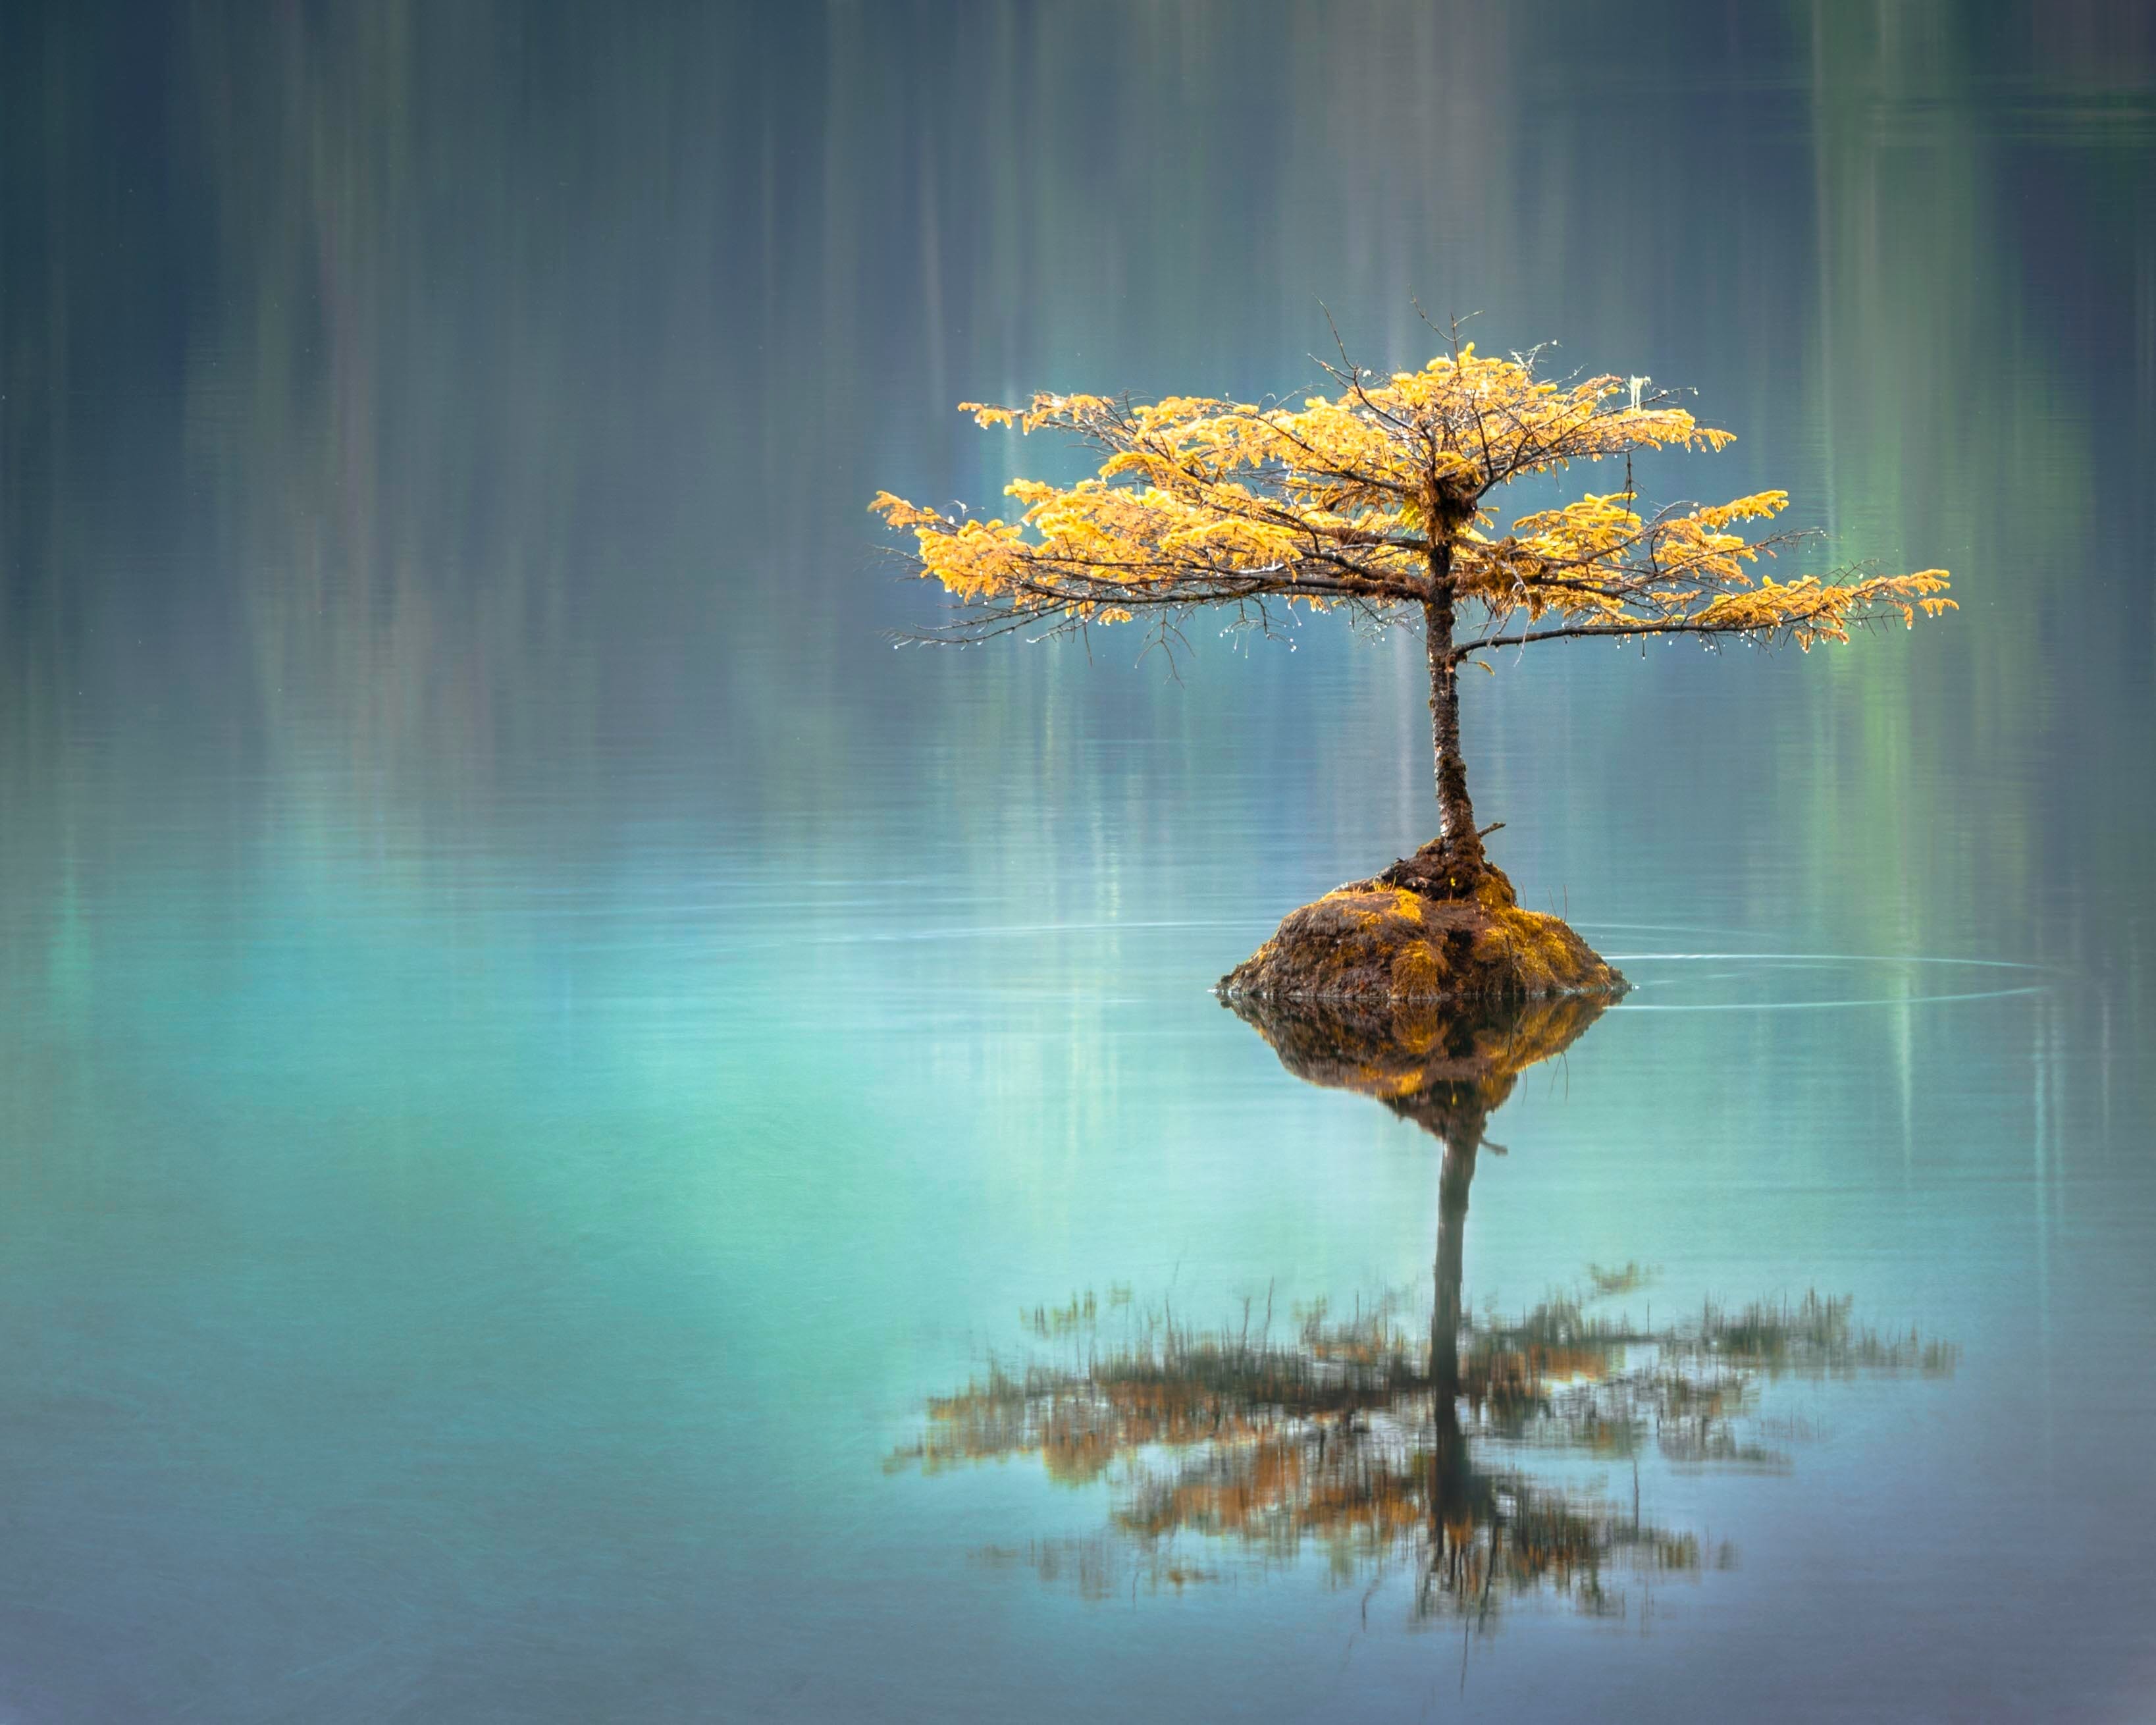
Reflections across the vertical axis are relatively common in nature – they’re present on most organisms – so it’s an especially useful technique for landscape, macro, and wildlife photographers. For instance, here’s a landscape shot that features a vertical reflection:

The reflection helps the tree stand out and makes for a great composition!
Horizontal Symmetry
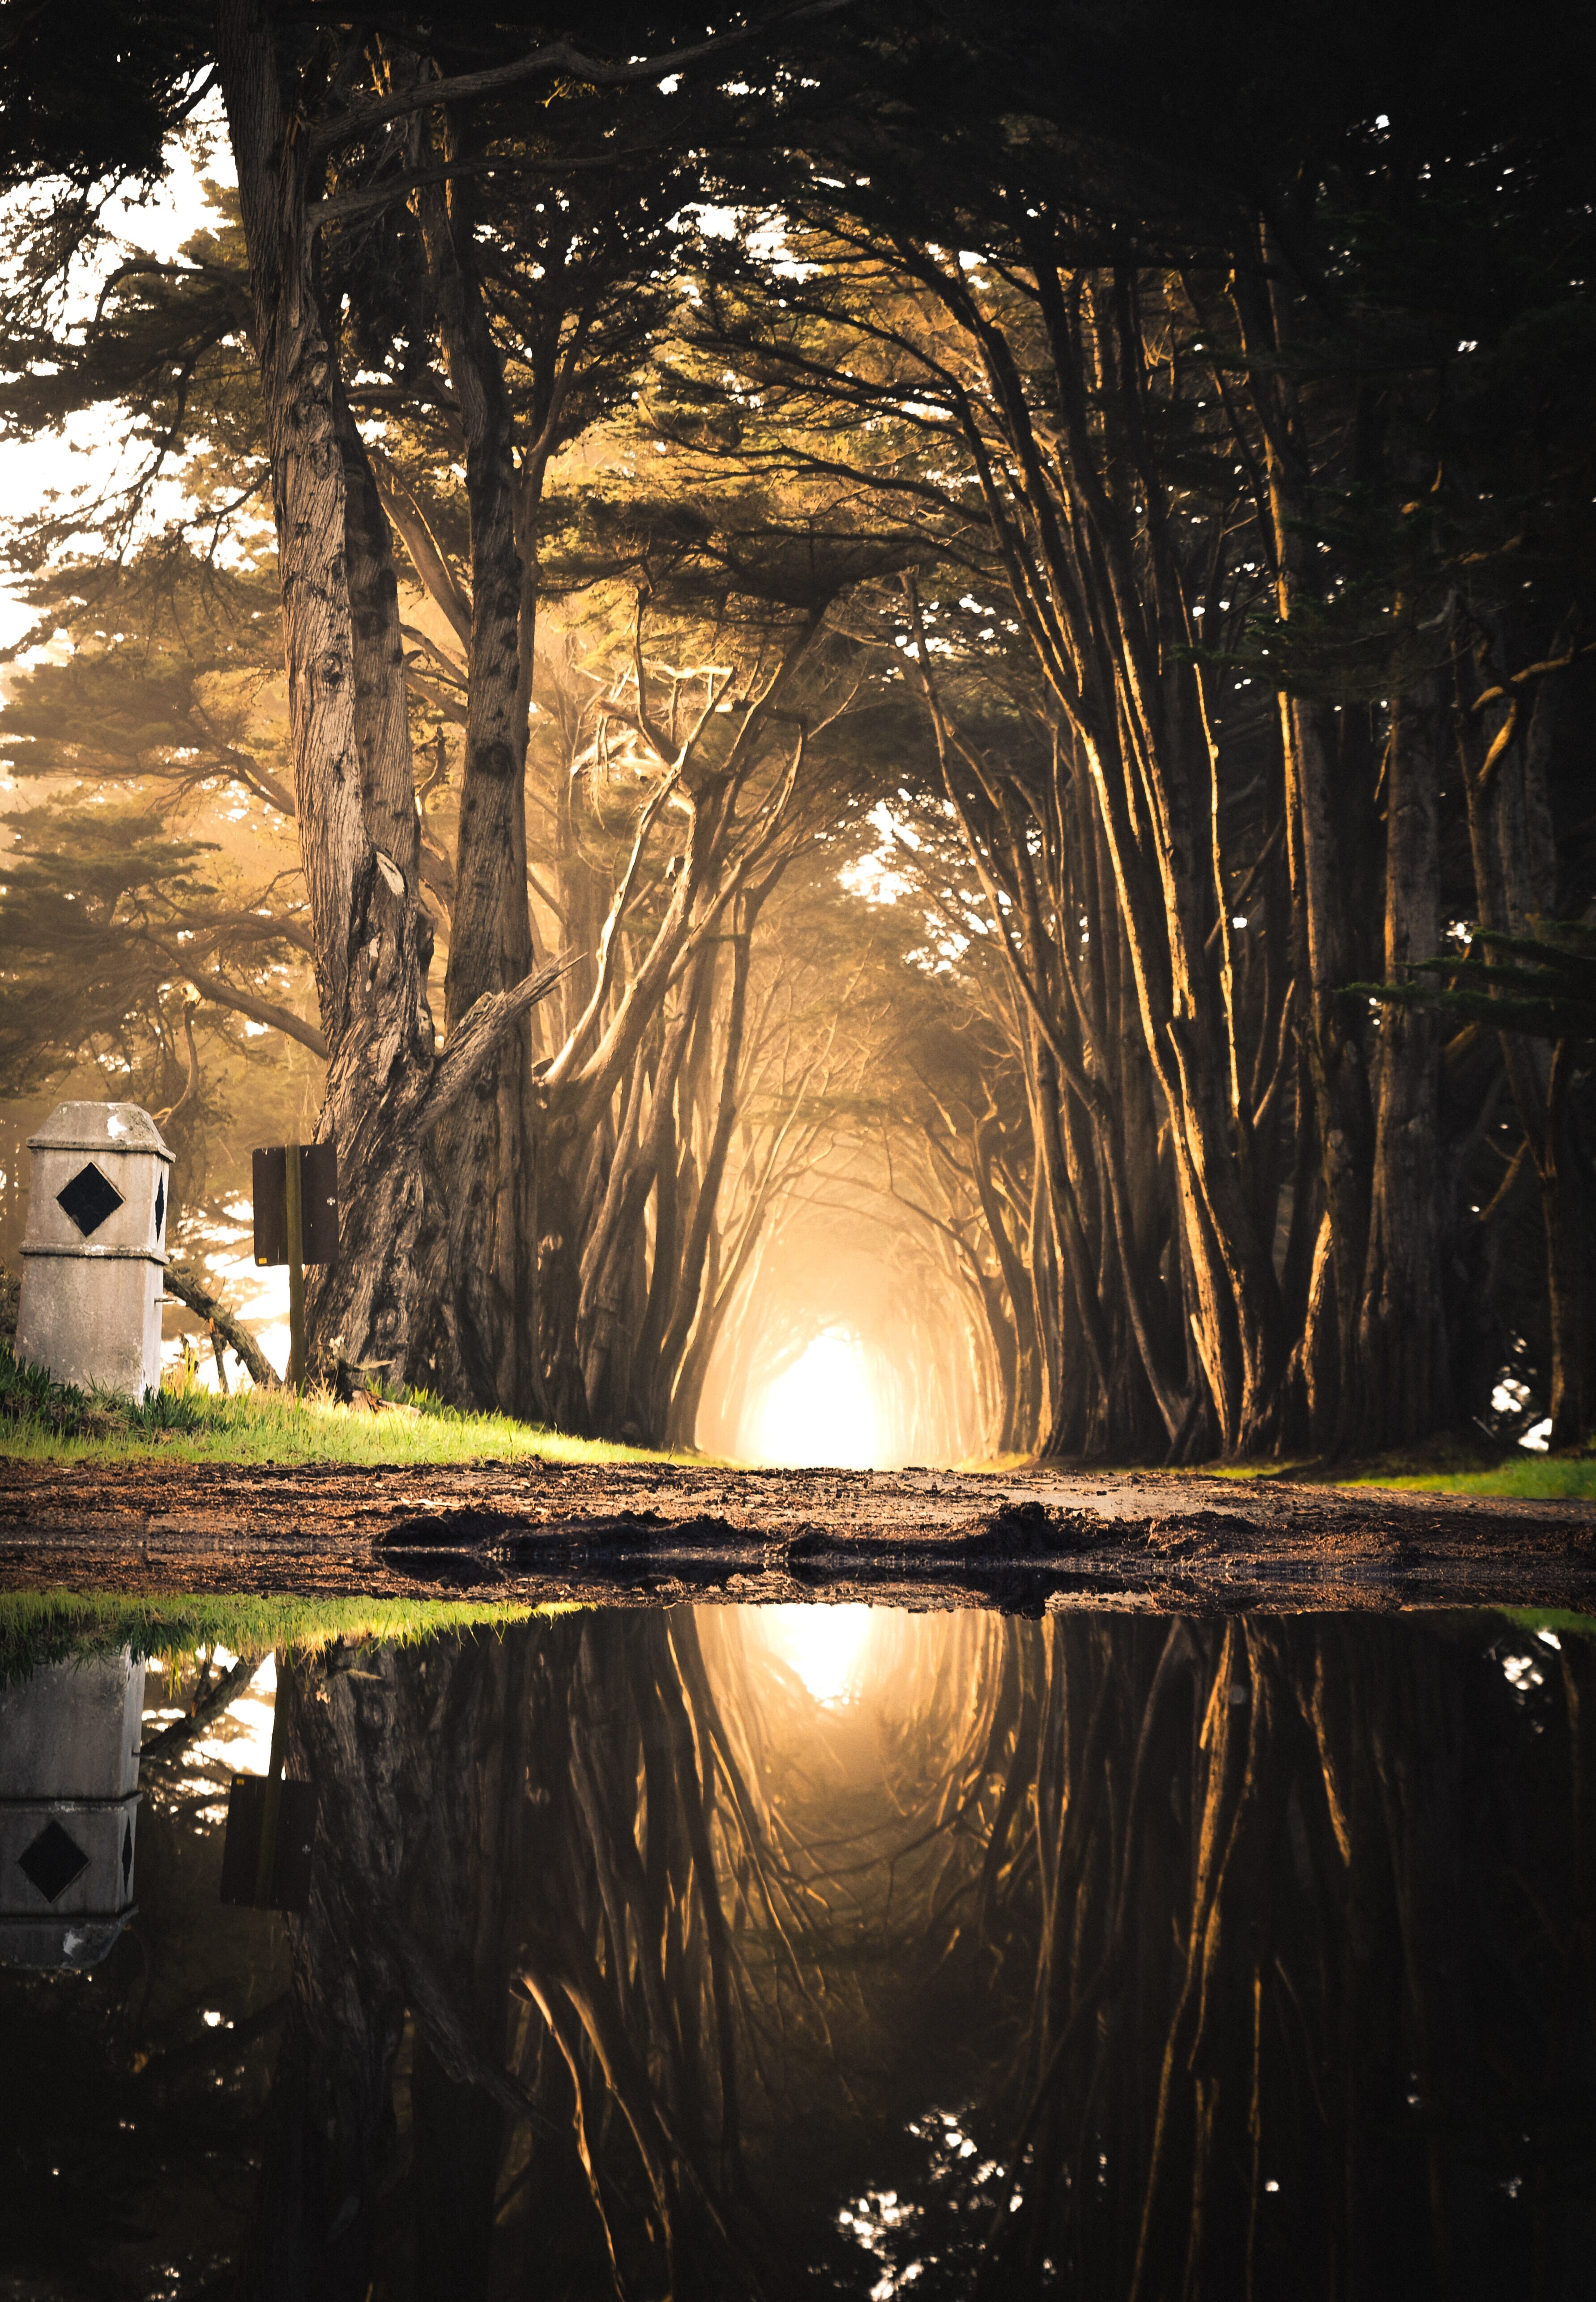
Horizontal symmetry is a reflection across the horizontal axis. In other words, your scene should reflect across a horizon-like line.

This is often created through reflections in water. Many stunning landscape photos rely on lake reflections to great effect, but note that you don’t have to work with scenic lakes; you can also find horizontal reflections in puddles, pools, and much more.
Now, horizontal reflections are nice, but they don’t offer the same level of balancing as vertical reflections. However, horizontal symmetry does create a neat effect, plus it creates a very intense result.
Diagonal Symmetry
Diagonal symmetry is rarer than vertical or horizontal symmetry. It refers to reflections across a diagonal in your frame, like the line splitting the sunglasses in two:

It’s pretty difficult to find but does convey an interesting sense of disorientation, so it’s good for images that are designed to communicate tension.
By the way, while you won’t find many diagonal reflections in nature, you can create it yourself by picking a horizontally symmetrical subject, then tilting your camera to create a sloped horizon.
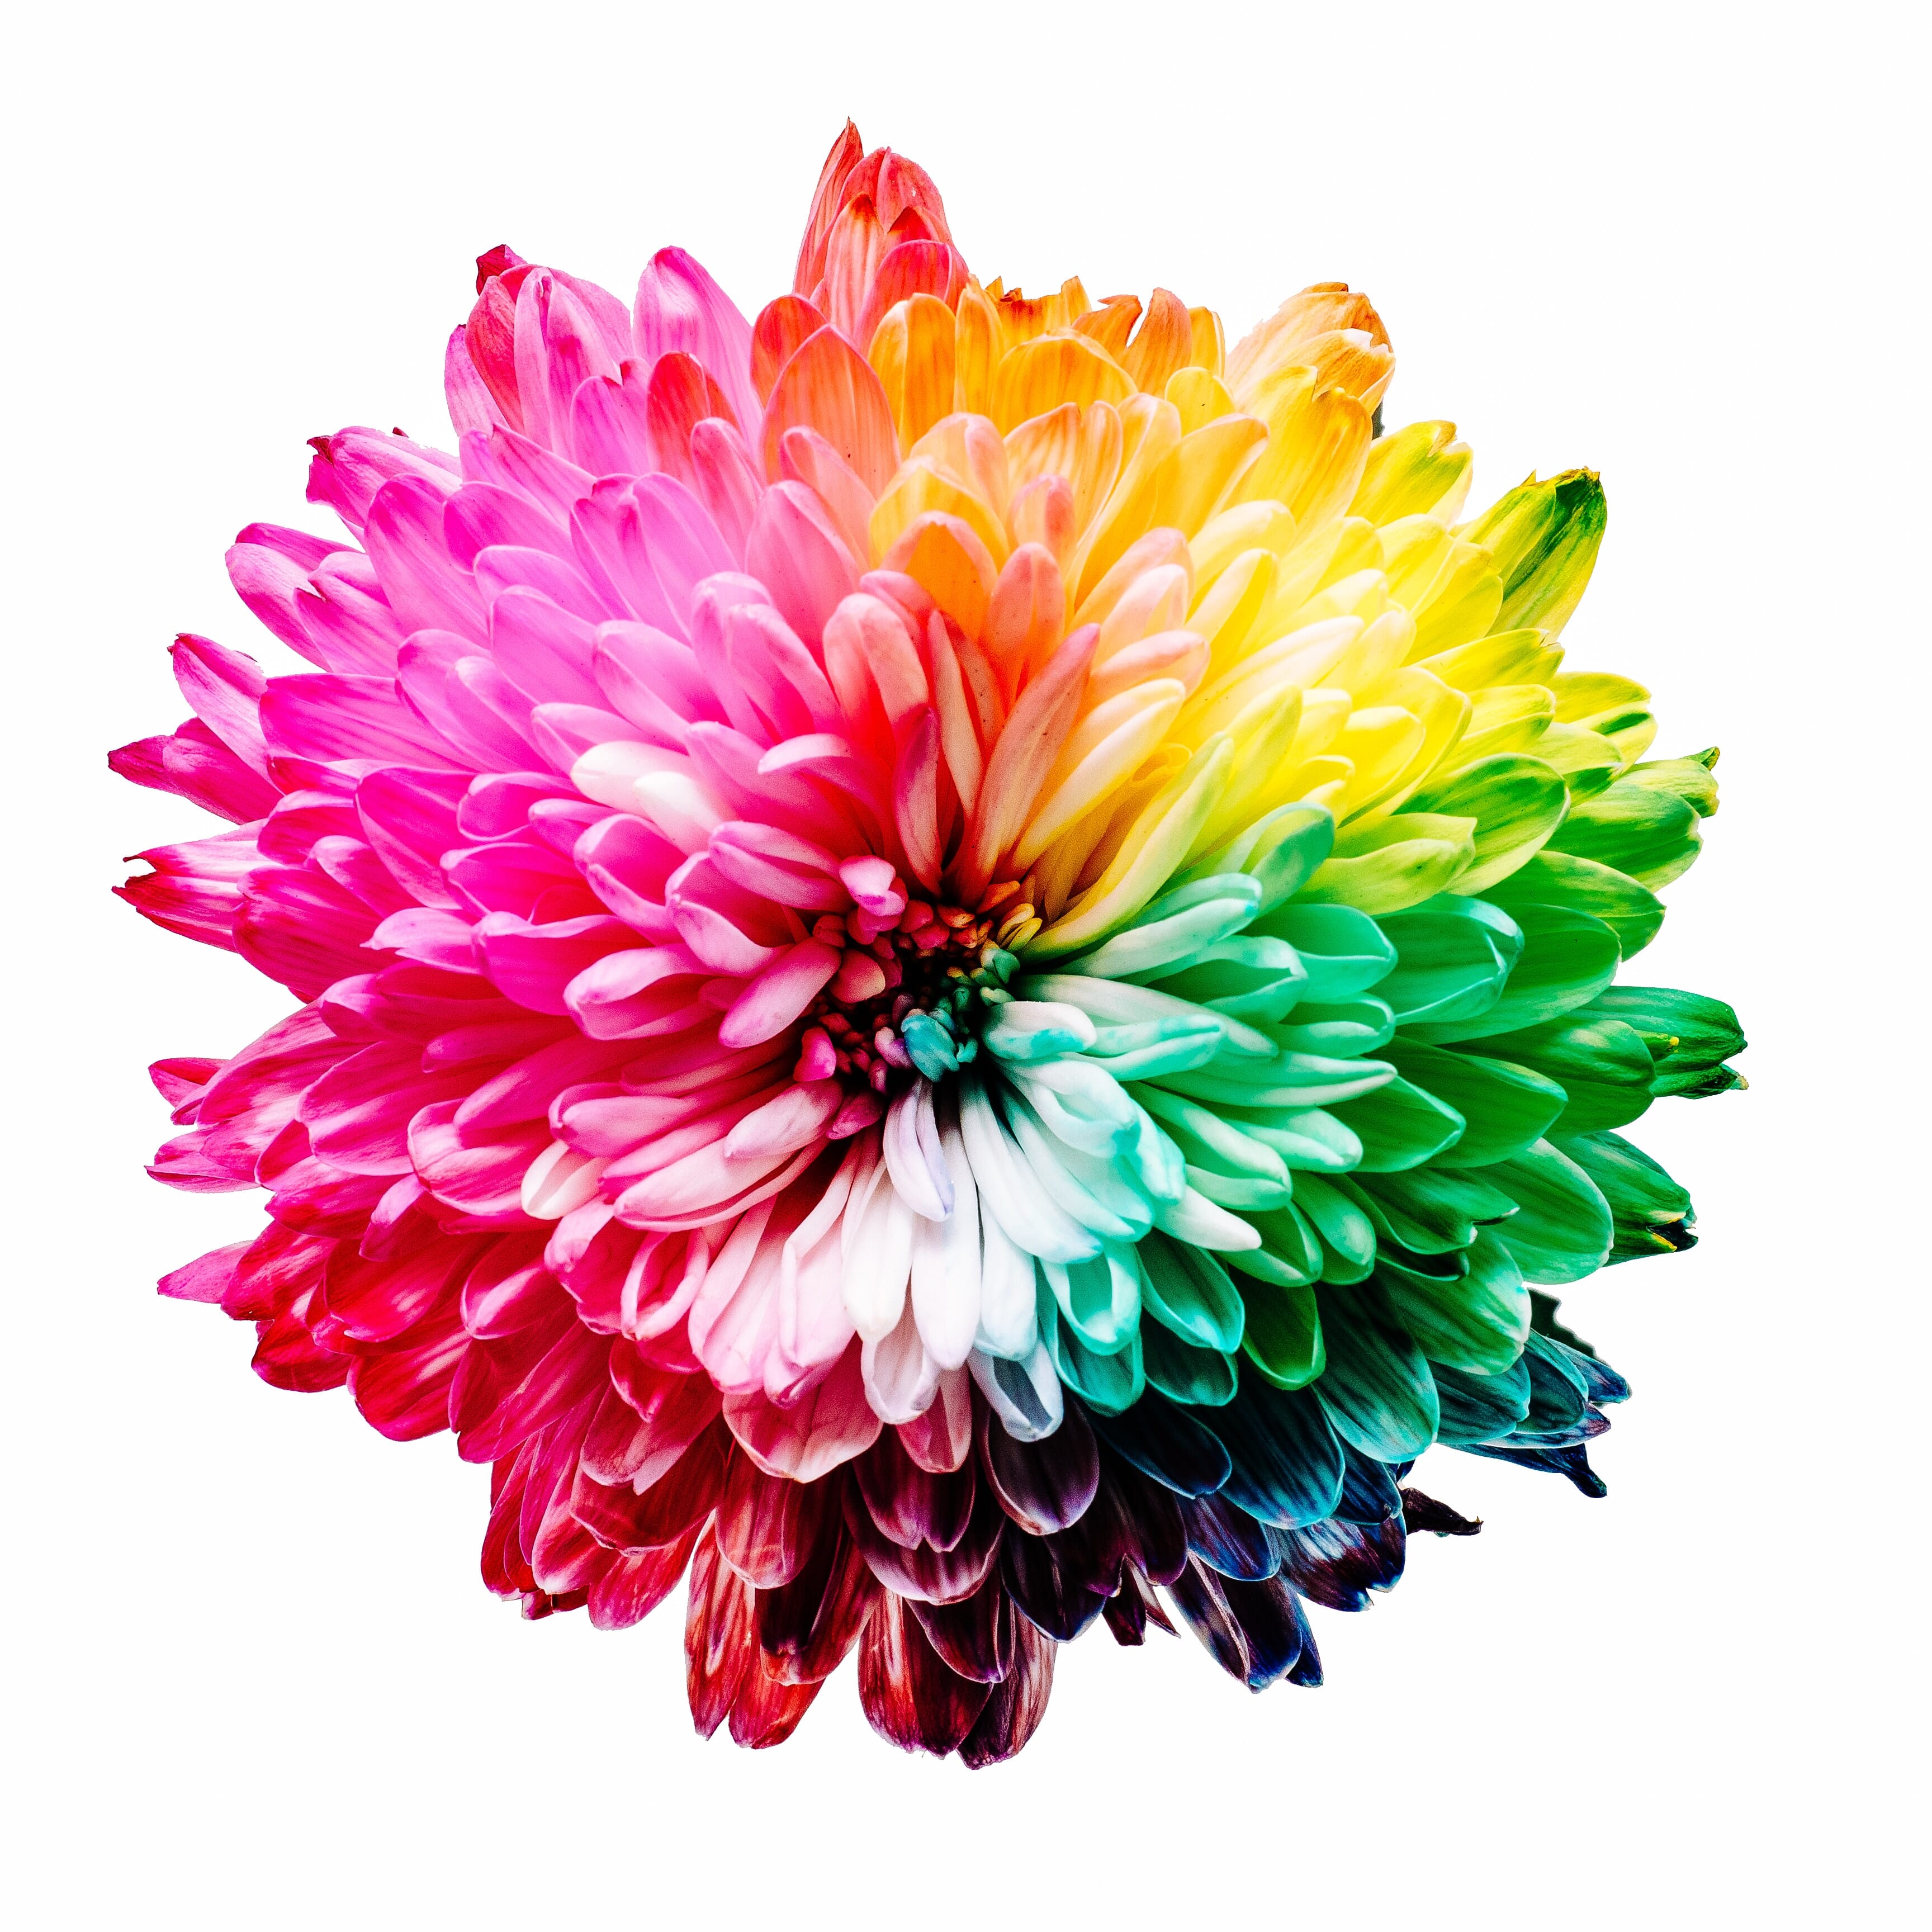
Radial Symmetry
Radial symmetry refers to reflections around a single center point, like the symmetry of bicycle spokes around the center of a wheel:

It’s popular among photographers because it allows you to create powerful abstract shots. Plus, you can find it very easily in nature: in flowers, in starfish, in trees (when photographing them from above), and more.
So while radial symmetry might seem a bit unconventional, you’ll find it all over the place. You just have to look!
Near Symmetry
So far, I’ve primarily talked about perfect symmetry, where you have a reflection (of sorts) across an axis or around a point.
But there’s another effect that you should be aware of: near symmetry.
It isn’t true symmetry, but it’s a type of apparent reflection that you can use for great results. For instance, if you have two people standing on one side of the frame, and you have two people standing on the other side of the frame, that’s near symmetry (even though the people aren’t identical!).
Related Posts
It’s not a true reflection. It’s not necessarily even obvious to the viewer that the reflection is there. But each side of the frame will be carefully balanced, which is why it’s worth pursuing.
How Can You Find Symmetry for Your Compositions?
Symmetry is everywhere, but it can take a clever eye to find it. I recommend looking for reflective objects, such as puddles, ponds, glass windows, and metal car hoods; these often work great, assuming you carefully frame your compositions (see the tips I give below!).
You can also find symmetry that doesn’t rely on reflective objects – in nature, for example, or even across different parts of the scene, such as when you have one person on the left side of the frame and another person on the right.
Tips for Using the Technique in Your Photos
Now let’s take a look at some quick tips for improving your compositions:
1. Place the Line of Reflection in the Center of Your Photo
Positioning the line of reflection in the center of your photo isn’t always necessary, but it often does work well because it emphasizes the bold, balanced nature of reflective compositions.
So if you have a shot of a mountain with its reflection, instead of positioning the horizon/reflection line toward the top or the bottom of the frame (as the rule of thirds would suggest), try putting it smack dab in the middle of the shot!

And if you’re photographing a radially symmetrical flower, instead of positioning the flower off to one side at a rule of thirds intersection point, go ahead and put the flower in the middle of the frame. The image will turn out beautifully balanced!
2. Fill the Frame with a Reflective Subject
Symmetry makes for some eye-catching effects. But if you want your viewer to really feel its power, then it’s important you keep the reflection highly noticeable within the frame.
That’s why I’d recommend creating tight compositions. Use a telephoto lens to get in close or take a few steps forward; that way, you can fill the frame with the subject and hit the viewer over the head with the reflection!
3. Position Your Camera Parallel to the Reflection
This technique is a bit tough and it doesn’t always work, but it’s a good one to keep in mind.
You see, when you’re photographing symmetry, you generally don’t want your reflective subject to move away into the distance. Instead, you want the reflection to proceed on the same plane of the composition so that the line of reflection is perfectly parallel to the camera sensor.
The more the reflection “leans” away from the sensor, the less powerful it becomes, and the less interesting your shot becomes, too.
So when you frame up a symmetrical composition, do what you can to keep the line of reflection parallel to your camera. You may need to move to the right or left; you may also need to get high above the subject or down low. That’s how you’ll get a stunning shot!
Start Adding Balance to Your Photos!
Now that you’ve finished this article, you know all about symmetry. And you know how you can use it for amazing results.
So remember the tips I’ve shared. And remember that this technique is bold, powerful, and often creates breathtaking results! Whenever you have the opportunity, try to use it in your images.
Symmetry in Photography FAQ
What is symmetry in photos?
It refers to a reflection across the image, such as a subject looking in a mirror, a subject reflected on water, or an animal with identical left and right sides.
What are common types of symmetry in photography?
You can find it anywhere, but to get started, I’d suggest looking for reflections in windows, in buildings, in water, and more!
Why do photographers use symmetry?
It allows photographers to create balanced compositions; it also helps create very stable, static, bold images.
How can you use symmetry to improve your photography?
I’d recommend looking for it whenever you’re out shooting. The truth is that it’s everywhere; there are reflections in windows, in water, and in metal, plus there are all sorts of naturally reflective subjects (e.g., animals and plants).
