
- Aperture is your biggest lever indoors — shoot wide open (f/1.4–f/2.8) for portraits and events, or stop down (f/8–f/11) with a tripod for real estate and product shots. Jump to aperture guide.
- Shutter speed depends on your subject — 1/125s minimum for people, 1/500s+ for indoor sports, or as slow as 1/60s on a tripod for still scenes. Jump to shutter speed.
- ISO on modern cameras handles 1600–6400 well, so don’t be afraid to push it. Noise is fixable; motion blur isn’t. Jump to ISO guide.
- White balance matters more indoors because mixed lighting (window daylight + tungsten bulbs) creates color casts. Set it manually or shoot RAW. Jump to white balance.
- Use the quick reference chart for scenario-specific settings: portraits, events, real estate, products, sports, and low light.
Indoor photography is one of the most common — and most frustrating — shooting situations. Whether you’re photographing a family gathering, a real estate listing, or products for an online store, the limited light forces you to make careful decisions about your camera settings.
The good news: once you understand how aperture, shutter speed, ISO, and white balance interact indoors, you can consistently capture sharp, well-exposed images in almost any interior space. This guide covers the exact settings for six common indoor scenarios, with recommendations for both dedicated cameras and smartphones.
Why Indoor Photography Is Challenging
Indoors, you’re working with a fraction of the light available outside. A typical well-lit room provides around 300–500 lux, while open shade outdoors delivers 10,000+ lux. That’s a difference of roughly 4–5 stops — which means your camera needs to compensate dramatically.
Left on Auto mode, most cameras respond by cranking up the ISO (introducing noise), slowing down the shutter speed (risking blur), or firing the pop-up flash (creating harsh, unflattering light). None of these produces great results. Taking manual or semi-manual control lets you make deliberate choices about which trade-offs are acceptable for your specific situation.
The other indoor challenge is mixed lighting. A room might have warm tungsten lamps, cool fluorescent overheads, and natural daylight from windows — all at the same time. Your camera’s auto white balance often can’t decide which light source to prioritize, resulting in images with odd color casts. Understanding how white balance works is essential for indoor shooting.
Understanding Aperture Indoors
Aperture is the most impactful setting for indoor photography because it directly controls how much light reaches your sensor. A wide aperture like f/1.4 or f/2.8 lets in significantly more light than f/8 or f/11, which can mean the difference between a clean image and a noisy mess.
For portraits and events, shoot as wide as your lens allows — f/1.4 to f/2.8 is ideal. This maximizes light intake while creating a pleasing background blur that separates your subject from a potentially cluttered indoor environment.
For real estate and product photography, you need the opposite: a narrow aperture (f/8 to f/11) keeps everything sharp from front to back. Since you’re stopping down and losing light, compensate with a tripod and slower shutter speed rather than boosting ISO.
Tip: If you’re serious about indoor photography, invest in a fast prime lens. A 35mm f/1.4 or 50mm f/1.8 is relatively affordable and makes a dramatic difference in low-light capability compared to a typical kit zoom at f/3.5–f/5.6. The kit lens at its longest focal length (55mm, f/5.6) lets in roughly 3–4 times less light than a 50mm f/1.8.
Shutter Speed for Indoor Scenes
Your shutter speed needs to match what you’re shooting. The classic reciprocal rule — use a shutter speed at least as fast as 1/focal length — is a good baseline, but indoor situations often demand faster speeds or careful stabilization.
- Still subjects (products, real estate): 1/60s or slower with a tripod. There’s no motion to freeze, so you can use long exposures and keep ISO low.
- People (portraits, events): 1/100s to 1/160s minimum. People move — even subtle shifts during a portrait session can cause softness at slower speeds.
- Children and pets: 1/250s or faster. They’re unpredictable and rarely stay still.
- Indoor sports: 1/500s to 1/1000s. Fast action requires fast shutter speeds, period. You’ll need to push ISO high to compensate.
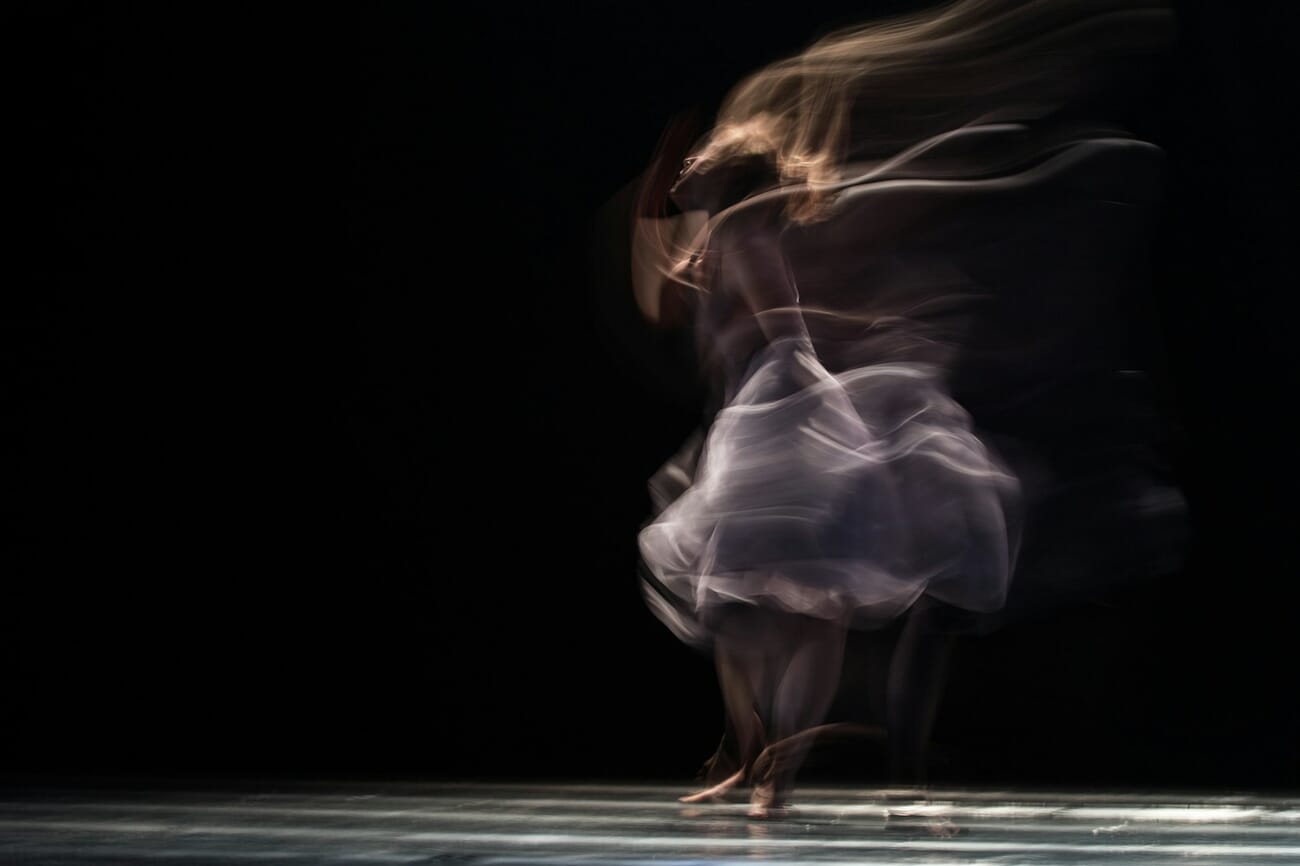
Image stabilization (IS/VR/IBIS) can buy you 2–4 extra stops of handheld stability, letting you shoot at 1/15s or 1/30s without camera shake. However, stabilization only helps with camera movement — it won’t freeze a moving subject. For people and action, you still need an adequately fast shutter speed regardless of stabilization.
ISO: Finding the Right Balance
ISO amplifies your sensor’s signal, brightening the image at the cost of introducing noise (grain). The key mindset shift: noise is fixable, blur is not. A slightly noisy but sharp photo is infinitely better than a clean but blurry one.
Modern cameras handle high ISO remarkably well. Full-frame bodies from Canon, Nikon, and Sony produce clean images up to ISO 6400, and the results remain very usable at ISO 12800. Even APS-C and Micro Four Thirds sensors have improved dramatically — ISO 3200 is perfectly acceptable on most current models.
Here’s a practical ISO framework for indoor shooting:
- ISO 100–400: Use with a tripod and static subjects (products, real estate interiors).
- ISO 400–1600: Well-lit rooms with window light, portraits near light sources.
- ISO 1600–6400: Dimly lit events, restaurants, venues with ambient-only lighting.
- ISO 6400–12800+: Indoor sports arenas, very dark rooms, situations where shutter speed is non-negotiable.
Auto ISO with limits is an excellent tool for indoor work. Set your minimum shutter speed (e.g., 1/125s for portraits) and maximum ISO (e.g., 6400), and let the camera adjust ISO within that range while you control aperture. This way, you get consistent exposure without needing to constantly adjust settings as lighting changes — perfect for events where you’re moving between bright and dark areas.
If noise does appear, modern noise reduction software powered by AI can clean it up remarkably well in post-processing. Tools like DxO PureRAW, Topaz DeNoise AI, and Lightroom’s built-in denoise feature can recover detail from images shot at ISO 6400+ that would have been unusable a few years ago.
White Balance for Mixed Indoor Lighting
Outdoors, the sun provides a single, consistent light source. Indoors, you might have three different types of light hitting your subject simultaneously — warm tungsten bulbs (around 3000K), cool fluorescent panels (4000–5000K), and daylight from windows (5500–6500K). This mixed lighting is the biggest color challenge in indoor photography.

Your options for handling white balance indoors:
- Shoot RAW: This is the single best piece of advice. RAW files let you adjust white balance freely in post-processing with zero quality loss. Set your camera to any white balance preset while shooting, then fine-tune later in Lightroom or Capture One.
- Manual/Custom WB: Use a gray card to set a precise white balance for the dominant light source. This gives you accurate colors in-camera — useful if you’re shooting JPEG or want to minimize post-processing.
- Kelvin dial: Many cameras let you set an exact color temperature (e.g., 3200K for tungsten, 5500K for daylight). Start with a preset that matches your main light source and adjust from there.
- Auto WB: Modern auto white balance is quite good in single-source lighting, but struggles with mixed sources. It’s fine for casual shooting but unreliable for critical color work.
Pro tip: When possible, turn off competing light sources. If you’re shooting by a window, switch off overhead lights to eliminate the warm/cool clash. One consistent light source is always easier to handle than three mixed ones.
Indoor Settings Quick Reference Chart
Use this quick reference chart to dial in your settings based on what you’re shooting. These are starting points — adjust based on your specific lighting conditions and equipment.
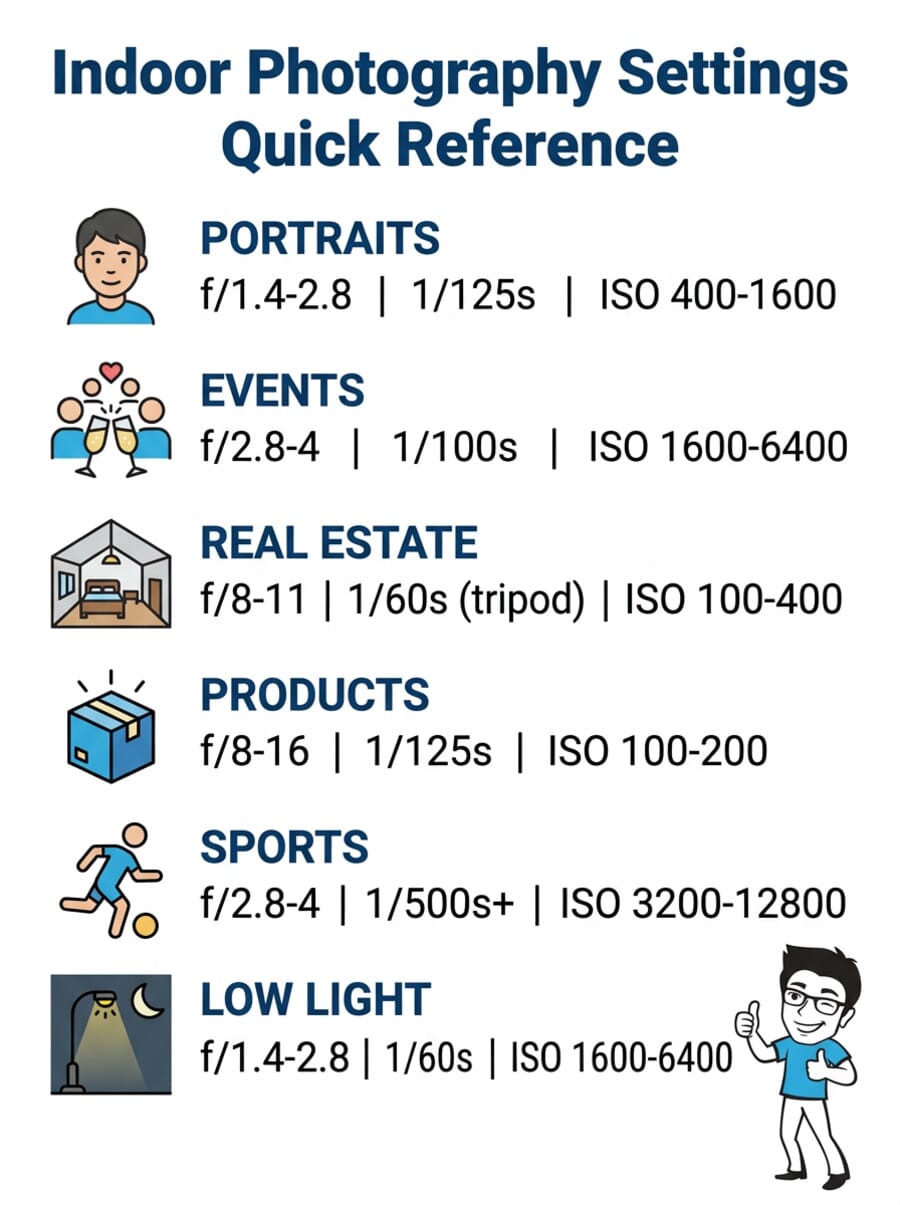
Settings for Indoor Portraits
Indoor portraiture is all about maximizing light and creating subject separation. Position your subject near the strongest light source — ideally a large window — and use these settings as your starting point:
- Aperture: f/1.4 to f/2.8 — wide open for maximum light and background blur.
- Shutter speed: 1/125s to 1/200s — fast enough to freeze subtle movements.
- ISO: 400–1600, depending on available light.
- Focus mode: Single-point AF, continuous (AF-C/Servo) for moving subjects. Place the focus point on the nearest eye.
- White balance: Daylight or Cloudy preset if shooting near windows; Tungsten for lamp-lit rooms.
Window light is your best friend for indoor portraits. A north-facing window provides soft, even illumination throughout the day. For more dramatic results, position your subject at 45 degrees to a side window — this creates the classic Rembrandt lighting pattern with beautiful shadow falloff. Check our guide to camera settings for portrait photography for more in-depth techniques.
Settings for Indoor Events
Events — weddings, corporate functions, birthday parties — are unpredictable. The lighting changes as you move from room to room, and you can’t ask guests to hold still. Speed and flexibility are key.
- Aperture: f/2.8 to f/4 — wide enough for light, with enough depth of field for small groups.
- Shutter speed: 1/100s to 1/160s — people move unpredictably at events.
- ISO: 1600–6400 (Auto ISO works well here with a 6400 ceiling).
- Focus mode: Continuous AF with wide-area or zone tracking.
- White balance: Auto or Tungsten for most indoor venues.
Consider using an off-camera flash bounced off the ceiling for more consistent, flattering results at events. A bounce flash adds fill light without the harsh, direct look of an on-camera flash. It also lets you use lower ISOs for cleaner files. For comprehensive event coverage strategies, see our event photography tips guide.
Settings for Real Estate Interiors
Real estate photography demands sharpness from corner to corner, accurate colors, and a sense of spaciousness. Unlike portrait work, you want everything in focus — which means stopping down and using a tripod.
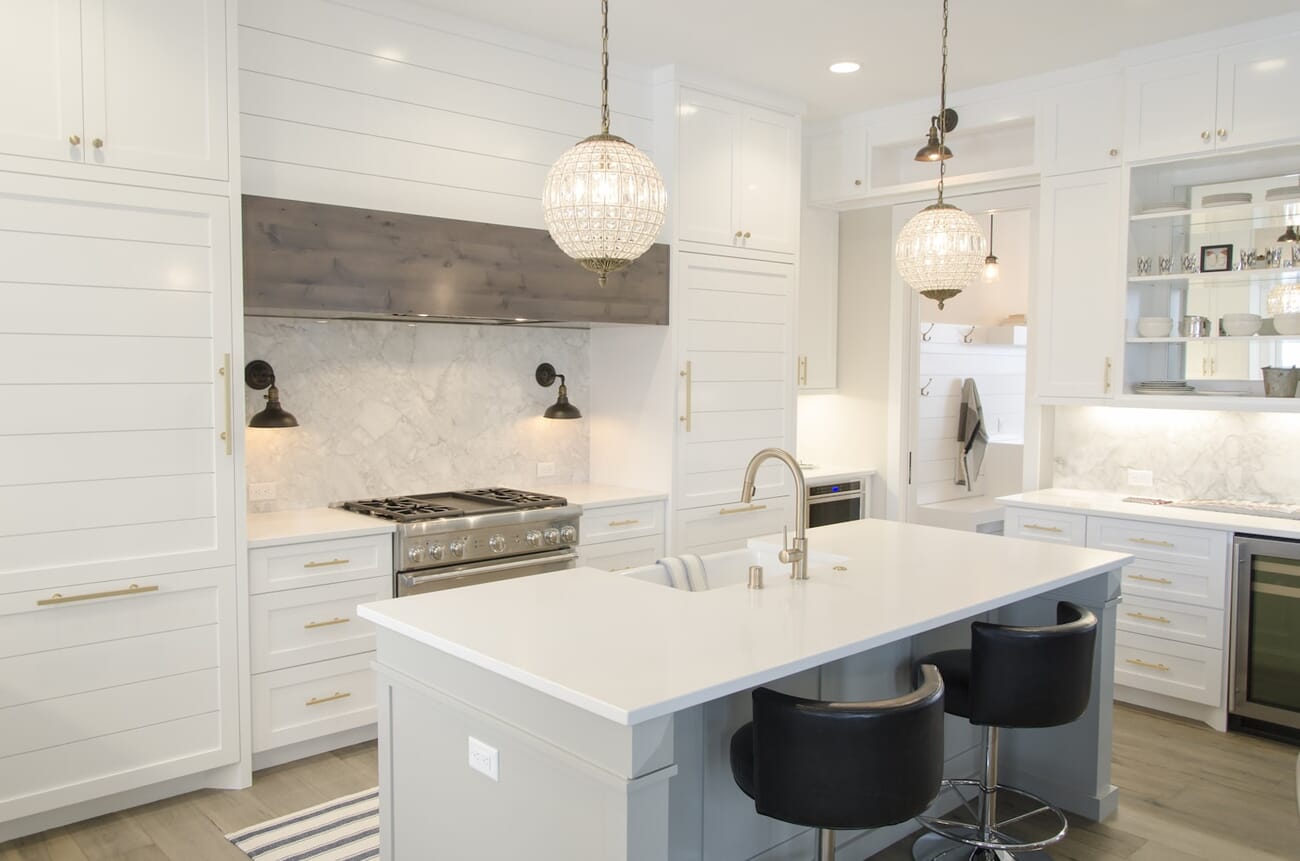
- Aperture: f/8 to f/11 — the sharpest range for most lenses, with deep depth of field.
- Shutter speed: 1/60s or slower — use a tripod. Bracket exposures (±2 stops) for HDR if needed.
- ISO: 100–400 — keep it low since the tripod eliminates the need for high ISO.
- Focal length: 14–24mm (full frame) or 10–16mm (APS-C) — wide enough to capture rooms without extreme distortion.
- White balance: Manual or Daylight preset. Turn off artificial lights to avoid color casts, or light-paint with flash for even illumination.
HDR bracketing is standard practice in real estate photography. Capture 3–5 exposures at different brightness levels and merge them in post-processing to retain detail in both bright windows and dark corners. Most editing apps (Lightroom, Photomatix, Aurora HDR) can merge HDR brackets automatically. Check out our best cameras for real estate photography for gear recommendations.
Settings for Product Photography
Product photography demands technical precision — sharp focus, accurate colors, and clean backgrounds. The good news is that you have full control over the environment, so there’s no excuse for subpar settings.
- Aperture: f/8 to f/16 — maximize sharpness and depth of field. For small items, f/11 is often the sweet spot.
- Shutter speed: 1/125s with strobes, or 1/10s–1 second with continuous lights and a tripod.
- ISO: 100–200 — always. You’re on a tripod with controlled lighting; there’s no reason to raise ISO.
- Focus mode: Manual focus with live view magnification for pixel-level precision.
- White balance: Custom using a gray card, or set to 5500K for standard studio strobes.
For product photography ideas and inspiration, check our dedicated guide. A simple two-light setup — one main light through a softbox and one fill — handles 90% of product shots. Add a reflector opposite the main light for clean shadow fill.
Settings for Indoor Sports
Indoor sports are the most technically demanding indoor scenario. You need extremely fast shutter speeds to freeze action, but the gym or arena lighting is typically inadequate. This forces aggressive compromises on ISO.
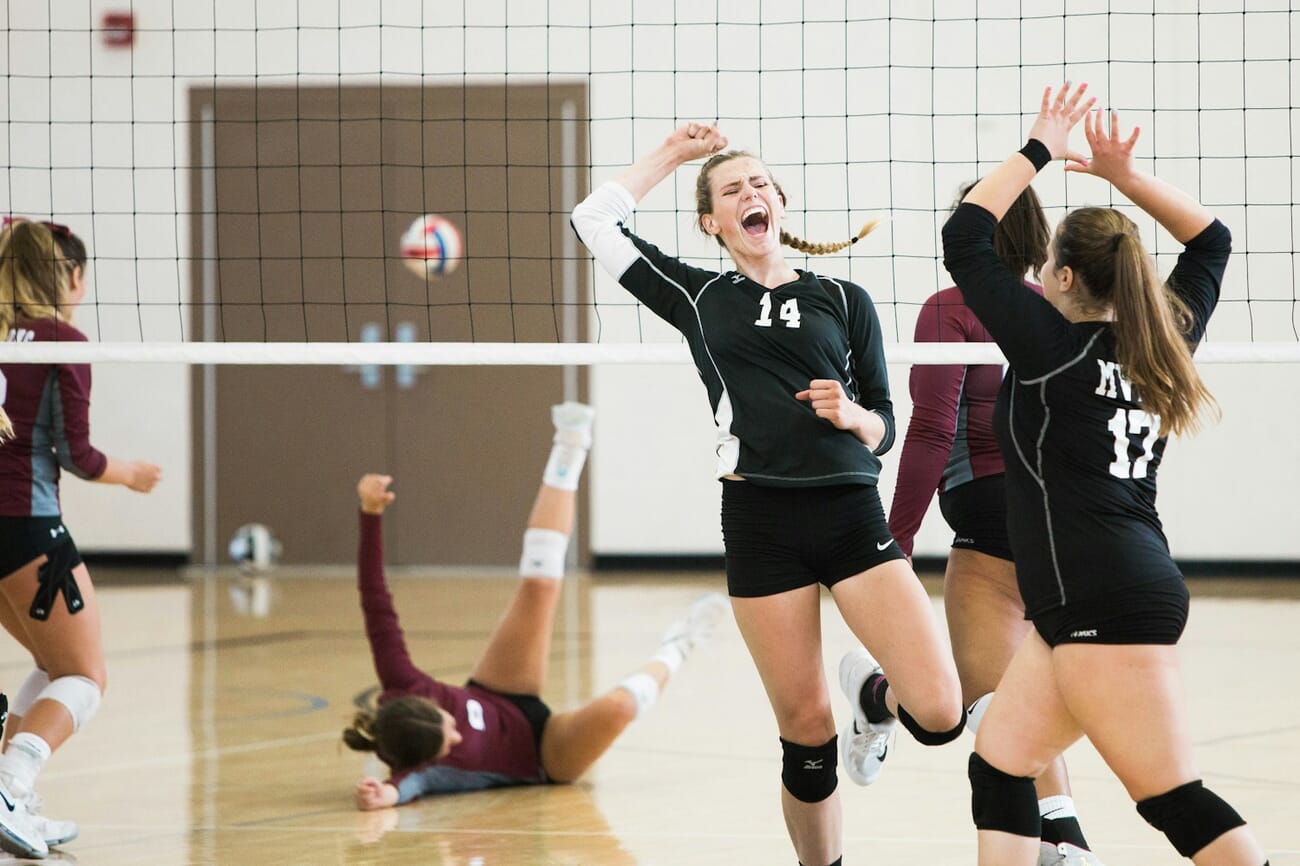
- Aperture: f/2.8 to f/4 — as wide as your lens allows. A 70–200mm f/2.8 is the standard workhorse for indoor sports.
- Shutter speed: 1/500s to 1/1000s — non-negotiable for freezing action. Basketball, volleyball, and gymnastics all require 1/500s minimum.
- ISO: 3200–12800 — this is where modern sensor technology really pays off. Full-frame cameras shine here.
- Focus mode: Continuous AF (AF-C/Servo) with zone or wide-area tracking. Use the fastest frame rate your camera offers.
- Metering: Spot or center-weighted — arena lighting creates bright floors and dark backgrounds that fool matrix metering.
Tip: If your images are still too dark or noisy, consider shooting at 1/320s — slightly slower than ideal, but the motion blur on extremities (hands, feet) can actually add a sense of dynamic energy. The torso and face will still be sharp at that speed.
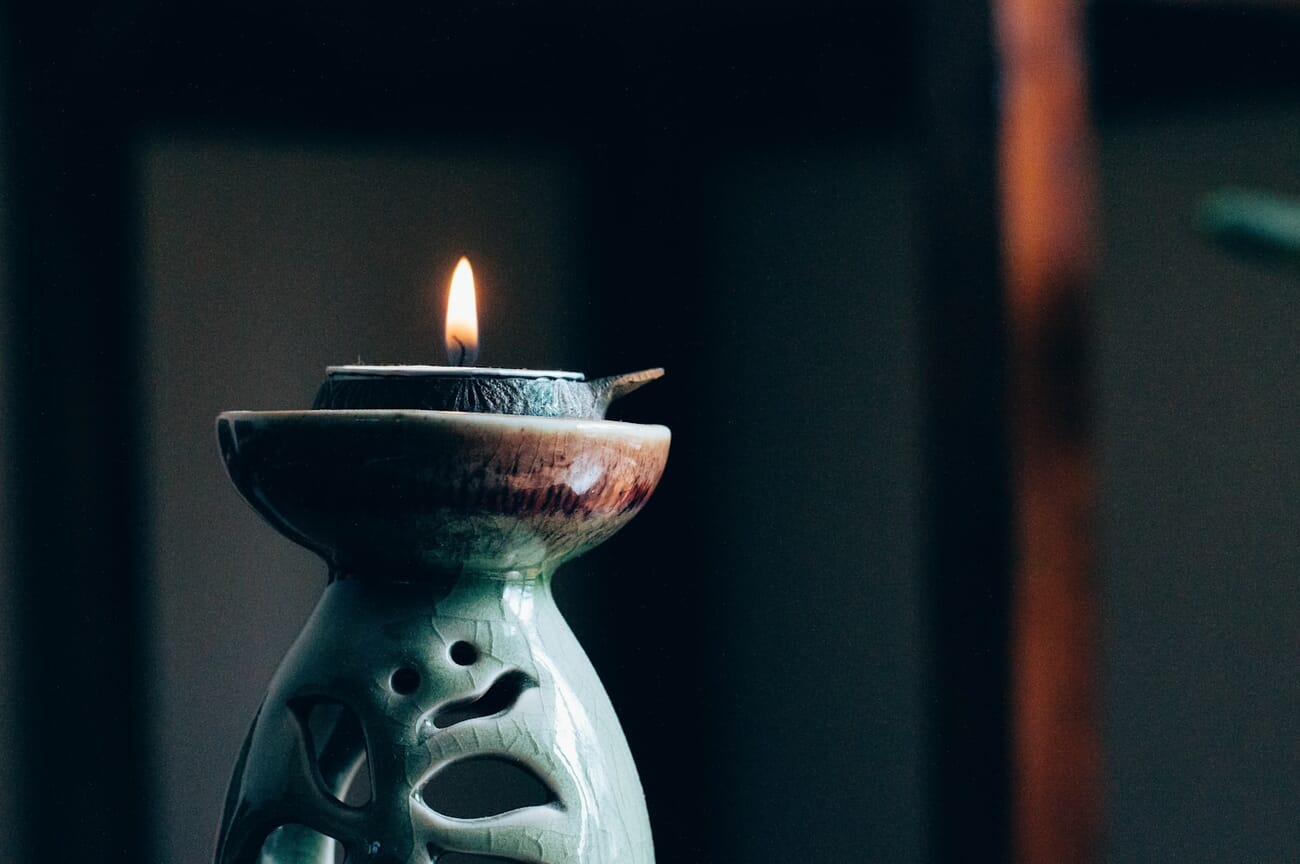
Settings for Low-Light and Ambient Scenes
Restaurants, bars, museums, concerts, candle-lit dinners — these are situations where the mood is the photo. You want to preserve the atmospheric lighting, not overpower it with flash.
- Aperture: f/1.4 to f/2.8 — wide open is essential. Fast primes (35mm f/1.4, 50mm f/1.8, 85mm f/1.4) are invaluable here.
- Shutter speed: 1/60s for still subjects, 1/125s if people are moving. Use image stabilization to push these lower if needed.
- ISO: 1600–6400. Accept the noise — it often adds a pleasing film-like grain in moody shots.
- White balance: Tungsten or ~3000K to preserve the warm, golden atmosphere of candlelight and incandescent bulbs. Don’t correct away the warmth — it is the mood.
- Flash: Off. Adding flash destroys the ambient atmosphere. If you absolutely need fill, use a tiny LED panel at minimum power.
For a deeper dive into techniques, check our full low-light photography guide, which covers advanced methods including focus stacking and long-exposure approaches for extreme darkness.
Smartphone Indoor Photography Settings
Modern smartphones have made impressive strides in indoor photography. The latest iPhone, Samsung Galaxy, and Google Pixel models use computational photography to produce results that rival entry-level cameras in many indoor situations.
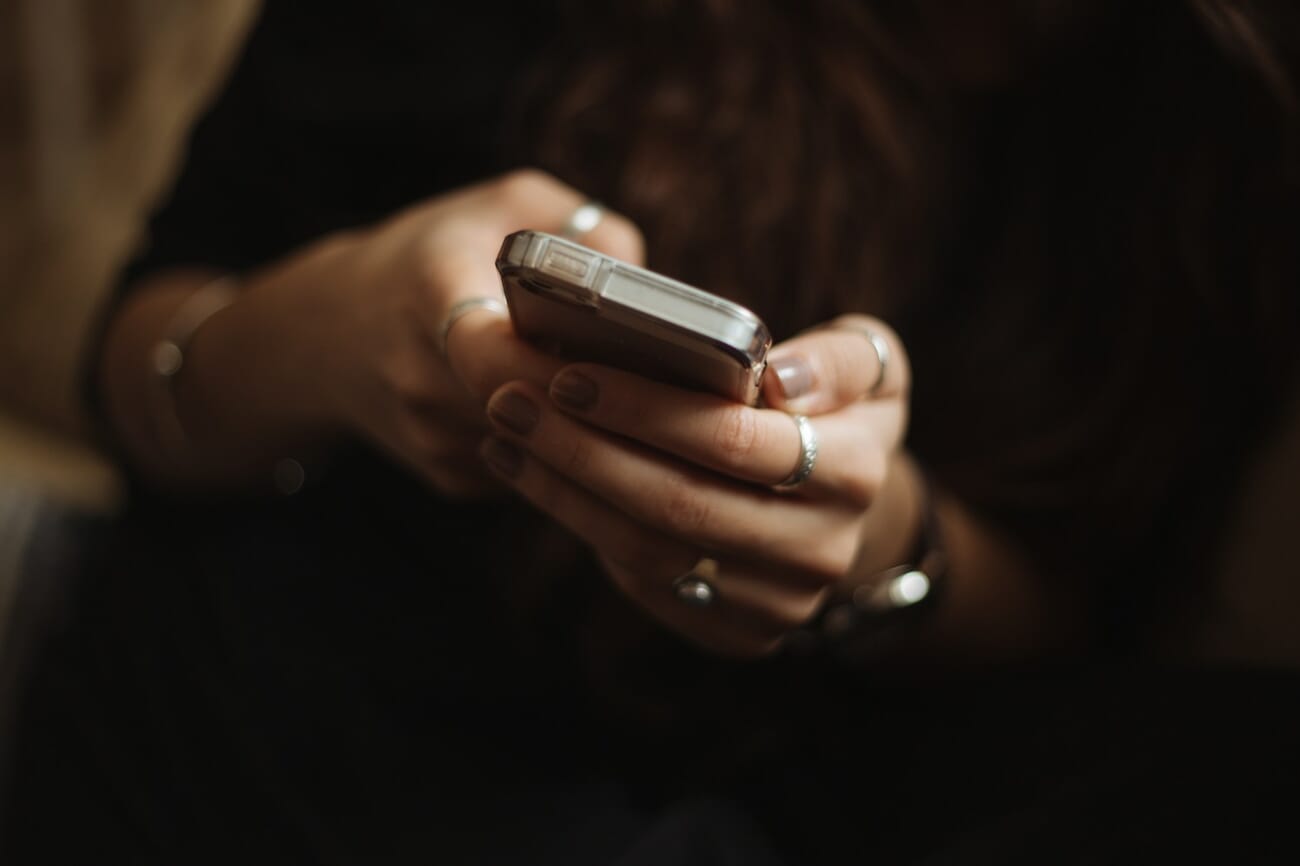
Here’s how to optimize your smartphone for indoor shots:
- Use Night Mode: All flagship phones now have dedicated night/low-light modes that capture multiple frames and merge them computationally. This dramatically reduces noise and improves detail in dim interiors — use it any time lighting is less than ideal.
- Switch to the main (1x) camera: The primary lens on most phones has the widest aperture (typically f/1.5–f/1.8). Ultra-wide and telephoto lenses have smaller apertures and worse low-light performance.
- Lock exposure and focus: Tap and hold on your subject to lock focus and exposure. Then slide the exposure slider down slightly — smartphones tend to overexpose indoors, which blows out highlights and increases noise.
- Shoot in ProRAW/RAW: iPhone’s ProRAW and Android’s RAW mode give you much more flexibility in post-processing, especially for controlling smartphone exposure and white balance.
- Use a tripod or prop: Even a small phone tripod eliminates handshake, letting Night Mode work optimally with longer exposures.
When to use a dedicated camera instead: Smartphones struggle with fast-moving subjects indoors (sports, active toddlers), extreme low light where even Night Mode introduces too much blur, and any situation where you need shallow depth of field beyond portrait mode’s software blur.
Focus Modes for Indoor Photography
Low light puts extra stress on your camera’s autofocus system. Less light means less contrast for the AF sensor to work with, which leads to hunting — that frustrating back-and-forth where the lens searches without locking on.
- Use single-point AF and place it directly on your subject’s face or eye. Multi-point AF is more likely to lock onto the wrong thing in cluttered indoor environments.
- Enable Eye AF if your camera has it. Modern Sony, Canon, and Nikon bodies all offer excellent real-time eye tracking that works even in dim conditions.
- Switch to manual focus when AF fails repeatedly. Use live view with magnification for precision, especially in product and macro photography.
- Use a focus assist lamp — most cameras and speedlights have a red AF-assist beam that projects a pattern onto your subject, giving the AF system something to grab in near-darkness.
Wide aperture caveat: At f/1.4 or f/1.8, depth of field is razor-thin. A slight forward/backward sway can shift focus from the eyes to the ears or nose. Use continuous AF (AF-C) for portraits at wide apertures to keep the camera constantly tracking your subject.
Using Flash Indoors
Flash gets a bad reputation because most people’s experience is with the harsh, direct pop-up flash. Used properly, flash is an incredibly powerful tool for indoor photography.
- Bounce flash: Point your speedlight at the ceiling or a nearby white wall. The light scatters and wraps around your subject softly — the single most impactful flash technique for indoor work.
- Diffuser: A small diffuser dome on your speedlight softens direct flash significantly. Not as good as bounce, but works when ceilings are too high or colored.
- Off-camera flash: Triggers (optical or radio) let you position a flash to the side for dramatic, directional light. Even one off-camera speedlight with a small softbox transforms indoor portraits.
- Flash settings: Use TTL (through-the-lens metering) for events where speed matters. Switch to manual flash power for controlled setups like portraits and products where consistency is key.
Flash sync speed matters: most cameras sync at 1/200s or 1/250s. If you need faster shutter speeds with flash (rare indoors), enable high-speed sync (HSS) — but be aware it reduces flash power significantly.
Choosing the Right Shooting Mode
For indoor photography, your shooting mode matters more than you might think. Here’s when to use each:
- Aperture Priority (A/Av): Best for most indoor situations. You set the aperture (wide for portraits, narrow for products), and the camera picks the shutter speed. Pair with Auto ISO for a nearly automated workflow that still gives you creative control. Learn more in our aperture priority mode guide.
- Shutter Priority (S/Tv): Use when shutter speed is your priority — indoor sports (1/500s+) or situations where you must prevent blur at a specific speed.
- Manual (M): Full control. Essential for product photography with strobes, real estate bracketing, and any situation where lighting is consistent and you want repeatable exposures.
- Program (P): Decent for snapshots, but you lose control over the aperture/shutter balance. Not recommended when you have specific creative goals.
The exposure triangle — the relationship between aperture, shutter speed, and ISO — is the foundation of all these modes. Understanding it makes indoor photography dramatically easier because you’ll know exactly which trade-off to make for any given situation.
Frequently Asked Questions
What are the best camera settings for indoor photography without flash?
Without flash, use a wide aperture (f/1.4–f/2.8), a shutter speed of 1/100s or faster for people, and push ISO to 1600–6400 as needed. Position your subject near the strongest light source in the room, ideally a window. Modern cameras handle high ISO well, so don’t be afraid to push it — a sharp, slightly noisy photo beats a blurry one.
Why are my indoor photos blurry?
The most common cause is a shutter speed that’s too slow. In low light, your camera (especially in Auto mode) may drop to 1/30s or 1/15s, which isn’t fast enough to freeze movement — either yours or your subject’s. Fix this by opening your aperture wider, raising your ISO, or adding light (a window, lamp, or flash).
Should I use Auto ISO for indoor photography?
Yes — Auto ISO with limits is one of the best tools for indoor shooting. Set a minimum shutter speed (1/125s for people, 1/60s for static subjects) and a maximum ISO (3200–6400 for most cameras). The camera adjusts ISO automatically while maintaining your desired shutter speed, saving you constant manual adjustments.
What’s the best lens for indoor photography?
A fast prime lens makes the biggest difference. A 35mm f/1.4 or 50mm f/1.8 is ideal for general indoor work — they’re affordable, lightweight, and let in far more light than a kit zoom. For events, a 24–70mm f/2.8 zoom offers versatility. For real estate, a 16–35mm wide-angle zoom is essential.
How do I avoid orange/yellow color casts in indoor photos?
The warm color cast comes from tungsten (incandescent) light bulbs. Set your white balance to Tungsten/Incandescent to correct it in-camera, or shoot RAW and adjust in post-processing. The most reliable solution is to turn off artificial lights and shoot by window light, or replace bulbs with daylight-balanced LED lights.
Can I take good indoor photos with a smartphone?
Absolutely. Modern smartphones with Night Mode (iPhone, Samsung Galaxy, Google Pixel) produce impressive indoor results. Use the main camera (not ultra-wide), enable Night Mode in dim conditions, lock exposure, and hold steady or use a small tripod. For professional work like real estate or product photography, a dedicated camera still offers more control and quality.
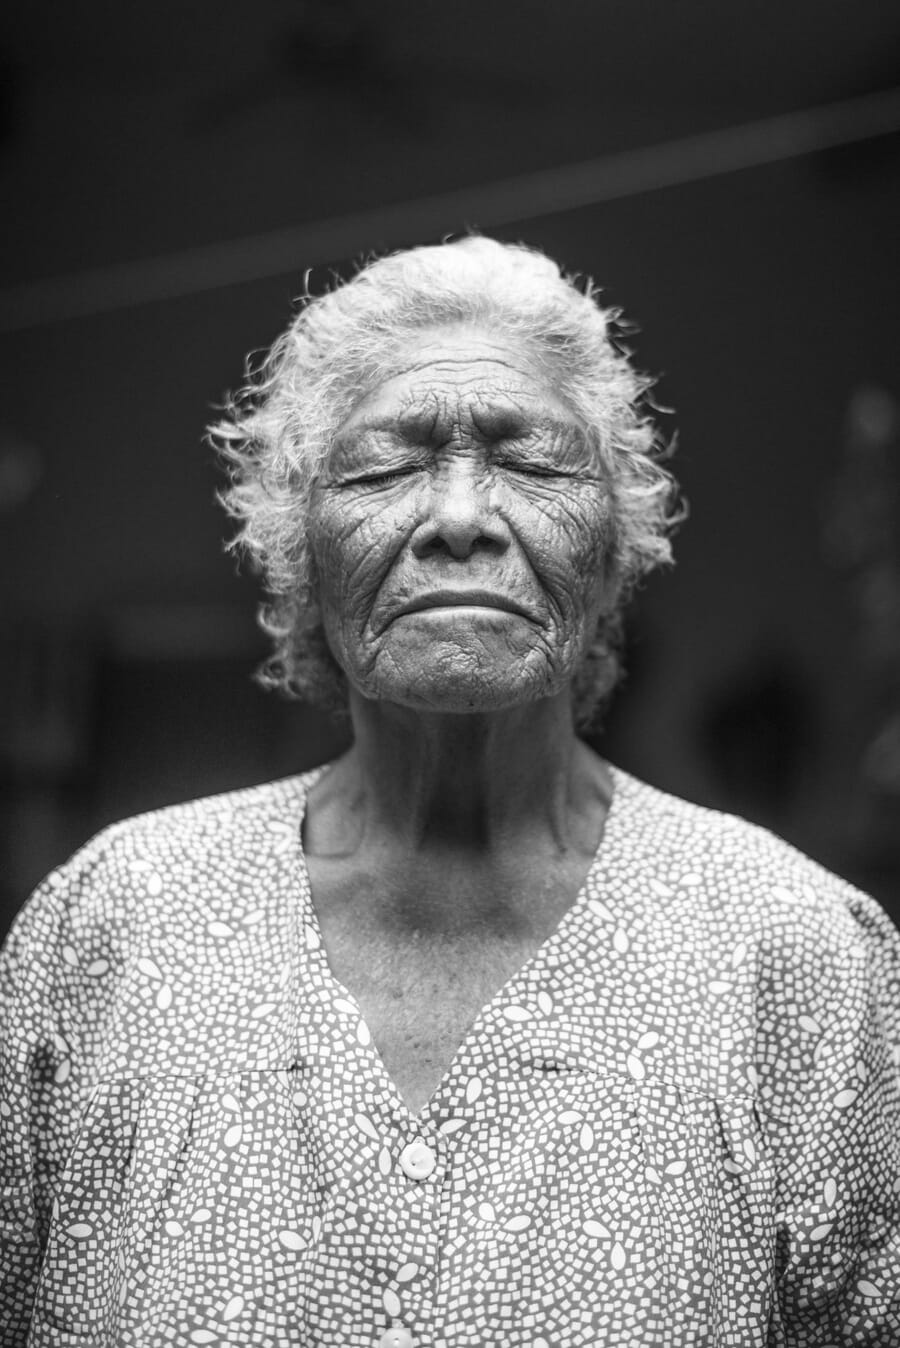
Featured image: Photo by Stepan Severinoff on Unsplash.
