Best Lights for Food Photography: 7 Great Strobes, Light Boxes, and Kits

If you want to take food photos that really grab the viewer’s attention, natural and consistent lighting is essential. The right light helps you reduce shadows, illuminate your dishes, and make sure that all components of your creations are visible. To get great shots every time, you need a variety of lighting options.

We’ve selected seven of the best lights for food photography to help you take incredible culinary shots that display your cooking genius. The options include several strobe lights, some fantastic light kits, and two portable light boxes so you can ensure you’re capturing all the mouth-watering details! Plus, we offer some great food photography tips like how to arrange the perfect setup.

Food dishes including beef, cashews, peppers, and onions from a top-down perspective.

When you buy through links on our site, we may earn a commission at no cost to you. We evaluate products independently. Commissions do not affect our evaluations. As an Amazon Associate, we earn from qualifying purchases.

1. Godox E300 Strobe Studio Flash Kit 900W

Our Pick
Godox E300 Strobe Studio Flash Kit 900W
Great for a one-stop solution

The Godox E300 Strobe Studio Flash Kit has soft boxes, light stands, a trigger, and 3x strobe lights for an immediate studio setup.

Pros
The strobes offer precise LED panel control
Light stands have great stability
The soft boxes are easy to attach
Cons
The light stands are a little fiddly to adjust

The Godox E300 Strobe Studio Flash Light Kit gives you everything you need to start taking incredible photos in your kitchen and is one of the best lights for food photography if you want a one-stop solution. Included, you get three studio flash heads, a softbox, an umbrella, a carry case, barn doors, three light stands, and a trigger.

The 3x Godox E300 strobes give you a maximum power of 300W, adjustable color temperature, and various triggering options including synchronized and slave. These give you fantastic control and are easy to attach to the light stands.

Godox E300 E-300 3Pcs 900W Photography Studio Strobe Flash Light Lamp Flash Speedlite with Godox RT-16 Flash Trigger Receiver, 2m Light Stand, Softbox, Umbrella, BD-03 Barn Door Kits, Carrying Case
Godox E300 E-300 3Pcs 900W Photography Studio Strobe Flash Light Lamp Flash Speedlite with Godox RT-16 Flash Trigger Receiver, 2m Light Stand, Softbox, Umbrella, BD-03 Barn Door Kits, Carrying Case (Image from Amazon)

The stands themselves are height adjustable and you can easily change the tilt and direction of the strobe lights to give you complete control over your studio setup. The 50x70cm softboxes are well-made and easily fit onto the front of the strobes.

You can, of course, control everything with the FT-16 trigger control which can be used to synch the lighting. If you don’t want to go to multiple different suppliers, but instead want a single studio setup, this Godox kit is perfect.

2. Neewer Vision 4 300W Strobe Light

Best Budget
Neewer Vision 4 300W Strobe Light
Great for portability

The Neewer Vision 4 300W Strobe Light has a high-powered lithium-ion battery that lasts for up to 1000 flashes on one charge so you can use it anywhere and for longer food photography sessions.

Pros
Simple rear control panel to change flash settings
High-quality battery good for 1000 flashes
Works with many shoe cameras
Cons
Only includes the strobe – no stands or accessories

If you need power and portability, the Neewer Vision 4 300W Strobe Light is an excellent model. Perhaps you need to take your gear to different cooking locations or take photos at clients’ restaurants. If so, the cordless design and high-quality lithium-ion battery allow you to use this strobe light anywhere at any time.

Neewer Vision 4 300W Outdoor Studio Flash Strobe Li-ion Battery Powered Cordless Monolight with 2.4G Wireless Trigger, 1000 Full Power Flashes, Recycle in 0.4-2.5 Sec, Bowens Mount
Neewer Vision 4 300W Outdoor Studio Flash Strobe Li-ion Battery Powered Cordless Monolight with 2.4G Wireless Trigger, 1000 Full Power Flashes, Recycle in 0.4-2.5 Sec, Bowens Mount (Image from Amazon)

For compatibility, you can use it with a wide range of shoe cameras including Canon, Nikon, Panasonic, Olympus, and Sony. It has a wireless 3.4G remote mode and fast sync speeds of 1/200 seconds. This gives you great responsiveness and ensures consistency in your food photography.

The power output is 300W, and it has a power adjustment feature in increments of 1/64 to 1/1. Don’t worry if you need to take multiple shots quickly – the recycle time is 0.4s. For the duration, you can set the strobe from 1/1000s to 1/10000s. Lastly, the battery should last for up to 1000 flashes on one charge – therefore, it should never run out mid-session.

3. Westcott FJ200 200Ws Strobe Light

Also Great
Westcott FJ200 200W Strobe Light
Great for minute controls

The FJ200 offers brilliant control over your lighting setup due to the advanced menu system accessible via the LCD display screen.

Pros
Capable of continuous capture up to 20fps
Automatic memory recall for previous settings
Durable and ergonomic design to maximize light output
Cons
Relatively expensive

The advanced LCD color display and menu system of the Westcott FJ200 200W Strobe Light are ideal if you need to make small adjustments and want complete control over your food lighting. Using the menu on the rear of the strobe, you can change things like the mode, speed, brightness, and color temperature.

Westcott FJ200 200Ws Strobe Light Bundle with FJ-X3 M Universal Wireless Flash Trigger, 64GB SD Card and Backdrop Boards (4 Items)
Westcott FJ200 200Ws Strobe Light Bundle with FJ-X3 M Universal Wireless Flash Trigger, 64GB SD Card and Backdrop Boards (4 Items) (Image from Amazon)

Aside from control, the light output itself is fantastic. This is because you benefit from the extended flash tube and rounded flash head – both of these features are proven to help improve output, but also give a more even light spread.

Related Posts

For connectivity, the strobe has an integrated FJ wireless flash receiver which reduces your need for brand-specific triggers. Additionally, the system enables you to control up to 16 devices across 32 channels, with a range of 328ft. This should be more than enough for your food photography setup. In the bundle, you get the FJ200 strobe light, wireless flash trigger, a tote bag for transportation, a 64GB memory card, and backdrop boards.

4. Lincostore 600W Continuous Lighting Kit

LINCO Photography Portrait Studio Lighting Kit
Great for beginners

The simple light bulb functionality is ideal for beginners who just want to get used to positioning and creating light setups.

Pros
Extensive kit with 3x bulbs and stands
Easy to use products for beginners
The stands have 3x adjustable height parts
Cons
Not suitable for professional work

If you want a budget option that allows you to start experimenting with light stands and a proper studio setup, the LINCO Photography Portrait Studio Lighting Kit is a fantastic option. It comes with 3x light bulbs, 3x light stands, an umbrella, and a carry bag.

LINCO Lincostore Photography Photo Portrait Studio 600W Umbrella Continuous Lighting Kit AM112
LINCO Lincostore Photography Photo Portrait Studio 600W Umbrella Continuous Lighting Kit AM112 (Image from Amazon)

Although the lighting does not offer the control of other products in this list, the bulbs have a 40W output and a relatively neutral color temperature of 5500K. As there are three, you can easily set them up in a three-point configuration to cover all angles and make sure your food is evenly lit.

The head fixtures that the bulbs screw into are versatile too and you can easily clamp them to the light stands with the screw mechanism. The bulbs do have a power cable, but it should be long enough so you can easily reach an outlet and still have flexibility in positioning.

To give you more control, each lightstand in this portable lighting kit has three height adjustment points and they are durable but lightweight for quick movements.

5. Neewer 600W Strobe Flash Studio Photography Kit

Neewer 600W Strobe Flash Studio Light Photography Kit
Great for professional work

The 2x high-quality 300W strobe lights give good flexibility and allow complete control over your food photography lighting.

Pros
5600K daylight temperature for natural lighting
The strobes have 9 brightness levels
Extensive kit with softboxes and stands
Cons
Relatively expensive

For professional food photography, the strobe lights and accessories included in this kit give you a fantastic starting point. The Neewer 600W Strobe Flash Studio Light Photography Kit would be great in a permanent studio setup although the carry bag makes it potentially a good travel item too.

The 300W strobe lights are of superior build quality and give you advanced controls. The default color temperature is 5600K which replicates natural daylight and is ideal for food photos. Additionally, the Aluminium casing should give you great longevity and they should last you for years.

NEEWER 600W Strobe Flash Studio Light Photography Kit: 2 Packs of Upgraded S101 300W 5600K Monolight with Bowens Mounts/Softboxes/Light Stands, 1 x Reflector/RT-16 Trigger/Bag for Portrait Product
NEEWER 600W Strobe Flash Studio Light Photography Kit: 2 Packs of Upgraded S101 300W 5600K Monolight with Bowens Mounts/Softboxes/Light Stands, 1 x Reflector/RT-16 Trigger/Bag for Portrait Product (Image from Amazon)

In terms of strobe light specifications, they have a recycle time of between 0.4-2.5s, and a flash duration of between 1/800 to 1/2000s. Furthermore, you can adjust the brightness in nine different levels based on 10% increments. Essentially, you have complete control over how your food is lit.

Aside from the lights, there are two durable stands and mountable softboxes. These allow you to create even lighting and ensure you have complete coverage from all angles. For synchronized shooting, there is also a receiver that plugs into your camera shoe slot.

6. Neewer Photo Studio Light Box

Neewer Photo Studio Light Box
Great for product emphasis

The Neewer Photo Studio Light Box allows you to place the focus on your food and remove unwanted background noise.

Pros
Collapsible design for portability
Adjustable brightness setting
80 high-quality LEDs
Cons
The panels get warm pretty quickly

You don’t only have to use complex strobe light setups and light boxes make a potential alternative. This is why the NEEWER Photo Studio Light Box is a brilliant option and one of the best food photography lights. You could use this light box to take photos of individual dishes or even photos of single foods like fruits and vegetables.

The NEEWER lightbox allows you to get clean shots with no disruption and is the perfect option if you want the emphasis on the food, not the backdrop and setting. It has 80 LEDs that operate at colors temperatures of between 6000-6500K. Additionally, there is a simple adjustment knob on the power adapter so you can make quick changes to the brightness.

NEEWER Photo Studio Light Box, 20” x 20” Shooting Light Tent with Adjustable Brightness, Foldable and Portable Tabletop Photography Lighting Kit with 80 LED Lights and 4 Colored Backdrops
NEEWER Photo Studio Light Box, 20” x 20” Shooting Light Tent with Adjustable Brightness, Foldable and Portable Tabletop Photography Lighting Kit with 80 LED Lights and 4 Colored Backdrops (Image from Amazon)

So that you get a true white background for your food, the reflective materials on the inside will help reduce shadows and hot spots. If white isn’t your color, there are three alternative background cloths – orange, grey, and black.

It’s a portable design too as the box can collapse easily and it is fixed together with a simple hook and loop system that you should be able to erect in minutes.

7. Travor Photo Studio Light Box

Travor Photo Studio Light Box
Great for different angles

The Travor Photo Studio Light Box allows you to photograph your food from four different angles without constantly adjusting the item itself.

Pros
Quick assembly and dismantling with no tools
Adjustable brightness LEDs from 0-100%
Four different color backdrops
Cons
The assembly instructions are poorly written

Our last pick is another high-quality light box that offers a little more flexibility in terms of color and adjustments. The Travor Photo Studio Light Box offers four backdrop colors – white, black, orange, and blue, but you can also adjust the LED light temperature and brightness from 0-100%.

Photo Box, Travor Photo Studio Light Box 35
Photo Box, Travor Photo Studio Light Box 35″/90cm Adjustable Brightness Shooting Tent Table Top Photography Lighting Kit with 126 LED Lights 4 Backdrops (Brightness 15000lm, CRI95+) (Image from Amazon)

The LED strips have 126 individual lights in total which give an equivalent lighting of 15,000LM. This should easily remove shadows and give you consistent lighting across your food items. Once the box is set up, it is easy to access to as there is a simple flap on one side that you can add and remove objects.

Not only that, but it can be opened in four different ways so you can easily take photos from multiple angles without continuously rotating or re-adjusting the dish itself. No tools are needed for the assembly, and the sides have zippers for quick dismantling.

Best Light Setups for Food Photography

Now you’ve got the lighting in mind, you can consider some food photography lighting tips to get you started!

There are different ways of setting up your lights for food photography, and we’re going to look at some useful, non-complicated light setups here. I’m suggesting these ones because they work very effectively. They also look like they were lit with natural light, and are quick and easy to set up and take down after the shoot.

Note that I tend not to shoot straight-down angle flat lays for food very often, as I like to show side or front-on views and get up close with the dishes. However, it’s a very popular form of food and product photography on social media.

One Light and a Reflector

This is my usual go-to light setup for when I have a lot of food photography to do. It’s quick to set up and takes up a minimal amount of space, as well as giving good, reliable results.

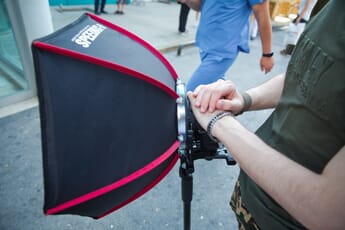
Food tends to look best when the main light is directed from the back or side of the dish. One way to do this is to set up an umbrella or a light with a softbox at the back or to the side of the dish.

Put the softbox as close up to where you are going to place the dish as possible without it touching or getting into your image. The closer and larger the light modifier, the softer the shadows. You don’t want harsh shadows on food unless you are shooting for a specific artistic effect.

Related Posts

I have the softbox set directly at a right angle to my table, so the light is going across the top and one side of the food. Opposite the light, my white reflector would be set up to bounce the light back onto the unlit side of the food and lift the shadows there.

You can use more than one reflector, and it doesn’t have to be a conventional reflector either!

One of the best tips I got from a professional food photographer was to use scrunched-up pieces of aluminum foil to give reflections in smaller, hard-to-reach areas.

To do this, you simply scrunch the foil up and then smooth it out again, then place it where you need a bit of extra light reflecting. For instance, if you are shooting mussels in the shell, these little foil reflectors can really lift the shadows in the shells without affecting the rest of your lighting.

One Main Light and a Fill Light

You can use your second softbox or white umbrella and strobe to be your fill light instead of using a reflector. Place your main light at the back or side of where you will place the food, and put the fill light where you would put your reflector. Simply set your fill light to a lower power than your main or key light.

There are advantages to both setups. However, it does depend on how much space you have available to safely set up your food photography lighting.

Back and Side Light

This isn’t one of my most-used setups, but it’s great if you want to mix window and reflected light with a strobe or continuous light.

The backlight would either come from a strobe or silver reflector placed behind the food, with diffused window light to the side and a foldable cardboard reflector on the other side.

This kind of setup is great for those airy, bright food images where you want to capture every detail and minimize shadows.

Bonus Tip

How do you set your white balance with different types of light sources? You can use your camera’s built-in white balance modes like daylight or flash, but they are not always accurate. I’ve found that the color rendition is slightly ‘off’, with a too-blue or too-yellow subtle color cast. Yes, it can be fixed in post-processing, but life is too short to spend time fixing color casts in editing software when there’s a simple way to avoid it.

The easiest way to do this is to set a custom white balance before you start shooting. Set your lights up and find the correct exposure for your setup, either with a light meter or by eye. Put a large piece of white paper or cardboard up where you will be placing your food. Adjust your camera’s lens to Manual Focus.

Fill the viewfinder with the white paper, and shoot a few frames. Go to your camera’s Set Custom White Balance menu, and follow your brand’s instructions on how to do this.

Once you’ve done this, your white balance is set correctly for the type of light you are using – even if it’s a mixture of daylight and flash.

Note that if you change lighting types, you must set your custom white balance again. Take fresh photos of your white paper lit with the new light source.

The Best Lights for Food Photography for Pros or Beginners

If you need professional equipment and want a full studio setup, the Godox E300 Strobe Studio Flash Light Kit, and Neewer 600W Strobe Flash Studio Light Photography Kit are both incredible options.

Perhaps you are just starting out on your food photography journey. If so, a beginner kit and bulbs like the LINCO Photography Portrait Studio Lighting Kit is a brilliant budget option.

Lastly, if you just need more strobe lights, or already have other studio equipment like light stands, something like the Neewer Vision 4 300W Strobe Light is a high-quality buy.


Disclosure/Disclaimer: As an Amazon Associate, we earn from qualifying purchases. Certain content was provided "as is" from Amazon and is subject to change or removal at any time. Product prices and availability: Amazon prices are updated daily or are accurate as of the date/time indicated and are subject to change. Any price and availability information displayed on Amazon.com at the time of purchase will apply to the purchase of this product.

About the Author
dawn gilfilan author

Dawn is a writer and photographer based in the UK. She graduated with a first-class honours degree in photography from The Northern School of Art. Her photography covers food, fashion, portraiture, and landscape projects. You can connect with her on LinkedIn and Instagram

Leave a Comment

Your email address will not be published. Required fields are marked *