
- Ruggard 80L Dry Cabinet is the best overall camera storage solution – electronically controlled humidity in a lockable cabinet.
- FORSPARK 100L offers the largest capacity with dual-core dehumidification for serious gear collections.
- Ruggard 50L is the best mid-size option – same quality as the 80L in a smaller, more affordable package.
- Pelican 1510 provides crushproof, waterproof portable protection for travel and home storage.
- Wisedry Silica Gel Packs are the most affordable humidity control option – reusable and effective.
- Amazon Basics Heavy Duty Shelf keeps gear organized and accessible on sturdy adjustable shelving.
How to Store Cameras and Lenses at Home
Camera gear is an investment – a decent mirrorless body and a couple of lenses can easily run into the thousands. But how that gear is stored at home makes the difference between equipment that lasts a decade and equipment that develops fungus, corrodes, or loses value prematurely.
Humidity is the primary threat. Moisture causes fungus growth on lens elements, corrosion of electronic contacts, and fogging inside sealed lens groups. Physical damage from drops and dust is the other major risk, especially for mirrorless cameras where the sensor is directly exposed when the lens is removed.
This guide compares the best camera storage solutions available – from dedicated dry cabinets that maintain precise humidity levels to budget-friendly desiccants and protective cases. Each product serves a different need and budget, so there is an option here whether the goal is protecting a single camera body or an entire professional kit.
When you buy through links on our site, we may earn a commission at no cost to you. We evaluate products independently. Commissions do not affect our evaluations. As an Amazon Associate, we earn from qualifying purchases.
Best Camera Storage Solutions


![wisedry 2 x 500 Gram [2.2 lbs] Rechargeable Silica Gel Car Dehumidifier, Microwave Fast Reactivated Desiccant Packets Large for Gun Safe Closet Basement Garage Storage Moisture Absorber Bag Reusable](https://m.media-amazon.com/images/I/51pHUtcOd3L._SL160_.jpg)
Camera Storage Solutions Compared
| Specifications | ||||||
|---|---|---|---|---|---|---|
| Type | Dry Cabinet | Dry Cabinet | Dry Cabinet | Hard Case | Desiccant Packs | Wire Shelf |
| Capacity | 80 Liters | 100 Liters | 50 Liters | 22L (carry-on) | 2 x 500g packs | 4 Shelves (350 lbs each) |
| Humidity Control | Electronic (35-60%) | Electronic (25-60%) | Electronic (35-60%) | Sealed (add desiccants) | Passive absorption | None |
| Power | ~8W continuous | ~8W continuous | ~5W continuous | None | Microwave recharge | None |
| Lockable | Yes | Yes | Yes | Yes (padlock holes) | N/A | No |
| Best For | Most photographers | Large collections | Smaller kits | Travel + storage | Budget humidity control | Gear organization |
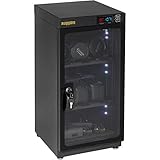
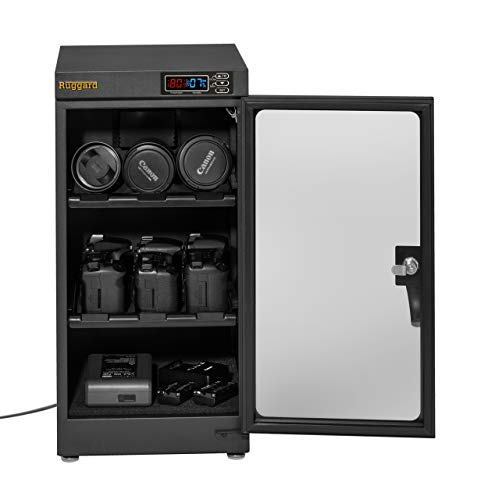
Ruggard Electronic Dry Cabinet (80L)
Most photographers who want reliable humidity-controlled storage
- Precise electronic humidity control (35-60% RH)
- Lockable tempered glass door with handle
- Padded shelf liners protect gear surfaces
- Silent operation with low power draw (~8W)
- 407 reviews with 4.6-star rating
- At $289, more expensive than DIY alternatives
- 80L may be too large for small kits
The Ruggard 80L is the most trusted dry cabinet among photographers. It maintains precise humidity levels electronically, requires zero maintenance beyond plugging it in, and holds enough gear for most serious hobbyists and working professionals.
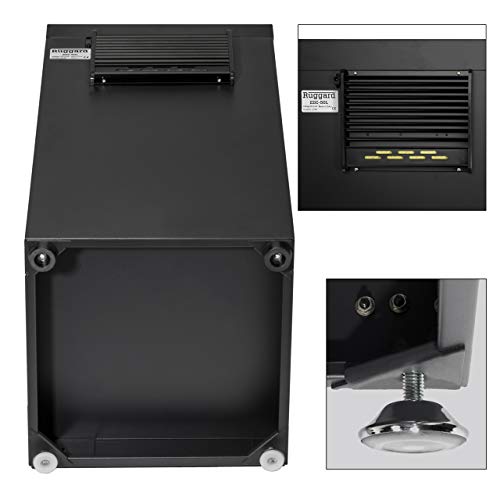
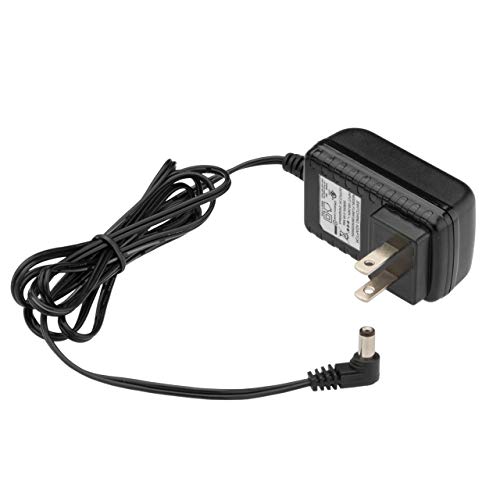
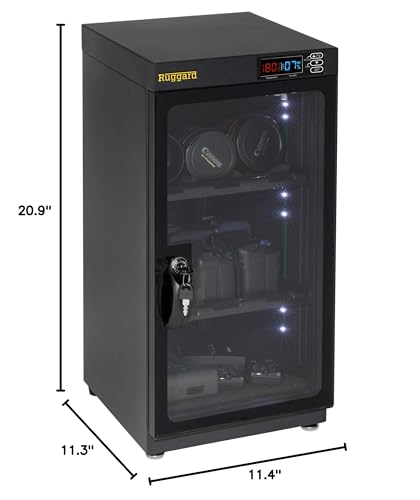
The Ruggard Electronic Dry Cabinet (80L) is the gold standard for home camera storage. It uses thermoelectric cooling to maintain a stable humidity level between 35-60% RH – the sweet spot that prevents fungus growth while avoiding the damage that overly dry conditions can cause to rubber seals and lubricants.
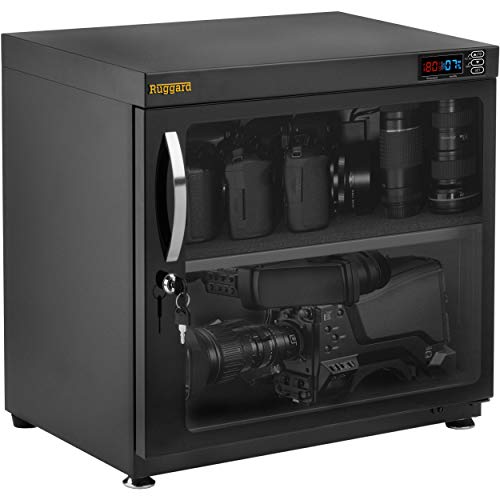
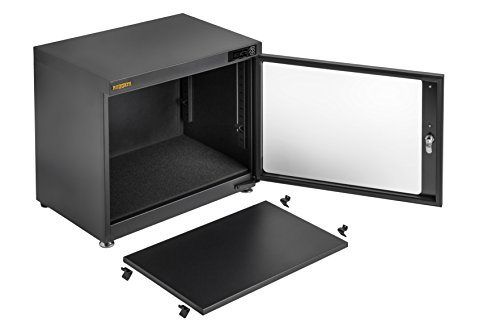
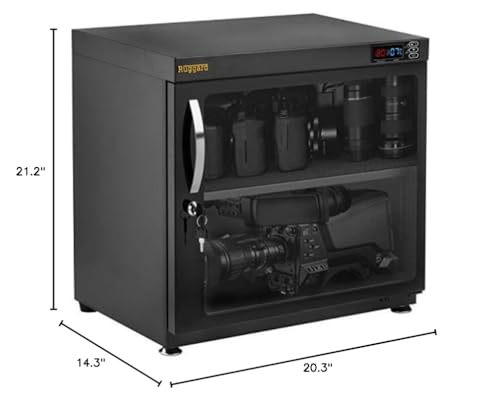
The 80-liter capacity is enough for 2-3 camera bodies and 5-6 lenses, plus accessories like flash units, batteries, and memory cards. The adjustable shelving lets users configure the interior to fit taller lenses or stack smaller items. Padded shelf liners prevent scratches on gear, and the lockable glass door adds security in shared spaces.
What makes the Ruggard stand out is its reliability. With over 400 reviews and a 4.6-star rating, it has a strong track record. The digital humidity display makes it easy to verify conditions at a glance, and the silent operation means it can sit in a bedroom or office without any noise. Power consumption is minimal at roughly 8 watts – about the same as a nightlight.
For anyone with more than a couple hundred dollars worth of gear, the Ruggard 80L pays for itself by preventing a single fungus-infected lens repair, which typically runs $200-$400.
Pricing & Where to Buy
The Ruggard Electronic Dry Cabinet (80L) is priced at $289 (as of March 2026). Ruggard also offers 30L ($159) and 50L ($210) versions for smaller collections.
- Buy on Amazon – Prime shipping available
- Check price at B&H Photo
FORSPARK 100L Camera Dehumidifier Dry Cabinet
Photographers with large gear collections who need maximum capacity
- 100L capacity with 4 customizable zones
- Smart humidity monitoring with auto-activation
- Cold-rolled steel frame with tempered glass door
- Ultra-quiet operation under 30dB
- LED interior lighting for easy access
- Premium price at $420
- Heavier and bulkier than smaller cabinets
- 4.2-star rating slightly lower than Ruggard
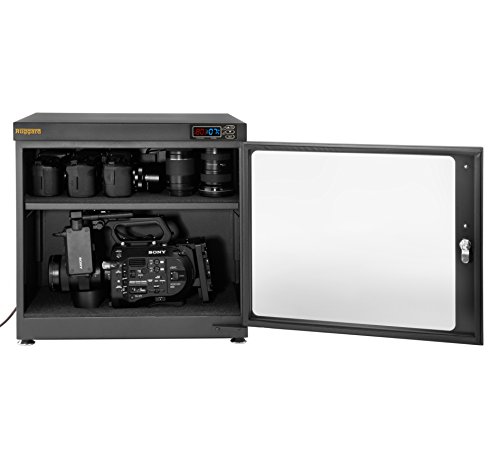
The FORSPARK 100L is built for photographers who have outgrown smaller cabinets. With four configurable zones and smart humidity control, it handles everything from a full mirrorless system to vintage film cameras and drones.
The FORSPARK 100L Dry Cabinet steps up the capacity for photographers whose collections have grown beyond what a standard cabinet can hold. At 100 liters, it comfortably stores 3-4 camera bodies, 8+ lenses, flash units, drones, and accessories with room to spare.
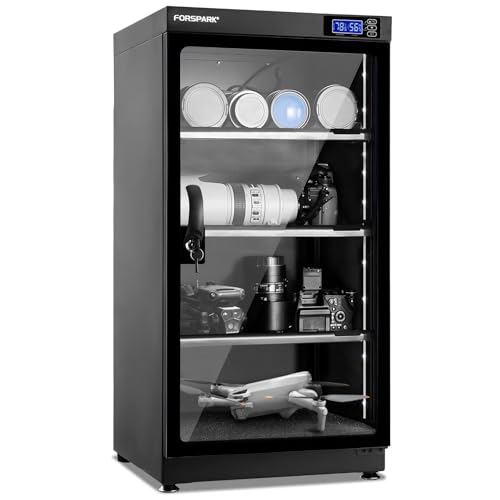


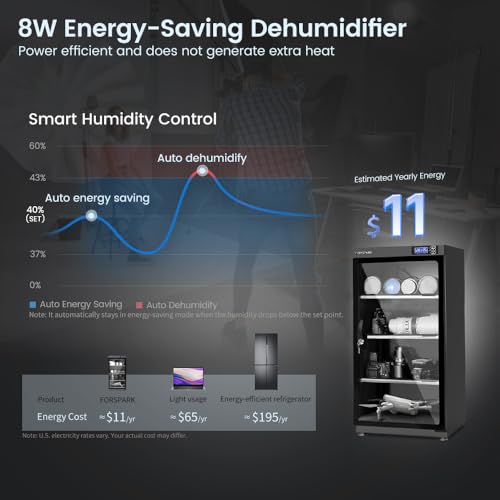

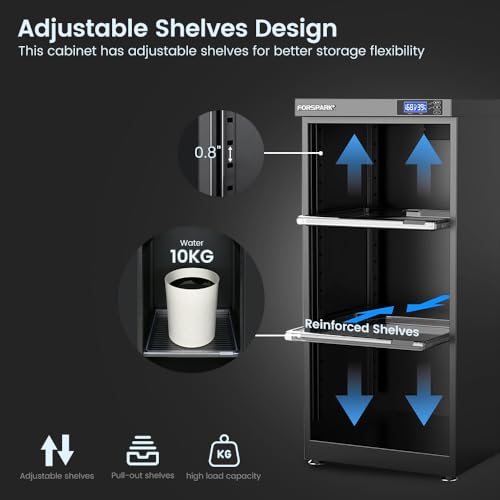
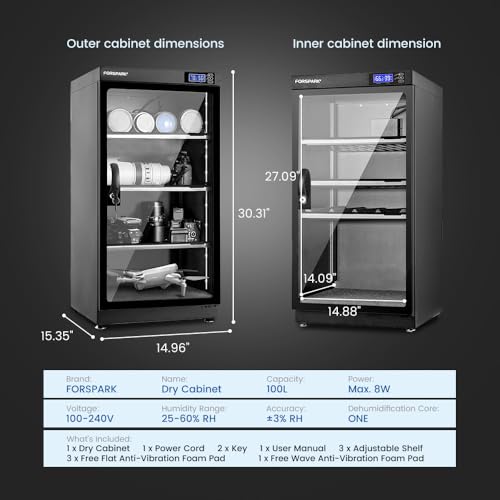

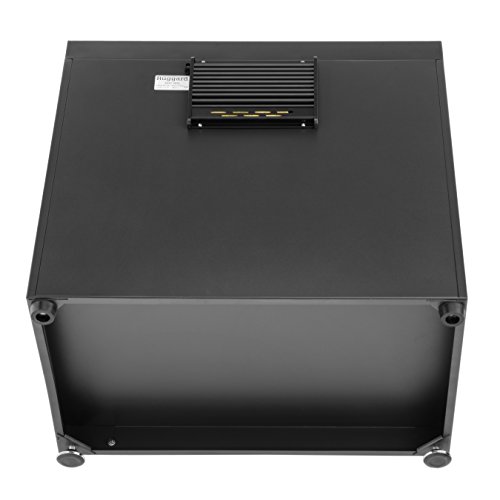
The three adjustable shelves create four distinct zones that can be customized for different gear sizes. The smart humidity monitor maintains 25-60% RH and auto-activates when humidity rises above the set threshold, meaning it works without any manual intervention. The cold-rolled steel frame and 4mm tempered glass with magnetic sealing provide solid build quality and an airtight environment.
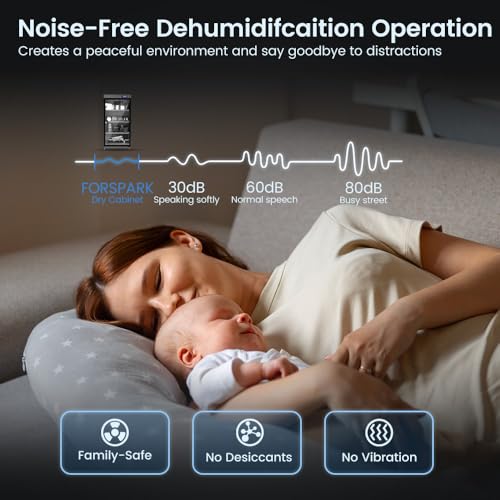
FORSPARK includes LED interior lighting, which is a genuinely useful feature when reaching for gear in a dimly lit corner. The 3-button control panel makes humidity and lighting adjustments straightforward. At under 30dB during operation, it is whisper-quiet – quieter than a typical refrigerator hum.
The trade-off for all this capacity is price and size. At $420 (as of March 2026), the FORSPARK 100L is a meaningful investment, but it is still cheaper than a single professional lens repair.
Pricing & Where to Buy
The FORSPARK 100L Dry Cabinet is priced at $419.99 (as of March 2026). FORSPARK also makes a 125L dual-core model for even larger collections.
- Buy on Amazon – Prime shipping available
Ruggard Electronic Dry Cabinet (50L)
Photographers with moderate gear collections who want Ruggard quality in a compact form
- Same proven Ruggard reliability as the 80L
- Fits 1-2 bodies and 3-4 lenses comfortably
- More affordable at $210 vs $289 for the 80L
- Adjustable shelves with padded liners
- Compact enough for a desk or closet shelf
- 50L may be tight for growing collections
- Same feature set as 80L – just smaller
The Ruggard 50L delivers the same electronic humidity control and build quality as its larger sibling at a lower price. Ideal for photographers who own one body, a few lenses, and want reliable protection without dedicating floor space to a full-size cabinet.
The Ruggard Electronic Dry Cabinet (50L) hits the sweet spot for most hobbyist photographers. It shares the same electronically controlled dehumidifier technology as the 80L model but in a more compact package that fits on a desk, inside a closet, or on a bookshelf.

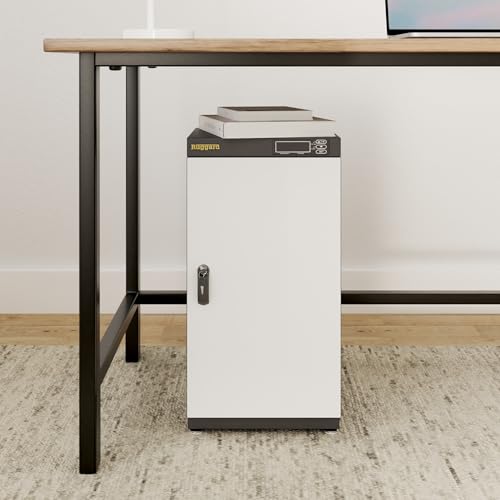
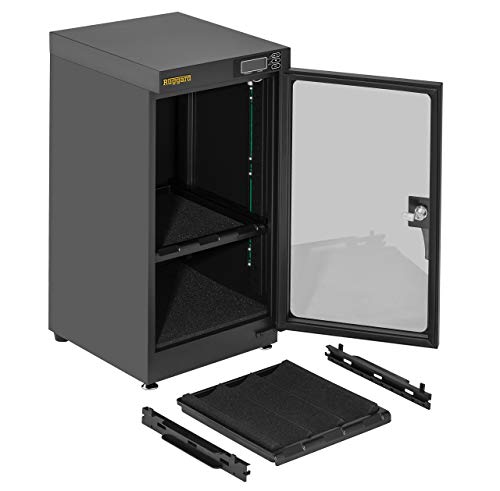
At 50 liters, it holds one to two camera bodies and three to four lenses, plus small accessories like batteries and memory cards. The adjustable shelving and padded liners are identical to the larger model. The lockable glass door provides the same security and visibility.
The main advantage of the 50L over the 80L is space and cost. At $210 (as of March 2026), it saves about $80 compared to the larger model, and its smaller footprint makes it practical for apartments or shared spaces where a full-size cabinet would be too bulky. The electronic humidity control maintains the same 35-60% RH range.
The only real downside is capacity planning. If a gear collection is likely to grow, starting with the Ruggard 50L might mean upgrading within a year or two. For collections that are already established and not growing, it is the more practical choice.
Pricing & Where to Buy
The Ruggard 50L Dry Cabinet is priced at $209.95 (as of March 2026). Also available in 30L ($159) and 80L ($289) versions.
- Buy on Amazon – Prime shipping available
- Check price at B&H Photo
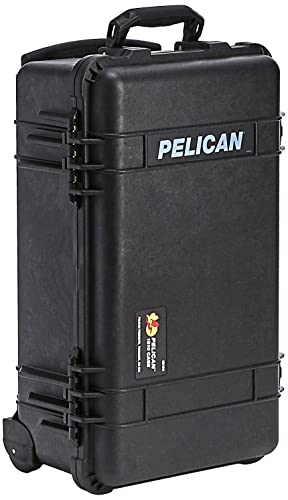
Pelican 1510 Case With Foam
Photographers who need crushproof, waterproof protection for storage and travel
- IP67 waterproof and crushproof copolymer construction
- Customizable pick-and-pluck foam interior
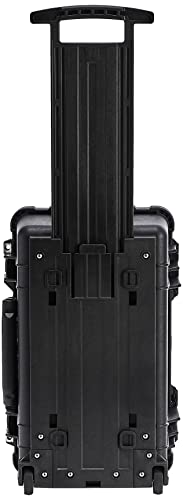
- Carry-on size with retractable handle and wheels
- Lifetime guarantee from Pelican
- Doubles as secure home storage and travel case
- No built-in humidity control – add desiccants separately
- Limited capacity compared to dry cabinets
- Heavier than soft bags at 13+ lbs empty
The Pelican 1510 is the industry standard for rugged gear protection. It handles drops, water, dust, and crushing without flinching. The carry-on-compliant size makes it the top choice for photographers who need storage that travels.
The Pelican 1510 Case takes a different approach to camera storage. Instead of controlling humidity electronically, it seals gear inside a crushproof, waterproof, dustproof shell made from copolymer polypropylene. The IP67 rating means it can be submerged in water and still keep contents dry.


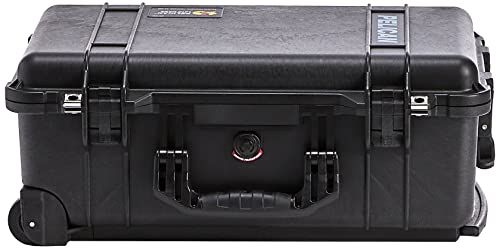
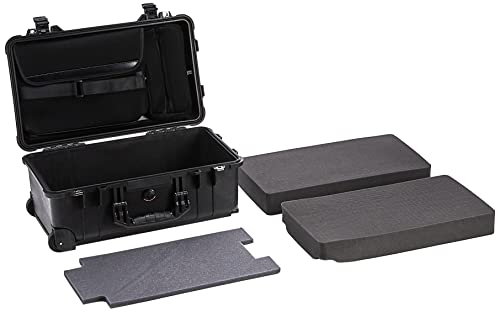
The pick-and-pluck foam interior lets users carve out custom compartments for each piece of gear. This ensures a snug fit that prevents movement during transport or earthquake-prone storage conditions. The automatic pressure equalization valve handles altitude changes during air travel without popping open.
The 1510 is carry-on compliant for most airlines, with a retractable handle and built-in wheels. This dual-purpose design makes it the clear choice for photographers who want home storage that can also go on location shoots. For humidity control inside the sealed case, pairing it with rechargeable silica gel packs creates a moisture-controlled environment that rivals a dry cabinet.
Pelican backs every case with a lifetime guarantee – if it breaks, they replace it. At $332 (as of March 2026), the Pelican 1510 is not cheap, but it is genuinely a buy-it-for-life product.
Pricing & Where to Buy
The Pelican 1510 with foam is priced at $331.95 (as of March 2026). Also available in a laptop-specific configuration and various color options.
- Buy on Amazon – Prime shipping available
- Check price at B&H Photo
- Check price at Adorama
- Pelican official store
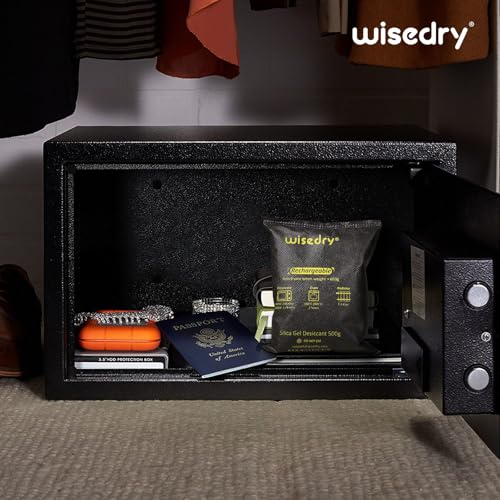
Wisedry 2 x 500 Gram Rechargeable Silica Gel Dehumidifier
Budget-conscious photographers who want basic humidity control without a dry cabinet
- Most affordable humidity control option under $25
- Rechargeable via microwave or oven – no replacement needed
- Color-changing indicator shows when recharging is needed
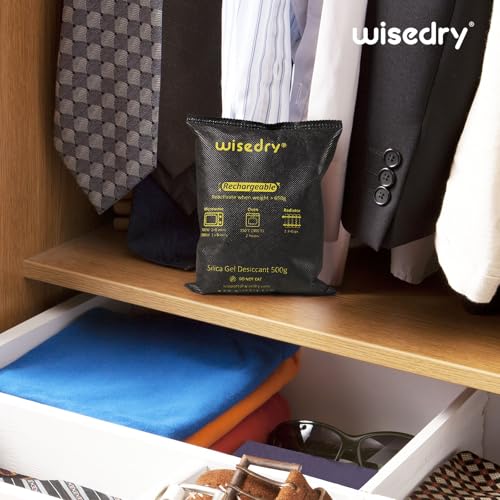
- Works in camera bags, cases, and storage containers
- 18,500+ reviews with 4.6-star rating
- Passive absorption – no precise humidity control
- Requires periodic recharging (every 2-4 weeks depending on conditions)
- Not sufficient for very humid environments on its own
Wisedry silica gel packs are the most practical entry point for humidity control. At $22 for two 500-gram packs, they cost a fraction of a dry cabinet and work inside any sealed container. The rechargeable design means no ongoing costs.
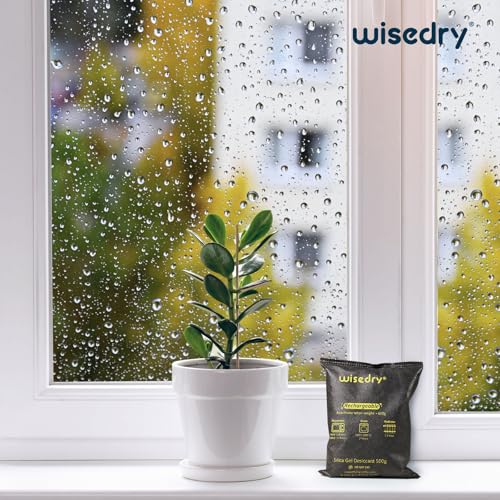
Not every photographer needs a $200+ dry cabinet. The Wisedry Rechargeable Silica Gel Packs offer practical humidity control for under $25. Each pack contains 500 grams of silica gel that absorbs moisture from the surrounding air, keeping gear dry inside camera bags, hard cases, or storage bins.
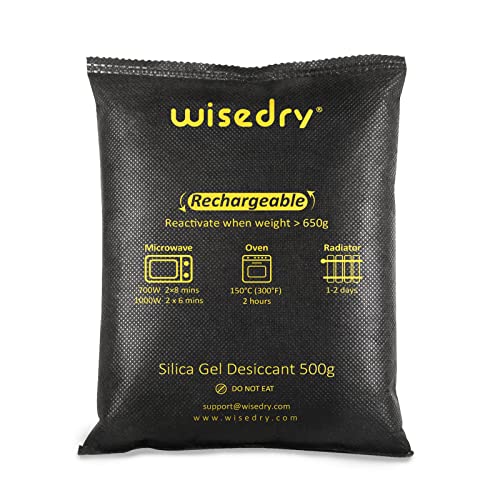
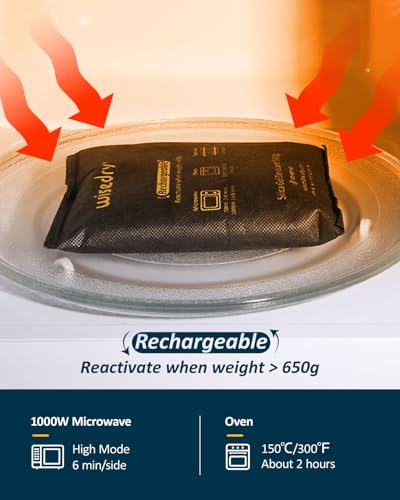


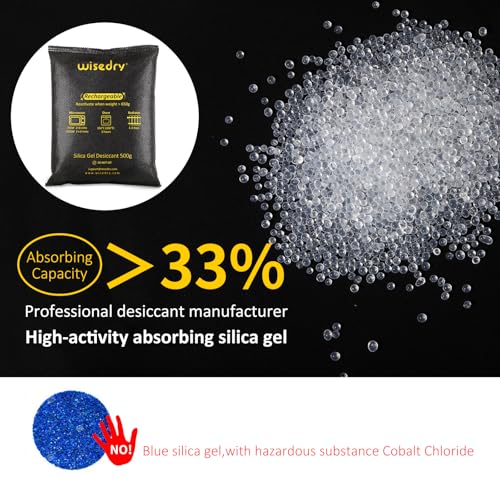
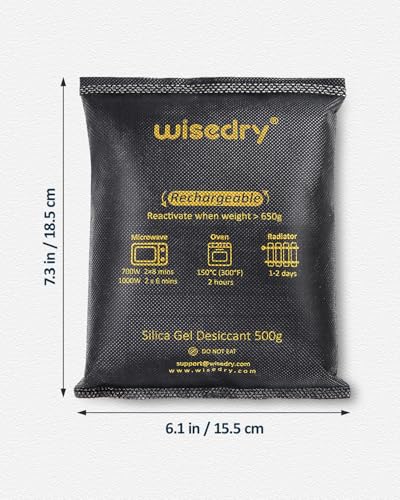
The key advantage over disposable silica gel packets is reusability. When the color-changing indicator beads turn from orange to green, the pack is saturated and needs recharging. Microwave it for a few minutes or place it in an oven at low heat, and it is ready to absorb moisture again. This cycle can be repeated hundreds of times.
With over 18,500 reviews and a 4.6-star rating, Wisedry packs are the most-reviewed camera dehumidifier product on Amazon for good reason. They work well as a standalone solution in dry-to-moderate climates, and they are an excellent supplement inside Pelican cases or other sealed containers for photographers in humid regions.
The limitation is that silica gel is passive – it absorbs moisture but cannot maintain a precise humidity level the way electronic dry cabinets can. In consistently humid environments (above 70% RH), desiccants alone may not be sufficient, and a dry cabinet becomes the better investment.
Pricing & Where to Buy
Wisedry 2-pack (2 x 500g) is priced at $21.84 (as of March 2026). Also available in smaller single packs and multi-packs for larger setups.
- Buy on Amazon – Prime shipping available
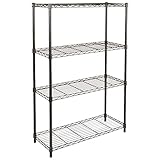
Amazon Basics 4-Shelf Heavy Duty Steel Wire Rack
Photographers who need organized, accessible storage for cases and gear
- 350 lbs per shelf capacity – handles heavy gear
- Adjustable shelf heights for different case sizes
- Under $52 – the most affordable organizational solution
- 76,000+ reviews with 4.7-star rating
- Assembly takes under 30 minutes
- No humidity or dust protection included
- Not lockable – no security features
- Wire design allows dust to settle on gear
The Amazon Basics shelf is not a standalone camera storage solution – it is an organizational tool that pairs with other products on this list. Use it to hold Pelican cases, camera bags, and dry cabinets in a dedicated gear closet for quick, organized access.
The Amazon Basics 4-Shelf Heavy Duty Wire Rack is not a storage solution on its own – it is the organizational backbone that makes other storage products more accessible. Use it to hold Pelican cases, camera bags, dry cabinets, and accessories in a single, organized location.


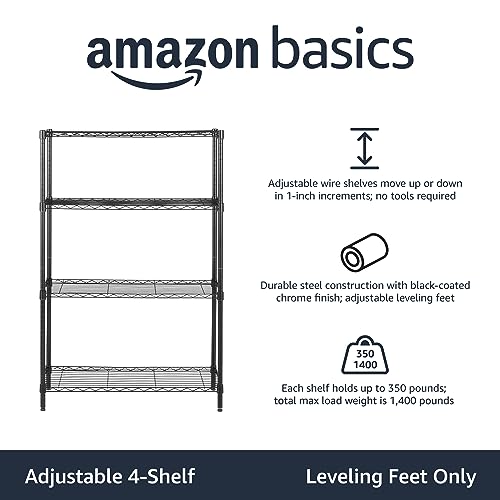


Each shelf supports up to 350 pounds, which is more than enough for even the heaviest gear collections. The adjustable shelf heights accommodate everything from a small dry cabinet to tall Pelican cases standing upright. Assembly is straightforward and takes about 20-30 minutes without tools.
The practical use case is creating a dedicated gear area – a closet, corner of an office, or spare room where all photography equipment lives in one organized spot. Place a dry cabinet on one shelf, stack hard cases on another, keep camera backpacks on a third, and use the top shelf for accessories and cleaning supplies.
At just $51 (as of March 2026) with over 76,000 reviews and a 4.7-star rating, the Amazon Basics shelf is a practical add-on for any photographer’s storage setup.
Pricing & Where to Buy
The Amazon Basics 4-Shelf Wire Rack is priced at $51.44 (as of March 2026). Available in multiple sizes and configurations.
- Buy on Amazon – Prime shipping available
Essential Camera Storage Tips
Beyond choosing the right storage products, a few habits make a significant difference in how long gear lasts:
Always use lens and body caps. This is especially critical for mirrorless cameras, where the sensor is directly exposed when the lens is removed. Dust, debris, and moisture can settle on the sensor surface. Keep front and rear caps on all lenses, and use body caps on cameras without a lens attached.
Store lenses front-element down. This prevents dust from settling on the rear element, which is harder to clean and sits closer to the sensor. For lenses with manual aperture rings, set the aperture to its narrowest setting before storage to reduce wear on the spring-loaded blades.
Remove batteries for long-term storage. Modern lithium-ion batteries are safe, but they can swell in warm conditions over time. Removing them also prevents slow discharge that degrades battery lifespan. Store batteries at 40-50% charge for optimal longevity.
Use protective UV filters on lenses. A $30 filter absorbs impacts that would otherwise damage a $1,000+ front element. Keep screen protectors on camera LCDs as well.
Choose the right location. Avoid direct sunlight, attics, garages, damp basements, and anywhere near speakers or large motors (magnetic fields affect image stabilization). The ideal spot is a climate-controlled interior room – a bedroom closet or home office.
Choose the Best Camera Storage Solution
The right camera storage solution depends on the size of the gear collection, the local climate, and the budget. For most photographers, the Ruggard 80L Dry Cabinet offers the best balance of capacity, humidity control, and reliability at a reasonable price.
For larger collections, the FORSPARK 100L provides the most space with smart humidity management. Photographers who travel frequently should consider the Pelican 1510 for its unmatched portability and protection.
On a tight budget, Wisedry silica gel packs paired with any sealed container provide genuine humidity control for under $25. And for anyone with multiple cases and bags scattered around, an Amazon Basics shelf brings organization to the setup for about $50.
Camera gear is an investment worth protecting. The cost of proper storage is always less than the cost of replacing a fungus-damaged lens or a corroded camera body.
Related Articles
Our Top Camera Storage Picks
Ruggard 80L Dry Cabinet
FORSPARK 100L Dry Cabinet
Ruggard 50L Dry Cabinet
Pelican 1510 Case
Wisedry Silica Gel Packs
Amazon Basics Heavy Duty Shelf
Disclosure/Disclaimer: As an Amazon Associate, we earn from qualifying purchases. Certain content was provided "as is" from Amazon and is subject to change or removal at any time. Product prices and availability: Amazon prices are updated daily or are accurate as of the date/time indicated and are subject to change. Any price and availability information displayed on Amazon.com at the time of purchase will apply to the purchase of this product.
