
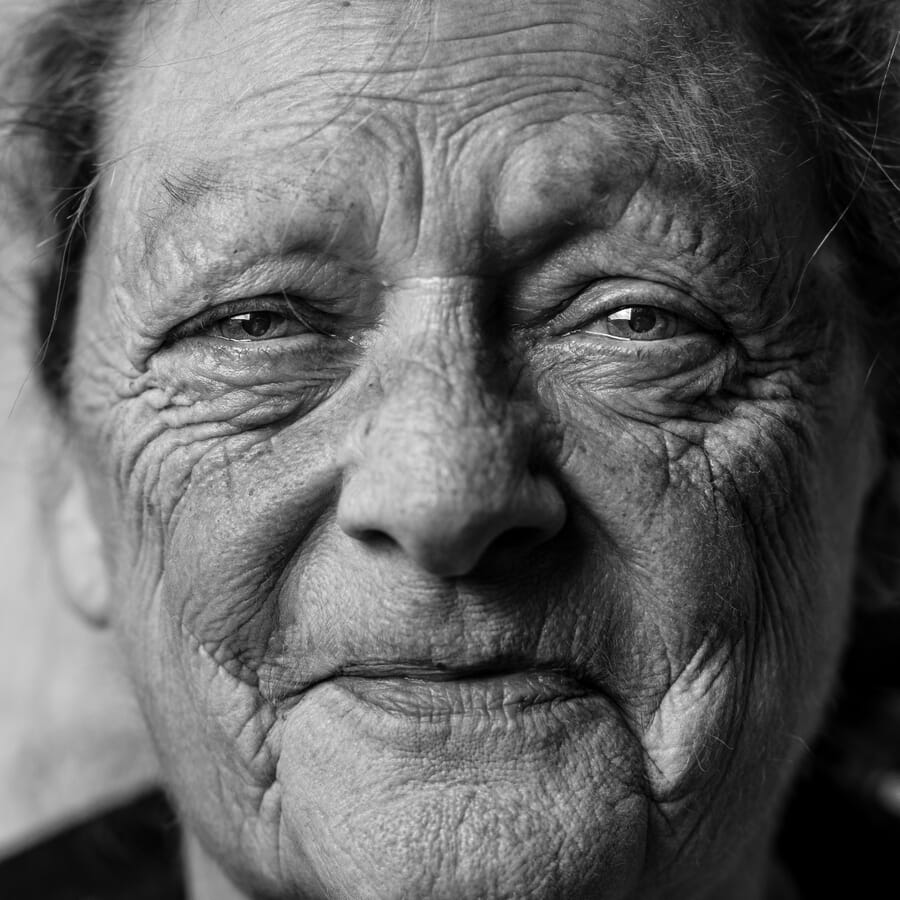
- Loop lighting is defined by a small, looping shadow beneath the subject’s nose – the most versatile portrait lighting pattern.
- Position your key light 20-45 degrees to the side and slightly above eye level for the classic loop shadow.
- It flatters nearly every face shape, making it the go-to for headshots, corporate portraits, and client work.
- You can achieve loop lighting with nothing more than a window and a white reflector.
- Understand how loop compares to Rembrandt and butterfly lighting to choose the right pattern for every shoot.
What Is Loop Lighting?
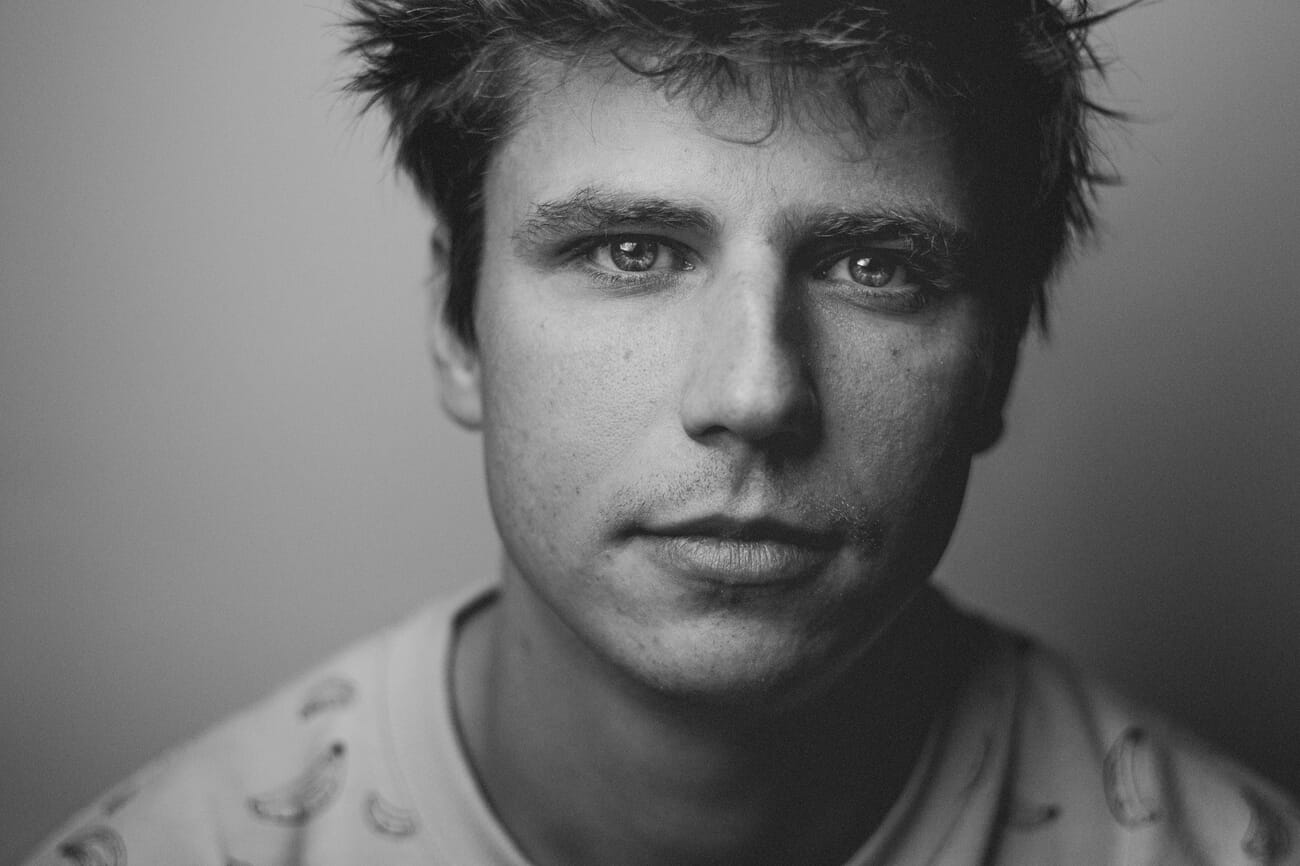
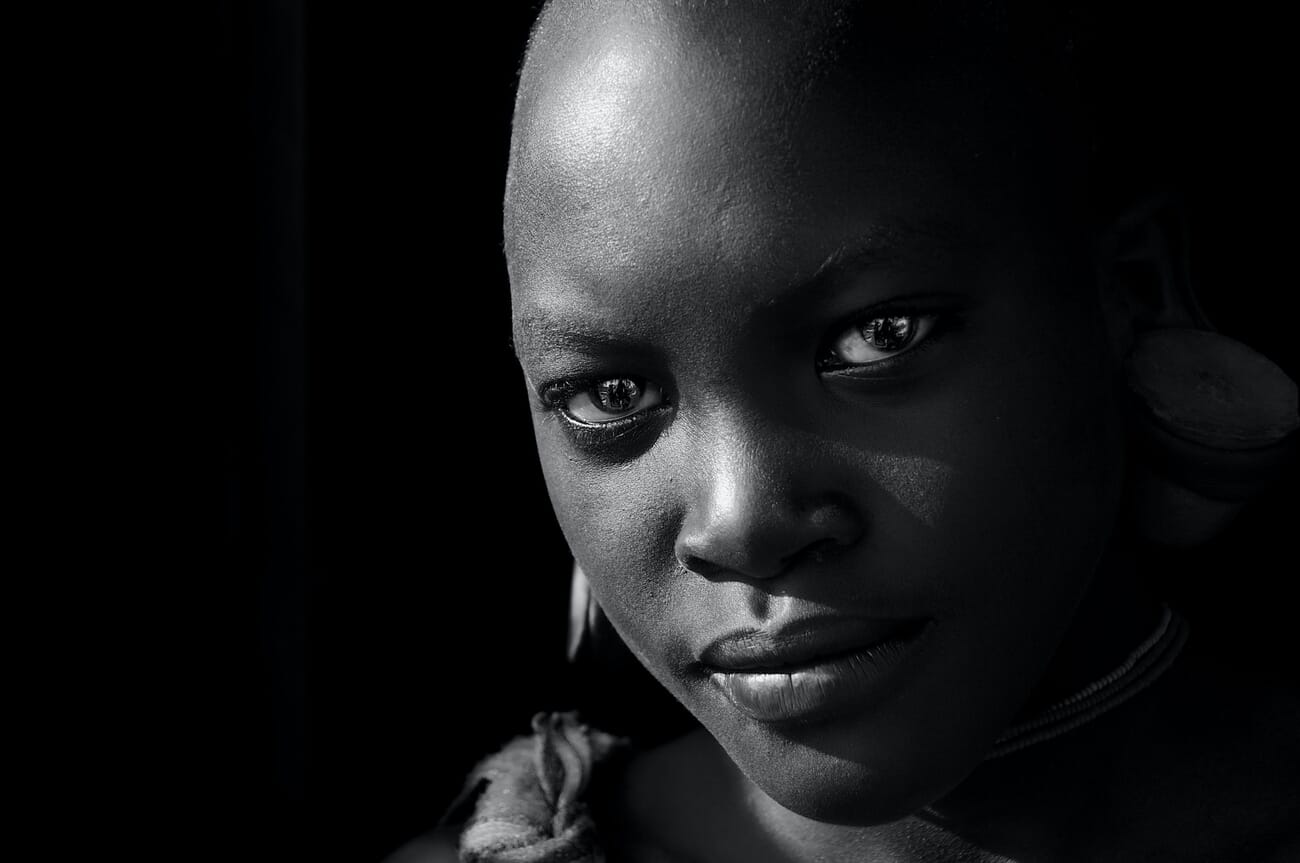
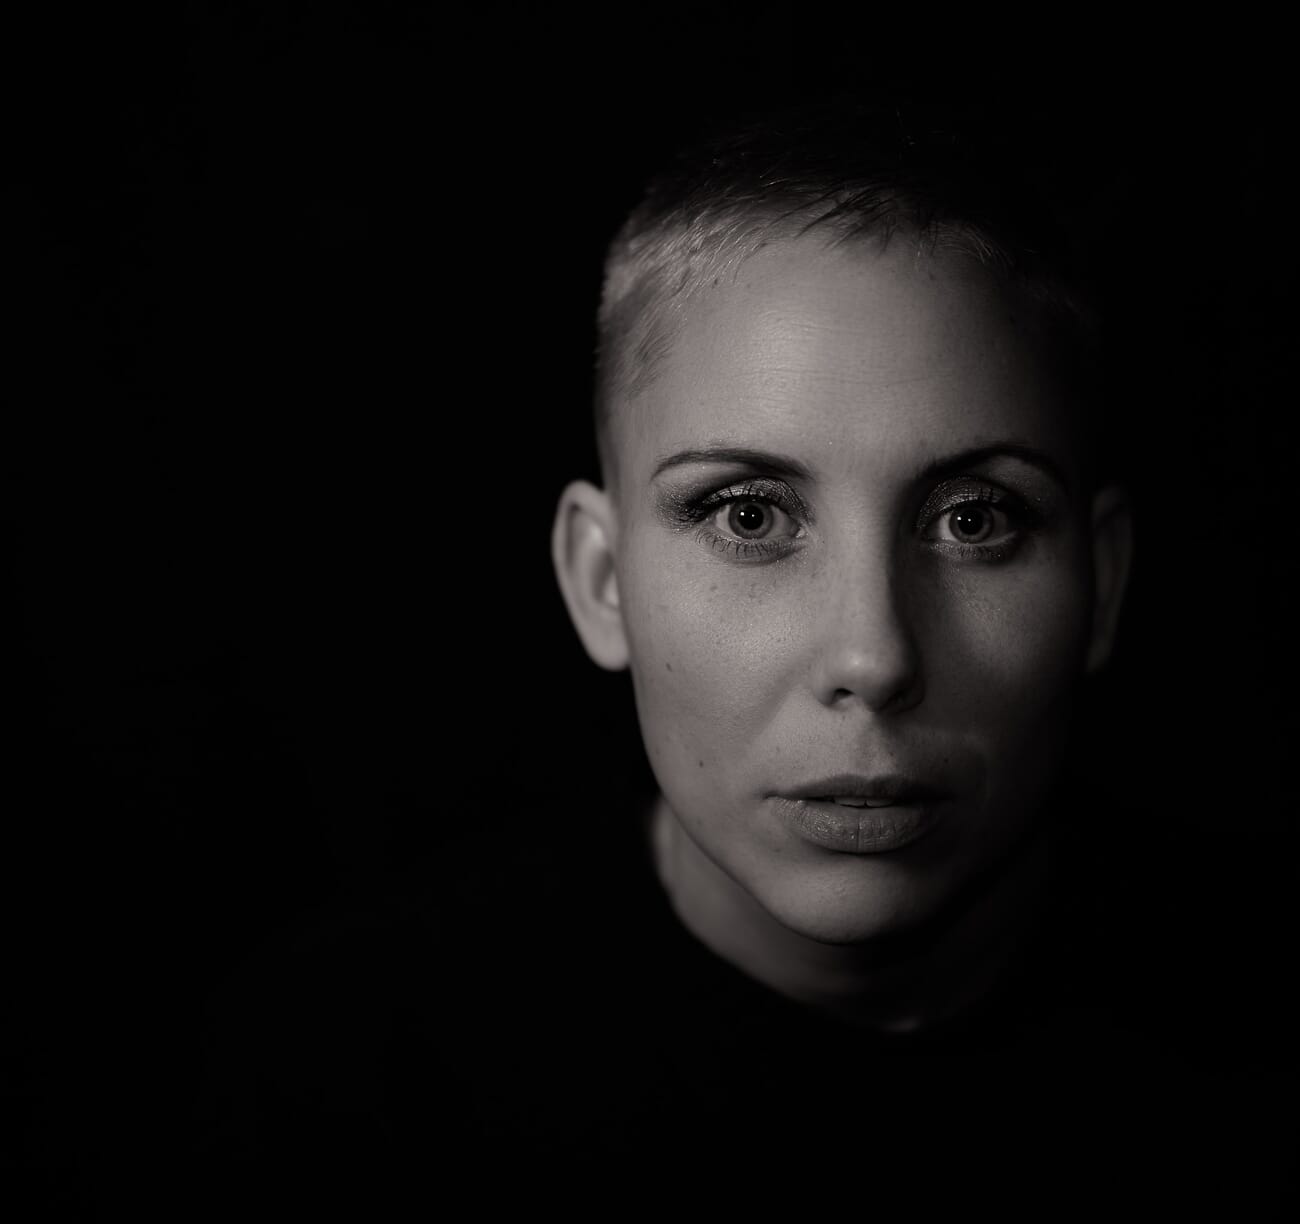
Loop lighting is one of the most widely used portrait lighting patterns in photography. It gets its name from the small, loop-shaped shadow that falls just below and to the side of the subject’s nose when a single key light is positioned slightly above and to one side of the camera.
Unlike more dramatic techniques such as Rembrandt lighting or split lighting, loop lighting keeps most of the face well-illuminated while still introducing enough shadow to create a sense of depth and dimension. The shadow is subtle – it doesn’t connect to the cheek shadow or form a closed triangle – which makes the pattern universally flattering.
This pattern sits between flat (butterfly) lighting and the more dramatic Rembrandt approach on the contrast spectrum. Photographers who want natural-looking portraits with gentle modeling – the gradual transition from highlight to shadow across the face – will find loop lighting to be the most reliable starting point. For a complete overview of all portrait lighting patterns and how they relate, see our guide to lighting patterns.
The defining characteristic to look for: a small shadow that loops downward from one side of the nose, angling slightly toward the corner of the mouth. If that shadow extends far enough to merge with the cheek shadow and create a triangle of light on the cheek, the pattern has shifted into Rembrandt territory.
When to Use Loop Lighting
Loop lighting works on a remarkably wide range of face shapes, which is why it has become the default pattern for many professional portrait photographers. Here are the situations where it excels:
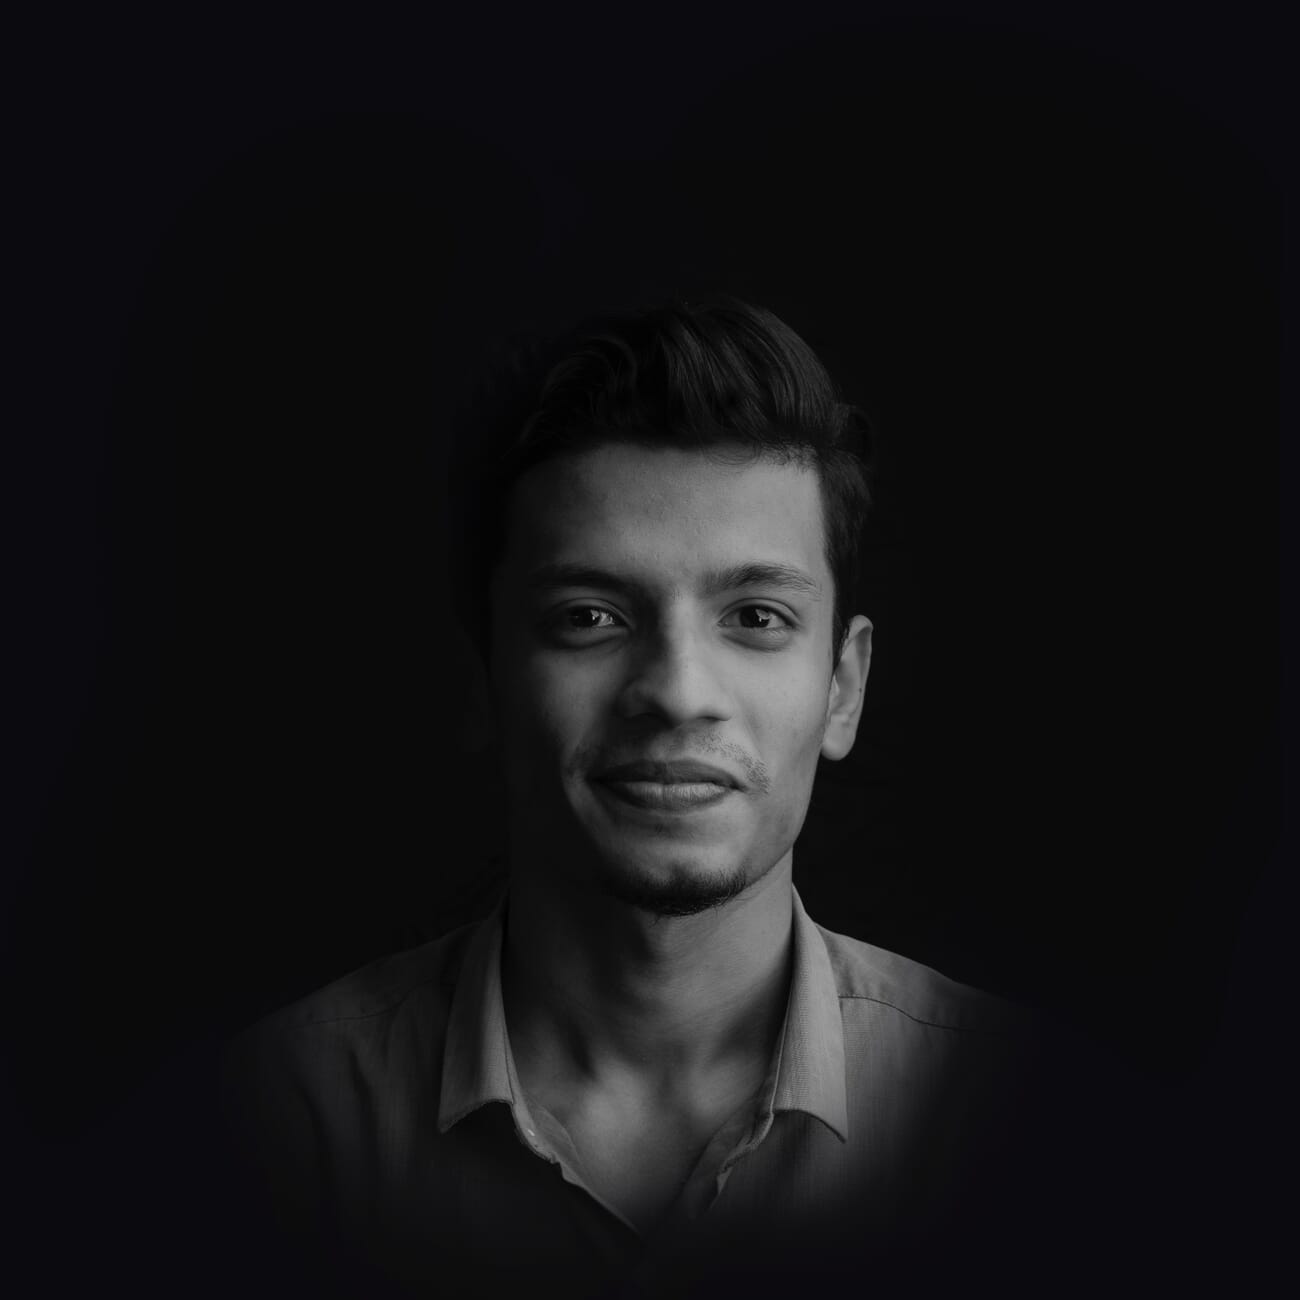
Headshots and corporate portraits. Loop lighting delivers a polished, professional look without appearing overly stylized. The gentle shadow adds dimension that flat lighting misses, while remaining subtle enough for LinkedIn profiles, company websites, and press materials.
Round or wide face shapes. The slight shadow on one side of the face creates a natural slimming effect. By allowing shadow to fall along one cheek, loop lighting visually narrows the face and adds definition to the jawline.
Oval and heart-shaped faces. These face shapes already have balanced proportions, and loop lighting complements them without overemphasizing any particular feature.
Social media portraits and content creation. For influencers, actors, and anyone building a personal brand, loop lighting provides the kind of clean, dimensional look that performs well on platforms like Instagram and TikTok. It photographs well from slightly varied angles, which is helpful during less rigidly controlled shoots.
Client work with mixed subjects. When photographing multiple people in a session – families, teams, or event attendees – loop lighting is a safe, efficient choice. It flatters most faces without requiring major adjustments between subjects, which keeps the session moving.
When to consider a different pattern: If the goal is high contrast, dramatic portraits, Rembrandt or split lighting will deliver stronger shadows and more intensity. For beauty and fashion work where even, front-facing illumination is key, butterfly lighting may be the better starting point.
Loop Lighting Setup: Step-by-Step Guide
Setting up loop lighting is straightforward, which is one reason it’s often the first pattern taught to new portrait photographers. The following steps walk through the process from choosing a light source to adding finishing touches.
Step 1: Choose Your Light Source
Loop lighting can be achieved with virtually any single-point light source. The choice depends on budget, shooting environment, and personal preference:
Speedlights and strobes. The most common choice for studio portrait work. A single speedlight mounted on a light stand works well for beginners, while monolights and studio strobes offer more power and faster recycle times for professional sessions.
LED continuous lights. An increasingly popular option, especially for photographers who also shoot video. Continuous lights provide constant illumination, making it easy to see exactly how the loop shadow falls before taking a shot.
Natural window light. A large window on an overcast day produces beautiful, soft light that’s perfectly suited for loop lighting. This option is covered in detail in the natural light section below.
The key principle: loop lighting requires a single dominant light source (the key light) positioned off-axis from the camera. Whether that source is a $50 speedlight or a $2,000 strobe, the pattern depends on placement, not price.
Step 2: Position Your Key Light
Key light placement is what defines loop lighting. Two variables matter: the horizontal angle and the height.
Horizontal angle: 20-45 degrees off-center. Position the light to one side of the camera, angled toward the subject’s face. At 20 degrees, the shadow will be quite small and subtle. At 45 degrees, the shadow becomes more pronounced – approaching Rembrandt territory. Most photographers find the sweet spot around 30-40 degrees.
Height: slightly above eye level. The light should be raised so it angles downward toward the subject at roughly 15-25 degrees. If the light is at the same height as the face, it creates flat, dimensionless illumination. If it’s too high, the nose shadow stretches too far down and eye sockets fill with shadow, creating an unflattering “raccoon eyes” effect.
The check: Look at the shadow beneath the subject’s nose. It should angle downward and slightly toward the far cheek, but it should not touch or merge with the cheek shadow. If it does, the light has moved too far to the side – bring it back toward the camera axis. Understanding how light direction shapes your images will help you nail this placement instinctively.

Step 3: Modify the Light
Bare, unmodified light produces hard-edged shadows that can look unflattering in portraits. A light modifier softens and shapes the output, and the choice of modifier significantly affects the final result:
Softboxes are the workhorse of portrait photography. Rectangular or octagonal softboxes (24×36 inches or larger) produce even, wraparound light with soft shadow transitions. The larger the softbox relative to the subject, the softer the light.
Shoot-through umbrellas offer an affordable, portable alternative. They spread light over a wider area than softboxes, which softens shadows further but can also reduce contrast.
Beauty dishes split the difference between hard and soft light. They produce a focused, punchy quality with defined but not harsh shadows – a popular choice for fashion, editorial, and headshot work.
General rule: Larger modifiers and closer placement produce softer light. Smaller modifiers and greater distance produce harder, more defined shadows. For loop lighting, moderate softness is usually ideal – enough to see the loop shadow clearly, but not so hard that every skin texture is amplified.
Step 4: Add a Fill Light or Reflector
The key light alone will produce a noticeable difference in brightness between the lit and shadow sides of the face. Fill light reduces that contrast (the “lighting ratio”) to taste.
Reflector (simplest option). A white or silver reflector placed on the opposite side of the key light bounces some illumination back into the shadows. A collapsible 5-in-1 reflector is one of the most cost-effective tools in portrait lighting.
Second light (more control). A dedicated fill light – typically set 1-2 stops lower than the key light – provides precise, repeatable control over shadow density.
Lighting ratios to consider: A 2:1 ratio (one stop difference) produces a bright, open look suitable for corporate headshots. A 3:1 or 4:1 ratio introduces more noticeable shadow, which works well for creative portraits. The loop shadow should remain visible regardless of the fill level – if the fill is too strong, the loop pattern disappears into flat light.
Step 5: Add a Background or Rim Light
While not strictly necessary, a separation light elevates the portrait from a simple snapshot to a more polished, three-dimensional image.
Rim light (hair light). Positioned behind and above the subject, angled down toward the head and shoulders, a rim light creates a thin highlight along the edges of the hair and body. This separates the subject from the background, adding a sense of depth.
Background light. A separate light aimed at the backdrop provides tonal control independent of the subject lighting. Placing a grid or snoot on the background light creates a focused hotspot behind the subject’s head, adding visual interest.
Practical tip: Start with just the key light and fill, and evaluate the image. If the subject blends into the background or the image feels flat, add a rim or background light. Many excellent loop-lit portraits use only two lights total. For a quick refresher on exposure settings for studio portraits, see our camera settings cheat sheet.
Loop Lighting with Natural Light
Studio strobes and LEDs are not the only way to achieve loop lighting. A single window can serve as an excellent key light source – and many portrait photographers prefer the organic quality of natural window light for this pattern.
Choose the right window. A medium to large window that does not receive direct sunlight works best. North-facing windows (in the northern hemisphere) provide consistent, soft light throughout the day. If direct sun is streaming through, hang a white sheet or sheer curtain to diffuse it.
Position the subject. Place the subject 2-4 feet from the window, turned so the window is roughly 30-45 degrees off to one side. The nose shadow should appear on the side of the face farthest from the window. If the subject faces the window directly, the lighting will be flat. If they turn too far away, the lighting shifts toward split or Rembrandt.
Control the height. With window light, the light typically enters at a horizontal angle rather than from above. To introduce the downward component that defines loop lighting, have the subject sit or choose a window where the sill is above the subject’s eye level.
Add fill. Place a white reflector or foam-core board on the opposite side of the subject from the window. This bounces window light back into the shadows and reduces contrast.
Best time of day. Overcast days are ideal because the cloud layer acts as a giant softbox, producing even, diffused light regardless of window orientation. On sunny days, early morning and late afternoon provide softer, warmer light than the harsh midday sun.
Common Loop Lighting Mistakes
Loop lighting is forgiving, but there are several common pitfalls that can undermine the pattern or produce unflattering results:
Key light positioned too high. When the light source is raised too far above the subject, the nose shadow extends down toward the upper lip or even the chin, and the eye sockets fill with dark shadows. The fix: lower the light until the nose shadow falls only slightly below the nose.
Key light too far to the side. Moving the light beyond 45 degrees off-center transitions the pattern from loop into Rembrandt – or even split lighting. The telltale sign is a nose shadow that connects to the cheek shadow, forming a triangle of light on the cheek.
No fill light or reflector. While high-contrast loop lighting can work for editorial and fine-art portraits, skipping fill entirely in standard portrait sessions often results in shadows that are too deep, losing detail on the dark side of the face.
Using an unmodified, hard light source. A bare flash or strobe produces sharp-edged shadows that accentuate skin texture, wrinkles, and blemishes. For most portrait subjects, some form of diffusion dramatically improves the quality of the loop shadow.
Ignoring the catchlights. The small reflection of the light source in the subject’s eyes adds life and energy to a portrait. In loop lighting, the catchlight should appear in the upper portion of the eye, typically at the 10 o’clock or 2 o’clock position. If there’s no visible catchlight, the light may be too high or angled too far to the side.
Loop vs Rembrandt vs Butterfly Lighting
Loop lighting is one of several classic portrait lighting patterns that every photographer should understand. Here’s how the three most common patterns compare:
Loop Lighting
The key light sits 20-45 degrees to the side and slightly above the subject. A small nose shadow loops downward but does not connect to the cheek shadow. The result is gentle, dimensional lighting that flatters most face shapes. It’s the most versatile of the three patterns and the default choice for general portrait work.
Rembrandt Lighting
Named after the Dutch painter who frequently depicted subjects with this dramatic illumination, Rembrandt lighting places the key light further to the side (roughly 45-60 degrees) and higher. The nose shadow extends far enough to connect with the cheek shadow, creating a distinctive triangle of light on the shadowed cheek beneath the eye. This pattern conveys mood, gravitas, and drama.
The key difference from loop lighting: in Rembrandt, the triangle of light on the shadowed cheek is fully enclosed (shadow on all sides), while in loop lighting, the nose shadow remains separate from the cheek shadow.
Butterfly Lighting (Paramount Lighting)
Butterfly lighting places the key light directly in front of and above the subject – centered on the camera axis. This produces a symmetrical shadow directly beneath the nose, shaped like a butterfly. The pattern minimizes texture and wrinkles, making it a classic choice for beauty, glamour, and fashion photography.
The tradeoff: butterfly lighting provides almost no side-to-side dimension and can flatten round face shapes further. It works best on subjects with defined bone structure.
Which Pattern to Choose?
Start with loop lighting as the default. It works on the widest range of subjects and situations. Move to Rembrandt when the portrait calls for drama or intensity. Switch to butterfly when shooting beauty or fashion work on subjects with strong cheekbones. For the most dramatic, high-contrast results, split lighting takes things even further by illuminating only half the face.
Frequently Asked Questions
What is the difference between loop lighting and Rembrandt lighting?
The difference comes down to how far the nose shadow extends. In loop lighting, the shadow falls below and to the side of the nose but remains separate from the cheek shadow. In Rembrandt lighting, the nose shadow connects with the cheek shadow to form a fully enclosed triangle of light on the shadowed cheek. Rembrandt uses a more extreme key light angle (45-60 degrees vs. 20-45 degrees).
Can loop lighting be used for group photos?
Loop lighting is primarily a single-subject pattern because the shadow angle is specific to one face orientation. In group settings, a modified approach can work using a large, soft key light positioned slightly off-center, but the loop shadow will only be visible on subjects facing the camera at the correct angle.
Which side should the key light be on?
There is no strict rule about left vs. right placement. Placing the key light on the side closer to the camera (“broad lighting”) creates a wider, more open look. Placing it on the far side (“short lighting”) creates a slimming, more sculpted effect. Short lighting with a loop pattern is particularly effective for subjects with round or wide faces.
What camera settings work best for loop lighting?
With strobes, a typical starting point is ISO 100, f/5.6 to f/8, and a shutter speed at or below the camera’s flash sync speed (usually 1/160 to 1/250 second). With continuous LED lights, the aperture and ISO may need to open up since continuous sources are generally less powerful. For a complete reference, see our portrait camera settings guide.


