
- Split lighting places the light at exactly 90 degrees to the subject, illuminating one half of the face while the other half falls into shadow.
- It creates the most dramatic contrast of any portrait lighting pattern – ideal for editorial, fine art, and character-driven work.
- The setup is remarkably simple: one light, 90 degrees to the side, at eye level or slightly above.
- Natural light works just as well as studio strobes – a window or doorway can produce perfect split lighting.
- Understand how split compares to Rembrandt and loop lighting to choose the right pattern for the mood you want.
What Is Split Lighting?
Split lighting is a portrait lighting pattern where the light source is positioned at exactly 90 degrees to the subject, dividing the face into two equal halves – one brightly lit, the other in deep shadow. The line of division runs straight down the center of the face, along the bridge of the nose.
Of all the standard portrait lighting patterns, split lighting produces the highest contrast and the most dramatic result. There are no soft transitions, no gentle shadows creeping across the cheek. It is bold, binary, and visually striking.
The pattern gets its name from the literal split it creates on the face. When executed properly, the dividing line between light and shadow follows the nose ridge precisely. If light spills onto the shadow-side cheek and creates a small triangle, the pattern has shifted into Rembrandt lighting territory. If the shadow is even smaller and doesn’t reach the cheek at all, it’s loop lighting.
Split lighting is not a flattering, universally safe pattern. It emphasizes texture, reveals asymmetry, and creates an intense mood. That’s exactly why photographers choose it – when drama is the goal, nothing else comes close.
When to Use Split Lighting
Split lighting excels in specific contexts where its dramatic intensity serves the image rather than distracting from it:
Editorial and fine art portraits. The stark contrast of split lighting immediately signals mood – mystery, intensity, introspection. It is a favorite of editorial photographers shooting for magazines, album covers, and artistic portfolios where visual impact matters more than conventional flattery.
Character-driven portraits. Subjects with strong, interesting features – deep wrinkles, prominent bone structure, textured skin, distinctive facial hair – come alive under split lighting. The hard shadow edge accentuates every surface detail, turning features into visual stories.
Film noir and cinematic looks. The split pattern is deeply rooted in cinema. Film noir directors used single hard lights to create exactly this kind of dramatic half-face illumination, and the look remains a staple of cinematic portrait photography.
Creative and experimental work. Combined with colored gels, textured backgrounds, or intentional motion blur, split lighting serves as a foundation for more experimental portrait styles. The clean division of light and dark provides a strong visual structure that supports bold creative choices.
When to choose a different pattern: For client headshots, family portraits, or situations where the subject needs to look approachable and evenly lit, split lighting is usually too intense. Loop lighting or Rembrandt lighting deliver drama with more subtlety and broader flattery.
Split Lighting Setup: Step by Step
Split lighting is one of the easiest patterns to set up. It requires minimal equipment and follows a straightforward formula.
Step 1: Gather Your Equipment
At minimum, split lighting requires a single light source. That can be a studio strobe, a speedlight on a light stand, a continuous LED panel, or even a window. The pattern depends entirely on placement, not on the type or expense of the light.
A light modifier is recommended but optional. A bare flash creates the hardest, most defined shadow edge – dramatic but unforgiving on skin. A small softbox or beauty dish softens the transition slightly while preserving the split character. A large softbox or umbrella will soften it further, which may reduce the dramatic impact.
Step 2: Position the Light at 90 Degrees
Place the light directly to one side of the subject at a 90-degree angle from the camera-subject axis. The light should face the subject’s ear, not their face. This perpendicular positioning is what creates the clean, center-line split.
Height: Start with the light at the subject’s eye level. This creates the most symmetrical split. Raising the light slightly (15-20 degrees above eye level) adds subtle shadow under the brow and cheekbone on the lit side, which can add depth. Avoid raising it too high – the shadow will creep across the face unevenly and break the clean split.
Subject position: The subject must face the camera directly, looking straight ahead. Even a slight turn of the head toward or away from the light will shift the pattern – toward the light produces Rembrandt, away from the light leaves even less of the face illuminated.
Distance: Moving the light closer creates a softer shadow transition (the light source appears larger relative to the subject). Moving it further away creates a harder, sharper edge. For the most defined split, place the light 4-6 feet from the subject.
Step 3: Dial In Your Camera Settings
Expose for the lit side of the face. Use spot metering aimed at the bright cheek or forehead, and let the shadow side go dark. With strobes, a typical starting point is ISO 100, f/5.6 to f/8, and shutter speed at flash sync (1/160-1/250s). With continuous lights, you may need ISO 400-800 depending on the light’s output.
Shoot in RAW format. The extreme tonal range of split lighting means you’ll want maximum flexibility in post-processing to fine-tune the shadow density and highlight detail. For a quick refresher on exposure settings, grab our camera settings cheat sheet.
Step 4: Refine with Fill, Background, and Gels
Fill light or reflector (optional). Pure split lighting means zero fill – the shadow side is completely dark. For a slightly softer version, add a white reflector on the shadow side to bounce a small amount of light back into the face. This preserves the split character while revealing subtle detail in the shadows. A silver reflector adds more punch; a black flag (negative fill) on the shadow side absorbs ambient bounce and deepens the shadows even further.
Background light (optional). A separate light aimed at the backdrop from behind the subject creates a subtle halo that separates the subject’s dark side from a dark background. Without it, the shadow side of the face can merge invisibly with a black backdrop – which may or may not be the desired effect.
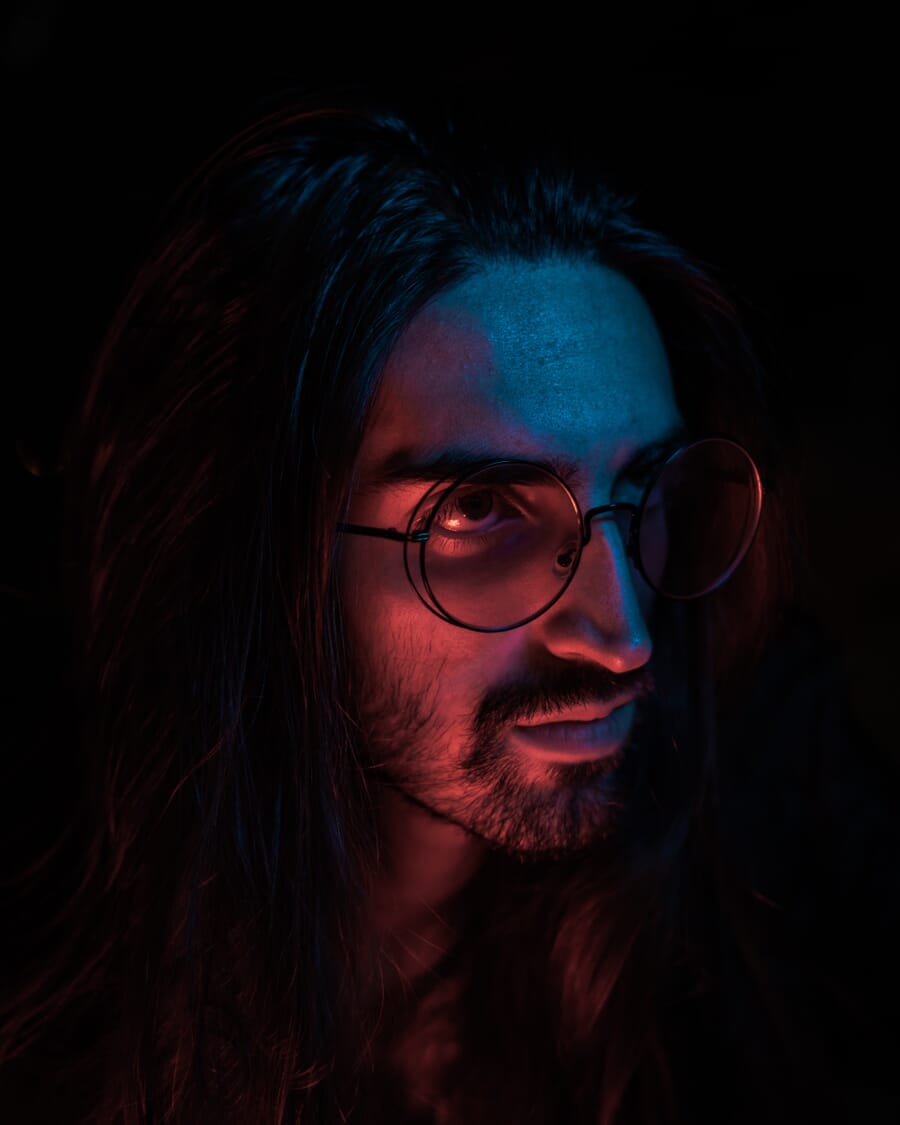
Colored gels. Split lighting pairs beautifully with colored gels for creative effect. Try complementary colors (blue key light, orange fill) or use a single gel on the key light against a differently colored background. The clean division of light and dark makes gel effects particularly striking.
Natural Light vs Studio Split Lighting
Split lighting doesn’t require a studio. Natural light sources can produce the same pattern with a distinct quality that many photographers prefer.
Window Light
Position the subject directly beside a window, facing the camera with the window at exactly 90 degrees. Close curtains on other windows and turn off room lights to eliminate ambient fill. The window becomes the key light, and the room’s darkness creates the shadow side.
Window split lighting tends to produce softer shadow transitions than studio strobes because the window acts as a large light source. For harder edges, use a smaller window or move the subject further from it. For a deeper look at how light direction shapes your images, see our dedicated guide.
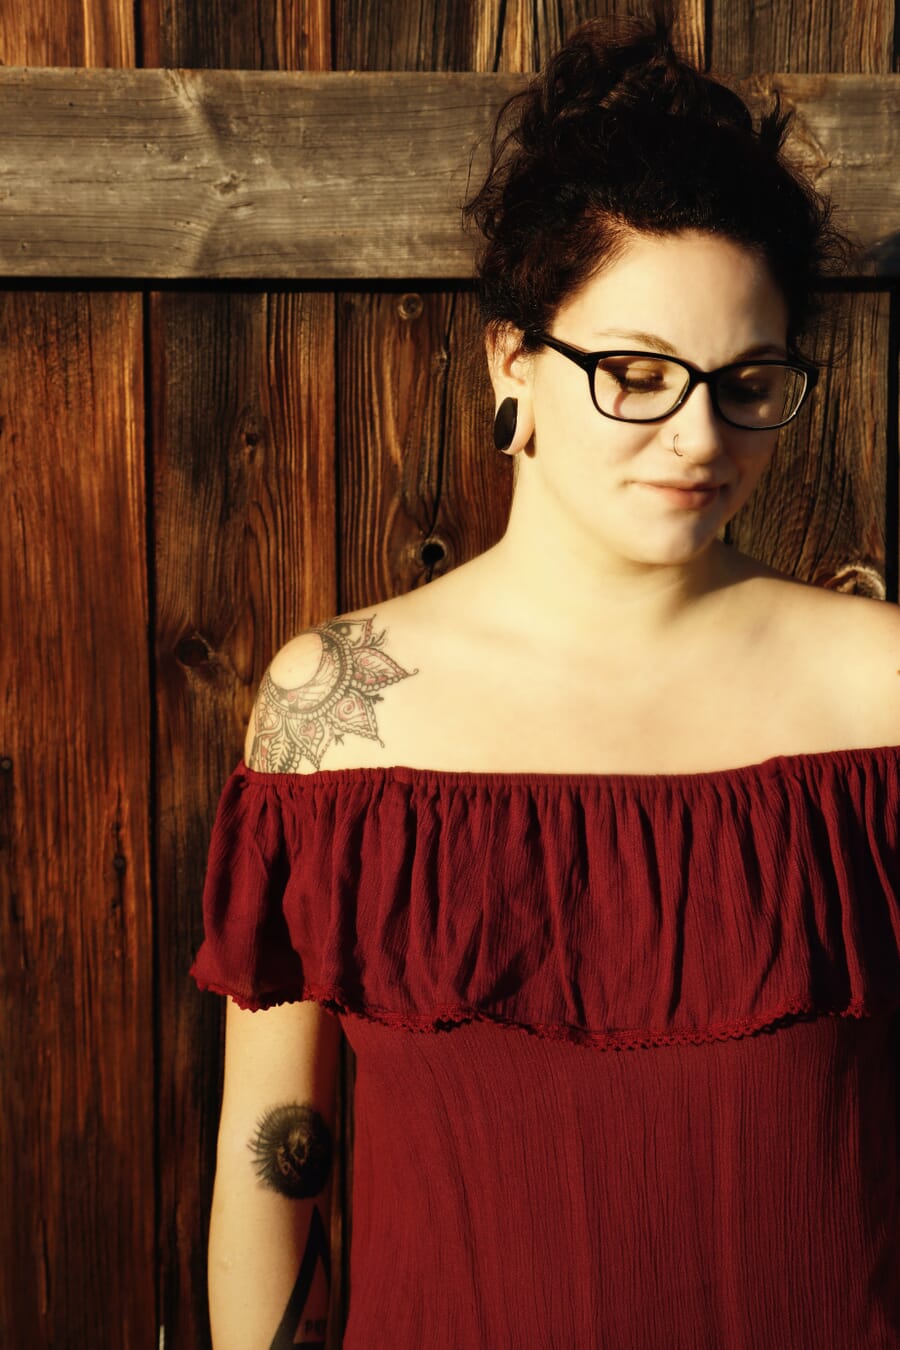
Outdoor Natural Light
The setting sun at golden hour provides ideal conditions for natural split lighting outdoors. Position the subject so the sun hits them from directly to one side. The low angle creates hard, warm light on one half of the face while the other falls into cool shadow.
Doorways, alleys, and gaps between buildings also create natural split conditions as harsh sunlight streams through narrow openings, lighting one side of a subject while the surrounding shade keeps the other side dark.
Studio Advantages
Studio strobes and continuous lights offer precise, repeatable control. You can adjust power output, swap modifiers, add gels, and fine-tune the distance and angle down to the centimeter. The results are consistent from shot to shot, which matters for commercial work and sessions with multiple subjects.
Natural light is beautiful but unpredictable – clouds shift, the sun moves, and ambient light bounces off nearby surfaces in ways you can’t fully control. Both approaches have their strengths; the best choice depends on the mood you’re after and the practical constraints of the shoot.
Split Lighting vs Rembrandt vs Loop Lighting
These three patterns form a continuum of dramatic intensity, all controlled by the horizontal angle of the key light:
- Loop lighting (20-45 degrees): A small shadow loops below the nose without reaching the cheek shadow. The most flattering and versatile pattern – safe for nearly any subject.
- Rembrandt lighting (45-60 degrees): The nose shadow connects to the cheek shadow, forming a triangle of light on the shadow-side cheek. Dramatic but still shows most of the face.
- Split lighting (90 degrees): A clean, center-line division with exactly half the face in shadow. Maximum drama, minimum flattery.
The progression is simple: as the light moves further to the side, contrast increases and the mood becomes more intense. Start with loop lighting for safe, flattering results. Move to Rembrandt for controlled drama. Push to split for the most extreme, high-contrast effect.
Tips for Better Split Lighting Portraits
- Watch the nose bridge. The nose is the dividing line. If light spills past the nose onto the shadow cheek, nudge the light further to the side or have the subject turn their head slightly away from the light.
- Check both eyes. In true split lighting, the shadow-side eye may have no catchlight (the bright reflection of the light source). This creates a moody, intense look. If you want a catchlight in both eyes, add a subtle reflector on the shadow side.
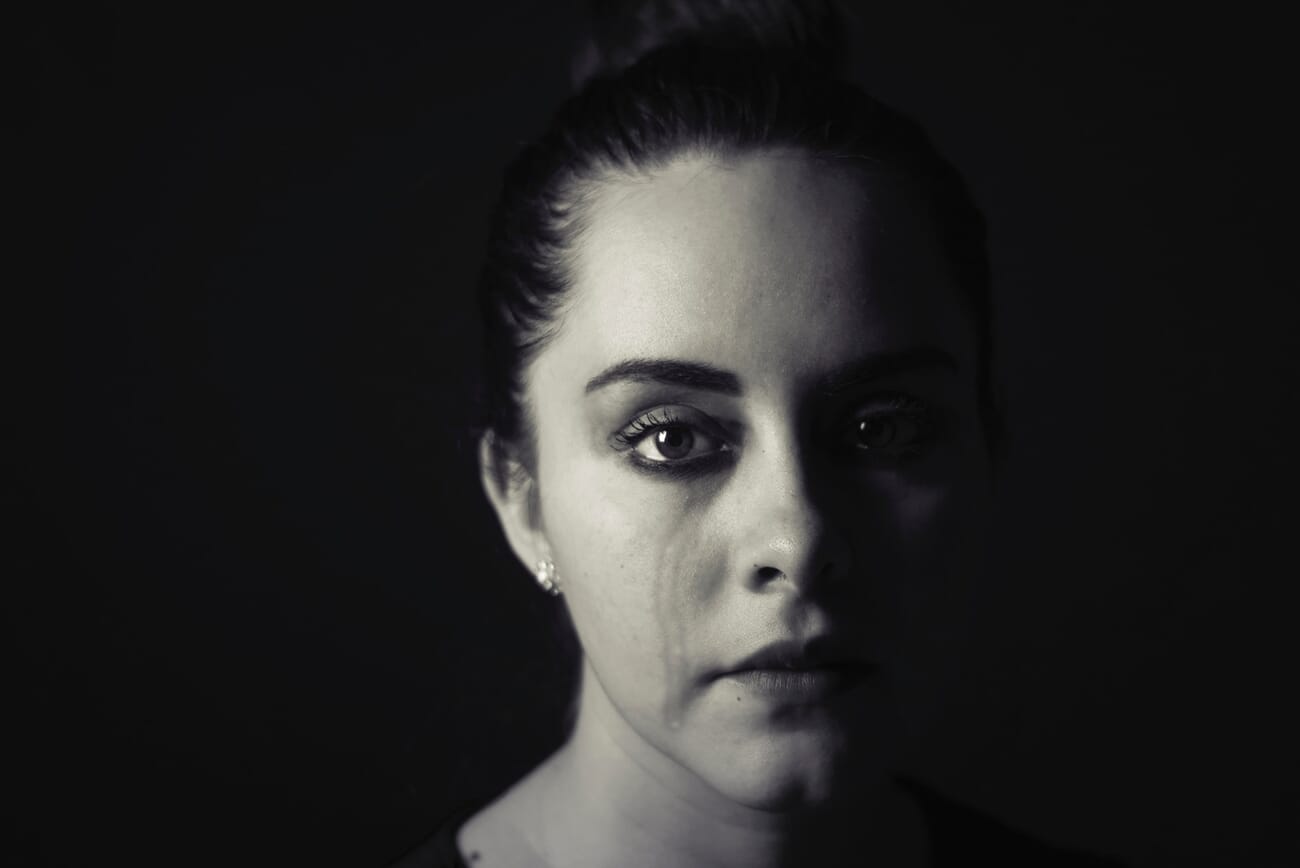
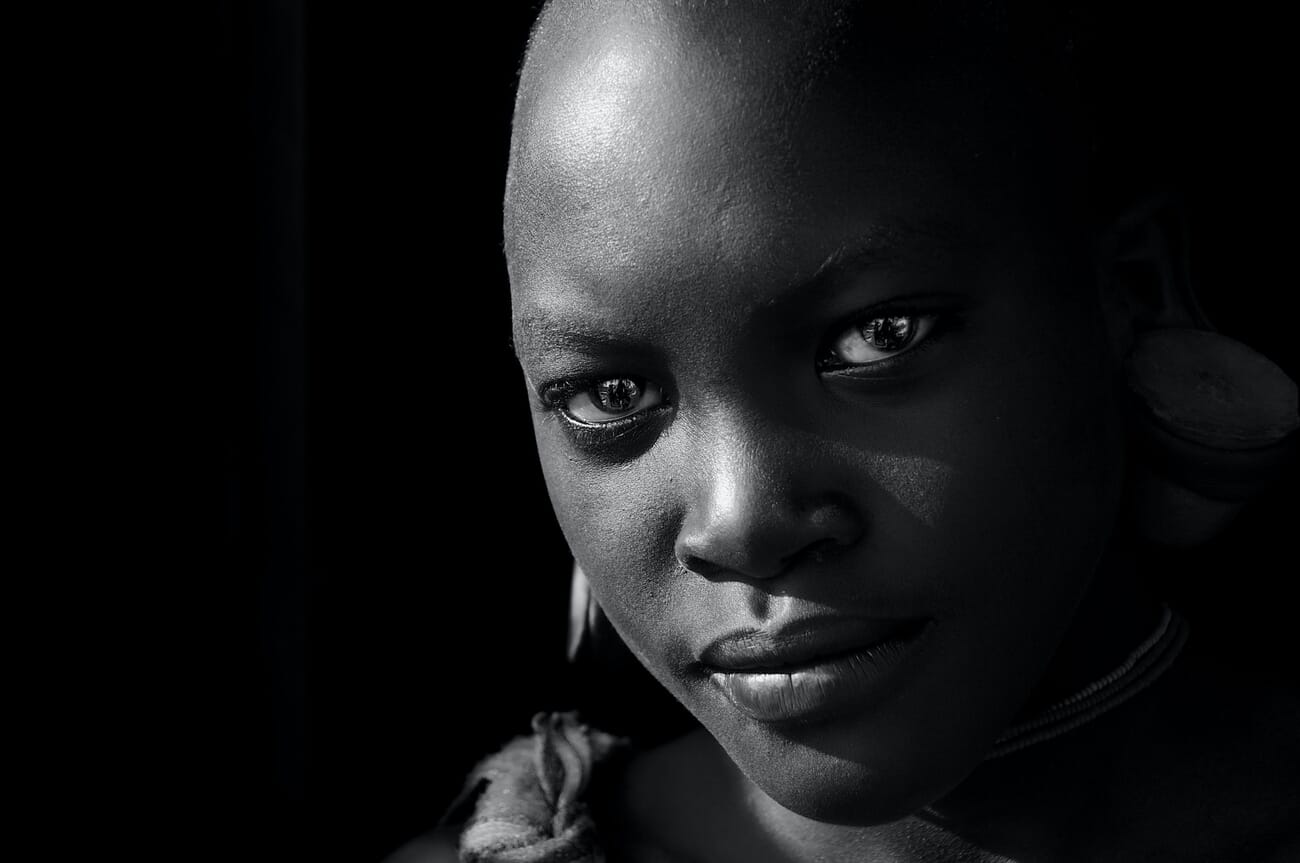
- Consider black and white. Split lighting and monochrome are natural partners. The bold tonal contrast translates beautifully when color is removed, emphasizing shape and texture.
- Use a dark background. A black or very dark gray background reinforces the dramatic mood. If the background is too bright, it competes with the lighting pattern and reduces the visual impact.
- Embrace asymmetry. Not every face is perfectly symmetrical. Choosing which side to light can emphasize or downplay asymmetric features. Try lighting from both sides and compare the results.
Frequently Asked Questions
What is split lighting in photography?
Split lighting is a portrait lighting pattern where a single light source is placed at exactly 90 degrees to the subject, illuminating one half of the face while the other half falls into deep shadow. The dividing line runs down the center of the face along the nose bridge.
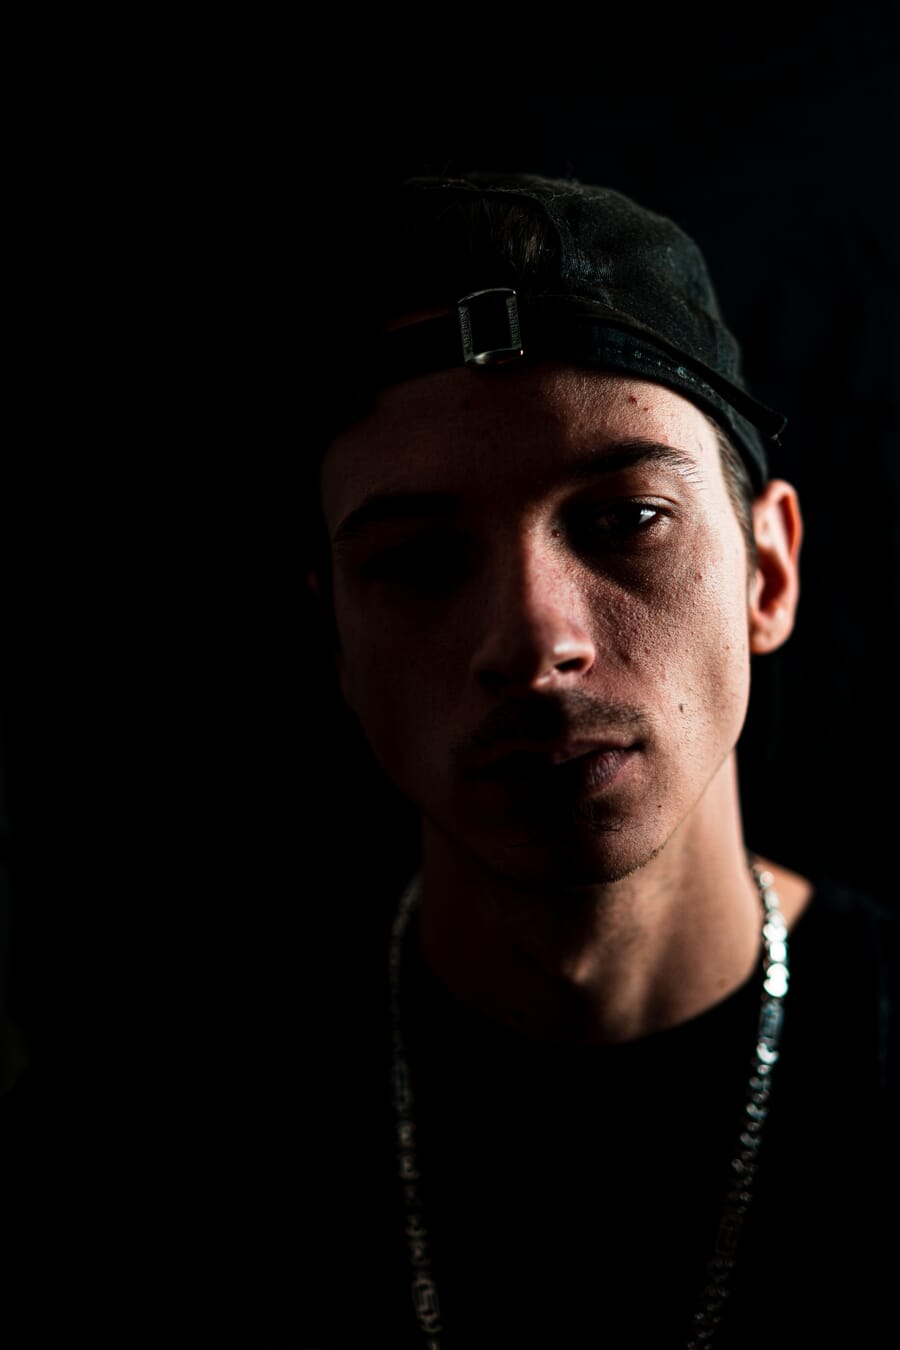
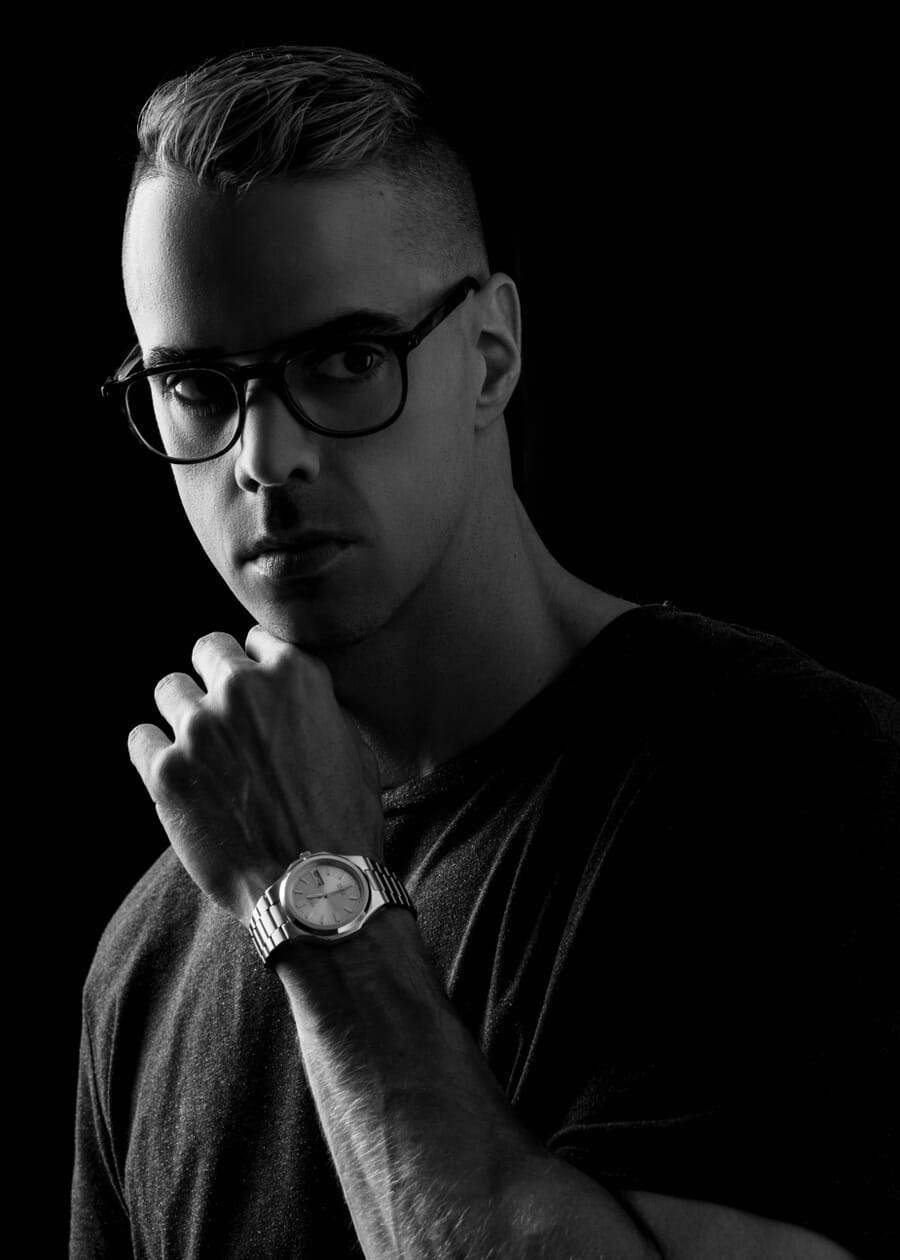
Is split lighting good for male or female portraits?
Split lighting works for any gender when the goal is dramatic intensity. It is more commonly used in male portraits because the hard shadows accentuate strong jaw lines and facial texture. For female subjects, it’s popular in fashion, editorial, and fine-art contexts where conventional flattery is less important than visual impact.
What is the difference between split lighting and Rembrandt lighting?
The key difference is light angle and shadow coverage. Split lighting uses a 90-degree light angle, dividing the face exactly in half. Rembrandt lighting uses a 45-60 degree angle, which allows some light to cross the nose and create a triangle-shaped highlight on the shadow-side cheek. Rembrandt is dramatic but less extreme than split.
Can you do split lighting with natural light?
Yes. Position the subject beside a window with the window at 90 degrees to the camera. Close other windows and turn off room lights so only the window illuminates one side of the face. Outdoors, the setting sun at golden hour provides similar side lighting for natural split portraits.


