- Rembrandt lighting is defined by a triangle of light on the shadow-side cheek, created by positioning the key light at 45-60 degrees.
- Named after Dutch master Rembrandt van Rijn, who used this natural light pattern in countless paintings.
- The setup requires just one light at 45 degrees to the side and slightly above the subject.
- Choose between short and broad Rembrandt to slim or widen the face depending on your subject.
- Understand how Rembrandt compares to loop and split lighting to pick the right drama level for every shoot.
What Is Rembrandt Lighting?
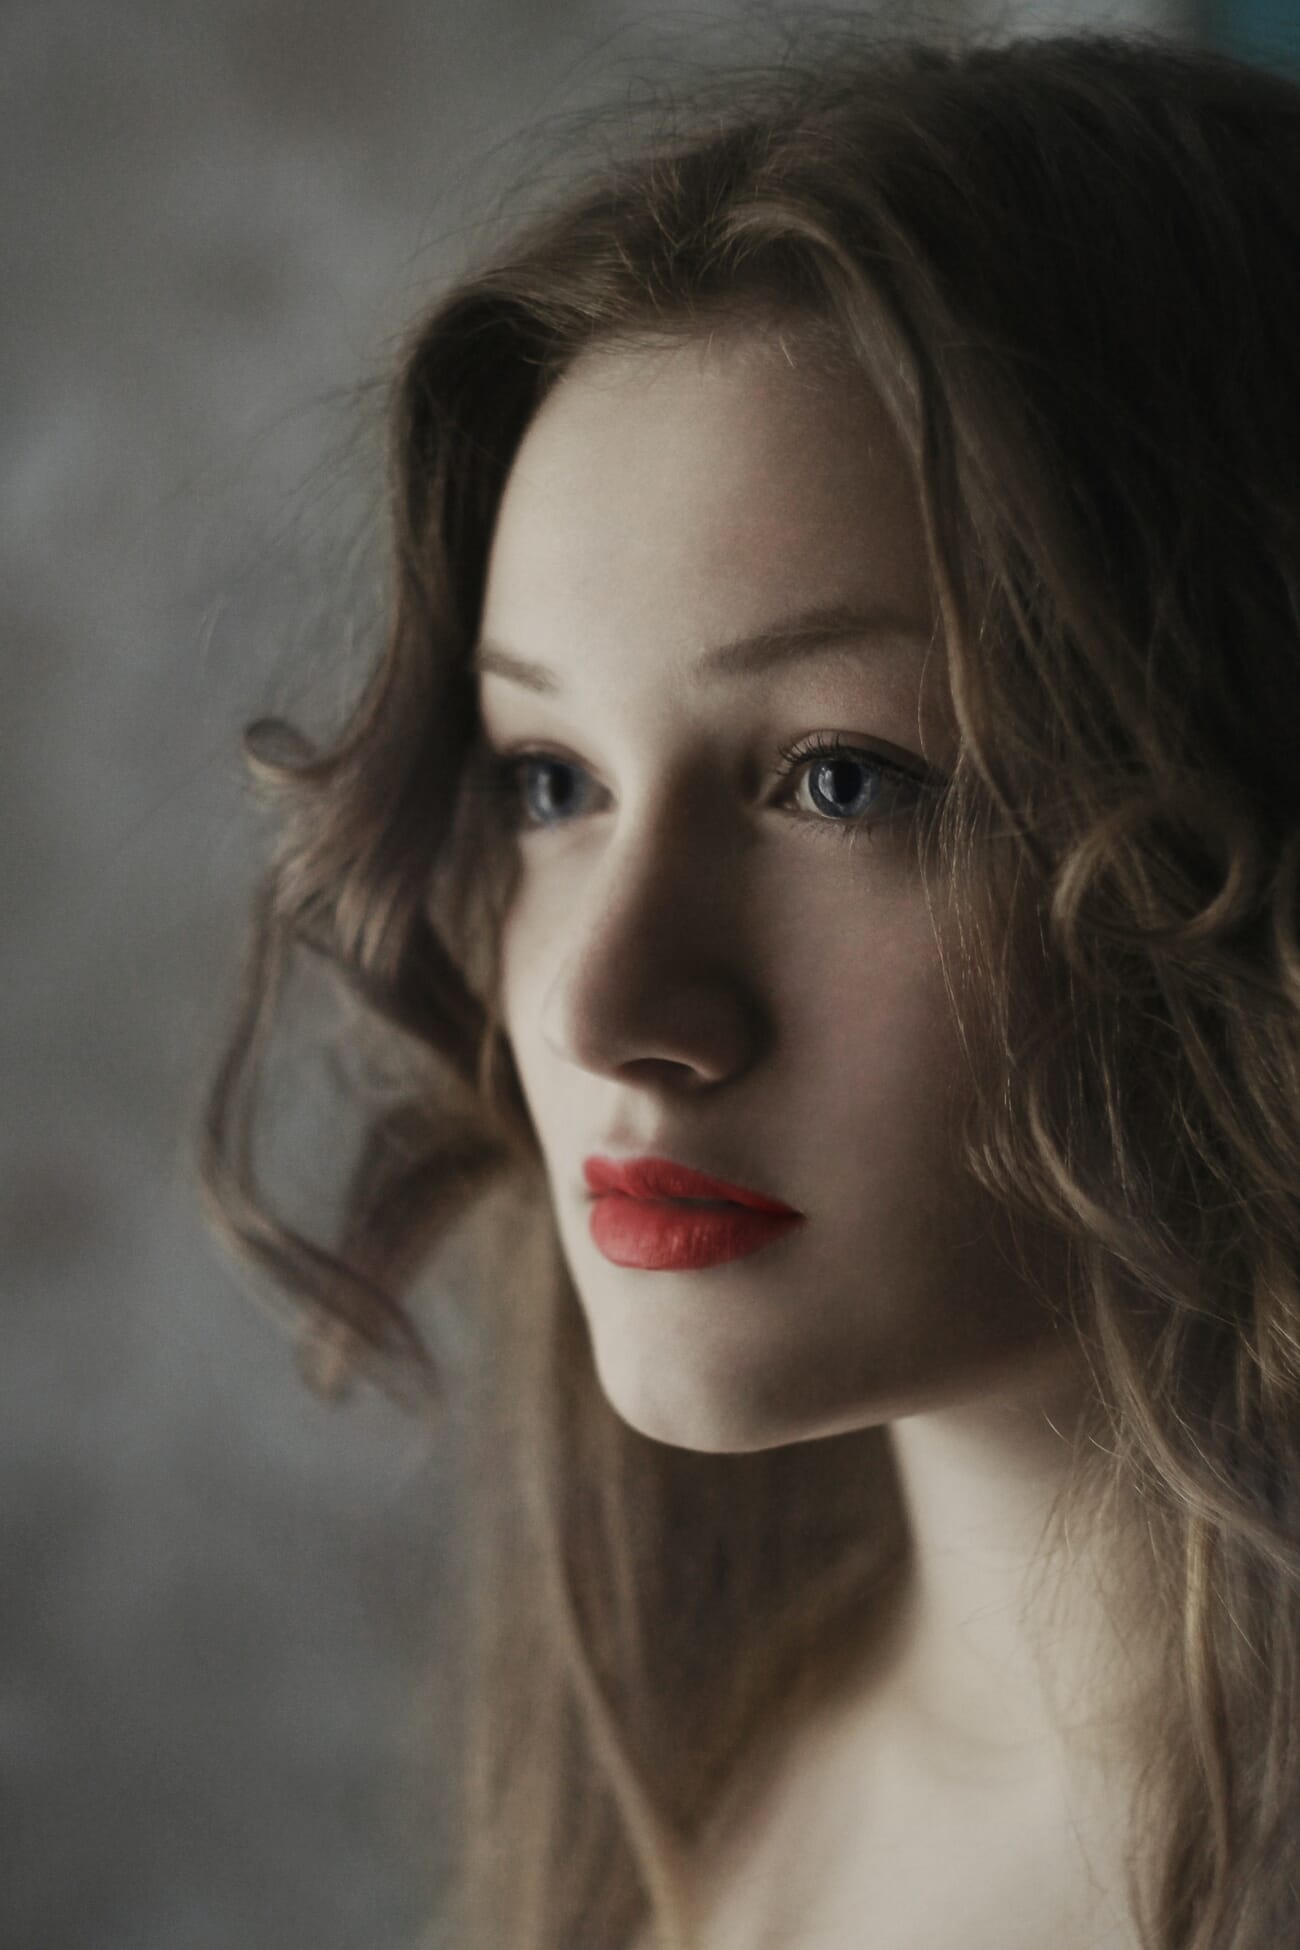
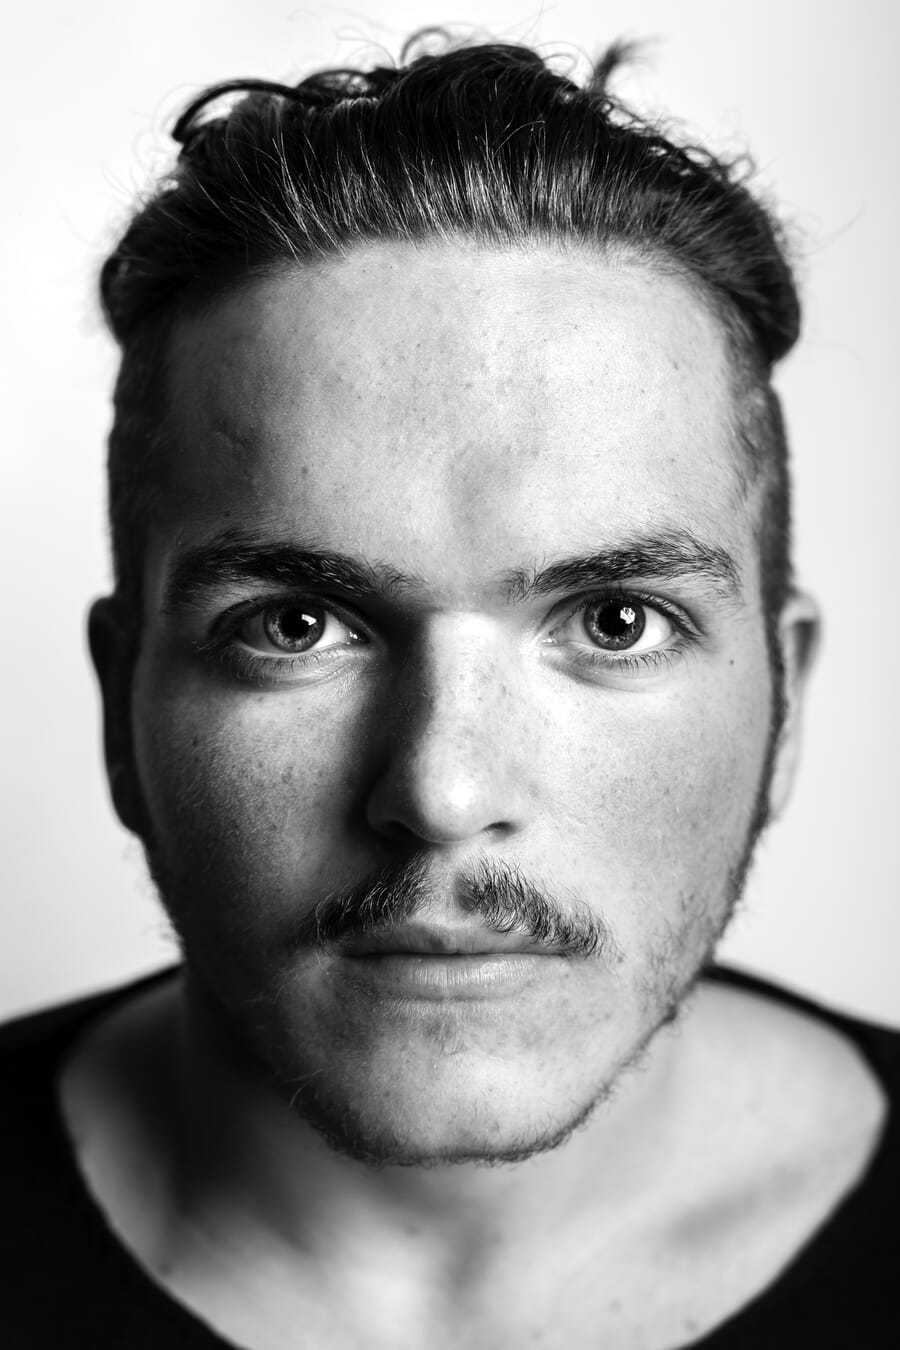
Rembrandt lighting is a portrait lighting pattern characterized by a small, triangular highlight on the shadow-side cheek of the subject. This triangle is formed when the nose shadow extends far enough to connect with the cheek shadow, enclosing a patch of light beneath the eye on the darker side of the face.
The triangle should be no wider than the eye and no longer than the nose. When it meets these proportions, you have textbook Rembrandt lighting – one of the most recognized and respected portrait lighting patterns in photography.
What makes Rembrandt lighting so effective is its balance of drama and visibility. Unlike split lighting, which hides half the face entirely, Rembrandt allows enough light to cross the nose bridge and illuminate a small area of the shadow cheek. The result is dramatic and moody, but the subject’s features remain largely readable.
Named After the Dutch Master
The pattern is named after Rembrandt Harmenszoon van Rijn (1606-1669), the Dutch Golden Age painter whose portraits consistently feature this distinctive illumination. Rembrandt painted in his Amsterdam studio using north-facing windows that created natural directional light falling at roughly 45 degrees – exactly the angle that produces the characteristic triangle.
Look at nearly any Rembrandt self-portrait or commissioned portrait, and you’ll see it: one side of the face brightly lit, the other in shadow, with that telltale triangle of light on the darkened cheek. He didn’t invent the technique deliberately – it was simply the result of painting by window light in a specific studio configuration. Photographers later named the pattern after him because his work is the most recognizable example of it.
Why Use Rembrandt Lighting?
Rembrandt lighting sits in a sweet spot on the drama spectrum – more intense than loop lighting but more versatile than split. Here’s why photographers reach for it:
It conveys mood and character. The deeper shadows and enclosed triangle create a sense of mystery, gravitas, and visual weight. Rembrandt-lit portraits feel like they have a story – which is why the pattern is popular in editorial, fine art, and character-driven work.
It sculpts the face. The interplay of highlight and shadow emphasizes bone structure, jawline, and facial contours. Subjects with strong features look particularly compelling under Rembrandt lighting.
It requires minimal equipment. A single light source – strobe, speedlight, or window – is all you need. No fill light is required (though one can be added to soften the contrast). This makes it one of the most efficient dramatic setups available.
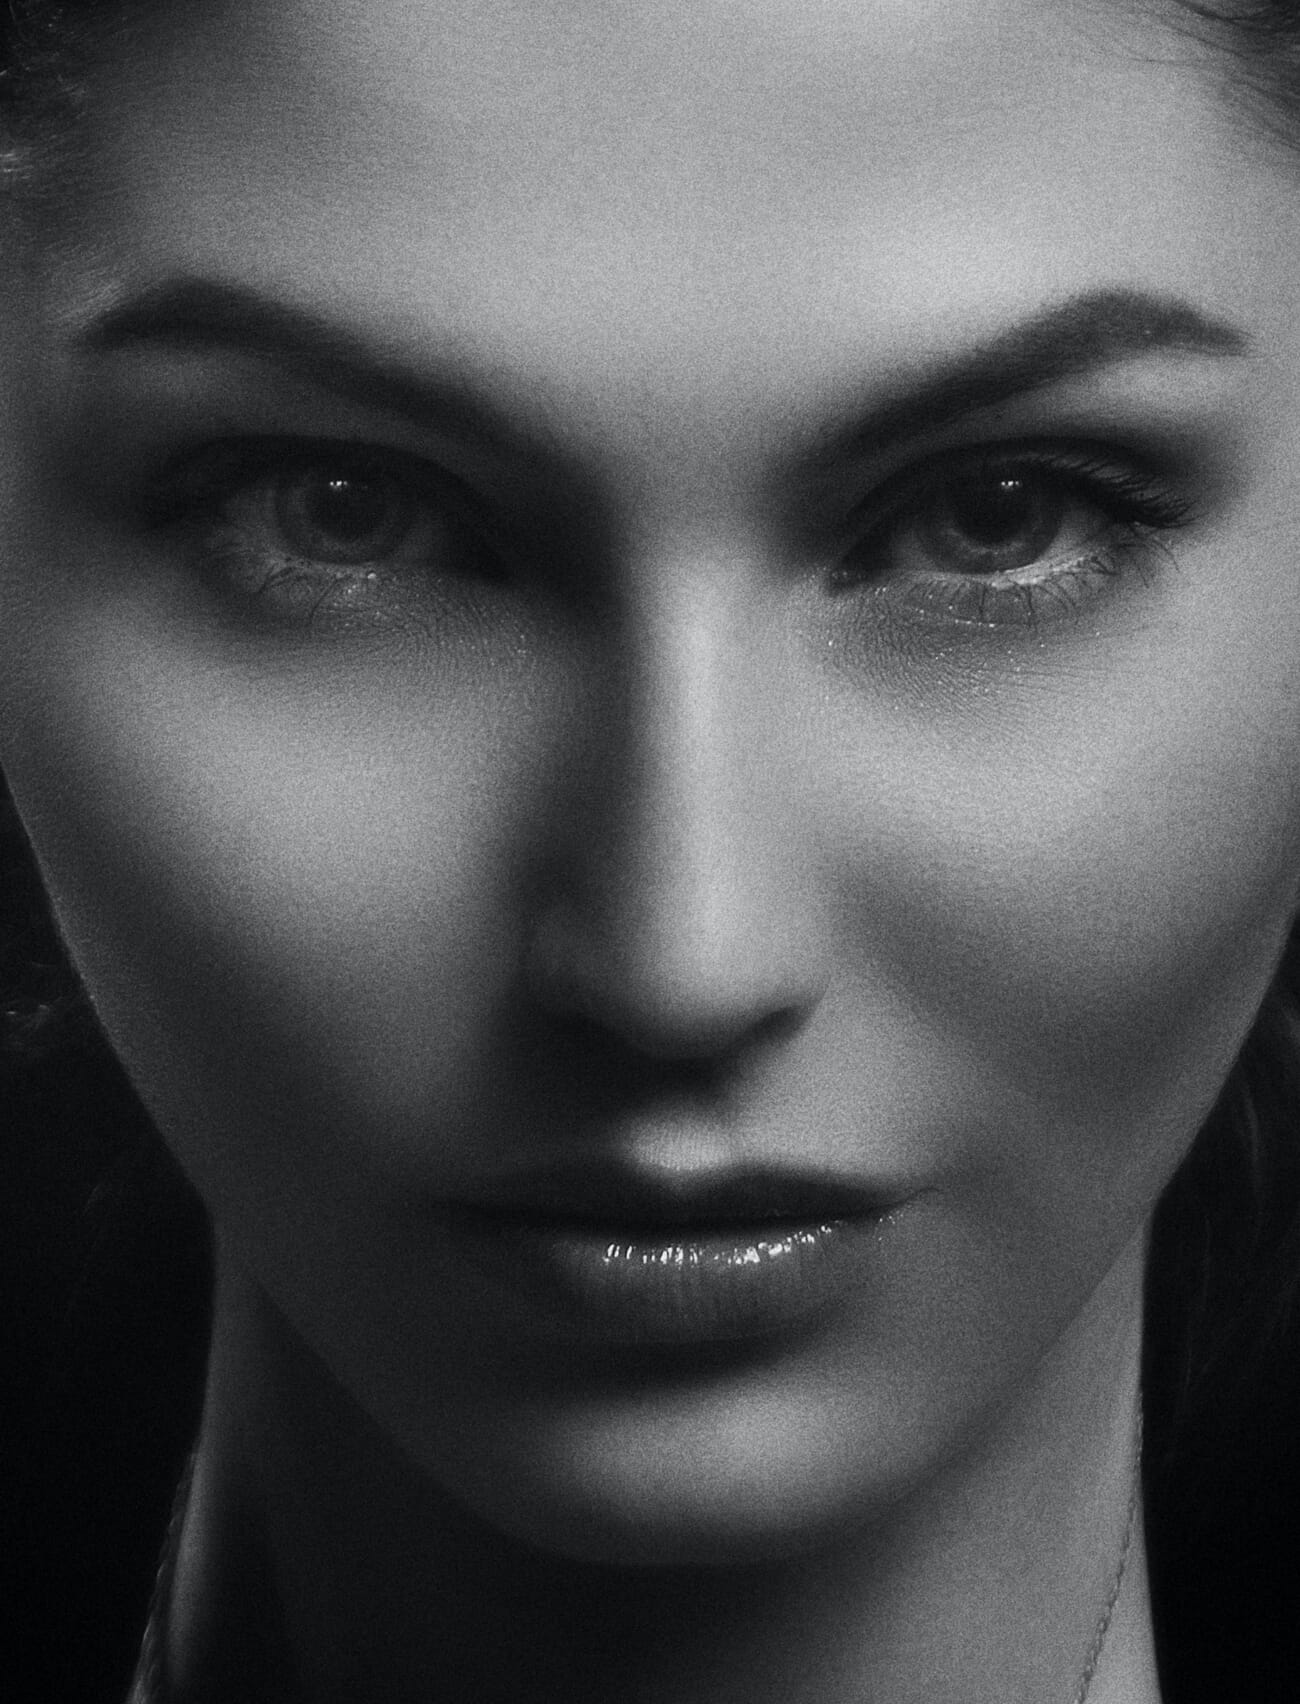
It works in both color and black-and-white. The strong tonal contrast translates beautifully to monochrome, where the triangle of light becomes even more visually striking against deep black shadows. For more techniques on creating bold shadow-heavy images, see our high contrast lighting guide.
Rembrandt Lighting Setup: Step by Step
Setting up Rembrandt lighting is straightforward once you understand the geometry. The entire pattern hinges on two variables: horizontal angle and height.
Equipment You Need
At minimum: one directional light source and a way to position it. A strobe or speedlight on a light stand is the most common choice, but a continuous LED or even a window works. A modifier (softbox, umbrella, or beauty dish) is recommended to control shadow edge quality.
Position the Key Light
Horizontal angle: 45-60 degrees off-center. Place the light to one side of the camera, angled toward the subject’s face. At 45 degrees, the triangle will be larger and more gradual. At 60 degrees, it becomes smaller and more defined, approaching split territory.
Height: above eye level, angled downward. Raise the light so it points down at the subject at roughly 25-40 degrees. This downward angle is critical – it’s what pushes the nose shadow far enough to connect with the cheek shadow and form the triangle. Too low and the nose shadow stays small (loop lighting). Too high and the eye sockets go dark.
The check: Look at the shadow-side cheek. You should see a triangle of light beneath the eye, bordered by the nose shadow above, the cheek shadow below, and the eye socket shadow to the side. The triangle should be no wider than the eye. If it’s too large, move the light further to the side. If there’s no triangle (just a loop shadow), move the light further from center or raise it higher. For a broader understanding of how light angle affects every pattern, see our guide to light direction in photography.
Choose Your Modifier
The modifier affects the quality of the shadow edge but not the pattern itself:
- Small reflector or bare flash: Hard, sharp shadow edges. Maximum drama, but unforgiving on skin texture.
- Beauty dish: Punchy but controlled. A popular choice for editorial Rembrandt lighting.
- Medium softbox (24×36″): Softer transitions while preserving the triangle shape. Good all-around choice.
- Large softbox or umbrella: Very soft shadows that may make the triangle harder to define. Works best when placed further from the subject.
Add Fill Light (Optional)
Classic Rembrandt lighting uses no fill – the shadows are deep and the contrast is high. But you can soften the look by adding fill on the shadow side:
- White reflector: Subtle, natural fill. Preserves mood while revealing some shadow detail.
- Second light at low power: More control. Set it 2-3 stops below the key light for a dramatic but readable result.
- No fill (negative fill with black flag): Deepens the shadows even further for maximum contrast.
The lighting ratio depends on the mood you want. A 4:1 ratio (two stops between lit and shadow sides) is classic Rembrandt. Push to 8:1 or higher for near-split intensity. Pull back to 3:1 for a softer version that retains the triangle while keeping the shadows more open. For a quick reference on exposure settings, grab our camera settings cheat sheet.
Short vs Broad Rembrandt Lighting
Rembrandt lighting can be combined with either short or broad lighting, which affects how the face appears relative to the camera:
Short Rembrandt (most common): The key light illuminates the side of the face turned away from the camera. The broader, more visible side of the face is in shadow. This creates a slimming effect and maximizes the sense of depth and dimension. It’s the default choice for most Rembrandt portraits.
Broad Rembrandt: The key light illuminates the side of the face turned toward the camera. The broader, more visible side is bright. This makes the face appear wider and is occasionally used for subjects with narrow or thin face shapes, or when a less conventional look is desired.
Rembrandt Lighting with Natural Light
Rembrandt himself used window light, and it remains one of the best ways to achieve this pattern. Position the subject beside a window with their body angled roughly 45 degrees away from the glass. The window should be slightly above eye level if possible – a tall window works well, or have the subject sit while the light enters from a standard-height window.
Close other windows and turn off room lights to reduce ambient fill. The single window becomes the key light, and the dark room provides the natural falloff that creates deep shadows. Place a black flag or dark fabric on the shadow side if wall bounce is filling in the shadows too much.
Check for the triangle: it should appear on the cheek furthest from the window. If you only see a loop shadow, have the subject turn slightly further away from the window, or move them back so the window’s angle becomes more extreme.

Rembrandt vs Loop vs Split Lighting
These three patterns form a continuum of increasing drama, all controlled by the key light’s horizontal angle:
- Loop lighting (20-45 degrees): A small nose shadow loops downward but stays separate from the cheek shadow. No triangle. The most flattering and versatile pattern – safe for nearly any subject.
- Rembrandt lighting (45-60 degrees): The nose shadow connects to the cheek shadow, forming the enclosed triangle. Dramatic and moody, but the face is still mostly readable.
- Split lighting (90 degrees): Light hits exactly half the face. No triangle – just a clean vertical division. Maximum drama, minimum flattery.
The transition between patterns is gradual, not binary. As you move the light from 30 degrees to 90 degrees, you’ll pass through all three. The key is to watch the nose shadow and the cheek: when the shadow connects and the triangle forms, you’ve hit Rembrandt. When the triangle disappears and the shadow covers the entire far side, you’ve reached split.
Tips for Better Rembrandt Portraits
- Watch the catchlight. A well-placed catchlight (the reflection of the light source) in the subject’s eyes adds life. In Rembrandt lighting, the catchlight typically appears at the 1-2 o’clock position in the shadow-side eye. If it’s missing, the eye looks flat and dead.
- Nose shape matters. Subjects with prominent or wide noses may produce triangles that don’t fully close. Adjust the light angle or the subject’s head position until the shadow connects properly.
- Don’t force it. Not every face produces a clean Rembrandt triangle. If the subject’s facial structure makes it difficult, shift to loop lighting rather than fighting the geometry.
- Black and white is your friend. The strong tonal contrast of Rembrandt lighting translates beautifully to monochrome. The triangle becomes a purely graphic element, adding visual punch.
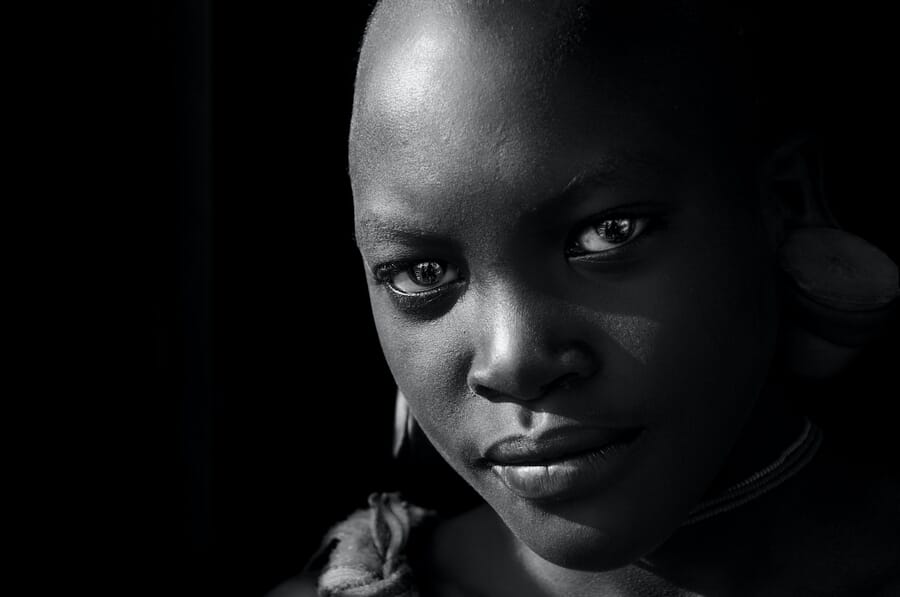
- Use a dark background. A black or dark gray backdrop reinforces the moody quality of Rembrandt lighting. Light backgrounds compete with the dramatic shadows and dilute the effect.
Frequently Asked Questions
What is Rembrandt lighting in photography?
Rembrandt lighting is a portrait lighting pattern defined by a small triangle of light on the shadow-side cheek. It’s created by positioning the key light at 45-60 degrees to the side and slightly above the subject, causing the nose shadow to connect with the cheek shadow and enclose the triangle.
What is the difference between Rembrandt and loop lighting?
In loop lighting, the nose shadow falls below and to the side of the nose but does not connect to the cheek shadow – no triangle forms. In Rembrandt lighting, the nose shadow extends far enough to connect with the cheek shadow, creating an enclosed triangle of light. The difference is the key light angle: 20-45 degrees for loop, 45-60 degrees for Rembrandt.
Why is it called Rembrandt lighting?
The pattern is named after Dutch painter Rembrandt van Rijn (1606-1669), whose portraits consistently feature this triangular highlight on the shadow-side cheek. He achieved it naturally using north-facing window light in his Amsterdam studio. Photographers named the pattern after him because his paintings are the most iconic example.
Can you create Rembrandt lighting with just a window?
Yes – it’s exactly how Rembrandt himself created the effect. Position the subject beside a window at roughly 45 degrees, with the window slightly above eye level. Close other light sources in the room to deepen the shadows. Check for the triangle on the shadow-side cheek to confirm the pattern.