
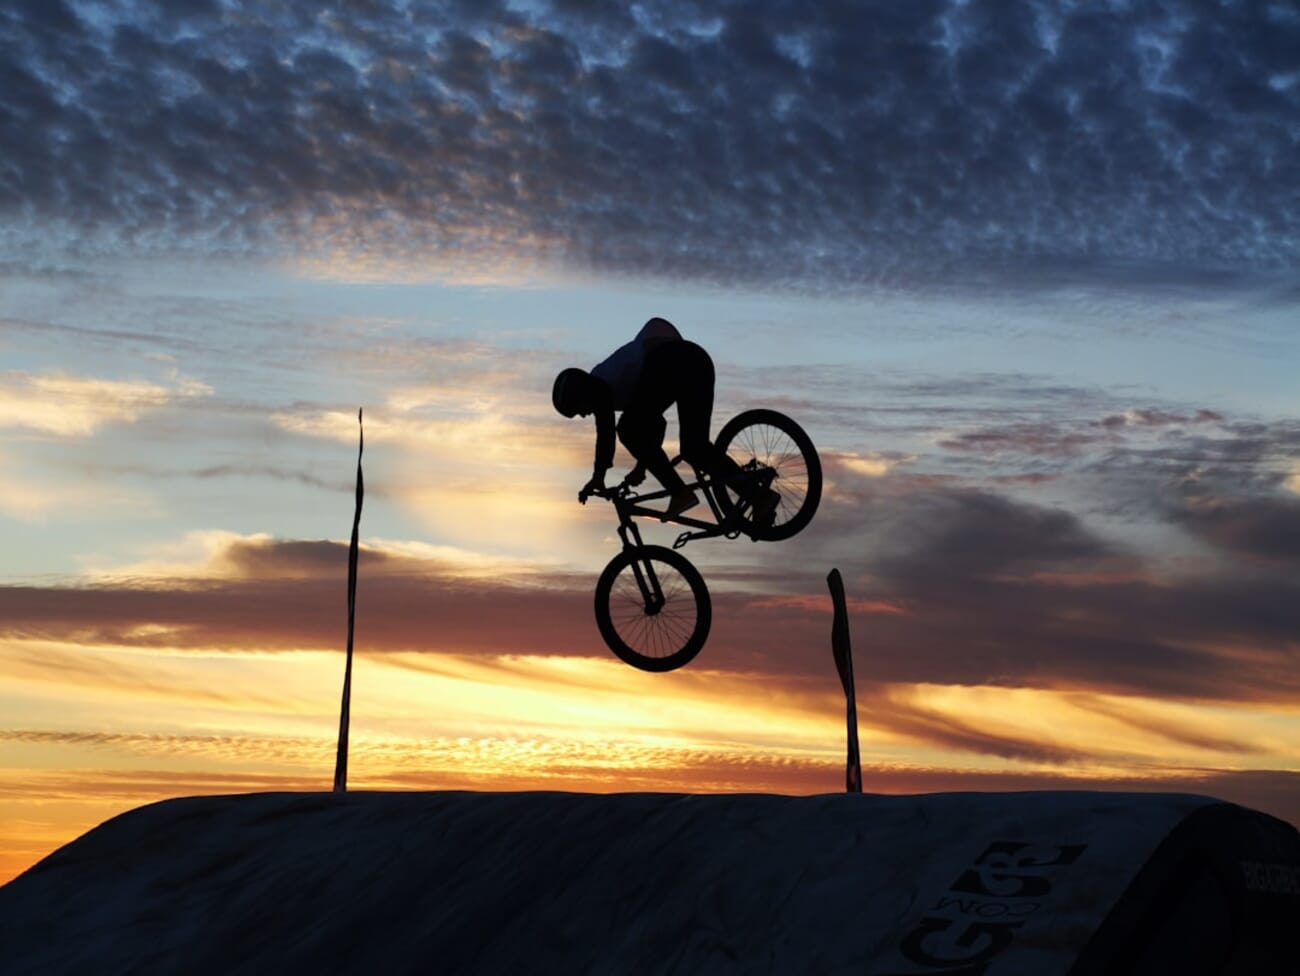
- Freeze action with shutter speeds of 1/500s or faster — use continuous autofocus and burst mode to nail the decisive moment.
- Motion blur at 1/15s–1/2s conveys speed and energy — use a tripod or brace the camera and let moving subjects streak through the frame.
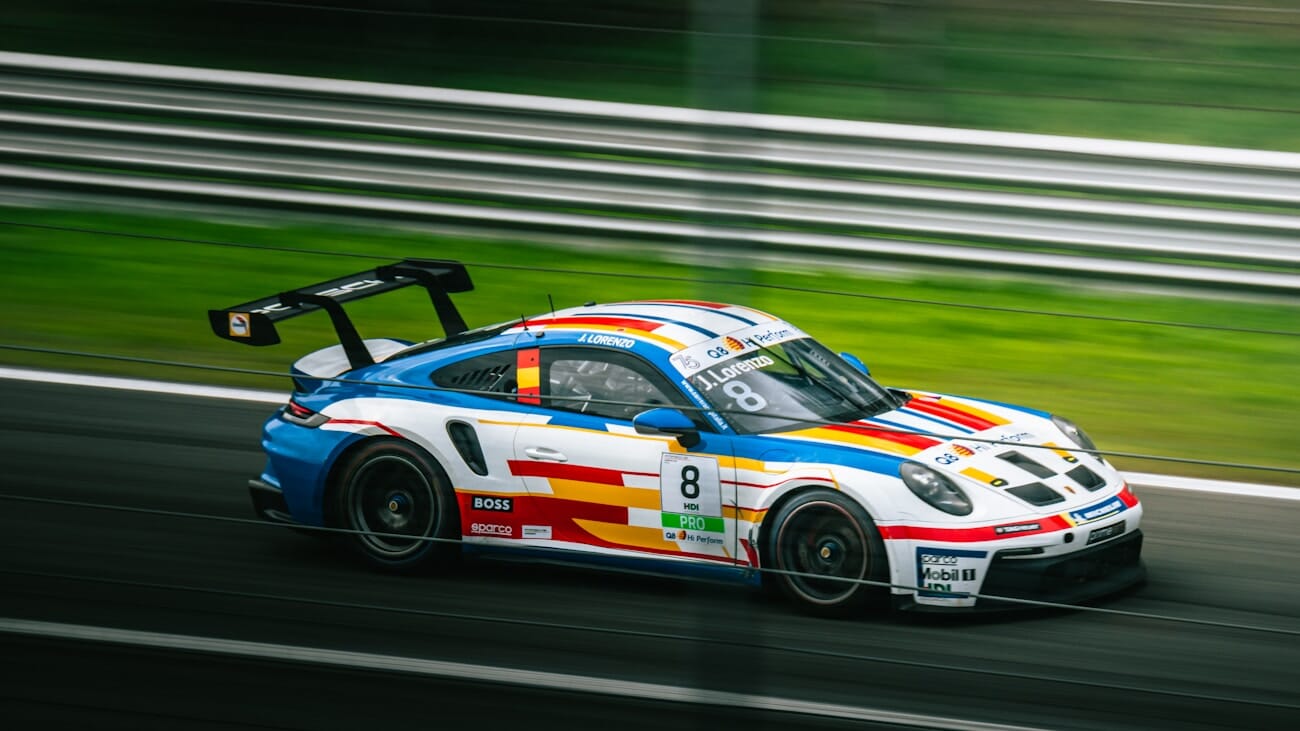
- Panning keeps a moving subject sharp against a blurred background — track smoothly at 1/30s–1/60s for a dramatic speed effect.
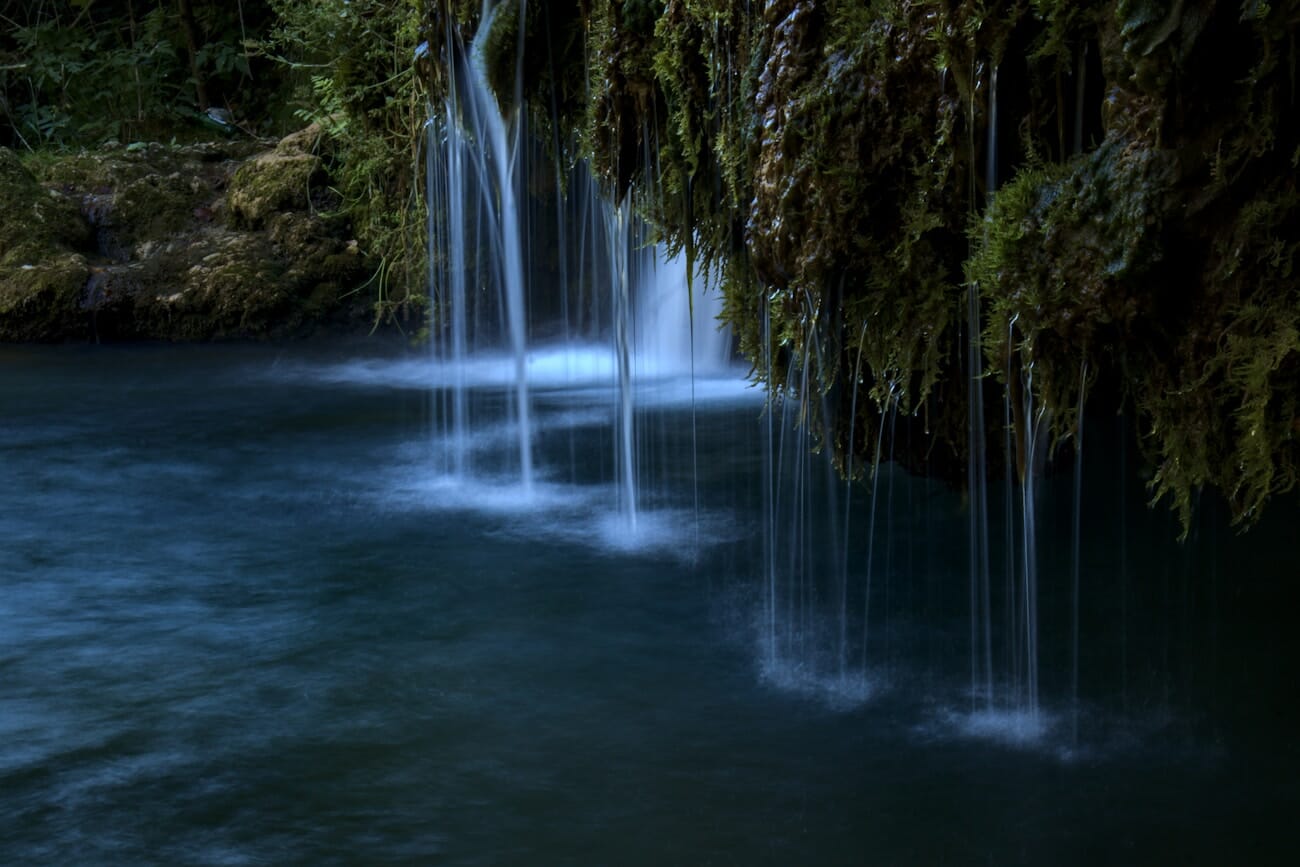
- Long exposure (1s–30s+) transforms waterfalls, clouds, and city traffic into silky, surreal scenes — an ND filter is essential in daylight.
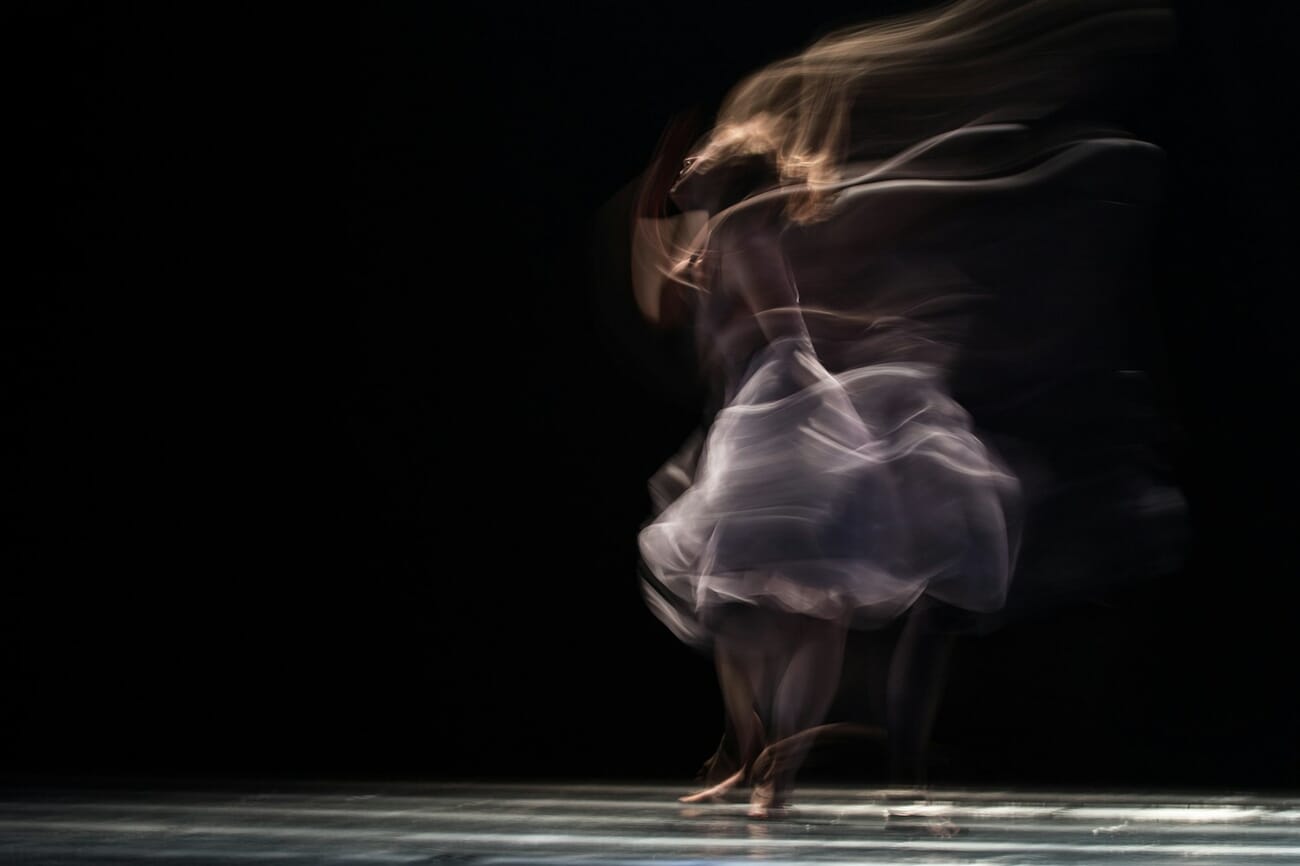
- Light trails and ICM (intentional camera movement) push motion into abstract art territory — experiment freely and expect creative surprises.
- Modern AI tracking autofocus, pre-capture buffers, and smartphone computational modes make freezing action easier than ever — even on a phone.
- Test your knowledge with our movement photography quiz.
Introduction
Photography freezes a single instant — but the best images make you feel motion even in a still frame. A sprinter’s muscles mid-stride, silky water pouring over rocks, neon light trails snaking through a city at night — movement is what separates a flat snapshot from a photograph that grabs you by the collar.
The key to all of it is shutter speed. Use a fast shutter and motion stops cold. Use a slow one and motion smears into streaks of color and energy. Every technique in this guide — freezing action, motion blur, panning, long exposure, light trails, and intentional camera movement — comes down to how long your shutter stays open and what moves (or doesn’t) while it does.
This guide covers every major way to capture movement in photography, with specific camera settings for each technique, plus modern tools like AI subject tracking and smartphone computational modes that make motion photography more accessible than ever.
Freezing Action: Stopping Motion in Its Tracks
Freezing action means using a fast enough shutter speed that a moving subject appears perfectly sharp and still. It’s the technique behind every tack-sharp sports shot, every frozen water droplet, every bird caught mid-wingbeat.
Recommended Settings
- Shutter speed: 1/500s for walking or jogging subjects, 1/1000s for running or cycling, 1/2000s–1/4000s for fast sports (basketball, motorsport), 1/8000s for hummingbird wings or splashing water
- Mode: Shutter Priority (S or Tv) — set the shutter speed and let the camera handle aperture and ISO
- Autofocus: Continuous AF (AF-C on Nikon/Sony, AI Servo on Canon) so the camera tracks your subject in real time
- Drive mode: High-speed burst — shoot 10–30 frames per second and pick the perfect moment afterward
- ISO: Auto ISO with a ceiling (e.g., 6400 or 12800) so the camera can compensate for the fast shutter in lower light
Tips for Sharp Action Shots
Timing matters more than spray-and-pray. Anticipate the peak of the action — a basketball player at the top of a jump, a skateboarder mid-kickflip — and fire a short burst around that moment. The decisive moment still exists, even with 30 fps cameras.
Subjects moving across the frame require faster shutter speeds than subjects moving toward or away from you. A car heading straight at you at 100 km/h barely changes position in the frame; the same car crossing perpendicular needs 1/2000s or faster to freeze.
If you’re hitting your ISO ceiling and still underexposing, open your aperture wider. A razor-thin depth of field at f/2.8 is better than a blurry subject at f/8. For a deeper dive into balancing these settings, check out our camera settings cheat sheet.
Motion Blur: Conveying Speed and Energy
Motion blur is the opposite approach: you deliberately use a shutter speed slow enough that moving elements smear across the frame. The result conveys speed, chaos, or dreamlike flow — depending on how much blur you introduce.
Think of a busy crosswalk where pedestrians become ghostly streaks while buildings stay razor-sharp. Or a waterfall where the water turns to silk while rocks and trees remain crisp. The contrast between sharp and blurred elements is what makes motion blur work.
Recommended Settings
- Shutter speed: 1/15s–1/4s for walking pedestrians, 1/2s–2s for flowing water, 1s–5s for busy traffic, 10s–30s for clouds and star trails
- Mode: Shutter Priority (S/Tv) or Manual
- Aperture: f/8–f/16 to reduce light intake and allow slower shutter speeds
- ISO: Base ISO (100 or 200) to keep the exposure manageable
- Stabilization: Tripod is essential for shutter speeds below 1/15s — even in-body stabilization can’t hold steady for multi-second exposures
Tips for Effective Motion Blur
The key to good motion blur is contrast: something moves, something doesn’t. If you’re shooting handheld and everything blurs, you just have a shaky photo. Mount the camera on a tripod so the static elements stay tack-sharp, and only the moving subject streaks through the frame.
If it’s too bright for slow shutter speeds (even at f/16, ISO 100), an ND filter is your best friend. A 6-stop ND turns 1/60s into a full second. A 10-stop ND gives you 15-second exposures in broad daylight.
Use your camera’s self-timer or a remote shutter release to avoid introducing vibration when you press the button. Even on a tripod, the act of pressing the shutter can cause micro-shake at slow speeds.
Panning: Sharp Subject, Blurred Background
Panning is a hybrid technique: you track a moving subject with your camera during a relatively slow exposure. The subject stays sharp (because the camera moves with it), while the background streaks into horizontal blur lines. The effect screams speed — it’s the go-to technique for motorsport, cycling, and running photography.
Recommended Settings
- Shutter speed: 1/30s–1/60s for cars and cyclists, 1/15s–1/30s for runners, 1/8s for extreme background blur (very difficult)
- Mode: Shutter Priority (S/Tv)
- Autofocus: Continuous AF with a single focus point or small zone — tracking the subject
- Stabilization: If your lens or camera has stabilization, enable Mode 2 (panning mode) if available — it stabilizes vertical shake while allowing horizontal movement
- Drive mode: Burst mode — take 5–10 frames per pan and pick the sharpest
How to Pan Successfully
Stand with your feet planted and twist from the waist — don’t pivot on your feet. Pre-focus on the spot where your subject will pass, or use continuous AF to track them. Start your pan before pressing the shutter, fire during the smoothest part of your rotation, and follow through after the shutter closes — just like a golf swing.
Panning has a low hit rate. Expect maybe 1 in 10 frames to be a keeper, even with practice. That’s normal. The ones that work are spectacular.
For the cleanest background blur, choose a shooting position where the subject passes perpendicular to your lens at a consistent distance. Side-on motion at a steady speed is the sweet spot. If they’re coming toward you at an angle, the blur pattern gets messy.
Long Exposure: Transforming Reality
Long exposure photography uses shutter speeds of one second to several minutes, turning ordinary scenes into something surreal. Water becomes glass. Clouds streak across the sky. Crowds vanish from busy plazas, leaving only the stationary structures behind.
Recommended Settings
- Shutter speed: 1s–5s for silky waterfalls, 15s–30s for streaking clouds, 30s+ (Bulb mode) for star trails and extreme smoothing effects
- Mode: Manual or Bulb
- Aperture: f/8–f/11 for sharpness; f/16 or smaller if you need to reduce light further
- ISO: 100 (base)
- ND filter: Essential for daytime long exposures — 6-stop for a few seconds, 10-stop for 30+ seconds in daylight
- Tripod: Non-negotiable — even the best IBIS can’t stabilize a 30-second exposure
- Remote release: Use a cable release, wireless remote, or 2-second self-timer
Popular Long Exposure Subjects
Waterfalls and rivers: 1/2s–2s gives a soft, feathery look. 5s+ turns water into smooth mist. Overcast days are ideal — direct sun makes it hard to get slow enough shutter speeds even with ND filters.
Seascapes: 10s–30s flattens ocean waves into a calm, ethereal surface. The contrast between glassy water and rugged rocks is mesmerizing. Shoot during blue hour for extra mood.
Clouds: 30s–2 minutes stretches clouds into dramatic streaks across the sky. Works best with scattered cumulus clouds that have visible movement — a solid overcast sky won’t produce interesting streaks.
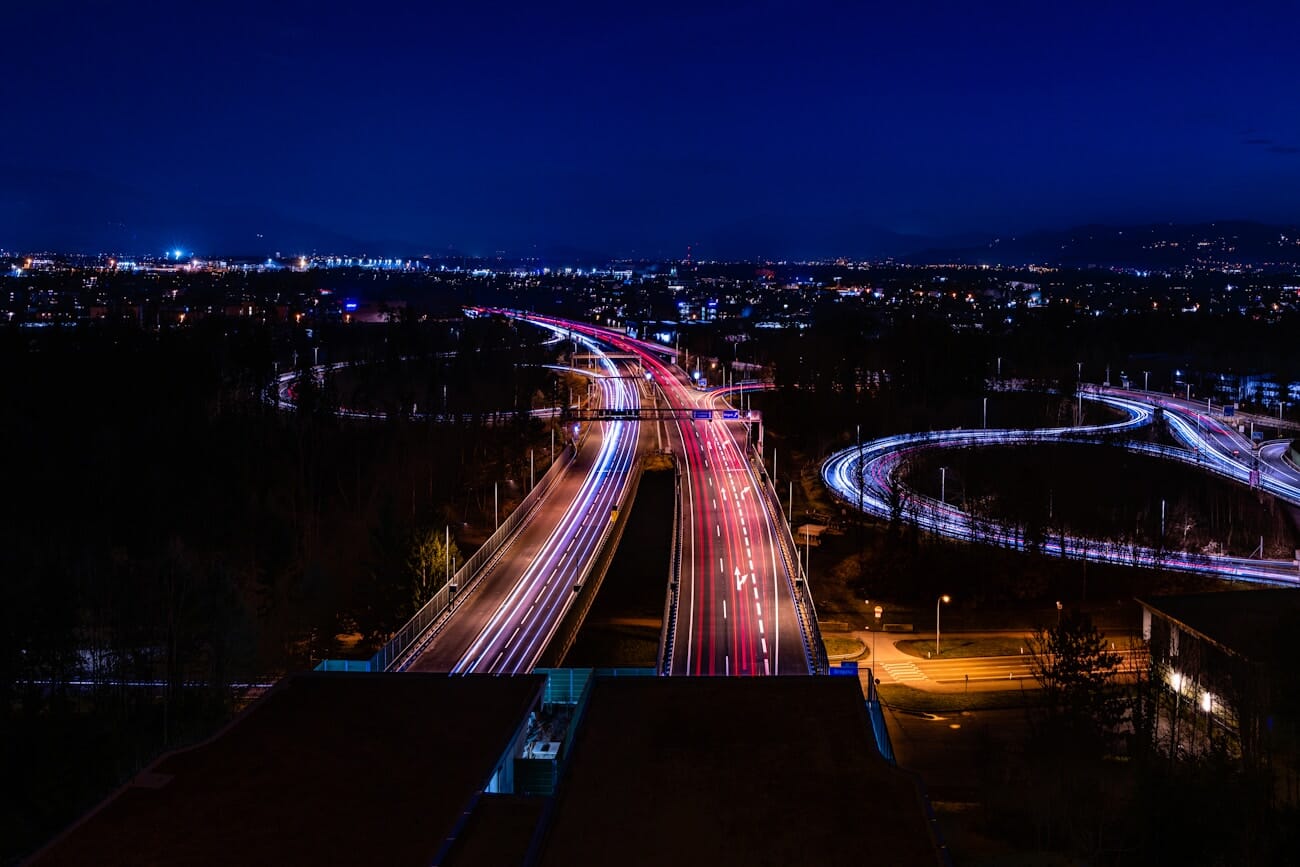
Cityscapes: Long exposures at dusk smooth out pedestrian traffic and turn car headlights and taillights into glowing rivers of light. For more night shooting techniques, read our complete night photography guide.
Light Trails: Painting With Motion
Light trails are one of the most visually striking forms of motion photography. Vehicle headlights and taillights, ferris wheels, sparklers — any moving light source becomes a glowing ribbon of color during a long exposure.
Recommended Settings
- Shutter speed: 10s–30s for traffic trails, 30s–2 min for complex intersections, Bulb mode for complete creative control
- Aperture: f/8–f/11 for sharp light trails with good depth of field
- ISO: 100–200
- White balance: Tungsten or a custom Kelvin around 3200K to balance the warm tone of street lights
- Tripod + remote release: Required — and don’t touch the tripod during exposure
Tips for Better Light Trails
Scout your location before sunset. You want a vantage point where traffic flows in interesting patterns — curves, roundabouts, highway interchanges, or bridges. Straight roads produce straight lines; curves produce sweeping arcs that are far more dynamic.
Shoot during the blue hour (20–40 minutes after sunset) when there’s still color in the sky but it’s dark enough for light trails to glow. Full darkness produces bright trails but a black, featureless sky.
If a single exposure doesn’t capture enough traffic, stack multiple exposures in Photoshop using Lighten blend mode. This lets you build up complex trail patterns without overexposing the scene.
ICM: Intentional Camera Movement
Intentional camera movement (ICM) flips the script entirely. Instead of keeping the camera still and letting subjects move, you deliberately move the camera during a slow exposure to create abstract, painterly images.
ICM produces results that look more like impressionist paintings than photographs. It’s experimental, unpredictable, and deeply creative — and it requires zero special equipment beyond a camera that lets you control shutter speed.

Recommended Settings
- Shutter speed: 1/4s–2s (experiment freely — there’s no “correct” speed)
- Aperture: f/8–f/22 to allow slower shutter speeds
- ISO: 100
- ND filter: Helpful in bright light to allow slower shutters
ICM Techniques to Try
Vertical sweep: Tilt the camera up or down during the exposure. Works beautifully in forests — tree trunks stretch into vertical streaks of color, creating an ethereal, dreamlike atmosphere.
Horizontal sweep: Pan left or right. Great for seascapes and horizons — colors blend into horizontal bands like a watercolor painting.
Rotation: Twist the camera around the lens axis. Creates swirling, kaleidoscopic patterns. Works best with subjects that have strong color contrasts.
Zoom burst: Zoom the lens in or out during the exposure. Produces radial blur lines that explode outward from the center of the frame. Set a slower shutter speed (1/4s–1s) and smoothly twist the zoom ring during the shot.
ICM is pure experimentation. Take dozens of shots with different movements and speeds. The unpredictability is part of the appeal — you’ll get plenty of duds, but the occasional magical frame makes it worthwhile.
Composition Tips for Movement Photography
The Rule of Space
When a subject is moving through the frame, leave more space in front of it than behind it. This gives the viewer’s eye room to follow the implied direction of motion. A runner placed at the left edge of the frame, heading right into open space, feels dynamic and natural. The same runner pushed to the right edge, running into the frame boundary, feels cramped and tense.
The rule of space works for both frozen action and motion blur. Even a panned shot with a blurred background benefits from extra space ahead of the subject.
Use Diagonal Lines
Diagonal composition amplifies the sense of movement. A skier cutting diagonally across the frame feels faster than one moving horizontally. Tilt your framing (subtly) or choose angles where the subject’s trajectory creates natural diagonals.
Capture the Peak of Action
In any motion sequence, there’s a single instant that tells the whole story. A dancer at the apex of a leap, a dog fully airborne catching a frisbee, a wave just before it crashes. Train yourself to anticipate these peak moments — they make far more powerful images than random mid-action frames.
Modern Tech: AI Tracking, Pre-Capture, and Phone Modes
Camera technology has evolved dramatically, and several modern features make capturing movement significantly easier than it was even a few years ago.
AI Subject Tracking Autofocus
Modern mirrorless cameras from Sony, Canon, Nikon, and others use deep-learning AI to recognize and track specific subjects — people, eyes, animals, birds, vehicles, trains, even insects. Once the camera locks on, it follows the subject across the frame and adjusts focus in real time, even as the subject changes direction, speed, or distance.
This is a game-changer for action photography. Older cameras required you to manually select focus points and predict where your subject would be. Today, the best cameras for sports photography handle tracking almost autonomously — you just compose and shoot.
Pre-Capture and Buffer Shooting
Pre-capture (called Pre-Burst, Pre-Recording, or ProCapture depending on the brand) starts recording frames before you fully press the shutter. Half-press the button, and the camera begins buffering images. When you fully press, it saves the buffered frames plus everything after.
This solves the biggest problem in action photography: reaction time. By the time you see the decisive moment and press the button, it’s already gone. Pre-capture means the camera was already recording 0.5–1 second before you reacted. Sony’s A9 III, for example, can pre-buffer at up to 120 fps.
Smartphone Computational Photography for Motion
Modern smartphones have their own motion photography superpowers — and they’re worth understanding whether you shoot phone-only or use a dedicated camera. For a full breakdown of phone exposure controls, see our smartphone exposure guide.
- Action/Sport mode: Most phones automatically boost shutter speed and ISO when they detect fast motion. On iPhones, the camera app does this silently. On Pixel and Samsung, dedicated action modes kick in.
- Long Exposure / Light Trails mode: iPhone’s Live Photos can create long exposure effects after the fact — take a Live Photo, swipe up, and select “Long Exposure.” Google Pixel offers a dedicated Night Sight and Astrophotography mode for multi-second captures.
- Pro / Manual mode: Samsung, Pixel, and most Android phones let you manually set shutter speed down to 1/2s–30s in Pro mode. Pair this with a phone tripod mount for real motion blur and light trail photography.
- Burst mode: Hold the shutter button (or volume button on iPhone) for rapid burst shooting. The phone’s AI will even suggest the “best” frame from the burst.
- Action Pan (Pixel): Google’s Pixel phones include a dedicated Action Pan mode that creates a panning effect computationally — blurring the background while keeping the subject sharp, no slow shutter speed required.
Essential Gear for Motion Photography
You don’t need exotic gear to photograph motion — but a few key accessories make certain techniques possible or significantly easier.
- Tripod: Essential for long exposures, light trails, and motion blur where the camera must stay perfectly still. Doesn’t have to be expensive — just stable. Check our guide to the best lightweight travel tripods for portable options.
- ND filters: Neutral density filters let you use slow shutter speeds in bright light. A 6-stop and 10-stop ND cover most situations. See our ND filter guide for recommendations.
- Remote shutter release: Eliminates vibration from pressing the shutter button during long exposures. Most cameras also support smartphone apps as wireless remotes.
- Fast lens: A wide-aperture lens (f/1.4–f/2.8) lets in more light, allowing faster shutter speeds in dim conditions. Critical for indoor sports and events.
- Camera with good high-ISO performance: When you’re pushing shutter speeds past 1/1000s in less-than-perfect light, a camera that handles ISO 3200–6400 cleanly gives you the confidence to freeze action without worrying about noise.
Movement Photography Settings Cheat Sheet
Here’s a quick-reference table for the most common motion scenarios. For more comprehensive settings across all photography situations, see our full camera settings cheat sheet.
| Technique | Shutter Speed | Aperture | ISO | Key Gear |
|---|---|---|---|---|
| Freeze walking/jogging | 1/500s | f/4–f/5.6 | Auto | None required |
| Freeze fast sports | 1/2000s–1/4000s | f/2.8–f/4 | Auto (cap 6400) | Fast lens |
| Motion blur (people) | 1/15s–1/4s | f/8–f/16 | 100 | Tripod |
| Silky waterfall | 1/2s–2s | f/11 | 100 | Tripod, ND filter |
| Panning (cars/bikes) | 1/30s–1/60s | f/8–f/11 | 100–400 | IS Mode 2 |
| Light trails | 10s–30s | f/8–f/11 | 100 | Tripod, remote |
| Star trails | 30s+ (stacked) | f/2.8 | 800–1600 | Tripod, intervalometer |
| ICM abstracts | 1/4s–2s | f/8–f/22 | 100 | ND filter (bright light) |
Frequently Asked Questions
What shutter speed freezes motion?
It depends on how fast the subject is moving and its direction relative to the camera. For walking subjects, 1/500s is enough. For fast sports, aim for 1/2000s or faster. Subjects moving across the frame need faster speeds than those moving toward you.
Do I need a tripod for motion blur photography?
For most motion blur techniques, yes. The camera needs to stay perfectly still so that static elements remain sharp while the moving subject blurs. The exception is panning, where you deliberately move the camera to track the subject. For ICM, you intentionally move the camera handheld.
What is panning in photography?
Panning means tracking a moving subject with your camera during a slow shutter exposure (typically 1/30s–1/60s). The subject stays relatively sharp because the camera moves with it, while the background blurs into horizontal streaks. It’s commonly used in motorsport and cycling photography to convey speed.
Can I capture motion blur on a smartphone?
Yes. iPhones can simulate long exposure using Live Photos — take a Live Photo and select the “Long Exposure” effect. Android phones with Pro mode let you manually set slow shutter speeds. Google Pixel’s Action Pan mode even creates a computational panning effect automatically.
What is ICM photography?
ICM stands for Intentional Camera Movement. Instead of keeping the camera still, you deliberately move it during a slow exposure to create abstract, painterly images. Common techniques include vertical sweeps (great in forests), horizontal sweeps (seascapes), rotation, and zoom bursts.
What ND filter strength do I need for long exposure?
A 6-stop ND filter lets you shoot around 1–4 seconds in overcast daylight. A 10-stop ND gives you 30-second or longer exposures even in bright sun. For most motion photography, a 6-stop ND covers the majority of situations. Many photographers carry both.
Featured image: Photo by Unsplash.
Test Your Knowledge
Think you have mastered motion photography? Take this quick quiz to find out:


