
- Night photography requires a sturdy tripod, remote release, and manual camera controls – your kit lens works fine to start.
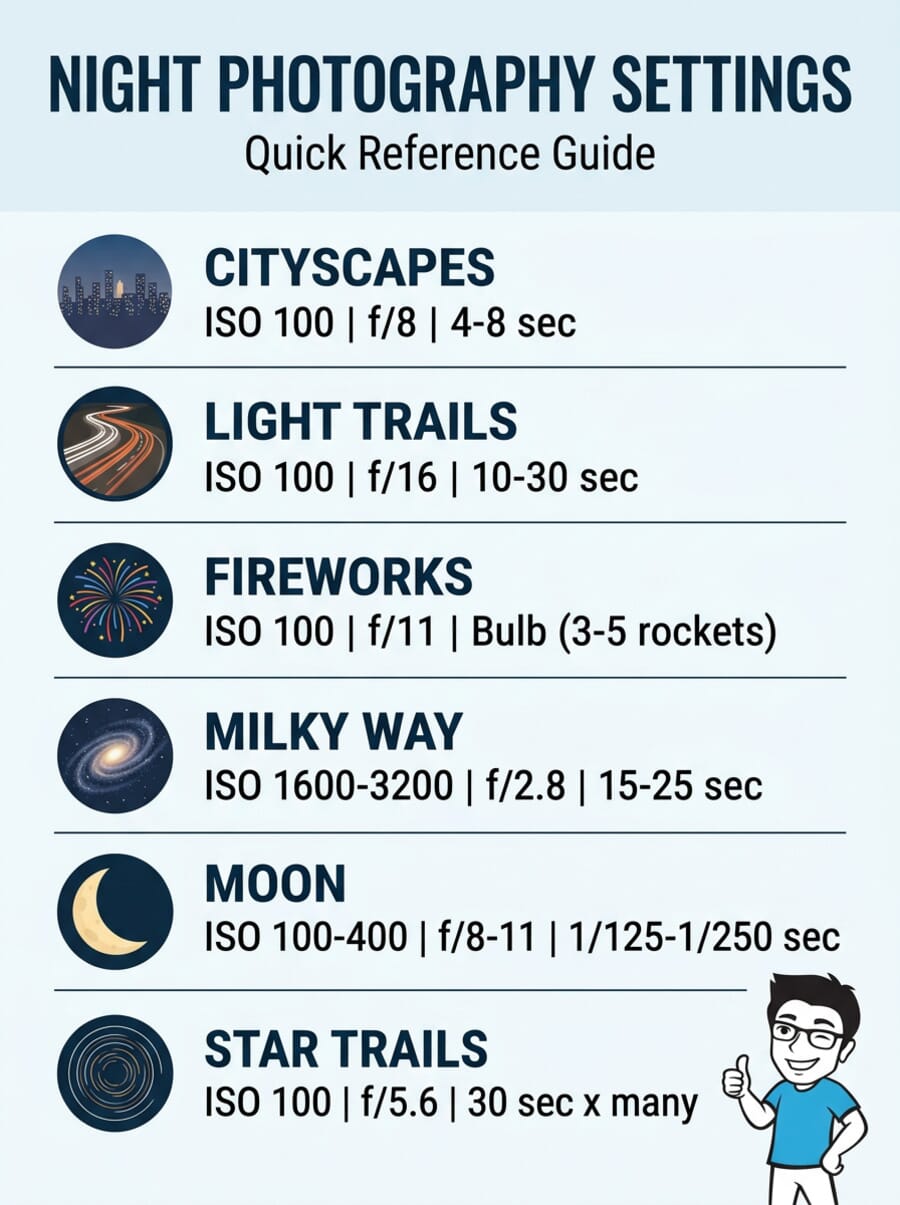
- Start with f/8, ISO 100, and a 4-second exposure for cityscapes, then adjust from your histogram.
- The blue hour (twilight after sunset) produces the best night photos because the sky balances with artificial light.
- Different subjects need different settings: light trails use f/16, Milky Way shots need f/2.8 at ISO 3200, and the moon needs exposures under 1 second.
- Always shoot RAW, focus manually on a light source, and turn off both noise reduction and image stabilization.
- Take the quiz at the end to test how well you’ve mastered the technique.
Why Night Photography Is Worth the Effort
When the sun goes down, most photographers pack up their gear. That is exactly when things get interesting.
Night photography transforms ordinary scenes into something extraordinary. A busy intersection becomes a river of light. A quiet cityscape glows against a deep blue sky. The Milky Way stretches across the frame in ways your eyes can barely perceive. Long exposures reveal a world that exists between seconds – one that only your camera can capture.
The best part? Night photography is far more approachable than it looks. You do not need expensive gear or years of experience. A camera with manual controls, a tripod, and the techniques in this guide are enough to create stunning results tonight.
This guide covers everything from basic camera settings to advanced techniques like light trail photography, astrophotography, and light painting. Each section includes specific, tested settings so you can skip the guesswork and start shooting.
Essential Gear for Night Photography
Night photography does not work without some key accessories. The long exposure times involved make handheld shooting impossible for most subjects, and working in the dark creates challenges you will not face during the day.
A Sturdy Tripod
A tripod is non-negotiable. You will be shooting exposures lasting seconds, minutes, or even hours. No amount of steady hands can compensate for that.
When setting up, avoid extending the center column – it makes the camera far less stable. Point one tripod leg directly toward your subject; this naturally places you between the other two legs, eliminating the risk of accidentally kicking a leg in the dark and ruining a long exposure.
Traveling without a tripod? Try the beanbag trick: fill a small cloth bag with dry beans or lentils. Press your camera into it on any flat surface for a surprisingly stable platform.
Remote Shutter Release
A remote shutter release lets you trigger the camera without touching it. Even pressing the shutter button can introduce enough vibration to blur a long exposure. Wireless radio remotes are more convenient than cable or infrared models, especially in cold weather. If you do not have a remote, use your camera’s 2-second self-timer as a workaround.
Lenses
Your standard kit lens is perfectly fine for cityscapes, light trails, and fireworks. You only need specialized lenses for specific subjects:
- Moon photography: A telephoto lens (ideally 500mm or longer) to fill the frame
- Milky Way and auroras: A fast wide-angle lens (14-24mm, f/2.8 or wider) to capture as much sky as possible
- General night scenes: A 24-70mm zoom covers most urban situations
If you are looking to invest, check our guide to the best nighttime photography lenses for specific recommendations.
Other Essential Accessories
- Viewfinder cover: This is the most underestimated accessory in night photography. During long exposures, light from streetlamps behind you can enter through the optical viewfinder, bypass the mirror, and ruin your image with stray light. Slide the plastic viewfinder cover over the eyepiece, or block it with your hand.
- Two flashlights: A weak one for adjusting camera settings without blinding yourself, and a strong one to illuminate your subject for autofocus to lock on.
- Extra batteries: Cold temperatures drain batteries fast. Keep spares in an inner pocket close to your body.
- Black clothing: Dark clothing prevents you from reflecting ambient light into the scene. More importantly, it lets you walk through your own frame (during light painting, for example) without showing up as a ghost in the final image.

Camera Settings for Night Photography
Night photography pushes your camera to its limits. Several settings that work perfectly during the day become counterproductive at night. Here is what to change before you start shooting.
Shoot RAW
Always shoot in RAW format. Night scenes have extreme contrast – bright lights next to deep shadows – and RAW files preserve far more tonal data than JPEGs. This gives you the flexibility to recover shadow detail and tame blown highlights in post-processing. Check your camera settings right now: make sure you are using the largest image size at the highest quality.
ISO
For most night photography, keep your ISO at 100. Cities and urban areas provide plenty of ambient artificial light. High ISO values only cause overexposure and digital noise. You will only need to raise ISO for extremely dark subjects like the Milky Way (ISO 1600-3200) or Northern Lights.
Aperture
Start with f/8. This provides sufficient depth of field for most night scenes and is close to the sharpest aperture for most lenses. From there, adjust based on your subject: close to f/16 for starburst effects on light sources, or open wide to f/2.8 for astrophotography where you need maximum light.
Manual Mode
Aperture Priority mode (A or Av) works fine for many night subjects. Your camera will calculate the exposure time based on your chosen aperture. But for subjects like fireworks, lightning, or star trails, you will need to switch to Manual mode (M) and control the shutter speed yourself. Use your camera’s histogram after each test shot – the data should sit roughly in the center, leaning slightly right for astrophotography.
What to Turn Off
- Long Exposure Noise Reduction: This makes the camera take a second “dark frame” exposure of the same length after your actual shot. A 15-second exposure becomes 30 seconds of waiting. You miss shots and waste time. Turn it off and handle noise in post-processing instead.
- Image Stabilization (IS/VR/OIS): Always turn this off when using a tripod. The stabilization system can actually introduce micro-vibrations when the camera is already perfectly still, causing blurry images.
- Auto ISO: Set a fixed ISO value. Auto ISO will fight your long exposure settings by raising sensitivity when it detects low light.
- Flash: Your subjects are meters or kilometers away. The flash is useless and will only illuminate dust particles in front of the lens.
Focusing in the Dark
Autofocus systems need contrast to work. A pitch-black night sky has none. If you leave your camera on automatic AF point selection, it will hunt endlessly without locking on.
The solution is simple: take control of focus yourself.
- Move the AF point manually onto a light source or high-contrast edge in your scene – a streetlamp, a lit window, or the edge of a building against the sky.
- Use Live View with magnification. Zoom in 5x or 10x on a distant light source on your LCD screen, then manually adjust the focus ring until the point of light is as small and sharp as possible.
- Use a strong flashlight to illuminate a distant object, autofocus on it, then switch to manual focus so the camera does not re-focus when you press the shutter.
Once focused, switch your lens to MF (manual focus) and do not touch the focus ring again. With a wide-angle lens at f/8, everything from about 1.6 meters to infinity will be sharp.
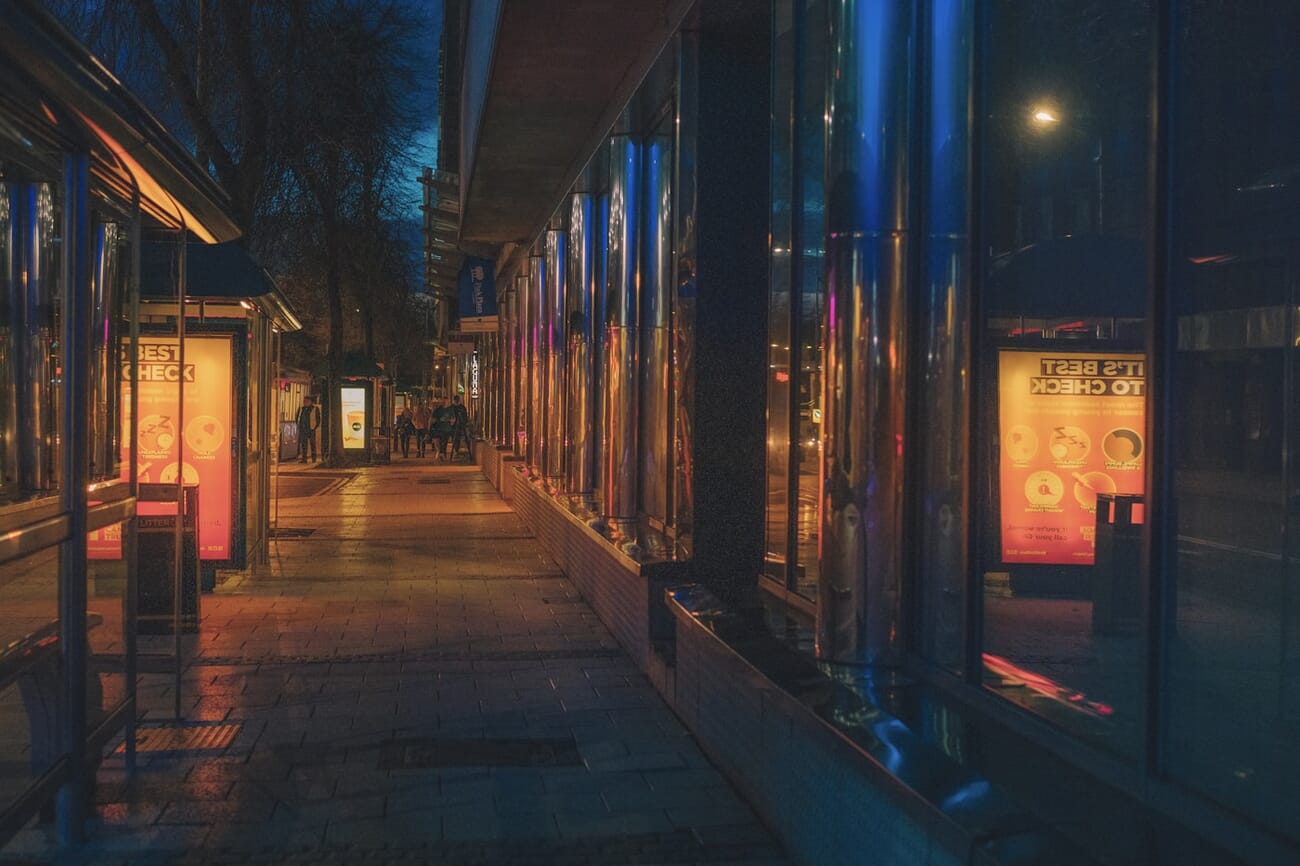
The Blue Hour: Your Secret Weapon
The best night photos are not taken when the sky is completely black. They are taken during the blue hour – the twilight period right after sunset or just before sunrise.
During this window (roughly 20-40 minutes), the deep blue sky has approximately the same brightness as the artificial lights from buildings and streetlamps. This creates an incredibly beautiful contrast between the warm artificial light and the cool blue sky – and it is far easier to expose correctly than a pitch-black sky.
Why the blue hour works so well:
- Balanced contrast: Artificial lights and the sky are close in brightness, so your camera can capture detail in both without blowing highlights or crushing shadows.
- Color contrast: The warm orange of streetlamps against the cool blue sky creates a naturally pleasing color palette.
- Easier metering: Your camera’s light meter is far more accurate during blue hour than against a black sky, which often tricks the meter into overexposing.
Timing it right: Use an app like PhotoPills or The Photographer’s Ephemeris to find exact blue hour times for your location. Arrive early, set up your composition while there is still light, and be ready to shoot the moment the sky deepens. The window is short and the best light changes fast.

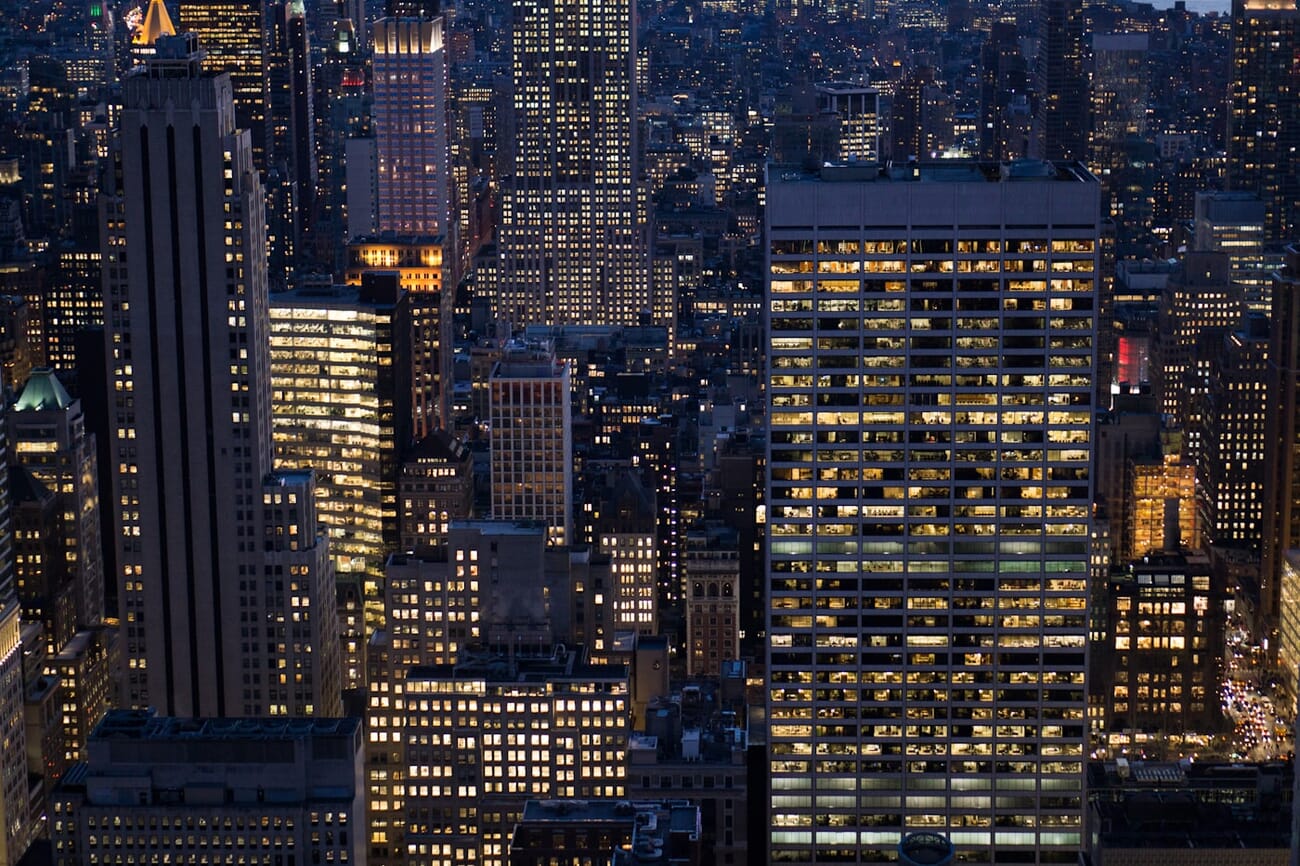
Urban Night Photography
Cities are the best place to start with night photography. Interesting locations are everywhere, artificial lighting softens contrast, and you do not need to drive to a remote location.
Starburst Effects
Want those beautiful star-shaped rays around streetlamps and point light sources? Close your aperture to f/11 or f/16. At wider apertures, lights look like soft blobs, but as you stop down, they transform into precise multi-pointed stars. The shape and number of rays depend on your lens’s aperture blade construction.
Shooting Through Glass
Observation decks and hotel windows offer incredible city views, but reflections from the room behind you can ruin the shot. Wipe the glass clean, turn off room lights if possible, then press the front of your lens directly against the glass. Use your hands or a dark cloth to block any gap between the lens barrel and the window. This eliminates reflections completely.
HDR for Extreme Contrast
Sometimes the contrast between bright lights and deep shadows is simply too extreme for a single exposure. When this happens, HDR (High Dynamic Range) is your solution. Shoot a bracketed sequence: one normal exposure, one underexposed (to save highlights), and one overexposed (to save shadows). Merge them in Lightroom or dedicated HDR software to retain detail across the full tonal range.
Light Trail Photography
Light trails have a magical effect, but the principle is beautifully simple. During a long exposure, a car’s bright headlights and taillights burn into the sensor while the car’s body – which does not emit enough light – vanishes like a ghost. Only the trails of light remain.
Getting the perfect light trail comes down to balancing three components:
Aperture Controls the Thickness
In light trail photography, the aperture controls the thickness and brightness of the light trail – not just the depth of field. Set your aperture to f/16 for clean, elegant trails. If you open wider (f/11 or below), the trails become washed out and overexposed, especially where multiple trails overlap at intersections.
Exposure Time Controls the Length
Double the exposure time, double the trail length. Start with 10-30 seconds and adjust based on traffic speed. Slow-moving traffic in stop-and-go conditions leaves more light per meter on the sensor than fast-moving cars, so you may need to close your aperture further to avoid overexposure.
ISO 100 – Always
Urban environments provide so much ambient light that raising ISO is unnecessary. Stick to ISO 100 for clean, noise-free results.
Pro tip: Shoot at an intersection to capture the dotted, broken lines left by blinking turn signals. For maximum drama, use a wide-angle lens from a low angle – cars passing close to the camera create much larger, more dynamic trails.

Astrophotography Basics
Capturing the night sky is one of the most rewarding challenges in photography. Here is how to photograph the most popular celestial subjects.
The Moon
If you use automatic mode, the moon will look like a glowing white blob. Switch to Manual mode with a telephoto lens (500mm or longer for detail) and follow this critical rule:
Never expose longer than 1 second. The moon moves faster than you think. Exposures over 1 second produce a blurry, oval-shaped moon. Use ISO 100-400, f/8-f/11, and shutter speeds around 1/125 to 1/250 second.
If you want the moon in a landscape shot, you will need to composite two exposures: one long exposure for the landscape and one fast exposure for the moon, blended in Photoshop.
The Milky Way
Capturing the Milky Way requires a clear, moonless night far from city light pollution. Use a wide-angle lens, open your aperture to f/2.8 or wider, and raise your ISO to 1600-3200.
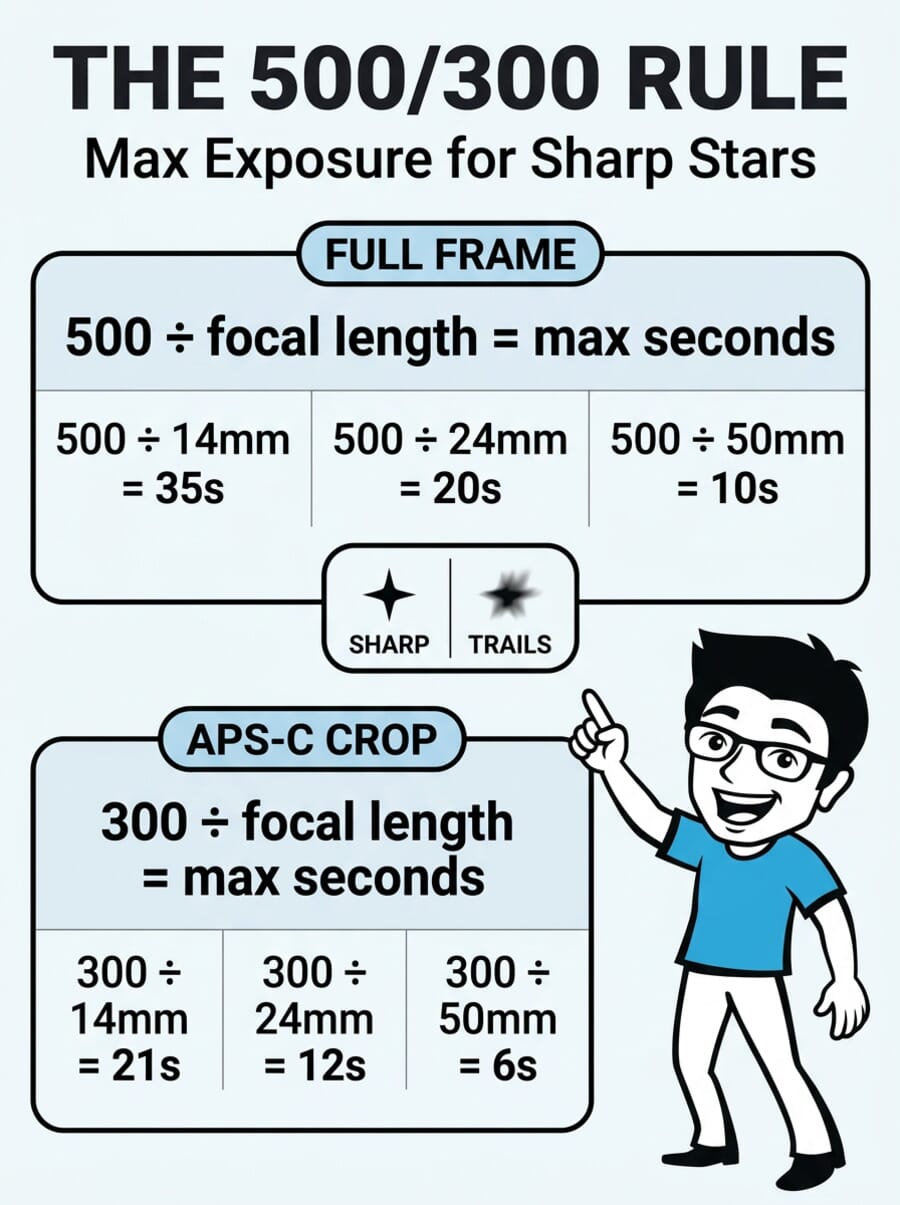
The key challenge is keeping stars sharp. Because the Earth rotates, long exposures turn stars into streaks. Use the 500 Rule to calculate your maximum exposure time:
- Full-frame camera: 500 / focal length = max seconds (e.g., 500 / 20mm = 25 seconds)
- APS-C (crop sensor): 300 / focal length = max seconds (e.g., 300 / 20mm = 15 seconds)
Always include an interesting foreground element – a tree, a barn, a rock formation. A sky full of stars without a subject is just a technical exercise, not a photograph.
For dedicated gear recommendations, see our guides to the best cameras for night photography and best Canon lenses for astrophotography.
Star Trails
If you deliberately want to capture star movement, you have two approaches:
- Single long exposure: In pitch-black darkness, set ISO 100, close your aperture, and leave the shutter open for 30 minutes or more.
- Image stacking (recommended): Take dozens of 30-second exposures continuously with an intervalometer, then merge them using software. This avoids overexposure from ambient light and lets you remove frames ruined by airplane trails.
Composition tip: Find the North Star (Polaris) and include it in your frame. Because it aligns with Earth’s axis, it appears stationary while all other stars form beautiful circular trails around it.

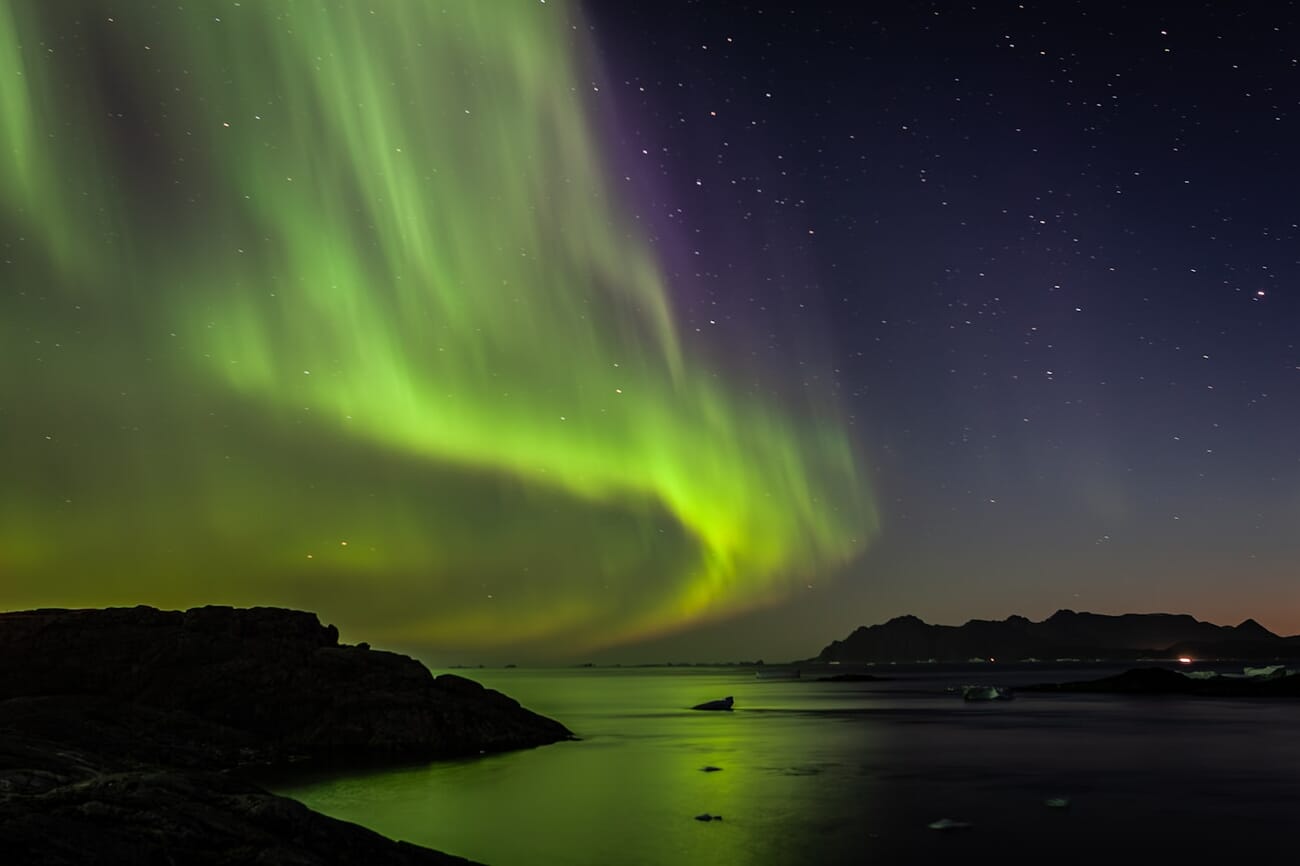
Northern Lights
The Aurora Borealis is one of nature’s most spectacular subjects. Capturing it requires the right conditions:
- Forecast: Use aurora prediction tools like vedur.is (Iceland) or dedicated aurora apps. An activity level of 3 or higher gives you a good chance.
- Shoot before moonrise: The moon acts as massive light pollution, washing out the aurora’s delicate colors.
- Clear skies: Auroras occur high in the atmosphere. Cloud cover blocks the view completely.
- Settings: Use a fast wide-angle lens at f/2.8 or wider, ISO 1600-3200, and exposures of 5-15 seconds. The aurora moves, so exposures longer than 15 seconds blur the light curtains.
How to Photograph Fireworks
Fireworks are light trails in the sky – the same principles apply, with a few key adjustments.
The setup: Arrive early. Set up your tripod where people will not bump into it. Attach your remote release. Turn off noise reduction, image stabilization, Auto ISO, and the flash.
The settings:
- ISO 100 – gives you headroom for long exposures
- f/11 – the sweet spot for trail thickness. Too wide (f/5.6) and the trails wash out; too narrow (f/22) and they look thin and pale
- Bulb mode – hold the shutter open to capture 3 to 5 rockets in a single frame. A single rocket looks boring; more than 5 creates chaos
Focusing trick: Before the show starts, autofocus on the exact spot where the rockets are being launched from the ground. Then switch to manual focus. As long as you do not touch the zoom ring, every rocket exploding directly above that spot will be perfectly sharp.
Photographing Lightning
Lightning photography is not technically complicated, but it demands patience, the right timing, and a healthy respect for safety.
Safety first: Maintain at least 1 kilometer from the storm. Calculate distance by counting seconds between lightning and thunder, then multiply by 300 meters. Never stand near water, elevated areas, or lightning rods.
Settings: Manual mode, ISO 100, f/8 as a starting point, and exposure times between 5 and 30 seconds. Do not exceed 30 seconds or moving clouds will blur into an ugly mess. Turn off noise reduction – you need to shoot continuously.
The strategy: Set up your camera, frame a wide shot with a wide-angle lens, and take one exposure after another continuously. Most frames will be empty. Delete those later. If you get multiple strikes from the same tripod position, you can composite them in Photoshop using the “Lighten” blending mode to stack multiple lightning bolts into one dramatic image.
For automated lightning detection, check out the Bolt Hunter Lightning Trigger which can trigger your camera the instant lightning strikes.
Light Painting Basics
Light painting turns you into the artist. While your camera takes a long exposure, you use handheld light sources to draw, illuminate, and create patterns in the dark.
Flashlights and LEDs
Use a flashlight or color-changing LED to draw shapes in the air during an exposure of 15-30 seconds. Attach a flashlight to a string and swing it in circles to create light spheres and spirals. You can even write words in the sky – though you will need to write them backwards (mirrored) since you are facing the camera.
Sparklers
Sparklers produce beautiful showers of light. Use them to trace outlines of people, outline objects, or write short words. The exposure time is dictated by how long the sparkler burns (usually 30-60 seconds).

Steel Wool (With a Safety Warning)
For a spectacular shower of sparks, stuff fine steel wool into a metal kitchen whisk, attach it to a string or cable, set it on fire, and spin it around during a long exposure. The results are visually stunning.
Editor’s Note: Steel wool photography carries serious fire risk. Always wear protective clothing (hooded jacket, safety goggles), spin over non-flammable surfaces (concrete, sand, water), and NEVER attempt this in dry environments or near vegetation. Check local fire regulations before trying. Safety first – no photo is worth starting a fire.
Frequently Asked Questions
What camera settings should I use for night photography?
Start with f/8, ISO 100, and a 4-second exposure for cityscapes. Shoot in RAW format, use Manual or Aperture Priority mode, and adjust exposure time based on your histogram. Turn off noise reduction, image stabilization, Auto ISO, and flash. Different subjects need different settings – light trails use f/16 and 10-30 seconds, while astrophotography needs f/2.8 at ISO 1600-3200.
Do I need an expensive camera for night photography?
No. Any camera with manual controls and a Bulb mode works well. Your standard kit lens handles cityscapes, light trails, and fireworks perfectly. You only need specialized (and expensive) fast lenses for extreme low-light subjects like the Milky Way or Northern Lights. A sturdy tripod matters more than an expensive camera body.
How do I focus in the dark?
Move your autofocus point onto a light source or high-contrast edge. Alternatively, use Live View magnification to zoom in 5-10x on a distant light and manually adjust focus until the point is sharp. You can also use a strong flashlight to illuminate a distant object, autofocus on it, then switch to manual focus.
What is the best time for night photography?
The blue hour – the twilight period about 20-40 minutes after sunset or before sunrise. During this time, the deep blue sky has roughly the same brightness as artificial lights, creating beautiful color contrast and making exposure much easier than shooting against a completely black sky.
Why are my night photos blurry?
The most common causes are camera shake (use a tripod and remote release), image stabilization fighting the tripod (turn IS/VR off), wind vibration (shield your tripod), or autofocus hunting in the dark (switch to manual focus). For DSLR users, mirror vibration can also cause softness – use mirror lock-up combined with a remote release.
How do I photograph the Milky Way?
You need a clear, moonless night far from city light pollution, a wide-angle lens at f/2.8 or wider, ISO 1600-3200, and the 500 Rule to calculate maximum exposure (500 divided by your focal length for full-frame, 300 for APS-C). Include an interesting foreground subject. Use manual focus with Live View magnification on a bright star.
Test Your Night Photography Knowledge
Think you have got the key concepts down? Take this quick quiz to test your understanding of night photography settings and techniques.
Featured image: Photo by Pierre Blache on Unsplash.