- Window light is one of the most accessible and flattering light sources – no expensive gear required.
- North- or south-facing windows deliver the softest, most consistent illumination throughout the day.
- Simple modifiers like white sheets, curtains, and reflectors let you shape window light to fit any mood.
- A wide aperture (f/1.8-f/2.8) compensates for lower indoor light while creating beautiful background blur.
- Experimenting with angles – front, side, back – unlocks dramatically different results from the same window.
- Portraits, food, still life, and product shots all look stunning under window light.
Introduction
Window light is one of the most powerful tools in photography. It delivers soft, directional illumination that creates beautifully dramatic images – and it’s available in virtually every building on earth. For photographers who want to elevate portraits, product shots, or still-life images without spending thousands on lighting gear, a well-chosen window is hard to beat.
Working with window light does require some technical know-how. Choosing the right window, controlling its illumination, positioning your subject, and dialing in camera settings can all be challenging – especially for beginners. This guide covers everything needed to master window light photography with confidence.
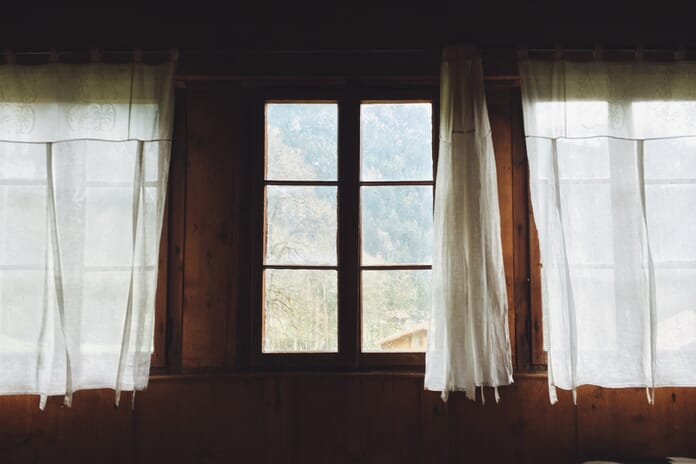
Choosing the Right Window
The direction a window faces makes an enormous difference in the quality of light it delivers.
East- and west-facing windows receive direct sunlight during the morning or evening. While this can work for high-contrast, dramatic shots, it introduces harsh shadows, inconsistent light levels, and rapidly shifting color temperature as the sun moves.
North- or south-facing windows (depending on hemisphere) never receive direct sunlight. The result is soft, even, flattering light that stays remarkably consistent from morning to late afternoon. This predictability makes it far easier to plan shoots, replicate results, and master light direction.
Pro tip: Not sure which way a window faces? Open a compass app on any smartphone and stand facing the glass. If it reads roughly north or south, that window is a prime candidate for photography.
Window Size Matters
In lighting, size matters. A larger light source relative to the subject produces softer, more gradual shadow transitions – and windows are no different. Think of a window as a giant softbox: the bigger it is, the more flattering the light.
Why bigger windows win:
- Light wraps around the subject from multiple angles, reducing contrast
- Shadow edges become gradual and creamy rather than sharp
- More total light enters the room, allowing lower ISO values and faster shutter speeds
Sliding glass doors, floor-to-ceiling windows, and French doors all make excellent light sources. Smaller windows work too – they simply produce slightly harder light with more defined shadows, which can be a creative choice in its own right.
Modifying Window Light
Even a perfect north-facing window can benefit from a little modification. Modifiers shape, soften, or redirect the light – and they don’t have to be expensive.
Common DIY window modifiers:
- White bed sheet – drape it over the window to diffuse and soften the light further. This is the simplest and most effective modifier.
- Sheer curtains – already installed in many homes; they act as a built-in diffuser.
- Tracing paper or parchment – tape it to the glass for a subtle softening effect on smaller windows.
- Black foam board (flag) – place it on one side of the subject to block light and add contrast, creating a more dramatic look.
One important caution: don’t over-diffuse. Every layer of material reduces light intensity, forcing higher ISO values or slower shutter speeds. A single layer of white fabric is usually enough.
Also make sure the modifier is neutral white. A colored sheet will introduce a color cast across the entire image – fixable in post-processing, but much easier to avoid in the first place.
Using Reflectors to Fill Shadows
When the shadow side of a subject looks too dark, a reflector is the simplest fix. It bounces window light back onto the shadowed areas, reducing contrast and creating a more balanced exposure.
How to position a reflector:
- Side-lit portrait: Position the reflector opposite the window, just outside the frame, angled toward the shadow side of the face
- Backlit portrait: Place a reflector below or in front of the subject to bounce light back onto the face, preventing a full silhouette
- Still life / food: Use a small white card or foam board propped up on the shadow side of the arrangement
DIY reflector options: white poster board, an open white book, aluminum foil on cardboard (for a stronger specular bounce), or a 5-in-1 collapsible reflector – the go-to tool for serious portrait and product photographers.
Adjust the reflector’s distance and angle until the shadow fill looks natural. Too much fill flattens the image; too little leaves harsh contrast. A subtle lift in the shadows is the sweet spot.
Camera Settings for Window Light
Window light is beautiful, but it’s not as intense as direct outdoor sun. Camera settings need to be chosen carefully for sharp, well-exposed results.
Aperture – go wide. A setting of f/1.8 to f/2.8 lets in maximum light and produces lovely background blur (bokeh). This is especially flattering for portrait photography. For product or food shots that need more depth of field, f/4 to f/5.6 works well. Not sure when to use which? The guide to wide vs. narrow aperture breaks it down.
Shutter speed – stay safe. For handheld portraits, keep the shutter at 1/125s or faster to freeze subject movement. For still-life or product shots on a tripod, shutter speed can drop to 1/15s or slower since nothing is moving. Using aperture priority mode lets the camera handle shutter speed automatically.
ISO – keep it low. Start at ISO 100 and only raise it when the shutter speed drops too slow. Modern mirrorless cameras handle ISO 800-1600 with minimal noise, so don’t be afraid to push it when needed.
Example Settings by Scenario
- Portrait near a large window, overcast day: f/2.0, 1/160s, ISO 400
- Food photography on a tripod, diffused window: f/4.0, 1/30s, ISO 200
- Pet photography, active subject: f/2.8, 1/250s, ISO 800
- Newborn portrait, soft light: f/2.8, 1/125s, ISO 400
Mirrorless tip: Cameras with in-body image stabilization (IBIS) can shoot handheld at shutter speeds 2-3 stops slower than usual. That means sharper window-light shots at lower ISO values, even in dim conditions.
Controlling the Light
The magic of window light comes from its directionality. Adding a second or third light source – an overhead lamp, a desk light, even another open window – dilutes that directional quality and can introduce mixed color temperatures.
Steps to isolate the light:
- Turn off every artificial light in the room – overhead fixtures, lamps, screens
- Close blinds or drapes on every window except the one being used as the light source
- If blinds aren’t available, cover extra windows with dark sheets or black foam board
- Check for reflective surfaces (mirrors, glass tables) that might bounce unwanted light back onto the subject
Once the room is controlled, the single window becomes a powerful, directional light source that carves out beautiful three-dimensional depth on any subject.
Using Blinds for Dramatic Shadows
Blinds are more than a way to block light – they’re a creative tool. Partially opened venetian blinds cast striking parallel shadows across a subject, adding texture, mood, and visual interest.
- Adjust the slat angle to control how wide or narrow the shadow stripes appear
- Move the subject closer to or farther from the window – closer creates sharper shadow lines; farther softens them
- Angle the subject’s face so shadow lines cross at an interesting diagonal rather than running straight across
This technique works beautifully for moody portrait work and creative self-portraits. It’s also a great way to practice silhouette photography concepts by controlling exactly how much light reaches the subject.
Experimenting with Lighting Angles
The angle between the subject, the window, and the camera determines the entire mood of a photograph. Even small repositioning changes can transform a flat image into something with striking depth.
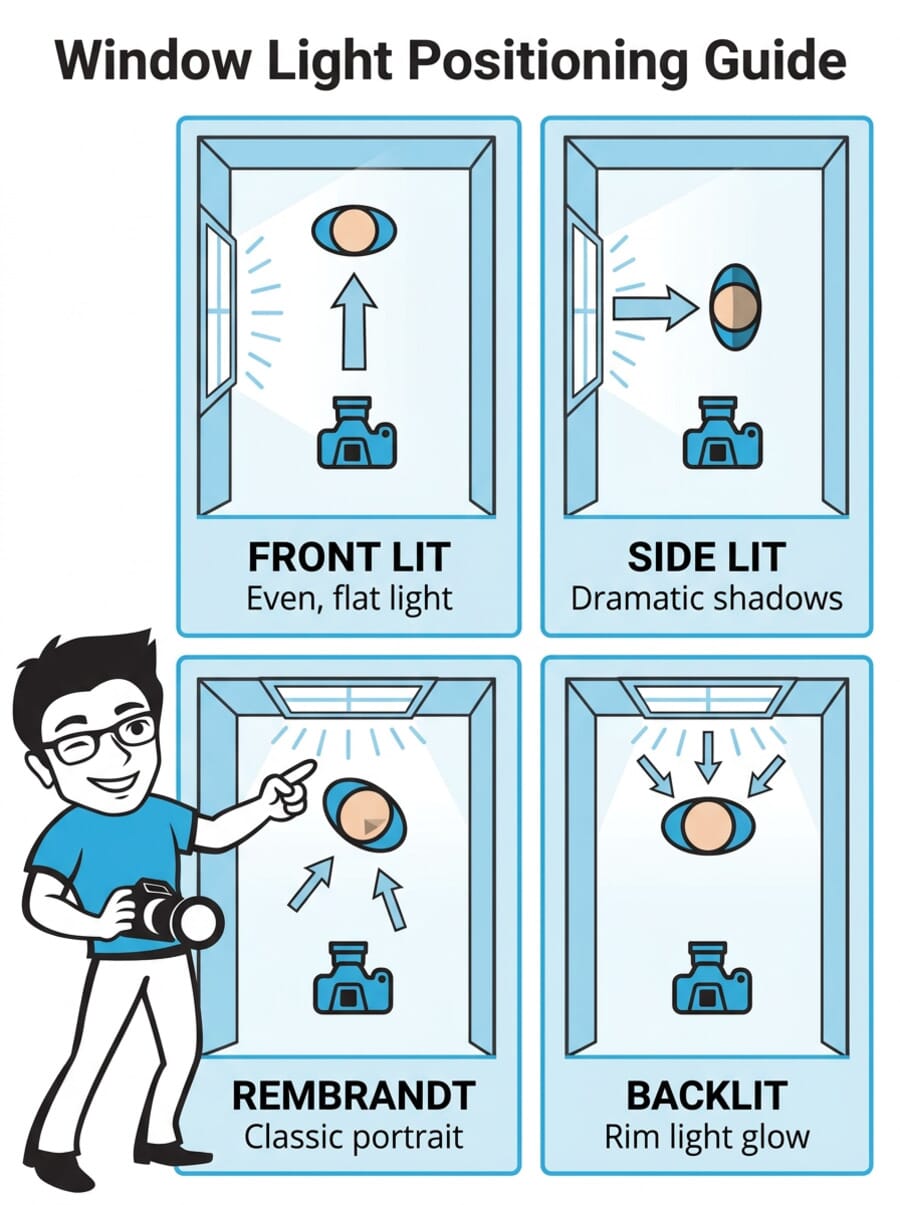
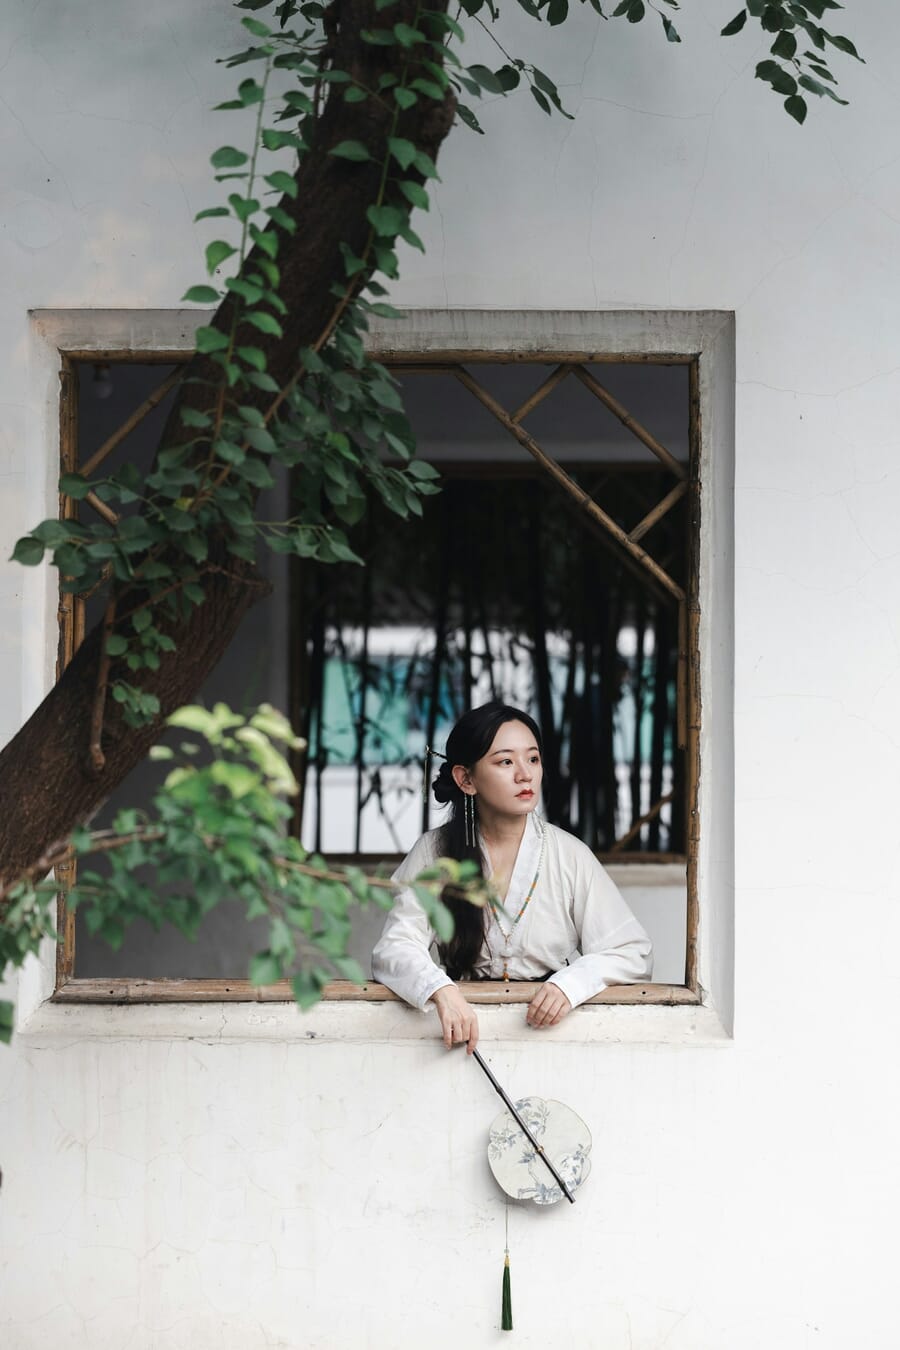
- Front light (subject facing window) – even, bright illumination with minimal shadows. Great for clean product shots and headshots.
- 45-degree light – the classic portrait angle. Creates gentle shadows on one side of the face that add dimension. This is similar to lighting patterns used in studios.
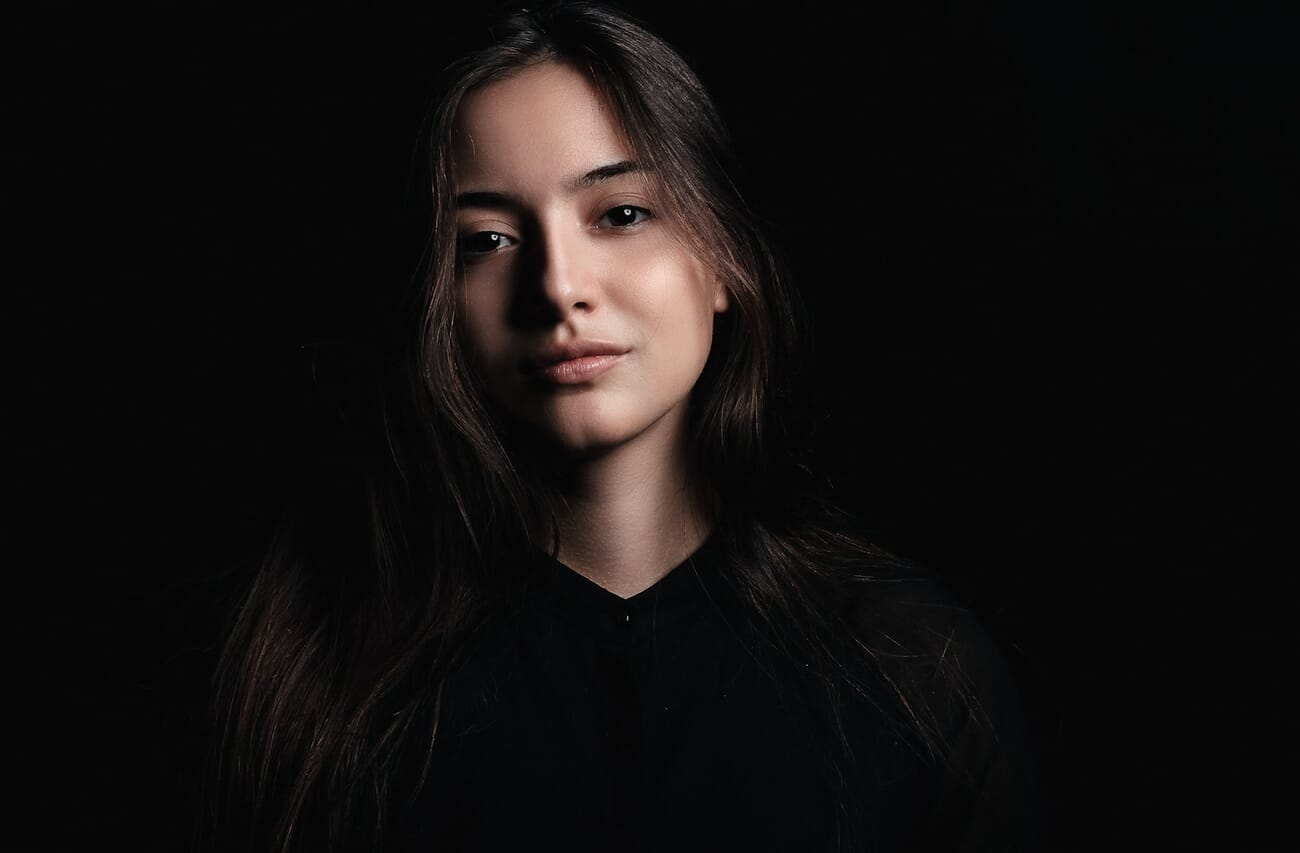
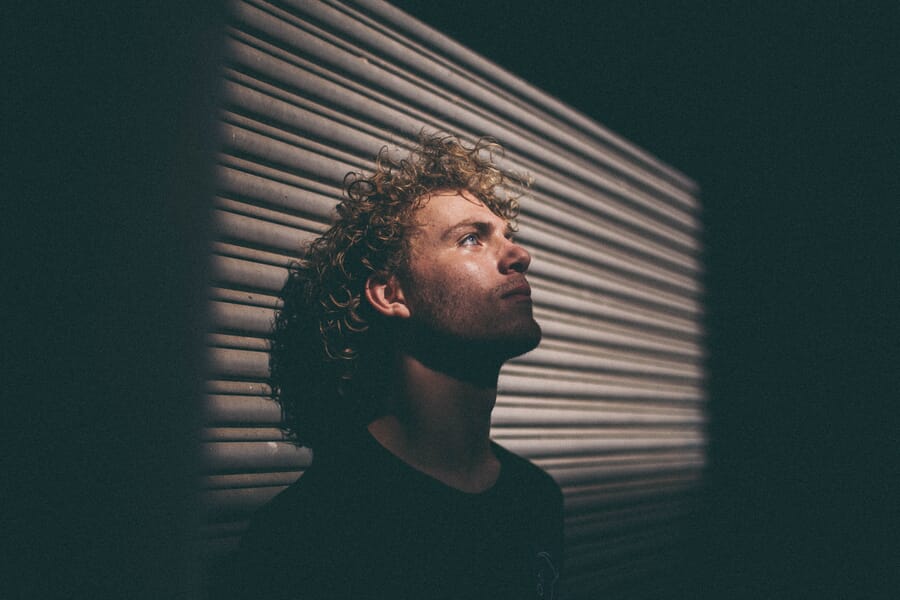
- Side light (90 degrees) – splits the face into a bright half and a shadow half. Highly dramatic, ideal for moody portraits.
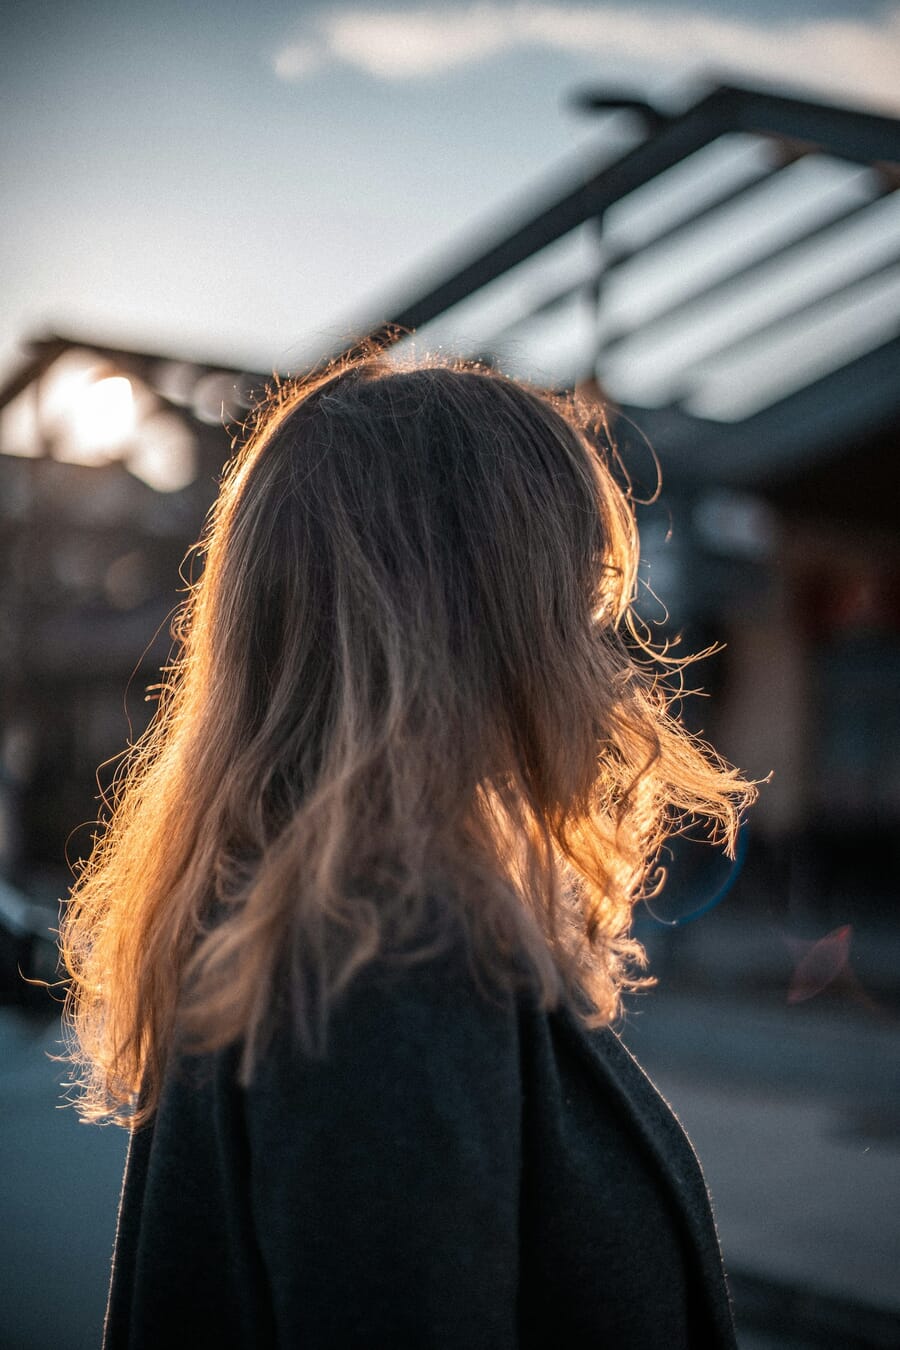
- Back light – subject between camera and window. Creates silhouettes, rim light, and a dreamy glowing effect around hair and edges.
Start with the subject facing the window directly, then gradually rotate them through 45, 90, 135, and full backlight positions. Shoot at each angle and compare – this exercise builds an intuitive understanding of how light direction shapes a photograph.
Backlight tip: For silhouette work, expose for the bright window rather than the subject. The subject goes dark while the window glows – a technique explored in the guide to shooting with the sun behind the subject.
Mirrorless tip: When shooting backlit subjects, enable eye-detect autofocus. Modern mirrorless cameras lock onto a subject’s eye even when strong backlight floods the sensor.
Best Subjects for Window Light
Portraits. Window light is the classic portrait light source. The soft, directional quality sculpts facial features beautifully, mimicking expensive studio setups. Side lighting from a window creates the kind of dramatic shadow play seen in Renaissance paintings.
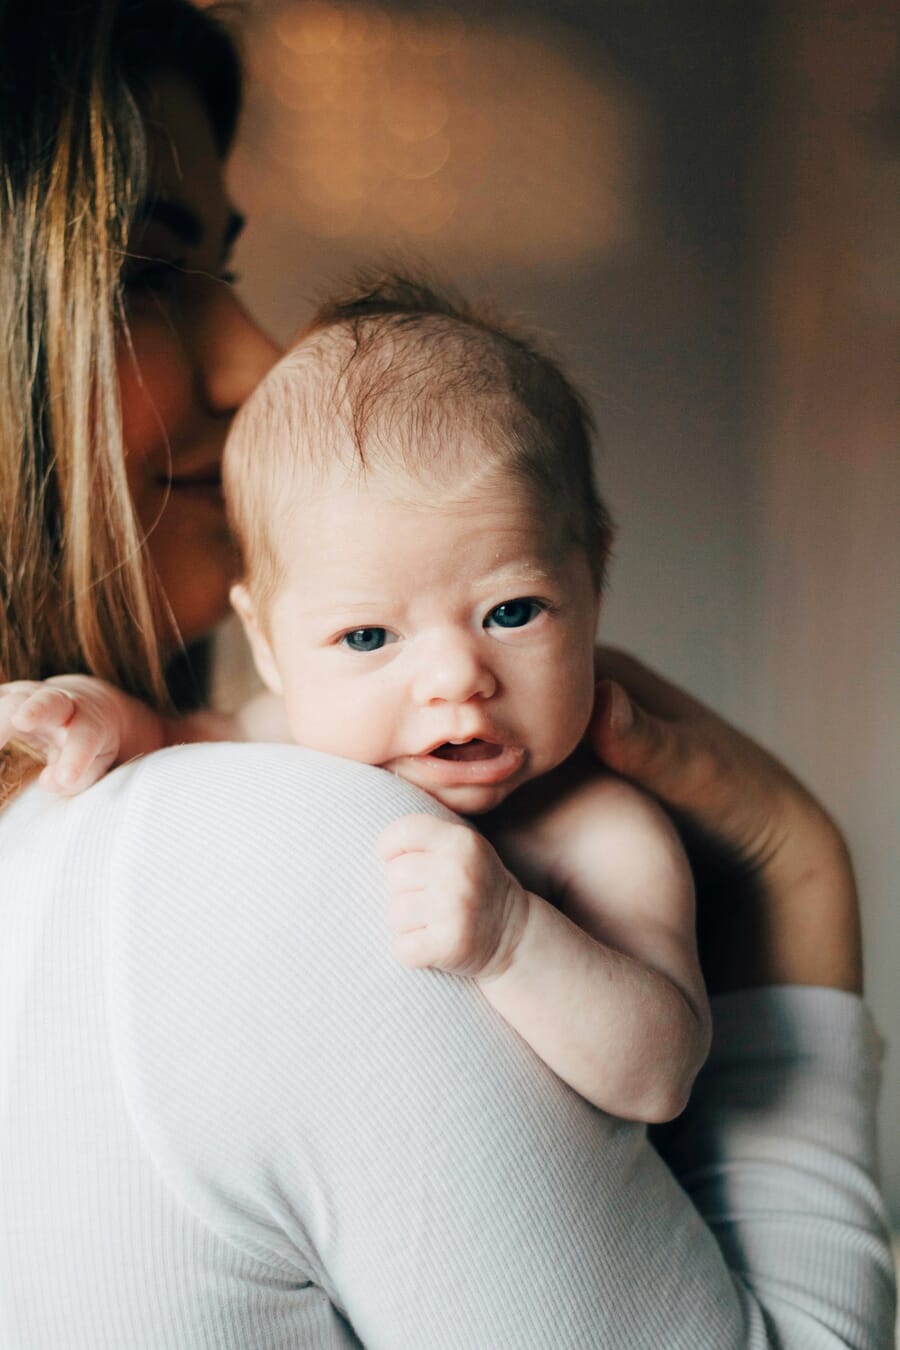
Newborn and baby photography. Soft window light is gentle, non-intrusive, and doesn’t produce a flash that startles infants. Position the baby near a large, diffused window for creamy, warm skin tones with minimal shadow contrast.
Food photography. Nearly all professional food photography relies on natural side light or backlight from a window. The soft shadows reveal texture in dishes – the crust of bread, the glaze on a roasted vegetable – without harsh reflections.
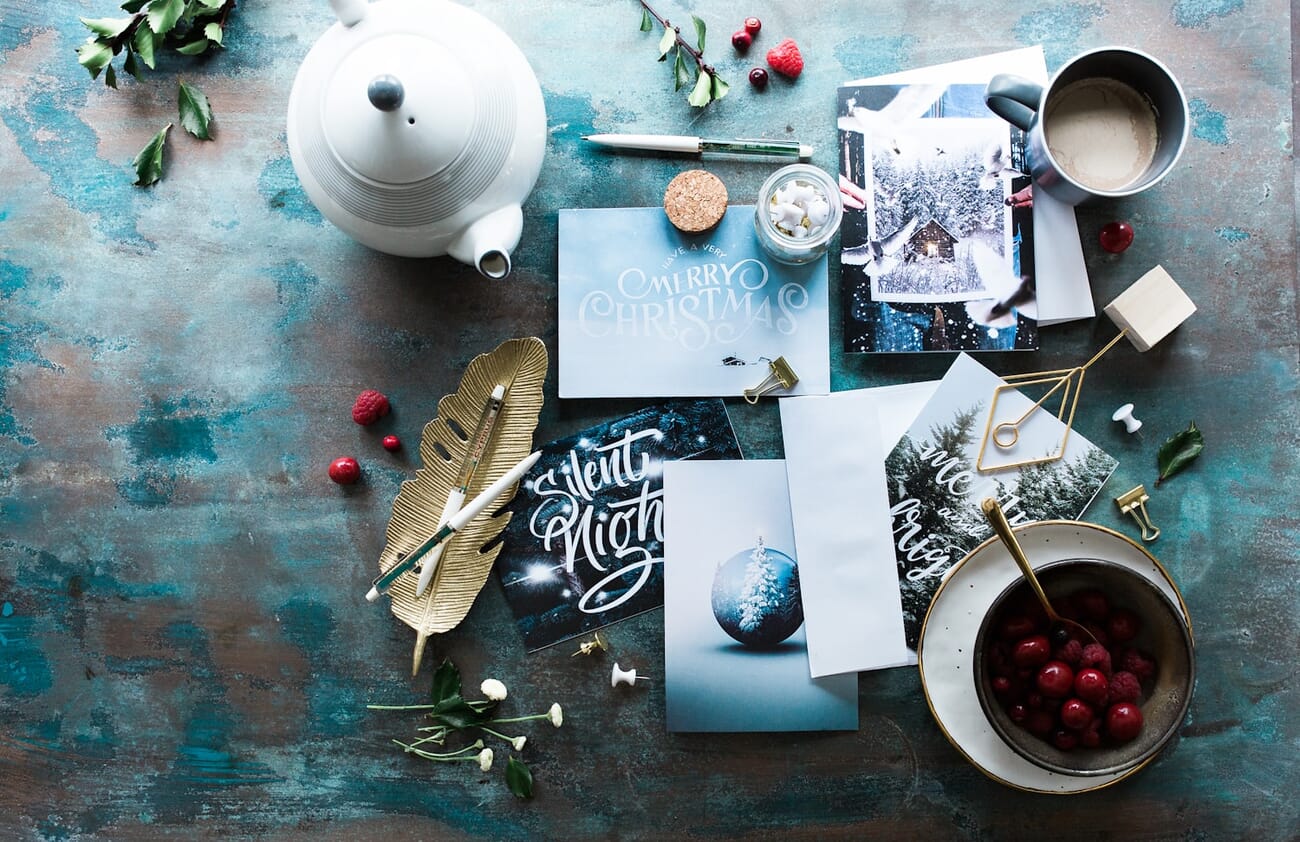
Still life. Flowers, books, ceramics, and everyday objects come alive under window light. The directional quality adds depth and dimension that flat overhead lighting can’t match.
Product photography. Small products – jewelry, cosmetics, handmade crafts – photograph beautifully near a window with a white reflector card on the opposite side. The setup costs almost nothing and rivals basic studio lighting.
Pet photography. Pets rarely sit still for long. The ample, steady light from a large window allows fast shutter speeds without flash – and animals are far more relaxed without strobes firing. Enable eye-detect AF on a mirrorless camera to keep a moving pet’s eyes tack-sharp.
Window Light for Smartphone Photography
Professional cameras aren’t the only tools that benefit from window light. Modern smartphones produce stunning results when paired with a good window – sometimes rivaling dedicated cameras for social media and web content.
- Use Portrait Mode. The computational background blur on iPhones, Samsung Galaxy, and Pixel phones works best with directional light. Window light gives the depth-mapping sensor clear subject separation, resulting in cleaner bokeh.
- Tap to set exposure. Tap the subject’s face on screen and drag the exposure slider down slightly to preserve highlight detail in the bright window area.
- Enable HDR for backlit scenes. HDR mode captures multiple exposures and blends them, preserving detail in both the bright window and the darker subject.
- Use the 2x or 3x lens. Telephoto lenses compress perspective and produce more flattering proportions for portraits.
- Shoot in ProRAW or RAW. Most flagship phones support RAW capture, preserving far more shadow and highlight data for editing.
Best position: Place the subject 2-4 feet from a north- or south-facing window, with the phone at eye level. Avoid positioning the window directly behind the subject unless intentionally going for a silhouette or HDR look.
Editing Window Light Photos
Even perfectly lit window photos benefit from post-processing. The high dynamic range of indoor scenes – bright windows next to shadowy interiors – means there’s almost always room to recover detail and refine the mood.
- Recover highlights. Pull the Highlights slider left to bring back detail in blown-out window areas.
- Lift shadows. Push the Shadows slider right to reveal detail in darker areas without losing the moody feel.
- Correct white balance. Indoor window light can shift warm or cool depending on time of day and wall color. Adjust Temperature until skin tones look natural.
- Add a subtle vignette. A light vignette draws the eye toward the subject and away from bright window edges.
AI masking tools in Adobe Lightroom make window light editing faster than ever. The “Select Subject” and “Select Sky” masks can isolate the bright window from the subject in one click, allowing independent exposure adjustments for each zone.
For a deeper dive into post-processing, check out the complete guide on how to edit photos. And for a quick reference to shooting settings, bookmark the camera settings cheat sheet.
Window Light After Dark
Window light doesn’t end at sunset. At night, ambient city light, streetlamps, and neon signs streaming through a window can create moody, atmospheric photos with a completely different character than daylight shooting.
- Use a tripod and slow shutter speed (1/15s – 1s) to gather enough light
- Push ISO higher (1600-3200) for handheld shots
- Embrace the color casts – mixed tungsten and neon creates interesting warmth
- Position the subject close to the window to maximize available light
For more on working in low light conditions, see the complete night photography guide.
Start Shooting with Window Light
Window light offers stunning, directional illumination that produces professional-quality results across a wide range of subjects. Whether the goal is a moody portrait, a bright food flat-lay, or a simple product shot, the techniques above provide a solid foundation.
Quick recap:
- Choose a north- or south-facing window for the most consistent, flattering light
- Use modifiers (white sheets, blinds, reflectors) to shape the light
- Dial in a wide aperture, safe shutter speed, and the lowest ISO the scene allows
- Experiment with angles – front, side, and back – to discover the full range of possibilities
- Edit thoughtfully, using masking tools to balance bright windows and shadowed subjects
Now grab a camera (or a smartphone), find the nearest window, and start shooting.
Frequently Asked Questions
What type of window is best for window light photography?
A north- or south-facing window is ideal. These windows receive indirect sunlight, producing soft, even illumination that stays consistent throughout the day – perfect for portraits, food, and product photography.
What camera settings work best for window light?
Start with a wide aperture (f/1.8-f/2.8), a shutter speed of 1/125s or faster for handheld portraits, and the lowest ISO that maintains proper exposure (typically ISO 200-800 indoors). Aperture priority mode handles shutter speed automatically while you control depth of field.
Should I use a reflector with window light?
It depends on the look you want. A reflector bounces light back into shadowed areas, reducing contrast for a more balanced exposure. For soft, flattering portraits, a reflector on the shadow side is highly recommended. For moodier, dramatic work, skip the reflector to preserve deep shadows.
Can smartphones take good window light photos?
Absolutely. Modern smartphones produce excellent window-light photos, especially when using portrait mode for background blur and HDR mode for backlit scenes. Position the subject 2-4 feet from a large window and tap the screen to set exposure on the face for the best results.
Featured image: Photo by Unsplash.


