
- Shadows aren’t problems to fix – they’re powerful compositional elements that add drama and depth.
- Hard shadows from direct light create bold graphic shapes; soft shadows from diffused light add gentle mood.
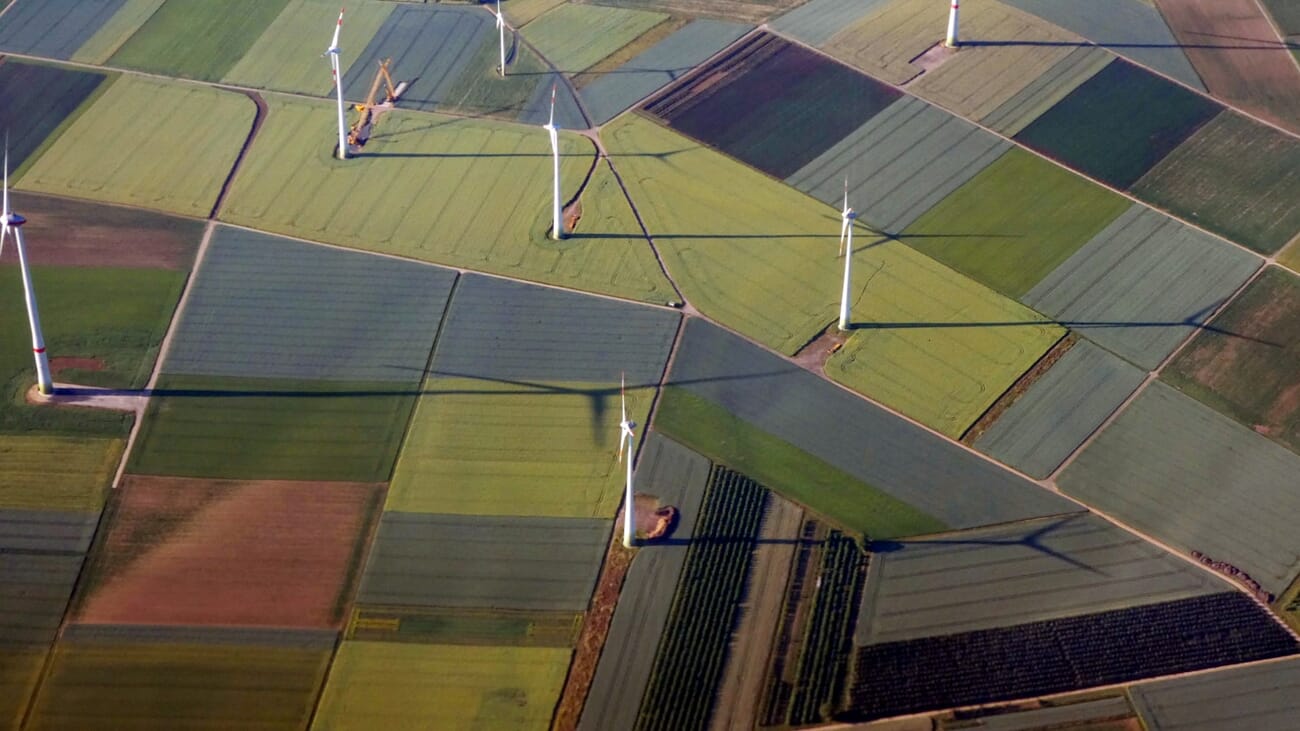
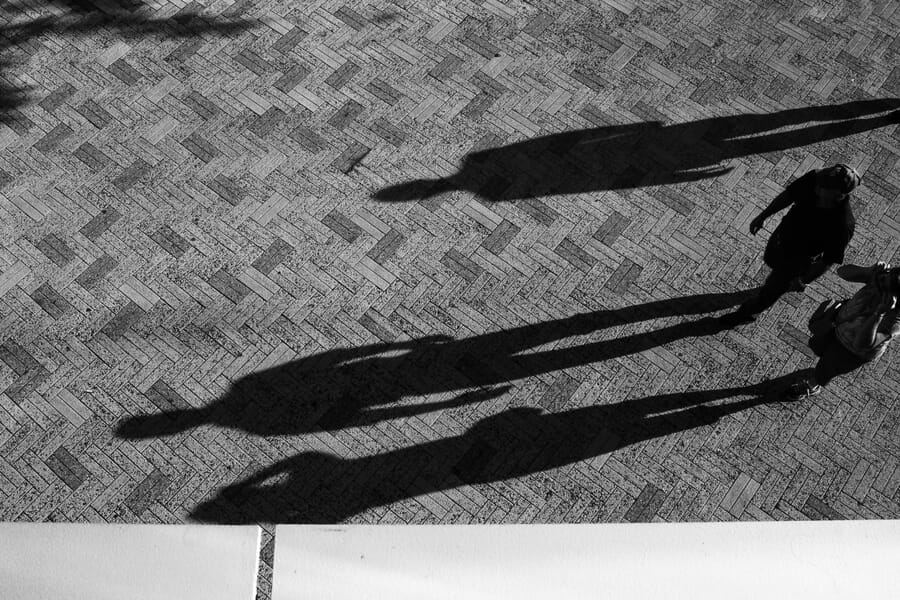
- Golden hour and low sun produce the longest, most dramatic shadows for outdoor work.
- Shadow portraits use projected shadows on faces and bodies for striking creative effects.
- Black and white conversion strips away color to let shadow patterns dominate the frame.
- Camera settings – expose for the highlights and let shadows go deep for maximum impact.
Introduction
Most photographers spend their time chasing light. But some of the most compelling images are defined not by what’s illuminated, but by what isn’t. Shadow photography flips the script – treating darkness as the subject rather than something to eliminate.
Shadows add mystery, depth, and graphic power to photographs. They can transform an ordinary scene into something cinematic, turn a simple portrait into fine art, and make architectural details pop off the frame. Once you train your eye to see shadows as creative tools, you’ll find them everywhere – and your images will be stronger for it.
When Shadows Become the Subject
The key mindset shift in shadow photography is simple: stop treating shadows as background noise and start treating them as the main event. A shadow cast by a tree, a person, or an architectural element can carry just as much visual weight as the object itself.
Look for shadows that tell stories:
- Human shadows on walls or sidewalks – the shadow can reveal posture, gesture, and emotion without showing the person at all
- Architectural shadows – buildings, fences, railings, and staircases cast geometric patterns that change throughout the day
- Natural shadows – tree branches, leaves, and flower stems create organic patterns on nearby surfaces
- Self-portraits via shadow – photograph your own shadow as a creative self-portrait without ever showing your face
Understanding how light direction works is essential for shadow photography. The angle of the light source determines where shadows fall, how long they stretch, and how defined their edges are.
Hard Shadows vs. Soft Shadows
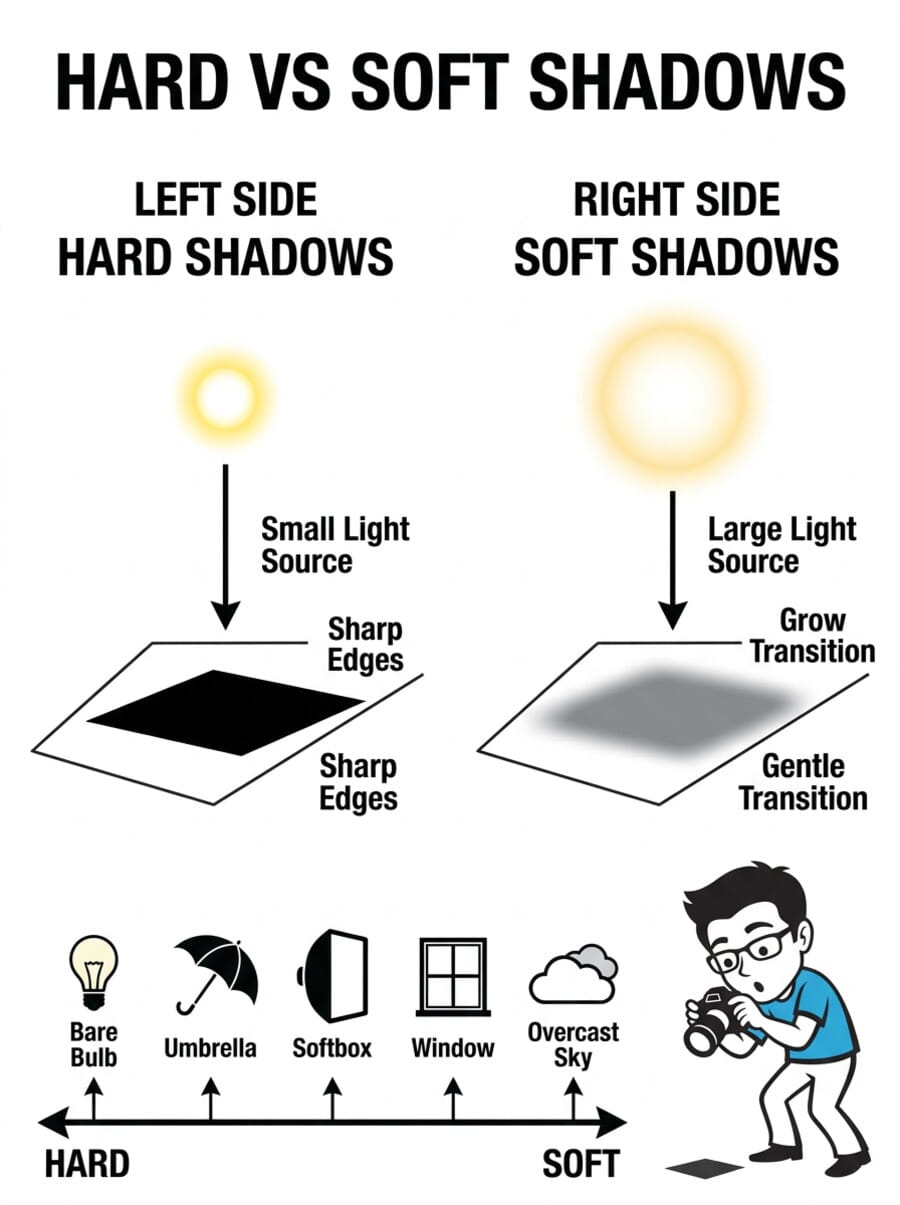
Not all shadows are created equal. The quality of a shadow depends entirely on the light source that creates it.
Hard shadows have sharp, clearly defined edges. They’re created by small, distant, or direct light sources – a bare flash, the midday sun on a cloudless day, or a spotlight. Hard shadows produce bold, graphic results with high contrast between light and dark areas.

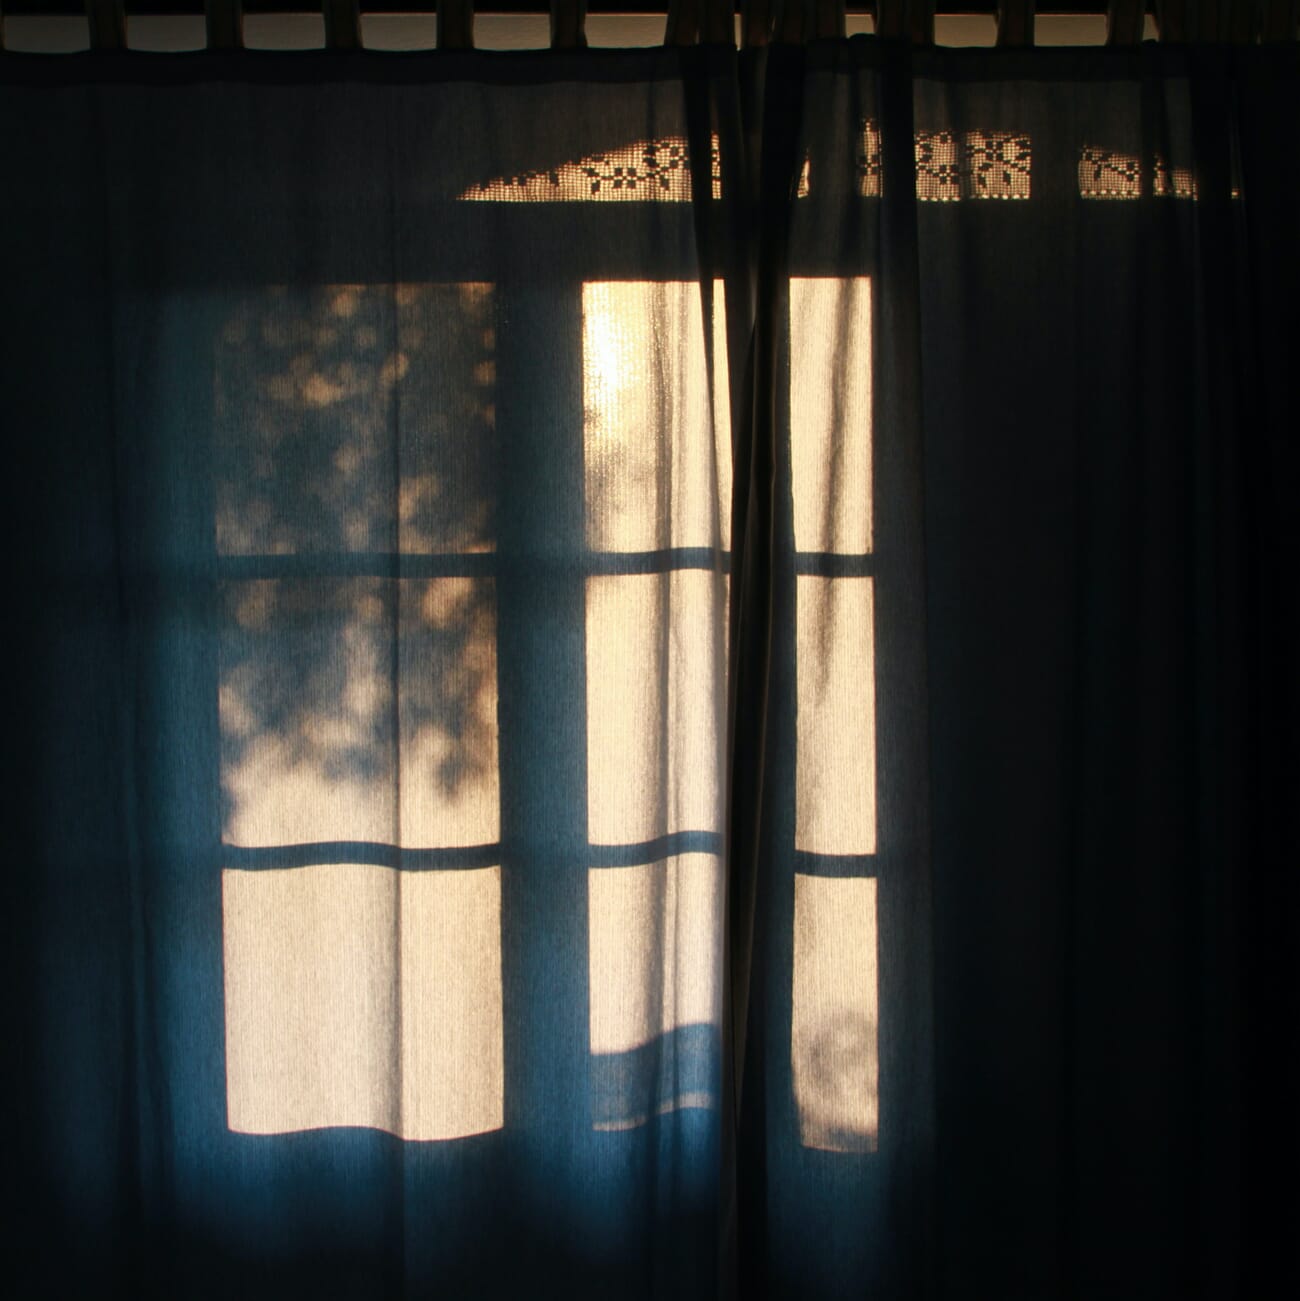
Soft shadows have gradual, feathered edges that transition gently from light to dark. They’re created by large, close, or diffused light sources – an overcast sky, a softbox, or window light filtered through curtains. Soft shadows feel more natural and subtle.
For shadow photography, hard shadows are usually more powerful. The sharp edges create clear shapes that read well as compositional elements. Soft shadows can still work, but they need higher contrast to stand out in the frame.
Golden Hour Shadow Techniques
The golden hour – roughly the first and last hour of sunlight each day – is the sweet spot for shadow photography. The sun sits low on the horizon, casting long, dramatic shadows that stretch across surfaces.
Why golden hour works so well:
- Shadows are at their longest, creating dramatic proportions
- The warm light adds color contrast between lit and shadowed areas
- The sun’s low angle creates directional light that rakes across textures
- The longer the shadow, the more it can interact with other elements in the scene
Practical tips for golden hour shadows:
- Arrive early – shadows change rapidly as the sun moves near the horizon
- Position yourself so shadows fall toward the camera for maximum visual impact
- Use a low shooting angle to emphasize shadow length across the ground
- Look for leading lines created by shadows that guide the viewer’s eye through the frame
For those interested in shooting after golden hour fades, the night photography guide covers techniques for working with artificial light and shadows after dark.
Shadow Portraits
Combining shadows with human subjects creates some of the most striking portrait work in photography. There are two main approaches.
Shadows ON the subject: Use window blinds, tree branches, fences, or any patterned object between the light source and the subject to project shadow patterns across the face or body. This works especially well with window light and venetian blinds – the parallel shadow lines add instant mood and visual complexity.
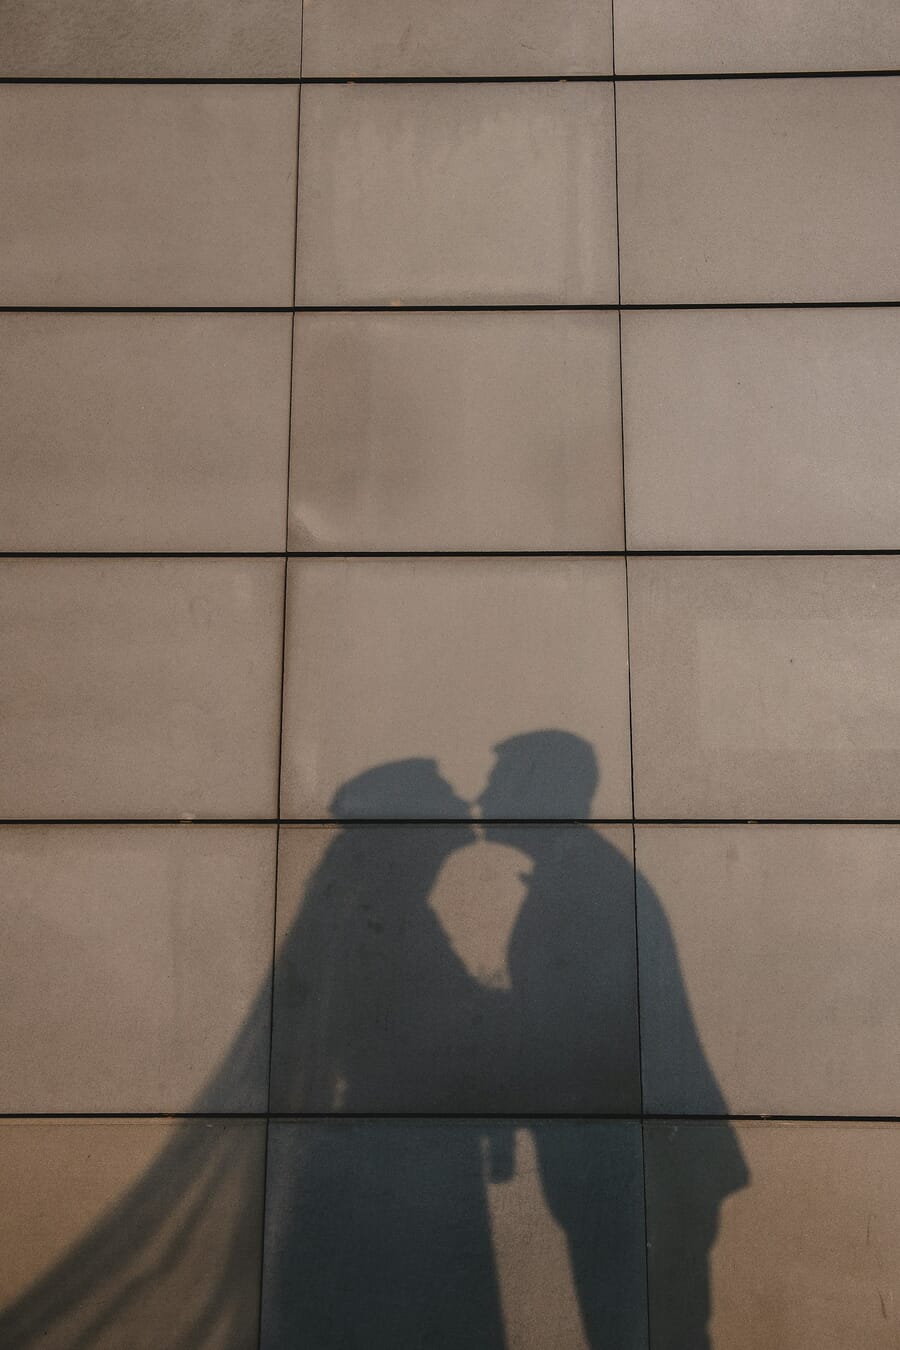
The subject AS a shadow: Position a subject between a strong light source and a clean surface (wall, sidewalk, fabric). Photograph only the shadow, ignoring the person entirely. This technique strips away all detail except silhouette and gesture, forcing the viewer to read body language and shape.
For shadow portraits, a reflector can be useful to add subtle fill light to the non-shadowed areas, preventing the subject from disappearing entirely into darkness.
Architectural and Street Shadows
Buildings and urban environments produce some of the most graphic shadow opportunities. The geometric lines of architecture combine with directional sunlight to create bold, abstract patterns.
Best subjects for architectural shadow photography:
- Staircases and railings – create repeating parallel or angular shadows
- Window frames and mullions – project grid patterns onto interior floors and walls
- Arches and doorways – frame subjects within shadow shapes
- Street lamps and signage – cast interesting shapes on sidewalks at golden hour
The best approach is to scout locations during midday (when shadows are short and directly below objects), then return during golden hour when the same structures cast long, dramatic shadows across larger areas.
Black and White Shadow Photography
Shadow photography and black-and-white are natural partners. Removing color eliminates distractions and forces the viewer to focus on light, shadow, shape, and form – exactly what shadow photography is about.
Tips for black-and-white shadow work:
- Shoot in color (RAW) and convert in post – this preserves maximum data for editing
- Increase contrast in editing to push shadows darker and highlights brighter
- Use the color channel mixer in Lightroom/Photoshop to control how different colors map to gray tones
- Look for scenes with strong tonal separation – bright highlights next to deep shadows
Many cameras offer a monochrome preview mode that shows a black-and-white live view while still recording in color. This is a great way to “see in shadows” while shooting.
Camera Settings for Shadow Photography
Exposure is the critical decision in shadow photography. The goal is usually to preserve the shadow shapes as dark, defined elements rather than lifting them into mid-tones.
Key settings:
- Expose for the highlights. Use spot metering on the brightest area of the scene. This keeps shadows dark and dramatic. The camera settings cheat sheet covers metering modes in detail.
- Use negative exposure compensation (-0.5 to -1.5 EV) to push the overall exposure darker and deepen shadows
- Shoot in RAW for maximum latitude to adjust shadows and highlights in post
- ISO – keep it low (100-400) for clean shadow areas. High ISO adds noise that shows most in dark regions
- Aperture – f/8 to f/11 for sharp shadow edges in architectural and street work; wider for portrait shadows
The histogram trick: A good shadow photograph will show a histogram bunched toward the left (dark) side with a spike on the right (highlights). This “gap” in the middle represents the high contrast that makes shadow images powerful. Don’t let the camera’s auto exposure try to “fix” this by brightening the image.
Composing with Shadows
Shadows follow all the standard composition rules – and break them in interesting ways.
- Leading lines: Shadows naturally create lines that guide the eye. Use them to point toward your main subject.
- Framing: A shadow can frame a lit subject, drawing attention to it through contrast
- Negative space: Large shadow areas act as negative space, giving the lit areas room to breathe
- Symmetry: A subject and its shadow create natural symmetry – especially effective on flat surfaces like water or polished floors
- Scale: Long golden hour shadows exaggerate the apparent size of objects, making small subjects feel monumental
The most important composition habit for shadow photography: slow down and wait. Shadows move as the sun moves. A scene that looks ordinary at noon might produce extraordinary shadow compositions an hour before sunset.
Start Shooting Shadows
Shadow photography teaches you to see light differently. Instead of looking at what’s bright, you start noticing what’s dark – and the shapes, patterns, and stories that darkness creates. It’s a skill that improves all of your photography, not just shadow-specific work.
Start simple: on the next sunny day, go for a walk during golden hour and photograph nothing but shadows. Look for patterns on sidewalks, silhouettes on walls, and the interplay of light and dark across everyday surfaces. That single exercise will sharpen your eye for light and shadow in ways that carry into every genre you shoot.
Frequently Asked Questions
What time of day is best for shadow photography?
Golden hour (the first and last hour of sunlight) produces the longest, most dramatic shadows. The low sun angle casts shadows that stretch across surfaces and create bold compositional elements. Midday sun creates shorter, harsher shadows that work well for overhead patterns.
How do I expose correctly for shadow photographs?
Expose for the highlights using spot metering. This keeps the bright areas properly exposed while letting shadows fall deep and dark. Use negative exposure compensation (-0.5 to -1.5 EV) if needed. Shoot in RAW for maximum editing flexibility.
Should I shoot shadow photos in black and white?
Black and white is excellent for shadow photography because it strips away color distractions, letting the viewer focus purely on light, shadow, and form. Shoot in color RAW for maximum data, then convert to black and white in editing for the best results.
How do I create interesting shadow patterns on portrait subjects?
Place a patterned object – venetian blinds, lace curtains, a plant, or a fence – between the light source and the subject. The object projects its shadow pattern onto the person’s face or body. Window light through blinds is the most popular method for creating dramatic shadow portrait effects.
Featured image: Photo by Unsplash.


