
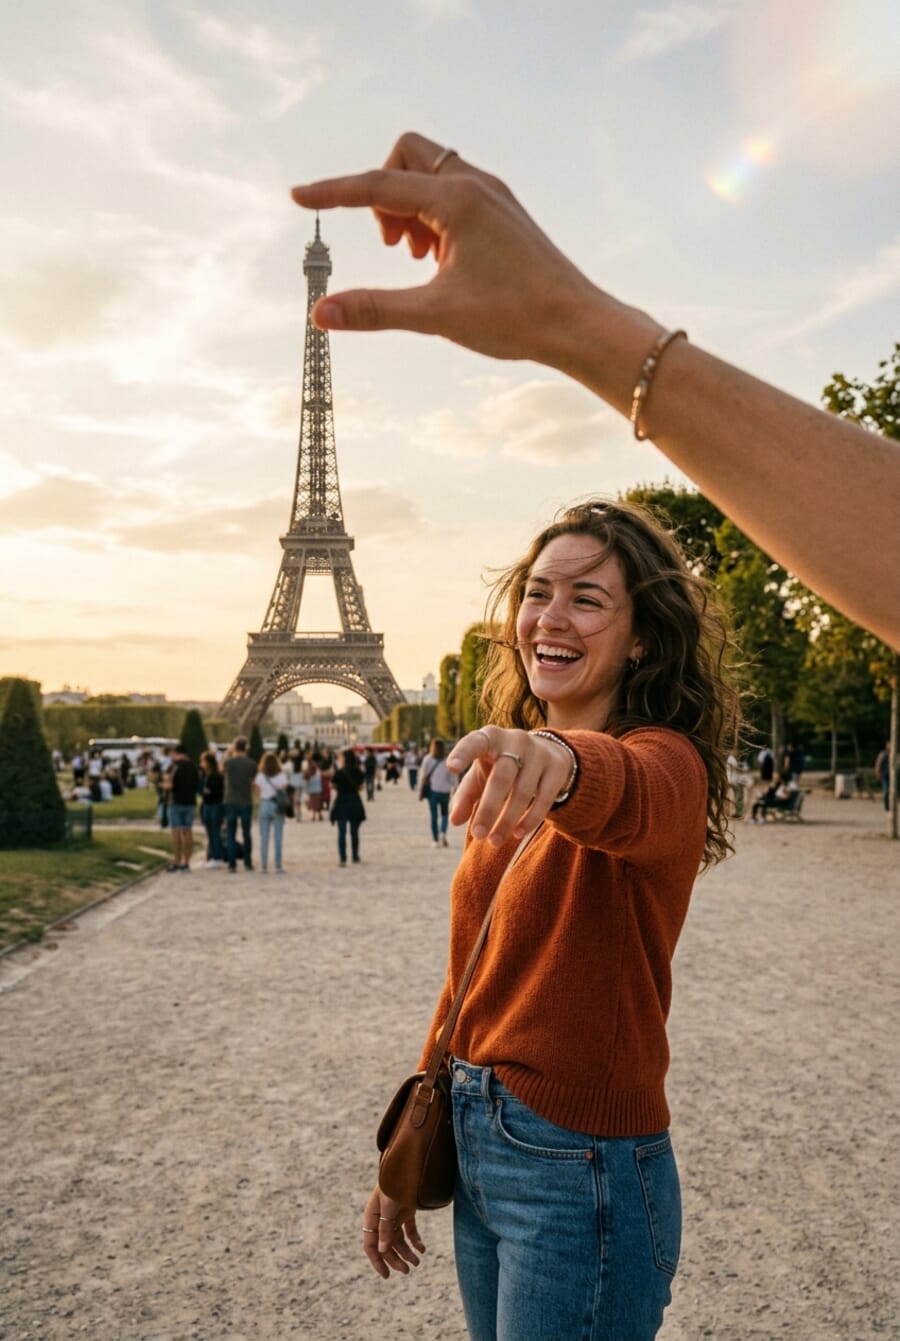
- Forced perspective uses optical illusions to make objects appear larger, smaller, or positioned impossibly — and 2026 is its biggest viral year yet, fueled by smartphone telephoto lenses.
- The trick is geometry: align a near subject with a distant one along the same sight line, then nail focus on both with a small aperture (f/11–f/16) or a long focal length.
- Smartphone shooters benefit hugely from the 200mm-equivalent telephoto on the iPhone 17 Pro, Galaxy S26 Ultra, and Vivo X300 Ultra — the long focal length compresses distance and makes alignment easier.
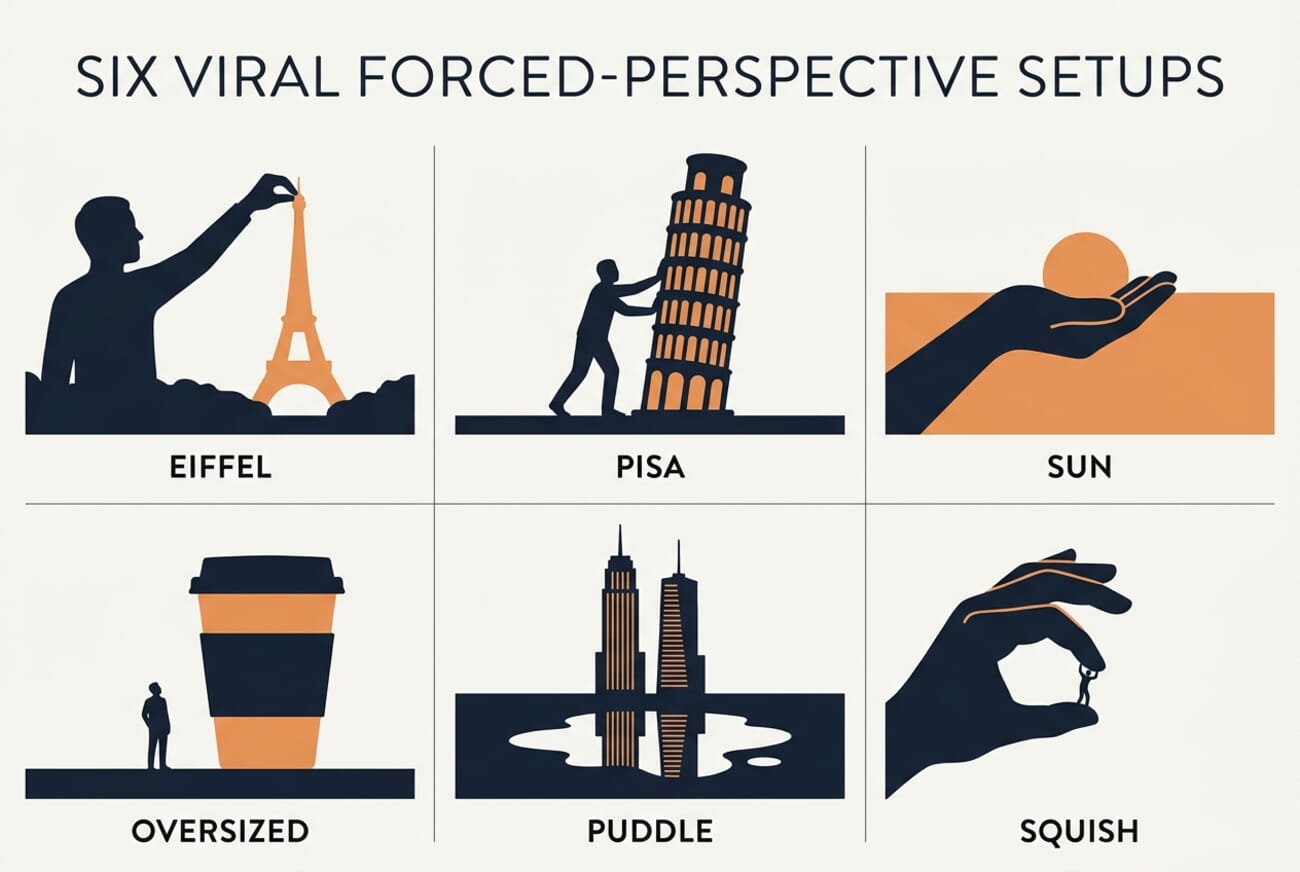
- Six setups dominate the 2026 feed: Eiffel pinch, Pisa lean, sun cradle, oversized prop, puddle reflection, and the squish. Each one works on the same simple geometry.
Forced perspective is having another moment. Walk past the Eiffel Tower on any spring afternoon in 2026 and you will see dozens of tourists holding their hands up to “pinch” the spire — only now most of them are doing it with the iPhone 17 Pro’s 8× telephoto instead of a clip-on lens. The technique itself is decades old, but a new generation of smartphone optics has made it accessible to anyone with a phone in their pocket.
This guide breaks down forced perspective from first principles: the geometry that makes the illusion work, the camera settings that keep both subjects sharp, the six setups going viral on TikTok and Instagram in 2026, and the gear that makes the whole thing easier than it has ever been.
What Is Forced Perspective Photography?
Forced perspective is a photographic illusion that exploits the way human vision processes depth. The brain estimates the size of an object by comparing it to other objects in the frame — and by assuming everything in a single 2D image sits at roughly the same distance. When a photographer breaks that assumption, the brain gets fooled in a very specific way: it sees a tiny object up close as a giant object far away, or vice versa.
Filmmakers used the technique long before social media existed — Peter Jackson made hobbits look short next to wizards in The Lord of the Rings by simply moving the actors toward or away from the camera on hidden tracks. The principle is identical in still photography. Place a small subject close to the lens and a large subject far away, line them up, and the camera flattens reality into a single playful image.
What makes 2026 different is reach. A technique that once required deliberate planning and a specific lens now works on any modern smartphone. Choosing the right camera angle is half the battle — forced perspective is just camera angles taken to their logical extreme.
The Geometry: How It Actually Works
Every forced-perspective photo, no matter how creative, comes down to the same simple geometric trick. The camera, the near subject, and the distant subject all sit on roughly the same sight line. Because the camera flattens 3D space onto a 2D sensor, anything along that line appears in the same place in the final image — regardless of its real-world distance.
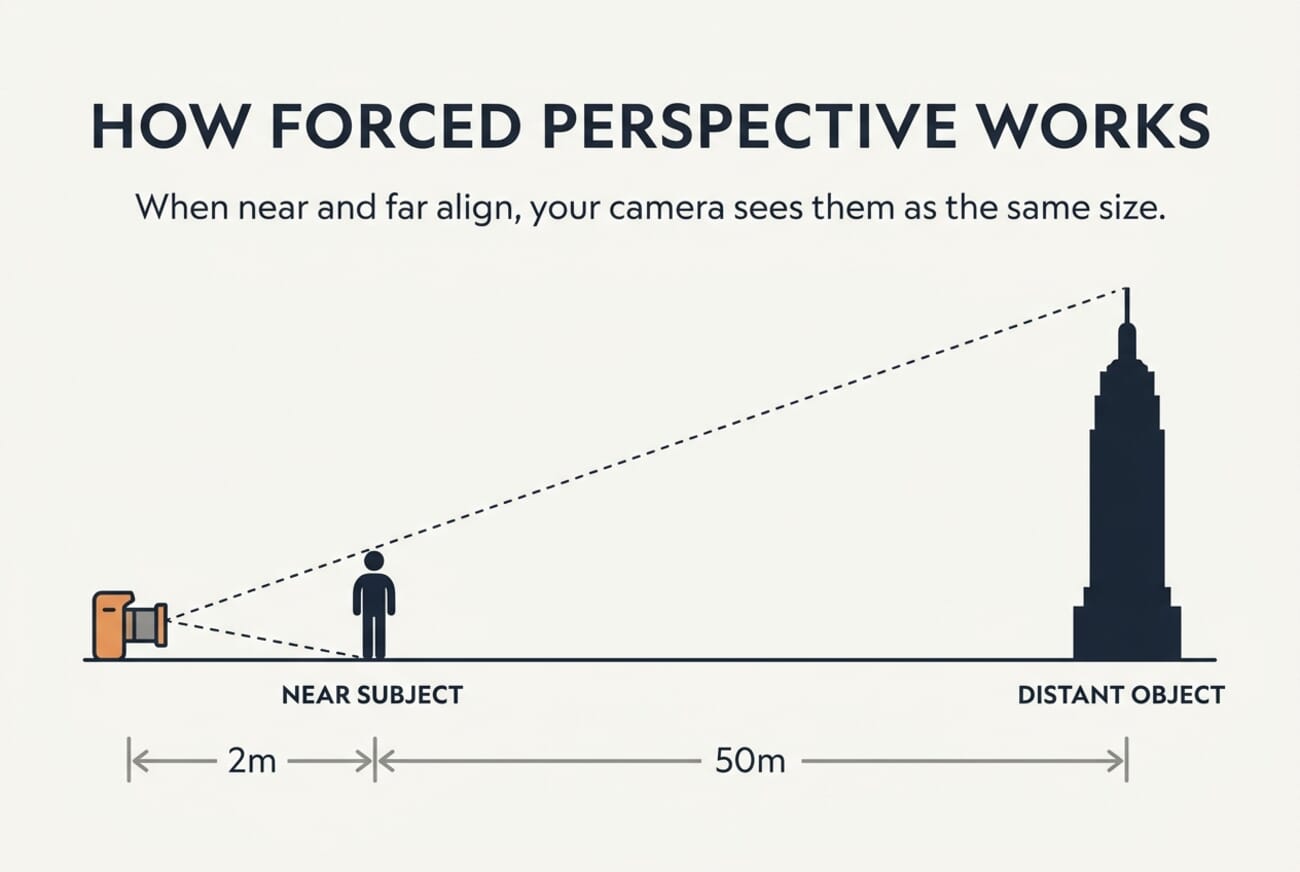
Two practical takeaways follow from the diagram. First, the closer the foreground subject is to the camera, the larger it will appear relative to the background — which is why “holding the Eiffel Tower” works best when the hand is roughly an arm’s length from the lens. Second, the further away the background subject sits, the more dramatic the size mismatch becomes. A tower 50 meters away looks small enough to pinch; the same tower 5 meters away just looks like a tower.
Camera Settings That Make It Work
The single most important setting for forced perspective is aperture. Both the near subject and the distant subject need to be sharp — a shallow depth of field collapses the illusion the moment one of them blurs. On a dedicated camera, that means stopping down to between f/11 and f/16. The smaller the aperture, the deeper the depth of field, and the more forgiving the focus.
Focal length matters almost as much. A wide lens (24mm or 35mm) exaggerates the size difference between near and far, which is what makes the giant-foreground / tiny-background look so cartoonish. A long lens (85mm or longer) compresses the scene and makes alignment far easier — useful when the background subject is enormous, like a mountain or a skyscraper.
- Aperture: f/11–f/16 for maximum depth of field
- Focus: set to the distant subject; the near subject will fall within the deep depth of field
- ISO: as low as the light allows — ISO 100–400 keeps the small aperture practical without bumping into shutter-speed limits
- Shutter speed: 1/125s or faster if a person is in the frame; tripod or stabilized phone if dropping below that
- Focal length: 24–35mm for dramatic size contrast; 85–200mm for compression and easier alignment
For more on baseline exposure and composition fundamentals, the photography tips for beginners guide covers the supporting skills every forced-perspective shot relies on.
Smartphone Forced Perspective in 2026
The single biggest change for forced-perspective shooters in 2026 is the long telephoto. Apple, Samsung, Vivo, and Xiaomi all ship flagships with a real 200mm-equivalent (or longer) telephoto module — and that focal length transforms what the technique can do.
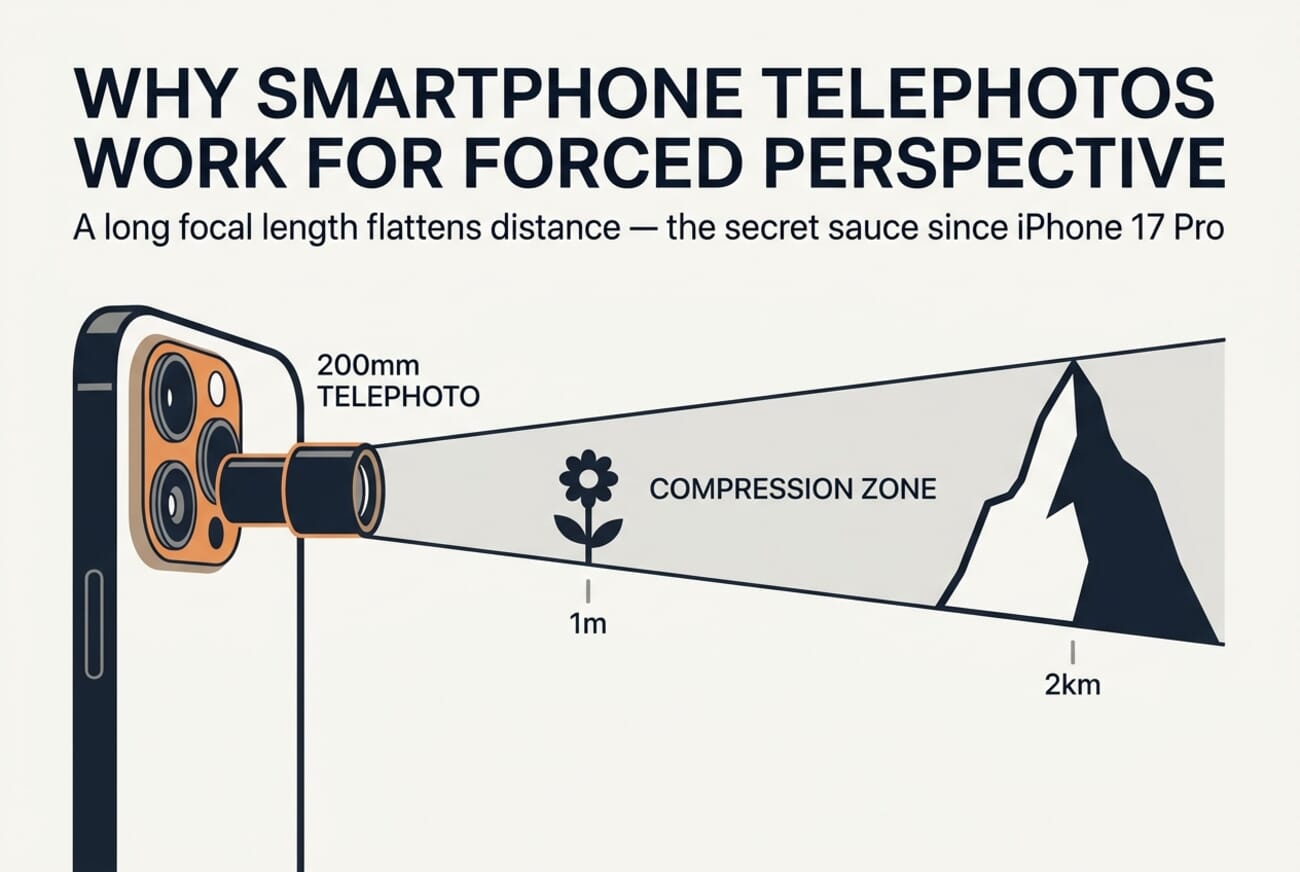
Long focal lengths compress the apparent distance between objects. A subject 20 meters away and a building 200 meters away look almost the same distance from the camera through a 200mm lens, which means alignment becomes trivial — there is no longer a need to physically position the foreground subject inches from the lens. The 2025–2026 phones that handle this best are:
- iPhone 17 Pro: 8× telephoto (200mm-equivalent) with the new tetraprism design — the easiest mainstream phone for tight forced-perspective compositions
- Samsung Galaxy S26 Ultra: 200MP main sensor with a 5× periscope telephoto, plus AI scene recognition that helps lock focus on both subjects
- Vivo X300 Ultra: Dual 200MP Zeiss cameras with optional 400mm telephoto adapter — extreme compression for landscape-scale forced perspective
- Xiaomi 17 Ultra: 1-inch Leica main sensor and 200MP variable-zoom periscope telephoto with LOFIC HDR
For shooters who want a bigger boost without upgrading the phone itself, dedicated iPhone telephoto lenses from Moment, NEEWER, and APEXEL push the effective focal length further still and unlock useful compression on older devices.
Six Viral 2026 Setups (and How to Pull Them Off)
Most of the forced-perspective content trending in 2026 reduces to six recurring setups. Each one runs on the same alignment principle, but the props and locations vary.
Setup 1 — The Eiffel Pinch
Stand on the Champ de Mars about 100 meters from the base of the tower. Have a friend extend a hand toward the lens, fingertips toward the spire. The photographer crouches low and lines up so the fingertips meet the top of the tower. A small aperture and a 35mm lens keep both elements sharp, and the smaller the foreground hand looks relative to the tower, the more believable the pinch.
Setup 2 — The Pisa Lean
The Leaning Tower of Pisa lends itself to a back-handed prop that makes the subject look like they are propping up the tower. Position the subject 5–8 meters from the camera with one arm extended at the angle that matches the tower’s tilt. Get the lens at chest height and use a wide focal length to exaggerate the tower’s lean.
Setup 3 — The Sun Cradle
Shoot during the last 20 minutes of golden hour, when the sun sits low and orange. Position the subject as a silhouette with hands cupped at face height. The photographer steps back until the sun appears to nestle in the cupped palms. Spot meter on the sky to keep the subject as a clean silhouette. The same technique works for backlit scenes — the backlit photography guide covers exposure compensation in detail.
Setup 4 — The Oversized Prop
Take a normal-sized object — a coffee cup, a book, a takeaway burger — and place it close to the lens. Position the subject 5–10 meters behind it. The result is a giant prop towering over a tiny human. This setup works especially well on social media because the absurd size mismatch reads instantly in a thumbnail.
Setup 5 — The Puddle Reflection
Wait for rain in a city with tall buildings. Find a puddle on the sidewalk, get the lens almost touching the water’s surface, and frame so the puddle reflects the upper portions of the buildings above. The reflection feels like a portal into an inverted city. This is the only setup on the list where alignment matters less than choice of location.
Setup 6 — The Squish
Two people, one foreground hand near the lens with thumb and index finger pinched, one distant subject standing exactly between the pinched fingertips. The illusion looks like the foreground person is squishing the distant person between their fingers. Easy to set up, devastatingly effective in a vertical Reels frame.
Master the Low-Angle and Puddle Reflection Trick
The single most underused forced-perspective technique is shooting from ground level. Most photographers default to eye-level, which discards the entire bottom half of the frame. Drop the camera to within a few centimeters of the ground and the visual hierarchy of the scene flips: tiny details — a flower, a coin, a leaf — become foreground anchors, while the background recedes dramatically.
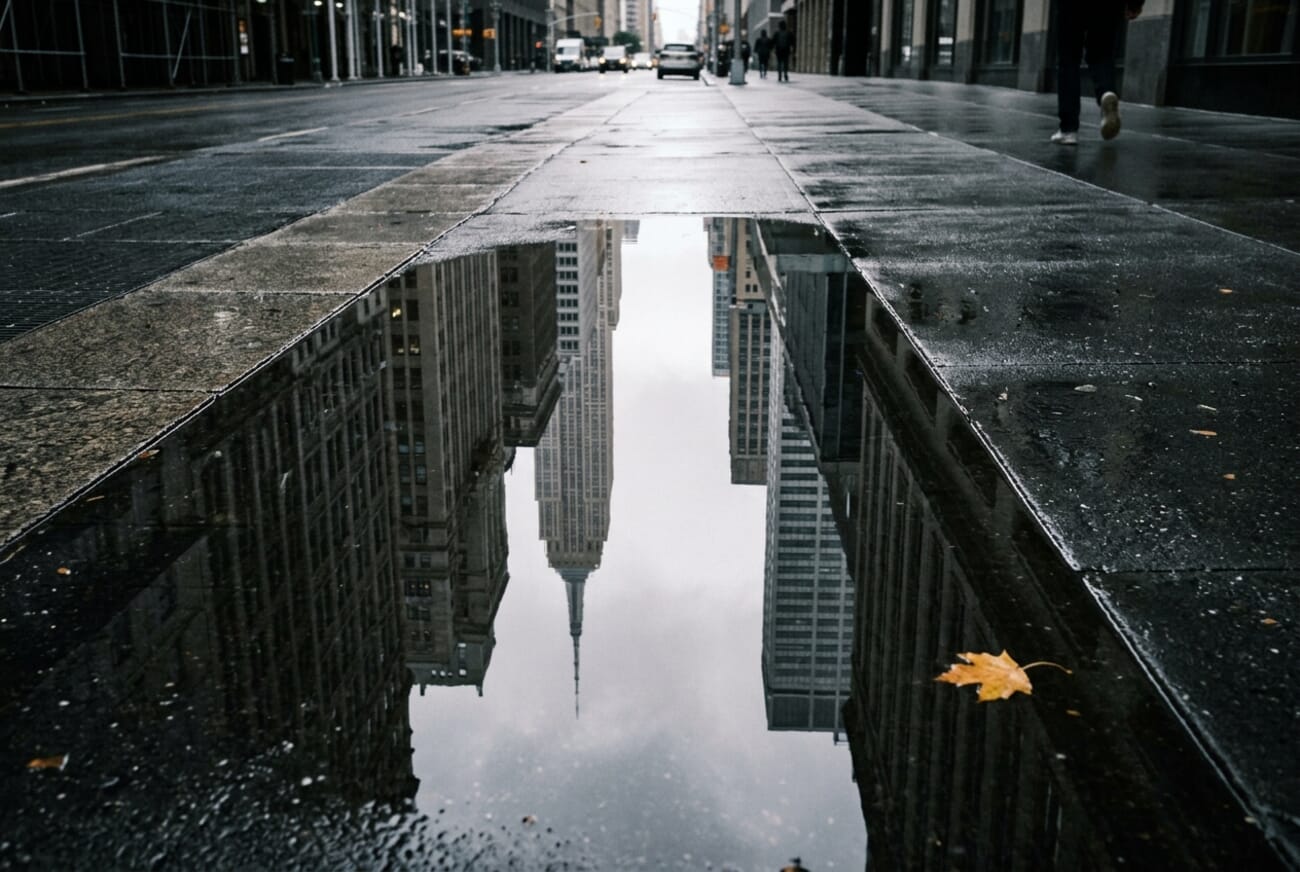
Puddle reflections add a second forced-perspective layer on top of the low angle. The mirrored image stretches the apparent height of buildings, creates symmetry the human eye reads as deliberate composition, and gives the photo an immediate sense of place. The technique requires nothing more than a puddle and a willingness to lie on a wet sidewalk. The reflection photography guide has more on focusing through water surfaces and balancing exposure between the real scene and its mirror.
Gear Worth Buying for 2026
Forced perspective has always been a low-budget technique — the geometry does the work, not the camera. That said, a few small additions make execution dramatically easier in 2026.
- Smartphone remote shutter: Bluetooth remotes from Newer or Moment let the photographer compose from a distance and trigger the shot without touching the phone. Crucial for shots where the photographer is also the foreground subject.
- Mini tripod: A Manfrotto Pixi Mini or Joby GorillaPod stabilizes the phone at unusual angles — particularly useful for puddle reflection shots that need the lens just above the water.
- Clip-on telephoto: Older phones without a 5× or 8× telephoto can borrow one with a clip-on adapter. Moment’s anamorphic and telephoto kits work with most modern phones.
- Polarizing filter: Cuts glare on puddle reflections, deepens the saturation of skies and foliage, and makes the whole image feel more intentional. Fits any 67mm or 77mm lens thread on dedicated cameras; clip-on versions exist for phones.
- Lens cloth: The most overlooked piece of gear in any kit. Smudges and rain droplets on a smartphone lens destroy the sharp-foreground / sharp-background look that forced perspective depends on.
Common Mistakes and How to Avoid Them
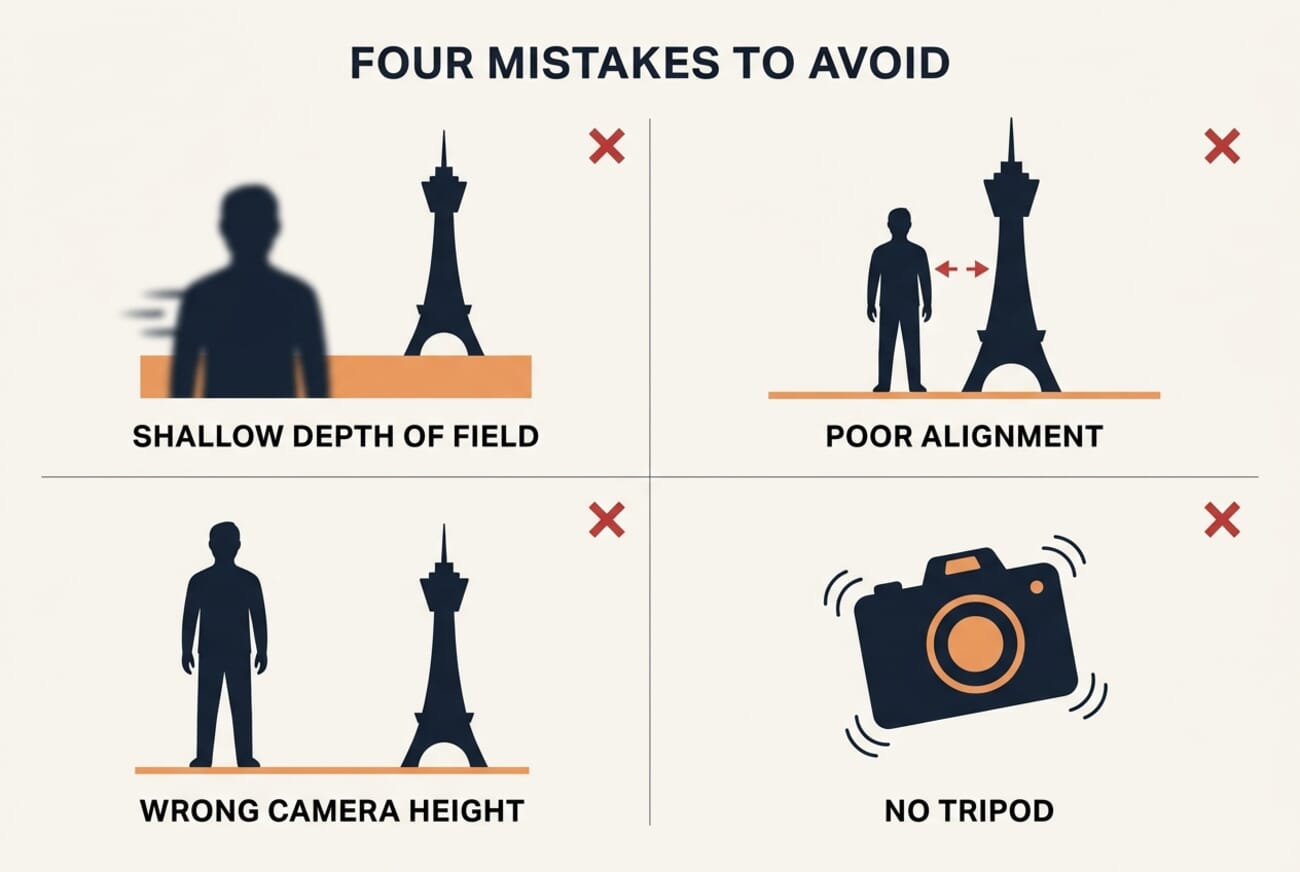
The four mistakes above account for the overwhelming majority of failed forced-perspective shots. Shallow depth of field is the most common — a phone shot at f/1.8 with a portrait-mode bokeh blur turns the distant subject into a smudge, killing the illusion. Stopping the aperture down or shooting in standard mode (not portrait) fixes it.
Poor alignment is the next biggest culprit. The camera, the near subject, and the distant subject have to sit on a single sight line. A few centimeters of drift breaks the entire composition. The fix is patience and a remote shutter — composing through the viewfinder at the moment of capture rather than guessing from in front of the camera.
Wrong camera height is subtler. Most failed Eiffel-pinch shots have the camera at eye level, which puts the tower’s base too low in the frame. Crouching to chest height — sometimes lower — usually fixes it instantly. And finally, no tripod or stabilization means a small handshake at f/16 turns into visible motion blur. A mini tripod solves it for under $25.
Frequently Asked Questions
What is the best camera for forced perspective photography?
Any camera can shoot forced perspective — the geometry is what creates the effect, not the gear. That said, modern smartphones with a real telephoto module (iPhone 17 Pro, Galaxy S26 Ultra, Vivo X300 Ultra) make alignment far easier thanks to the compression of long focal lengths. Dedicated mirrorless or DSLR cameras with a kit zoom around 24–70mm work just as well and give the photographer more aperture control.
Is forced perspective easier with a smartphone or a dedicated camera?
For most everyday setups in 2026, a smartphone with a 5× or 8× telephoto is faster and simpler. The long focal length compresses distance, the small sensor gives natural deep depth of field, and the phone’s quick autofocus locks on both subjects almost automatically. Dedicated cameras shine for printable resolution and creative aperture work, but they require more deliberate setup.
Does forced perspective require a tripod?
Not strictly. Daylight scenes at f/11 with a fast shutter can be shot handheld. A tripod or mini-tripod becomes necessary in two situations: low-light setups where the small aperture forces shutter speeds below 1/60s, and self-portraits where the photographer is also the subject and uses a remote shutter or self-timer.
Can portrait mode be used for forced perspective?
Generally no. Portrait mode (or any wide-aperture style with simulated bokeh) blurs the background, which destroys the very illusion forced perspective relies on. Both the near and the far subjects need to be sharp. Standard mode at the phone’s native aperture, or a dedicated camera at f/11 or smaller, produces the deep depth of field the technique demands.
What is the best time of day for forced perspective shots?
Late afternoon golden hour is the gold standard. The directional light helps separate near and far subjects, the warm tones flatter most scenes, and the lower sun lets photographers crouch without the lens flaring out. The exception is the puddle reflection setup, which works better on overcast days when the sky has soft, even diffuse light.
Background research and reference material for this guide.


