
- Master light first — golden hour, window light, and overcast skies are your three best friends as a beginner.
- Learn 5 composition rules — rule of thirds, leading lines, symmetry, framing, and negative space transform ordinary shots.
- Understand the exposure triangle — aperture, shutter speed, and ISO control every photograph you take.
- Smartphones count — modern phone cameras use computational photography that rivals dedicated cameras in many situations.
- Build a simple editing workflow — even basic adjustments in Lightroom, Snapseed, or AI-powered editors can dramatically improve your photos.
- Test your knowledge with our interactive photography quiz at the end.
You Already Have Everything You Need
Right now, someone with a $300 smartphone is taking a better photo than someone with a $3,000 camera. The difference isn’t gear — it’s understanding a handful of fundamentals that separate snapshots from photographs.
This guide distills photography into the techniques that actually move the needle for beginners. No theory dumps. No gear worship. Just the practical skills that produce visible results from your very first shoot — whether you’re using a mirrorless camera, a DSLR, or the phone in your pocket.
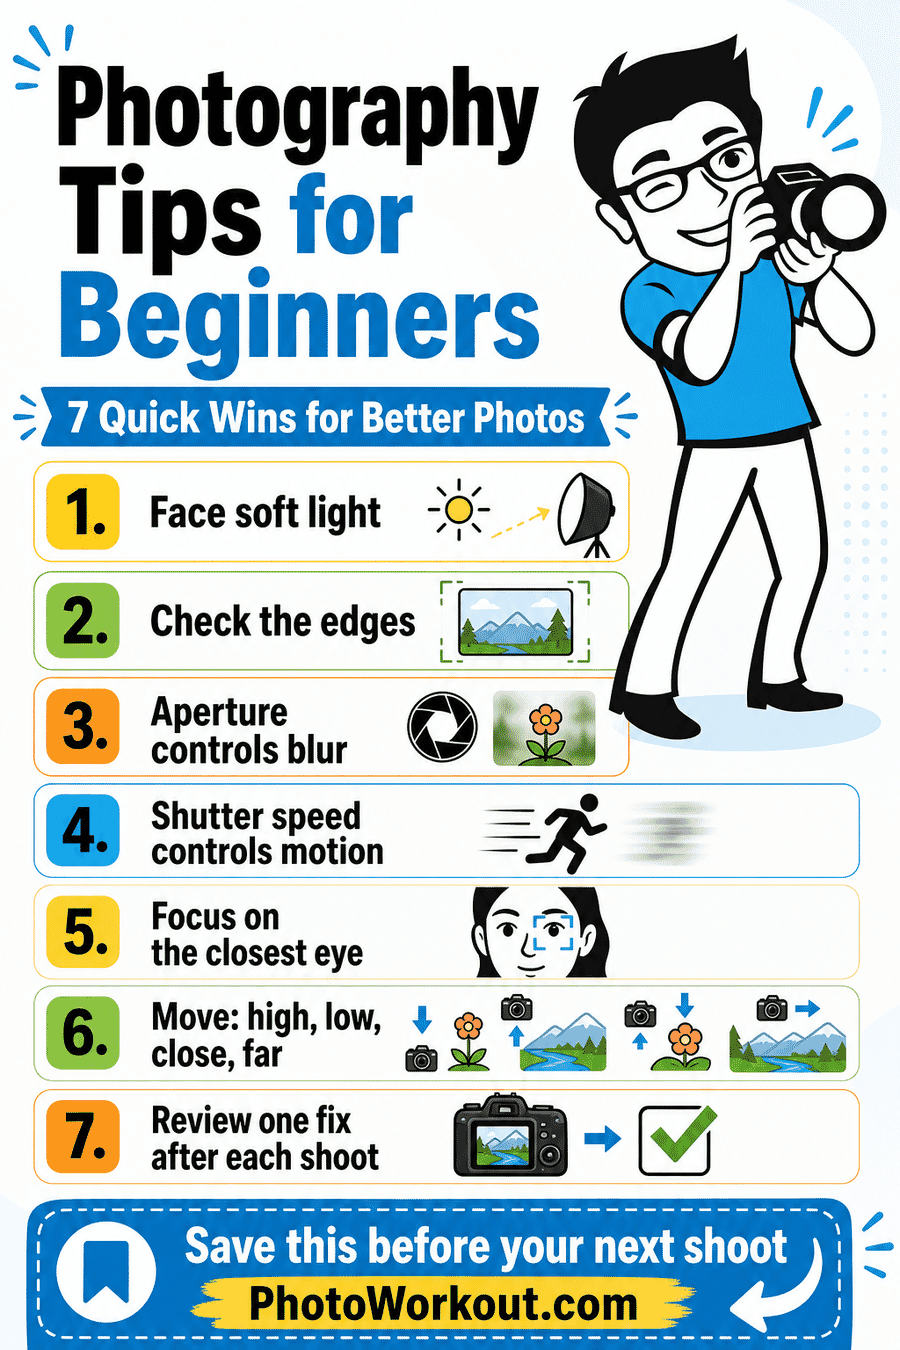
Bookmark this page. You’ll come back to it.
Want the quick version? Save this beginner photography cheat sheet before your next shoot.
1. Master Light Before Touching Any Other Setting
Light is the single most important element in photography — the word literally means “writing with light.” The same scene shot in harsh midday sun versus soft golden hour glow will look like two completely different photographs. Understanding how to find, read, and use light is the fastest path to dramatically better images.
Chase the Golden Hour
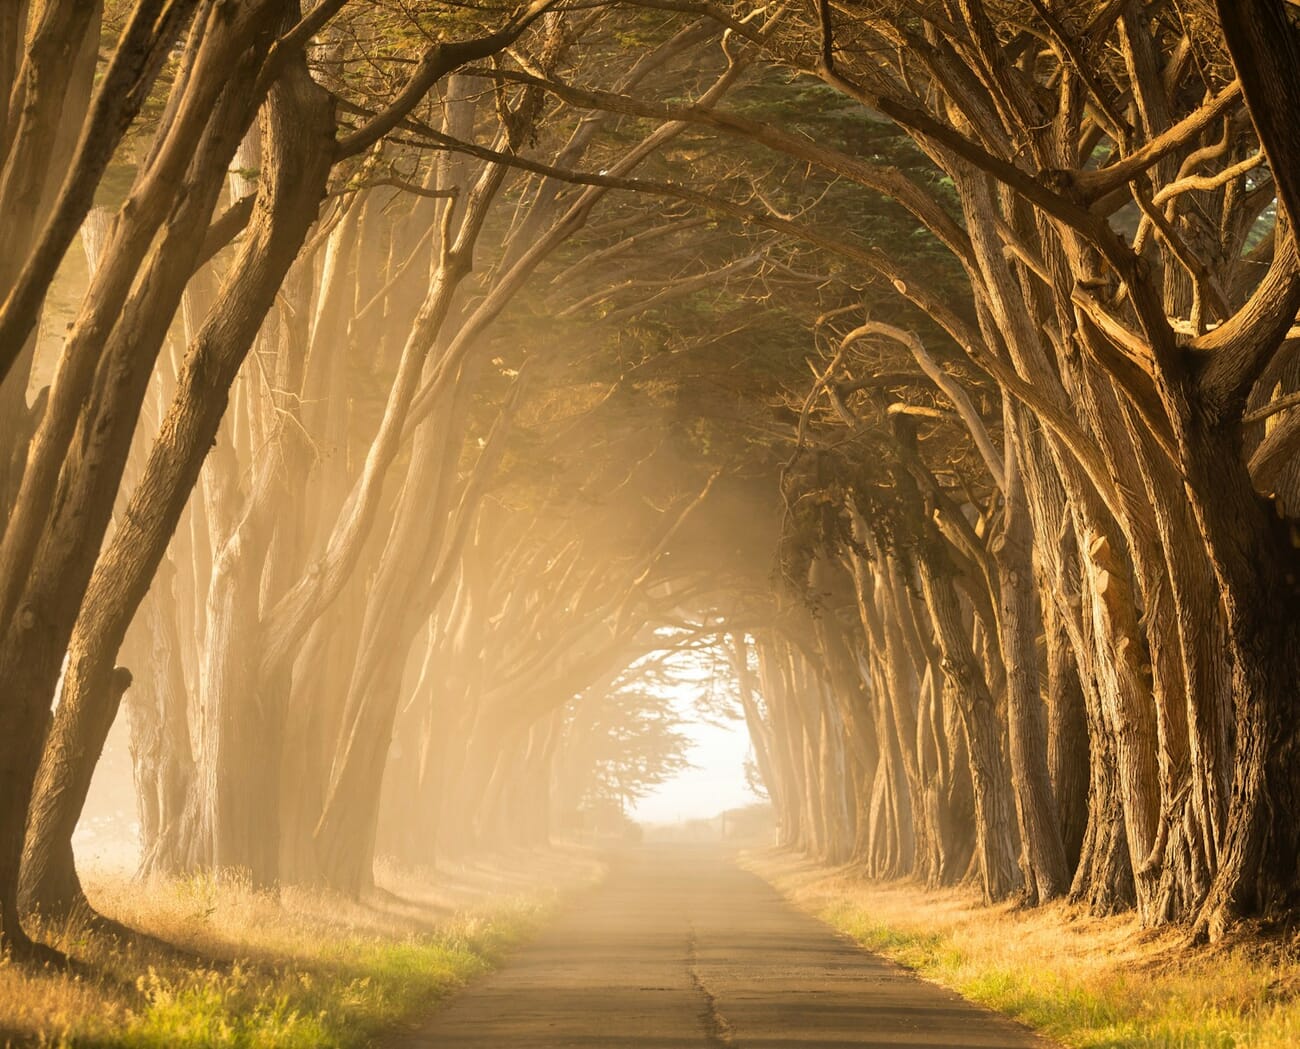
The golden hour — roughly the first hour after sunrise and the last hour before sunset — produces warm, directional light that flatters every subject. Shadows stretch long and soft, colors glow, and even mundane scenes look cinematic. If you only change one thing about your photography, start shooting during golden hour.
Embrace Overcast Days
Cloud cover acts as a giant softbox, diffusing sunlight into even, shadow-free illumination. Overcast days are ideal for portraits, macro photography, and street photography because you avoid harsh shadows and blown-out highlights. Don’t put the camera away when clouds roll in — some of the best light happens under gray skies.
Use Window Light Indoors
A single window produces gorgeous, directional light for portraits and still life. Position your subject next to a window — not in direct sun — and watch how the soft, angled light wraps around their face. This technique has been used by painters and photographers for centuries, and it’s completely free. For a deeper dive, check out our complete guide to window light photography.
Want to understand how different light directions affect your photos? Our guide on light direction in photography breaks down front light, side light, back light, and more.
2. Understand How Light Direction Changes Everything
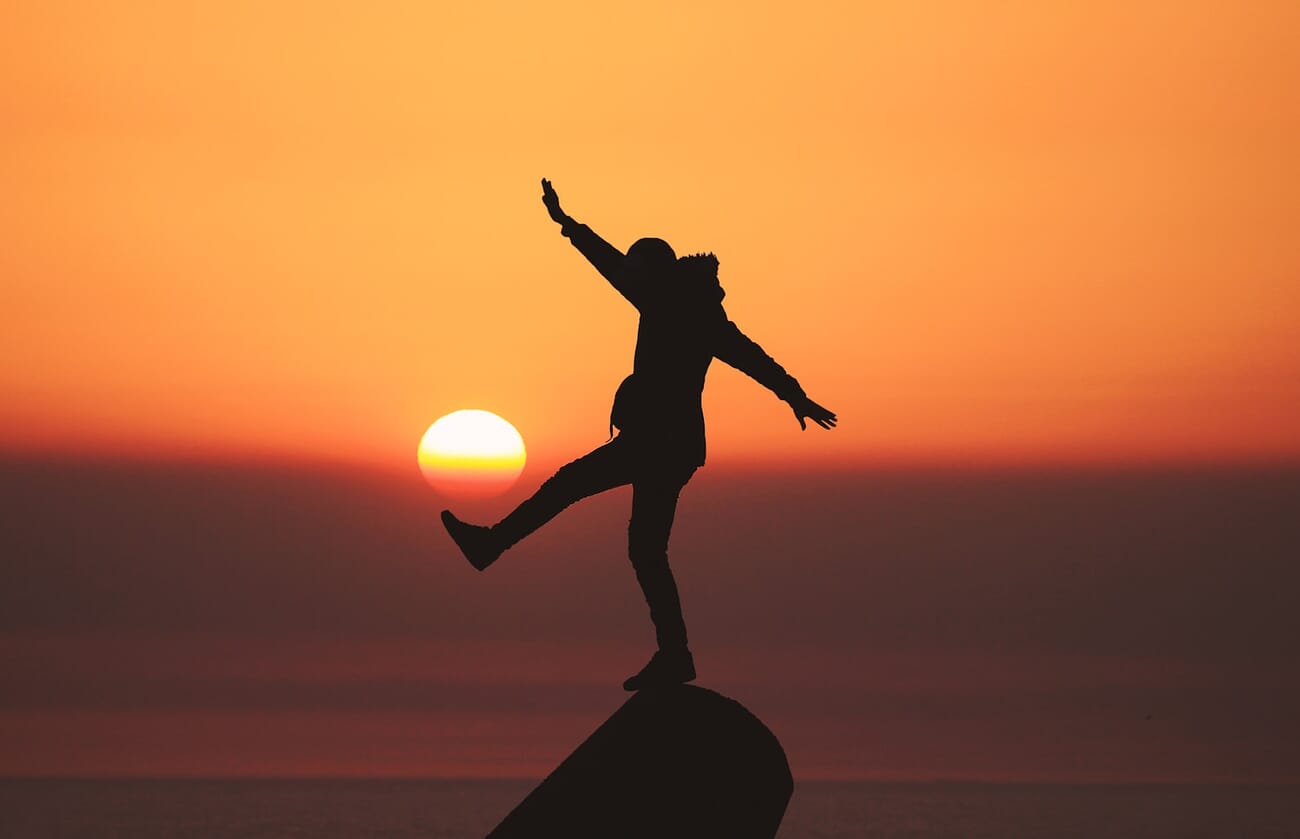
Where light comes from matters as much as what kind of light it is. Front lighting (light behind the camera) produces flat, evenly lit images — great for documentation, less interesting for creative work. Side lighting reveals texture and dimension. Backlighting (light behind the subject) creates dramatic silhouettes and rim light effects.
Here’s a quick experiment: take the same portrait four times — with light coming from the front, the left, the right, and behind your subject. You’ll instantly see how light direction shapes mood, depth, and drama. For techniques on shooting into the light, see our guide to photographing with the sun behind your subject.
3. Learn These 5 Composition Rules (Then Break Them)
Composition is how you arrange elements within the frame. It’s the difference between a photo that people glance at and one that holds their attention. These five rules cover about 90% of what makes a composition work.
Rule of Thirds
Imagine dividing your frame into a 3×3 grid. Place your main subject where the lines intersect — not dead center. This creates natural visual tension and makes images feel more dynamic. Most cameras and phones can overlay this grid on your screen.
Leading Lines
Leading lines are natural or man-made lines that guide the viewer’s eye through the frame — roads, fences, rivers, architectural elements. They create depth and draw attention to your subject. Look for them everywhere: train tracks, shorelines, rows of trees, even shadows.
Symmetry and Patterns
Humans are drawn to symmetry and repeating patterns. Architecture, reflections in water, and tile work make excellent subjects. The trick is finding perfect symmetry — or intentionally breaking it with one element that disrupts the pattern.
Natural Framing
Use doorways, arches, branches, or windows to create a frame within the frame. This adds depth and draws the viewer’s eye to the subject.
Negative Space
Sometimes less is more. Leave empty space around your subject to create a sense of isolation, calm, or minimalism. A small bird against a vast sky, or a lone person on an empty beach — negative space makes the subject feel significant.
For a comprehensive deep dive into all composition techniques, our complete guide to composition in photography covers everything from the golden ratio to visual weight.
4. Change Your Perspective — Literally
The fastest way to improve a boring photo? Move your feet. Most beginners shoot everything from eye level while standing. But dropping to your knees, lying on the ground, climbing stairs, or holding the camera above your head opens up entirely different worlds.
Low angles make subjects look powerful and dominant. High angles make them look small or vulnerable. Dutch tilts (tilting the camera diagonally) add energy and tension. For a full breakdown of how each angle affects your viewer psychologically, see our guide to camera angles and perspective.
Exercise: Pick one subject — a coffee cup, a flower, your pet — and shoot it from 10 completely different angles. You’ll be surprised how many interesting compositions exist in the most ordinary objects.
5. Understand the Exposure Triangle
The exposure triangle — aperture, shutter speed, and ISO — is the engine behind every photograph. These three settings control how much light reaches your sensor and determine the look of your image. Understanding how they work together is the single most empowering technical skill in photography.
- Aperture (f-stop) — Controls the size of the lens opening. A wide aperture (low number like f/1.8) lets in lots of light and creates shallow depth of field (blurry background). A narrow aperture (high number like f/11) keeps everything in focus. Learn more in our wide vs. narrow aperture guide.
- Shutter speed — Controls how long the sensor is exposed to light. Fast shutter speeds (1/1000s) freeze motion. Slow shutter speeds (1/30s or slower) create motion blur. Our guide to capturing movement covers every technique.
- ISO — Controls the sensor’s sensitivity to light. Low ISO (100-400) produces clean images. High ISO (1600+) adds grain/noise but lets you shoot in darker conditions.
These three settings are always in balance — if you change one, you’ll need to adjust another. Our exposure triangle deep dive walks through exactly how they interact.
6. Start With Aperture Priority Mode
Jumping straight to full Manual mode is like learning to drive in a Formula 1 car. Aperture Priority mode (marked “A” on Nikon/Sony or “Av” on Canon) is the sweet spot for beginners: you control the aperture (and therefore depth of field), while the camera automatically picks the right shutter speed.
This gives you creative control over the most visible part of your image — how much is in focus — without worrying about exposure math. Most professional photographers use Aperture Priority for everyday shooting.

For a complete breakdown of every camera mode and when to use each one, grab our camera settings cheat sheet — it includes printable reference cards you can keep in your camera bag.
7. Shoot in RAW Format
JPEG files are like pre-developed prints — the camera makes all the editing decisions for you and throws away the extra data. RAW files are the digital equivalent of a film negative — they preserve all the data your sensor captured, giving you far more flexibility to fix exposure, adjust white balance, and recover shadow or highlight detail later.
The tradeoff? RAW files are larger (roughly 3-5x bigger than JPEGs) and need to be processed in software like Lightroom, Capture One, or even free apps like RawTherapee. But the editing flexibility is transformative.
Tip: Most cameras let you shoot RAW + JPEG simultaneously. Start with this dual mode so you have JPEGs for quick sharing and RAW files for when you want to seriously edit.
8. Nail Your Focus Every Time
A beautifully composed, perfectly lit photo is worthless if the focus is off. Here are the focus fundamentals every beginner needs:
- Use single-point autofocus — Don’t let the camera decide what to focus on. Switch to single-point AF and place that point exactly on your subject’s eye (for portraits) or the key element of your scene.
- Back-button focus — Separating the focus function from the shutter button gives you much more control. Most cameras can be configured to use a rear button for focusing, freeing the shutter button to only take the photo.
- AI-powered autofocus — Modern mirrorless cameras use AI to detect and track eyes, faces, animals, and vehicles. If your camera has subject detection AF, turn it on — it’s remarkable how well it works.
9. Simplify Your Compositions
The number one compositional mistake beginners make is trying to include too much in the frame. Great photos usually have one clear subject. Everything else either supports that subject or should be removed.
Before pressing the shutter, ask: “What is this photo about?” If you can’t answer in one sentence, simplify. Move closer. Change your angle. Wait for distracting elements to leave the frame.
The subtraction method: Instead of adding elements to your composition, practice removing them. Walk closer to your subject. Use a longer focal length to compress the background. Find a cleaner angle. Photography is often about what you leave out of the frame.
10. Use Color and Contrast Intentionally
Color tells a story before your viewer consciously processes the content. Warm tones (red, orange, yellow) feel energetic and intimate. Cool tones (blue, green, purple) feel calm or melancholic. Complementary colors (opposites on the color wheel, like blue and orange) create visual pop.
Contrast — the difference between the brightest and darkest parts of your image — determines mood too. High contrast feels dramatic and bold. Low contrast feels soft and dreamy. Our guide to high contrast lighting shows how to use contrast for dramatic impact.
Photography Basics Cheat Sheet
Save or print this visual reference to keep the fundamentals at your fingertips:

11. Try Street Photography
Street photography is one of the best training grounds for any photographer. It forces you to react quickly, compose on the fly, read changing light conditions, and overcome the social discomfort of photographing in public. The gear requirements are minimal — any camera or phone will do.

Start with a 35mm or 50mm focal length (or the equivalent on your phone). Shoot from the hip if you’re nervous. Over time, street photography builds confidence and a sharper eye for composition and decisive moments. For camera recommendations, check our guide to the best street photography cameras.
12. Master Smartphone Photography
The camera in your pocket is more powerful than most people realize. Modern smartphones use computational photography — AI algorithms that combine multiple exposures, enhance details, and optimize settings in real time — to produce results that would have required expensive equipment just a few years ago.
Key smartphone photography techniques:
- Tap to set focus and exposure — Don’t rely on auto. Tap on your subject to lock focus, then slide your finger up or down to adjust exposure.
- Use the 0.5x ultrawide lens for landscapes, architecture, and creative distortion.
- Night mode isn’t cheating — Modern night modes stack multiple exposures to create clean, detailed low-light photos that were impossible five years ago.
- Shoot in ProRAW or Pro mode — iPhones offer ProRAW; Android phones like Samsung and Pixel have Pro mode. These give you RAW-level editing flexibility on your phone.
- Clean your lens — Seriously. Your phone lives in your pocket, accumulating fingerprints. A quick wipe before shooting makes a noticeable difference.
For a deeper guide to controlling light and brightness on your phone, see our smartphone exposure guide.
13. Build a Simple Editing Workflow
Editing isn’t about making fake photos — it’s about finishing what you started in camera. Even small adjustments to exposure, contrast, and color temperature can transform a flat image into something that matches what your eyes actually saw.
Here’s a simple beginner editing workflow that works in any app:
- Straighten and crop — Fix the horizon, remove distracting edges.
- Adjust exposure — Get the overall brightness right.
- Set white balance — Make whites look white, skin tones look natural.
- Tweak contrast — Add punch without crushing shadows or blowing highlights.
- Boost (or reduce) saturation — Use vibrance for subtle color enhancement, saturation for dramatic effect.
- Sharpen — Apply gentle sharpening as a final step.
Recommended Editing Tools
- Adobe Lightroom — The industry standard for photo organization and editing. Worth the subscription if photography is more than a hobby. See our Lightroom editing guide for a walkthrough.
- Snapseed (free) — Google’s powerful mobile editor with selective editing tools. Check out our complete Snapseed editing guide.
- AI-powered editors — Tools like Luminar Neo, Topaz Photo Pro, and Adobe’s Generative Fill use artificial intelligence to handle complex edits with one click. Our guide to AI photo editors compares the best options.
- Apple Photos / Google Photos — The built-in editors on your phone are surprisingly capable for quick adjustments.
14. Avoid These Common Beginner Mistakes
Every photographer makes these mistakes early on. Recognizing them is half the battle:
- Shooting in Auto mode forever — Auto mode makes all the creative decisions for you. Switch to Aperture Priority to start learning.
- Centering every subject — Dead-center composition is almost always the least interesting option.
- Ignoring the background — A distracting background ruins even a perfectly lit, perfectly focused subject. Check what’s behind your subject before shooting.
- Over-editing — If your photo looks “edited,” you’ve gone too far. Pull back on the saturation and HDR slider.
- Chimping obsessively — Checking every single shot on the LCD means you’re missing moments. Take a sequence, then review.
- Never shooting vertically — Horizontal is the default, but many subjects — tall buildings, standing portraits, waterfalls — work better in portrait orientation.
15. Practice With Intentional Projects
Random shooting builds experience slowly. Focused projects accelerate learning dramatically. Try these:
- One lens, one week — Pick a single focal length and don’t change it for seven days. This forces you to “zoom with your feet” and deeply understand one perspective.
- The 365 project — Take one photo every day for a year. Consistency matters more than perfection.
- Color of the day — Spend a day photographing only red things, or blue things, or yellow things. This trains your eye to see color everywhere.
- Document your neighborhood — Photograph the same 10-block area over different seasons, times of day, and weather conditions. You’ll discover beauty in the familiar.
16. Study Great Photography
The best way to develop your eye is to study work you admire. Follow photographers on Instagram and Flickr, visit exhibitions, flip through photo books. But don’t just look — analyze. Ask yourself:
- Where is the light coming from?
- What makes this composition work?
- What mood does the color palette create?
- What would I do differently?
For inspiration, our list of the 40 most famous photographers and what we can learn from them offers a masterclass in photographic vision across genres.
17. Essential Landscape Photography Tips
Landscape photography rewards patience and planning. Here are the fundamentals:
- Use a tripod — Landscapes demand sharp images, and tripods allow you to use low ISO and narrow apertures for maximum detail.
- Shoot at f/8 to f/11 — This is the sharpness sweet spot for most lenses.
- Include foreground interest — Rocks, flowers, or leading lines in the foreground add depth and pull the viewer into the scene.
- Shoot during golden hour or blue hour — The quality of light makes or breaks landscape photos.
- Try long exposures — Use ND filters to smooth water and blur clouds for an ethereal look.
For complete settings guidance, our landscape photography camera settings guide covers every scenario from sunrises to star trails.
18. Portrait Photography Basics
Portraits are about connection. Technical perfection means nothing if your subject looks uncomfortable. Here’s how to get started:
- Focus on the eyes — The eyes are the anchor of any portrait. Use single-point or eye-detection AF to nail focus on the nearest eye.
- Use a wide aperture — f/1.8 to f/2.8 creates beautiful background separation, making your subject pop.
- Flattering light — Open shade (under a tree, next to a building) and window light produce soft, even illumination. Avoid harsh overhead sun.
- Talk to your subject — Genuine emotion comes from conversation, not posing commands. Ask questions, tell jokes, create a relaxed atmosphere.
- Use a longer focal length — 50mm, 85mm, or 105mm lenses are classic portrait choices because they compress features flatteringly. Our guide to the best portrait lenses covers options for every budget.
19. Indoor Photography Without a Flash
Indoor lighting is tricky — it’s often dim, mixed-color, and unflattering. Here’s how to work with it:
- Open the aperture wide — Shoot at f/1.8 or f/2.8 to let in maximum light.
- Raise ISO thoughtfully — Modern cameras handle ISO 1600-3200 well. Don’t be afraid of a little grain — it’s better than a blurry photo from a slow shutter speed.
- Use window light — Position subjects near windows for natural, directional illumination.
- Set white balance manually — Indoor lighting (tungsten, fluorescent, LED) creates color casts. Adjust white balance to neutralize them, or shoot RAW and fix in editing.
- Stabilize — Use a tripod, lean against a wall, or brace your elbows against your body for sharper handheld shots.
For detailed settings for every indoor scenario — from events to real estate — check our complete indoor photography camera settings guide.
20. Get Close and Capture Details
Renowned photojournalist Robert Capa said, “If your pictures aren’t good enough, you’re not close enough.” Getting physically closer to your subject — or using a macro lens — reveals textures, patterns, and details invisible at a distance.
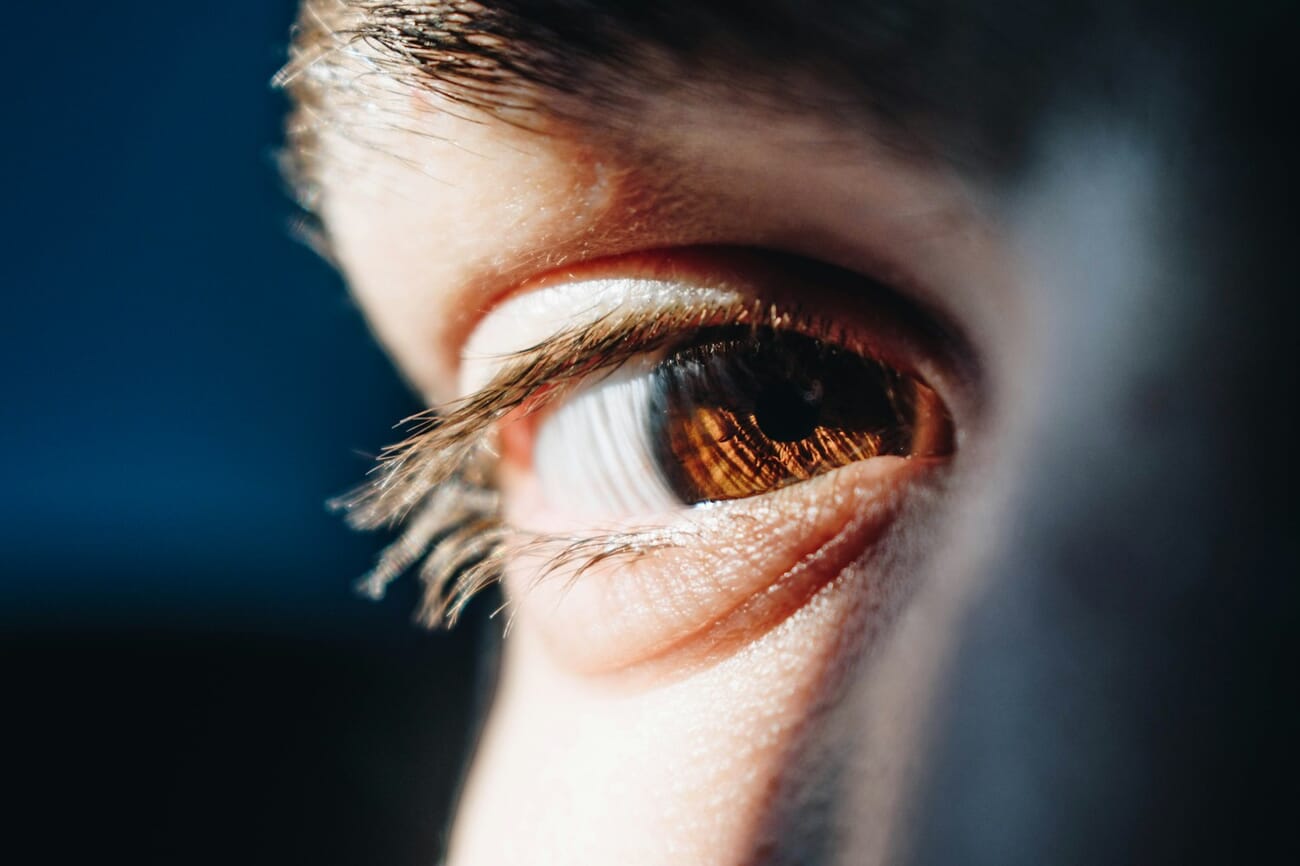
A dedicated macro lens (like the one used for the shot above) unlocks extreme close-up detail, but you don’t need one to start. Most kit lenses have a minimum focus distance that lets you get reasonably close. Smartphone cameras with macro mode (or clip-on macro lenses) work surprisingly well too. The key is looking for subjects with interesting texture: wood grain, fabric weave, flower petals, water droplets, peeling paint.
21. Stop Worrying About Gear
Gear Acquisition Syndrome (GAS) is real, and it’s a creativity killer. The truth is: any camera made in the last five years is more than capable of producing stunning images. The limiting factor is almost never the equipment — it’s the photographer’s understanding of light, composition, and timing.
That said, if you’re shopping for your first dedicated camera, our guide to the best cameras for beginners cuts through the noise. And if you’re curious about which lenses to pair with it, see what lenses a beginner photographer should have.
The best camera is the one you have with you. For most people, that’s a smartphone — and that’s perfectly fine.
22. Shoot More, Delete More
Volume matters in the early stages. Professional photographers regularly shoot hundreds of frames and keep only a handful. That’s not waste — it’s the process.
Be prolific, then be ruthless. Shoot every day if you can. Try different angles, different light, different subjects. Then edit your collection down to only the strongest images. This cycle of shooting and curating is how your eye develops. A great photographer isn’t someone who takes perfect photos — it’s someone who knows which photos to keep.
As you progress, explore our essential camera settings guide to take more deliberate control of your images, consider the night photography beginner’s guide when you’re ready to tackle low-light challenges, and check out the highest-paying photography jobs if you’re thinking about turning your skills into a career.
Test Your Photography Knowledge
Think you’ve absorbed the fundamentals? Take this quick quiz to see how well you know the basics — from the exposure triangle to composition rules:
Frequently Asked Questions
What’s the best camera for a beginner?
Any modern mirrorless camera from Canon, Nikon, Sony, or Fujifilm will serve you well. Entry-level models like the Canon EOS R50, Nikon Z30, or Sony a6400 are excellent starting points. That said, your smartphone is also a legitimate camera — don’t let gear gatekeeping stop you from shooting.
Should I learn on a DSLR or mirrorless camera?
Mirrorless is the future. All major manufacturers have shifted their R&D and new lens development to mirrorless systems. A used DSLR can be a great budget option for learning, but if you’re buying new, go mirrorless.
Do I really need to learn manual mode?
Not immediately. Start with Aperture Priority mode, which gives you creative control while the camera handles exposure. Once you’re comfortable with aperture, shutter speed, and ISO individually, Manual mode becomes intuitive rather than overwhelming.
Can I take professional-quality photos with a smartphone?
Yes, especially with flagship phones like the iPhone 17 Pro, Samsung Galaxy S26 Ultra, or Google Pixel 10 Pro. Computational photography has closed much of the gap with dedicated cameras. The main advantages of a dedicated camera are optical zoom range, shallow depth of field, and better low-light performance at high ISOs.
How do I make my photos look more professional?
Three things make the biggest difference: better light (shoot during golden hour or by a window), cleaner compositions (one clear subject, uncluttered background), and basic editing (straighten, adjust exposure, add a touch of contrast). These cost nothing and produce immediate results.
What’s the difference between RAW and JPEG?
JPEG is a compressed, processed file — the camera decides the final look. RAW preserves all sensor data, giving you vastly more editing flexibility. Think of JPEG as a print and RAW as a film negative. Shoot RAW when you want maximum control in post-processing.
Featured image: Photo by Suhyeon Choi on Unsplash.


