
- Filling the frame means making your subject dominate the image — eliminating distractions and drawing the viewer straight to what matters.
- You can fill the frame by moving closer, zooming in, or cropping in post-processing.
- This technique works best for portraits, macro, food, and detail shots — but sometimes leaving space is the better choice.
- Common mistakes include cutting off key elements, ignoring the background, and using fill-the-frame as a crutch for every shot.
- Take the quiz at the end to test how well you’ve mastered the technique.
What Does “Fill the Frame” Mean?
Filling the frame is one of the simplest and most powerful composition techniques in photography. The idea is straightforward: make your subject take up most — or all — of the image.
Instead of leaving lots of empty space around your subject, you get close enough (or zoom in enough) that the subject becomes the dominant element. There’s no question about what the photo is about.
Think of it this way: if someone glances at your photo for one second, will they immediately know what you wanted them to see? When you fill the frame, the answer is always yes.

In the portrait above, the subject’s face fills nearly the entire frame. There’s no distracting background, no wasted space — just the subject. That’s fill the frame in action.
Why Does Filling the Frame Work So Well?
Filling the frame works because it leverages some basic principles of how we process images:
- Eliminates distractions — When the subject fills the frame, there’s nothing else competing for the viewer’s attention. No cluttered backgrounds, no stray objects pulling the eye away.
- Creates intimacy — Getting close to a subject makes the viewer feel like they’re right there. This is especially powerful in portrait photography, where filling the frame with a face creates an emotional connection.
- Reveals detail — When you fill the frame, you show textures, patterns, and fine details that would be invisible from further away. Every eyelash, every petal, every crack in the wall becomes part of the story.
- Strengthens composition — A frame-filling subject creates a bold, confident composition. There’s no ambiguity about what the photographer intended.
- Increases impact — Large subjects feel powerful and immediate. A butterfly that fills the frame feels more dramatic than one that’s a tiny speck in a wide shot.
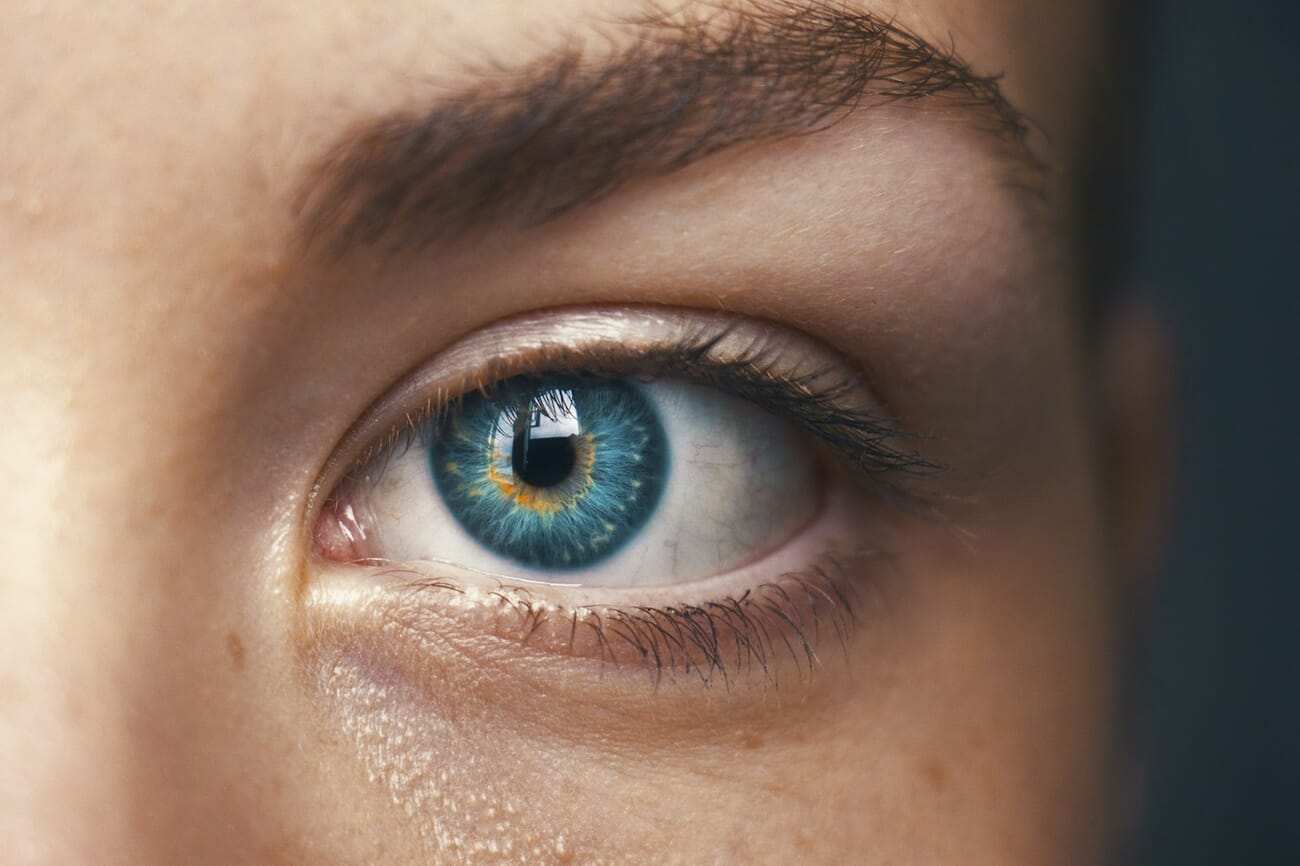
This extreme close-up of an eye reveals incredible detail — the texture of the iris, individual eyelashes, reflections in the pupil. None of this would be visible in a wider shot.
How to Fill the Frame: 3 Methods
There are three main ways to fill the frame with your subject. Each has its place, and experienced photographers use all three depending on the situation.
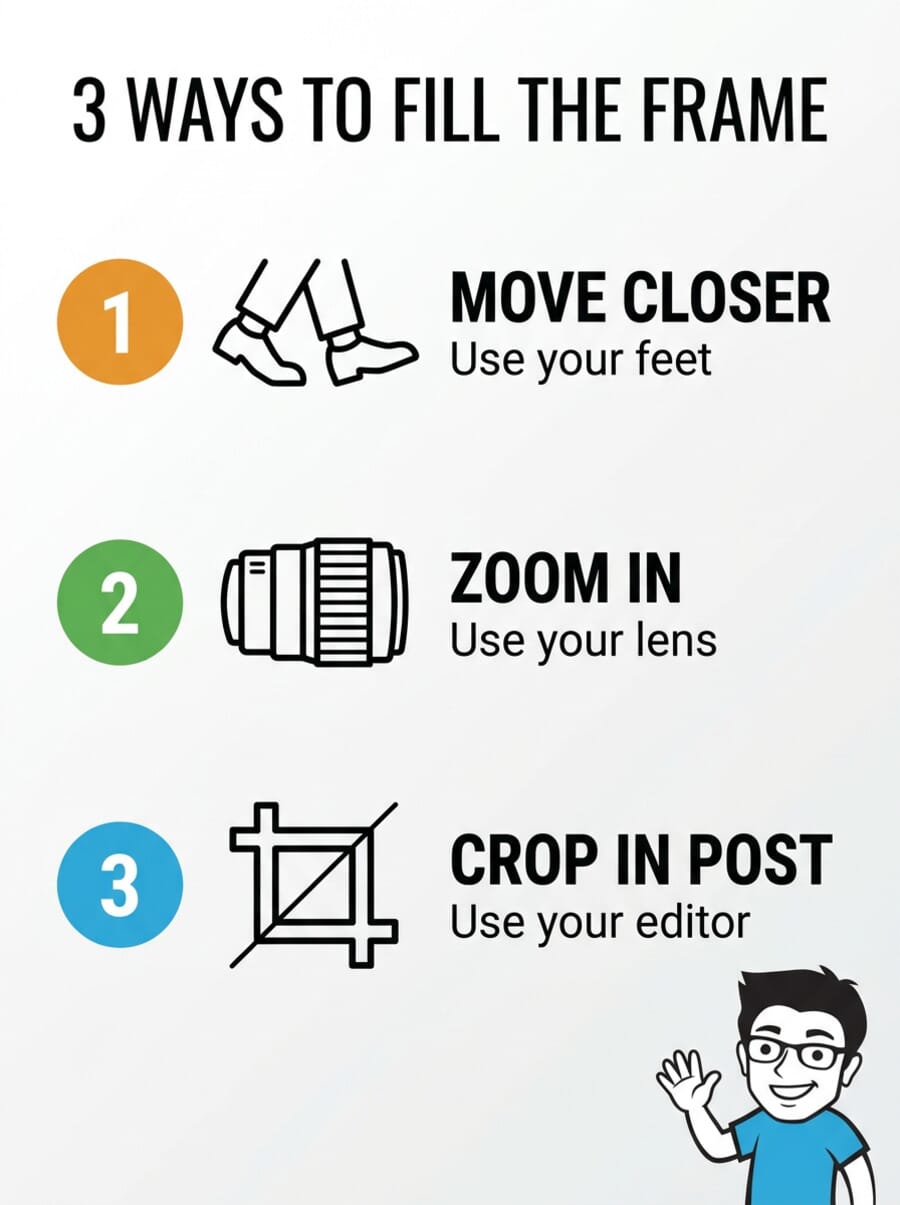
1. Move Closer to Your Subject
The most direct approach: use your feet. Walk toward your subject until it fills your viewfinder. This is the method legendary photojournalist Robert Capa was referring to when he said, “If your pictures aren’t good enough, you’re not close enough.”
Moving closer changes the perspective in ways that zooming can’t replicate. You get a more natural look, more connection with the subject, and often better background compression.
When to use it: Street photography, portraits, events — any time you can physically get closer without disturbing the scene or the subject.
2. Zoom In
When you can’t physically get closer — maybe there’s a fence in the way, or you’re photographing wildlife — use a longer focal length. A telephoto lens (85mm, 135mm, 200mm+) lets you fill the frame from a distance.
Zooming in also compresses the background, which can simplify your composition even further. Pair it with a wide aperture and you get beautiful bokeh that makes the subject pop.
When to use it: Wildlife, sports, candid portraits, any subject you can’t approach closely.
3. Crop in Post-Processing
Sometimes you realize after the fact that you should have filled the frame more. That’s where cropping comes in. Modern cameras have enough resolution that you can crop significantly and still have a sharp, usable image.
The trade-off: You’re throwing away pixels. A heavily cropped image won’t be as sharp or printable at large sizes as one that was framed tightly in-camera. Cropping is a rescue tool, not a replacement for good framing.
When to use it: When you missed the shot in the field, when you want to experiment with tighter compositions after the fact, or when shooting with a high-megapixel camera that gives you room to crop.
Fill the Frame by Genre
Filling the frame looks different depending on what you’re shooting. Here’s how to apply this technique across common photography genres.
Portraits
Filling the frame with a face is one of the most powerful moves in portrait photography. A tight headshot — where the face fills 70-80% of the image — creates instant emotional connection. The viewer can see every expression, every nuance.
Don’t be afraid to crop into the forehead or hair. What matters is the eyes and the expression, not showing the entire head.
Nature and Macro

Macro photography is essentially filling the frame taken to the extreme. When you photograph a flower, an insect, or a dewdrop so close that it fills your entire image, you reveal a hidden world of detail.
Even without a dedicated macro lens, you can fill the frame with natural subjects by getting as close as your lens allows and cropping in post.
Food Photography
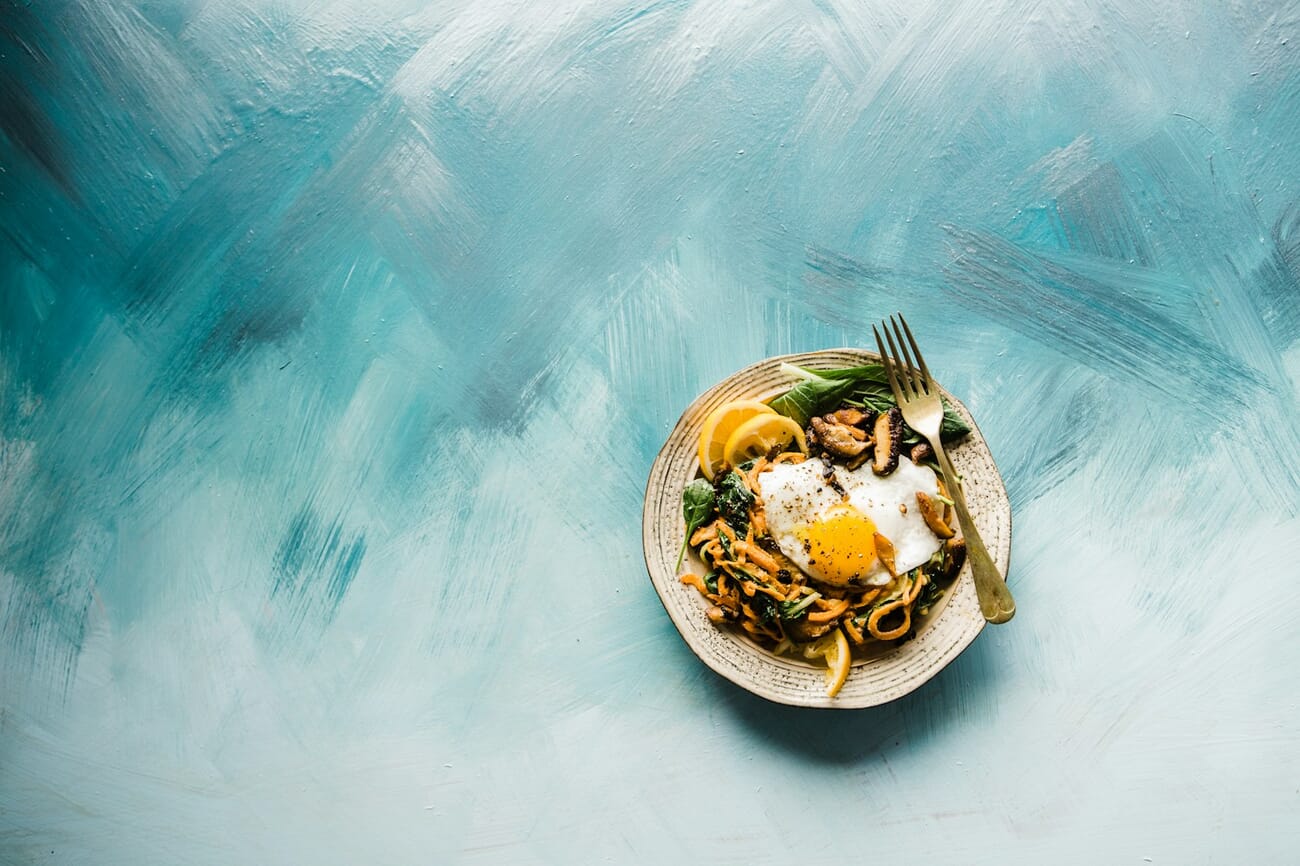
Food photography benefits hugely from filling the frame. A plate shot from above, filling the entire image, showcases textures, colors, and arrangement. The viewer can almost taste the food.
Textures and Abstracts

When you fill the frame with a texture or pattern, the photo becomes almost abstract. There’s no context, no scale — just the pattern itself. This works beautifully with wood grain, rust, fabric, water ripples, and countless other subjects.
Architecture

Filling the frame with architectural details — a door knocker, carved stonework, weathered wood — can reveal character that’s invisible in wide establishing shots. Look for patterns, textures, and details that tell a story about the building.
Fill the Frame vs. Negative Space
Filling the frame and negative space are essentially opposite approaches to composition. Both are valid, and understanding when to use each will make you a stronger photographer.
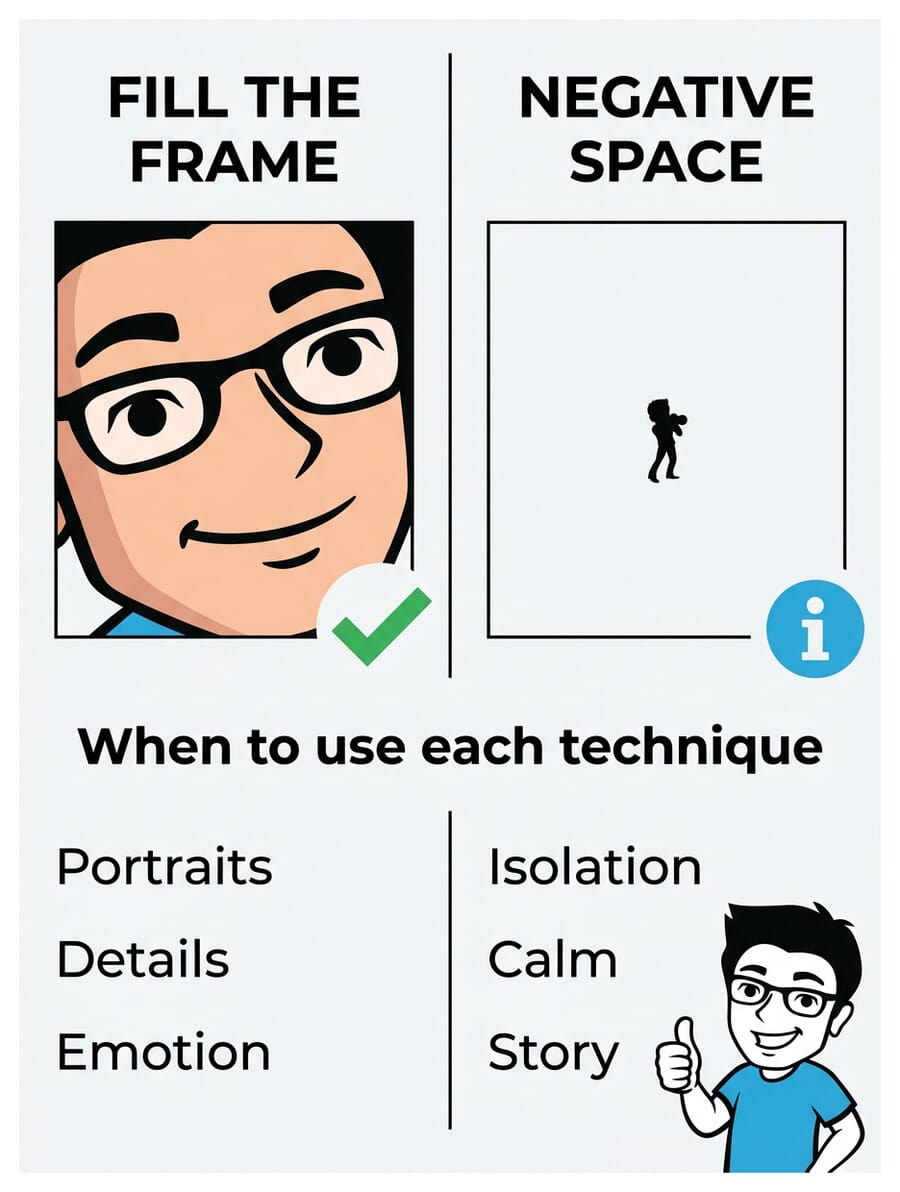
Filling the frame emphasizes the subject. It’s bold, direct, and focuses attention on detail and emotion.
Negative space emphasizes the emptiness around the subject. It creates feelings of solitude, calm, or vastness. A lone tree in a snowy field. A single boat on a vast ocean.
Neither technique is “better” — they serve different purposes. The key is to make a deliberate choice rather than ending up somewhere in between by accident.
When NOT to Fill the Frame
Fill the frame is powerful, but it’s not always the right choice. Here are situations where leaving space around your subject is better:
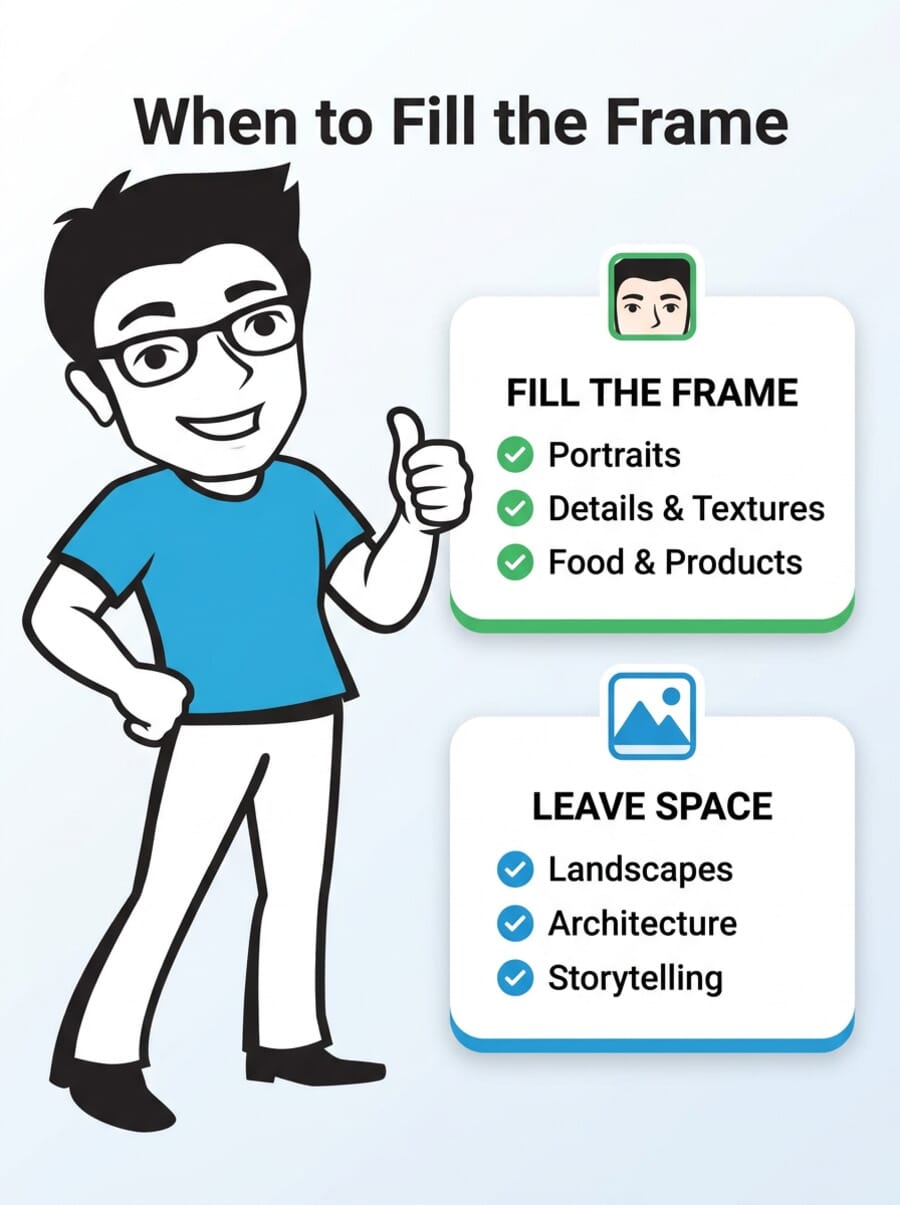
- When context matters — A person standing in front of the Eiffel Tower tells a different story than a tight headshot. Sometimes the where is as important as the who.
- When the subject is moving — Leave room in the direction the subject is moving or looking. A runner who fills the frame with no space ahead feels cramped and awkward.
- When you want to convey scale — A tiny climber on a massive cliff face tells a story about the enormity of the landscape. Filling the frame with just the climber loses that sense of scale.
- Landscape photography — Wide, sweeping vistas often benefit from breathing room. The vastness is the subject.
- When you want mood through emptiness — As discussed above, negative space creates its own emotional impact.
Common Mistakes When Filling the Frame
Even experienced photographers make these errors. Watch out for:
- Cutting off important parts — There’s a difference between intentionally cropping into a forehead and accidentally chopping off a hand or foot at an awkward joint. Be deliberate about what you include and exclude.
- Ignoring the background — Just because you’re filling the frame doesn’t mean the background disappears entirely. A busy background behind a tight portrait still creates visual clutter. Use a wide aperture to blur it out.
- Using it for every shot — Filling the frame is a tool, not a rule. If every photo in your portfolio is a tight crop, your work will feel one-dimensional. Mix it up with wider compositions for variety.
- Getting too close with a wide-angle lens — Using a wide-angle lens very close to a face creates unflattering distortion. For tight portrait framings, use an 85mm or longer focal length.
- Not checking the edges — When you’re focused on the subject, it’s easy to miss distracting elements sneaking in at the frame edges. A stray branch, a bright highlight, or a person’s elbow can ruin an otherwise clean composition.
Practical Tips for Better Frame-Filling Photos
Ready to put this into practice? Here’s a quick checklist:
- Start wide, then get closer — Take a few shots from your current distance, then physically move closer and shoot again. Compare the results. You’ll almost always prefer the closer version.
- Use the rule of thirds — Even in a tight frame, placing your subject slightly off-center creates a more dynamic composition than dead center.
- Focus on the eyes — In portraits, always focus on the eyes. When you fill the frame with a face, any focus error becomes painfully obvious.
- Try different angles — Don’t just fill the frame from eye level. Try shooting from above, below, or from the side for more interesting perspectives.
- Practice with your phone — Your smartphone is a great tool for learning to fill the frame because you have to get close (no optical zoom on most phones). This builds the habit of using your feet.
- Review and crop ruthlessly — When editing, ask yourself: “What can I remove from this frame without losing the story?” If there’s dead space that isn’t serving the composition, crop it out.
Practice Exercise: The Fill-the-Frame Challenge
Here’s a simple exercise to build your fill-the-frame instincts:
- Pick any subject — a flower, a coffee cup, a pet, a friend’s face.
- Take a photo from where you’re standing.
- Take two steps closer and shoot again.
- Take two more steps closer and shoot again.
- Get as close as your lens will focus and shoot one more.
Now compare all four images. Notice how each step closer changes the feel of the photo. Notice how details emerge and distractions disappear. That progression is the power of filling the frame.
Do this exercise with 10 different subjects over the next week, and filling the frame will become second nature.
Does filling the frame work with smartphone photography?
Absolutely. Smartphones are actually ideal for practicing this technique because most have fixed wide-angle lenses with no optical zoom. This forces you to physically move closer to your subject, which is the best way to fill the frame. Just be mindful of minimum focus distance — most phones can focus as close as 10-15cm.
Should I fill the frame in camera or crop later?
Whenever possible, fill the frame in-camera by moving closer or zooming in. This preserves maximum image quality and resolution. Cropping in post-processing is a useful backup, but heavy cropping reduces sharpness and limits how large you can print. Think of cropping as a fine-tuning tool, not a primary strategy.
What lens is best for filling the frame?
A telephoto lens (85mm to 200mm) makes it easy to fill the frame from a comfortable distance, especially for portraits. For macro subjects like flowers and insects, a dedicated macro lens lets you fill the frame with tiny subjects. Wide-angle lenses can fill the frame too, but be careful of distortion when shooting very close to people.
Can I fill the frame and still use the rule of thirds?
Yes — filling the frame and the rule of thirds work beautifully together. Even in a tight crop, you can position your subject’s eyes or key elements along the thirds lines for a more dynamic composition than centering everything.
Is filling the frame the same as cropping tight?
They’re related but not identical. Filling the frame is a mindset you apply while shooting — you compose the image tightly in your viewfinder. Cropping tight is something you do after the fact in editing. The results can look similar, but filling the frame in-camera gives you better image quality since you’re using the full sensor resolution.
Test Your Knowledge
Think you’ve mastered the fill-the-frame technique? Take this quick 6-question quiz to find out!
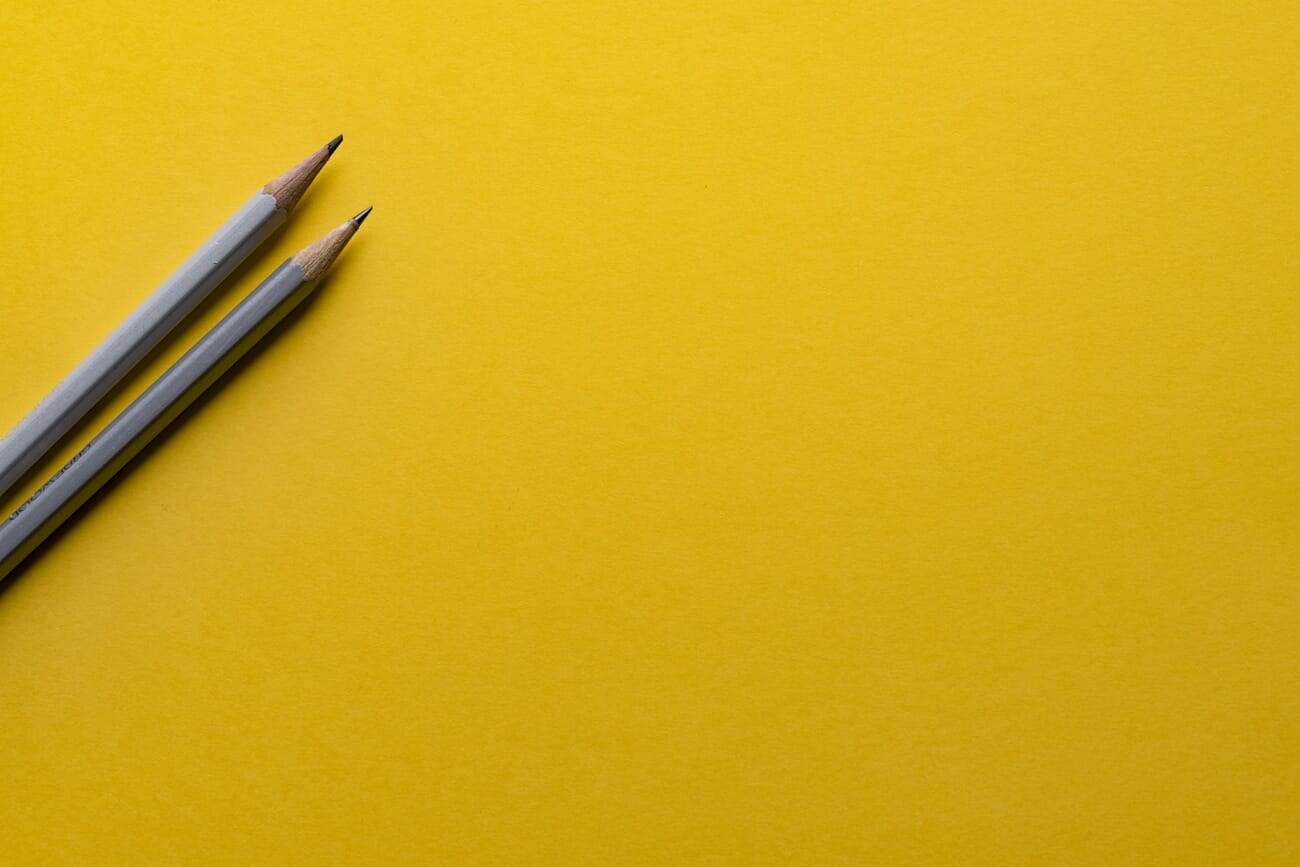
Featured image: Photo by Alef Morais on Unsplash.
