
- Manual mode lets you set aperture, shutter speed, and ISO independently — the three settings that together decide exposure.
- Start with the most important setting for the scene (aperture for portraits, shutter for sports), then dial in the other two using the exposure bar.
- Mirrorless cameras (2026 majority) show live exposure preview in the EVF/LCD, making manual mode dramatically easier than it was on DSLRs.
- ISO Auto in Manual is now standard on Canon, Sony, Nikon, and Fujifilm — lock aperture + shutter, let the camera handle ISO. Best hybrid mode for events and variable light.
- Manual isn’t always right: in fast-changing light, rapid action, or mixed lighting, aperture priority or shutter priority often deliver better results than full manual.
Manual mode is the camera setting that separates photographers who control their images from photographers whose images control them. It sounds intimidating — three settings, infinite combinations — but the logic is simple once you internalize what each setting does. This guide walks through the three pillars (aperture, shutter speed, ISO), the order of operations for dialing in a shot, the mirrorless-specific advantages that make manual mode dramatically easier in 2026 than it was a decade ago, and the scenarios where manual mode isn’t actually the right choice.
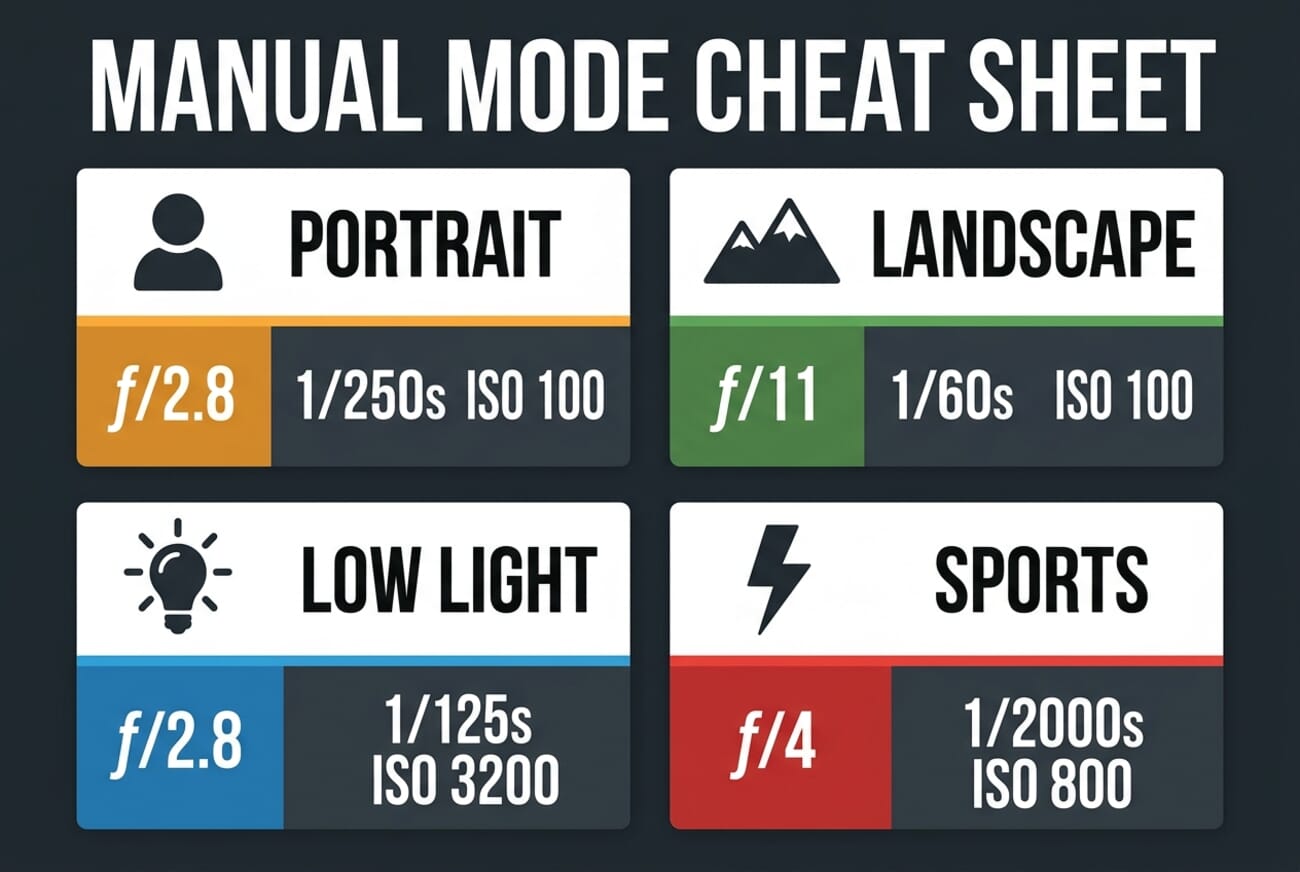
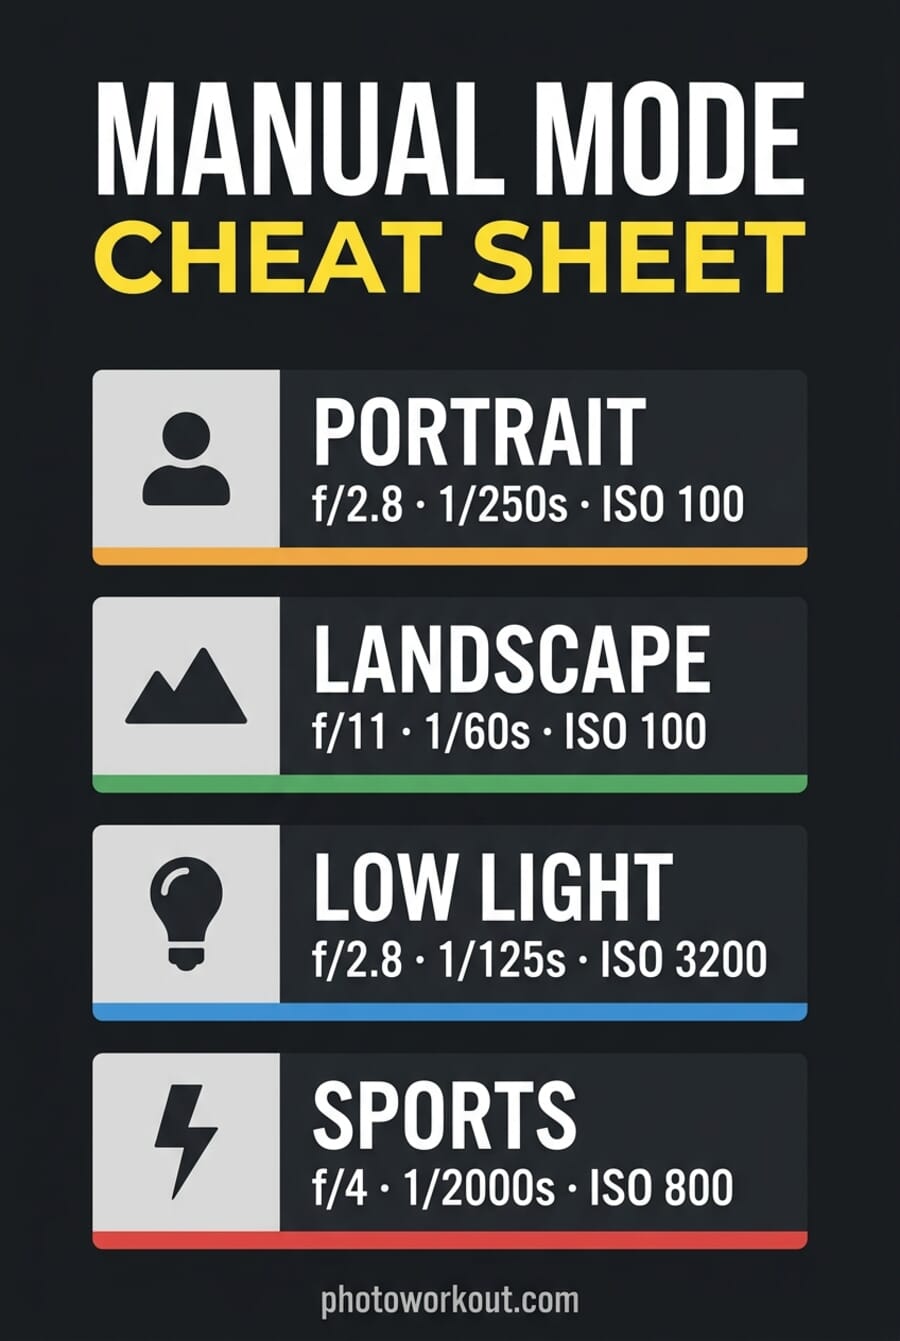
If you’ve avoided manual mode because it feels advanced, the cheat sheet above is your entry point. Match the scenario, use the starting values, adjust with the exposure bar. Within a dozen shoots, the numbers stop feeling foreign.
What Is Manual Mode?
Manual mode allows you to independently choose all three of your key camera settings:
- Aperture.
- Shutter speed.
- And ISO.
This is in contrast to:
Auto mode, which chooses all three settings for you.
- Aperture Priority mode, which allows you to choose your aperture and ISO but picks your shutter speed automatically.
- Shutter Priority mode, which lets you choose your shutter speed and ISO, but picks your aperture automatically.
- And Program mode, which lets you choose the ISO, while the camera automatically picks the aperture and shutter speed.
In other words:
Manual mode is how you choose all the settings, and your camera chooses none.
What Is the Purpose of Aperture, Shutter Speed, and ISO?
Aperture, shutter speed, and ISO are all about determining the exposure (i.e., the brightness) of your images.
So depending on your choice of settings, you might end up with a nicely exposed photo like this one:
Or a photo that’s too light, like this:
Or too dark, like this:
In addition to determining the overall exposure of a photo, all three settings have other “side” effects.
Now let’s take a look at each setting in turn, and how it can affect your photos:
Aperture
The aperture refers to a diaphragm in your lens.
- The larger the diaphragm, the more light that hits the camera sensor.
- And the smaller the diaphgram, the less light that hits the camera sensor.
- So the wider the aperture, the brighter your photos.
- And the narrower the aperture, the darker your photos.
That’s the first affect that aperture will have on your images.

Now, aperture is referred to in terms of f-stops, or f-numbers, like this:
f/2.8, f/4, f/5.6, f/8, etc.
The smaller the number (e.g., f/2.8), the wider the aperture, and the brighter the resulting photo.
The higher the number (e.g., f/11), the narrower the aperture, and the darker the resulting photo.
Make sense?
So by choosing a smaller f-stop, you end up with a brighter photo, all else being equal.
(Things get a bit more complicated when you start throwing shutter speed and ISO into the mix, but this guide will leave that alone for now.)
Aperture also has a second affect on your images:
Depth of field.
This may sound complex, but don’t be intimidated; it’s actually pretty easy to understand. You see, depth of field is simply the amount of the photo that is sharp.
So a photo with a narrow depth of field has a sliver of the scene in focus, while the rest of the photo remains out of focus, like this:
And a photo with a deep depth of field has the entire scene in focus, from front to back:
But how does this actually work with aperture?
Well, the smaller your f-number, the narrower your depth of field.
So a photo taken with an f-number of f/2.8 will look something like this:
Whereas a photo taken with an f-number of f/16 will look something like this:
There are plenty of other f-numbers/apertures, but these are just points along the spectrum from mostly blurry to sharp throughout.
See: Examples of Wide vs Narrow Aperture
Got it?
This is why aperture is such a cool setting, by the way. Sure, it allows you to adjust the exposure of your images, and that’s nice.
But it also allows you to change how much of the photo is in focus, which is great for creating different effects.
If you want a more modern, artistic look, which is very common in portrait photography and wildlife photography, you might use a wide aperture for a photo like this:
Whereas if you’re shooting a landscape or architectural photo, you’ll probably want to use a narrow aperture for a photo like this:

(That way, you can keep the viewer focused on the entire scene.)
And that’s why it’s often important to choose your aperture yourself. If you let your camera pick, it’ll sometimes do a good job–but it often won’t.
After all, how does your camera know what aperture works best for creative purposes? It doesn’t think about creativity at all, just exposure.
Now let’s take a look at the next key setting:
Shutter Speed
Shutter speed refers to the length of time the camera sensor is exposed to the light.
So if you dial in a slow shutter speed, the camera sensor will be exposed to the light for a longer period of time, and you’ll end up with a brighter photo.
And if you dial in a fast shutter speed, the camera sensor will be exposed to the light for less time, resulting in a darker photo.
That’s why shutter speed is written in terms of seconds, like this:
1/2s, 1/60s, 1/250s, 2s, 1/2000s, etc.
So, for a quick example, if I were to take a photo of a flower using a fast shutter speed (e.g., 1/500s), I might end up with something dark, like this:
Whereas if I were to take a photo of the same flower, using a slow shutter speed (e.g., 1/125s), the shot would be a lot brighter, like this:
But your shutter speed doesn’t just influence a photo’s brightness.
It also helps determine how sharp your photos turn out.
You see, if you use a slow shutter speed, then your subject has time to move and your camera has time to shake.
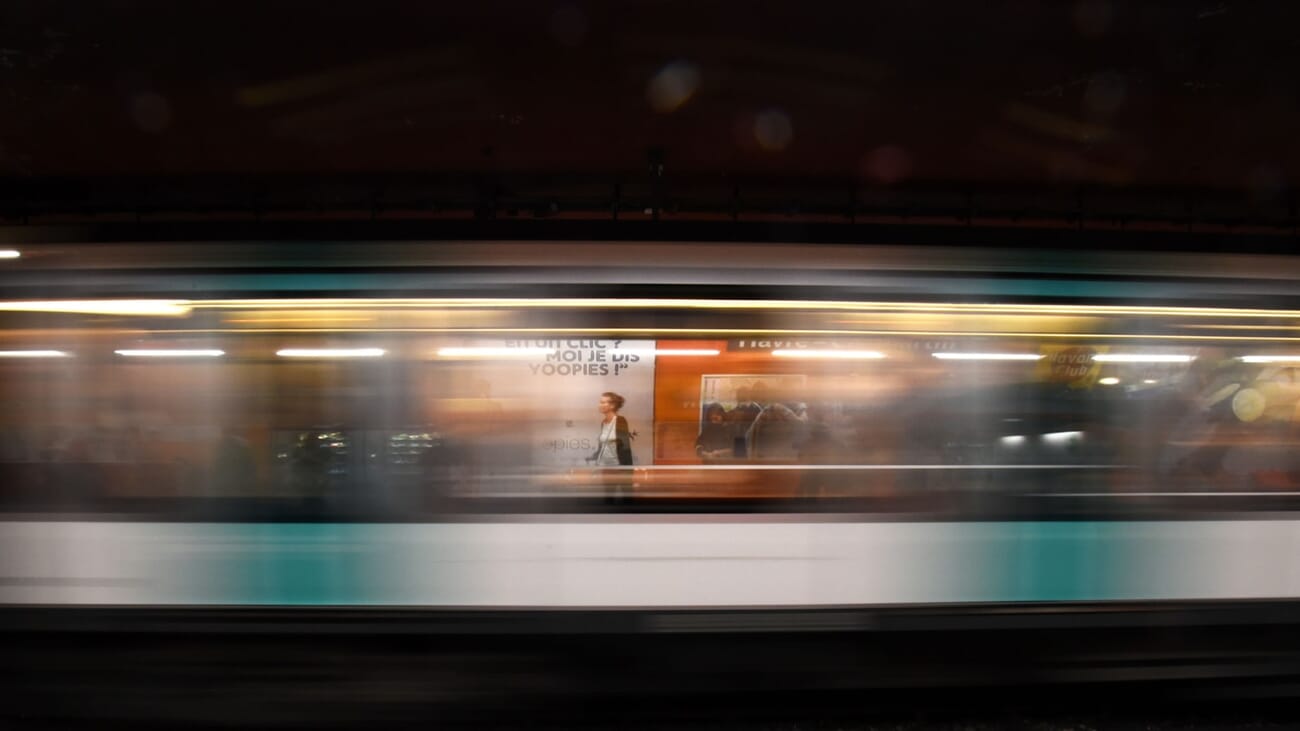
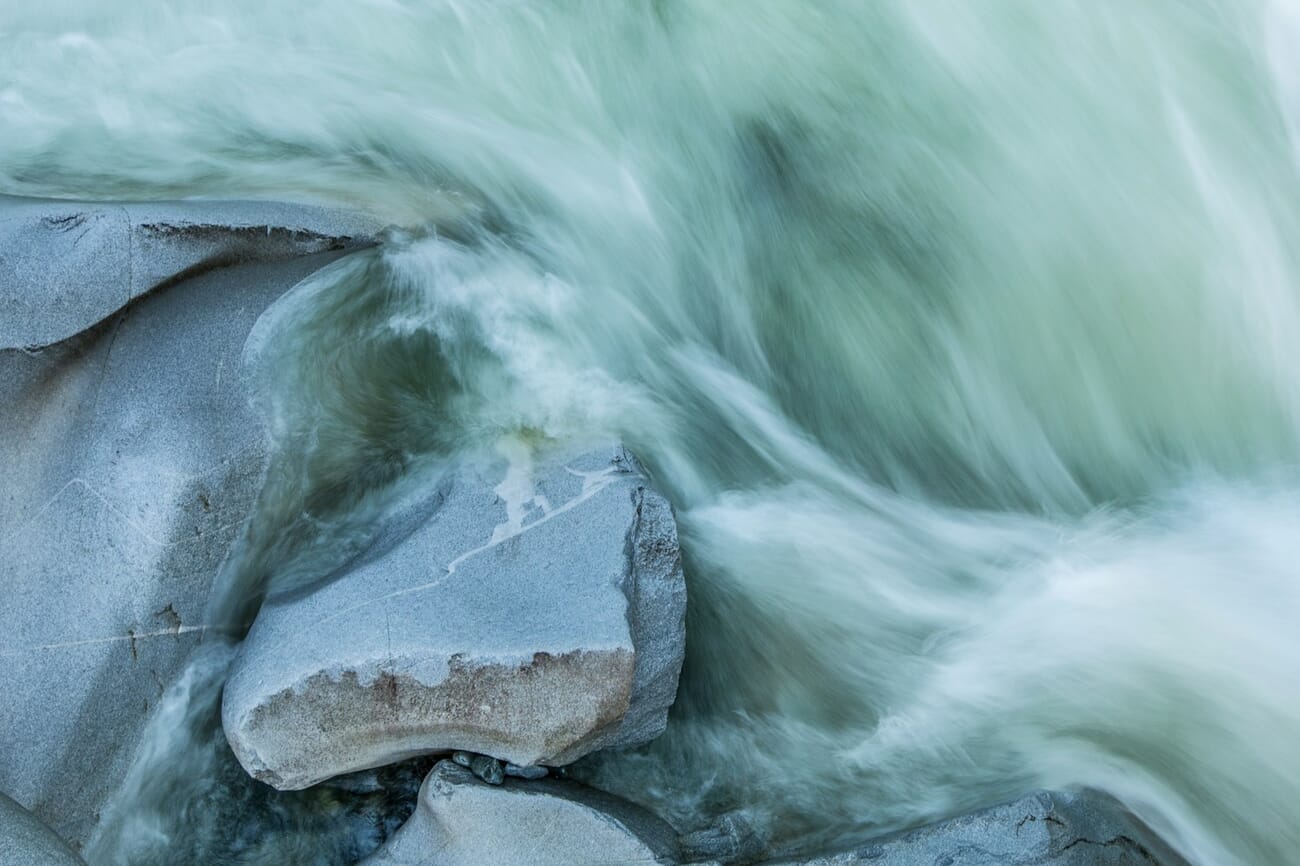
So a shutter speed that’s slower will result in a blurrier photo, whereas a shutter speed that’s faster will freeze the scene, resulting in a totally sharp shot:
This is huge when you’re photographing fast-moving subjects, like birds in motion or football players running.
If you don’t use a fast shutter speed, then your images won’t turn out sharp–and, generally speaking, a blurry image is a bad image.
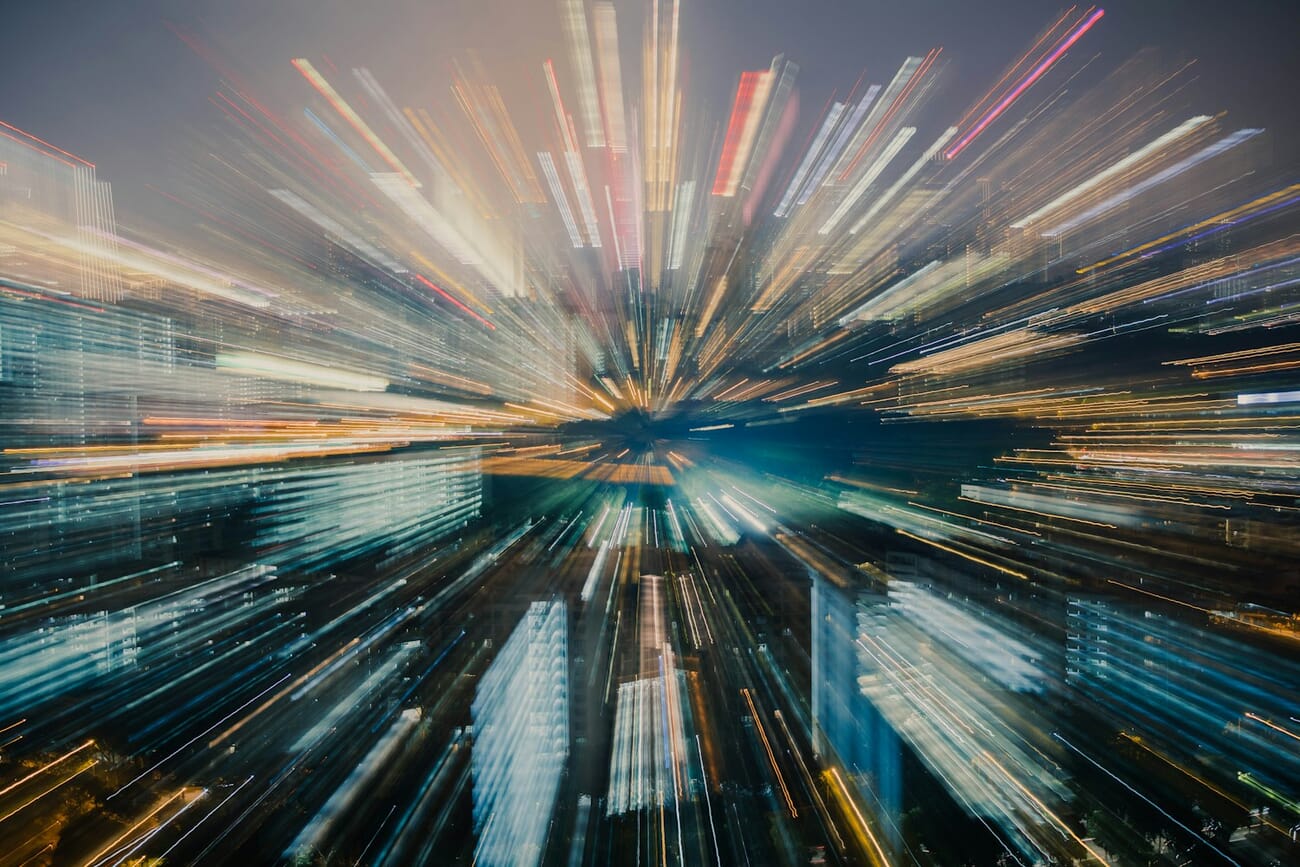
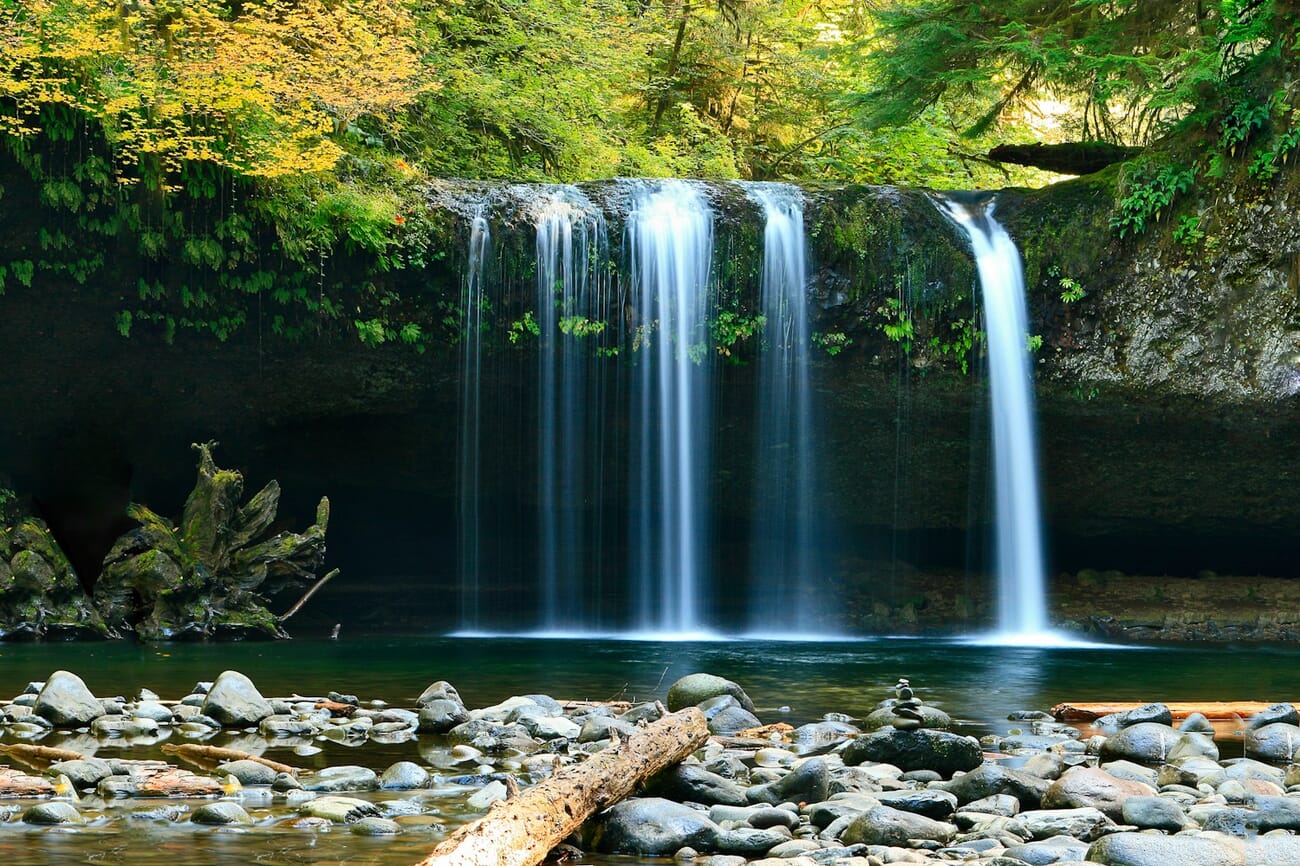
You can also use slower shutter speeds to achieve artistic blur effects, such as when photographing moving water:
Which is why it’s often a good idea to carefully select your shutter speed via Manual mode, rather than leaving it up to the camera.
ISO
ISO is the last key setting you need to understand when using Manual mode.
It basically refers to an amplification setting–in other words, should your camera’s sensor try to make the photo brighter?
The higher the ISO, the more your camera amplifies the photo.
So an ISO of 100 will result in a photo like this:
Whereas an ISO of 400 will result in a photo like this:
Make sense?
But–as with aperture and shutter speed–ISO has a second effect.
The higher the ISO, the noisier your images become.
Noise refers to a grainy texture, like sand on your image.
And noise is pretty much always bad.
Which is why you can’t just boost the ISO of your photos willy-nilly. Instead, you have to think about the amount of noise you’ll be introducing–and only make the tradeoff if necessary (so that you can brighten the image for a well-exposed shot).
ISO Auto in Manual Mode (The Best of Both Worlds)
Every major 2026 camera (Canon EOS R, Sony Alpha, Nikon Z, Fujifilm X) lets you set Auto ISO inside Manual mode. You lock aperture and shutter speed, the camera handles only ISO, and exposure stays correct even when the light shifts.
This is the hybrid mode professionals use more than pure manual:
- Weddings and events: lighting changes every ten seconds as the sun moves or the couple walks between shade and direct light. Fixed aperture (for consistent depth of field) and fixed shutter (for motion control); let ISO float.
- Street photography: subjects move between shade and sun between frames. Lock f/5.6 and 1/500s, let ISO compensate.
- Concerts and stage: lighting is dramatic and unpredictable. Lock the aperture to the lens sweet spot, the shutter to freeze performers, and the camera handles the ISO from frame to frame.
Set your minimum shutter speed and maximum ISO ceiling in the camera menu so Auto ISO doesn’t run to ISO 51200 on a dim frame. A cap of ISO 6400 (modern full-frame) or ISO 3200 (APS-C or older sensors) keeps noise manageable.
Putting It All Together: Exposure
I’ve talked about how aperture, shutter speed, and ISO determine your exposure.
But it’s important to remember:
They determine it by working together.
So you can end up with a too-bright photo by using a too-wide aperture, or a shutter speed that’s too slow, or an ISO that’s too high.
And you can end up with a too-dark photo by doing the exact opposite: narrowing your aperture, using a too-fast shutter speed, or a too-low ISO.
You can also compensate for a change in the ISO by changing your aperture, or a change in the aperture by changing the shutter speed.
In other words:
While you do have choose aperture, shutter speed, and ISO separately, you need to make sure you’re considering all the settings and their effects on the overall image.
Manual Mode on Mirrorless Cameras (2026)
Most cameras sold in 2026 are mirrorless, and shooting manual on a mirrorless body is genuinely easier than on a DSLR. Three specific advantages matter when you’re learning the mode.
Live View Exposure Preview (WYSIWYG)
A mirrorless electronic viewfinder (EVF) and rear LCD show a live simulation of the final exposure. Turn your shutter speed up too far and the frame actually goes dark in the viewfinder. Open the aperture and the frame brightens. You can see overexposure and underexposure before pressing the shutter.
DSLRs don’t do this — an optical viewfinder shows the scene as your eye sees it, regardless of your exposure settings. You have to either rely on the exposure bar or flip to Live View mode (which turns the DSLR into a slow mirrorless camera for preview purposes). For beginners, mirrorless’ WYSIWYG preview removes the biggest headache of manual shooting: guessing whether your shot will be blown out or underexposed.
Electronic vs Mechanical Shutter
Mirrorless cameras usually give you two shutter options:
- Mechanical shutter — the traditional moving curtains. Reliable up to around 1/4000 or 1/8000 of a second, no rolling-shutter distortion, works perfectly with studio strobes and flash.
- Electronic shutter — silent, reaches shutter speeds as fast as 1/32000 or higher, and enables burst rates up to 120fps on flagships. Catch: reading the sensor takes time, so fast-moving subjects can show rolling-shutter skew (tilted propellers, warped golf swings), and most electronic shutters don’t sync with flash.
For manual-mode learning, stick with mechanical shutter unless silence is critical (wildlife, ceremonies, museums) or you need speeds above 1/4000.
In-Body Image Stabilization (IBIS)
Most 2026 mirrorless bodies include 5–8 stops of IBIS. For handheld shooting, leave it on — it’s often the difference between a sharp shot at 1/30s and a blurred one. Two exceptions:
- On a tripod: turn IBIS off. Micro-corrections can introduce their own jitter when the camera isn’t actually moving.
- Long exposures past 1s: IBIS compensation windows typically cap under a second — beyond that it becomes ineffective or can add noise. Tripod + IBIS-off is the rule for any exposure longer than a second.
How to Use Manual Mode for the Best Images
Manual mode allows you to control the aperture, the shutter speed, and the ISO.
And, as you now know, each of these settings adjusts the brightness of the scene, while also having some other effect (on photo sharpness, depth of field, and noise).
So once you switch over to Manual mode, you have control over every aspect of your image.
That’s a lot of power. And you have to be careful, because you don’t want to end up making a mistake and ruining your photos.
So you shouldn’t just randomly choose your settings and be done. Instead, consider every setting in turn to arrive at the perfect setup.
When you’re out in the field, here’s what The common recommendation is you do:
First, ask yourself:
Which of the three key settings is the most important?
If you’re shooting a deep landscape that requires a certain aperture, then your aperture is probably going to be most important.

If you’re shooting a sports game that requires a certain shutter speed to freeze the players, then your shutter speed is probably going to be most important.
It’s rare that ISO will be your most important setting, which is why The common recommendation is you leave it for later.
Then, once you’ve determined which setting matters the most…
…set that first.
Next, look at your other two settings.
These should be aperture and ISO, or shutter speed and ISO.
In cases with aperture and ISO, set your aperture to the lowest value you can afford (so that you keep your main subject in focus).
In cases with shutter speed and ISO, set your shutter speed to the lowest value you can afford (so that your image has no motion blur or visible camera shake).
At this point, you’ll have your aperture and your shutter speed set.
So dial in your camera’s native ISO–which is usually ISO 100, but might be ISO 160 or ISO 200.
Then look at your camera’s exposure bar.
(This will sit under the image screen in the viewfinder.)
If your shot is too dark, the exposure bar will indicate that you need to brighten it.
In this case, you’ll want to raise your ISO until the exposure bar indicates that you’ve nailed the exposure.
(If you raise it too much, you’ll start to see a lot of noise. So see if you can widen your aperture or drop your shutter speed to brighten the image, instead.)
Whereas if your shot is too bright, the exposure bar will indicate that you need to darken it.
And in this case, you’ll want to keep your ISO at its native setting, and raise the shutter speed or narrow the aperture until the exposure is just right.
Quick recap:
First dial in your most important setting.
Then choose your shutter speed or aperture (whichever remains).
Third, set your ISO to 100.
Then look at the exposure bar. Boost your ISO if the exposure is too dark, and boost your shutter speed or narrow your aperture if the exposure is too bright.
Do all this, and you’ll end up with a very well-exposed photo.
Manual vs Aperture Priority vs Shutter Priority vs Program
Manual mode is one of four main shooting modes on any camera. Professionals rarely use pure manual for every shot — they switch between modes based on what the scene demands. Here’s the quick map:
| Mode | Dial symbol | You set | Camera sets | Best for |
|---|---|---|---|---|
| Program | P | ISO, exposure compensation | Aperture + shutter speed | Handing the camera to someone else, candid family events, street photography in changing light |
| Aperture Priority | Av (Canon) / A (others) | Aperture, ISO | Shutter speed | Portraits (depth of field control), landscapes with a tripod, product photography |
| Shutter Priority | Tv (Canon) / S (others) | Shutter speed, ISO | Aperture | Sports, wildlife, kids in motion, waterfalls and long exposures |
| Manual | M | Everything (aperture, shutter, ISO) | Nothing | Studio and strobes, astrophotography, anything with unchanging light, panoramas and HDR brackets |
| Manual + Auto ISO | M + Auto ISO | Aperture, shutter speed | ISO only | Weddings, events, concerts, street — anywhere light shifts but you need locked depth of field and motion control |
The practical workflow: use Aperture Priority for most everyday shooting (it’s the fastest mode that still gives you creative control), switch to Shutter Priority for action, and drop into full Manual when lighting is consistent and you want exactly the look you envisioned.
When Should You Use Manual Mode?
Most beginners think that the pros use Manual mode all the time.
But this isn’t actually true.
Manual mode is great for taking control of all your camera settings, but it’s slightly slower than using a mode such as Aperture Priority or Shutter Priority.
After all, it takes time to choose all your settings–and when the light is changing quickly, you may not have time to alter your shutter speed, aperture, or ISO. You may need to fire off shots ASAP.
Use Manual mode when you want complete control AND the scene cooperates:
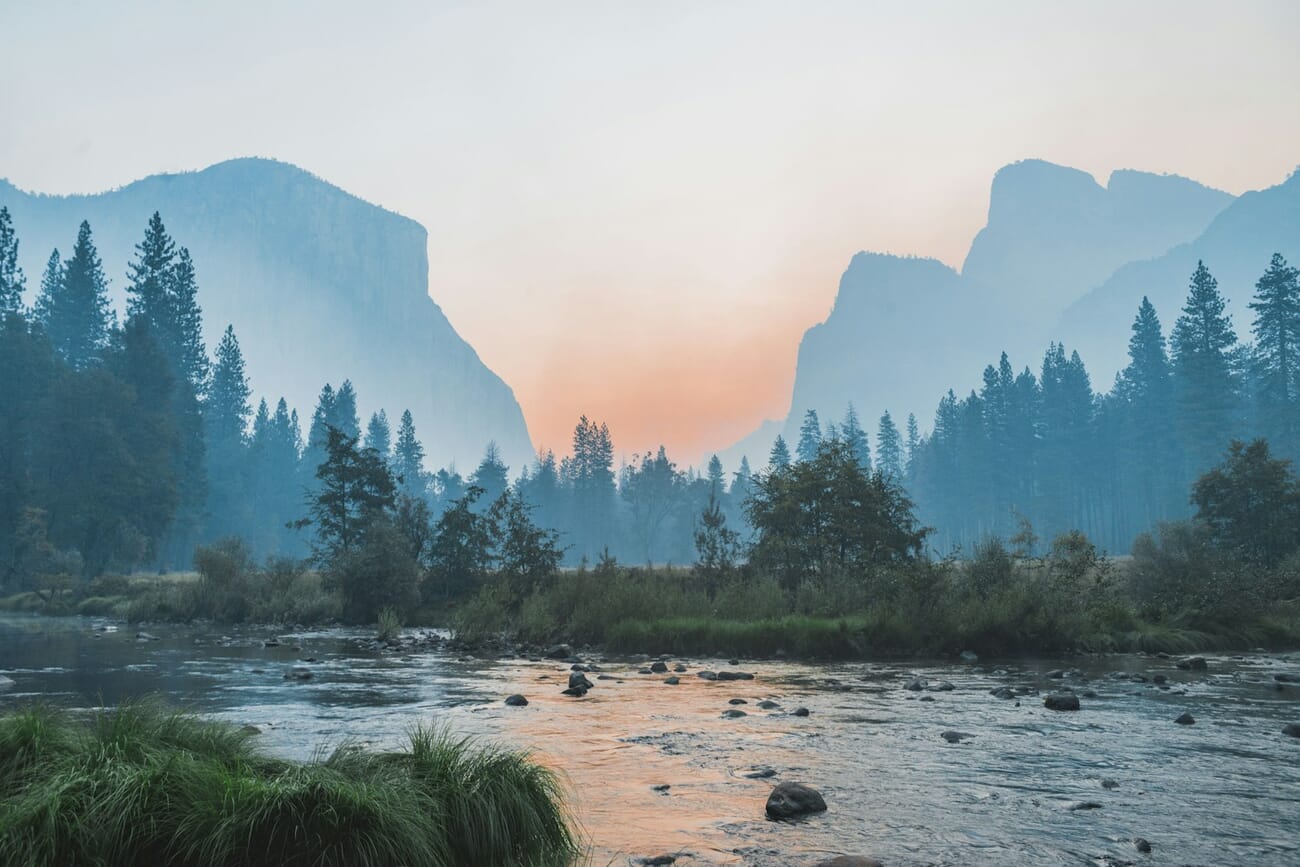
- Slow-paced genres — landscape, architecture, macro, still life. Time to think through every setting.
- Unchanging light — studio portraits with strobes, indoor product photography, anything with a constant light source.
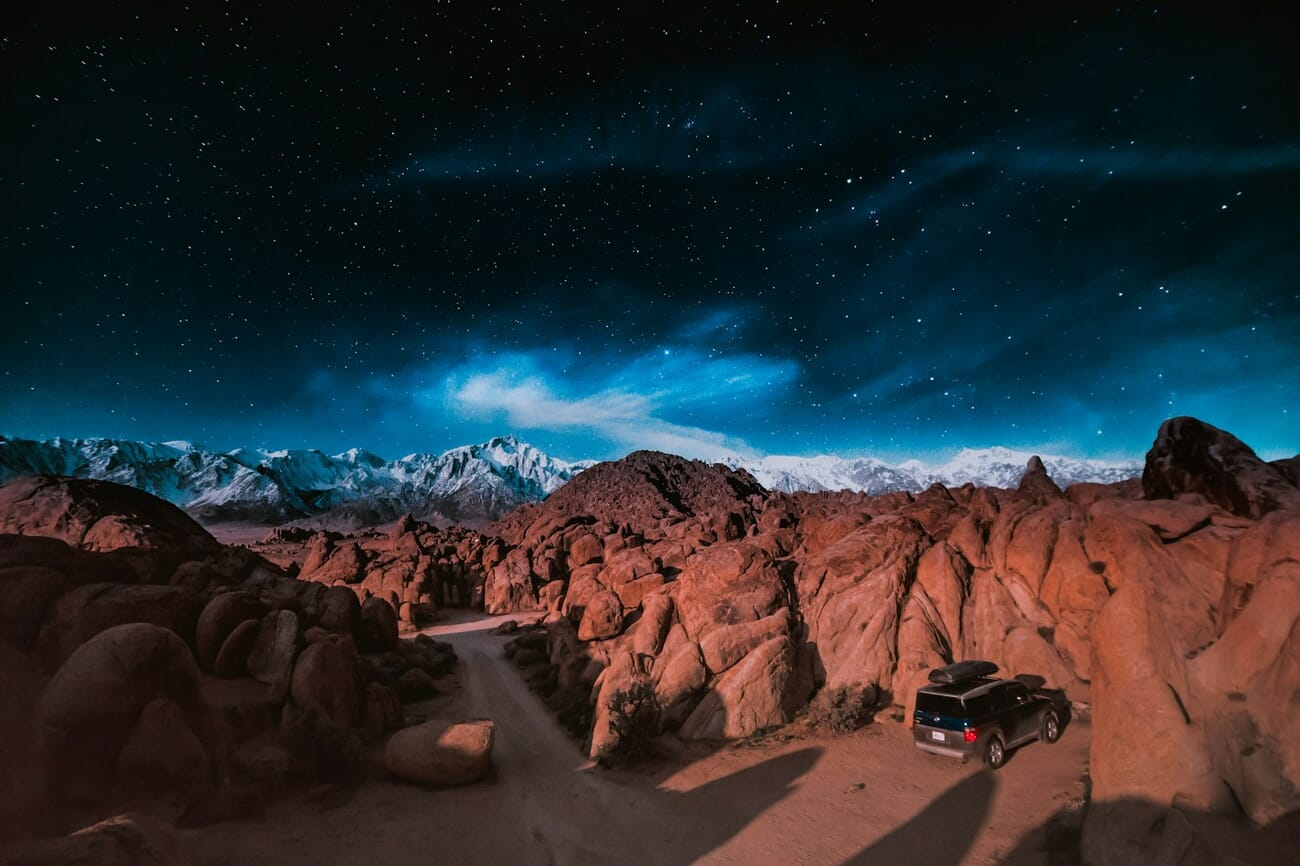
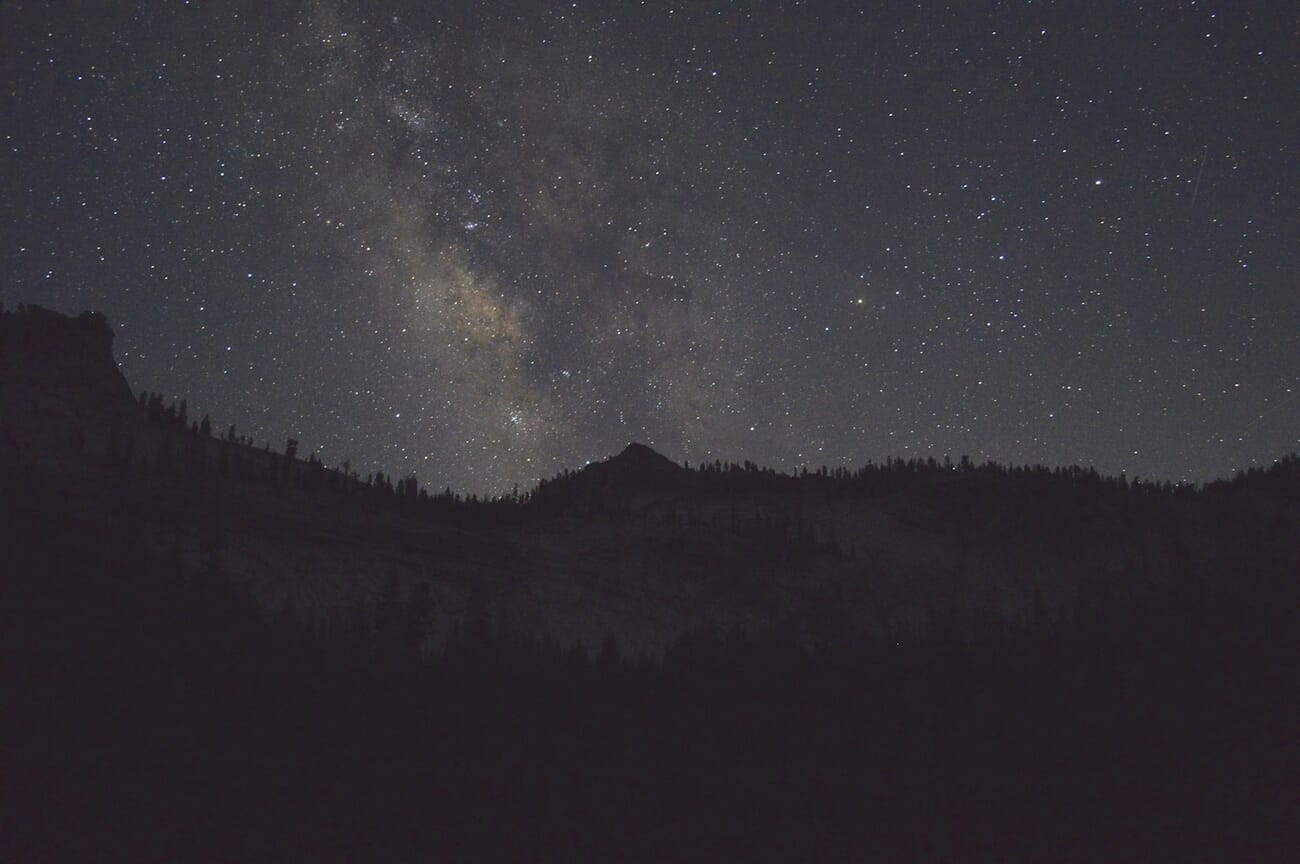
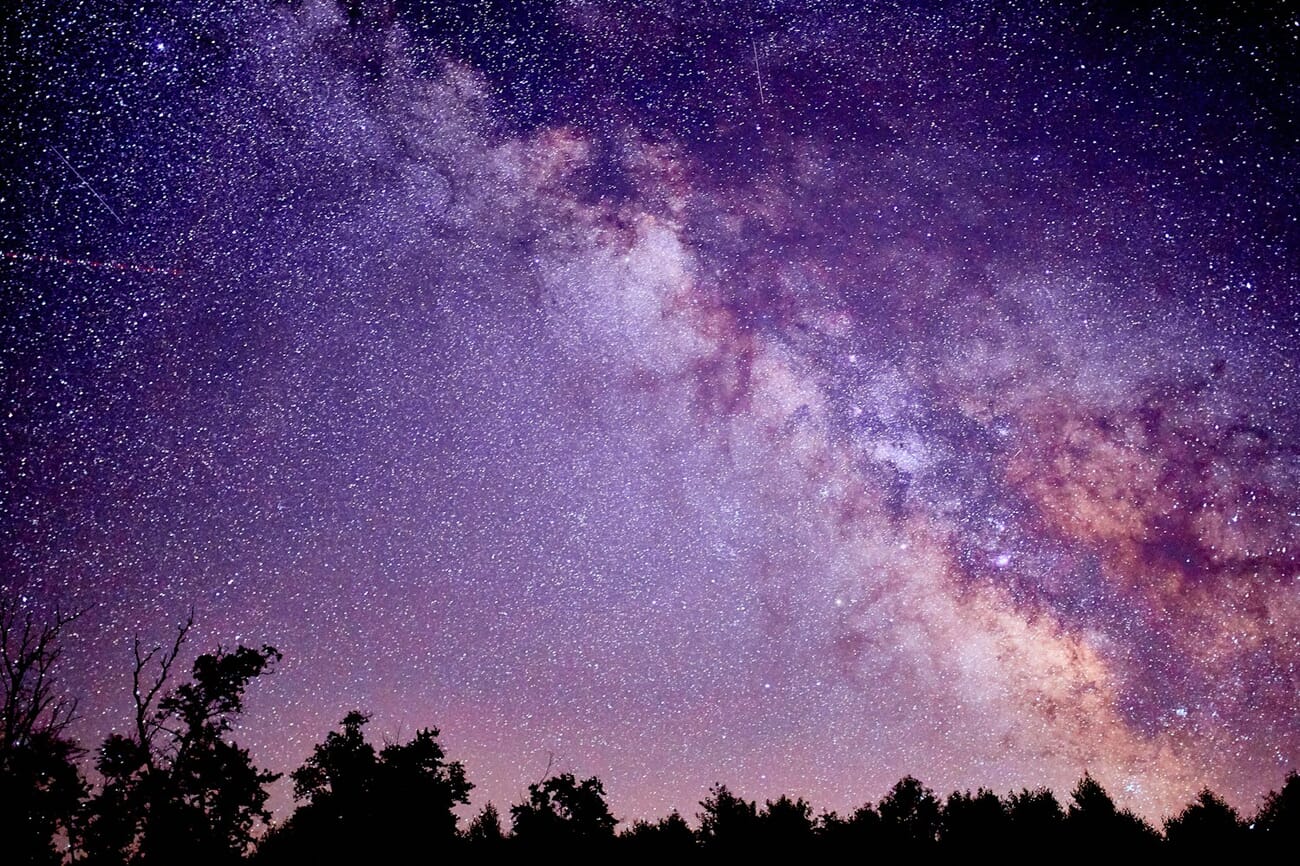
- Astro and long exposures — stars, light trails, fireworks. Metering is unreliable in the dark; manual is the only option.
- HDR brackets and panoramas — exposure must stay identical across frames. Any auto mode will drift.
- Film emulation and exposure consistency — shooting a set you’ll process as a unit.
When NOT to use Manual mode
Manual mode is often the WRONG choice. Five scenarios where a semi-auto mode delivers better results:
- Rapidly changing light. Walking between shade and sun; moving between indoor and outdoor; sunset that changes by the second. Manual means constantly re-setting; Aperture Priority or Manual + Auto ISO handle this gracefully.
- Fast action and unpredictable subjects. Sports, wildlife, kids. You’re composing, tracking, and nailing focus; you don’t have time to also be checking the exposure bar. Use Shutter Priority so shutter speed is locked and the camera handles aperture.
- Weddings and events. Mixed lighting (tungsten reception + window daylight + DJ LEDs) + fast-paced shooting + you’re delivering 500+ frames. Manual + Auto ISO is the standard pro workflow here — lock what matters, let ISO float.
- Handing the camera to a friend. They’re not going to learn the exposure triangle before the shutter release. Program mode is the respectful choice.
- Learning on a smartphone. Manual mode on most phones is buried and slow. Use the default mode; modern computational cameras beat manual in 99% of phone-photography scenarios.
The rule: Manual mode is a tool, not a trophy. Pros use it when it helps and switch to Aperture Priority, Shutter Priority, or Manual + Auto ISO the rest of the time.
Manual Mode in Photography: The Next Step
Now that you’re familiar with Manual mode, you’ll be able to confidently take control of your camera’s key settings.
And this will be a huge benefit in practical situations.
So start practicing with Manual mode.
You’ll get really, really good at it before long!
Need a quick reference for settings in different scenarios? The camera settings cheat sheet covers all the essentials.
Frequently Asked Questions
What is Manual mode in photography?
Manual mode (M on the camera’s mode dial) lets you set aperture, shutter speed, and ISO independently instead of letting the camera choose them. Full control, full responsibility for the exposure.
Should a beginner use Manual mode?
Start in Aperture Priority to learn how aperture affects depth of field, then move to Manual once the exposure triangle feels intuitive. On a mirrorless camera, the live exposure preview makes Manual mode easier to learn than it ever was on a DSLR — many beginners in 2026 skip the semi-auto step entirely.
Is Manual mode difficult?
Manual mode takes practice, not talent. The exposure triangle (aperture ↔ shutter ↔ ISO) is three settings with predictable relationships; once you’ve shot a few hundred frames, the numbers feel automatic. Pros don’t think “wait, I need to increase ISO” — they feel the scene and the fingers move.
What’s the difference between Manual mode and Aperture Priority?
In Manual mode, you set all three exposure values. In Aperture Priority (Av or A), you set aperture and ISO, and the camera picks the shutter speed to match the meter reading. Aperture Priority is faster and more forgiving in changing light; Manual is more precise when lighting is consistent.
What is ISO Auto in Manual mode?
A hybrid mode: you lock aperture and shutter speed (for consistent depth of field and motion control), and the camera handles ISO automatically to match the meter. Ideal for events, weddings, and any shoot with changing light. Set an ISO ceiling in the menu so the camera doesn’t run to extreme values.
Do professionals always shoot in Manual?
No. Most professionals use Aperture Priority for most everyday work and switch modes based on the situation. Manual mode is the right tool for studio, astro, panoramas, and anything with unchanging light; Aperture Priority or Shutter Priority handle fast-changing real-world scenes better.
Sources for this guide:


