
- Low light photography has two core challenges: camera shake (from hand movement) and motion blur (from subject movement) — each requires different solutions.
- AI noise reduction in 2026 — Lightroom AI Denoise, Topaz Denoise Max (95% less VRAM than v3), and Capture One AI Denoise — has added 2–3 stops of usable ISO range on every camera.
- 2026 low-light camera leaders: Sony a7R VI (66.8MP stacked, 30fps), Sony a7 V (AI autofocus, partially stacked), Canon EOS R6 V (7K RAW, active cooling, $2,499).
- Modern ISO ceiling: current full-frame sensors stay clean through ISO 12800; with AI denoise, ISO 25600+ is fully usable for editorial work.
- Stabilize the body by tucking elbows, bracing against surfaces, and using the viewfinder as a third contact point.
- IBIS (In-Body Image Stabilization) now offers 7–8+ stops of compensation — handheld shots at surprisingly slow shutter speeds become routine.
- Smartphone Night Mode — iPhone 17 + Moment app, NightCap Camera, Google’s Pixel Night Sight — rivals dedicated cameras in casual handheld scenarios.
- Use the exposure triangle strategically: wide aperture (f/1.4–f/2.8), higher ISO than you think, slowest safe shutter speed.
- Creative techniques like light trails, light painting, and silhouettes turn low light from a limitation into an artistic opportunity.
Introduction to Low Light Photography
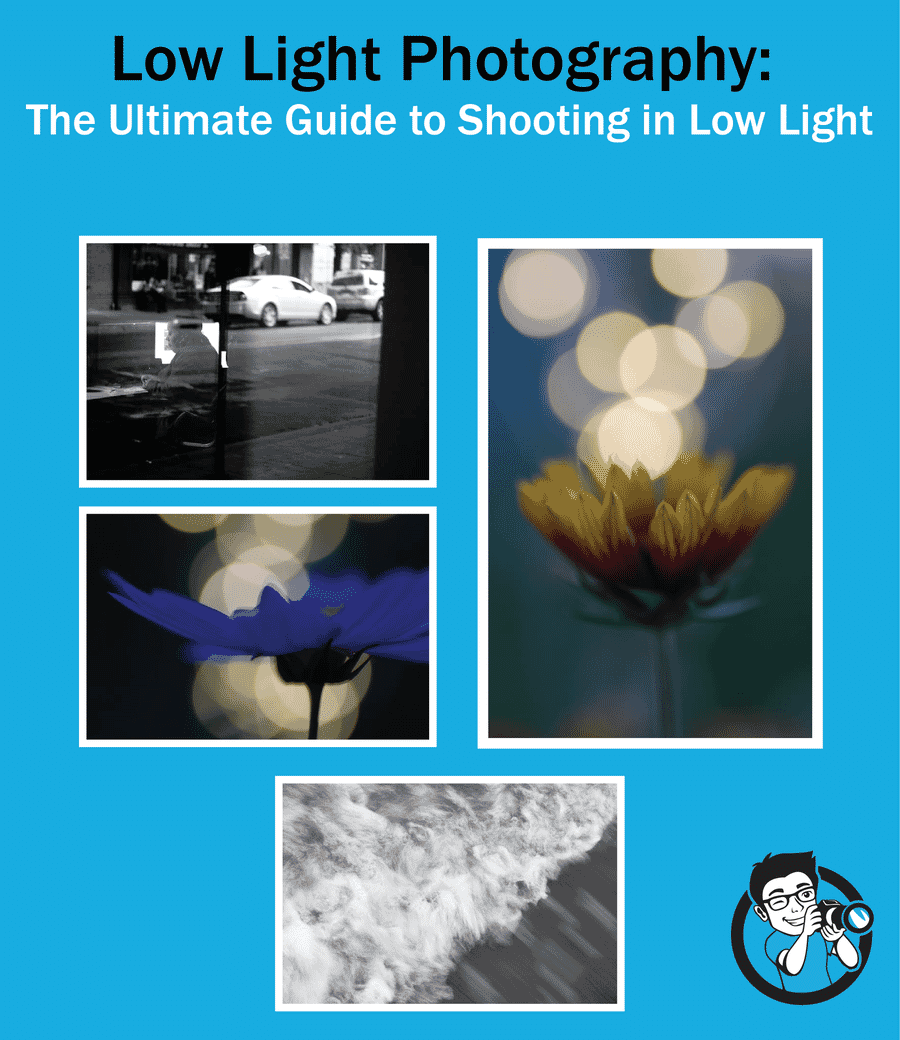
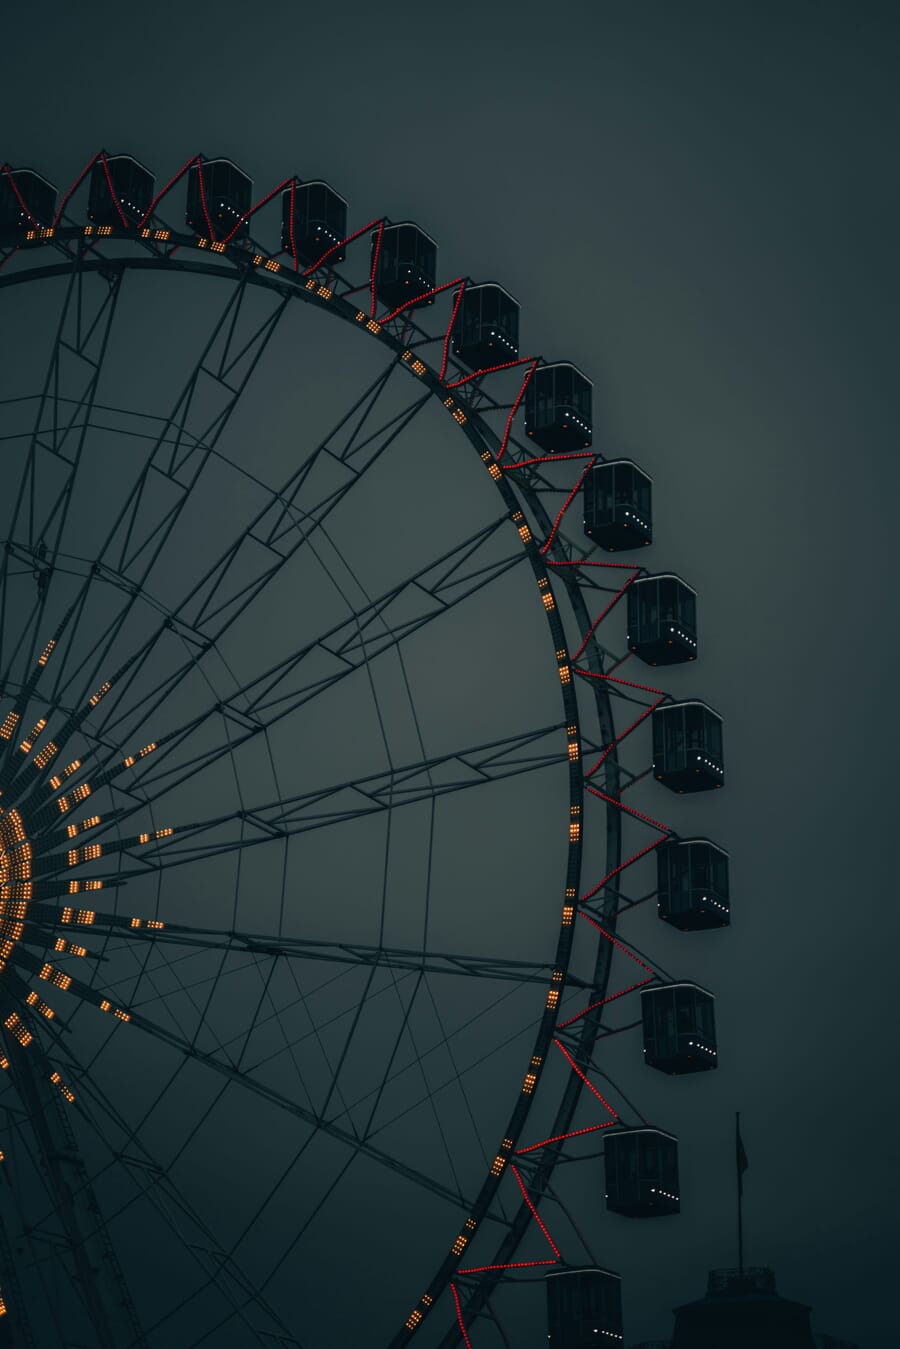
Capturing stunning images in dim conditions is one of photography’s most rewarding — and most frustrating — challenges. Whether it’s a moody street scene at dusk, a candlelit portrait, or the Milky Way arching over a mountain range, low light photography demands a solid understanding of camera settings, stabilization techniques, and post-processing tools.
The good news? Modern camera technology has made low light shooting more accessible than ever:
- In-body image stabilization (IBIS) now offers 7–8+ stops of compensation
- AI-powered noise reduction can rescue images shot at ISO 12800 and beyond
- Action cameras are catching up too — GoPro’s new GP3 processor brings a dedicated AI NPU specifically designed for low-light video processing
- Mirrorless EVFs show real-time exposure previews in the dark
- Smartphone Night Modes use computational photography to rival dedicated cameras in some scenarios
This guide covers everything needed to master low light photography — from foundational techniques for eliminating blur to advanced creative methods, gear recommendations, and modern AI workflows. It’s organized around the two fundamental challenges every photographer faces when light gets scarce.
Still Subjects vs. Moving Subjects: Understanding the Two Core Challenges
Low light photography comes with two distinct problems, and recognizing which one applies to a given situation is the first step to solving it:
- Camera shake — the camera moves during exposure, blurring the entire frame
- Motion blur — the subject moves during exposure, creating ghosting or streaking
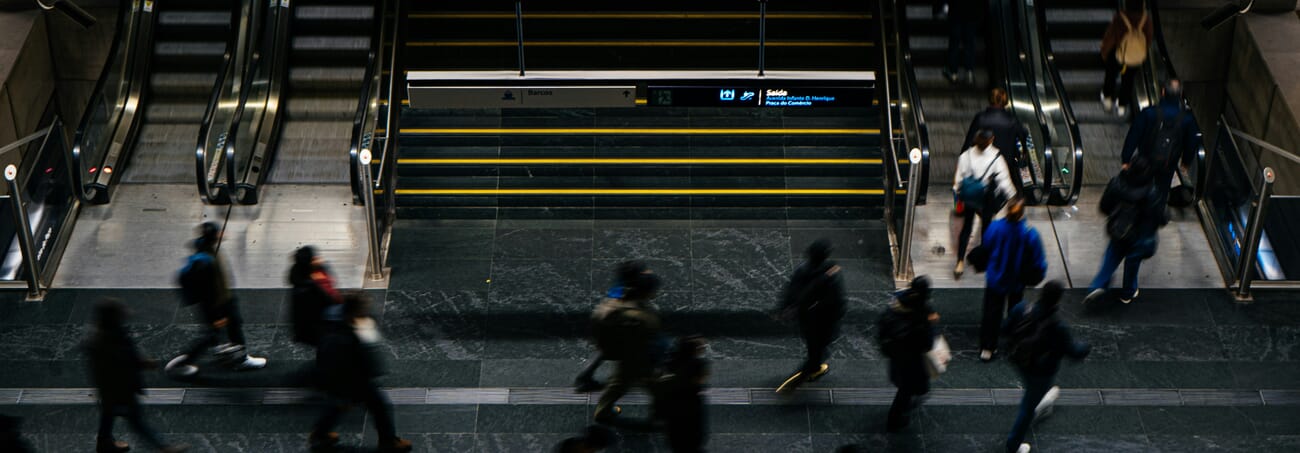
Camera shake is the more common problem and the easier one to fix. It happens whenever the shutter speed is too slow for handheld shooting — the photographer’s natural hand tremor introduces blur across the entire image.
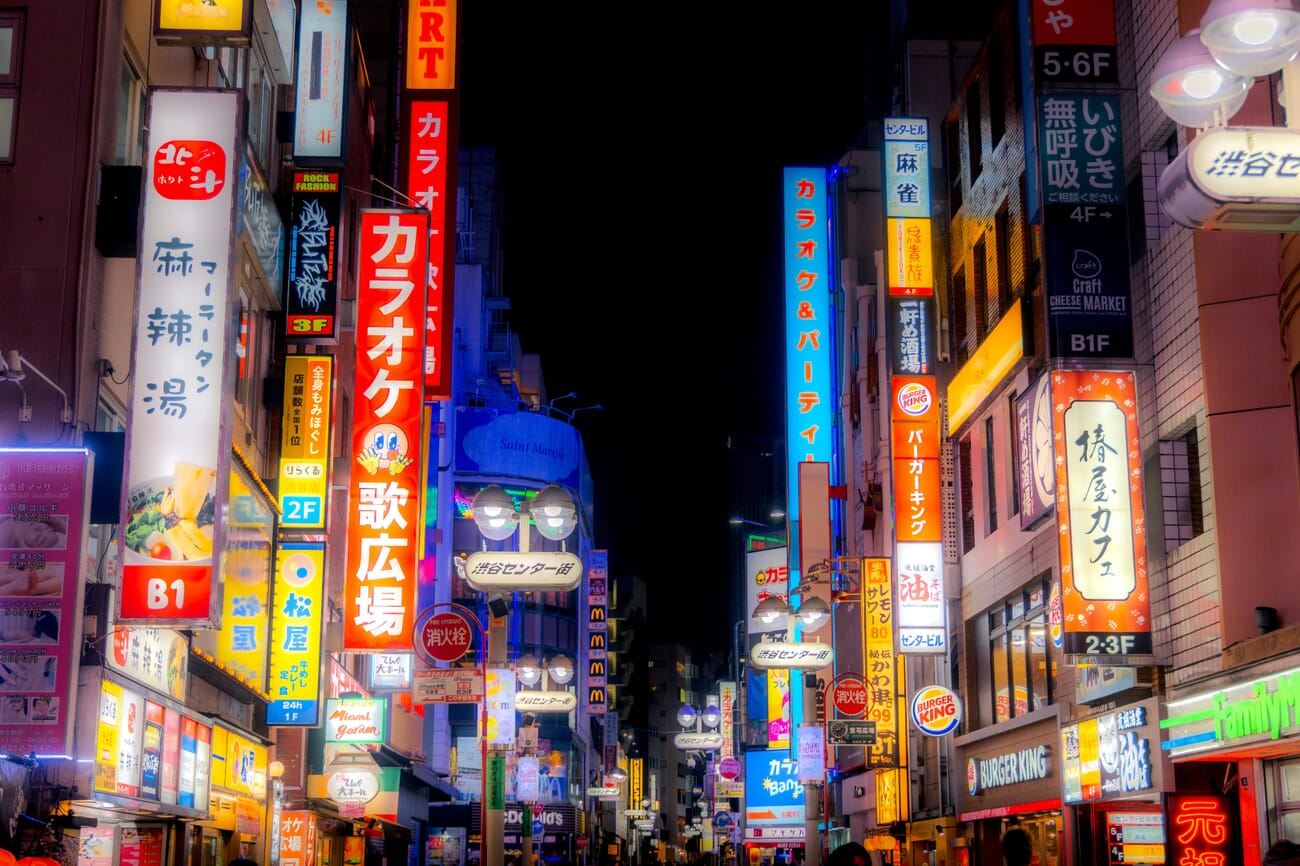
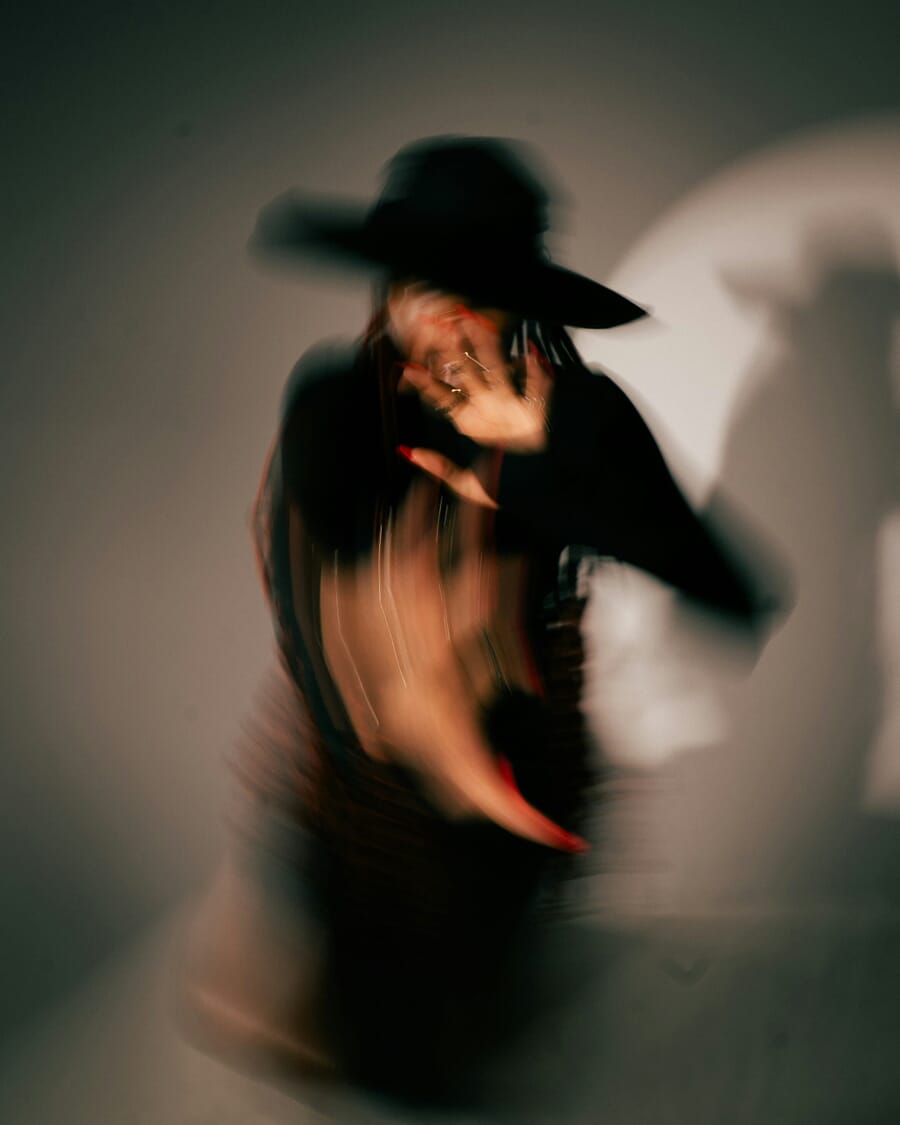
Motion blur, on the other hand, occurs when the subject moves — regardless of how steady the camera is. A person walking through a dimly lit scene, a dancer on a dark stage, or a pet moving indoors under low light will all show motion blur if the shutter speed isn’t fast enough.
Key distinction: Photos can suffer from camera shake alone, motion blur alone, or both simultaneously. The solution for each is different, so identifying the problem correctly saves time and frustration.
Camera Shake Explained
When a camera takes a photo, the sensor is exposed to light for a specific duration — the shutter speed. At fast shutter speeds like 1/2000s, there’s virtually zero camera shake. But at slower speeds like 1/15s or 1s, even the slightest hand tremor creates visible blur.
The challenge in low light is that longer shutter speeds are often necessary to gather enough light for a properly exposed image. This creates a tension: the camera needs more time to collect light, but more time means more opportunity for shake to ruin the shot.
Motion Blur Explained
Motion blur is harder to control than camera shake because it depends on the subject’s speed, not the photographer’s technique. The only way to freeze a moving subject is to use a sufficiently fast shutter speed — which means less light reaching the sensor.
How to Prevent Camera Shake: 5 Proven Techniques
There are two approaches to eliminating camera shake: stabilize the camera so it doesn’t move, or use a fast enough shutter speed that any movement becomes imperceptible. Here are five techniques that cover both approaches.
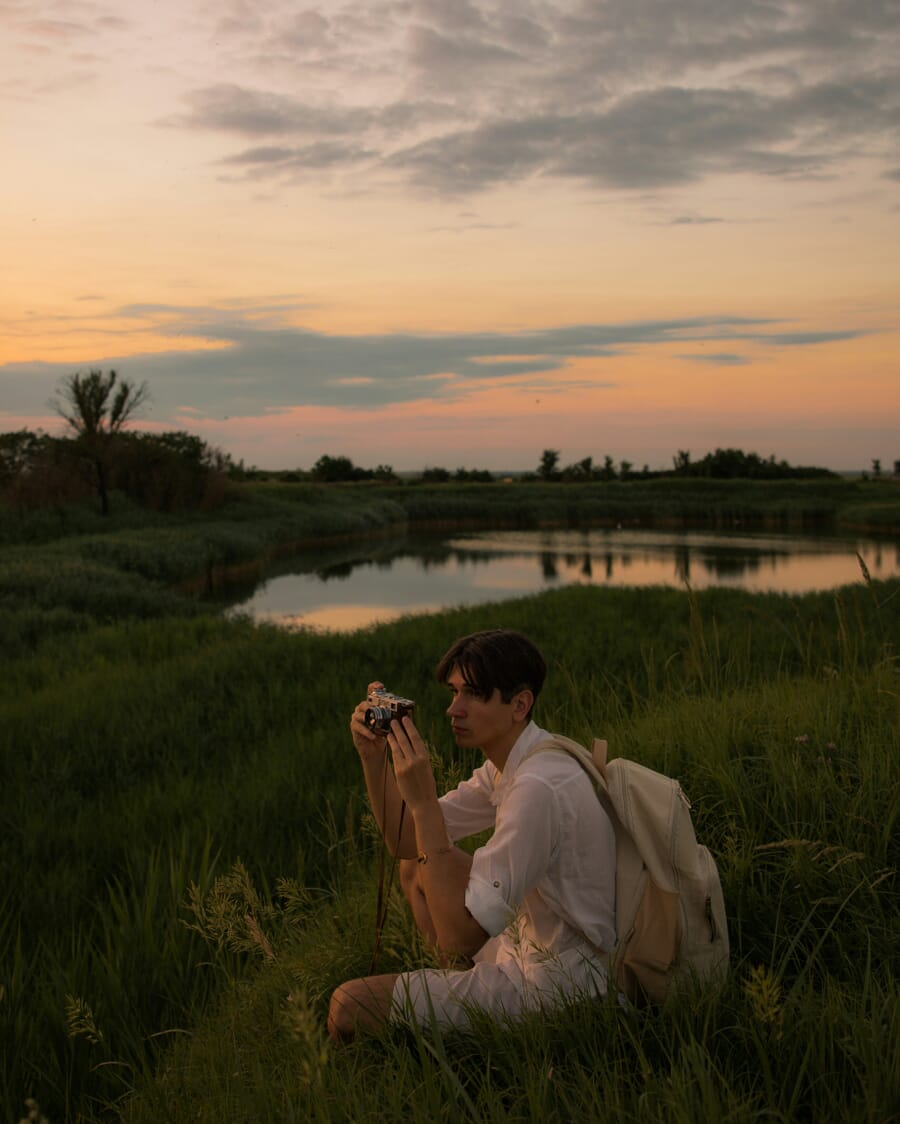
1. Stabilize the Body for Sharper Handheld Shots
The most important — and most overlooked — technique for sharp low light photos is proper body positioning. It costs nothing, works with any camera, and should become second nature.
The four-step stabilization method:
- Grip correctly: Right hand wraps firmly around the camera body with the index finger on the shutter. Left hand cups the lens from underneath — don’t squeeze, just support.
- Use the viewfinder: Press the camera against the face and shoot through the EVF or optical viewfinder. This creates a three-point contact (two hands + face) that dramatically improves stability compared to shooting at arm’s length with the rear LCD.
- Tuck the elbows: Keep elbows pressed close to the torso. Elbows flared out act like levers that amplify any movement.
- Brace against something: Lean against a wall, tree, railing, or car. If nothing is available, drop to one knee or lie flat on the ground with elbows pressed against the earth.
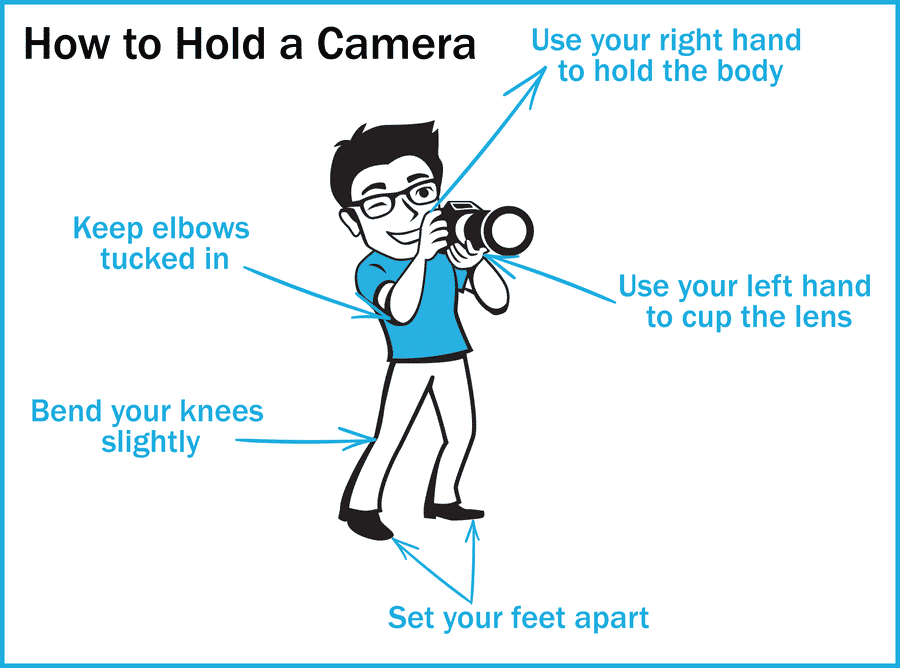
This technique should be practiced constantly — not just in low light. Building muscle memory for a stable shooting position improves the keeper rate across all conditions.
2. Use a Tripod for Zero Camera Shake
For absolute sharpness — especially in landscape, architecture, and astrophotography — a tripod is non-negotiable. It eliminates camera shake completely and allows exposure times measured in seconds or even minutes.
Tripod buying tips:
- Carbon fiber is the gold standard — lightweight, stable, and vibration-dampening. But expensive.
- Aluminum is the budget alternative — very stable but noticeably heavier.
- Avoid plastic tripods under $50 — they’re typically unstable and prone to breakage.
- Load capacity matters: The tripod should comfortably support the camera + heaviest lens combination.
Related: Best Beginner Tripods
3. Use a Remote Release or Self-Timer
Even on a tripod, physically pressing the shutter button introduces vibrations. For maximum sharpness — particularly with telephoto lenses or very long exposures — eliminate that last source of shake.
Three options:
- Remote shutter release (wired or wireless) — triggers the shutter without touching the camera
- Self-timer (2-second or 10-second delay) — lets vibrations settle before the shutter fires
- Smartphone app — most mirrorless cameras offer WiFi/Bluetooth remote control with live preview
4. Leverage Image Stabilization (IBIS + OIS)
Modern cameras and lenses include sophisticated stabilization systems that physically move internal components to counteract hand movement in real time.
Stabilization systems by brand:
- Canon: In-Body IS + Optical IS lenses (coordinated IS for combined benefit)
- Nikon: In-Body VR + VR lenses (synchro VR on newer bodies)
- Sony: SteadyShot INSIDE + OSS lenses
- Fujifilm: 5-axis IBIS (up to 7 stops on some bodies)
- OM System: Industry-leading IBIS (up to 8+ stops)
When body-based and lens-based stabilization work together (coordinated IS), the results can be extraordinary — handheld exposures of 1/2 second or longer with a standard lens become entirely feasible.
Related: Best Low Light Mirrorless Cameras
5. Use a Fast Shutter Speed (Reciprocal Rule)
When stabilization and tripods aren’t available, the simplest approach is to shoot fast enough that any shake becomes invisible.
The reciprocal rule provides a baseline: the minimum safe shutter speed equals 1/(focal length). For a 50mm lens, that’s 1/50s. For a 200mm lens, it’s 1/200s.
Quick reference:
- 24mm lens → minimum 1/25s
- 50mm lens → minimum 1/50s
- 100mm lens → minimum 1/100s
- 200mm lens → minimum 1/200s
With modern IBIS, these numbers can often be extended by 3–5 stops (e.g., handheld at 1/6s with a 50mm lens). But the reciprocal rule remains the starting point for any situation without stabilization.
Related: Best Camera Settings for Portraits
How to Prevent Motion Blur: 3 Essential Strategies
Freezing a moving subject in low light is trickier than eliminating camera shake. The only real solution is a fast shutter speed — which means compensating elsewhere in the exposure triangle.
1. Match Shutter Speed to Subject Speed
Different subjects require different minimum shutter speeds to appear sharp:
- Walking people: 1/250s – 1/400s
- Running/sports: 1/500s – 1/800s
- Moving vehicles: 1/1000s+
- Birds in flight: 1/1500s – 1/2000s
- Head/hand gestures: 1/125s – 1/250s
The problem: faster shutter speeds let in less light. In already-dim conditions, this can produce unacceptably dark images — unless the exposure is compensated through ISO and aperture.
2. Boost ISO to Compensate
ISO controls the sensor’s sensitivity to light. Raising it allows faster shutter speeds without underexposing the image.
- ISO 100–400: Daylight, bright conditions
- ISO 800–3200: Overcast, shade, golden hour, indoor with windows
- ISO 6400–12800: Indoor events, dusk, street photography — fully clean on 2026 full-frame sensors
- ISO 25600–51200: Near darkness, concerts, astrophotography — usable with AI denoise
Higher ISO traditionally meant more noise (grain), but 2026 full-frame sensors — Sony’s a7 V and a7R VI, Canon’s EOS R6 V — produce remarkably clean images at ISO 12800 and beyond. The ceiling has moved a full stop in just two years. And even when noise appears, AI-powered denoise tools can remove it in post-processing while preserving detail (more on this below).
Pro tip: Always shoot in RAW format when using high ISO. RAW files contain far more data for AI denoise tools to work with, producing cleaner results than processing JPEGs.
3. Open Up the Aperture
A wider aperture (lower f-number) lets more light reach the sensor, enabling faster shutter speeds. Lenses with maximum apertures of f/1.4, f/1.8, or f/2.8 are prized for low light work.
The tradeoff: wider apertures produce a shallower depth of field, meaning less of the scene is in focus. The background — and sometimes parts of the subject — will appear blurred.
For many low light scenarios, this shallow depth of field is actually desirable — it isolates the subject and creates beautiful bokeh. It’s a worthwhile tradeoff: bright, sharp subjects with creamy, blurred backgrounds.
Related: Working With Aperture Priority
Best Camera Settings for Low Light (Exposure Triangle Deep Dive)
The exposure triangle — shutter speed, aperture, and ISO — is the foundation of every low light decision. Here’s how to balance all three for different low light scenarios.
Scenario 1: Stationary Subject, Handheld
- Mode: Aperture Priority (A/Av)
- Aperture: Wide open (f/1.4–f/2.8)
- ISO: Auto ISO with max limit (e.g., ISO 6400)
- Min shutter speed: Set in Auto ISO menu to reciprocal rule value
Scenario 2: Moving Subject, Handheld
- Mode: Shutter Priority (S/Tv) or Manual
- Shutter speed: Match to subject speed (1/250s–1/1000s+)
- Aperture: Wide open
- ISO: Auto ISO or push to 3200–12800 as needed
Scenario 3: Landscape on Tripod
- Mode: Manual or Aperture Priority
- Aperture: f/8–f/11 (sweet spot for sharpness)
- ISO: Base ISO (100 or 64)
- Shutter speed: Whatever is needed (1s, 10s, 30s — tripod handles it)
Scenario 4: Astrophotography
- Mode: Full Manual
- Aperture: Widest available (f/1.4–f/2.8)
- ISO: 1600–6400
- Shutter speed: 500 Rule ÷ focal length (e.g., 500 ÷ 24mm = 20s max before star trails appear)
- Focus: Manual focus to infinity, confirmed with live view magnification
Related: Camera Settings Guide
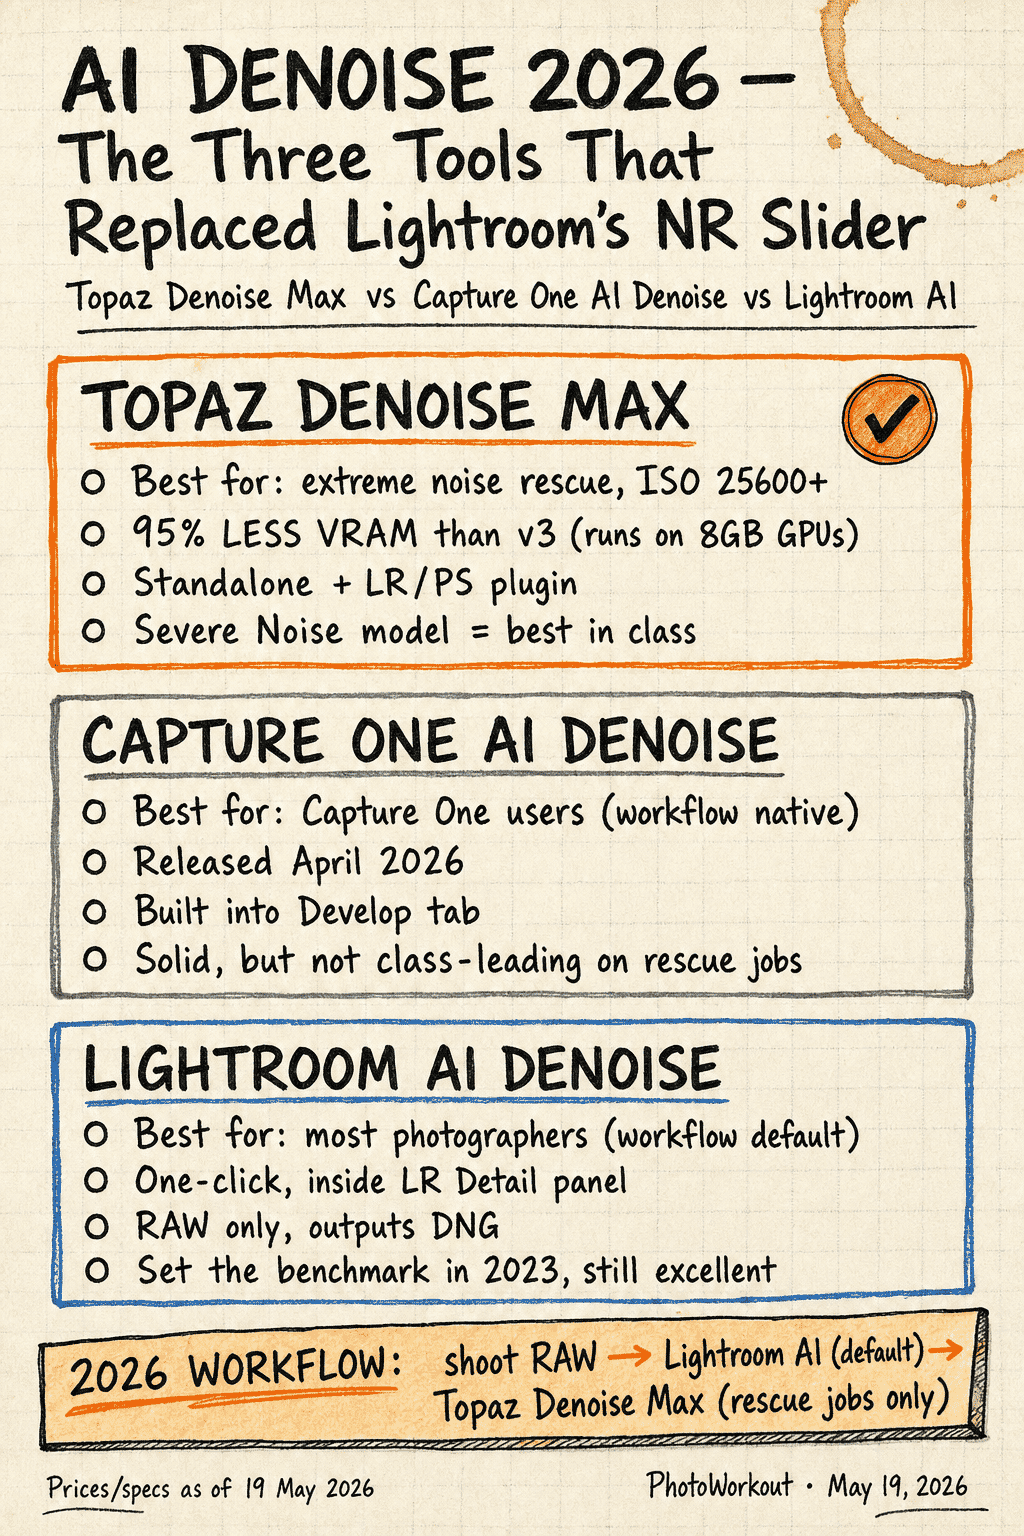
AI Noise Reduction in 2026: The Modern Low Light Workflow
AI-powered noise reduction has fundamentally changed how photographers approach high-ISO shooting. What used to be unusable noise at ISO 12800 can now be cleaned into publication-quality images with a single click. As of 2026, three tools dominate the category — each with a different strength.
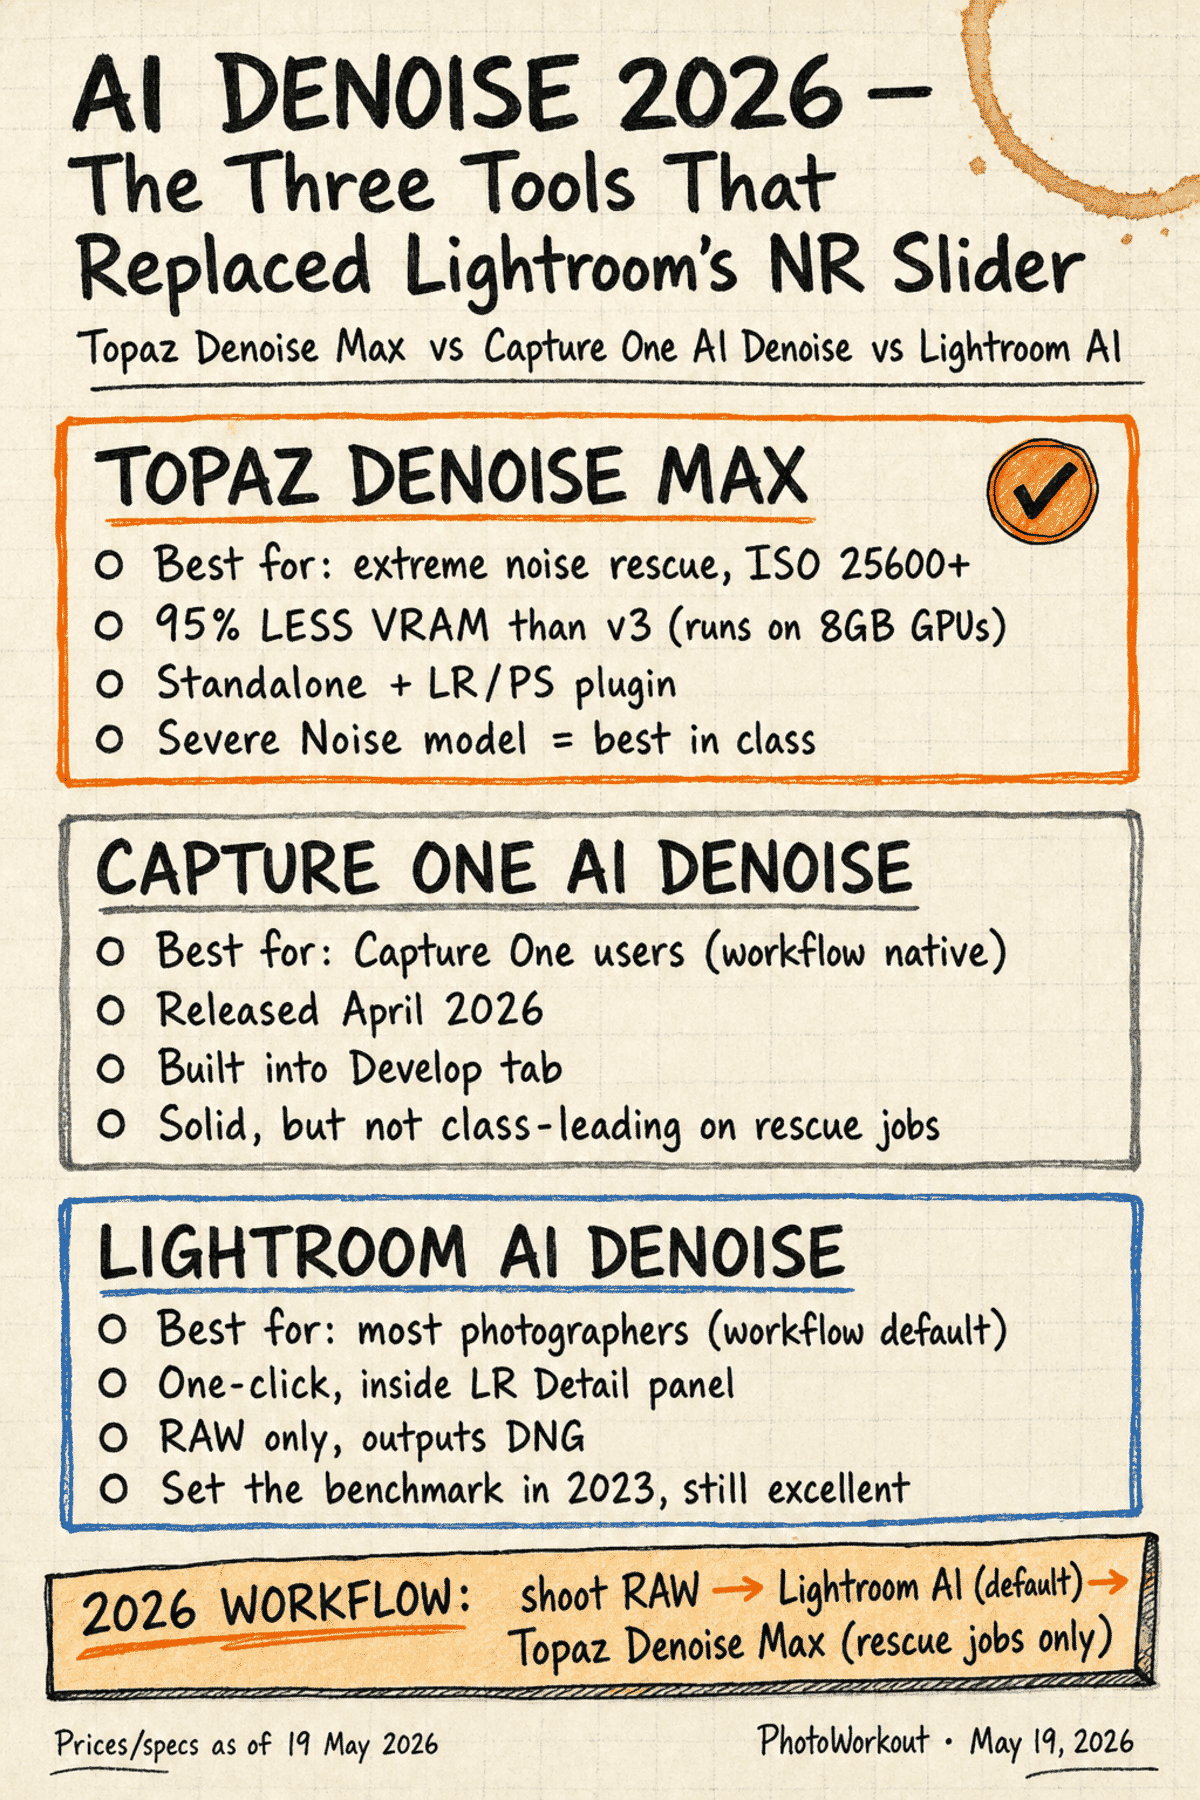
Topaz Denoise Max — Best for Rescue Jobs
Topaz Photo AI‘s standalone denoise tier — rebranded Denoise Max in the April 2026 model refresh — is the rescue tool of choice for extreme noise. It runs as a standalone application and as a Lightroom/Photoshop plugin, and its Severe Noise model handles ISO 25600+ files that no other tool can salvage.
The headline change in the 2026 release: 95% less VRAM than the previous version. The earlier model needed a high-end GPU with 16GB+ of VRAM to run smoothly; Denoise Max now runs cleanly on 8GB cards. That single change moved Topaz from “the tool you ran on your desktop” to “the tool that fits inside a normal photographer’s editing rig.” Full breakdown of the April 2026 release is in PhotoWorkout’s Topaz next-gen AI models coverage.
Lightroom AI Denoise — The Default for Most Photographers
Adobe Lightroom‘s AI Denoise sits inside the Detail panel of Lightroom Classic and Lightroom CC. One slider, one click, RAW-only, outputs a new DNG file alongside the original. It set the benchmark in 2023 and remains the workflow default for the majority of working photographers — partly because it’s “good enough” for 95% of files, and partly because it lives inside the tool you’re already using.
For files shot below ISO 12800 on a modern full-frame sensor, Lightroom AI Denoise produces results that are visually indistinguishable from Topaz on a 1:1 zoom. Topaz only pulls clearly ahead on the rescue jobs — ISO 25600+, heavily underexposed RAW, or aggressive shadow lifts.
Capture One AI Denoise — Native for the C1 Workflow
Capture One added AI Denoise in April 2026 — five years after Lightroom shipped its version, but the wait was worth it for photographers already inside the C1 ecosystem. It lives in the Develop tab, runs on the same Develop session you’d use for everything else, and integrates with Capture One’s sessions/catalogs without an extra DNG roundtrip.
On a head-to-head test, Capture One’s denoise produces solid mid-noise results but doesn’t lead the category for rescue jobs — that crown still belongs to Topaz Denoise Max. PhotoWorkout’s Capture One vs Lightroom vs Topaz head-to-head walks through identical-file comparisons across three ISO bands.
The 2026 AI Denoise Workflow
For the typical 2026 editorial workflow, the recommendation is straightforward:
- Shoot RAW at whatever ISO is needed — push past ISO 12800 without hesitation on a 2026 full-frame body.
- Import and tone in Lightroom, Capture One, or DxO PhotoLab. Make basic adjustments (exposure, white balance, shadows/highlights) before denoise.
- Apply Lightroom or Capture One AI Denoise by default — Detail panel in LR, Develop tab in C1. One slider, one click, done for most files.
- Reach for Topaz Denoise Max on rescue jobs only — ISO 25600+, heavy shadow lifts, or files where the default tool leaves visible noise after maxing the slider.
- Sharpen after denoise, not before. All AI denoise tools soften fine detail slightly; recover it with a moderate sharpening pass at the end.
Honourable mention — DxO PureRAW: processes RAW files before they enter the main editing workflow, using DxO’s DeepPRIME XD2s algorithm. The most natural-looking denoise output of the four, but adds a DNG roundtrip to the workflow that LR/C1 users typically don’t want. Best for photographers who already use DxO PhotoLab.
This workflow has effectively added 2–3 stops of usable ISO range to every camera. An image shot at ISO 25600 and processed through AI denoise can look comparable to a clean ISO 1600 shot from just five years ago.
Related: AI Photo Editing Tools
Low Light Gear Recommendations
While technique matters more than gear, certain equipment makes low light photography significantly easier.
Fast Lenses
Lenses with wide maximum apertures are the single most impactful gear upgrade for low light work:
- 50mm f/1.8 — The “nifty fifty.” Affordable, sharp, and available for every camera system. The best first low light lens.
- 35mm f/1.4 — Excellent for street photography and environmental portraits in dim conditions.
- 85mm f/1.4 or f/1.8 — Portrait lens that excels in low light with beautiful background separation.
- 24-70mm f/2.8 — The versatile workhorse zoom. Not as fast as primes but covers a useful range.
- 70-200mm f/2.8 — Essential for events, concerts, and sports in dim conditions.
The difference between f/3.5 (typical kit lens) and f/1.8 is roughly 4 stops — equivalent to multiplying the available light by 16×. That’s the difference between ISO 12800 and ISO 800 for the same shutter speed.
Related: Best Lenses for Nighttime Photography
Camera Bodies: Sensor Size Matters
Larger sensors gather more light per pixel, which translates to cleaner high-ISO images:
- Full-frame (35mm) — The sweet spot for low light. Clean images at ISO 6400–12800 on current models.
- APS-C — Very capable. About 1 stop behind full-frame at high ISO. Modern APS-C cameras produce excellent results through ISO 3200–6400.
- Micro Four Thirds — About 2 stops behind full-frame, but OM System’s exceptional IBIS partially compensates for the smaller sensor.
Top 2026 Low-Light Camera Bodies
Three cameras launched in the first half of 2026 redrew the low-light leaderboard. Each takes a different approach — resolution, all-rounder, video-flagship — but all three deliver cleaner high-ISO output than anything available a year ago.
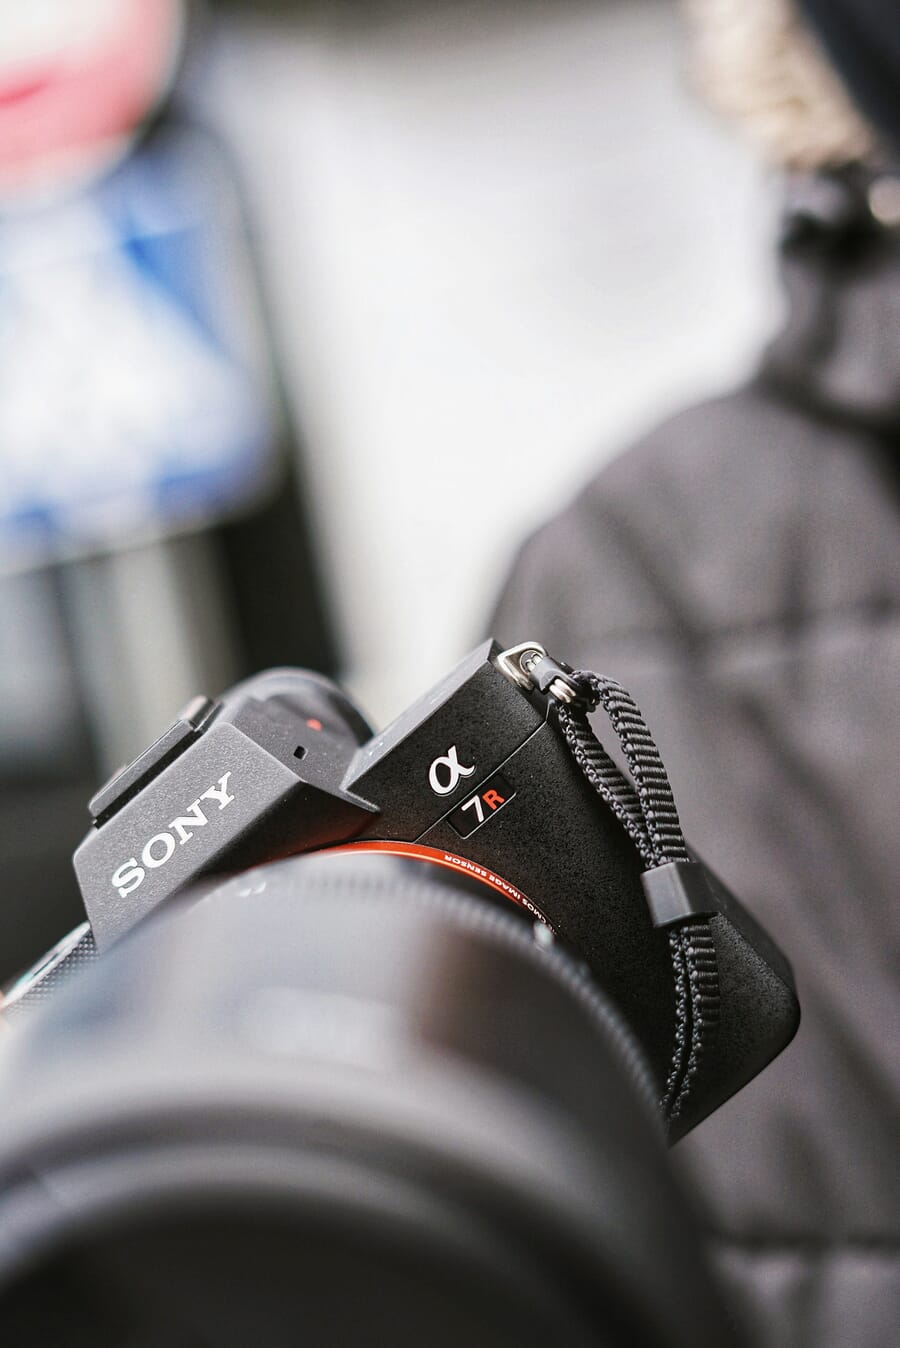
Sony a7 V — The new all-rounder. A partially-stacked 33MP full-frame sensor, AI autofocus (subject recognition for humans, animals, vehicles, insects, planes), and 30fps bursts. Clean files past ISO 12800 thanks to a redesigned analog readout chain. This is the body most photographers should buy in 2026 if they don’t have a strong reason to go elsewhere — it’s the modern equivalent of the original a7 III’s “default best mirrorless” status.
Sony a7R VI — The resolution monster that finally caught up on speed. 66.8MP stacked sensor, 30fps RAW bursts (matching the a1 II’s burst rate at nearly double the pixels), and surprisingly clean high-ISO behavior despite the pixel density. The a7R series used to be the “studio + landscapes” body that lagged behind for events and action; the VI erases that limitation. If you need the resolution, this is now the camera you take to a wedding or a concert.
Canon EOS R6 V — Canon’s video flagship at the prosumer price point. $2,499, 7K RAW internal recording, an active cooling fan that lets it record indefinitely, and (controversially) no EVF — Canon’s bet that this body’s primary buyer is a hybrid shooter who’ll use the rear screen for video and only occasionally take stills. The new sensor is roughly a stop cleaner than the R6 II at the same ISO, and the active cooling means it doesn’t slow down on long exposures or video clips.
Which one wins for low light specifically? The a7 V for the best balance of speed, resolution, and price. The a7R VI if 66.8MP is genuinely useful for the work. The R6 V if low-light video is the priority and stills are secondary. None of the three needs a tripod for handheld shooting down to about 1/4 second with modern IBIS — and all three benefit substantially from the AI denoise workflow above.
Mirrorless Advantages for Low Light Photography
Mirrorless cameras have become the preferred tool for low light work, offering several advantages that DSLRs cannot match:
Electronic Viewfinder (EVF) with real-time exposure preview: Unlike an optical viewfinder, the EVF shows exactly what the sensor sees — including exposure, white balance, and the effects of shooting settings. In dark conditions, this means the EVF can brighten the scene beyond what the naked eye sees, making composition in near-darkness far easier.
Advanced autofocus in darkness: Modern mirrorless AF systems use on-sensor phase detection that works in extremely low light (some down to -7 EV). Eye-detect AF continues to track subjects’ eyes even in dim conditions, which is transformative for low light portrait and event photography.
Superior IBIS: Mirrorless camera designs allow for more sophisticated IBIS mechanisms because there’s no mirror box taking up space. This is why mirrorless cameras consistently lead in stabilization performance.
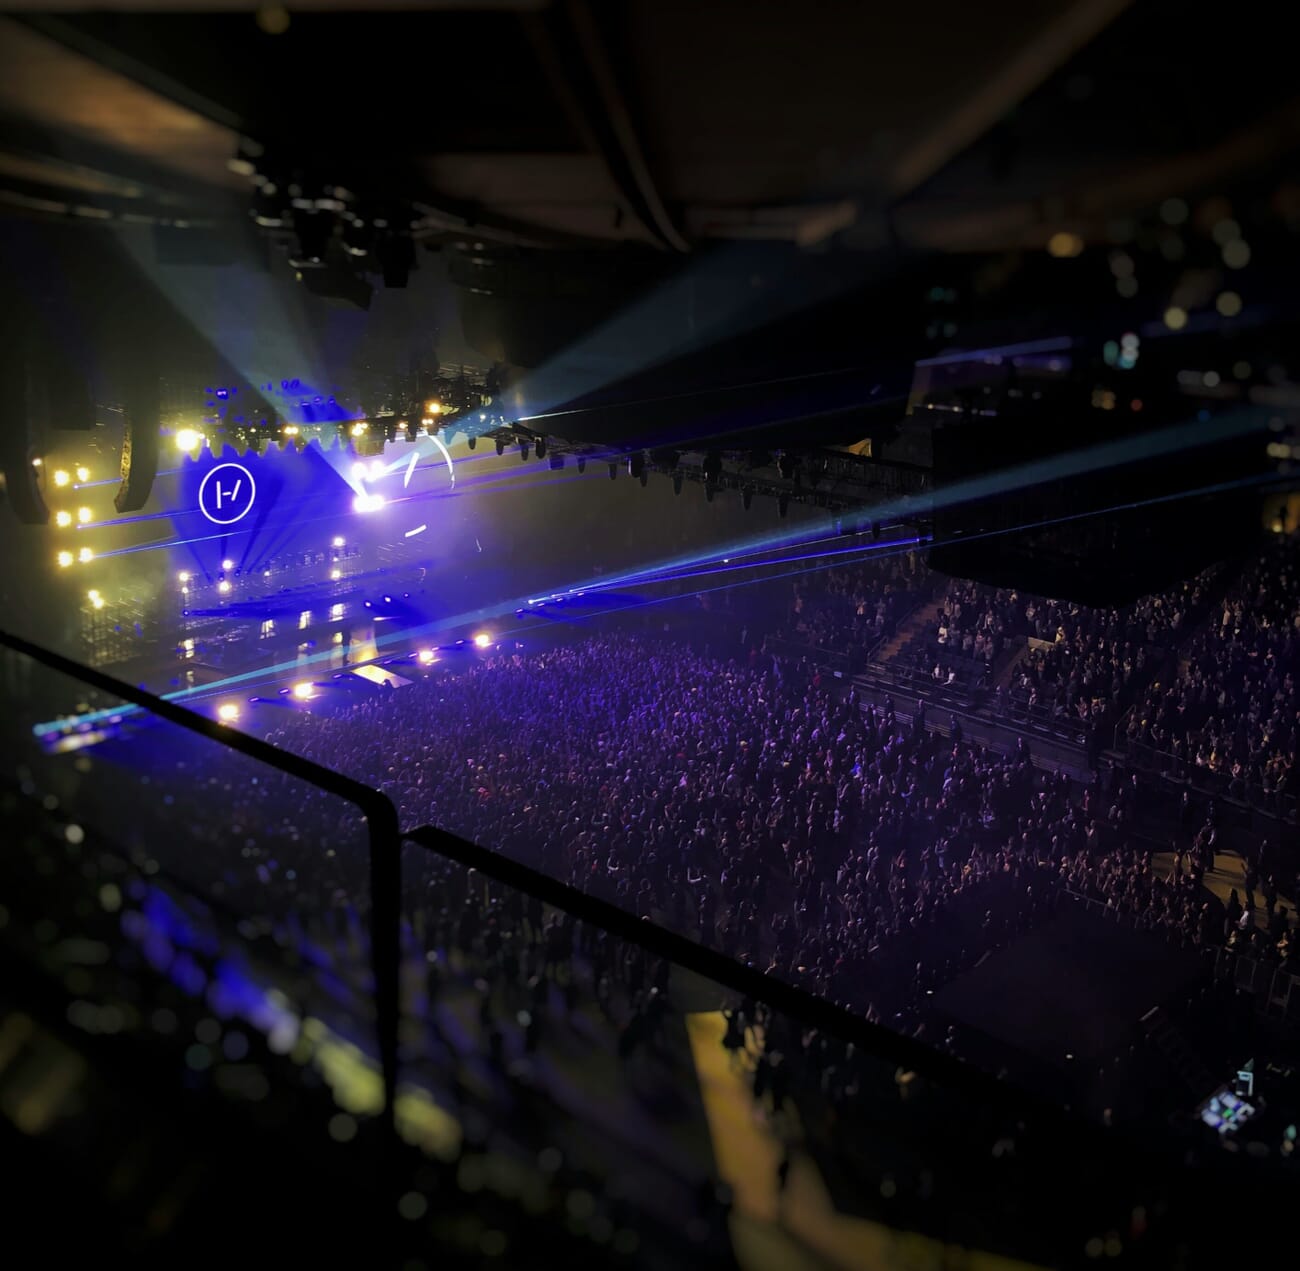
Silent shooting: Electronic shutters allow completely silent operation — crucial for low light situations like concerts, theater, weddings, and wildlife at dusk.
Focus peaking and magnification: Manual focus aids that highlight in-focus areas with colored overlays make precise focusing in darkness much more reliable.
Computational Photography and Smartphone Night Mode
Smartphone Night Modes have dramatically raised the bar for low light photography — often producing results that rival dedicated cameras in casual shooting scenarios. As of 2026, the iPhone 17 (with its variable-aperture main lens), Google’s Pixel 10 with Night Sight, and Samsung’s S26 Ultra Nightography mode all produce hand-holdable 1–3 second exposures that would have required a tripod from a dedicated camera just five years ago.
Apps that unlock more from a phone:
- Moment (iOS/Android) — manual control over shutter speed, ISO, focus, and white balance. Pairs with Moment’s add-on lenses for genuine wide/tele/macro work. The “Pro Camera” app of choice for serious phone photographers.
- NightCap Camera (iOS) — purpose-built for astrophotography and long exposures. Star Trails, Light Trails, ISS, Meteor modes. The best phone tool for night-sky work.
- ProCam X / Camera FV-5 (Android) — Android equivalents with manual control and DNG RAW output.
The iPhone’s variable-aperture story is covered in detail in PhotoWorkout’s iPhone camera roadmap piece — short version: Apple opening the main lens up to f/1.6 in low light, then stepping down to f/4 for daylight depth-of-field, was the single biggest smartphone low-light improvement of the past three years.
How Night Mode Works
Night Mode uses computational photography — a combination of hardware and software processing that goes far beyond what a single exposure can capture:
- Multi-frame capture: The phone takes 5–30 frames at varying exposures over 1–5 seconds
- Frame alignment: AI aligns the frames to compensate for hand movement between shots
- HDR merging: The best-exposed areas from each frame are combined
- AI denoising: Machine learning removes noise while preserving texture
- Local tone mapping: Shadows are lifted and highlights controlled for a balanced result
When Smartphones Beat Dedicated Cameras
- Casual handheld shots in restaurants, bars, and indoor events — Night Mode’s computational stack often beats a quick snapshot from a dedicated camera
- Ultra-wide night scenes — smartphone ultra-wide lenses with Night Mode can produce impressive cityscapes
- Convenience — the best camera is the one that’s available, and a phone is always in the pocket
When Dedicated Cameras Still Win
- Moving subjects — Night Mode requires the scene to be relatively static during its multi-second capture
- RAW flexibility — dedicated cameras produce RAW files with far more editing headroom
- Shallow depth of field — larger sensors + fast lenses create real optical bokeh that computational blur can’t fully replicate
- Print-quality resolution — larger sensors capture more detail for large prints
Creative Low Light Techniques
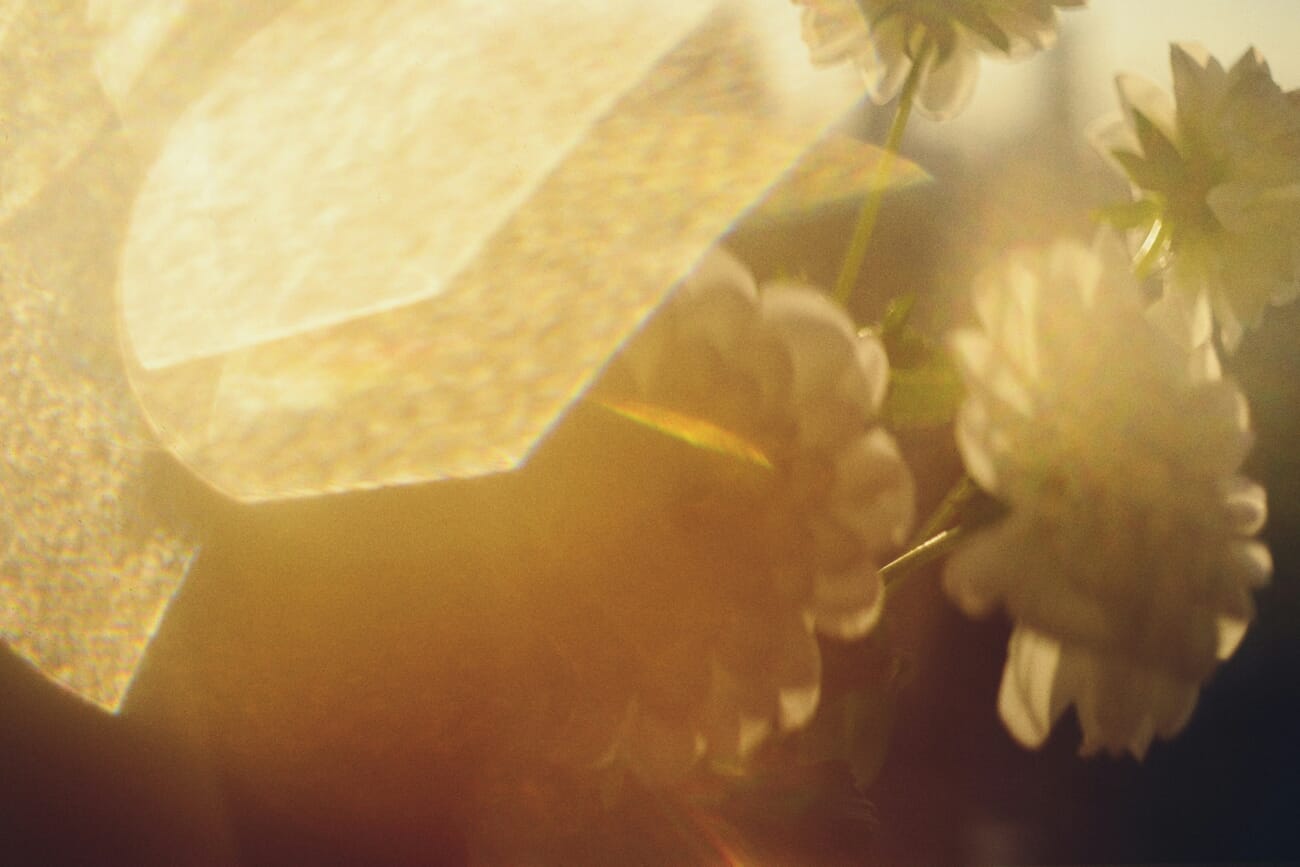
Low light isn’t just a challenge to overcome — it’s an opportunity for creative expression. Some of photography’s most compelling images are only possible in dim conditions.
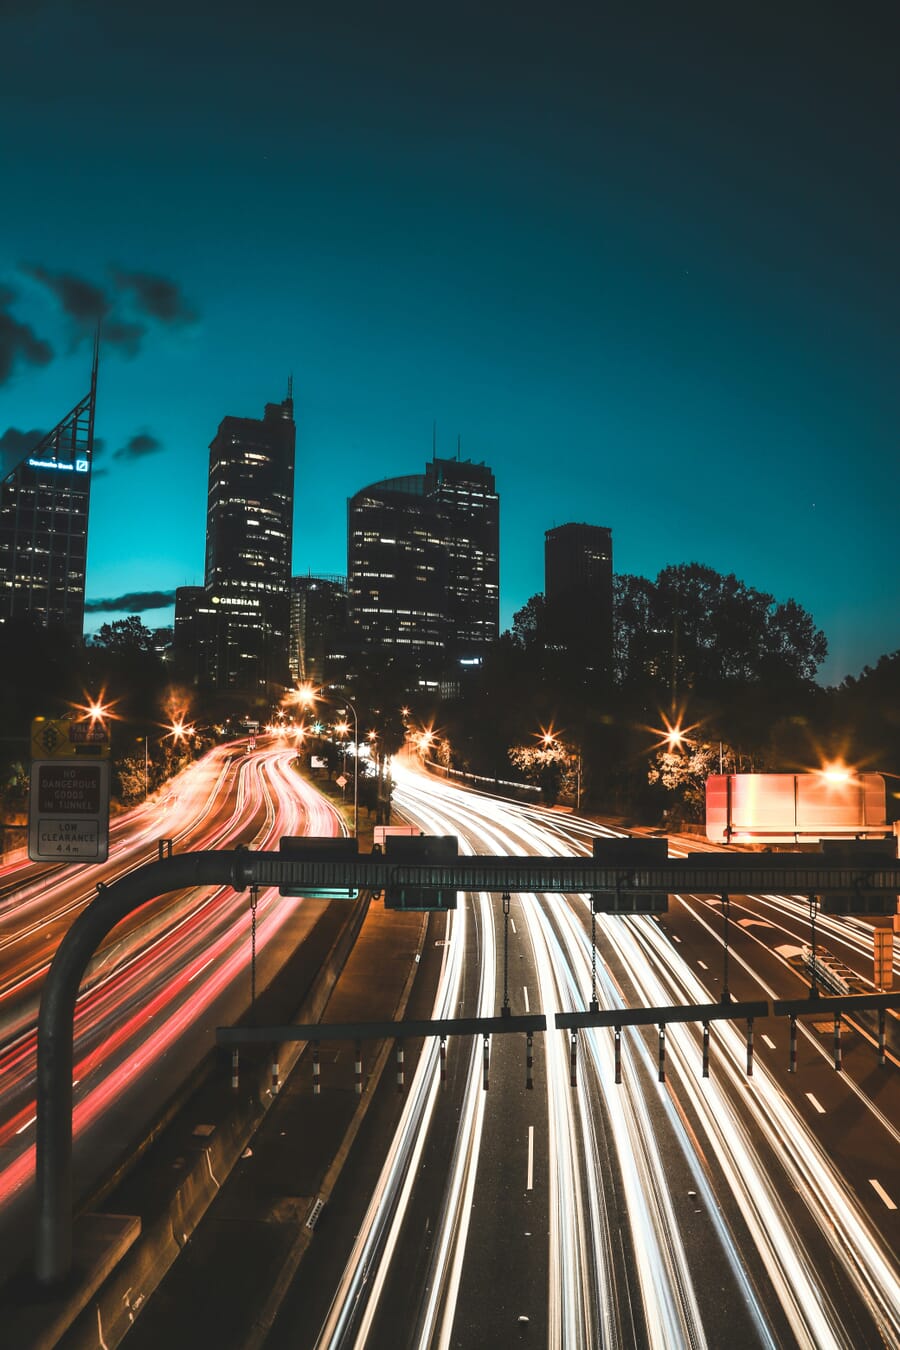
Light Trails
Car headlights and taillights become flowing ribbons of color with long exposures. This technique requires a tripod and shutter speeds of 1–30 seconds, depending on traffic speed and the desired effect.
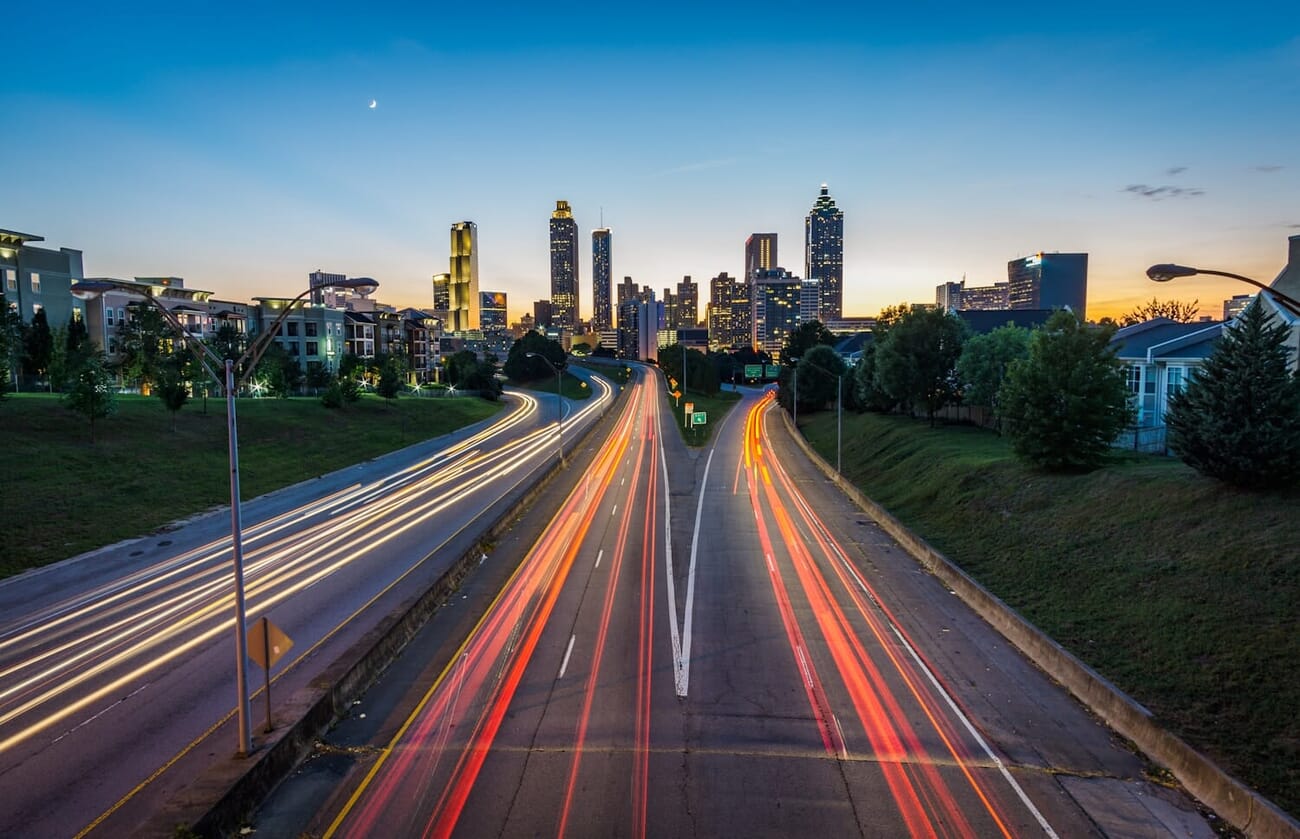
Settings for light trails:
- Aperture: f/8–f/16 (deep depth of field, controls light intake)
- ISO: 100–400 (keep low to avoid overexposure)
- Shutter speed: 5–30 seconds (experiment for trail length)
- Use a tripod and remote release
Light Painting
Light painting involves moving a light source (flashlight, LED wand, sparkler) through the frame during a long exposure. The camera records the light’s path as a bright streak against a dark background.
Getting started:
- Use Bulb mode for exposures longer than 30 seconds
- Start with a simple flashlight and practice writing shapes
- Colored LED wands and wire wool create more dramatic effects
- A completely dark location works best — light pollution reduces the effect
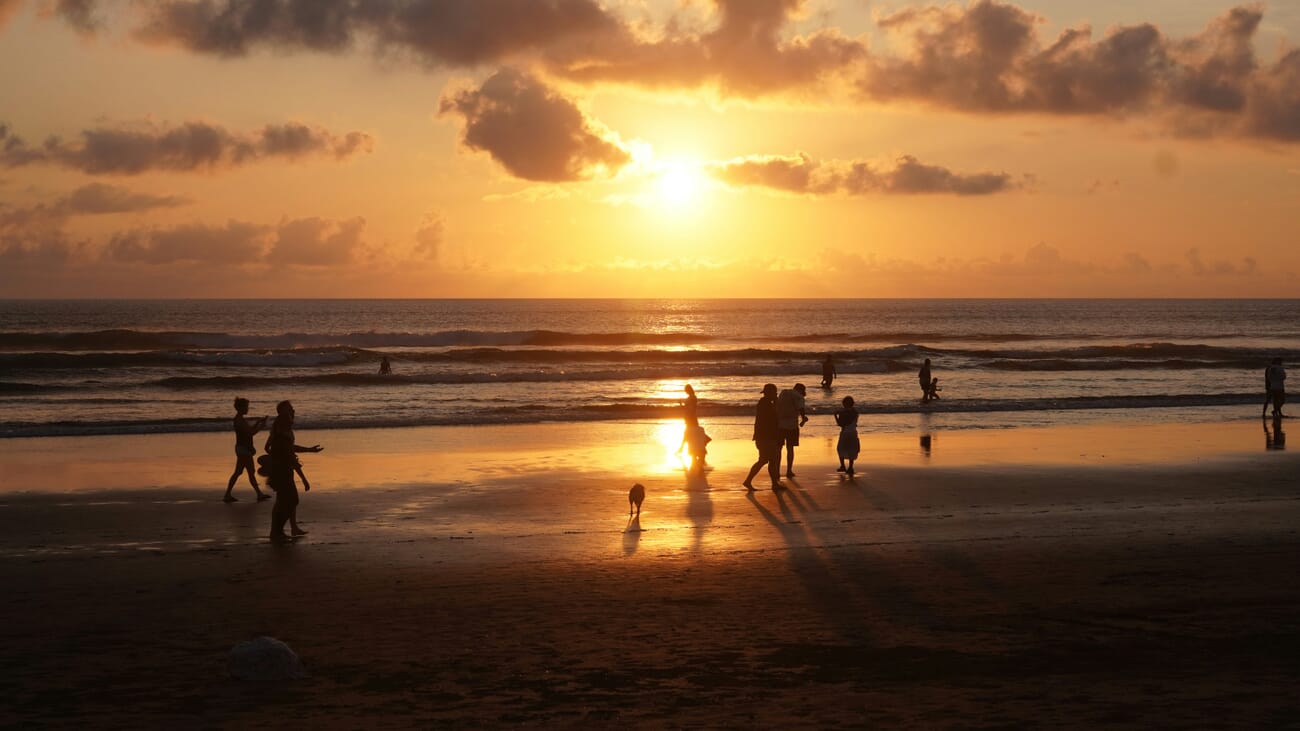
Silhouettes
Silhouettes use the contrast between a bright background (sunset, window, streetlight) and a dark foreground subject. The key is to expose for the bright background, letting the subject fall into pure black.
Tips for strong silhouettes:
- Choose subjects with recognizable profiles (people, trees, buildings)
- Meter for the bright background, or use negative exposure compensation
- Separate subjects from each other — overlapping silhouettes become confusing shapes
Astrophotography
Capturing the Milky Way, star trails, and meteor showers is one of low light photography’s most rewarding disciplines. It requires a fast wide-angle lens, a sturdy tripod, and a location far from light pollution.

Essential astrophotography settings:
- Lens: 14–24mm at f/1.4–f/2.8
- ISO: 1600–6400
- Shutter speed: Use the 500 Rule (500 ÷ focal length = max seconds before star trails)
- Focus: Manual focus to infinity, confirmed with live view magnification on a bright star
- White balance: ~4000K for natural-looking Milky Way colors
Low Light Photography: Next Steps
Mastering low light photography comes down to understanding a handful of core techniques and knowing when to apply each one. The two fundamental challenges — camera shake and motion blur — each have clear solutions.
Modern technology has removed many of the barriers that once made low light shooting difficult. Advanced IBIS, improved high-ISO sensor performance, AI-powered noise reduction, and even smartphone computational photography have dramatically expanded what’s possible in dim conditions.
The key is practice. Experiment with different settings, try the creative techniques, and review the results critically. Low light photography rewards patience and experimentation — and the images it produces are often the most dramatic and memorable in any portfolio.
Low Light Photography Frequently Asked Questions
How do you shoot sharp photos of moving subjects in low light?
Use a fast shutter speed (1/250s or faster depending on subject speed) combined with a wide aperture (f/1.4–f/2.8) and elevated ISO (3200–12800). Modern 2026 full-frame sensors handle ISO 12800 cleanly, and AI denoise tools — Lightroom AI Denoise, Capture One AI Denoise, or Topaz Denoise Max — can clean up any remaining noise in post-processing.
How do you shoot sharp photos of stationary subjects in low light?
Eliminate camera shake through proper body positioning: tuck elbows in, brace against a wall or the ground, and use the viewfinder for a three-point contact. Modern mirrorless cameras with IBIS offering 7–8+ stops of compensation make handheld low light shooting much easier. For maximum sharpness, use a tripod with a remote release or self-timer.
Is a tripod necessary for low light photography?
Not always. Modern IBIS systems allow handheld shooting at surprisingly slow shutter speeds, and high ISO + AI denoise tools make fast shutter speeds more practical. A tripod remains essential for landscapes requiring deep depth of field at base ISO, long-exposure creative techniques (light trails, astrophotography), and any situation demanding maximum image quality.
Can AI noise reduction fix high-ISO photos in 2026?
Yes — AI noise reduction has been transformative. The current state-of-the-art is a three-tool category: Lightroom AI Denoise (the workflow default), Capture One AI Denoise (added April 2026), and Topaz Denoise Max (best for rescue jobs at ISO 25600+, now running on 8GB GPUs). Always shoot in RAW format — RAW files give these tools much more data to work with.
What is the best ISO setting for low light photography?
There’s no single best ISO — it depends on the situation. For tripod work, use base ISO (100 or 64) with longer shutter speeds. For handheld shooting of static scenes, ISO 800–3200 is typical. For moving subjects in dim conditions, ISO 6400–12800 may be necessary. Modern 2026 full-frame cameras — the Sony a7 V, a7R VI, and Canon EOS R6 V — produce clean images through ISO 12800, and AI denoise tools extend usable ISO to 25600 and beyond.
Can smartphones take good low light photos?
Modern smartphones with Night Mode produce impressive low light results for casual shooting. The iPhone 17 (with its variable-aperture main lens), Pixel 10 with Night Sight, and Samsung S26 Ultra Nightography all rival dedicated cameras in the right scenarios. Apps like Moment (manual control) and NightCap Camera (astrophotography modes) extend a phone’s range further. Dedicated cameras still outperform smartphones for moving subjects, RAW editing flexibility, shallow depth of field with real optical bokeh, and large print quality.
Are mirrorless cameras better than DSLRs for low light?
Mirrorless cameras offer several practical advantages for low light work: EVFs that brighten dark scenes for easier composition, advanced on-sensor phase-detect AF that works in extreme darkness (some 2026 models down to -7 EV), superior IBIS systems, and silent electronic shutters for discreet shooting. While high-end DSLRs can produce equally clean high-ISO images, the shooting experience in the dark is meaningfully better with mirrorless.
AI Noise Reduction Tools
- Adobe — Lightroom Denoise documentation – Official Adobe documentation on the AI Denoise feature, including RAW-only requirement and DNG output.
- Topaz Labs — Photo AI / Denoise Max – Topaz Photo AI product page. Severe Noise model handles ISO 25600+; April 2026 release introduced the 95% VRAM reduction.
- Capture One — AI Denoise release notes – Capture One's official release notes covering the April 2026 AI Denoise addition to the Develop tab.
2026 Camera Specifications
- Sony — Alpha 7 V product page – Sony's official a7 V specs including the partially-stacked 33MP sensor and AI autofocus.
- Sony — Alpha 7R VI product page – Sony's official a7R VI specs: 66.8MP stacked sensor, 30fps RAW bursts.
- Canon — EOS R6 V product page – Canon's official EOS R6 V specs: 7K RAW internal, active cooling fan, $2,499 launch price.
Image Sources
- Joey Kyber on Unsplash — light trails photo – Urban light trails photograph used in the Light Trails section.
- Greg Rakozy on Unsplash — Milky Way photo – Milky Way astrophotography used in the Astrophotography section.
This guide contains affiliate links to Adobe Creative Cloud and Topaz Labs. If you purchase through these links, PhotoWorkout earns a small commission at no extra cost. Recommendations are independent and based on hands-on testing.


