- On Mac, the built-in Preview and Apple Photos apps handle RAW-to-JPEG conversion in seconds — no download needed, and Preview batches entire folders.
- On Windows 11, the native Photos app works for quick single-file exports; Pixillion adds batch control for anyone doing volume.
- On iPhone, the Photos app can convert ProRAW and HEIC files to JPEG directly via Share → Convert Image. On Android, Lightroom Mobile and Snapseed are the fastest routes.
- Online tools (Convertio, iLoveIMG, Zamzar) stay the best quick option — no install, browser-based, free tier covers most one-off jobs.
- For serious work or large batches, pair a RAW developer (Lightroom Classic, Luminar Neo, darktable, RawTherapee) with an AI enhancer like DxO PureRAW or Topaz Photo AI.
Converting RAW files to JPEG is one of the most common tasks in a photographer’s workflow — and in 2026, there are more paths to the same finish line than ever. This guide covers every method worth knowing: built-in tools on Mac and Windows, mobile conversion for iPhone and Android (including Apple ProRAW and HEIC), the current crop of free online converters, and the AI-powered batch tools that have emerged as a new category.
Whether the goal is a quick one-off export for email, a batch of 500 files for a client gallery, or a modernized archive using the new JPEG alternative, there’s a step-by-step workflow here for it. Every method works with the major RAW formats — Canon CR3, Nikon NEF, Sony ARW, Fujifilm RAF, and DNG (now an ISO standard) — and every app covered is still active and supported as of April 2026.
The sections below are organized roughly in order of accessibility, starting with the tools already on your computer and working up to the paid pro options. Skip to whichever matches your setup.
When you buy through links on our site, we may earn a commission at no cost to you. We evaluate products independently. Commissions do not affect our evaluations.
How to Convert RAW to JPEG on Mac
Converting RAW files to JPEGs on a Mac takes seconds. macOS includes excellent built-in tools for this task.
Convert a Single Image with Preview
First, identify the RAW image you want to convert.
Open your image in Apple’s Preview program (right-click on the file and select Open With > Preview.)
Then, once the image has appeared, select File>Export.
A dialog box will pop up with the option to pick a new location for your RAW file. Feel free to select any location and even create a new folder—though you can always leave these options alone, and Preview will automatically save the JPEG alongside the original RAW file.

Next, select your preferred Format; here, you’ll need to hit JPEG.
You can leave the Depth on its default (which should be 8 Bits/Channel). If you want an extra-small JPEG, go ahead and drop the Quality slider.
(Most workflows benefit from exporting at maximum quality unless there’s a specific reason to shrink the file — e.g., email attachments or chat apps.)
Finally, hit Save. And check in your chosen location to see your new JPEG!
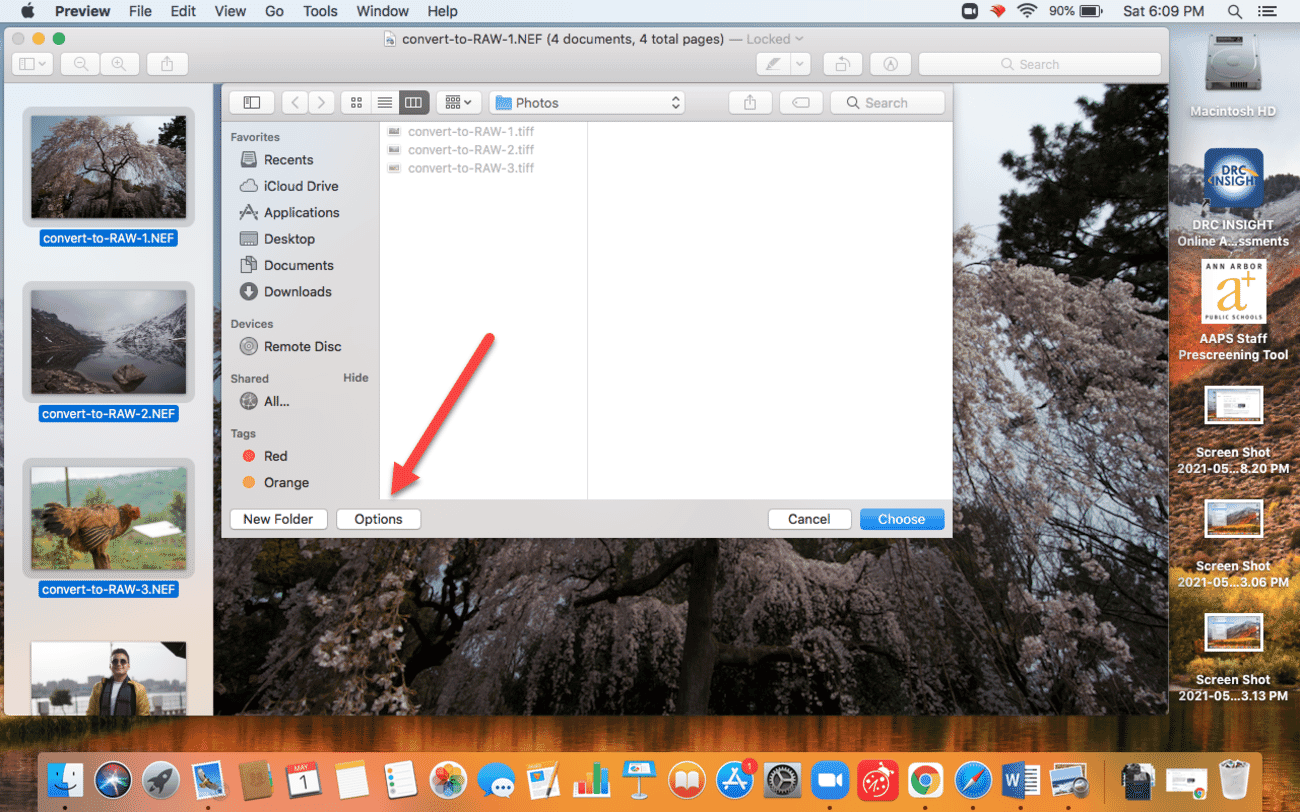
Convert a Batch of Images
You can also convert a whole batch of RAW images to JPEGs using Preview.
Simply select all the images, then right-click, hit Open With, and then Preview.
Then tap File>Export Selected Images.
At this point, you’ll need to choose the location where you’d like to save your JPEGs. So pick a folder, then head down to the Options button:
This will bring up your file format and sizing options. Under Format, pick JPEG. Leave the Depth alone, but drop the Quality if you’d like to reduce the file size.
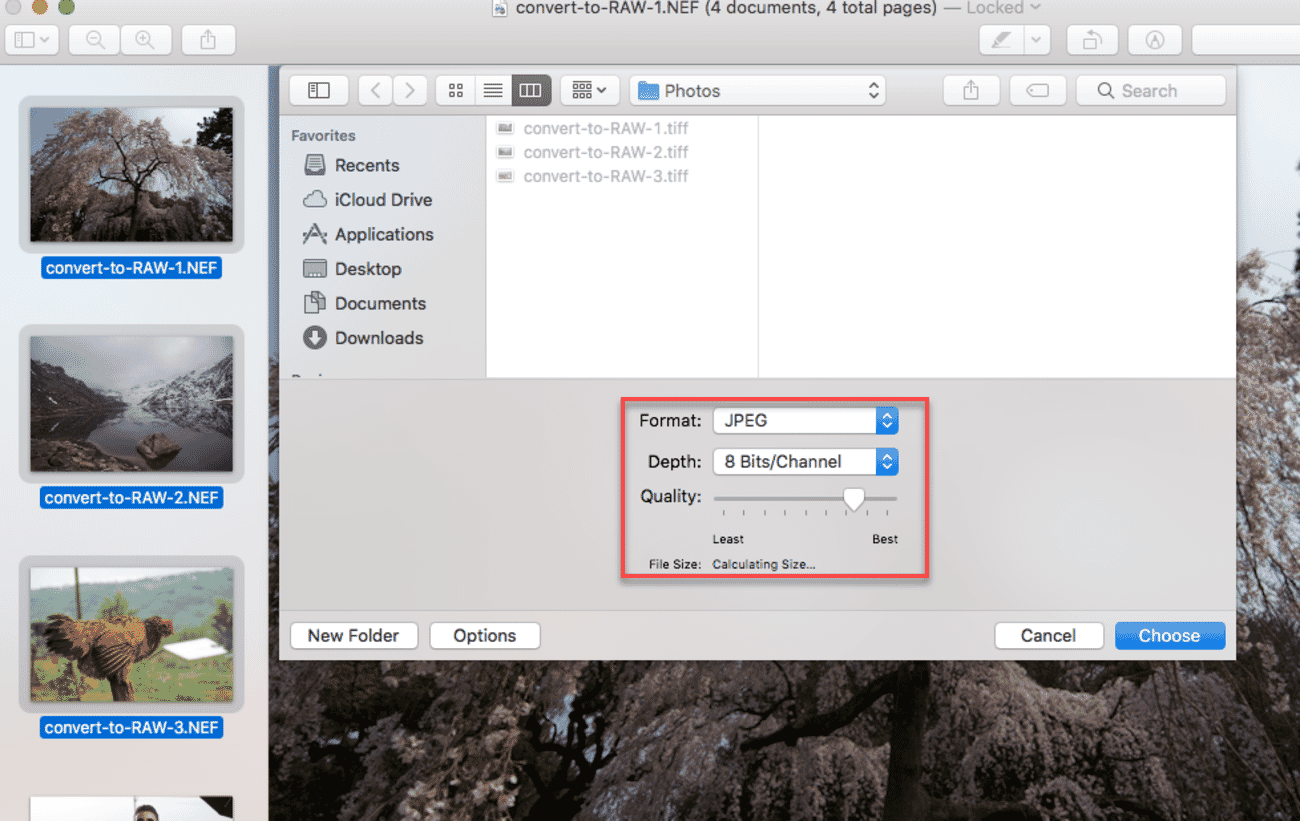
Then, when you’re done, hit Choose.
And that’s it! You’ll have successfully batch-converted your RAWs to JPEGs on a Mac.
Alternative: Apple Photos
Apple Photos is another excellent option for Mac users, especially if you want to do some quick edits before converting. Import your RAW files into Photos, make any desired adjustments, then select your images and choose File > Export > Export [X] Photos. Select JPEG as the format and your preferred quality level.
Apple Photos also handles batch exports well and maintains good quality during conversion.
How to Convert RAW to JPEG on Windows
Windows 10 and Windows 11 have significantly improved their native RAW file support. However, for the most control over your conversions, a dedicated program like Pixillion offers more options.
Quick Method: Windows Photos App
Windows 11’s Photos app can open and convert many RAW formats. Simply open your RAW file in Photos, then use Save as or Save a copy to export as JPEG. While basic, this works well for quick, single-file conversions.
Note: You may need to install the Raw Image Extension from the Microsoft Store for full RAW format support (it’s free).
Advanced Method: Pixillion
For more control and batch processing, download Pixillion from the NCH software website:
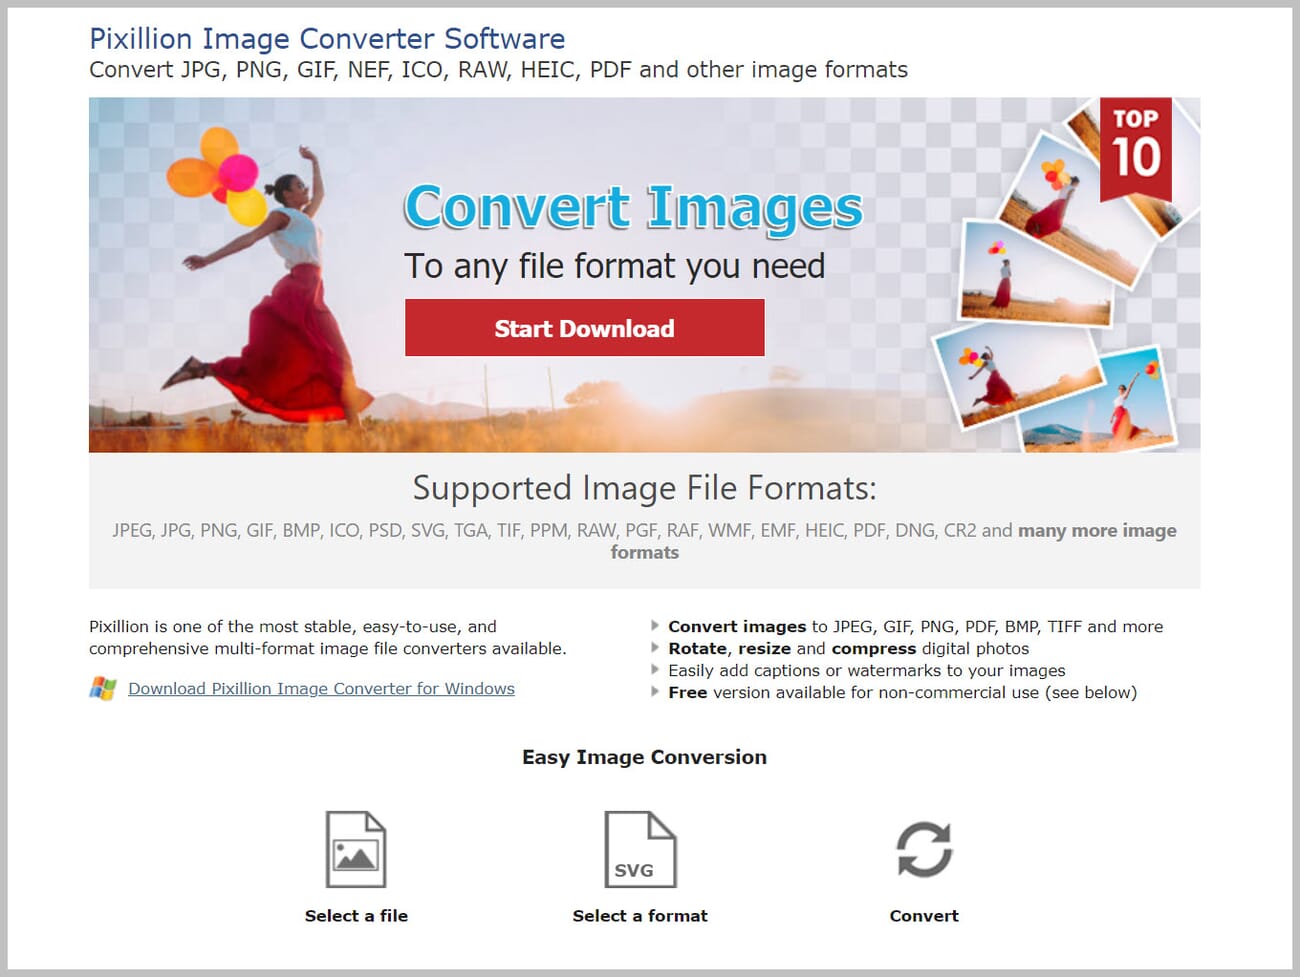
Pixillion works on Windows 10 and Windows 11, and is free for non-commercial use.
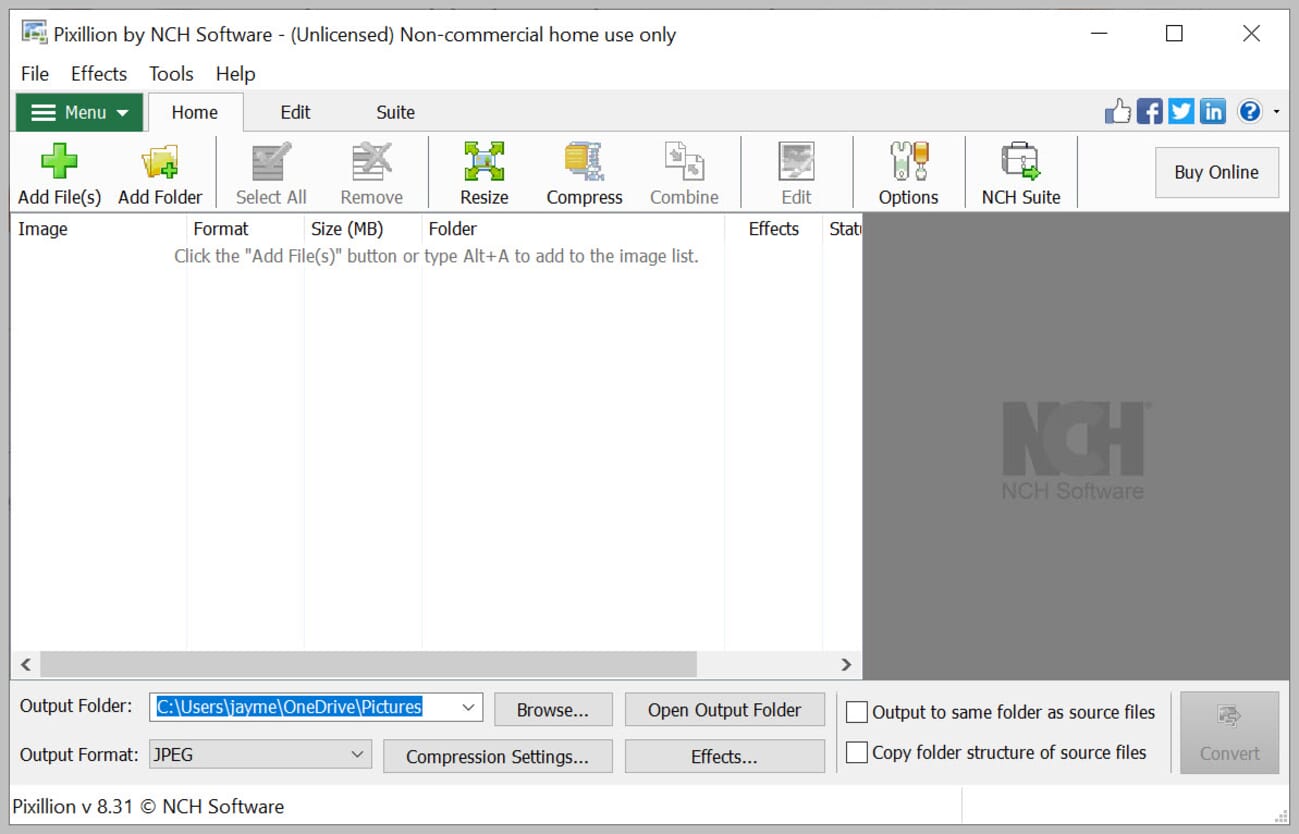
Open the program. You’ll see an “Unlicensed” label across the top, but don’t let it worry you; NCH only requires that you pay if you plan to use the converter commercially.
Next, tap Add File(s):
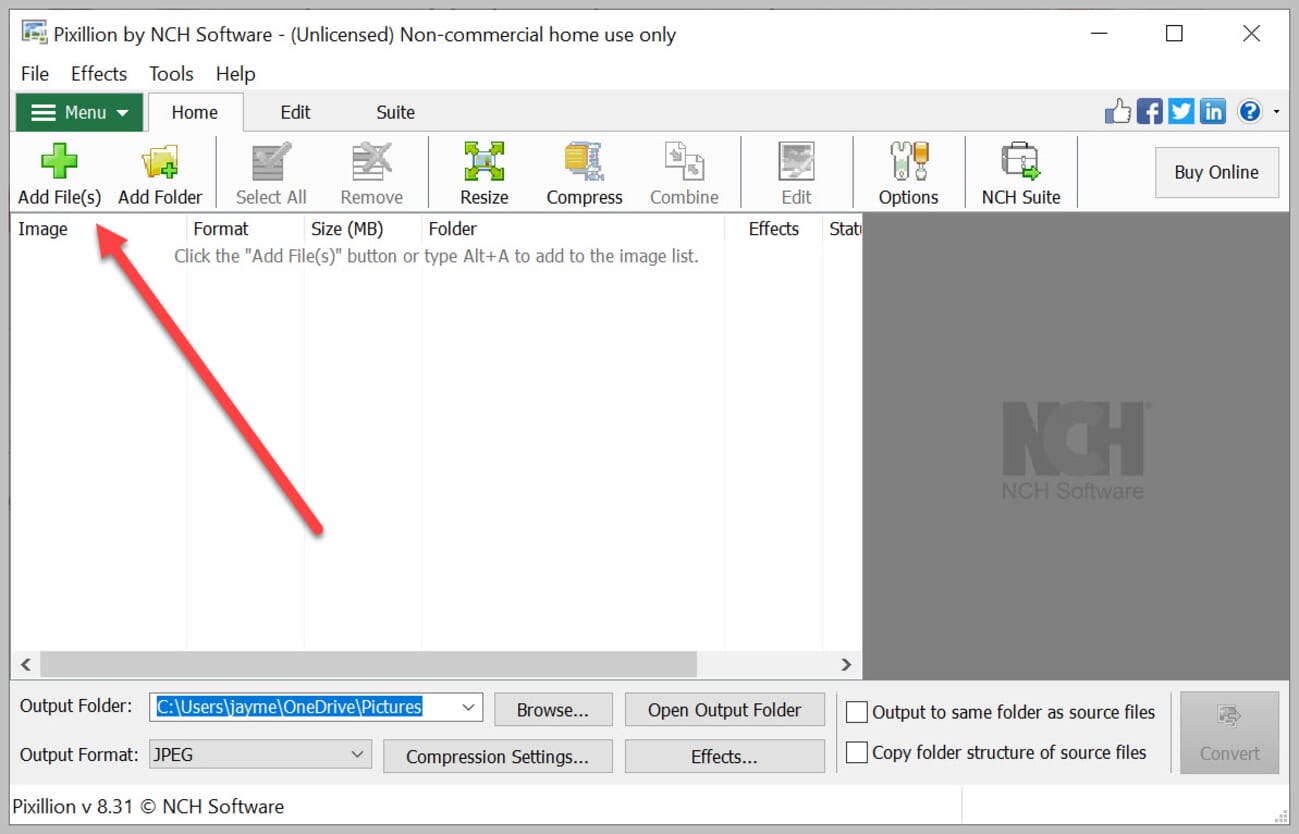
And select the images you’d like to convert.
You can also just drag and drop images onto the Pixillion window.
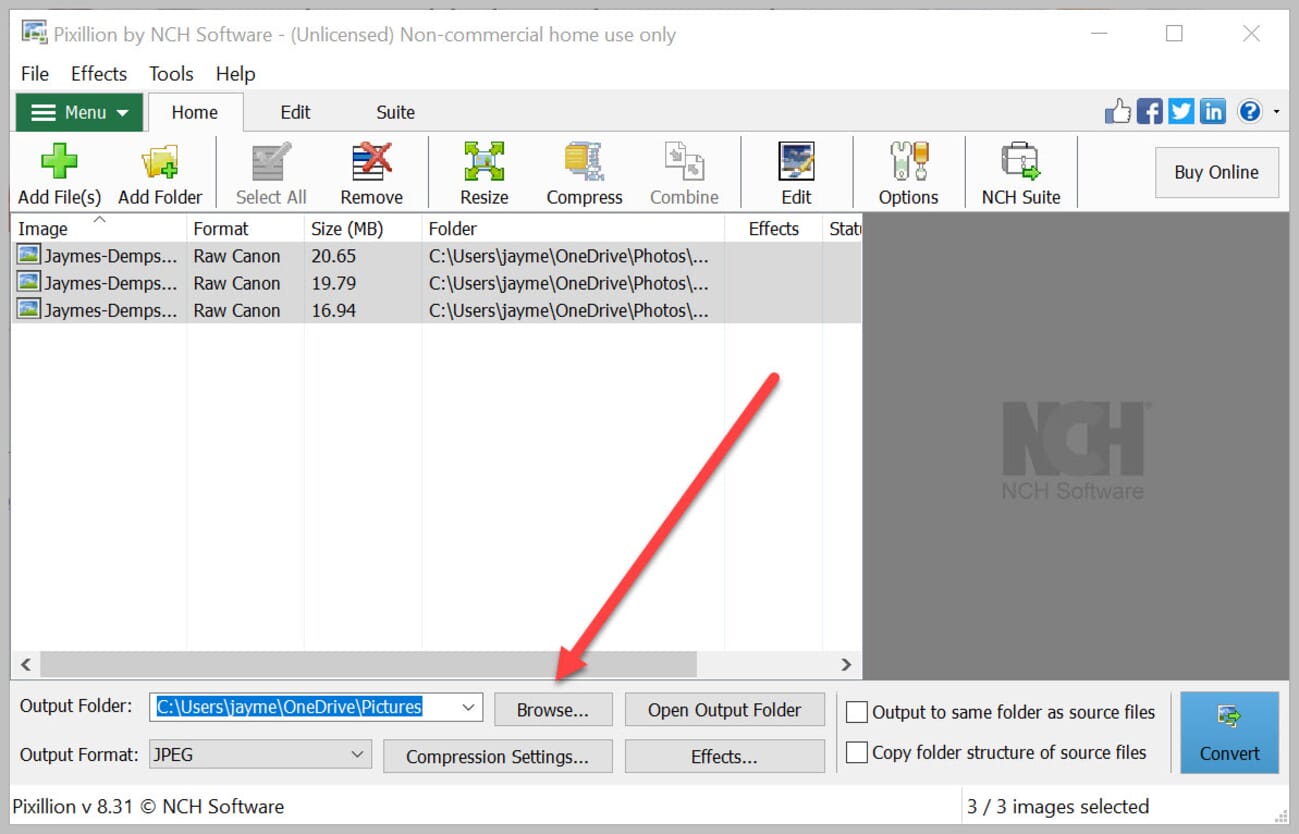
Once you’ve added the RAWs for conversion, pick your output folder:
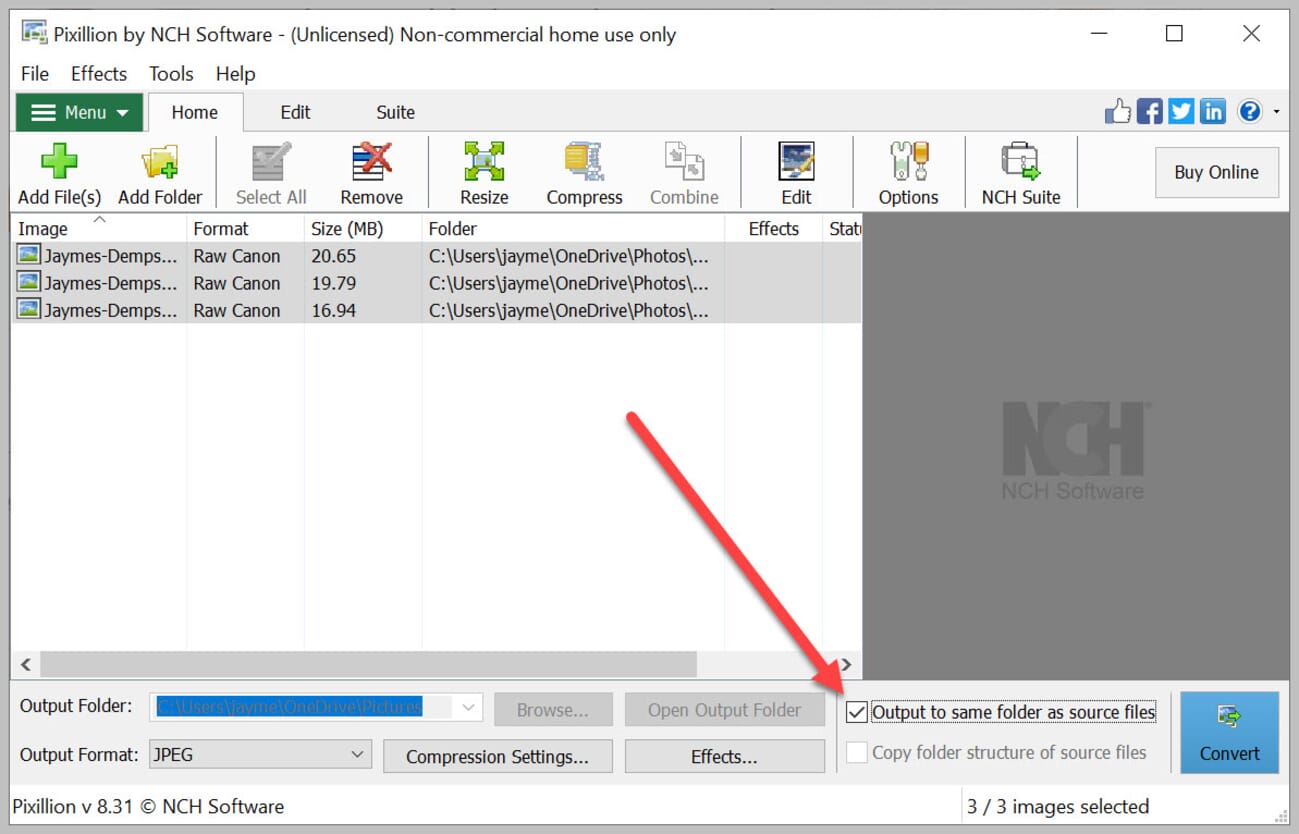
Though you can check the Output to same folder as source files box if you’re looking to save your JPEG to the original RAW file folder:
Select the JPEG Output Format:
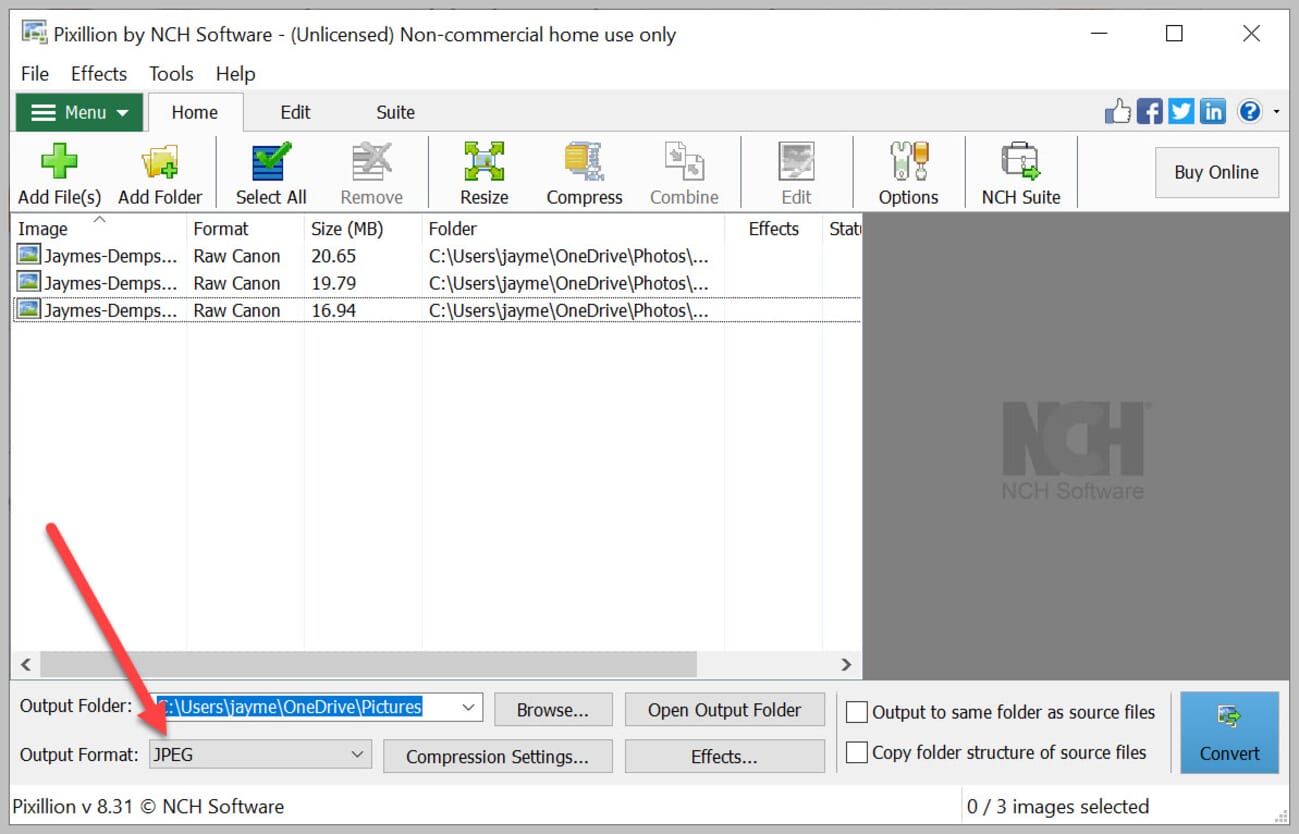
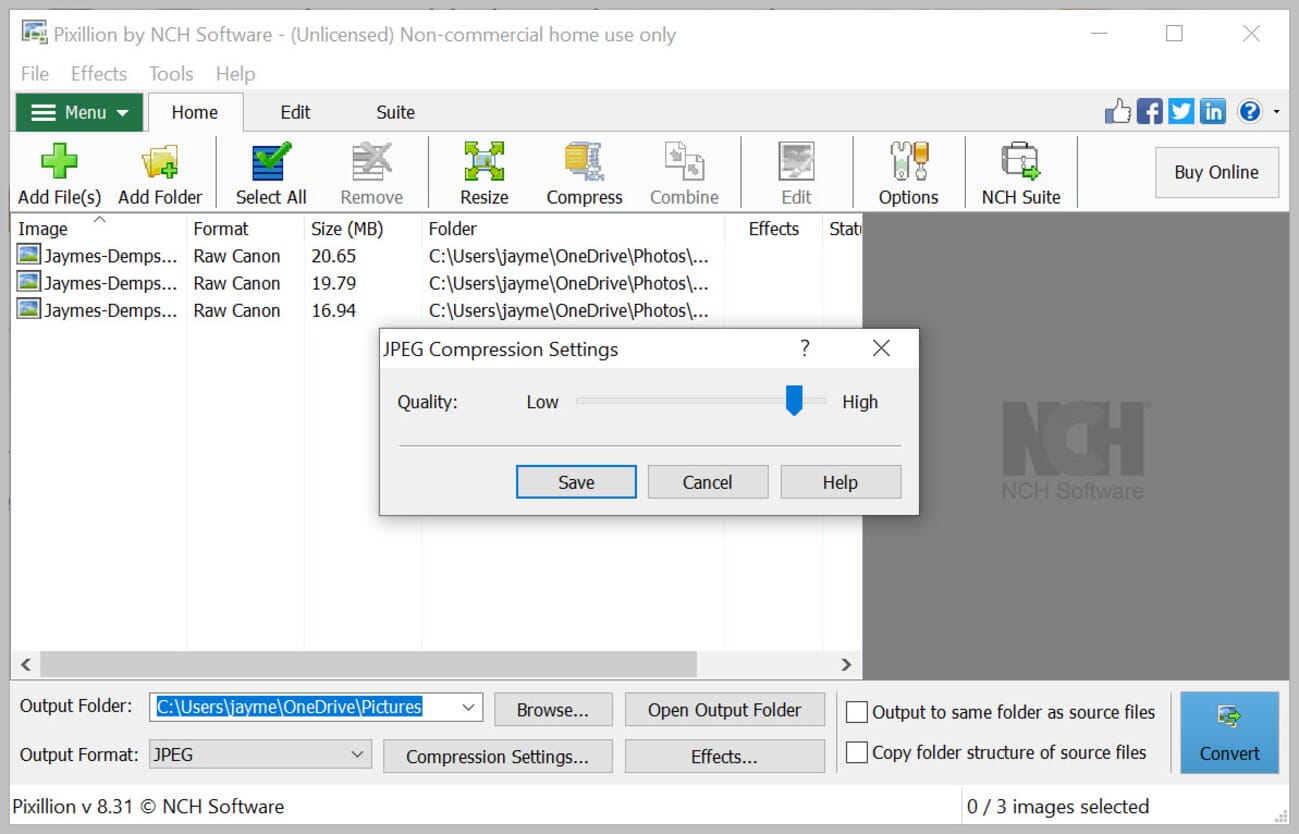
And if you want to reduce the image size, go ahead and adjust the Compression Settings.
Finally, hit Convert. And your JPEGs will be saved as specified!
How to Convert RAW to JPEG on iPhone and Android
Mobile RAW has moved from niche to mainstream since Apple ProRAW (available on iPhone 12 Pro and every Pro model since) and HEIC became the iPhone’s default image format. Android phones with Pro camera modes — Samsung Galaxy, Google Pixel, OnePlus — have offered DNG RAW capture even longer. The good news: converting those files to JPEG no longer requires a laptop.
iPhone: Convert ProRAW and HEIC to JPEG
The quickest route on iPhone uses the built-in Photos app, no third-party install needed. Open the image (ProRAW or HEIC), long-press on the thumbnail, then tap Quick Actions → Convert Image. Choose JPEG as the format and Actual Size (or Large/Medium for smaller files). The converted copy saves alongside the original, and the RAW or HEIC file stays untouched.
For batches, the Files app handles multi-select conversion the same way: select all the images, long-press, pick Quick Actions → Convert Image, and iOS runs them in the background. Lightroom Mobile is the right tool for anyone who wants to edit before export — it accepts ProRAW natively and its export dialog includes the same quality/resize controls as Lightroom Classic on desktop.
Android: Convert RAW/DNG to JPEG
Android has no Apple-equivalent system-level converter, but three apps cover the space well. Google Photos can open DNG files and save a JPEG copy via the Save as copy option after any edit. Snapseed (also from Google, and still free) opens DNG, lets you do the editing, then Save or Export produces a JPEG. And Lightroom Mobile offers the same export flow as its iOS counterpart — the best option for anyone already in the Adobe ecosystem.
Dedicated converters like RAW to JPG Converter on the Play Store offer batch processing without any editing step, which suits photographers who just need the format swap done fast.
How to Convert RAW to JPEG Online
If you’re looking for a quick, no-download RAW image converter solution, online converters are your best bet. Here are two reliable options:
- CloudConvert
- ILoveIMG
They’re quick, intuitive, and (mostly) free.
Converting with CloudConvert
CloudConvert is a freemium online image converter; the free, no sign-up version allows you to convert up to 25 files per day. After that, however, you’ll need to pay for Conversion Minutes, explained in-depth on the Pricing page.
To convert from RAW to JPEG, simply select your RAW image. Just hit Select File:
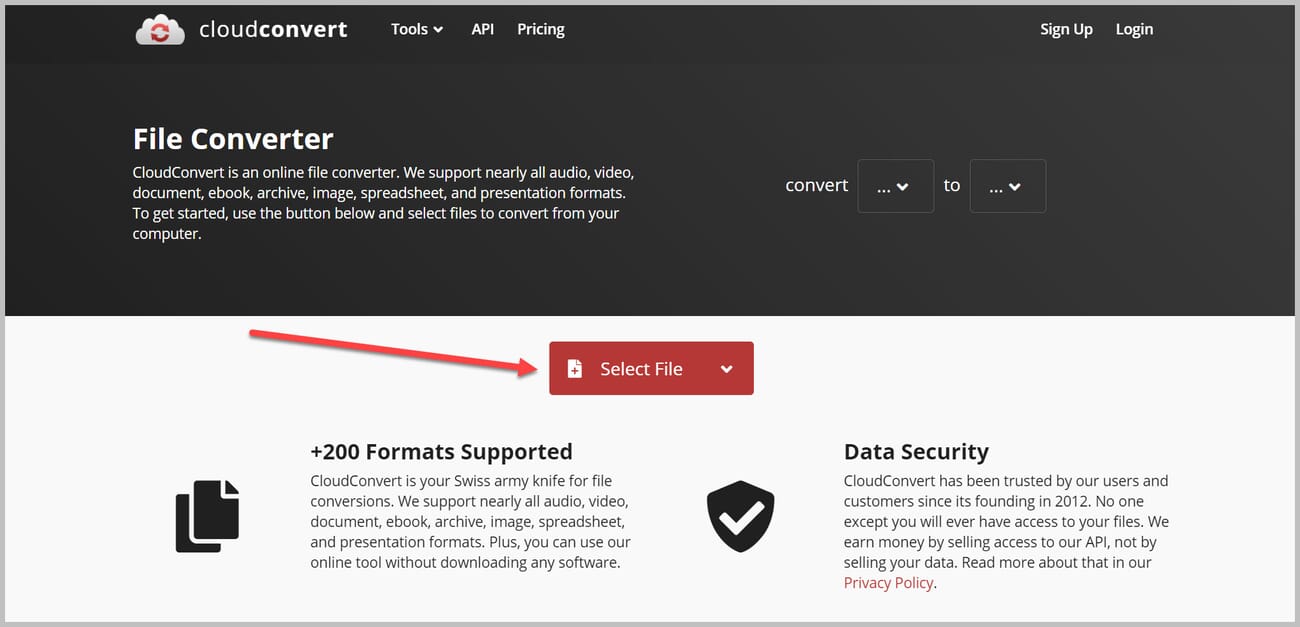
Or do a quick drag-and-drop.
Note that you can add multiple files by tapping the Add More Files button (or by simply highlighting several images during the original selection process):

Select JPG from the Convert to dropdown:
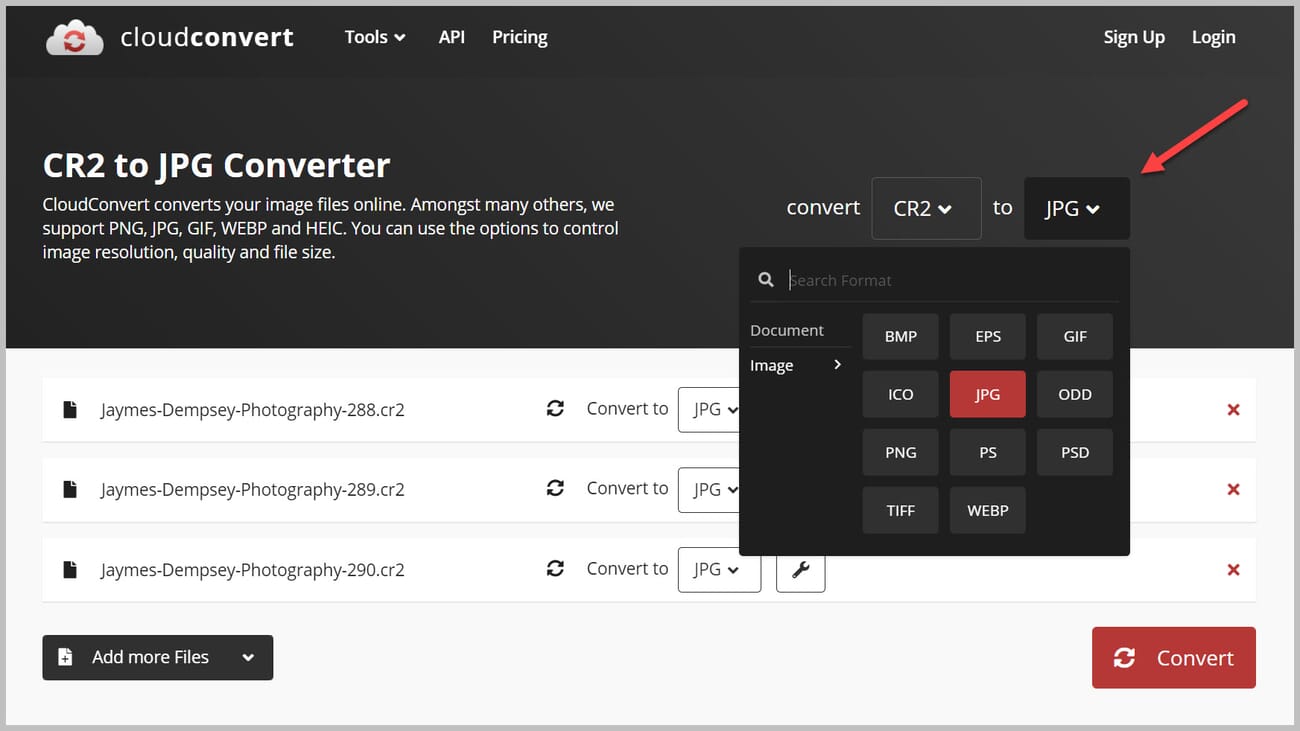
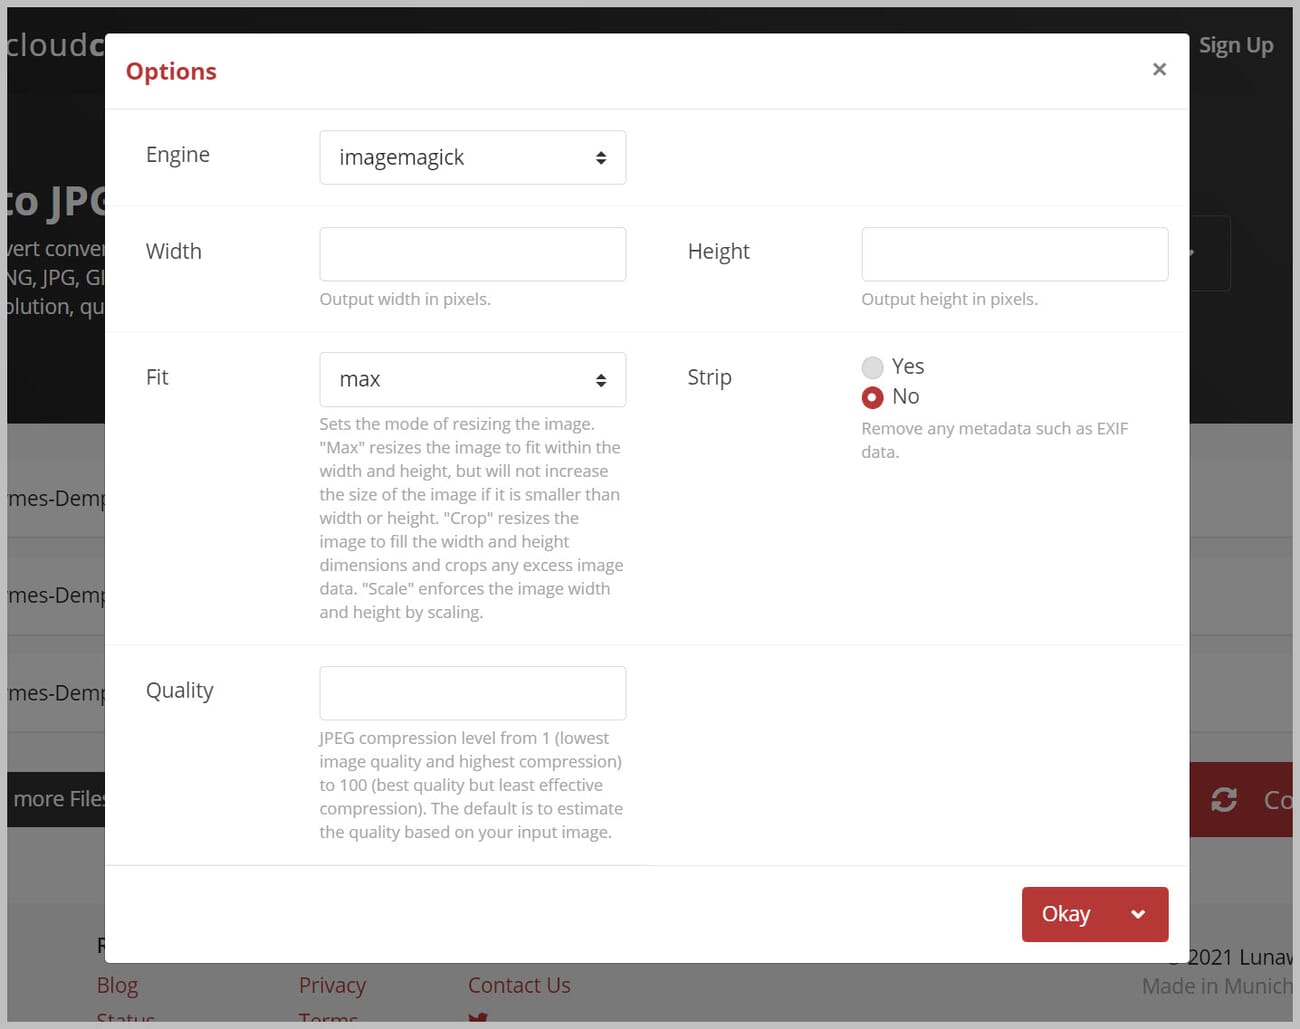
Then open the Tools icon (shaped like a wrench):
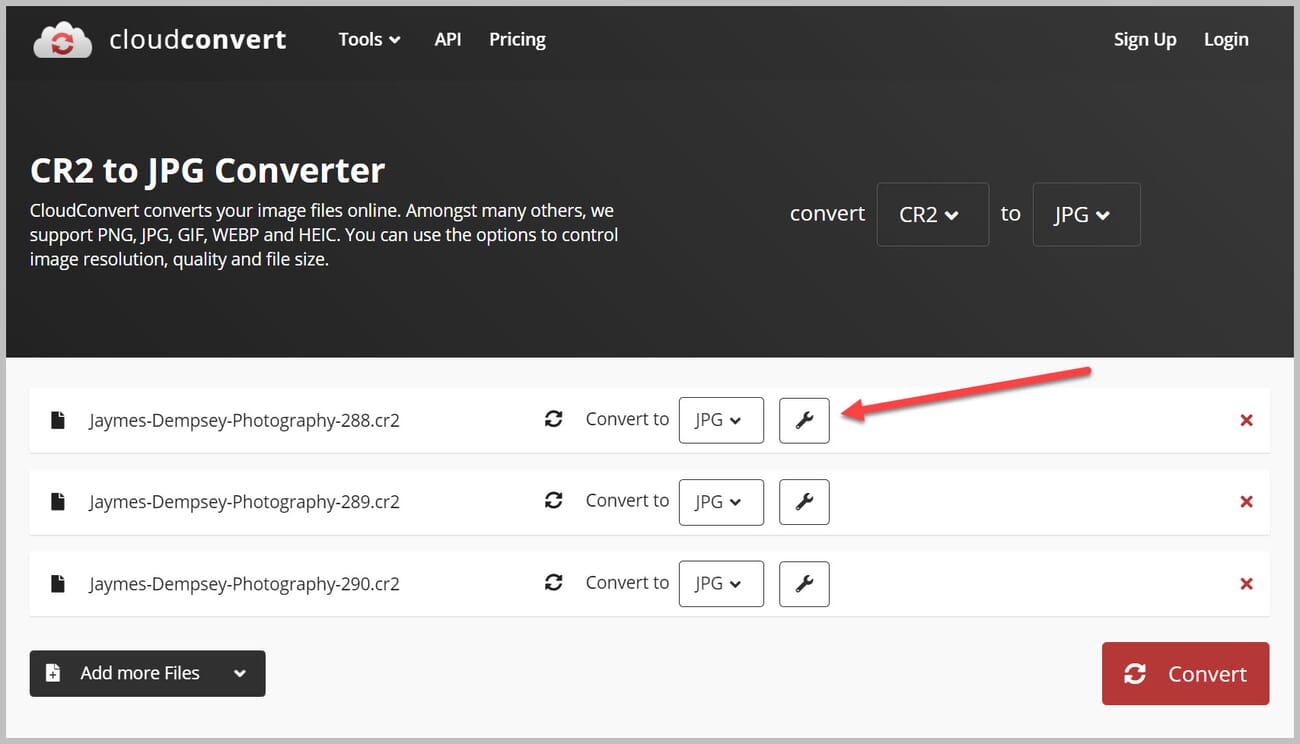
Which lets you adjust the image size and quality:
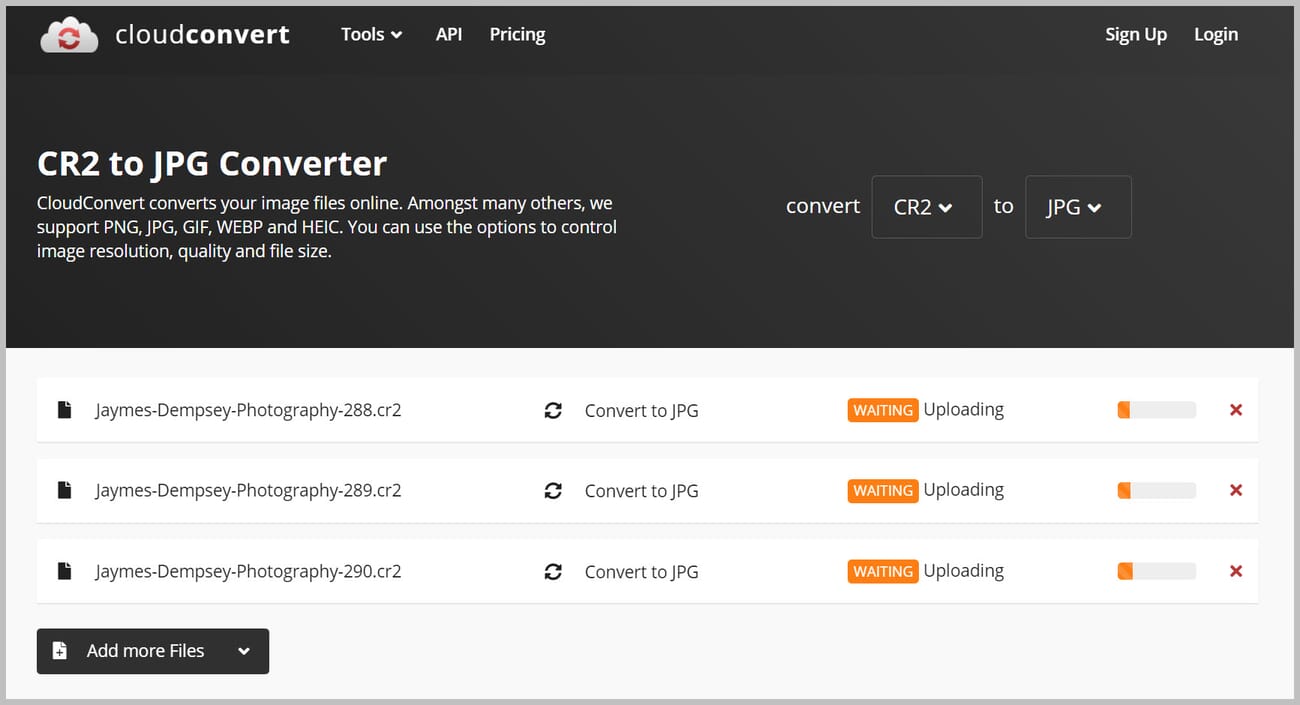
Finally, hit Convert.
Depending on the size (and number) of RAW images, you may have to wait a few minutes. This is a primary drawback of online RAW-to-JPEG converters, by the way—compared to desktop programs, they’re really, really slow.
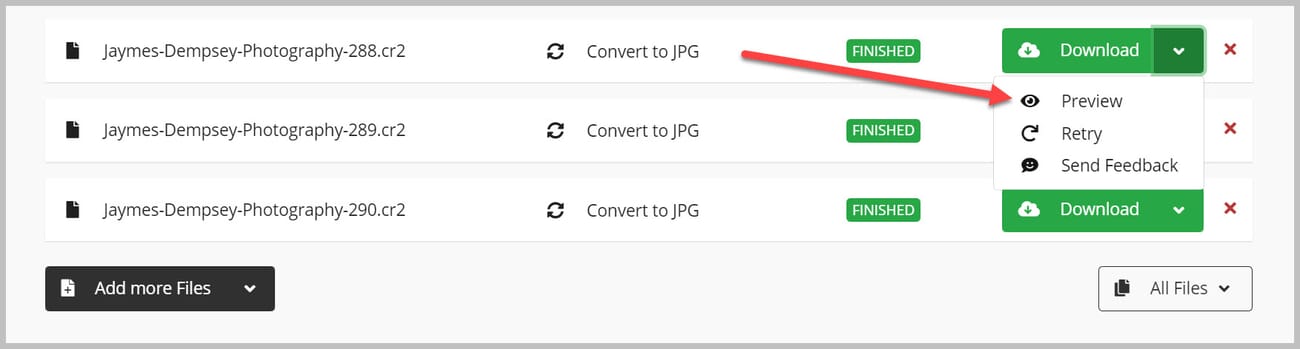
Once the conversion has finished, you’ll have the option to Download your photos to the desktop:
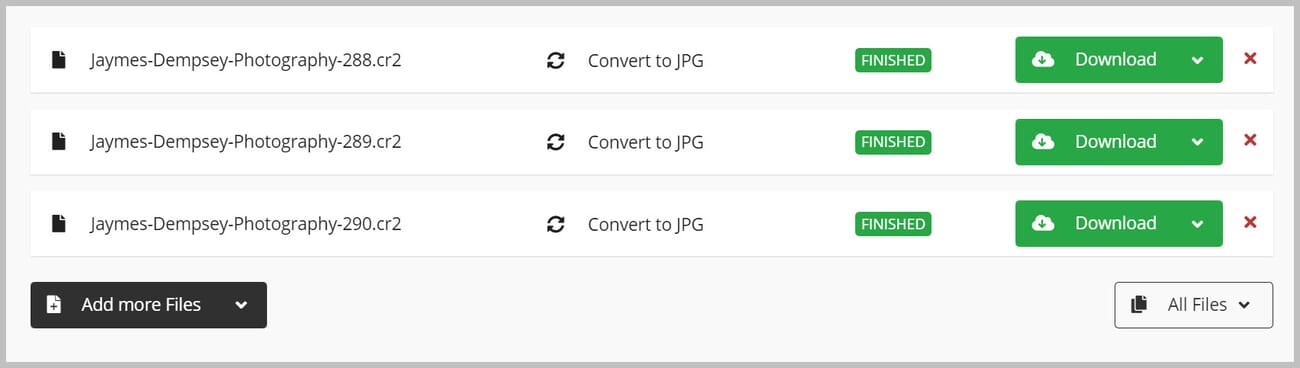
Or Preview the photos in the browser window:
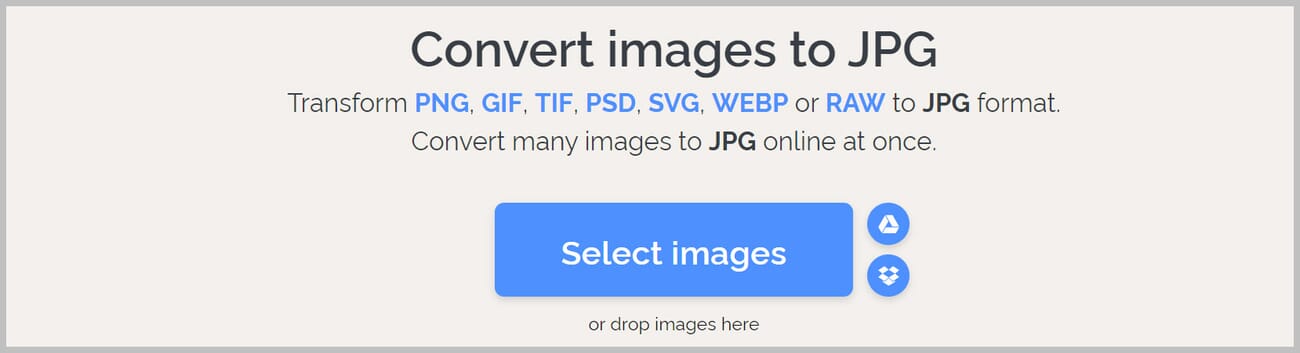
Converting with ILoveIMG
ILoveIMG is another great online image converter; it even allows for unlimited conversions.
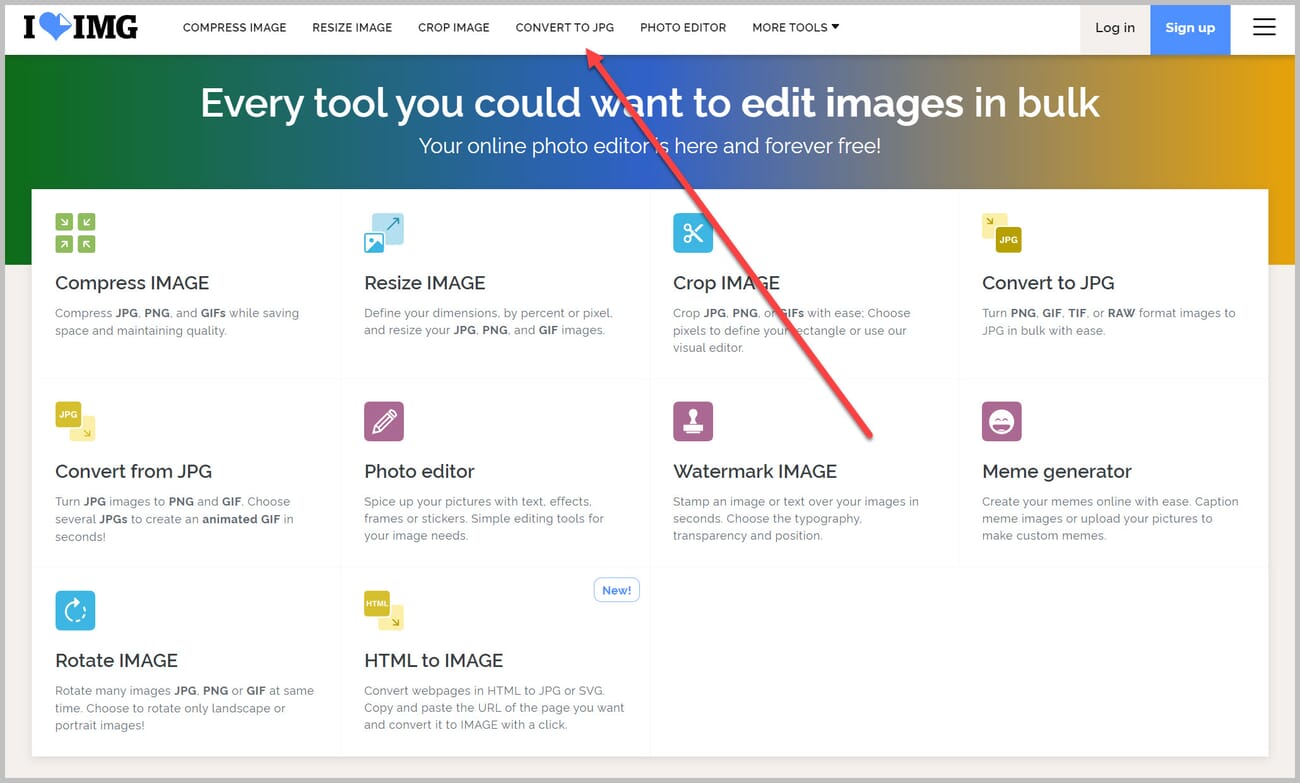
Just head over to the ILoveIMG website, and select Convert to JPG at the top:
Select your images (or do a drag-and-drop):
You can add additional images with the Add More Images dropdown on the right:
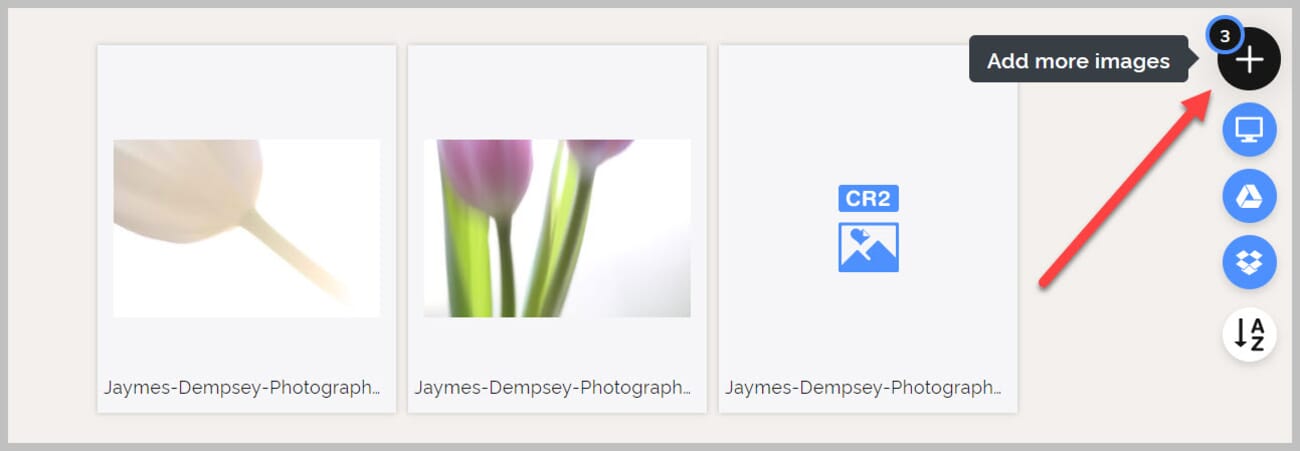
And then, when you’re ready, hit Convert to JPG.
Once the images are converted, you can click to Download your JPEGs:
If you try both CloudConvert and ILoveIMG, you’ll notice that CloudConvert offers more options, but ILoveIMG is faster, plus it’s easier to use (and it offers unlimited conversions). The program you choose depends on your needs, but both will get the job done.
Also worth checking: Convertio and Zamzar
Convertio is a browser-based converter that accepts RAW files up to 100 MB on the free tier and supports the full alphabet soup of formats — CR2, CR3, NEF, ARW, RAF, ORF, RW2, DNG. Files get processed on Convertio’s servers and are auto-deleted after 24 hours. It’s fast and reliable for single files but the free tier throttles at ten conversions per day.
Zamzar takes a slightly different approach — the free tier allows files up to 50 MB and delivers the converted file by email if you prefer (or direct download). It’s older than CloudConvert and iLoveIMG and remains a solid fallback when other services hit a formatting edge case.
All four online options (CloudConvert, iLoveIMG, Convertio, Zamzar) upload images to third-party servers. For sensitive or client work, convert locally instead — Preview, the Windows Photos app, or any of the desktop editors below.
How to Convert RAW to JPEG with Image Editors
The sections below cover how to use Lightroom, Luminar Neo, and Photoshop to convert RAWs to JPEGs.
The advantage to using a dedicated image editor—as opposed to a program such as Preview, Pixillion, or an online converter—is that you can first edit your RAW images, then export them. You also tend to get more conversion options; for instance, Lightroom lets you batch-rename files, adjust the image size, sharpen, and add watermarks, among other things.
How to Convert RAW to JPEG with Lightroom Classic
Start by selecting your RAW image(s) in Lightroom Classic.
(Feel free to extensively edit your shots in Lightroom, first; you might consider adjusting exposure, contrast, colors, and more.)
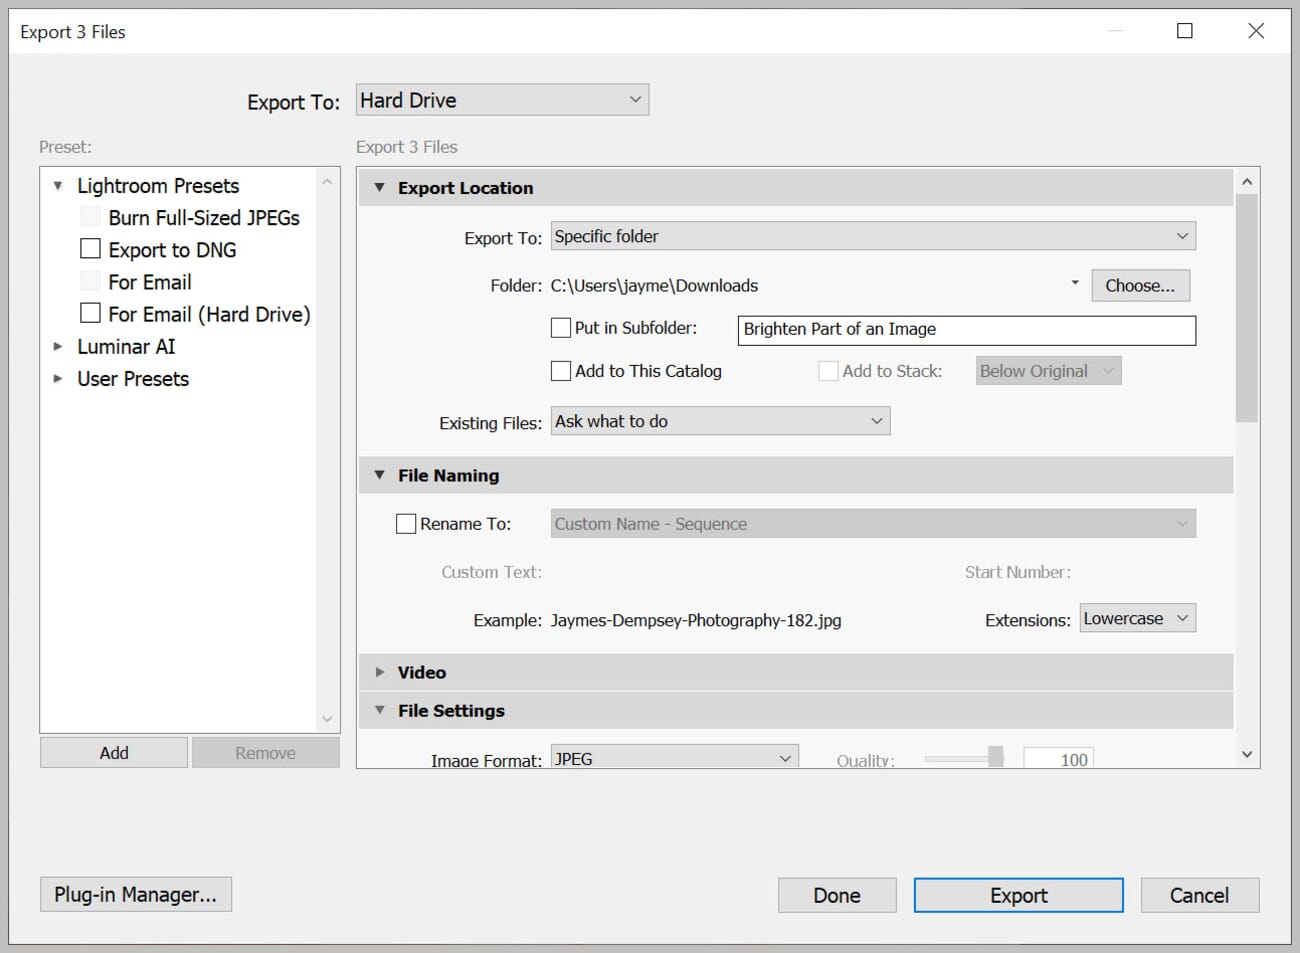
Head to the Library tab, then click Export:
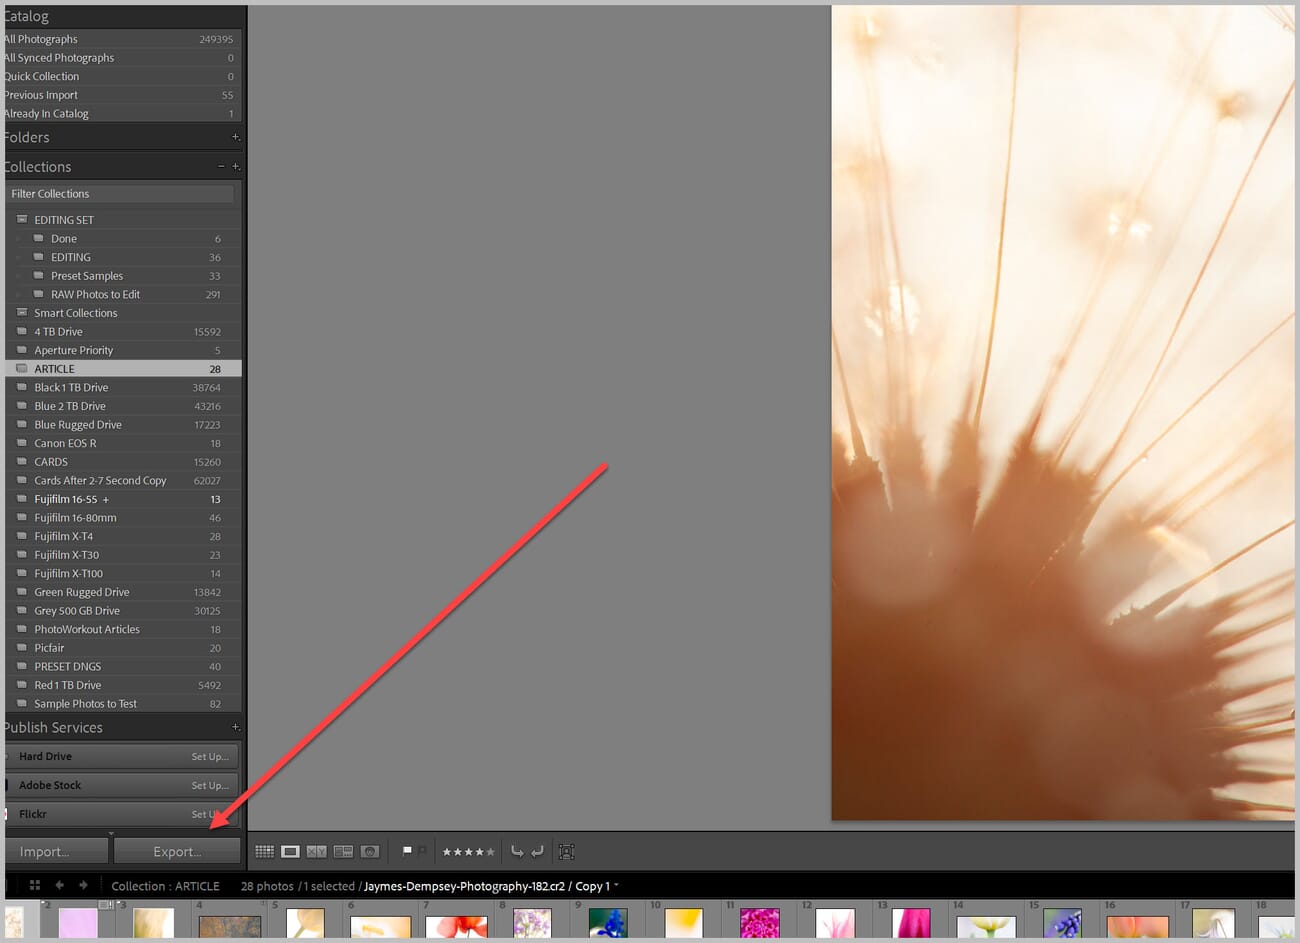
The Export window will pop up, which will tell you the number of files you’ll be converting:
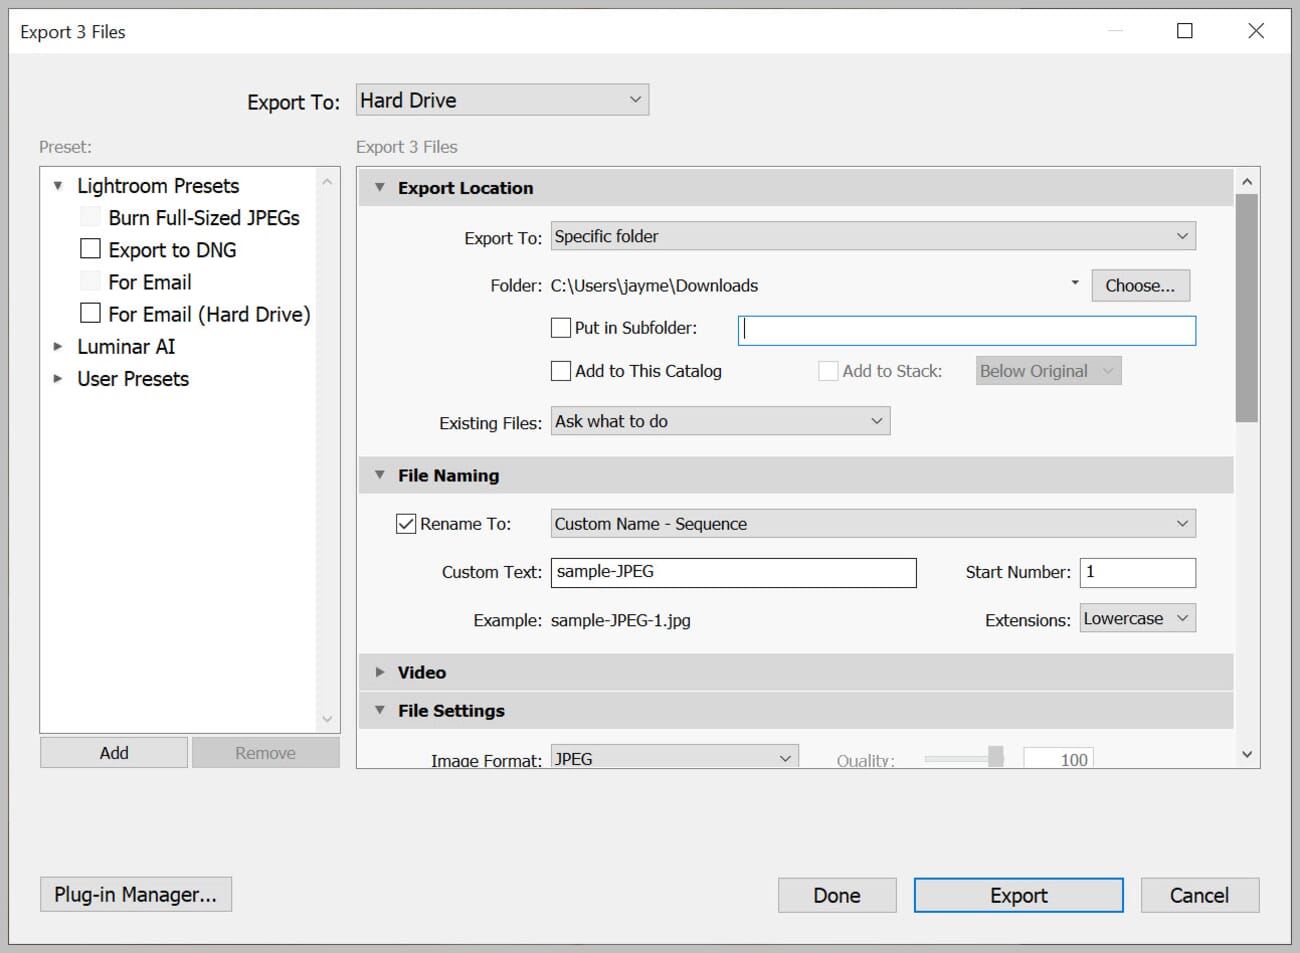
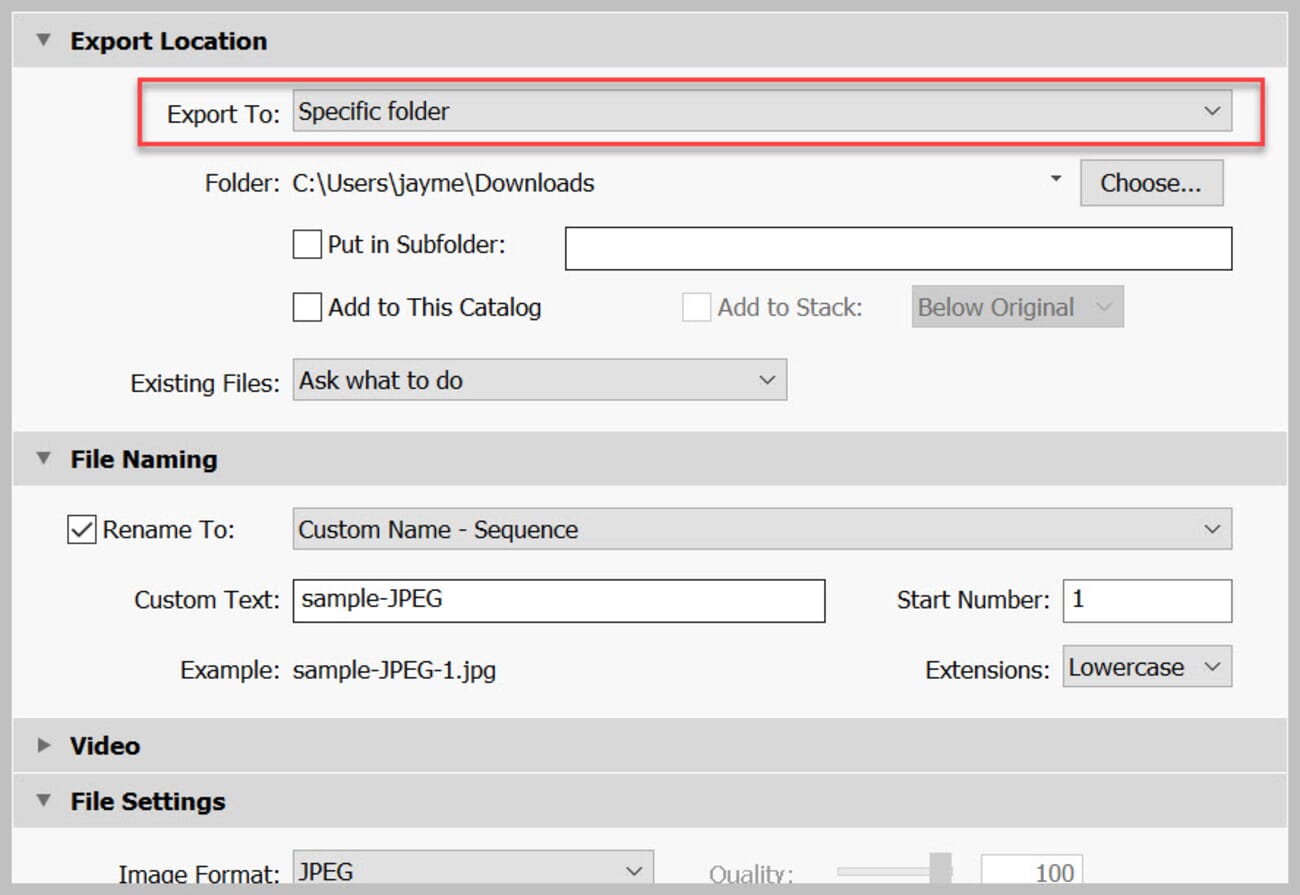
Choose your Export Location:
As well as your file names:
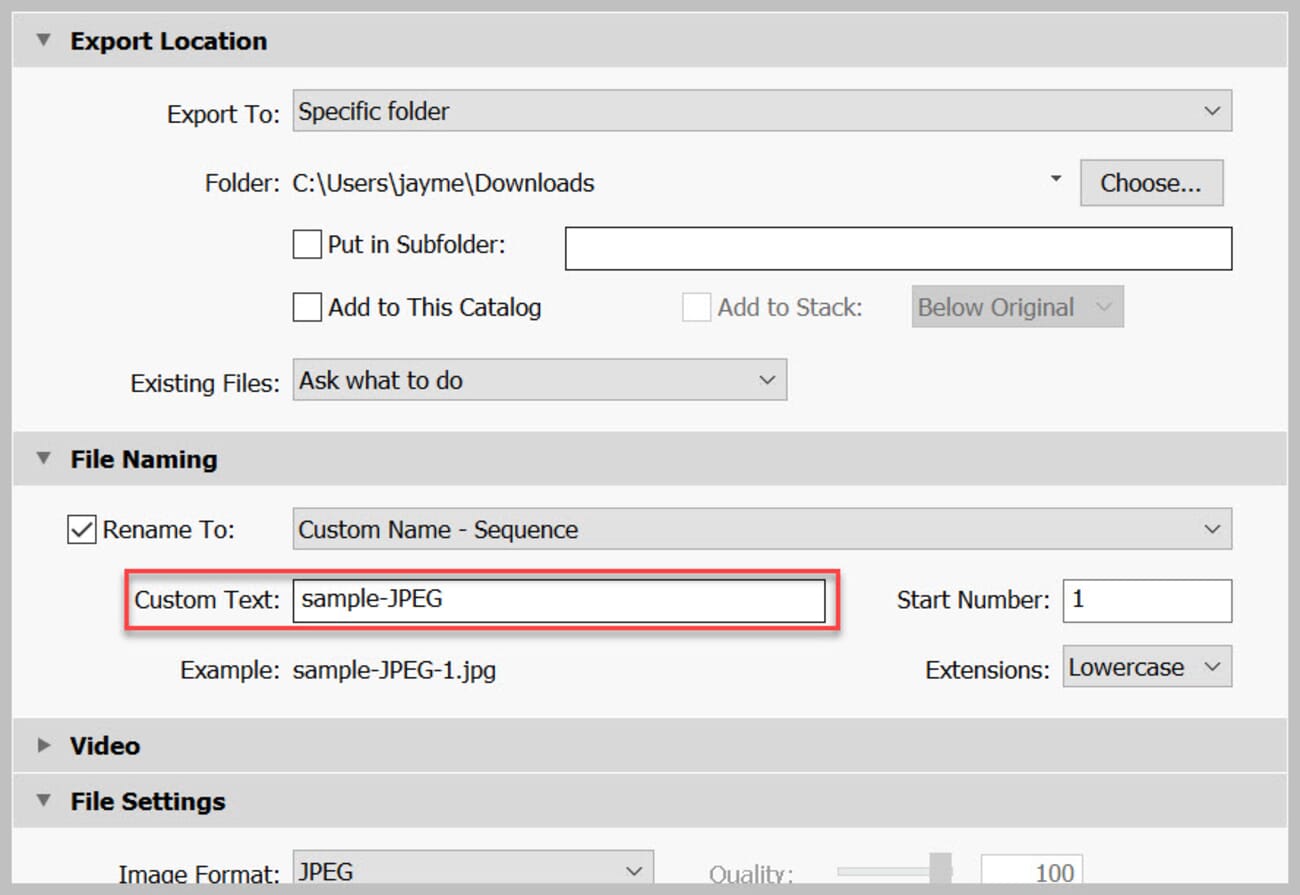
Pick the JPEG file setting and adjust the Quality:
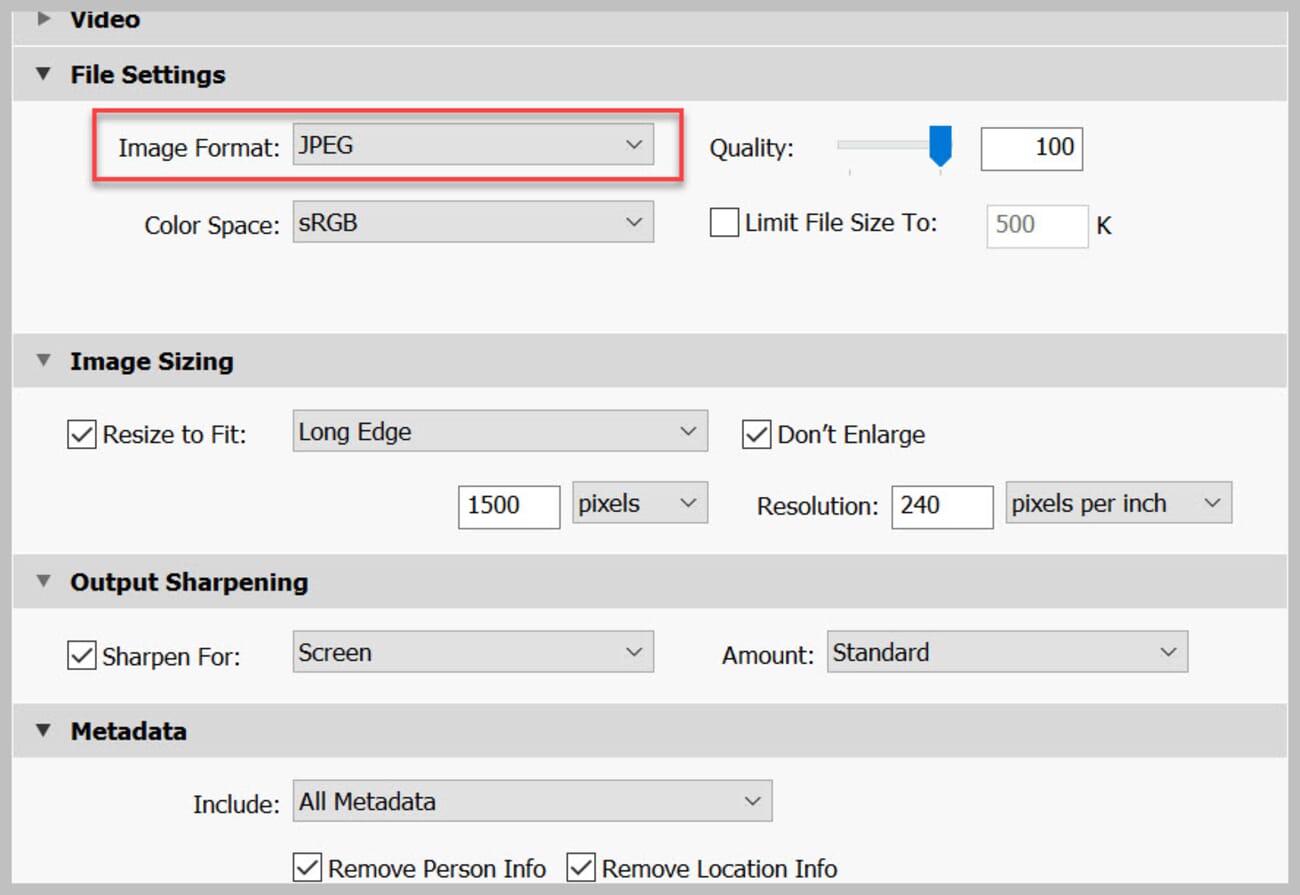
You can also resize images in the Image Sizing panel (1500 pixels on the long edge is a common web-display target).
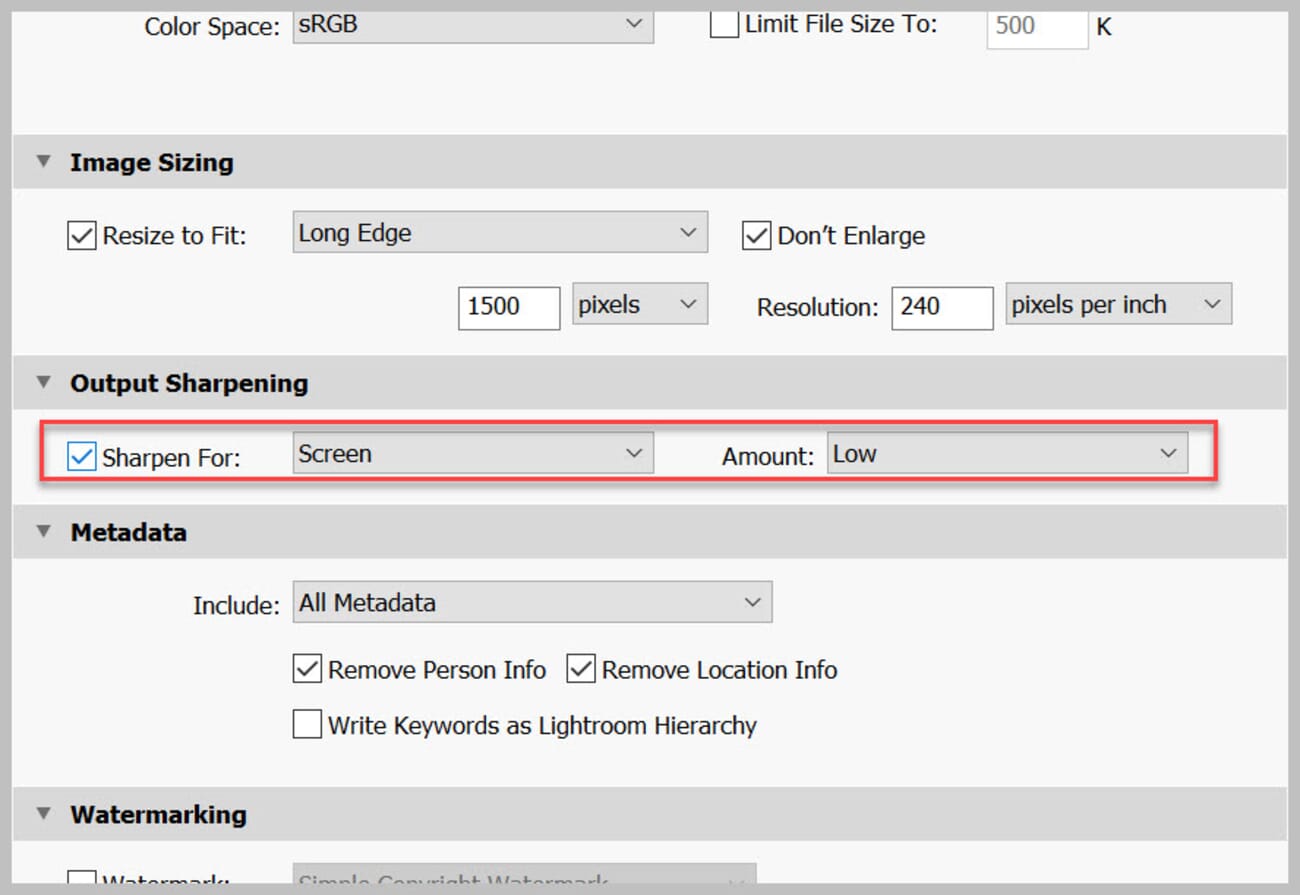
Since you’re compressing a RAW to a JPEG, it’s often a good idea to add a bit of sharpening. So check the Sharpen For box and select Screen. You can experiment with different amounts, but Low is a good starting point.
Finally, select Export.
You can watch the Export progress in the upper-left corner of the Lightroom window.
How to Convert RAW to JPEG with Luminar Neo
Luminar Neo is Skylum’s current flagship photo editor, replacing the older Luminar 4 and Luminar AI products. It offers powerful AI-driven editing tools alongside straightforward RAW-to-JPEG conversion.
Single Image Export
To export a single image, open your RAW file in Luminar Neo and make any desired edits. When ready, click the Share icon in the top-right corner (or go to File > Export).
In the export dialog:
- Choose your save Location and File Name
- Set Format to JPEG
- Adjust Quality (80-100 is recommended for most uses)
- Add output Sharpening if desired (Low works well for screen viewing)
- Set any Resize options if needed
Click Export to save your JPEG.
Batch Export
Luminar Neo supports batch exports through its Catalog view. Select multiple images, right-click, and choose Export. You can apply the same settings to all selected images for efficient batch conversion.
One of Luminar Neo’s strengths is its AI-powered tools that can automatically enhance your RAW files before export—features like AI Structure, Enhance AI, and Sky AI can dramatically improve your images with just a few clicks.
How to Convert RAW to JPEG with Free Alternatives
If you’re looking for powerful RAW conversion without paying for software, several excellent free and open-source options are available:
darktable
darktable is a free, open-source photography workflow application and RAW developer. It’s available for Windows, macOS, and Linux, and offers professional-grade RAW processing capabilities.
To convert RAW to JPEG in darktable:
- Import your RAW files into the lighttable
- Select the image(s) you want to export
- Open the Export module on the right panel
- Set target storage to file on disk
- Choose JPEG as the file format
- Set your quality level (92-95 is a good balance)
- Click Export
RawTherapee
RawTherapee is another excellent free RAW processor that supports virtually every camera format. It offers extensive control over the conversion process, including advanced color management and noise reduction.
Both darktable and RawTherapee have steeper learning curves than commercial software, but they’re incredibly capable once you get familiar with them—and they’re completely free.
AI-Powered RAW Converters (New in 2026)
A new category showed up in 2025–2026: RAW-to-JPEG tools that apply AI denoise, deblur, and detail-enhancement during the conversion instead of relying on the photographer to edit first. These aren’t replacements for a full RAW developer like Lightroom or Luminar — they’re bolt-on processors aimed at the “I shot it in bad light, I need a usable JPEG out the other side” workflow.
DxO PureRAW
DxO PureRAW is the most mature product in this space. It takes in a RAW file, applies DxO’s DeepPRIME XD2 denoise and optical-correction profiles (built from camera + lens calibration data), and spits out either a linear DNG for further editing or a JPEG ready to share. The results on high-ISO files are genuinely impressive — it’s the tool that lets a clean-ish ISO 12800 file exist. One-time license, perpetual use.
Topaz Photo AI
Topaz Photo AI bundles denoise, sharpen, upscale, and face recovery into a single batch-capable app. Drop a folder of RAWs on it and Topaz auto-detects which fixes each image needs. It’s the best “set it and forget it” option for wedding or event shooters pushing hundreds of files at a time. Standalone app plus Lightroom/Photoshop plugin.
Movavi Picverse and other AI batch tools
Movavi Picverse, WaveSpeed AI, and similar consumer-focused tools position themselves as simpler, cheaper alternatives to DxO and Topaz — drag-and-drop interfaces, per-image AI enhancement toggles, and direct JPEG export. The quality gap closes a bit every release, but they still sit a notch below DxO on high-ISO noise and below Topaz on subject recovery. Worth a trial if those are overkill for the job.
The rule of thumb: if the RAW was shot cleanly, skip the AI layer and export straight from a traditional developer. If the RAW was shot in bad light or at a high ISO, an AI pass before JPEG export is usually worth the few extra seconds per image.
How to Convert RAW to JPEG with Photoshop
Photoshop is an ultra-powerful program—so, as you might expect, it actually offers several ways of converting RAWs to JPEGs (with various levels of control and involvement).
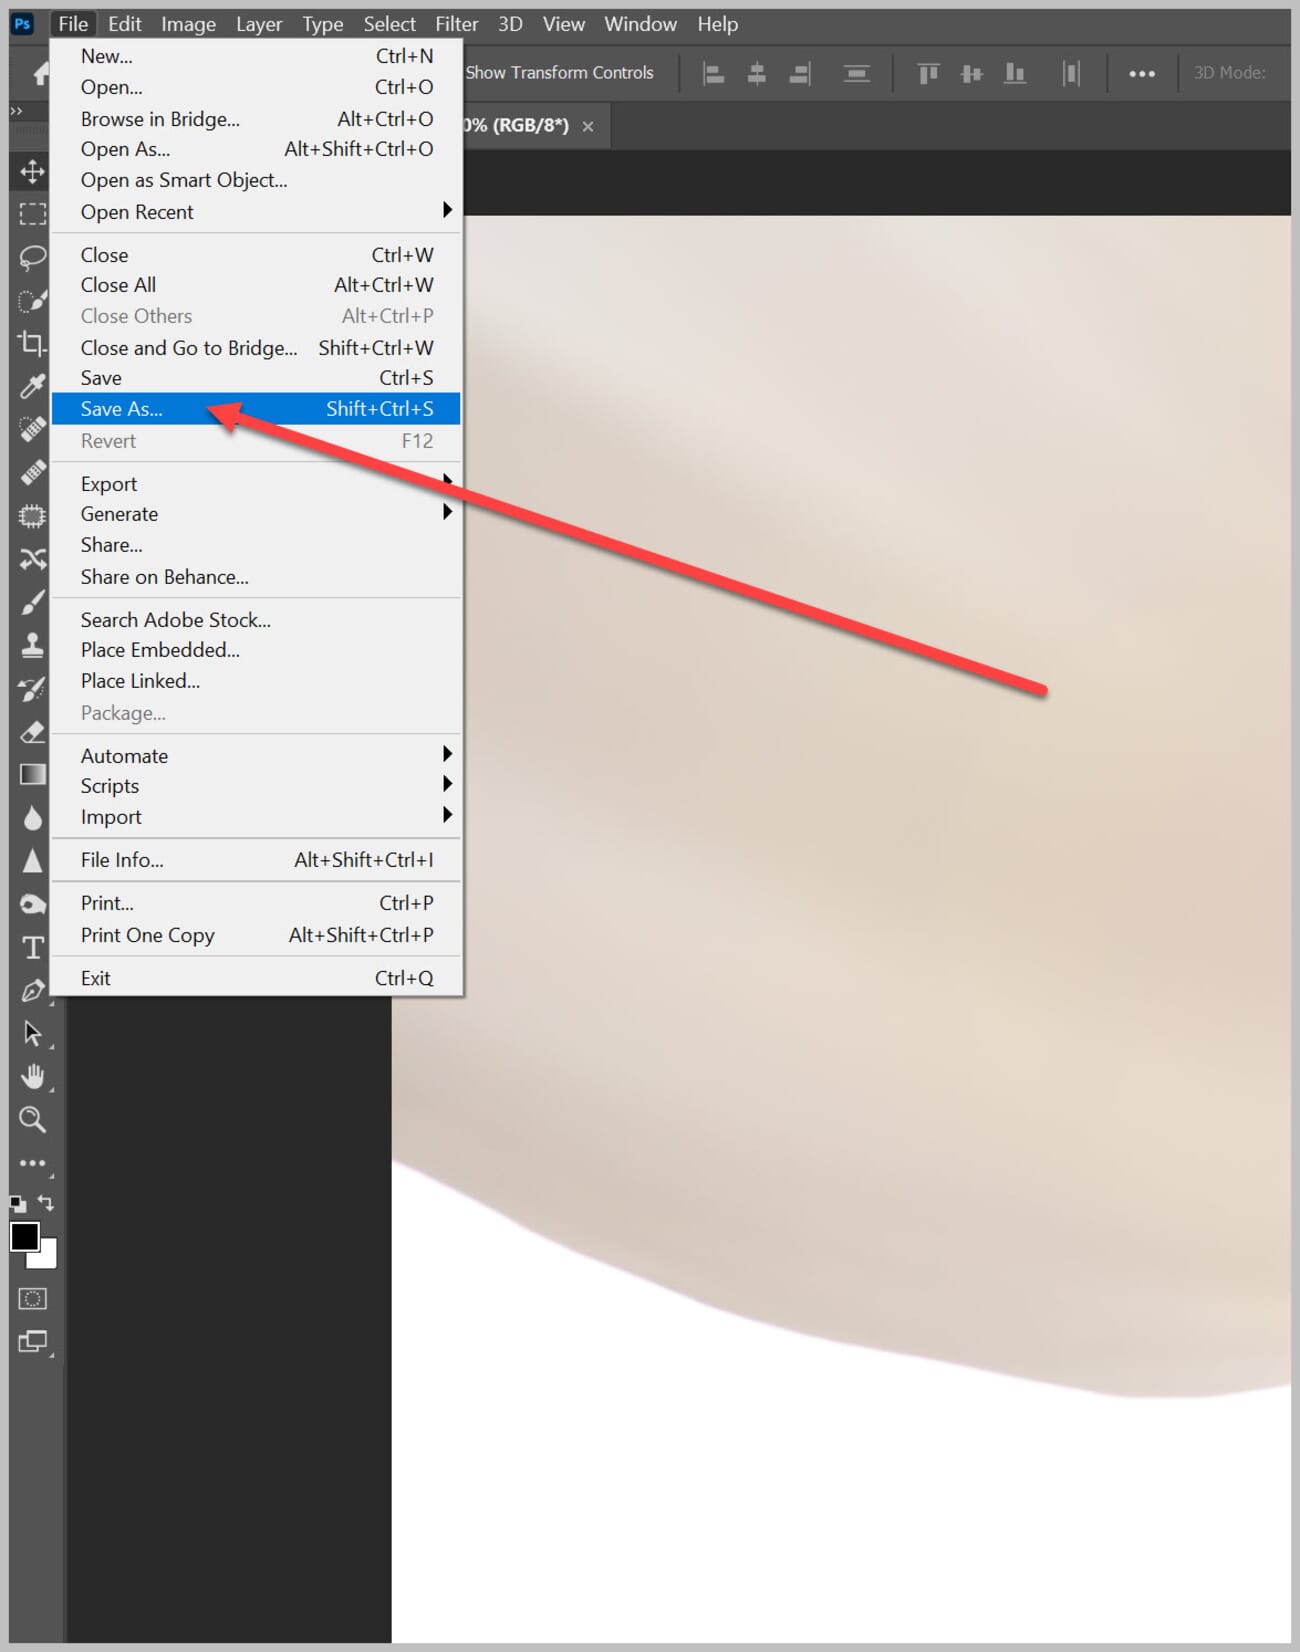
The simplest method is to open your photo, then select File>Save As (or File > Save a Copy in newer versions):
Rename your file, select your preferred location, and change the Save as type to JPEG:
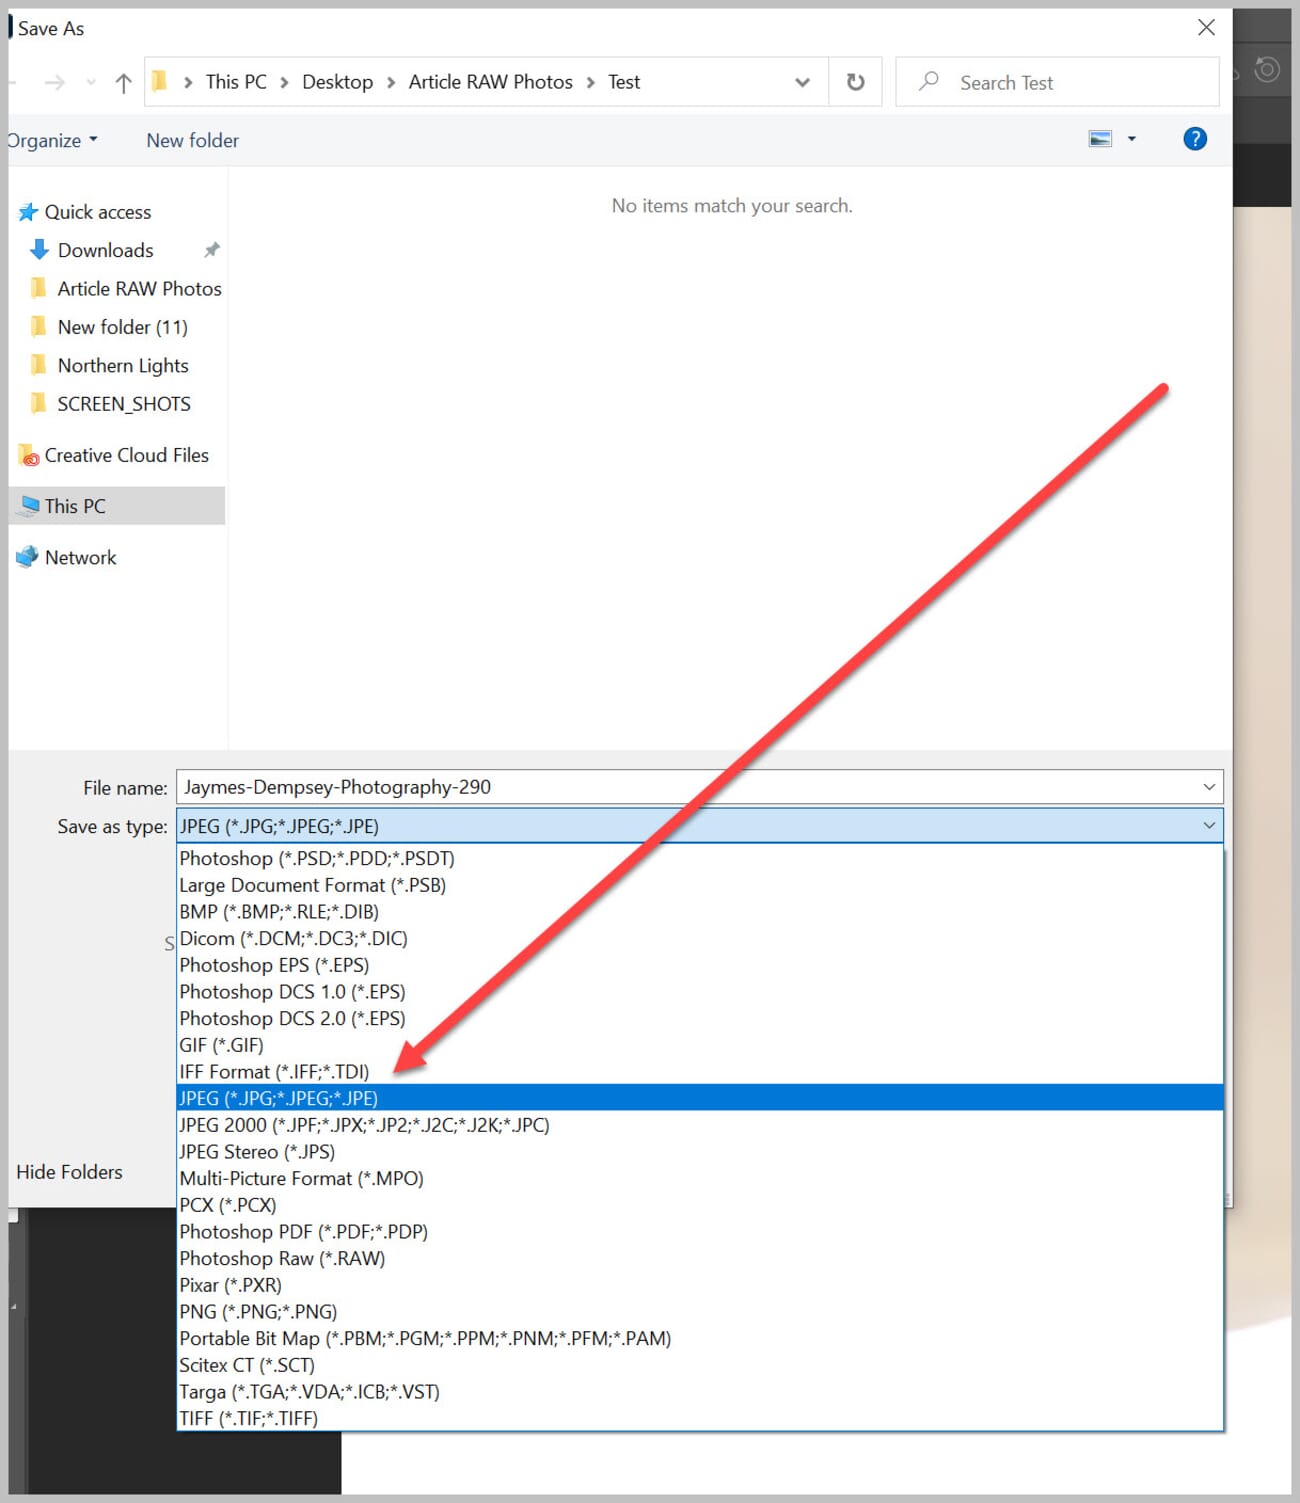
Hit Save, and you’ll see the JPEG Options dialog box:
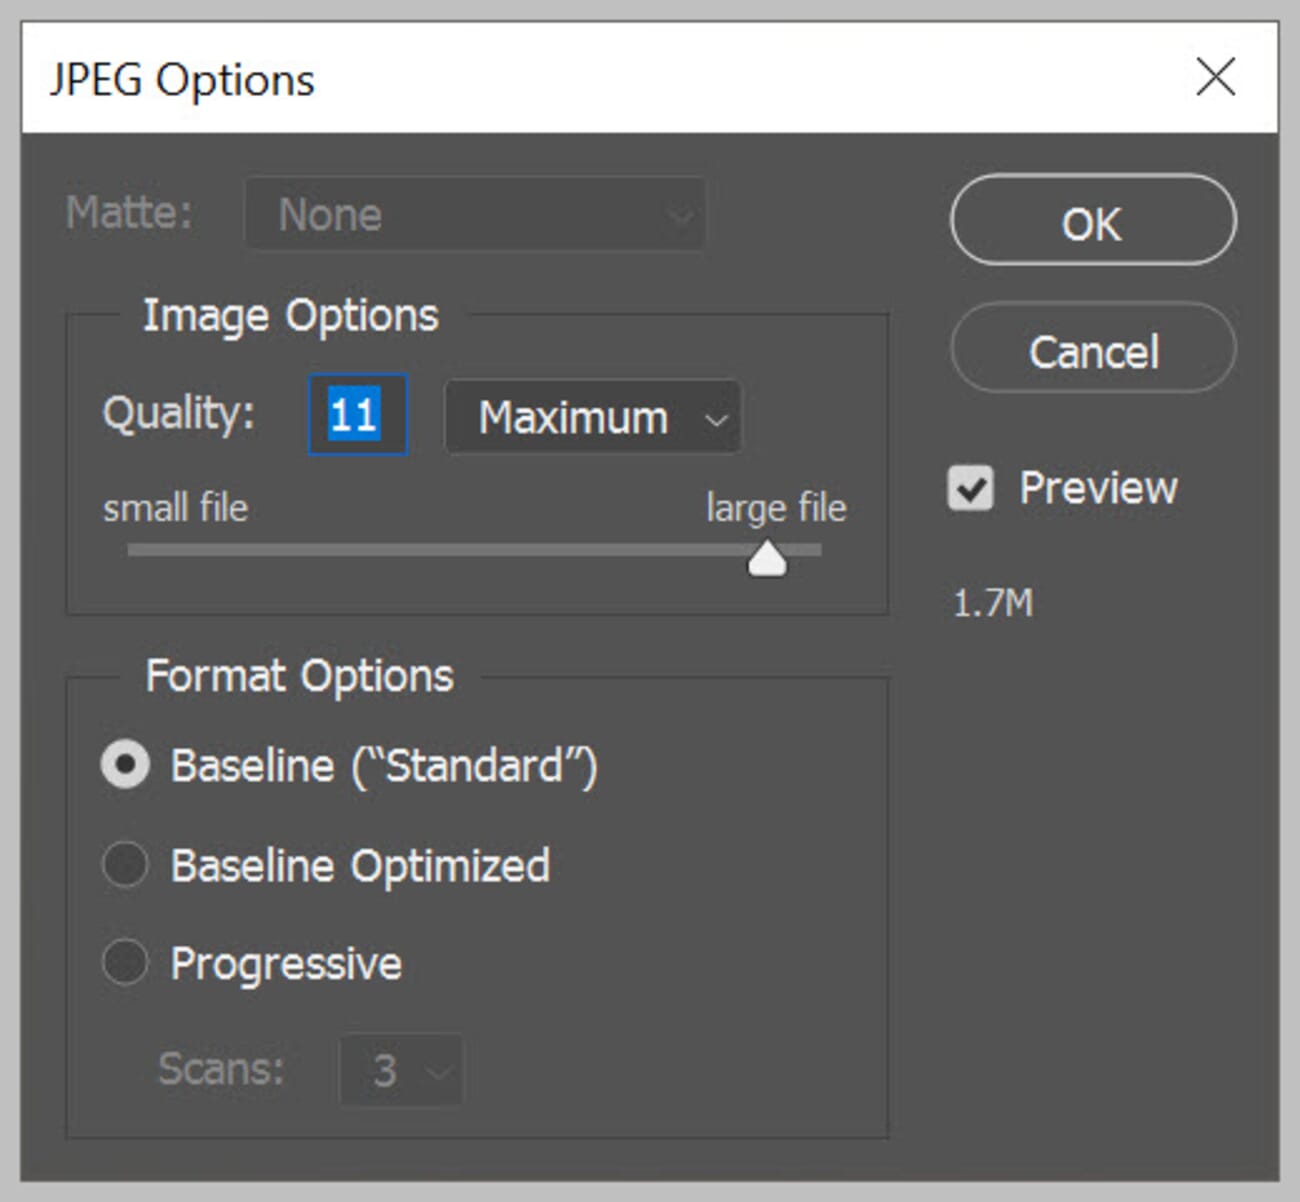
Select the image quality here; the Format Options default is a safe choice. Hit OK.
But if you want more control and resizing options, another Photoshop RAW-to-JPEG conversion method is via the File>Export As path:
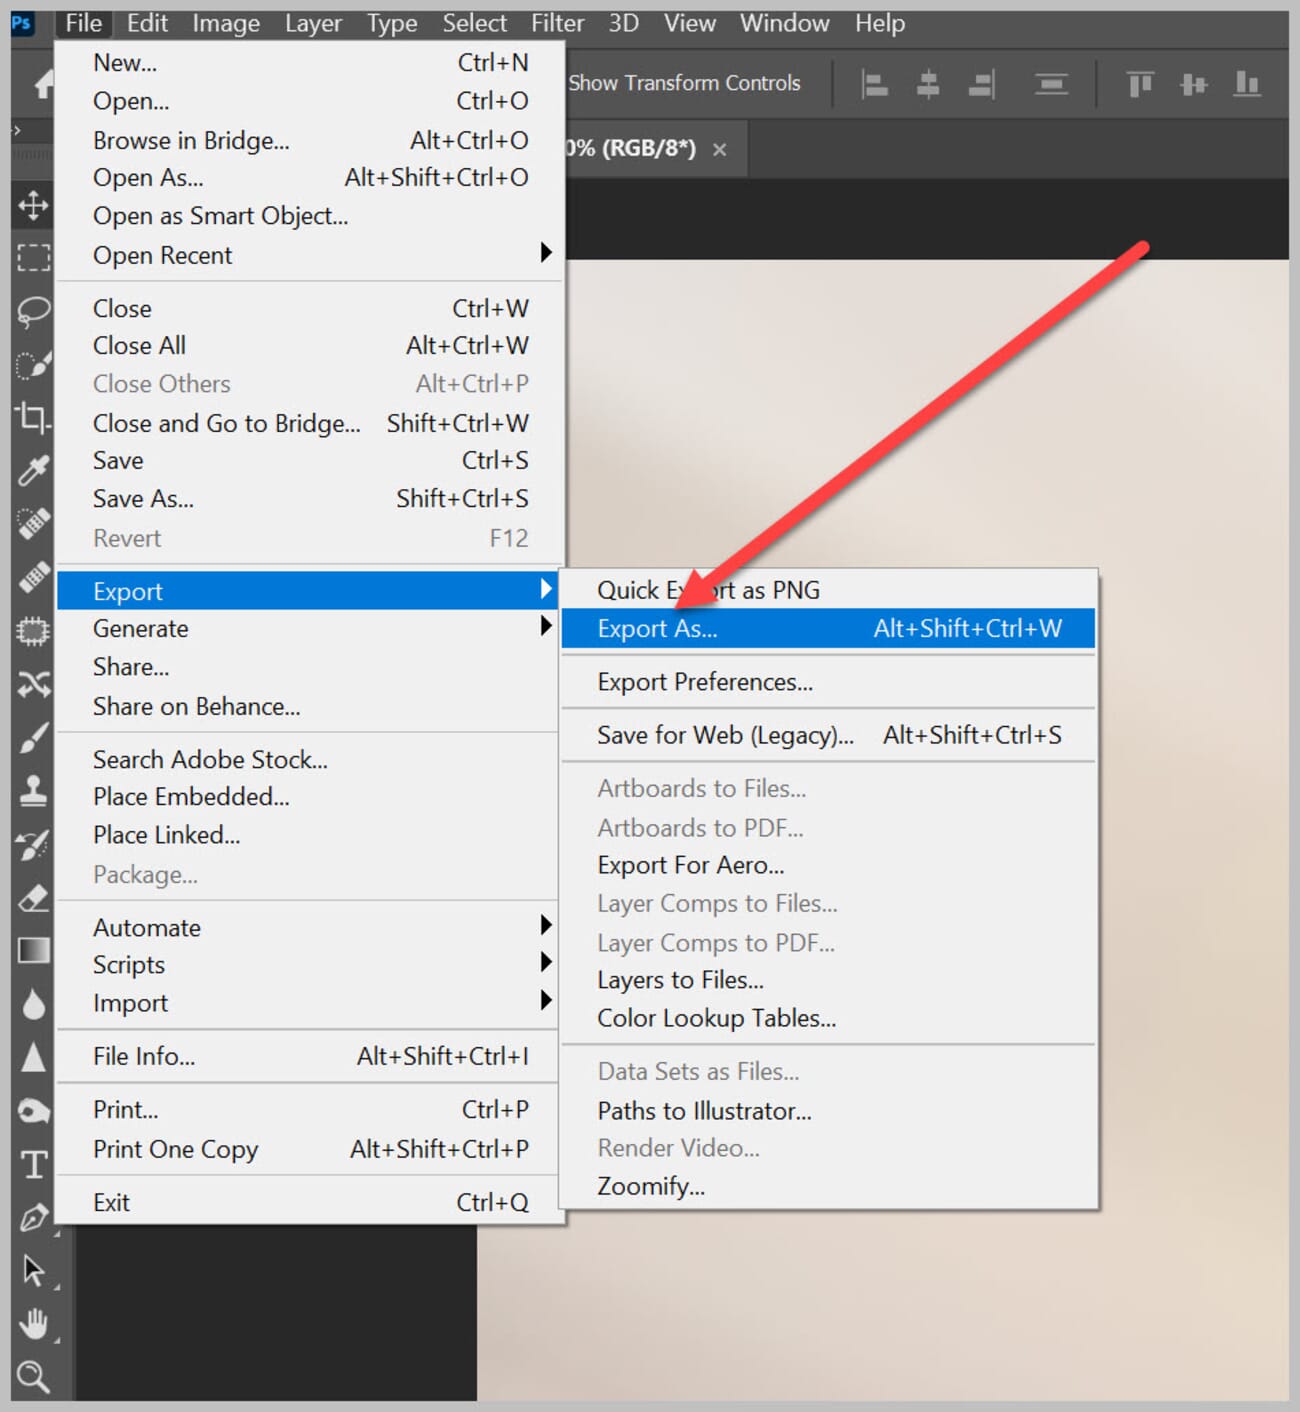
Then select JPG under File Settings>Format:
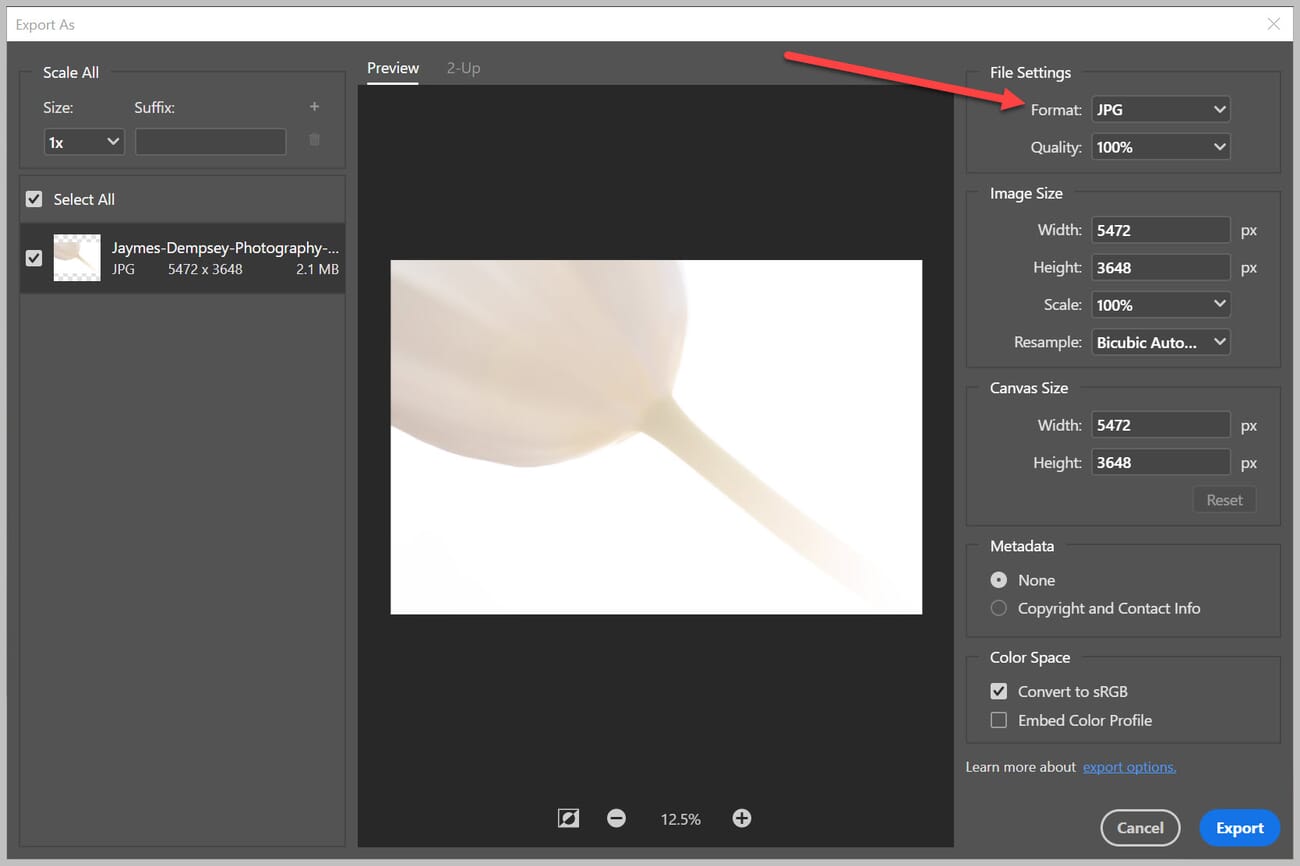
You can adjust the image size, as well as the canvas size—and you can even see a preview of your image before exporting.
Once you’re done making adjustments, tap Export, then pick your download location.
Easy, right?
A quick note on JPEG XL
ACDSee 2026 added native JPEG XL support, joining a small but growing list of editors (darktable, Krita, IrfanView) that can export to the format. JPEG XL offers roughly 20% better compression than JPEG at equivalent quality, supports HDR and lossless transcoding from existing JPEGs, and handles wide color gamuts cleanly.
The catch in April 2026: browser support is still partial. Chrome and Edge require a flag; Firefox supports it; Safari gained experimental support last year. Unless the workflow is entirely internal (archival storage, pro print output), stick with JPEG for anything that needs to display in a stranger’s browser. JPEG XL is a smart format to archive to — it’s not yet a safe format to publish.
Which method should you actually pick?
The fastest one-off conversion on a computer you already own is almost always the built-in tool — Preview on Mac, Photos on Windows 11. For a volume batch, Lightroom Classic remains the benchmark. For mobile-first shooters, the Photos app on iPhone and Lightroom Mobile on Android cover 90% of needs without opening a laptop.
When the source files are noisy or shot in tough light, adding an AI layer — DxO PureRAW, Topaz Photo AI — before JPEG export is worth the extra 10 seconds per image. And for anyone thinking ahead on format: JPEG XL is worth archiving to, not yet worth publishing to.
Whichever tool lands in your workflow, keep the RAW originals. They’re the master copy — JPEG is just the delivery format.
Frequently Asked Questions
How do I convert RAW to JPEG?
The best method depends on the operating system and the volume of files. On macOS, Preview handles single files and small batches in seconds (File → Export → JPEG). On Windows 11, the built-in Photos app works for one-off exports; Pixillion is the go-to free tool for batch work. On iPhone and Android, the Photos app and Lightroom Mobile both handle the conversion without a laptop. For high-volume professional work, Lightroom Classic, Luminar Neo, and Photoshop give the most control.
How do I convert a file to JPEG on a Mac?
The fastest method is Preview: right-click the RAW file → Open With → Preview, then File → Export, choose JPEG as the format, and save. Apple Photos is the better option for editing before export. Both are built in and both handle batch exports.
What is the fastest way to convert RAW to JPEG?
For a single image, Preview on Mac or the Photos app on Windows 11 are near-instant. For batches of hundreds, Lightroom Classic’s Export dialog is the fastest — it can parallelize exports across CPU cores. Online tools (iLoveIMG, Convertio) are fastest when factoring in “no software to install” and the batch is small (under 25 files).
How do I convert multiple images to JPEG on Mac?
In Finder, select all the RAW files → right-click → Open With → Preview. Keep everything selected inside Preview, then File → Export Selected Images. Click Options, choose JPEG as the format, adjust quality if needed, and Choose. Apple Photos handles the same job via File → Export → Export [X] Photos.
Does converting RAW to JPEG lose quality?
Yes — JPEG is a lossy format, so some quality is lost. At quality 90–100, the loss is almost always invisible to the eye, but the file size drops dramatically (a 50 MB RAW becomes a 5–10 MB JPEG). The right move is to keep the original RAW file as the archive and export JPEGs on demand. That way no information is permanently lost.
What free software can convert RAW to JPEG?
The strongest free options are darktable and RawTherapee for full RAW development with export to JPEG — both rival paid software once you learn them. On Mac, Preview and Apple Photos are free and built in. On Windows 11, the Photos app handles RAW natively (install the free Raw Image Extension from the Microsoft Store for full format coverage). For browser-based free conversion, iLoveIMG, Convertio, and Zamzar all have usable free tiers.
Sources for this guide:
Apple + Microsoft documentation
- Apple Support — Preview – Preview user guide, including File → Export to JPEG
- Apple Support — iPhone ProRAW – How ProRAW works and which iPhones support it
- Microsoft Support — Raw Image Extension – Free extension adding RAW support to Windows Photos app
Tools covered
- Adobe Lightroom Classic – Official export-to-JPEG documentation
- darktable – Open-source RAW workflow application
- RawTherapee – Free, advanced RAW processor
- DxO PureRAW – AI noise reduction and optical correction for RAW files
- Topaz Photo AI – AI denoise, sharpen, and upscale for batch RAW workflows
Format references
- JPEG XL specification – Official JPEG XL format page (ISO/IEC 18181)