Editor’s Key Takeaways: Launch Your Photography NFT Venture Today

The article by tech enthusiast Mako Young highlights NFT creation and selling, particularly for photographers. It breaks down NFTs and provides a detailed, step-by-step guide for photographers interested in entering the NFT market.
- What Are NFTs: NFTs (non-fungible tokens) are unique digital assets such as photos, GIFs, and videos. They are recorded on a blockchain to verify authenticity and ownership, making them safe from counterfeiting.
- How to Sell Photos as NFTs: The article outlines a step-by-step process:
- Select a Blockchain Platform
- Create a Cryptocurrency Wallet
- Fill Wallet with Cryptocurrency
- Select an NFT Marketplace
- Connect Wallet to Marketplace
- Create and Tokenize Your Photo
- List Your NFT on the Marketplace
Overall, the article provides a comprehensive guide to selling photo NFTs, from understanding the concept and blockchain selection to finalizing the sale.
When you buy through links on our site, we may earn a commission at no cost to you. We evaluate products independently. Commissions do not affect our evaluations.
Introduction
Web 3.0 is a technological revolution, and NFTs are a significant part of it. They’re all over the news and social media – but what actually are NFTs? And how can you sell photos as NFTs on the internet?
That’s where we come in. In this comprehensive guide, we describe everything you need to know to help you start your own photography NFT venture!
How to Sell Your Photo as NFT:
What Are NFTs?
NFTs, or non-fungible tokens, are digital assets. They can be made from photos, GIFs, illustrations, videos, audio files, and more.
Every NFT is unique and considered a collectible. Importantly, NFTs are recorded in a blockchain digital ledger to verify their authenticity and validate their exclusivity. That way, you don’t have to worry about counterfeit assets. The process also ensures ownership transparency and keeps track of the deals that an NFT goes through.
People sell NFTs using online marketplaces. Here, sellers tokenize their artwork and transfer the ownership of those tokens to buyers. All transactions use cryptocurrencies, so after a buyer transfers the price of an NFT in crypto, the blockchain records the purchase.
Buyers have the option to bid on these digital assets or negotiate an agreeable price with the seller.
How to Sell Photos as NFTs: The Step-By-Step Process
Selling photos as NFTs can be pretty intimidating, especially for beginners. Below, we break the process down into small, easily digestible steps.
Step 1: Select a Blockchain Platform
There are multiple blockchains available, and each has its own rules and regulations. So it is essential to carefully choose the platform where you’ll create and potentially sell your photography NFTs. This is crucial because you will also have to select compatible marketplaces and tools.
The most popular blockchains are:
- Ethereum
- Binance Smart Chain
- Tezos
- Polkadot
- Cosmos
- EOS
- Flow
Ethereum is currently the most popular blockchain platform for minting NFTs, which makes it the ideal choice if you want more exposure for your work.
Step 2: Create a Cryptocurrency Wallet
After choosing a blockchain, you must pick the cryptocurrency wallet that you will use to make all the necessary transactions. For the Ethereum ecosystem, you will need a wallet that supports ERC-721. Some options are MetaMask, TrustWallet, and Coinbase Wallet.
Related Posts
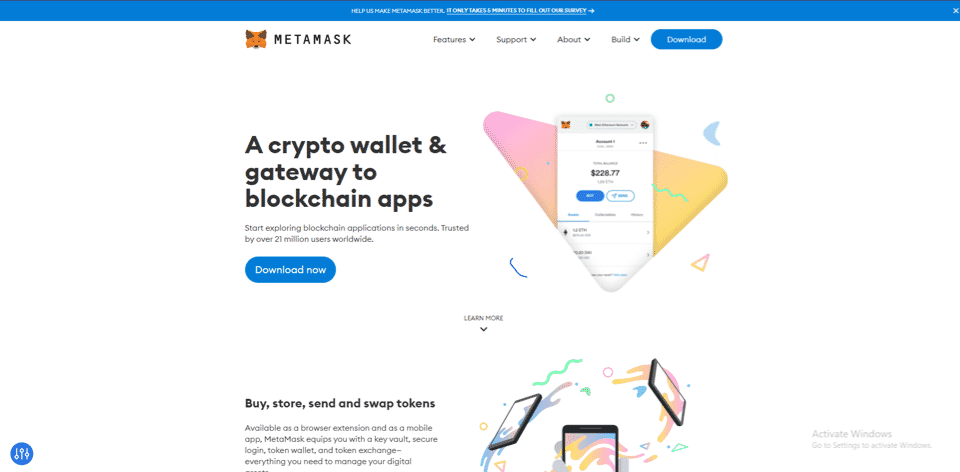
For example, we will use MetaMask to guide you through the entire process of creating a cryptocurrency wallet.
- First, go to MetaMask.io and click the Download Now button.
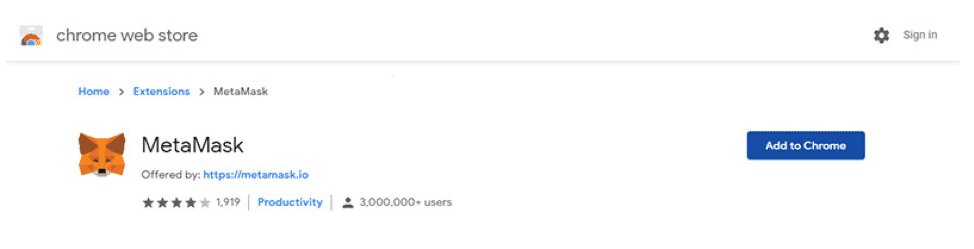
- Install MetaMask. You can do this on Chrome, iOS, or Android. You can also find the MetaMask app in both the Play Store and the App Store.

- Next, click Add to Chrome to add an extension of MetaMask to your browser.
- Click on Get Started.
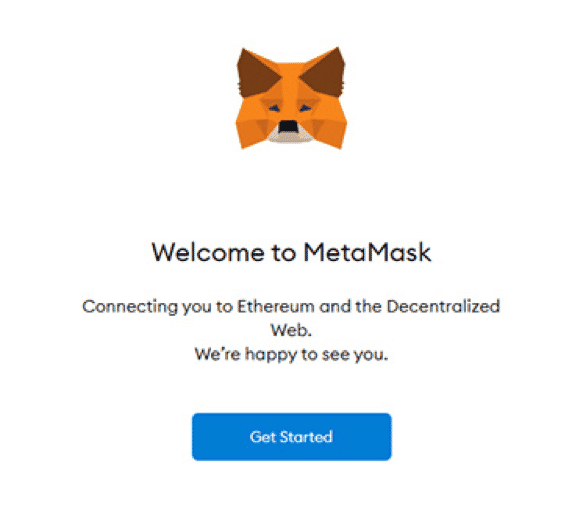
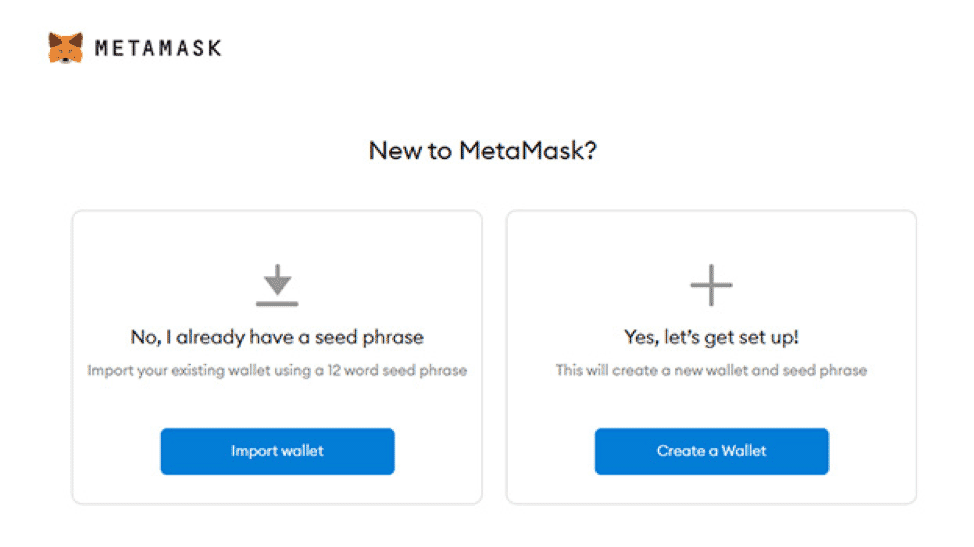
- In the next window, you’ll be given the option to either import an existing wallet or create a new one.
- If you have an existing wallet, put in your 12-word seed phrase to access it via MetaMask.
- For first-time users, create a wallet by filling in the required details. MetaMask will generate a new wallet for you with a corresponding 12-word seed phrase.
Note: The 12-word seed phrase is an authentication code exclusive to your crypto wallet. Do not lose your code. Store it someplace safe. More importantly, do not share this phrase with anyone else. Scammers and hackers are always phishing people to provide their details.
Step 3: Fill Your Wallet with Your Chosen Currency
Once your crypto wallet is ready, you will need to put some cryptocurrency in it to carry out transactions and pay the necessary fees. If you’re using the Ethereum blockchain, you need to deposit Ether into your wallet. Try depositing $100 to $150 when starting out.
You can add cryptocurrency to your wallet in multiple ways:
- Direct deposit
- By connecting an offline hardware wallet to your online wallet and making a transfer
- By transferring currency from another online wallet (if you use MetaMask, you can receive funds from Binance Wallet)
- Buying Ether directly with Wyre
Pay close attention to the price of Ether and buy when the price is relatively low. After you transfer funds to your wallet, you can choose a suitable marketplace:
Step 4: Select Your NFT Marketplace
There are quite a few NFT marketplaces for photography. Each has slightly different protocols and charges. A popular and accessible marketplace is OpenSea, which has an easy-to-use interface and smooth buying, selling, and trading processes.
Here are some other options to consider:
Note: You will need an invite from an active member or board curator to gain access to some marketplaces like Foundation and SuperRare.
Step 5: Connect Your Crypto Wallet to the Marketplace
Fill out the necessary personal details and sign into the marketplace of your choice. Once you’ve created your profile, you’ll need to add your cryptocurrency wallet. To do this with OpenSea, simply follow these steps:
- Click on the Profile Icon in the top right-hand corner.
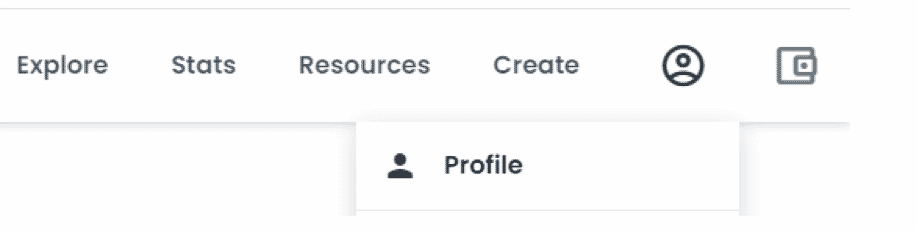
- Next, click on the wallet that you’re using.
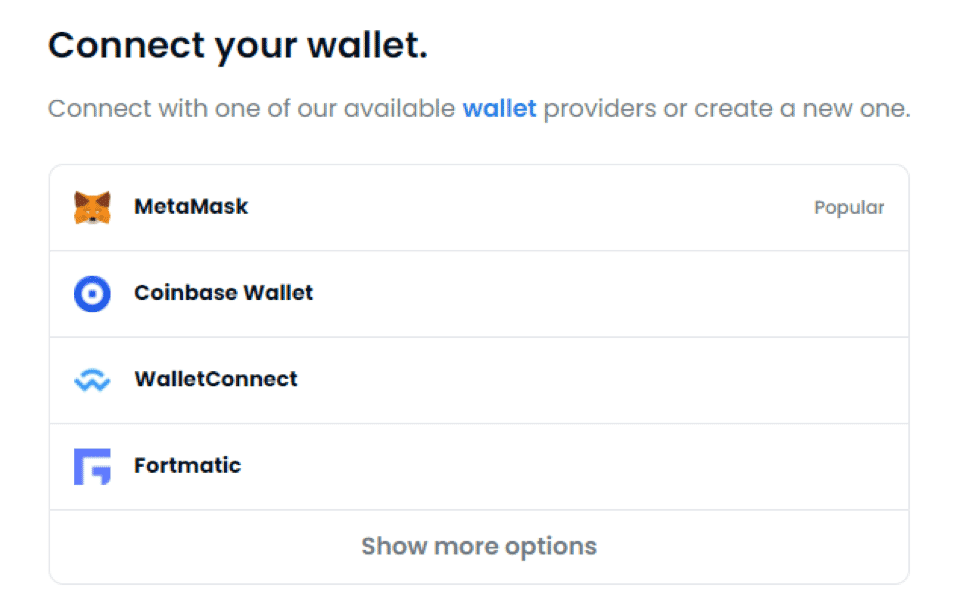
- Type in your details and your wallet will connect to your profile.
Step 6: Create Your 1/1 or Semi-Fungible Token
Make sure to connect your wallet so you can do any transactions directly through your profile, including making and listing NFTs. You can choose to create a 1/1 or a semi-fungible token.
If you’re just starting out, then we recommend creating a 1/1 token first and getting the hang of how everything works. Afterward, you can decide whether to create semi-fungible tokens, which are more complicated and have a lengthier listing process.
- Click on Create.

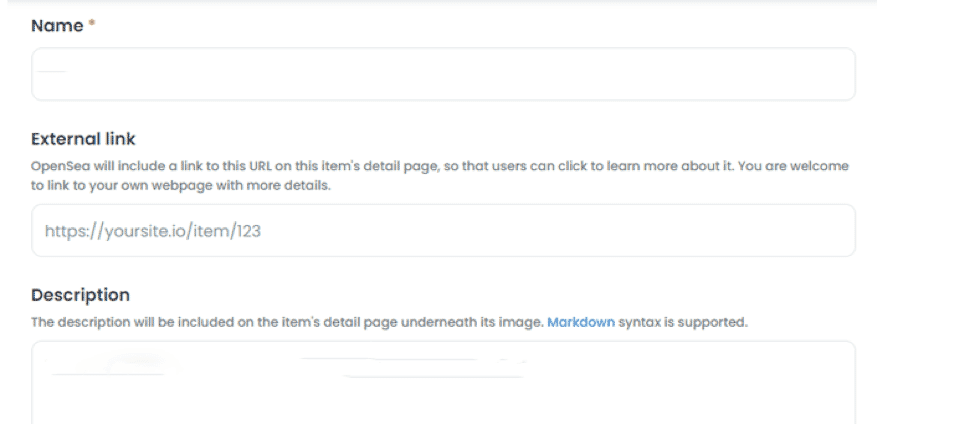
- Upload the photograph you want to tokenize. The maximum uploadable file size is 100 MB.
- Give a unique name to your NFT, then add an external link to your portfolio or website. You can also add a description of your NFT.
- Select an appropriate collection to categorize your NFTs. There are around two million collections on the marketplace, and you can always create new ones.
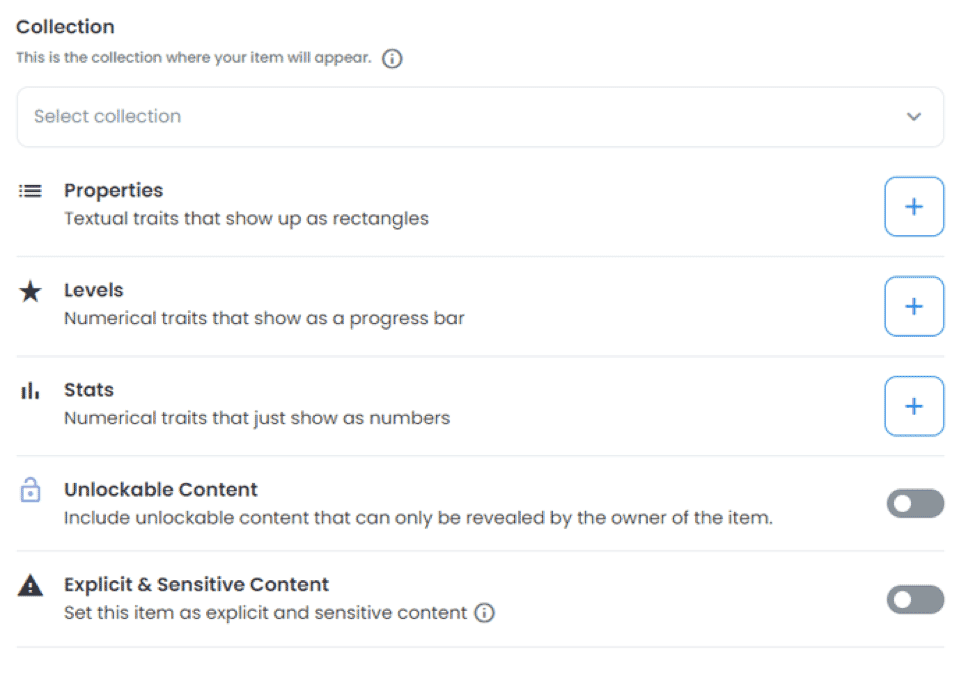
- Choose if you want the NFT to be a 1/1 or a semi-fungible token.
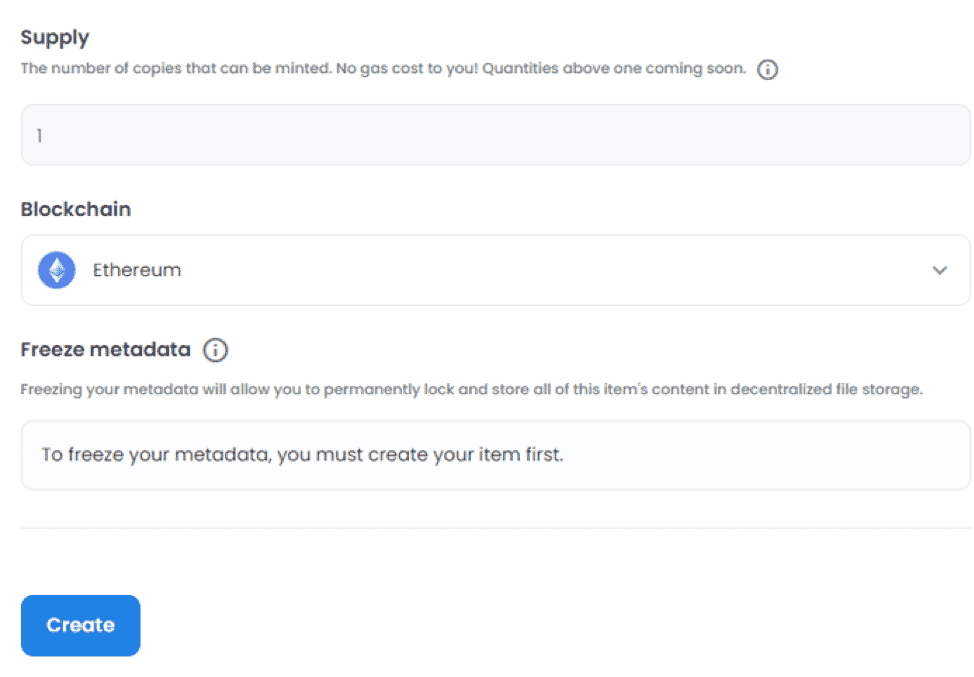
- Select the blockchain you want to use.
- If you choose Ethereum, make sure your wallet also has ETH. You’ll have to pay for minting your NFT, also known as a gas fee.
- If you want to keep your image NFT’s details in decentralized file storage, select Freeze Metadata. Since such a process will entail more computing power, it’ll cost you extra gas fees.
- Click Create to put up your NFT on the blockchain.
Step 7: List Your NFT on the Marketplace
Congratulations! You now own a digital asset ready for selling. To list your NFT on a marketplace, do the following:
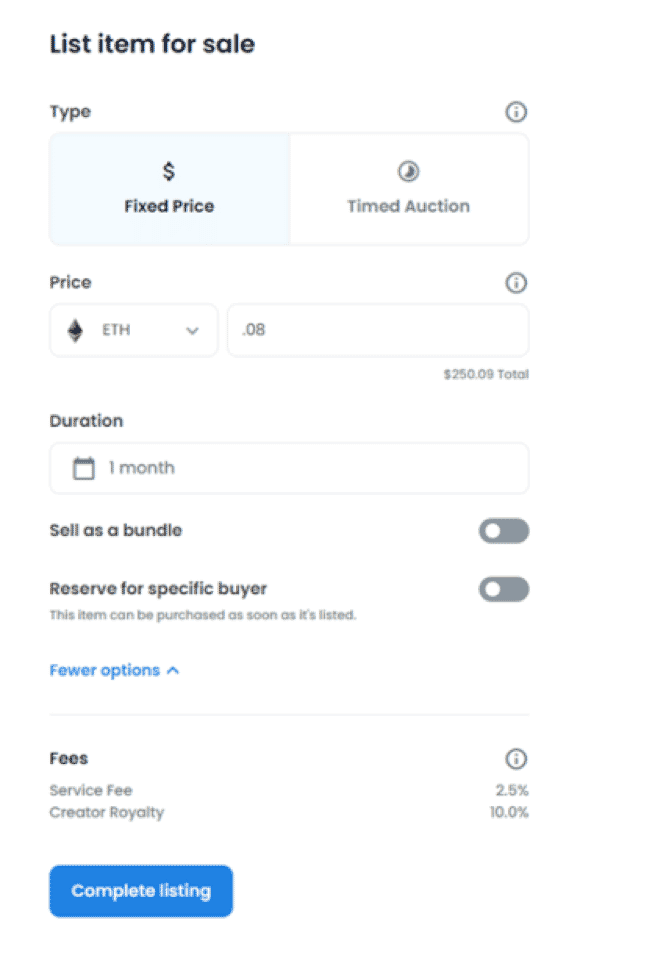
- Select Fixed Price if you want to sell your photograph NFT for a particular price. Select Timed Auction if you want people to bid for your NFT.
- Set a standard price for your token.
- Decide how long your picture will stay up for sale.
- After customizing all these metrics, click on Complete Listing.
And there you go! You just posted your photo as an NFT on the internet.
Note that you will be charged a listing fee. New sellers will have to pay two gas fees: one is for initializing your account, and the other is for minting your NFT on the blockchain ledger. Once your NFT is minted, the fees will get deducted from your wallet automatically.
How Do Ethereum Gas Fees Work?
Ethereum gas fees are the minimum charge for the computational energy required to record a transaction on the Ethereum blockchain. The gas fees are constantly changing depending on the stress experienced by the servers and the workload. As Ethereum is a digital ledger, every transaction is visible to the general public for verification.
If there are a lot of transactions taking place, the gas fees are relatively high. On the other hand, if the load on the blockchain is low, the gas fees will also be low. Gas fees are also directly affected by the value of Ether in real time. So every time you want to mint a photograph as an NFT, check the gas fees and calculate your costs before setting a price for your image.
Start Selling Your Photos!
Technology moves fast. As more and more of the world becomes digital, it’s no surprise that photographers are shifting toward selling photos as NFTs. The process of digitizing your assets and putting them up for sale provides clarity and convenience for both buyers and sellers.
So follow our instructions, create some NFTs, and have fun selling!