Do you want to use layers in Luminar, but you’re not sure how? Or are you simply looking for a way to take your photo editing to the next level, fast?
You’ve come to the right place.

Because this article is dedicated to showing you everything you need to know about Luminar layers:
What they are.
How they work.
And how you can use them for incredible results.
Let’s get started.
If you want to check out an easy-to-follow video with all the tips in this article, look no further!
This video contains everything you need to know about Luminar Layers:
Luminar Layers: How to Use Layers in Luminar 4 for Amazing Results
Layers in Luminar 4 may seem intimidating, but they are actually effortless! Discover everything you need to know about using layers to create beautiful edits.
What Are Layers in Luminar?
Layers are a way of creating separate edits within the same file.
When you create a new layer, it’s as if you’ve put a piece of paper over your original photo, one that you can adjust however you like. You can ultimately blend the new layer with the original photo, but you don’t have to–you can choose to delete the layer, in the end.
Related Post: Luminar Review
Here I have an original flower photo:

Now I can add an adjustment layer, which I use to crank up the exposure:

And I add another adjustment layer, which I use to add contrast:

And I add a third layer, this one of another flower image, which I can blend with the original:

Then I can delete some of the layers, leaving my preferred layers behind.
What makes this so useful?
For one, it allows you to do discrete layer editing, where you create different edits in different layers. That way, if you don’t like one set of edits, you can delete the layer, without affecting the other layers or the original photo.
Layer editing also allows for complex masking functions, where you only blend part of the layer with the original photo. So you can use masking to ensure that only your main subject is affected by a sharpening layer, for instance. This is an extremely easy way to do local editing adjustments in Luminar.
Finally, layer editing allows for careful use of blend modes–where you combine layers with the original in unique ways, which can result in a higher-contrast photo, a darker photo, a lighter photo, and more.
Luminar Layers: The Basics
Now let’s take a look at how layers work in Luminar.
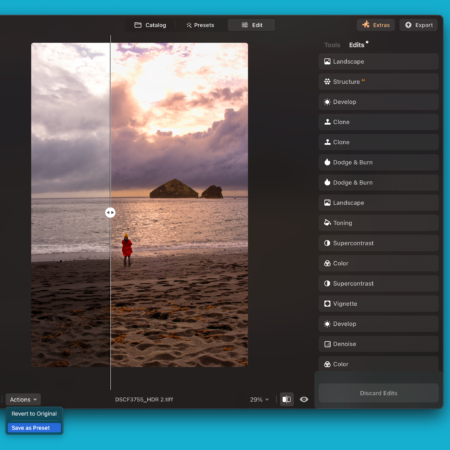
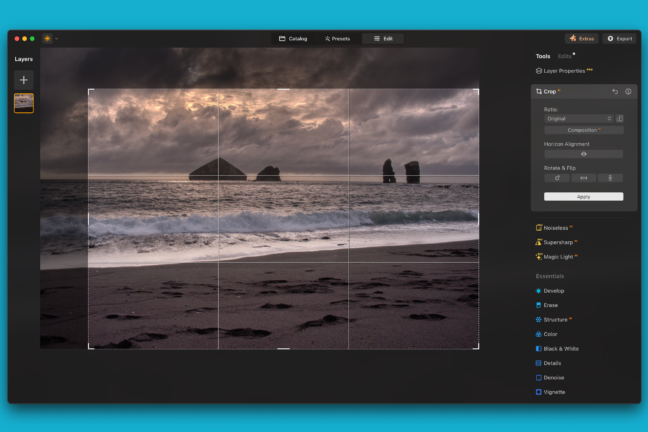
Start by entering Edit mode and navigate to the Layer tab:

Notice how sparse the workspace is? It’s good for keeping track of layers without any distractions.
Go ahead and click on the Plus icon:

Then take note of the dropdown menu. You’re given the option to create three different possible layers:
An adjustment layer.
An image layer.
Or a stamped layer.
Let’s take a look at each in turn:
Adjustment Layers
Adjustment layers are meant for adding edits to your images.
I’m talking about things like exposure adjustments, contrast adjustments, color adjustments, split toning, and more.
When working with an adjustment layer, make sure that you’ve selected the layer:

If you’re unsure whether the right layer is selected, look at the top of each panel for the layer name:

Then make your preferred adjustments, and they’ll be incorporated within the new layer.
You can change the strength of the layer adjustments:

You’re also able to rename layers, by accessing the layer dropdown and selecting Rename Layer:

This allows you to name your layers based on a useful identifier (e.g., for an exposure adjustment layer you might use the name Exposure Layer).
You can also mask new layers by selecting the Edit Mask button and choosing one of the masking options:

These masking tools will allow you to selectively apply edits to specific areas. For instance, the Brush masking tool will allow you to paint adjustments onto your image, while the Gradient mask will let you apply a gradient to your image, altering a part of your photo. The Luminosity mask will allow you to selectively edit areas of your image based on their brightness levels.
Related Tutorials
Finally, you can blend the layer with the layers below it by selecting different Blend options:

While I’ll explain blend modes in great detail later, just know that they offer different ways of mixing a layer with the original image (and with other layers). So one blend mode might combine a layer with the original image to create a darker image, one blend mode might combine layers to make a lighter image, and another blend mode might only use the color from the layer but the saturation from the original image to create something entirely unique.
Note that adjustment layers are the most commonly used layers, and they may be the only layers you use if you don’t plan to do any image compositing.
However, if you want to blend multiple images together, you’ll want to create an image layer:
Image Layers
Image layers are layers that take the form of images. In other words, an image layer is a second image stacked on top of the original. This can be useful for compositing images, when you take a part of one photo and incorporate it into another for artistic effect.
To create an image layer, hit the Plus icon, then select New Image Layer.
Related Posts

A Browse window will open, giving you the opportunity to select an image you’d like to use as a layer:

Select the relevant image, and it will open as a new layer in the Layer tab.
You’ll then be given the option to change the layer opacity, use layer masking tools, blend the layer with layers below it, or transform the layer.
In particular, I’d like to draw your attention to two useful image layer tools:
Layer Transform and layer Blend modes.
Layer Transform allows you to make physical adjustments to your layer. Click on the Layer Transform button, and the Transform dialog will open:

Here, you can crop the layer, resize the layer, rotate the layer, or flip the layer horizontally:

All these transformation options are useful for working with image composites. You might crop an image layer to ensure only part of the second image is blended with the original, or you might resize the layer to make it more compatible with the underlying image.
Layer blend options are equally useful, giving you various ways of combining your image layer with the original photo.
For instance, the Overlay blend mode will result in a final image with enhanced contrast, while the Multiply blend mode will apply a powerful darkening algorithm to your image blending.
While it’ll take some time to familiarize yourself with all the Luminar blend modes, note that you don’t have to be a blend mode expert to work with them–instead, feel free to experiment with different options and see how things turn out!
Stamped Layers
A Luminar stamped layer is simply a new layer that includes all the old layers within.
In other words:
If your photo has three layers, the stamped layer will take those three layers, merge them together, and name it Stamped Layer.
To create a stamped layer, click on the Plus icon, then select Create Stamped Layer:

Your stamped layer will appear in the layers panel:

As with image layers and adjustment layers, stamped layers can be blended via the Blend mode options.
And you can transform stamped layers via the Layer Transform option.
You can even apply masks, selectively painting the stamped layer onto the layers below it via the Edit Mask toolset:

Layer Blend Modes
Now that you know all about the types of layers in Luminar, let’s take a closer look at the different layer blend modes, and how they affect your images.
Note that every blend mode works on the selected layer to merge it with all layers below–but no layers above. So if you have five layers and apply a Blend option to Layer 3, it’ll only blend with Layer 2 and Layer 1 beneath it.
Make sense?
Also, before we get started with more specific discussion of the blend modes, I’d like to establish some naming conventions:
I’m going to refer to the original (bottom) layer as the background layer.
And I’m going to refer to the added layer as the top layer.
Now, the Normal blend mode gives complete priority to the top layer.
So when you use the Normal layer, the top layer will appear, while the bottom layer will stay invisible beneath it–unless you reduce the layer opacity or mask out the top layer.
This is the default blend mode to use when making basic adjustments. Unlike standard editing, it allows you to apply alterations to your image safely–where, if you don’t like a set of alterations, you can delete the layer and start over, without having to redo your entire photo editing process or selectively drop sliders back to zero.
You might also choose to use this blend mode if you’re looking to selectively apply adjustments to your image via the masking tools. Create an adjustment layer, make your adjustments, and then use the masking tools for a carefully-edited final product.
The Darken blend mode isn’t at all like the Normal blend mode.
Instead of giving the top layer priority, the Darken layer prioritizes darker pixels over lighter pixels. So it goes through both the top and the background layer, and it makes sure the darker pixels show through, effectively darkening your image.
You might use the Darken blend mode if you’re combining a light textured background with a high-key (i.e., white background) portrait.
By selecting the Darken blend mode, you can ensure that the textured background comes through around the portrait subject, but doesn’t affect the portrait subject at all.
Here’s the Darken blend mode, applied to several blended flower images:

The Lighten blend mode is like the Darken blend mode in reverse.
Because rather than choose the darker pixels, the Lighten blend mode selects the lighter pixels and allows them to shine through.
So black backgrounds tend to disappear when you apply the Lighten blend mode, letting brighter features reveal themselves.
On my image of flowers, the result is strange–but if you look carefully at the two images, you’ll see that only the lightest pixels shine through:

Note that Luminar also offers two stronger methods of lightening and darkening photos:
The Multiply blend mode and the Screen blend mode.
With Multiply, you end up with a darker image, because Luminar literally multiplies the background pixels with the top pixels, creating a dark result (though areas that were completely white in the top image with simply be replaced with the darker values in the bottom image, and vice versa).
And with Screen, you end up with a brighter image, because Luminar inverts and multiplies the pixels to enhance light values. Though black areas in one layer will simply be replaced by the lighter areas in the other layer.
A few other blend modes worth paying attention to are the Overlay, Soft Light, and Hard Light blend modes, which are commonly used and will blend layers to enhance the contrast with various levels of strength.
Look at the difference between an Overlay blend:

A Soft Light blend:

And a Hard Light blend:

Finally, the Color blend mode will take the color from the top layer and blend it with the tones of the underlying layer. This is useful for quickly changing the colors of underlying objects.
And that’s it! While there are a few more Luminar blend modes, they’re much less frequently used. I recommend you focus on working with the blend modes that I’ve highlighted here, and only move on to the remaining options if you find that the common blend modes aren’t enough.
Masking Layers in Luminar
When it comes to working with layers in Luminar, one thing I absolutely recommend you master is the Edit Mask tools.

As discussed above, masking tools allow you to selectively apply edits to your bottom layer.
Now, there are four types of layer masking tools in Luminar.
First, the Brush allows you to paint adjustments from the top layer onto the background layer. This is useful for quickly brightening up specific objects, darkening distracting elements, and more.

Second, the Radial mask allows you to apply a circle (or oval) to your photo, and make edits within its perimeter:

This is useful for brightening or darkening circular subjects. Note that you can also invert the Radial mask so that the edits apply outside the circle, which allows you to create a customizable vignette.
Next, the Gradient Mask allows you to apply edits in a gradient to your photo. So you could lighten the bottom of the photo but leave the top alone (if the foreground of a landscape image were too dark, for instance). You could also darken the sky in a photo, warm it up, add a bit of contrast, and more.

Note that you can change the width of the gradient, the position, and the rotation–so that you’re able to shape the way the gradient affects your photo (for all sorts of creative looks).
Finally, the Luminosity Mask is a more advanced masking option offered by Luminar.

A luminosity mask causes the top layer to be applied depending on the brightness of different pixels in the bottom layer. In other words, by selecting the Luminosity Mask option, you hide the darker areas of the background layer, while blending the top layer with the lighter background areas only (though you can invert the layer if you’d like to swap out the affected areas by selecting the three dots, tapping Mask, and then Invert).
Note that Luminosity masks are useful for adjusting landscape images, because you can selectively apply edits to the brighter sky while leaving the darker foreground alone.
How to Use Layers in Luminar 4: Conclusion
Now that you’ve finished this article, you should be an expert in Luminar layers.
In fact, you can make all sorts of helpful changes to your images–with the adjustment layer, image layer, and powerful masking options.
So open up some images and start editing. Familiarize yourself with the Layers tab.
And you’ll be creating masterpieces in no time at all!
Related Posts
What are layers in Luminar?
Layers are a photo editing function that allow you to apply edits on top of an original image–without really modifying the underlying photo. With layers, you can make a series of edits using a layer, then delete the layer if you decide you’re better off without it. You can also use layers for more complex editing, such as masking (when you selectively adjust aspects of an image), as well as blending (when you combine the top layer with the background layer in different ways).
What is layer masking in Luminar?
Layer masking is one of the most important concepts to know when working with layers. Masking is when you selectively hide parts of a layer in order to blend bits and pieces with the underlying photo. For instance, you might want to sharpen a face but not the background, so you could use a mask to selectively apply the sharpening to only the face. Or you might want to darken the background but not your main subject, which you can easily do with the Radial mask in Luminar.
What is the Luminar Layer Transform function?
The Layer Transform function in Luminar allows you to modify layers by cropping, resizing, flipping (horizontally or vertically), and more. This is especially useful when you’re compositing images but don’t need one of the images in full, or when two images have different dimensions but need to be combined.
What can I do with layers in Luminar?
Layers in Luminar are good for many things. You can use them to safely apply adjustments to your images (so that you can quickly delete sets of edits). You can also use them to selectively adjust your images via the masking tools. Or you can use them to create image composites for a more artistic look.
What are the different types of layers in Luminar?
Luminar offers three basic layer types: image layers, stamped layers, and adjustment layers. Adjustment layers are the most common, because they allow you to apply sets of adjustments to your photos and selectively apply effects via layer masks. But stamped layers take all your current layers, duplicate them, and turn them into a single combined layer, and image layers let you combine multiple images into a single image file.
Great article! Actually had some good substance, thanks for taking the time to write it out.