
- Luminar Neo is a powerful AI-driven photo editor for Mac and Windows — available as a one-time purchase starting at $119
- Fall 2025 brought Photo Restoration, AI Assistant, and Light Depth — all genuinely impressive additions
- Works standalone AND as a plugin for Lightroom Classic and Photoshop
- New Luminar Mobile app enables cross-device editing (mobile → desktop)
- Best suited for enthusiast and semi-pro photographers who want AI-powered editing without a subscription
- Use coupon code PHOTOWORKOUT for $10 off any plan

When you buy through links on our site, we may earn a commission at no cost to you. We evaluate products independently. Commissions do not affect our evaluations.
Introduction
Luminar Neo’s Spring 2026 update (v1.27, the “Enhanced Portrait Photography” release) quietly turns Skylum’s flagship into a credible one-stop portrait editor. The headline additions — Bokeh AI for objects, an expanded Skin AI panel, a smarter dark-circle remover, and the long-overdue Mask Feather control — deliver the most genuinely useful retouching toolkit Luminar has ever shipped, and the results mostly avoid the waxy, over-processed look these tools are notorious for. We dig into each new feature below with eight draggable before/after sliders, then cover the broader app: workflow, pricing, and how it stacks up against the alternatives.
Since its launch, Luminar Neo has evolved into a comprehensive editing and organizing platform. The Fall 2025 update introduced Photo Restoration, an AI Assistant, and Light Depth — cementing its position as one of the most feature-rich AI photo editing tools available.
This review covers everything photographers need to know: features, performance, pricing, and how Luminar Neo compares to the competition.

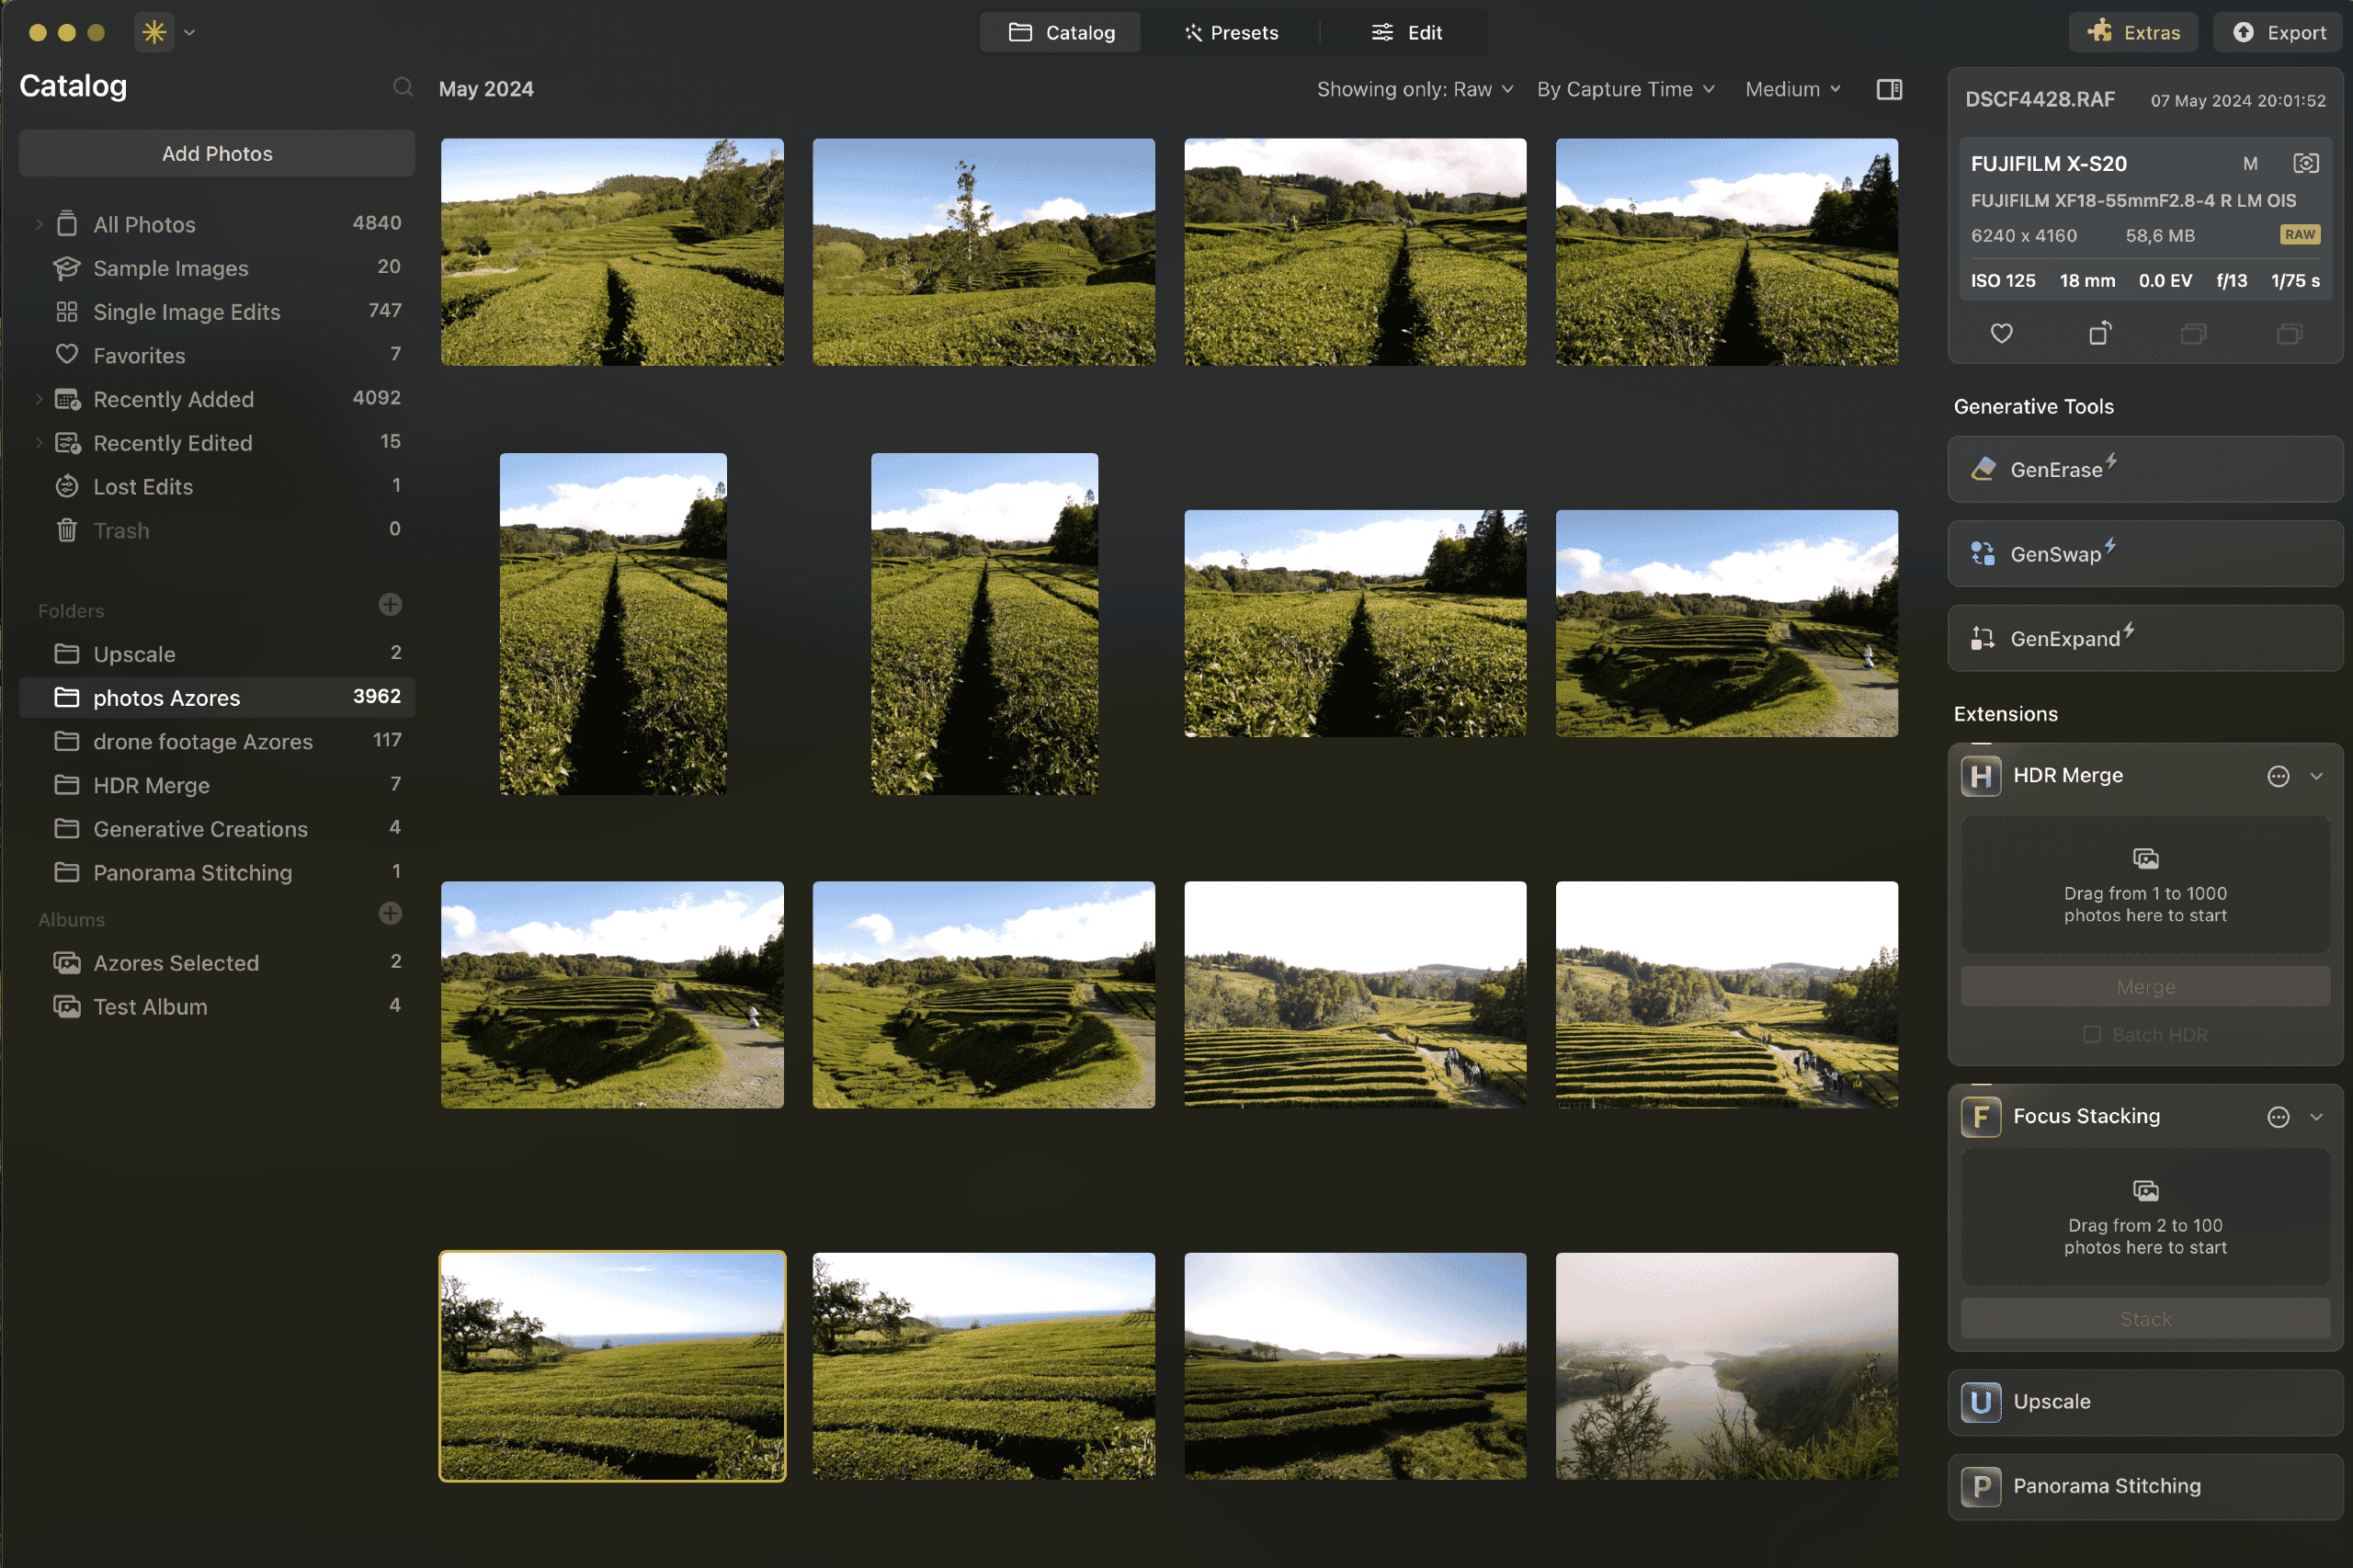
Luminar Neo is a powerful AI-driven photo editing and organizing application for Windows and Mac. With built-in pro tools like HDR Merge, Focus Stacking, Panorama Stitching, and AI-powered features for sky replacement, object removal, and photo restoration — it offers exceptional value as a one-time purchase alternative to Adobe’s subscription model.
From $119 (one-time)- Exceptional ease of use with AI-powered tools
- All-in-one: editing, organizing, HDR, focus stacking, panoramas
- One-time purchase — no subscription required
- Photo Restoration and Light Depth are genuinely impressive
- Works standalone and as Lightroom/Photoshop plugin
- Generative AI tools require annual renewal after first year
- Cross-device sync currently one-way only (mobile → desktop)
- Occasional performance lag with very large files on older hardware
Spring 2026 Update: Portrait Retouching Comes of Age
Skylum has a habit of shipping eye-catching AI features and letting the rough edges show. Its Spring 2026 update for Luminar Neo — version 1.27, branded the “Enhanced Portrait Photography” upgrade — is a more disciplined effort. The headline additions are all about faces and skin: a smarter Bokeh AI that now blurs backgrounds behind objects as well as people, an expanded Skin AI with one-click blemish, shine and smoothing controls, an improved dark-circle remover inside Face AI, and a long-overdue Mask Feather tool. Tying it together is a new cross-device idea: start an edit on your phone, finish it on the desktop.
Below are eight before/after sliders drawn from Skylum’s sample and press image set. Drag the divider on each one to compare untouched vs. processed. They’re a fair look at what the tools can do in favourable conditions — not a substitute for testing your own files.
Bokeh AI: fake depth-of-field that finally convinces
Bokeh AI is the rebuilt version of what used to be called Portrait Bokeh. Adjust a single Blur slider and the tool auto-generates a depth mask; Focus Distance moves the plane of focus, and Bokeh Shape changes the shape of the out-of-focus highlights. The biggest change this release is scope — it now works on objects and scenes, not only people.
Bokeh AI on a non-portrait subject
Synthetic highlights at night
Portrait separation
Across these, Bokeh AI is impressive when the subject has a clean silhouette and falls off in depth gradually. It is least convincing on wispy detail — flyaway hair, thin branches — where the auto-mask can blur something that should stay sharp, or vice versa. The good news is the mask is editable, so you’re not stuck with the first guess. For social and web output it’s genuinely useful; for large prints, plan to refine the mask by hand.
Skin AI: from two sliders to a full retouching panel
This is the upgrade most people will actually use day to day. Skin AI used to be a two-slider affair (Amount and Shine Removal). It now covers Face Skin Smoothing, Body Smoothing and a reworked Shine Removal, plus an all-new Blemish Removal tool. Skylum says corrections are applied through intelligent masking to avoid the over-smoothed look — and to its credit, that mostly holds up.
Blemish Removal
Shine Removal
Face Skin Smoothing
Body Smoothing
Taken together, Skin AI is the heart of this update. The masking is smart enough that you can be heavy-handed with the sliders and still get away with it on small output. The one caution: like all such tools, it rewards a light touch, and there’s no substitute for backing off the smoothing once the blemishes are gone.
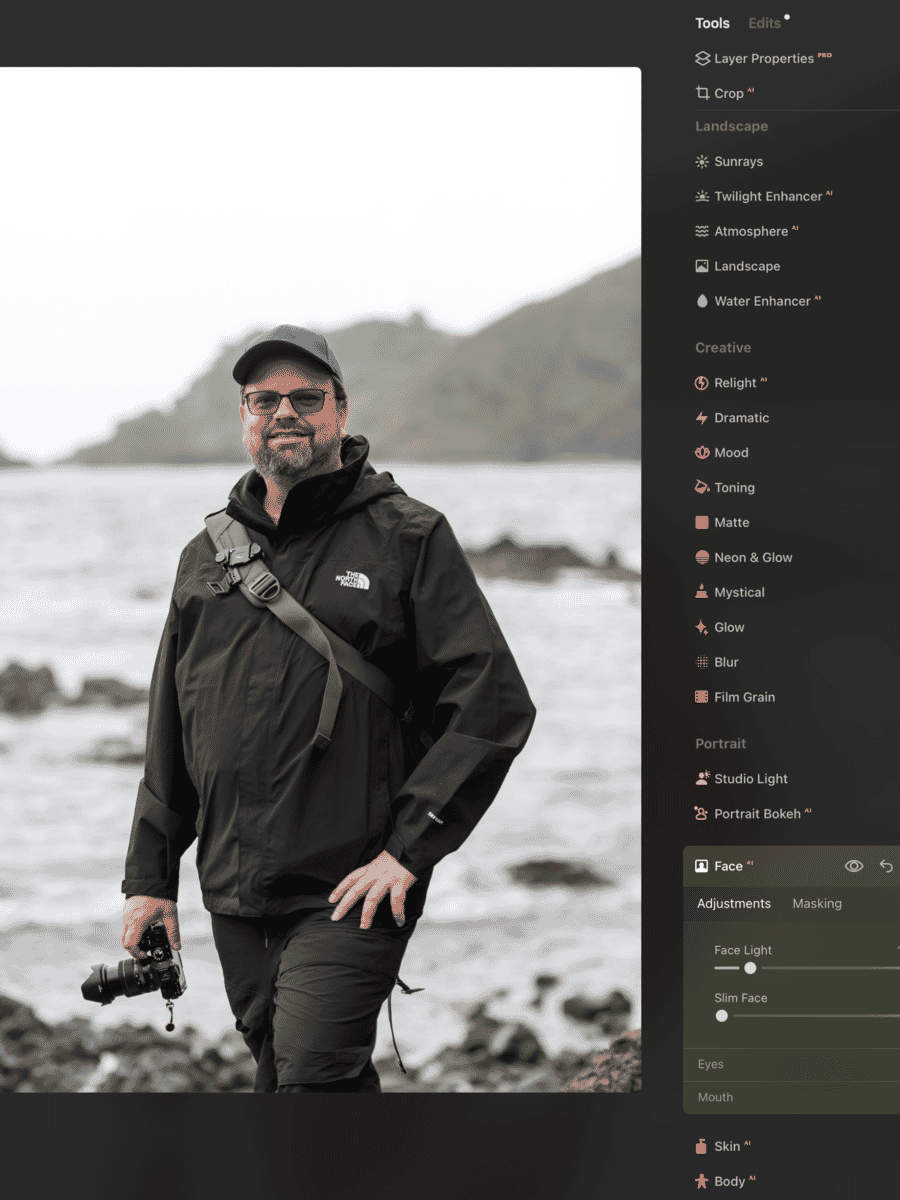
Face AI: a dark-circle remover that actually looks real
Face AI uses facial recognition to map eyes, lips and contours — and, usefully, it keeps working on three-quarter and side-on portraits where some competitors give up. The improvement this release is its Dark Circles Removal, and it’s the kind of feature that’s easy to overdo and hard to get right.
Dark Circles Removal
This is the most “set-and-forget” tool in the bunch. For headshots, family photos and events — anywhere tired eyes are the difference between a keeper and a delete — it’s a real time-saver, and it resists the raccoon-in-reverse look that plagues manual dodging.
Mask Feather: soft edges, at last
Less glamorous than the AI features but arguably more important to careful editors, Mask Feather softens the edge of any mask so a local adjustment blends instead of stopping at a hard line. A Feather slider controls the softness and Shift Edge grows or shrinks the boundary — together they remove the tell-tale halo that used to give away selective edits in Luminar.
Phone-to-desktop editing — the big idea, half-built
The release’s connecting theme is a cross-device workflow: edit a shot in the Luminar mobile app, and it syncs through Luminar’s cloud catalog (Luminar Spaces) to your desktop a minute or two later to finish. Use the same Skylum account on both devices and it just appears.
It’s a great pitch for photographers who cull and rough-edit on the go. The catch is in the fine print: sync currently runs one way only — from mobile to desktop. Skylum says two-way editing is in active development, but as it stands you can’t push a desktop edit back to your phone. That makes this a “start on mobile, finish on desktop” tool rather than the seamless round-trip the tagline implies. Promising, but treat it as a 1.0.
Spring 2026 verdict at a glance
- Skin AI’s blemish, shine and smoothing tools look natural and preserve texture.
- Bokeh AI now handles objects and night scenes, not just portraits.
- Dark-circle removal is fast and convincingly subtle.
- Mask Feather finally fixes hard-edged local adjustments.
- Caveats: cross-device sync is one-way (phone → desktop only); a launch known-issues list touches several of the new features. Hold a catalog backup before committing a busy shoot.
Key Features Overview
Luminar Neo packs an enormous feature set. Here’s a categorized breakdown of what the software offers:
AI-Powered Editing Tools
- SkyAI — Automatically detects and replaces skies with realistic composites
- FaceAI & SkinAI — Portrait retouching with automatic face detection, skin smoothing, and feature enhancement
- BodyAI — Subtle body proportions adjustments
- AtmosphereAI — Adds fog, mist, or haze effects with depth-aware placement
- Background RemovalAI — One-click background removal for portraits and objects
- SupersharpAI — Intelligent sharpening that distinguishes detail from noise
- NoiselessAI — Advanced noise reduction preserving fine detail
- UpscaleAI — Enlarge images while maintaining quality
Generative AI Tools
- GenErase — Remove unwanted objects with AI-generated fill
- GenExpand — Extend image boundaries using generative AI
- GenSwap — Replace selected areas with AI-generated content based on text prompts
Note: Generative tools are included for one year from purchase and require renewal thereafter.
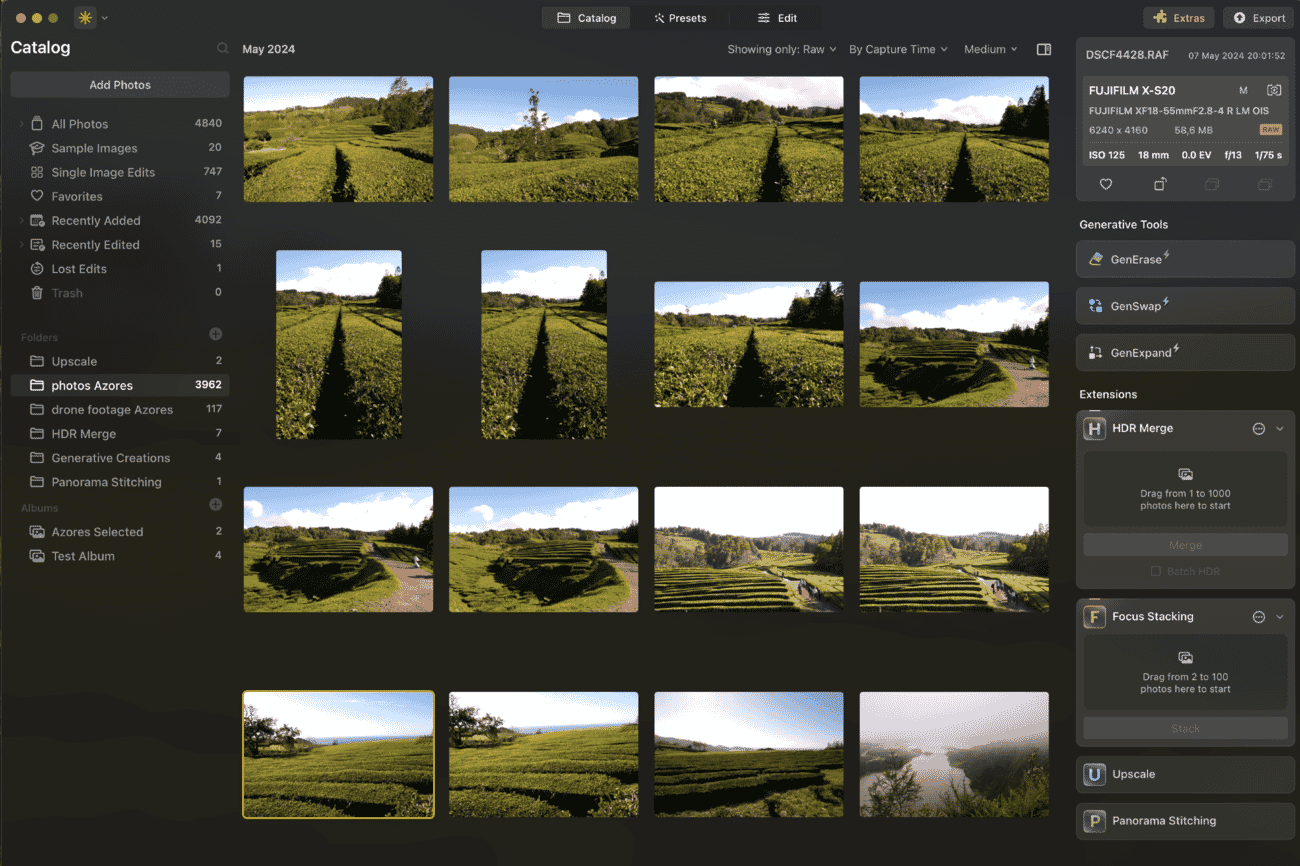
Photo Organization
Luminar Neo includes a built-in Catalog for organizing photos. It supports folder-based browsing, albums, smart filters, and star ratings. While not as deep as Lightroom’s library module, it’s more than adequate for most workflows.
Ease of Use & Interface
Luminar Neo’s interface is one of its strongest selling points. The layout is clean and intuitive, with tools organized into logical categories along the right panel. Even photographers with no prior editing experience can produce polished results within minutes.
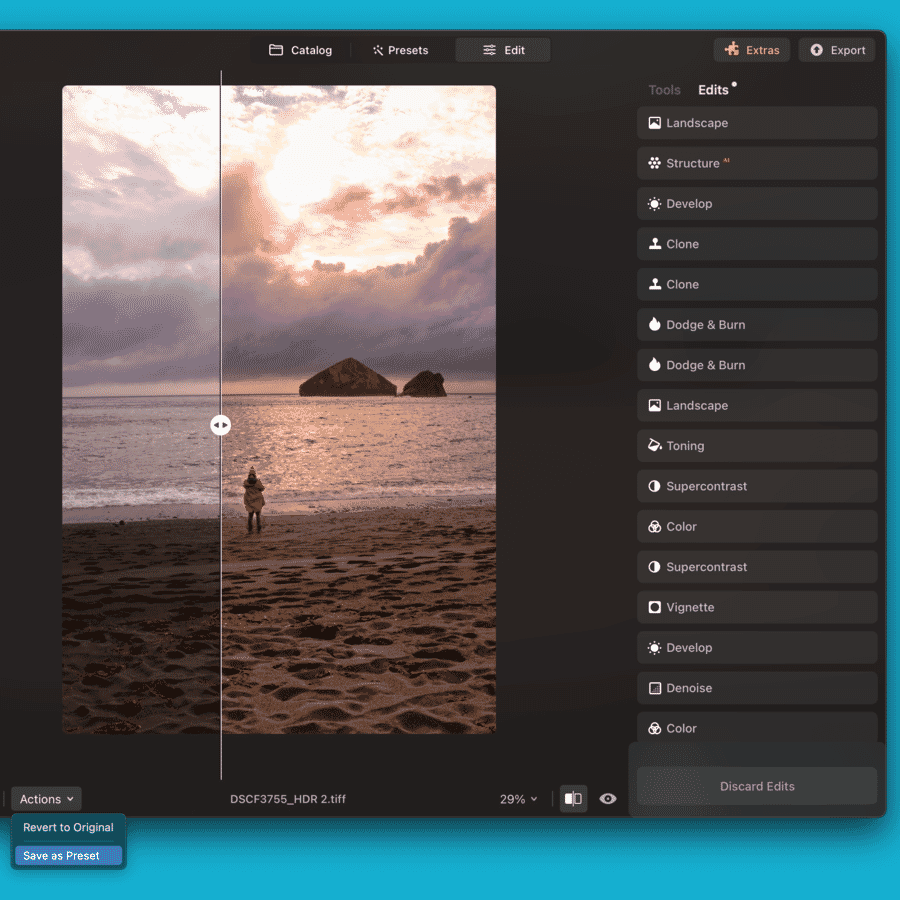
The software uses a non-destructive editing workflow. Every adjustment can be revisited, modified, or removed at any point. An edit history panel provides a complete record of changes, making it easy to experiment without fear of losing the original.
For those coming from other editors, Luminar Neo also works as a plugin for Lightroom Classic and Photoshop — allowing photographers to integrate it into their existing workflow rather than replacing it entirely.
Presets
Luminar Neo ships with a rich collection of one-click presets organized by category — essentials, landscape, portrait, cinematic, street, and more. Each preset applies a combination of adjustments that can be fine-tuned after application.
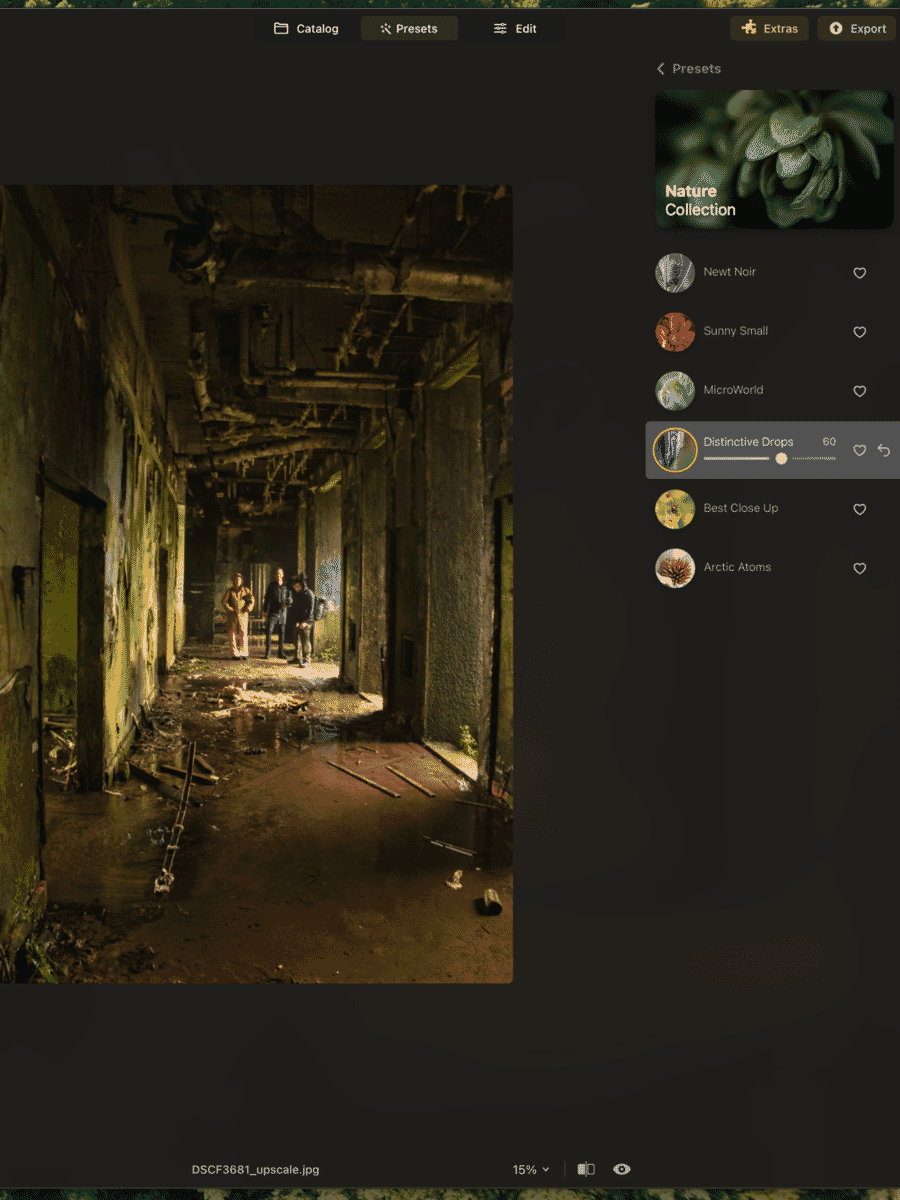
Beyond the built-in options, users can create and save custom presets, download additional packs from the Skylum marketplace, or share presets with other Luminar Neo users. The preset system is well-implemented — offering a fast starting point without sacrificing creative control.
Advanced Pro Tools
While Luminar Neo is known for its ease of use, it also includes serious professional tools:
- Layers & Masking — Full layer support with blend modes, opacity control, and AI-assisted masking for complex selections
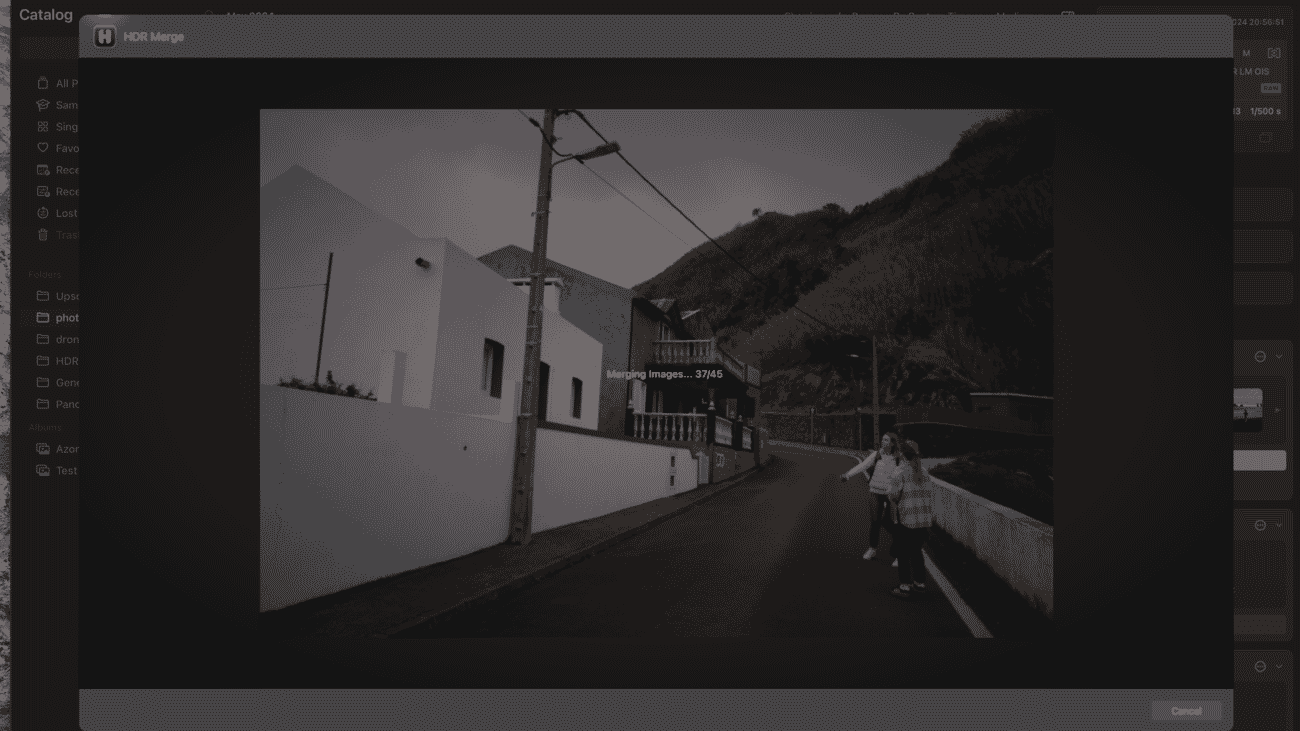
- HDR Merge — Combine multiple exposures into a single high dynamic range image with automatic alignment and ghost removal
- Focus Stacking — Merge images taken at different focus distances into one sharp composite — essential for macro and landscape photographers
- Panorama Stitching — Automatically stitch multiple frames into seamless panoramic images
- Magic LightAI — Intelligently enhance or add light sources in photos
- Clone & Stamp — Manual retouching tools for precise corrections
- Dodge & Burn — Selective lightening and darkening for fine exposure control
Batch processing support means photographers can apply edits, presets, or export settings across hundreds of images simultaneously — a significant time-saver for high-volume editing workflows.

Performance
Luminar Neo’s performance has improved significantly over successive updates. On modern hardware (Apple Silicon Macs or recent Windows machines with dedicated GPUs), the software runs smoothly — even with multiple AI tools applied to high-resolution files.
That said, photographers working with very large files on older hardware may notice occasional lag, particularly when stacking multiple AI effects. A capable desktop or laptop with at least 16GB of RAM is recommended for the best experience.
Startup time is reasonable, and the catalog loads quickly even with large libraries. Export speeds are competitive with other editors in this class.
Pricing
Luminar Neo uses a one-time purchase model — no monthly subscription required. Skylum offers three tiers:
| Plan | Price | Includes |
|---|---|---|
| Desktop License | $119 one-time | Desktop app + 1 year of updates |
| Cross-device Perpetual | $159 one-time | Desktop + Luminar Mobile on up to 3 devices (most popular) |
| Max License | $179 one-time | Everything above + Creative Library access |
All plans include generative AI tools (GenErase, GenExpand, GenSwap) for one year from purchase. All plans work as both a standalone editor and a plugin for Lightroom Classic and Photoshop.
💡 Use coupon code PHOTOWORKOUT for $10 off any plan at Skylum’s website.
Compared to Adobe’s Photography Plan ($9.99/month = $120/year, ongoing), Luminar Neo’s one-time pricing represents strong value — especially for photographers who don’t need Photoshop’s full feature set.
Luminar Neo vs. Alternatives
How does Luminar Neo stack up against other popular photo editors? Here’s a quick comparison:
- Adobe Lightroom Classic — Superior catalog and tethering, but subscription-only ($9.99/mo). Luminar Neo matches or exceeds it in AI tools and offers one-time pricing.
- Adobe Photoshop — More powerful for compositing and graphic design, but overkill for most photo editing. Luminar Neo is far more approachable for photography-specific tasks.
- Capture One — Excellent color science and tethering, preferred by studio professionals. Higher price point and steeper learning curve than Luminar Neo.
- ON1 Photo RAW — Similar one-time pricing model with solid AI features. Luminar Neo has a more polished interface and stronger AI tool selection.
- DxO PhotoLab — Best-in-class noise reduction (DeepPRIME), but lacks Luminar Neo’s creative AI tools like Sky replacement and generative features.
For photographers seeking the best balance of AI-powered ease of use, professional features, and value pricing, Luminar Neo stands out as the strongest all-around option. Those needing advanced photo organization may want to pair it with a dedicated tool like Excire Foto.
Verdict
Luminar Neo earns a strong 5/5 rating. It has matured into a genuinely impressive photo editor that delivers on its promise of making advanced editing accessible through AI — without dumbing down the creative process.
The Fall 2025 additions — Photo Restoration, AI Assistant, and Light Depth — are not gimmicks. They solve real problems and produce results that would require significant manual effort in competing software. The expansion into mobile editing with Luminar Mobile shows Skylum is building a complete ecosystem, not just a desktop app.
Who should buy Luminar Neo?
- Enthusiast photographers who want powerful results without a steep learning curve
- Lightroom users looking for a plugin to add AI capabilities to their workflow
- Anyone tired of Adobe subscriptions who wants a capable one-time-purchase alternative
- Photographers who shoot landscapes, portraits, or travel — the AI tools shine in these genres
The only real caveats are the annual renewal for generative AI tools and the one-way mobile sync limitation. Neither is a dealbreaker — and both are clearly disclosed upfront.
For photographers ready to try it, Luminar Neo offers a free trial — the best way to see if it fits their workflow.
Feb – Merging layers, post-crop vignette, improved Presets.
Oct – Color Transfer and enhancements.
Aug – New camera support.
Jun – Czech language.
Apr – Visual refresh and new features.
Sep – Neon & Glow, Tilt Shift. Aug – Studio Light, Blur Tool.
Jul – Panorama Stitching. Jun – Upscale AI improvements.
Apr – Undo/Redo. Feb – Plugin support. Jan – New onboarding.
Aug – Noiseless AI. Jul – HDR Merge, Dodge & Burn.
Jun – Duplicate Layers, Portrait Background Removal.
May – Mask AI, Histogram. Apr – Presets improvements. Mar – Smart Objects.
Spring 2026 update
- Skylum — What's New in Luminar Neo (v1.27 release notes) – Official feature summary for the Spring 2026 'Enhanced Portrait Photography' update.
- Skylum — Spring Upgrade brief (Notion) – Affiliate-partner briefing covering the new tools, positioning, and known-issues list.
Image sources
- Skylum press / sample image set for the Spring 2026 release – All before/after sliders use sample images supplied by Skylum for press use. © respective photographers.


