
- Urban photography captures life, architecture, and atmosphere in built environments — from candid street scenes to geometric patterns and nighttime cityscapes.
- You don’t need expensive gear — a compact mirrorless camera or even a modern smartphone is enough to get started.
- Master camera settings for different scenarios — daytime street, golden hour, night, and rainy conditions each demand different approaches.
- Use composition techniques like leading lines, reflections, and layering to create compelling urban images.
- Post-processing in Lightroom or similar software can transform good urban shots into standout images through contrast, color grading, and black-and-white conversion.
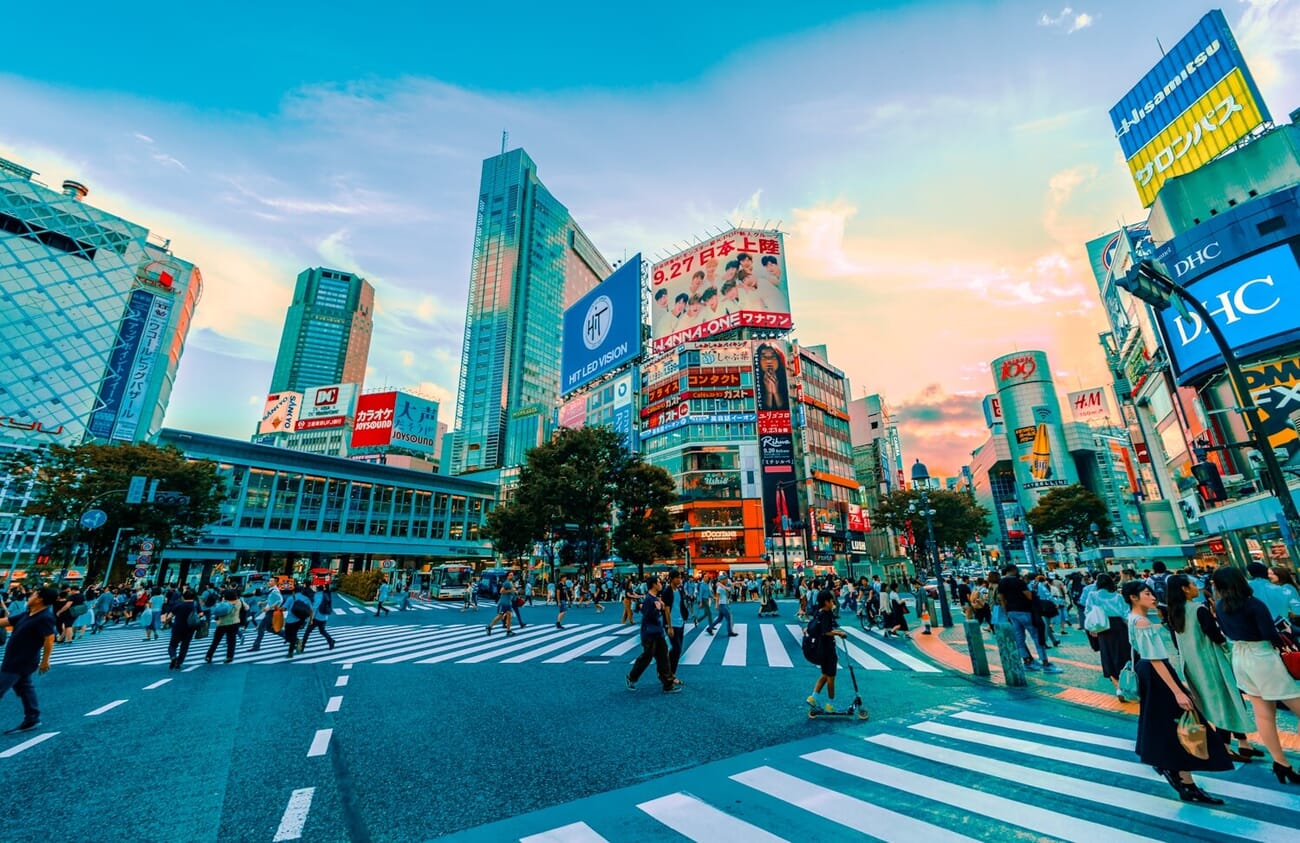
Every city tells a story. The steam rising from a subway grate, the geometry of a glass skyscraper, a stranger’s silhouette against neon light — these are the raw materials of urban photography.
Urban photography is one of the most accessible and rewarding genres in photography. You don’t need a studio, models, or exotic locations. Your city — any city — is your canvas. All you need is a camera, comfortable shoes, and a willingness to look at familiar places with fresh eyes.
When you buy through links on our site, we may earn a commission at no cost to you. We evaluate products independently. Commissions do not affect our evaluations. As an Amazon Associate, we earn from qualifying purchases.
In this guide, we’ll cover everything from different urban photography styles to camera settings, gear recommendations, editing techniques, and practical tips to help you capture compelling urban images.
What Is Urban Photography?
Urban photography is any photography that focuses on the built environment — cities, towns, and the life that happens within them. It encompasses architecture, street scenes, people, infrastructure, and the interplay between all of these elements.
What separates urban photography from other genres is the setting. The urban landscape — with its concrete, glass, steel, and human activity — provides both the subject and the backdrop. Whether you’re photographing a quiet alley at dawn or a bustling intersection at rush hour, the city itself is always a character in the frame.
Urban photography overlaps with several related genres, including visual storytelling, architectural photography, and street photography. The beauty of the genre is its flexibility — there are no strict rules about what qualifies.
Different Styles of Urban Photography
Urban photography is a broad genre with several distinct styles. Understanding these styles helps you develop your own creative approach and recognize opportunities when you’re out shooting.

Candid Street Photography
Candid street photography is perhaps the most popular form of urban photography. It captures everyday life — people commuting, shopping, talking, waiting — without the subjects being aware of the camera. The goal is to preserve authentic, unposed moments.
The two defining elements are an urban setting and candid human elements. Streets, crosswalks, public transport, markets, and parks all work as backdrops. The key is that your subjects act naturally — their behavior unchanged by your presence.
To get started with candid urban photography, use a small, quiet camera and shoot from the hip or at arm’s length. A wide-angle lens (24-35mm) lets you include context without getting uncomfortably close to your subjects. For more on capturing candid moments, see our photography tips for beginners.
Geometric Urban Photography
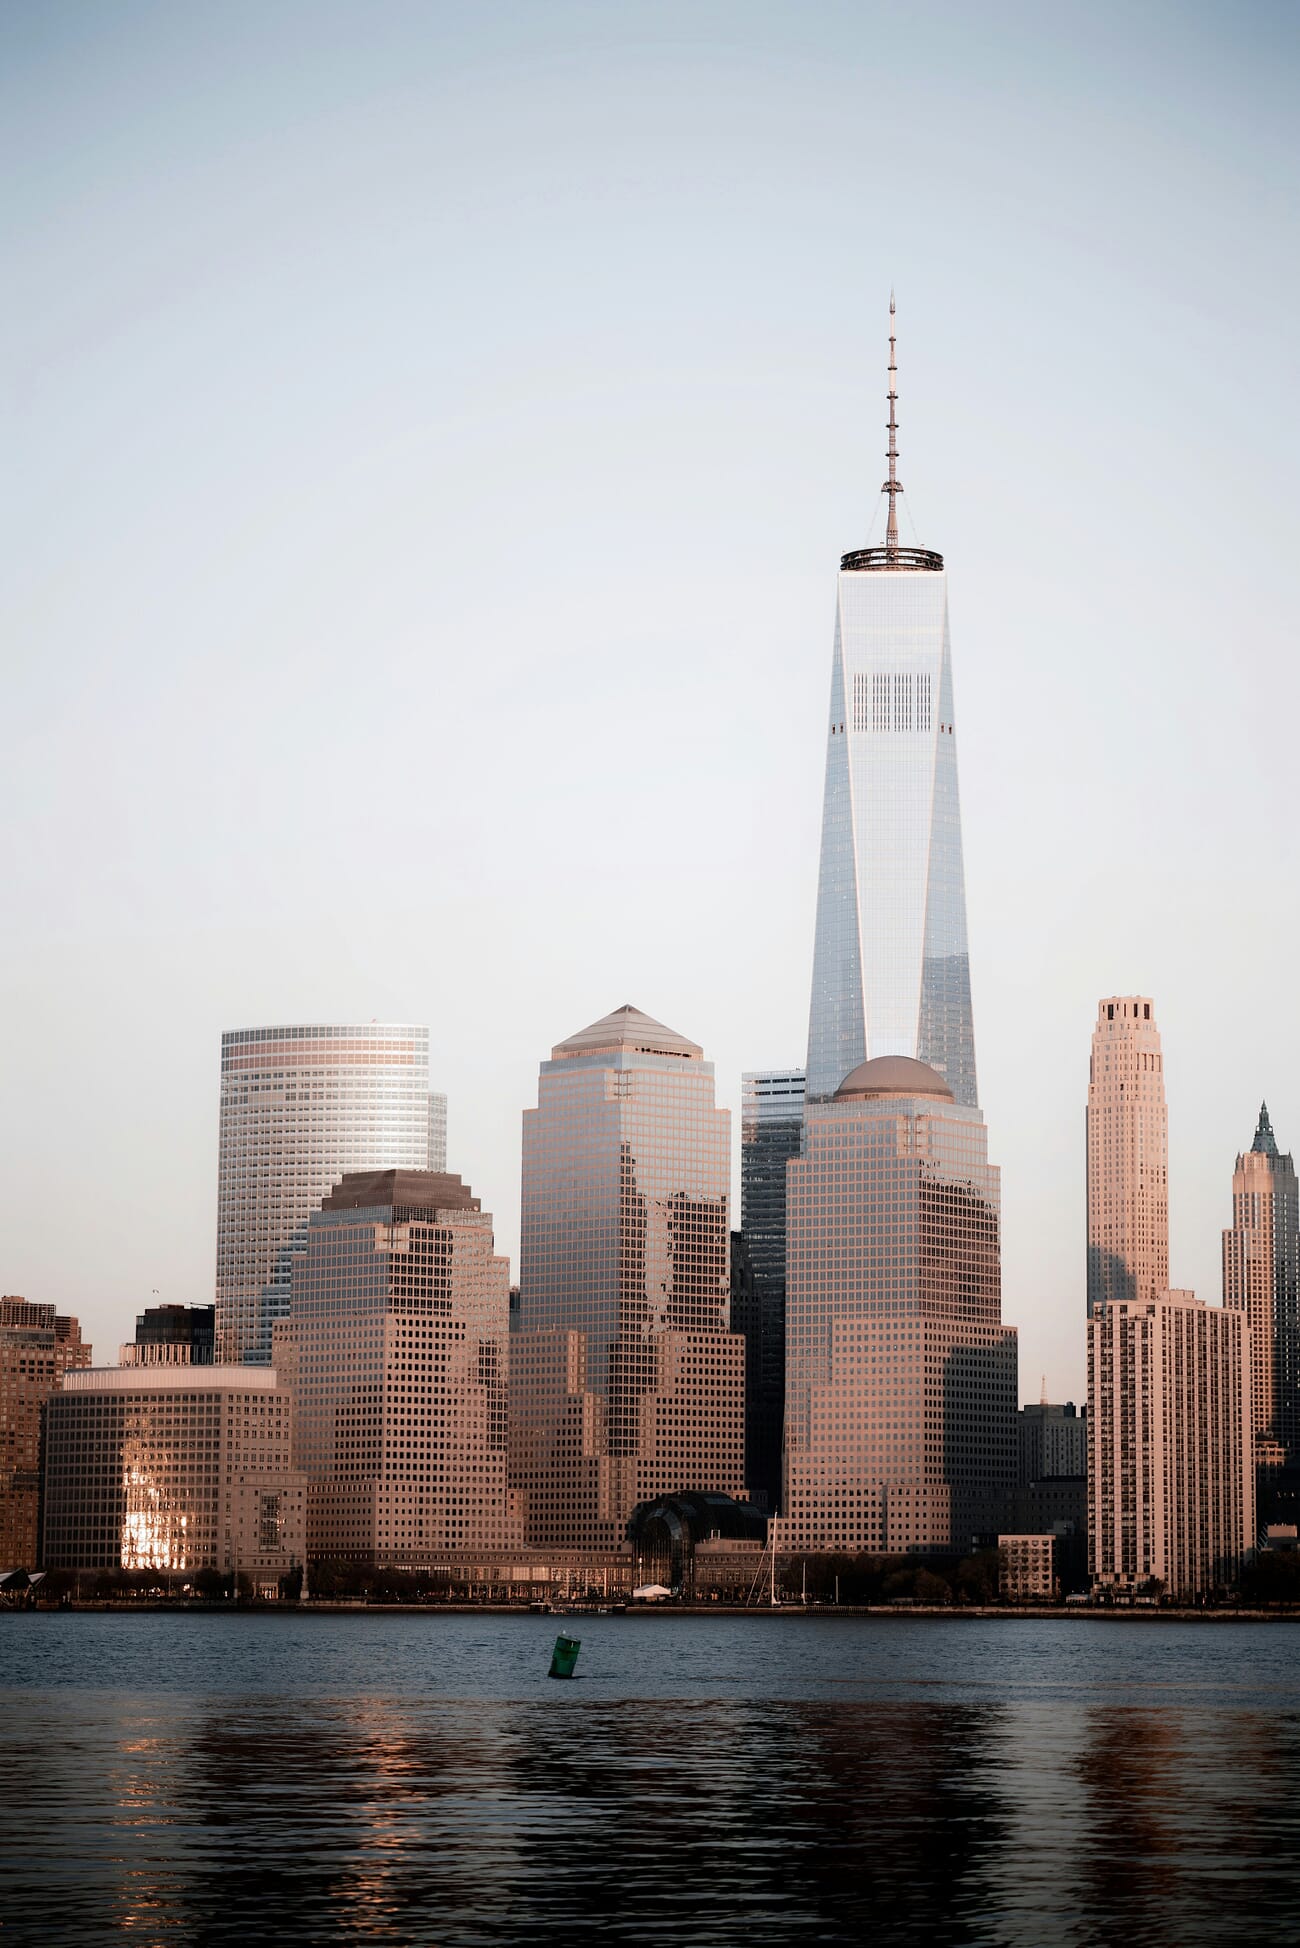
Geometric urban photography focuses on the shapes, patterns, lines, and symmetry found in urban architecture. Most geometric shots remove human presence entirely, letting the structure itself become the subject.
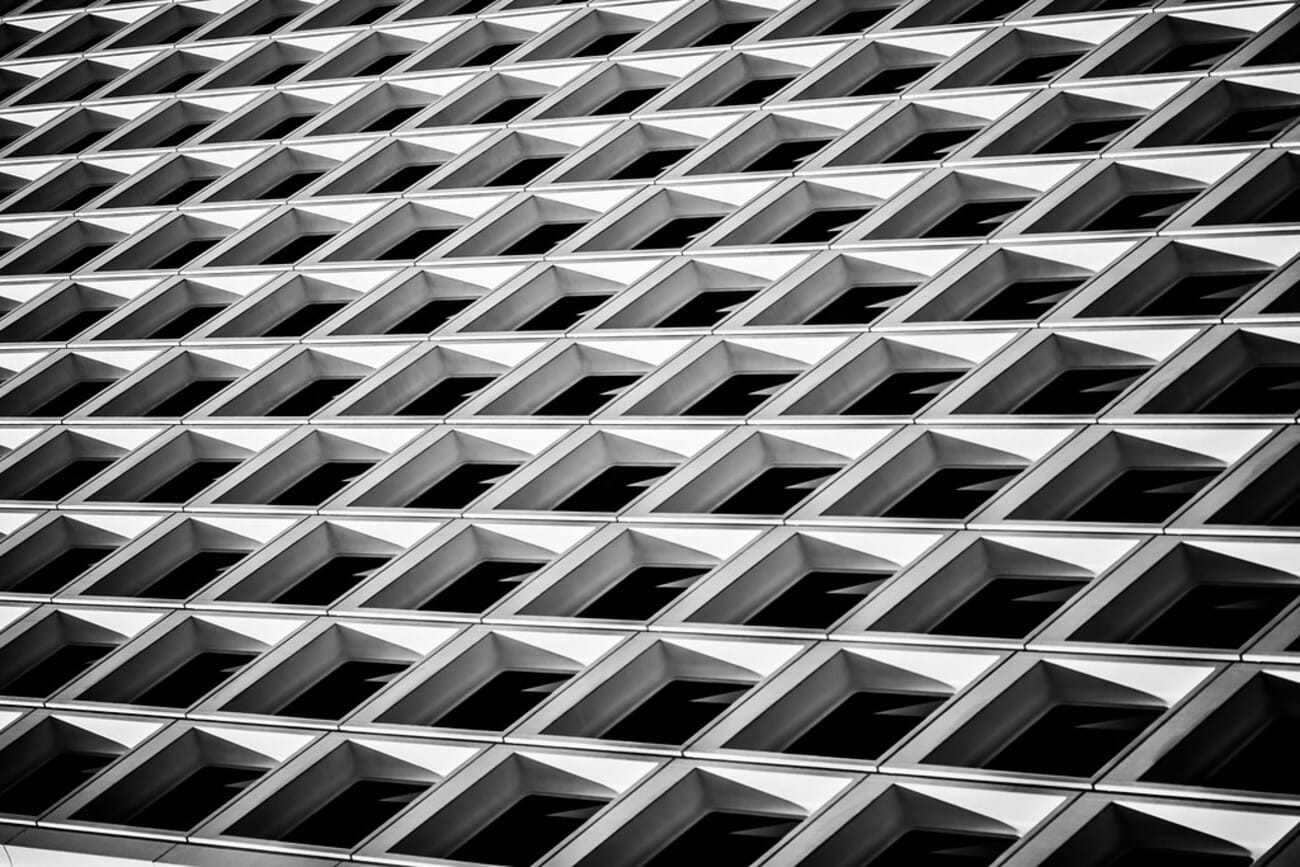
City centers are packed with geometric opportunities — window grids, repeating balconies, spiral staircases, parking garage ramps, and the angular intersections of skyscrapers against the sky. Look for leading lines, symmetry, and repetition. The rule of thirds and golden ratio are especially useful for framing these compositions.
Urban Portrait Photography
Urban portrait photography combines posed or semi-posed portraits with the city as a backdrop. Unlike candid street photography, urban portraits involve direct interaction with your subject.
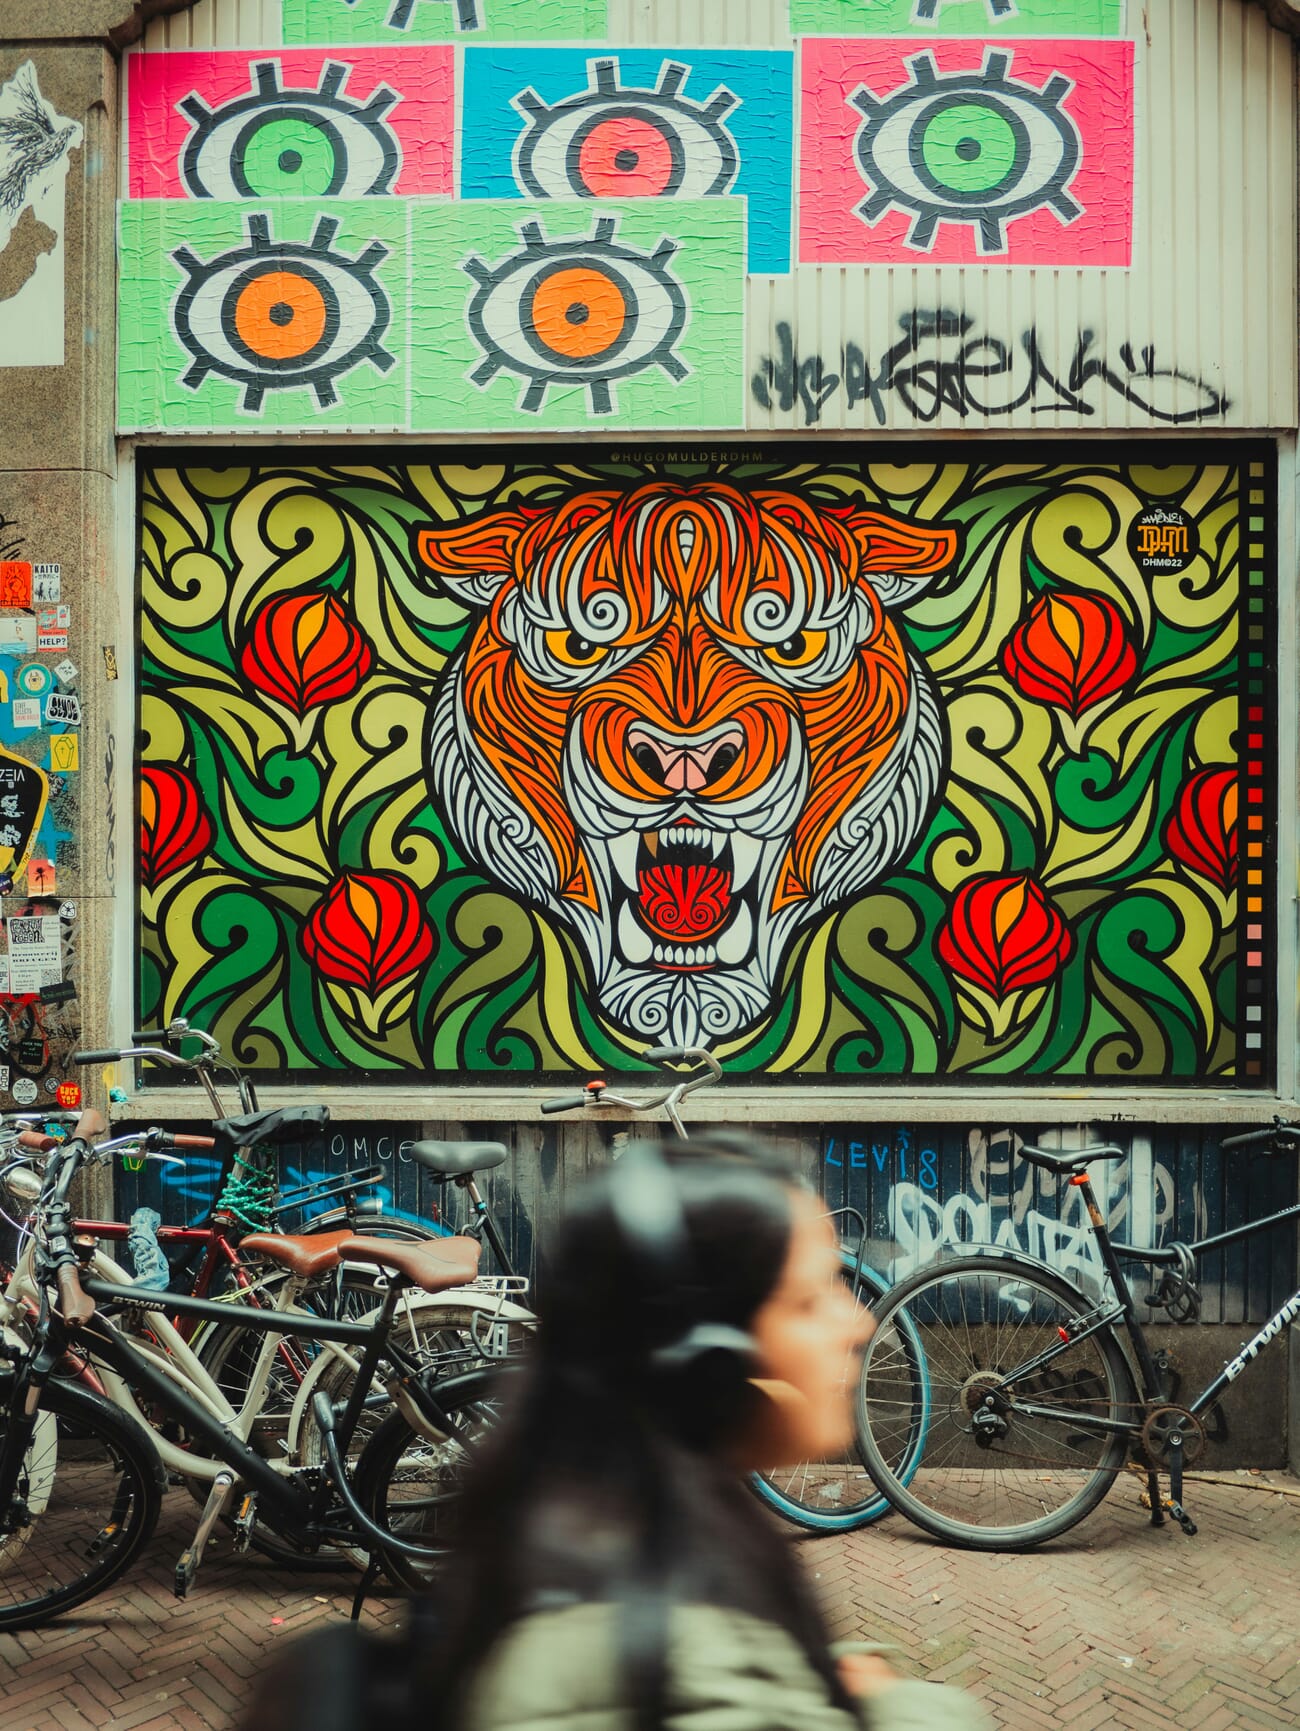
The urban setting adds character, texture, and mood to portraits. Graffiti walls, fire escapes, neon signs, and industrial doorways all create visually interesting backgrounds. Use a wide aperture (f/1.4–f/2.8) to separate your subject from the busy urban background with pleasing bokeh.
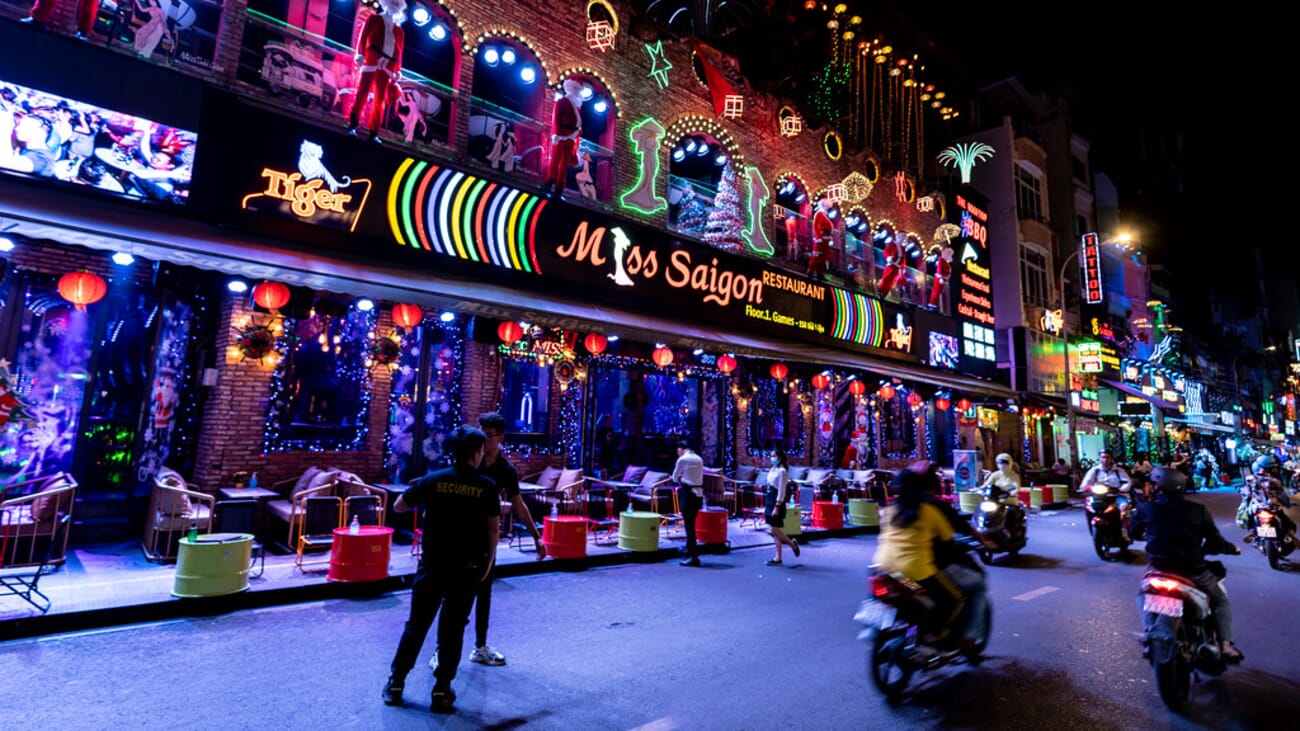
Nighttime Urban Photography
Nighttime urban photography transforms cities into a completely different world. Neon signs, car headlights, streetlamps, and illuminated buildings create a rich tapestry of color and contrast that doesn’t exist during the day.
Shooting at night requires different techniques than daytime photography. You’ll typically need higher ISOs, wider apertures, and slower shutter speeds. A tripod helps for long exposures, but modern cameras with in-body image stabilization (IBIS) can handle many nighttime shots handheld. For a deep dive, check out our low light photography guide.
Blue hour — the 20-30 minutes after sunset — is a prime time for urban photography. The sky retains color while city lights switch on, creating a balanced, atmospheric look that’s impossible to replicate at any other time.
Minimalist Urban Photography
Minimalist urban photography strips the city down to its essentials. The approach emphasizes negative space, clean lines, and simple subjects isolated against uncluttered backgrounds.
Fog, mist, and overcast days are your best friends for minimalist urban work — they simplify backgrounds and create natural negative space. Look for lone figures against blank walls, a single building against the sky, or isolated urban details like a bench, streetlight, or mailbox.
Urban Decay Photography
Urban decay photography documents the beauty in abandonment — peeling paint, crumbling facades, rusted infrastructure, graffiti, and overgrown lots. It’s a style that finds artistry in entropy.
Industrial areas, abandoned buildings, old railway yards, and neighborhoods undergoing renovation are prime locations. Pay attention to textures — rust, chipped paint, cracked concrete, and weathered wood all add visual interest. Always prioritize safety and respect private property when exploring these locations.
Abstract Urban Photography
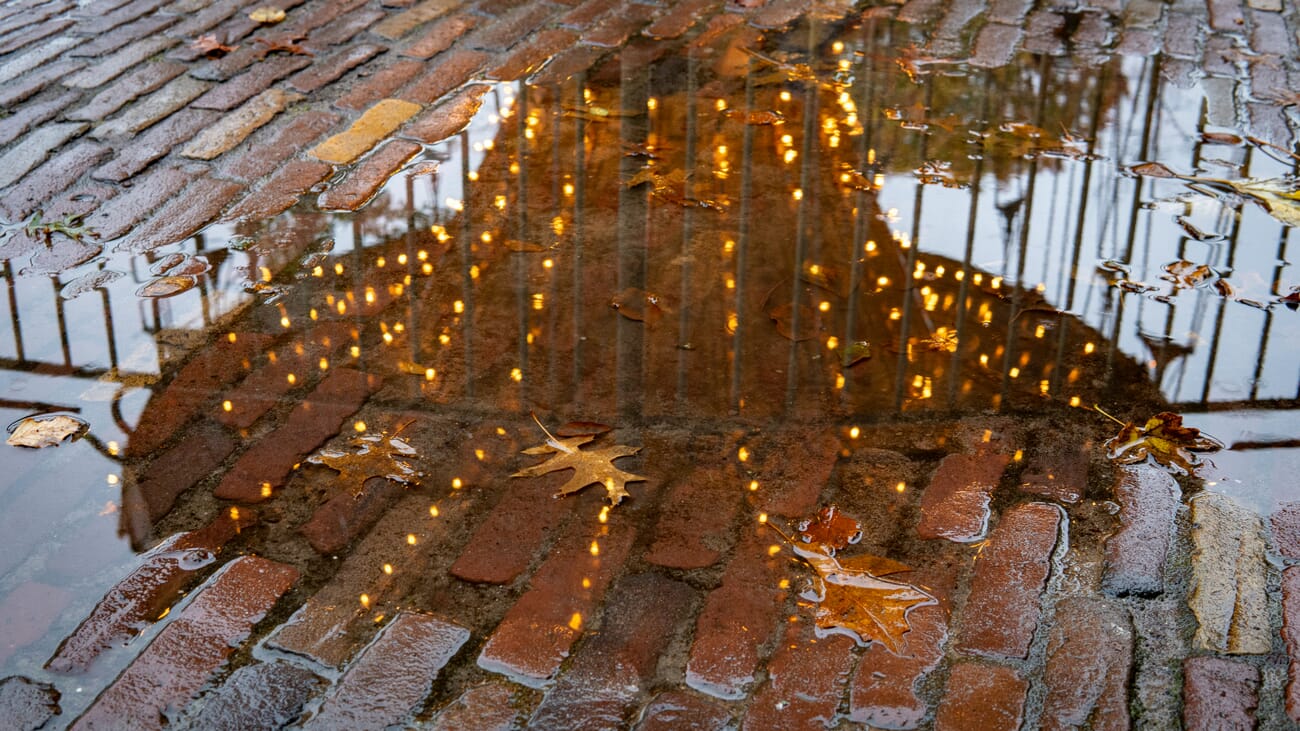
Abstract urban photography takes familiar urban elements and renders them unrecognizable through creative use of angle, reflection, motion blur, or extreme cropping. Glass buildings, puddle reflections, and moving crowds all lend themselves to abstraction.
Try intentional camera movement (ICM), shooting through textured glass, or using long exposures to blur pedestrians into ghostly streaks. The goal is to create images that feel more like art than documentation.
Composition and Technique Tips
Strong composition separates casual snapshots from compelling urban photographs. Here are the techniques that matter most in urban environments.
Use Leading Lines
Cities are full of leading lines — roads, railway tracks, bridges, fences, sidewalk edges, and building edges. Use these to draw the viewer’s eye through the frame and toward your main subject.
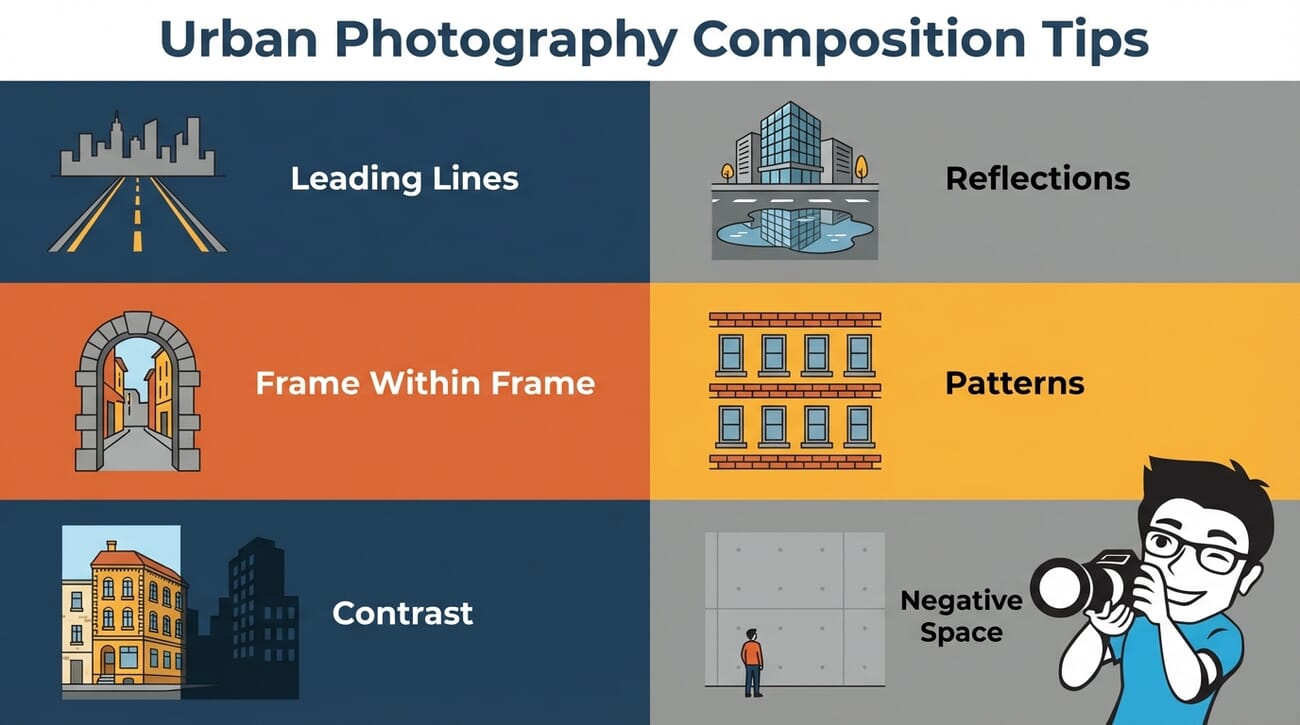
Look for Reflections
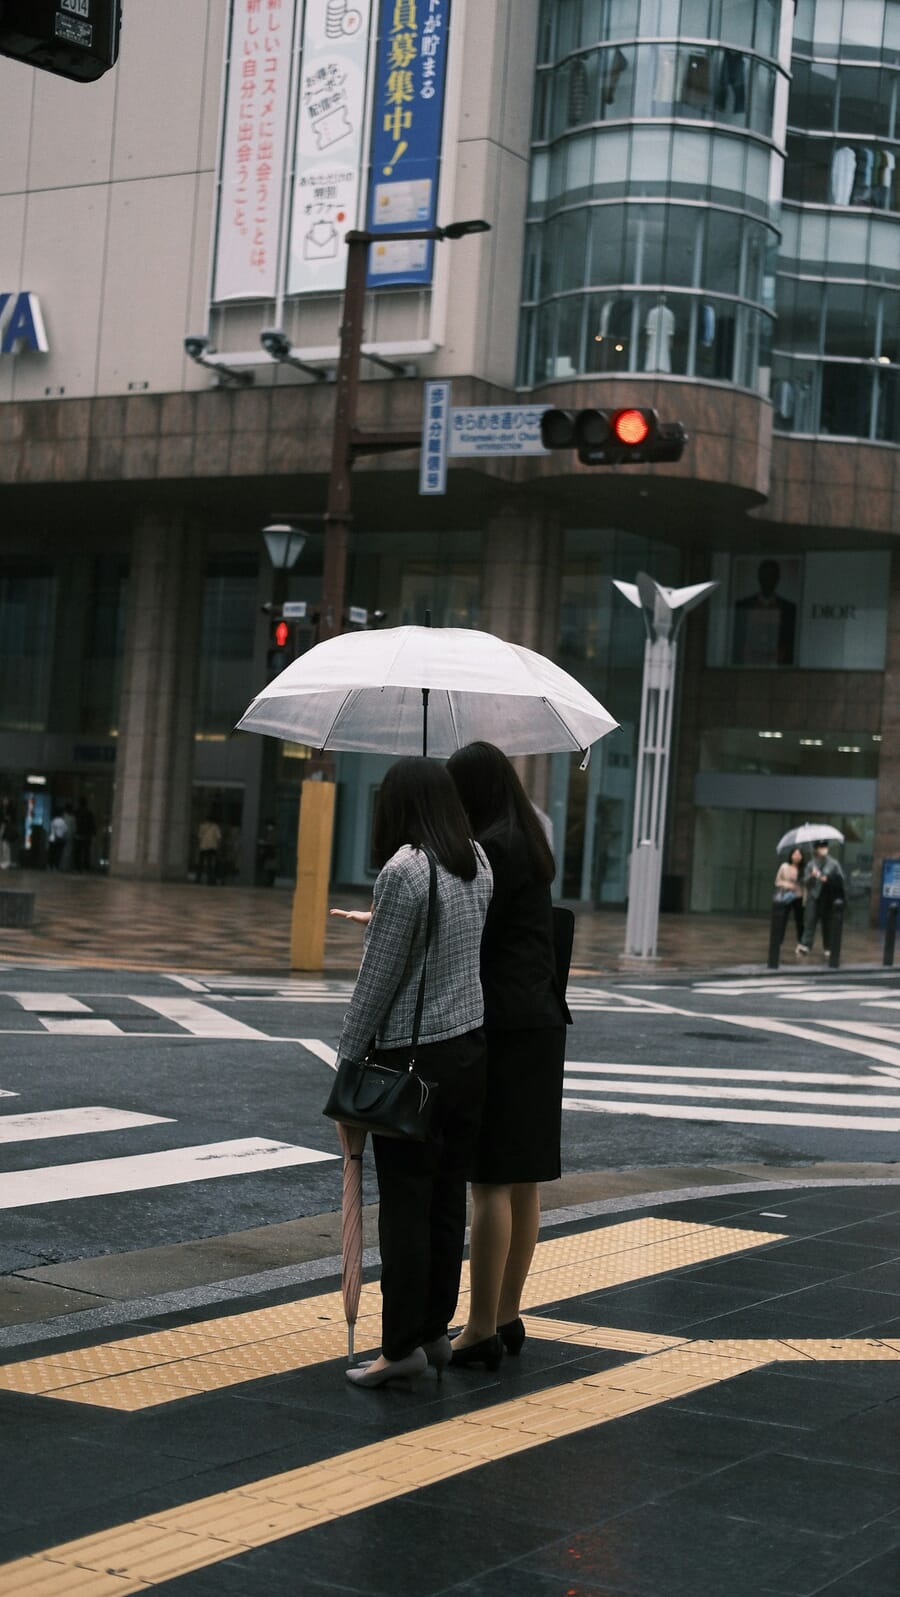
Puddles, glass facades, car hoods, and wet pavement all create reflections that add depth and visual interest. Rainy days are a gift for urban photographers — the entire city becomes a mirror. See our reflection photography guide for more techniques.
Shoot in All Weather
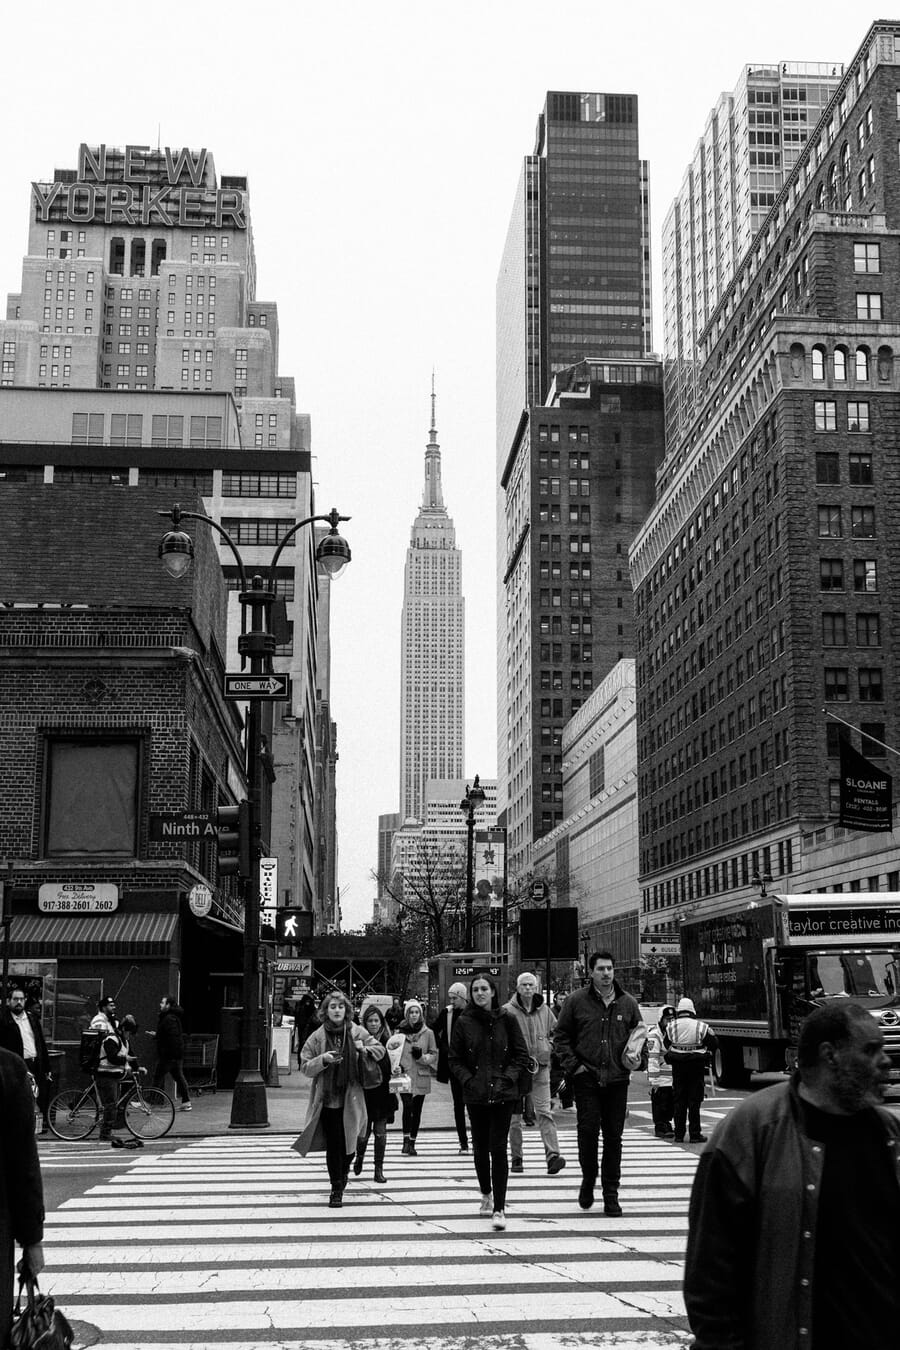
Don’t wait for perfect conditions. Rain adds reflections and mood. Fog creates atmosphere and simplifies backgrounds. Snow transforms familiar scenes. Harsh midday sun creates dramatic shadows and high-contrast lighting that works beautifully in black and white.
Use Layers and Framing
Urban environments are inherently layered — foreground, middle ground, and background. Use doorways, arches, windows, and alleys to frame your subject. Layering adds depth and makes images feel three-dimensional.
Use Social Media for Location Scouting
Instagram, TikTok, and Pinterest are excellent tools for finding photogenic locations. Search by location tags and hashtags like #streetphotography, #urbex, or your city’s name. Google Maps Street View lets you pre-scout angles and lighting conditions before you visit.
Apps like PhotoPills and Sun Surveyor help you plan golden hour and blue hour shoots by showing exactly where the sun will be at any location and time.
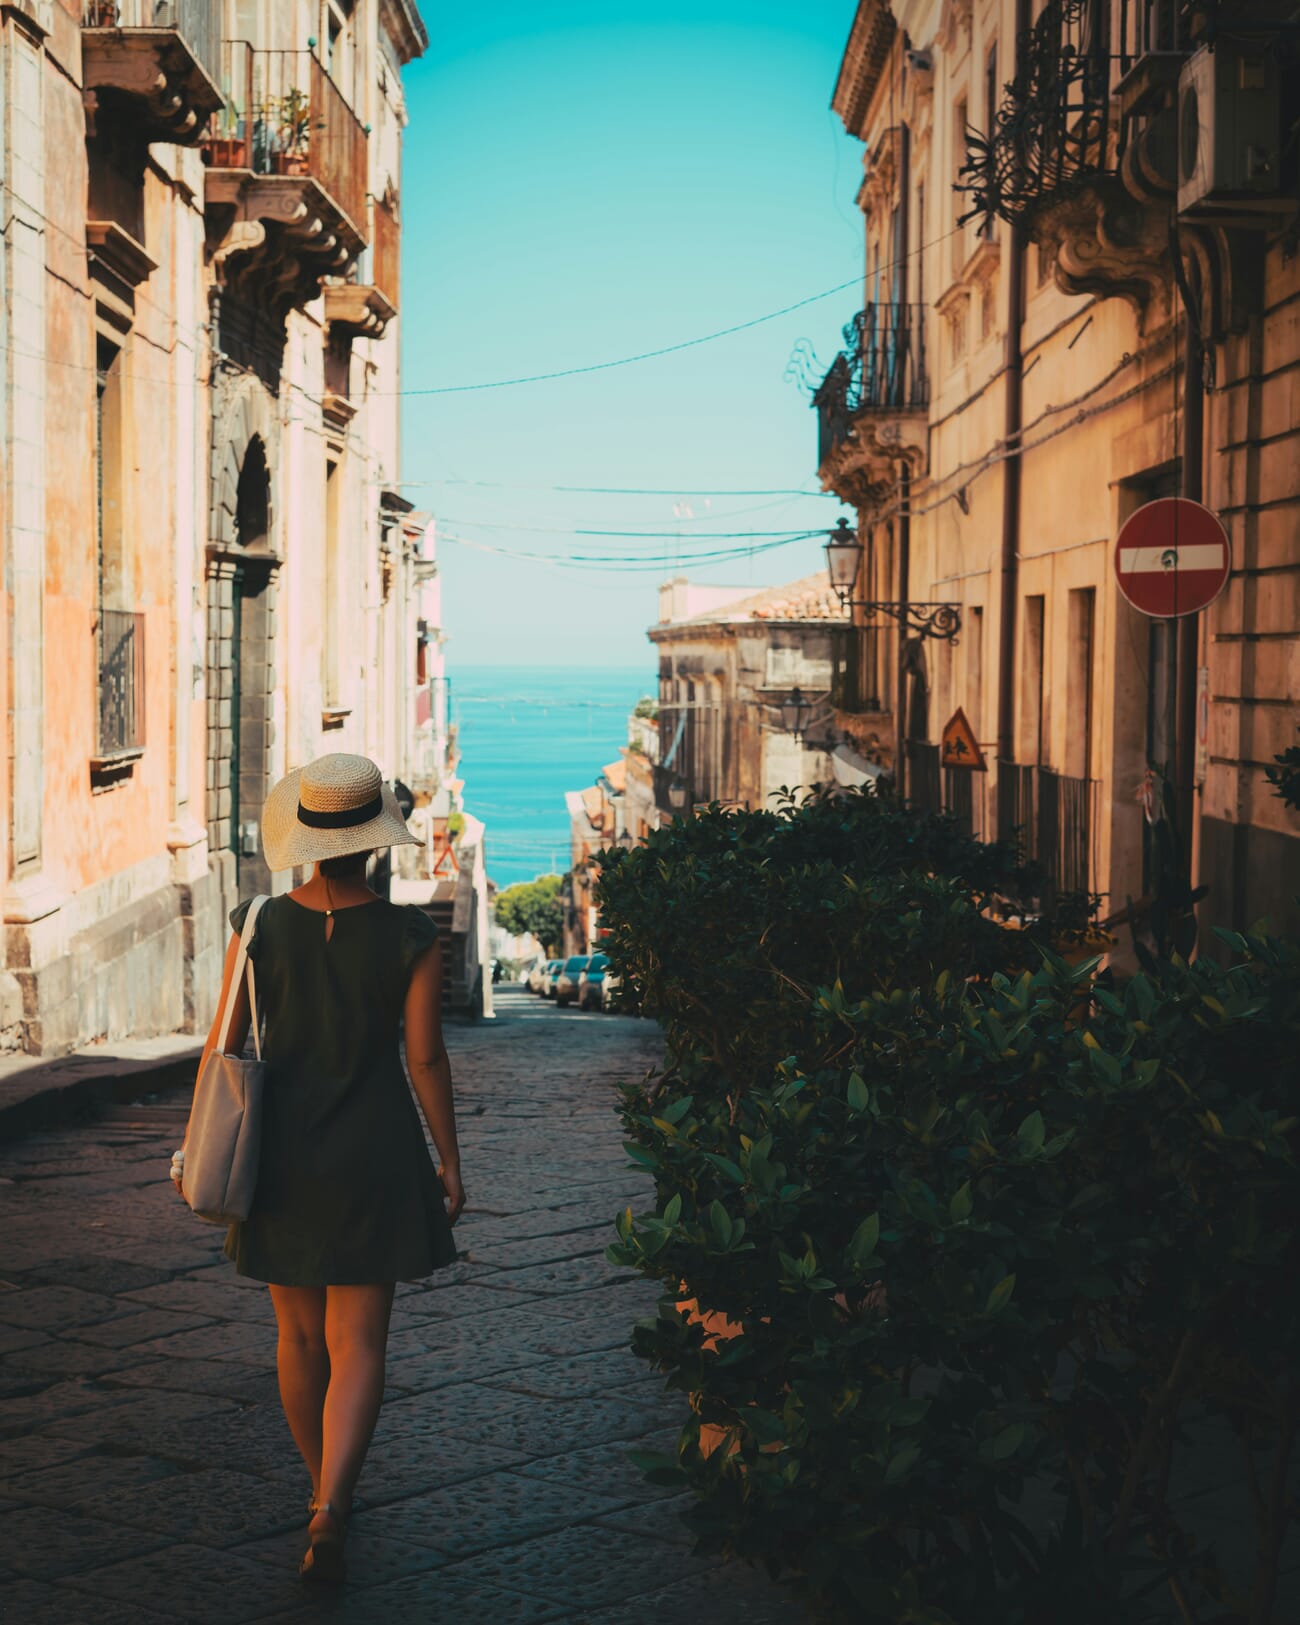
Tell a Story with People
Including people in your urban shots adds narrative and emotional weight. A lone figure on a bridge, commuters rushing through a tunnel, or a musician performing on a sidewalk all tell stories that pure architecture shots can’t. The key is capturing the relationship between people and their urban environment.
Look Up and Look Down
Most people photograph cities at eye level. Challenge yourself to look straight up between buildings for dramatic converging lines, or look straight down from elevated positions for patterns in plazas, crosswalks, and rooftops. These perspectives reveal urban geometry that’s invisible at street level.
Urban Photography Camera Settings
Urban photography covers many scenarios, and each demands different camera settings. Here’s a quick reference for the most common situations.
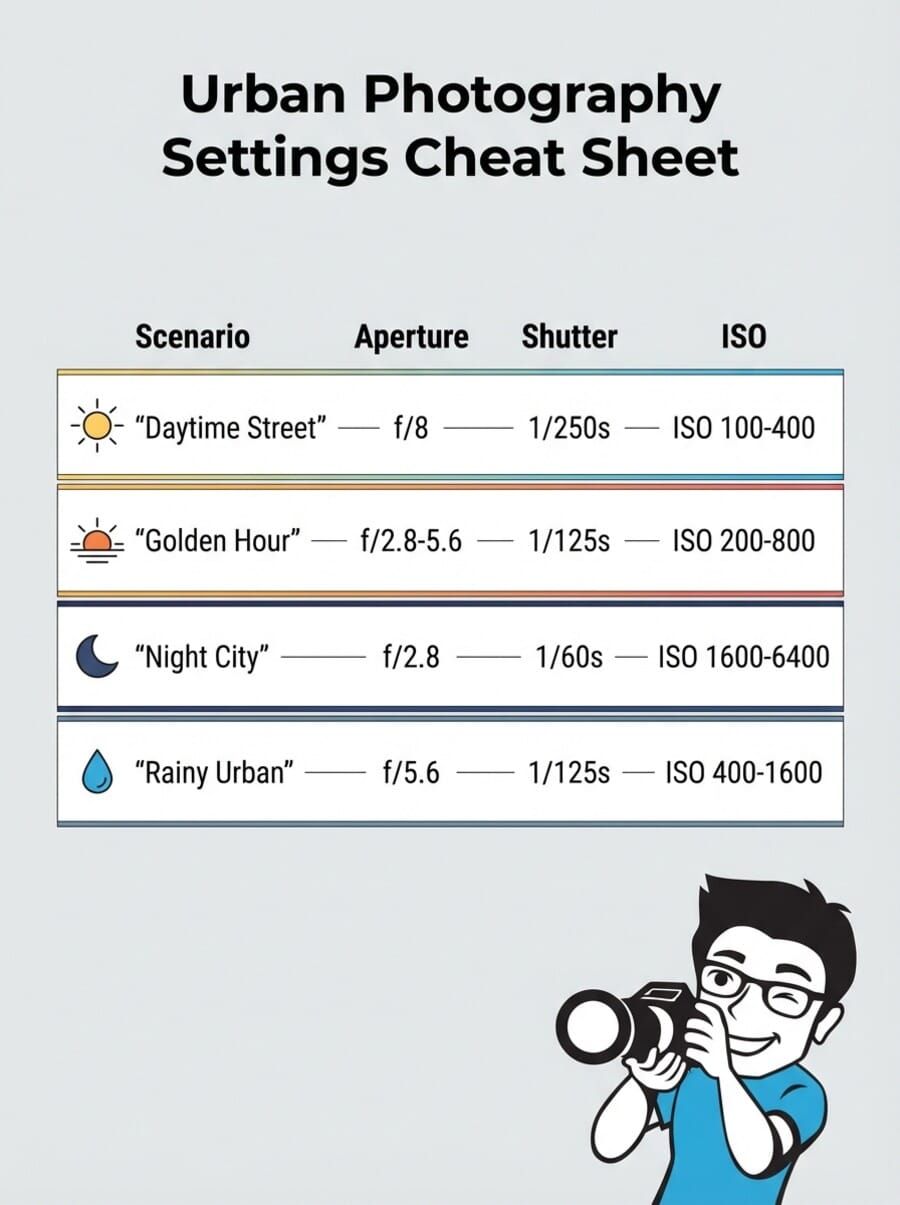
Daytime street photography: Use f/8 for a deep depth of field that keeps both your subject and the urban background sharp. Set shutter speed to 1/250s or faster to freeze pedestrian movement. Keep ISO between 100-400.
Golden hour: Open up to f/2.8-5.6 to let in the warm, low-angle light. A shutter speed of 1/125s works for most subjects. Bump ISO to 200-800 as the light fades.
Night city: Shoot wide open at f/2.8 or wider. For handheld shots, use 1/60s (rely on IBIS) and push ISO to 1600-6400. For long exposures on a tripod, drop ISO back down and use slower shutter speeds for light trails.
Rainy conditions: Use f/5.6 for a good balance of sharpness and light gathering. Shutter speed of 1/125s freezes rain droplets, while slower speeds blur them into atmospheric streaks. ISO between 400-1600 depending on available light.
Pro tip: Aperture Priority mode is the most practical setting for urban photography — set your aperture and let the camera handle shutter speed. Switch to Manual only for specific creative effects like long exposures.
Best Cameras for Urban Photography
The best camera for urban photography is small, fast, and quiet. You’ll be carrying it all day, shooting quickly in changing conditions, and ideally not attracting attention. Here are top picks for different budgets.
Compact Fixed-Lens Cameras
- Fujifilm X100VI — The gold standard for urban and street photography. Its 40MP APS-C sensor, fixed 23mm f/2 lens (35mm equivalent), and retro design make it both capable and unobtrusive. Film simulations let you achieve stunning results straight out of camera.
- Ricoh GR IIIx — Pocketable yet powerful, with a 24MP APS-C sensor and a 40mm equivalent f/2.8 lens. Its tiny size means you’ll always have it with you — the best camera is the one you carry.
Mirrorless Cameras
- Sony A7C II — A full-frame sensor in a compact body. Excellent autofocus, 5-axis IBIS, and a flip screen make it ideal for urban shooting. Pair it with a 35mm or 50mm prime.
- Fujifilm X-T5 — 40MP APS-C sensor with outstanding color science. Lighter and more affordable than full-frame, with access to Fujifilm’s excellent X-mount lenses.
Lenses for Urban Photography
For interchangeable-lens cameras, these focal lengths work best for urban photography:
- 24mm — Wide enough to capture building facades and street scenes with environmental context.
- 35mm — The classic street photography focal length. Natural perspective, versatile for most situations.
- 50mm — Isolates subjects from busy backgrounds. Great for urban portraits and silhouettes.
- 24-70mm zoom — The do-everything option if you only want to carry one lens.
Useful Accessories
- Compact tripod or GorillaPod — Essential for long exposures and night shots.
- ND filter — Lets you use slow shutter speeds in daylight for motion blur effects (blurred crowds, smooth water).
- Comfortable camera strap — You’ll be walking for hours. A good strap reduces fatigue.
- Weather protection — A rain cover or weather-sealed body lets you shoot in the best urban conditions without worry.
Urban Photography with a Smartphone
Modern smartphones are genuinely excellent tools for urban photography. The latest iPhones, Samsung Galaxy, and Google Pixel devices have multi-lens systems, computational photography, and Night Mode capabilities that rival dedicated cameras in many situations.
Smartphones have key advantages for urban shooting:
- Always with you — The best camera is the one you have. Smartphones let you capture unexpected moments instantly.
- Discreet — People don’t react to phones the way they react to cameras, making candid shots easier.
- Ultrawide lens — Most modern phones include an ultrawide lens that’s perfect for tight urban spaces and dramatic architectural perspectives.
- Night Mode — Computational photography stacks multiple exposures to produce clean, detailed nighttime shots that were impossible on phones just a few years ago.
- Instant sharing — Edit and post to social media directly from the field.
Tips for phone-based urban photography: Shoot in RAW (ProRAW on iPhone, RAW on Android) for maximum editing flexibility. Use the 0.5x ultrawide for dramatic architecture shots. Lock exposure and focus by tapping and holding on your subject. And explore manual camera apps like Halide (iOS) or Open Camera (Android) for full control over settings.
Editing Urban Photos
Post-processing is where good urban photos become great ones. Even subtle adjustments to contrast, color, and tone can dramatically change the mood of a city scene. For a comprehensive editing guide, see our Lightroom tutorial.
Key Adjustments for Urban Photos
- Contrast and clarity — Urban scenes often benefit from boosted contrast and clarity to emphasize textures in concrete, brick, and metal. Add +20 to +40 clarity for a gritty urban feel.
- Dehaze — City haze and smog can flatten images. The dehaze slider in Lightroom cuts through atmospheric haze and restores punch.
- Perspective correction — Tilted buildings are the most common urban photography mistake. Use Lightroom’s Transform panel (or hit Auto) to straighten verticals.
- Color grading — Urban photography lends itself to cinematic color grades. Try teal-and-orange for nighttime scenes, desaturated greens for moody daytime, or warm highlights with cool shadows for golden hour.
Black and White Conversion
Many iconic urban photographs are black and white. Removing color forces the viewer to focus on light, shadow, shape, and texture — all elements that cities have in abundance. For the best B&W conversions, don’t just desaturate — use the B&W mixer to control how individual colors convert to gray tones. Boost the red channel for brighter skin tones and darken the blue channel for dramatic skies.
For a broader overview of editing techniques, check out our guide on how to edit photos.
Urban Photography FAQ
Is urban photography the same as street photography?
Not exactly. Street photography is a subset of urban photography that focuses specifically on candid moments with people. Urban photography is broader — it also includes architecture, geometric patterns, nighttime cityscapes, urban decay, and more. All street photography is urban photography, but not all urban photography is street photography.
Do I need permission to photograph people in public?
In most countries, photographing people in public spaces is legal without their consent, as there’s no reasonable expectation of privacy. However, laws vary by location — some countries (like Germany and Japan) have stricter rules. Always be respectful, and if someone asks you not to photograph them, honor that request. For commercial use, you’ll typically need a model release.
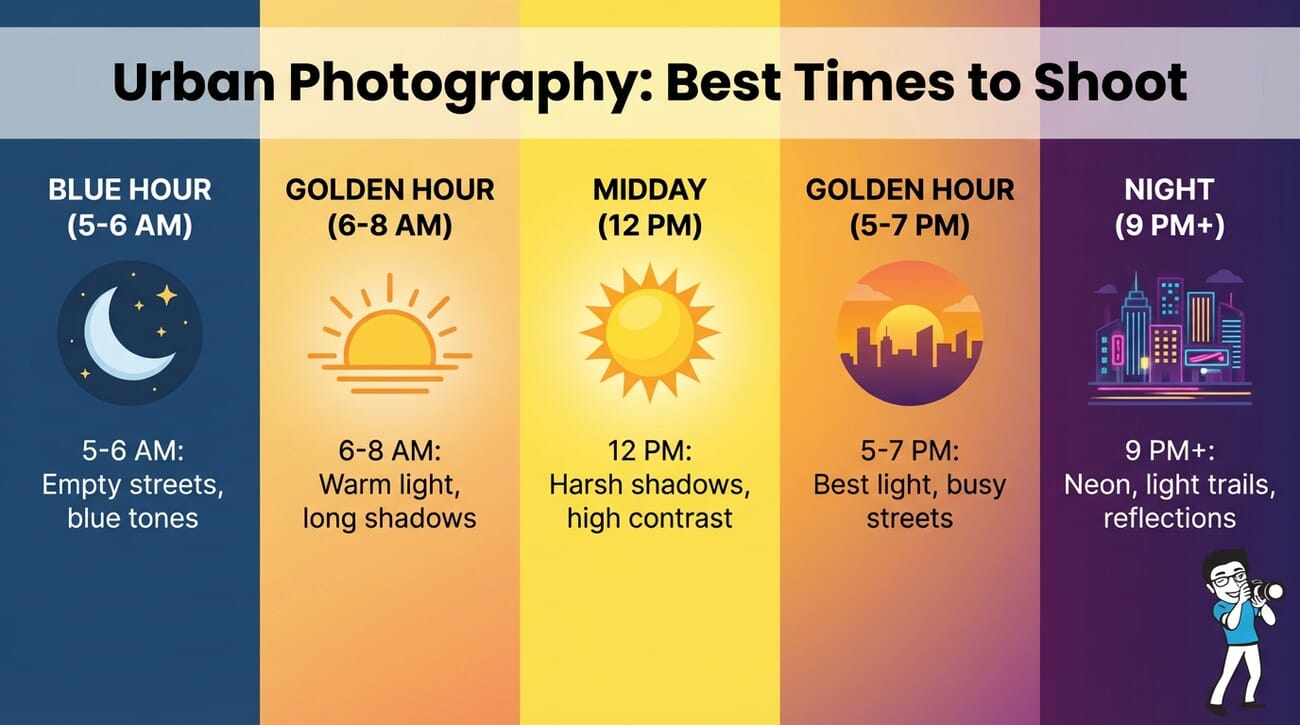
What is the best time of day for urban photography?
Golden hour (the hour after sunrise and before sunset) provides warm, directional light that adds depth and atmosphere. Blue hour (20-30 minutes after sunset) is ideal for nighttime cityscapes. But urban photography works at any time — harsh midday sun creates dramatic shadows, overcast days provide even lighting, and nighttime opens up neon and artificial light opportunities.
Can I do urban photography with a smartphone?
Absolutely. Modern smartphones with ultrawide lenses, Night Mode, and RAW shooting capability are excellent for urban photography. Their small size makes them less intimidating for candid shots, and computational photography handles challenging lighting well. Many professional urban photographers now regularly use phones alongside dedicated cameras.
What camera settings should I use for urban photography at night?
For handheld night shooting, use a wide aperture (f/2.8 or wider), shutter speed of 1/60s (with image stabilization), and ISO 1600-6400. For tripod-based long exposures (light trails, smooth crowds), use f/8-11, shutter speeds of 1-30 seconds, and ISO 100-400. Shoot in RAW for maximum flexibility when recovering highlights and shadows.
Is urban photography legal? Can I photograph buildings?
Photographing buildings from public spaces is legal in most jurisdictions. Some notable exceptions include certain military installations, government buildings in specific countries, and locations where photography is explicitly prohibited. The Eiffel Tower’s nighttime light display, for example, is copyrighted in some contexts. When in doubt, check local regulations.
Featured image: Photo by Branislav Rodman on Unsplash.
