Key Takeaways: How to Edit Photos Like a Pro
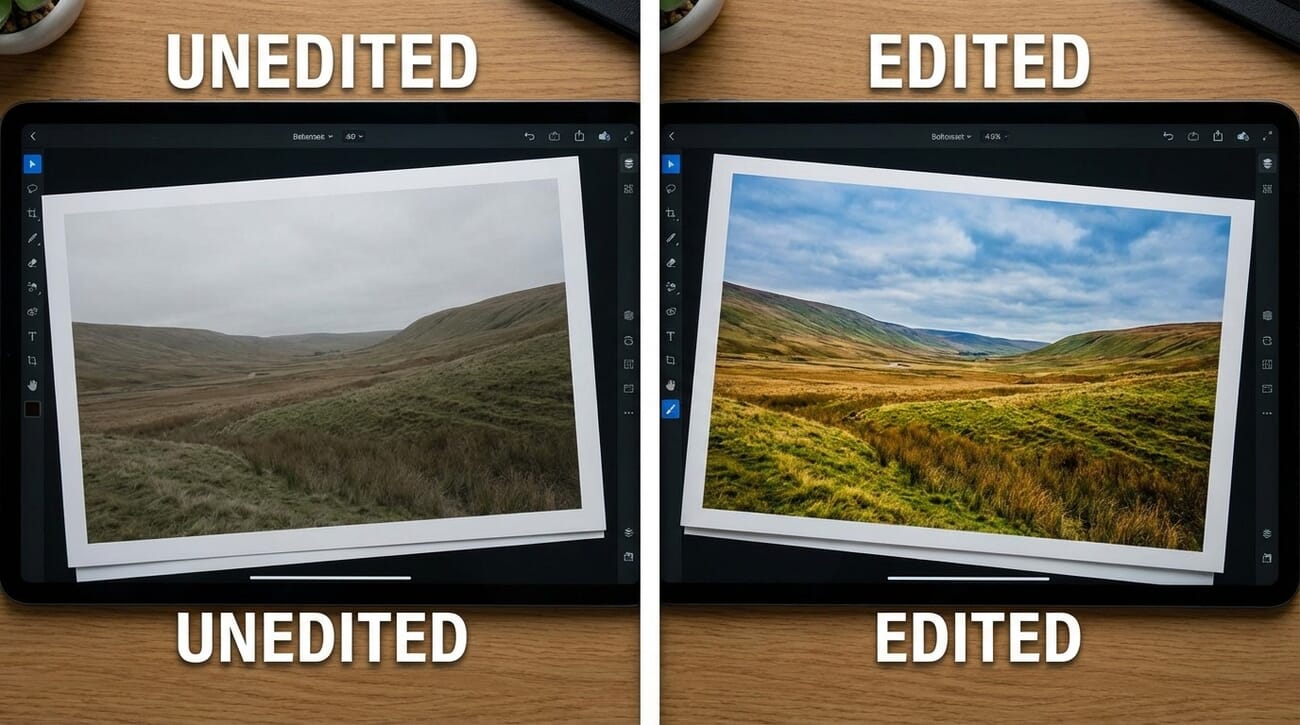
- Why Edit Photos? — Editing transforms average shots into stunning images by improving exposure, color, contrast, and composition.
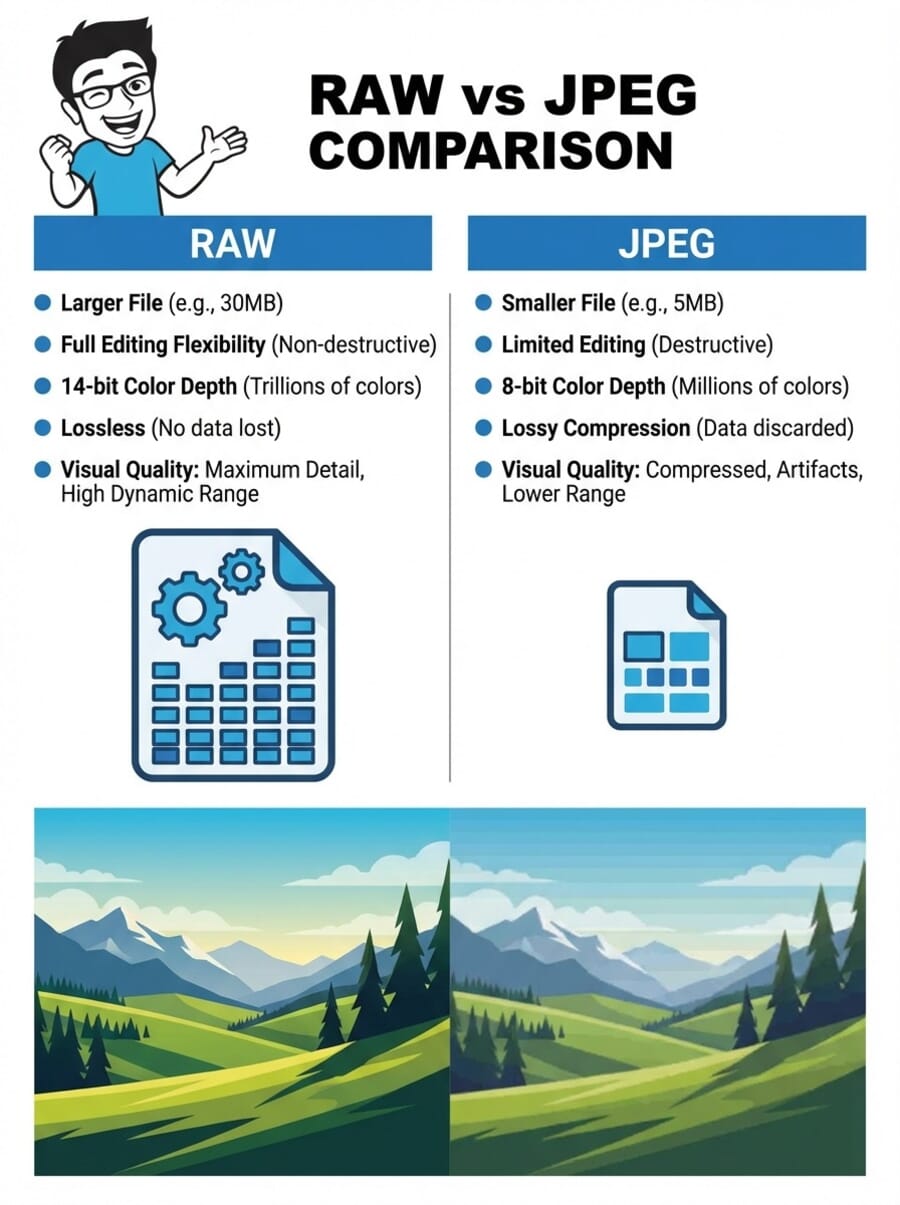
- RAW vs JPEG — Shoot in RAW for maximum editing flexibility; JPEG is convenient but limits post-processing options.
- Best Software in 2026 — Adobe Lightroom remains the gold standard; Capture One, Photoshop, and free tools like Darktable offer excellent alternatives.
- Mobile Editing — Lightroom Mobile, Snapseed, and Apple Photos bring professional-grade editing to smartphones.
- AI-Powered Tools — Topaz Photo AI, Lightroom Denoise AI, and Generative Fill are game-changers for noise reduction, sharpening, and object removal.
- Core Concepts — Master global/local adjustments, white balance, exposure, contrast, saturation, cloning, sharpening, and noise reduction.
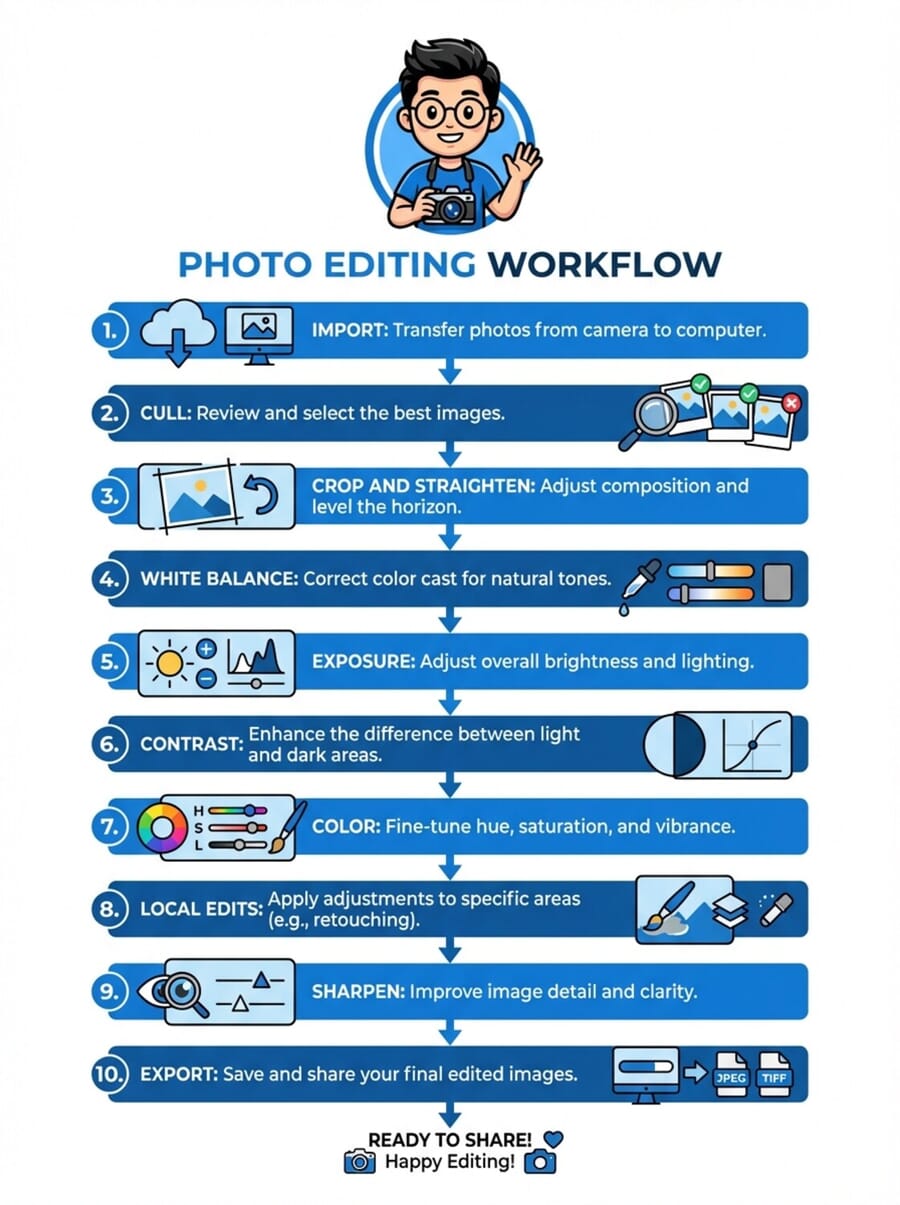
- Step-by-Step Workflow — Follow a structured editing plan: organize → crop → white balance → exposure → contrast → color → noise reduction → sharpen → export.
- Export & Sharing — Export as JPEG in sRGB, optimize file sizes for social media, and apply output sharpening.
When you buy through links on our site, we may earn a commission at no cost to you. We evaluate products independently. Commissions do not affect our evaluations.
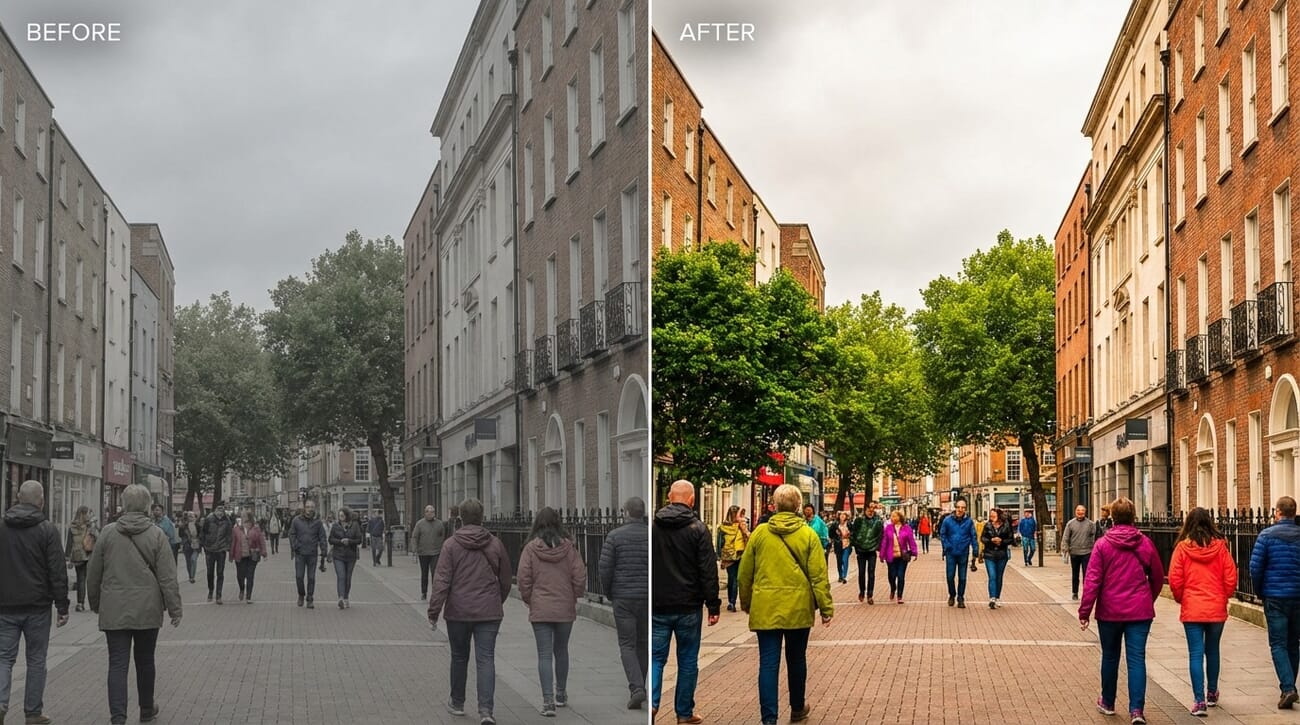
Why Edit Photos?
Photo editing — also called post-processing — is the process of modifying and improving a photograph after it has been captured. Every professional photographer edits their work, and for good reason: editing is what transforms a decent shot into a truly compelling image.
Here are just a few things that photo editing makes possible:
- Add depth and dimension to a flat image
- Replace muddy tones with vivid, striking colors
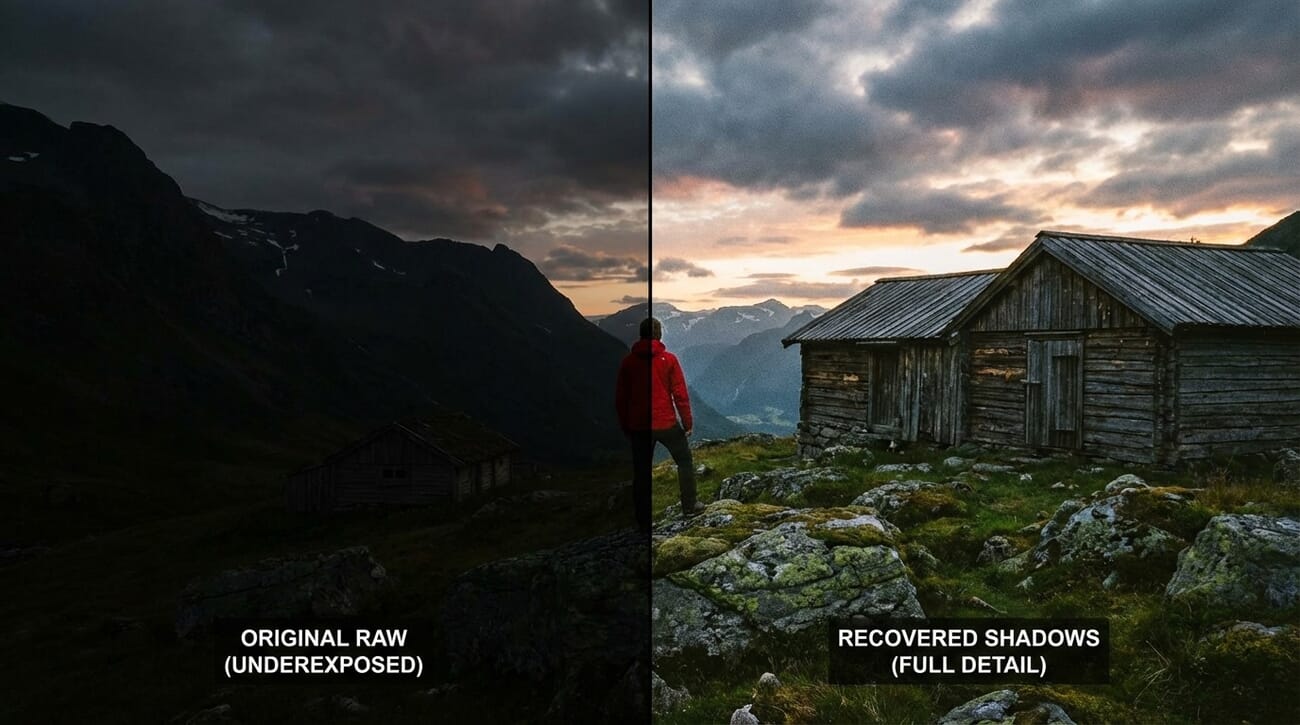
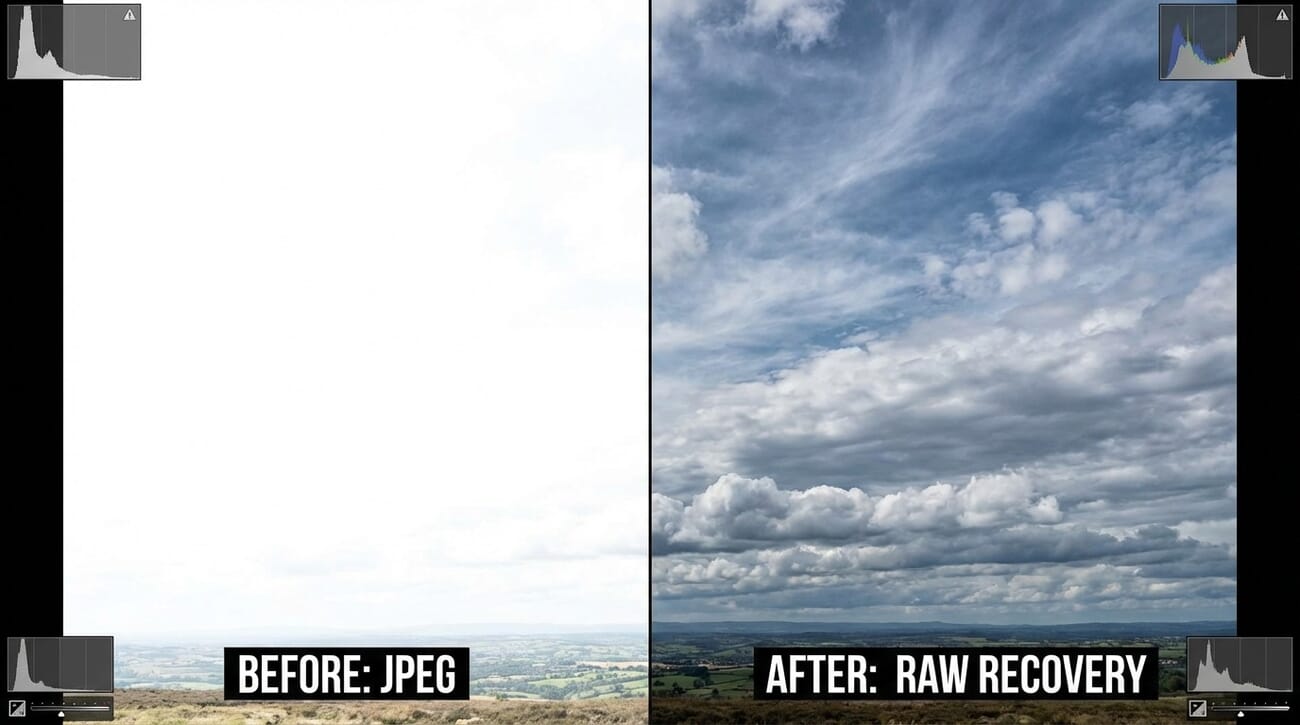
- Brighten underexposed shots or recover blown-out highlights
- Remove distracting background elements
- Apply creative looks — cinematic, vintage, moody, or vibrant
- Straighten crooked horizons and improve composition
- Clean up blemishes, dust spots, and sensor artifacts
On the flip side, poor editing can make a photo look worse than the original. Common mistakes include oversaturated colors, unnatural halos from over-sharpening, blown-out highlights, and strange color casts. The key is restraint — good editing enhances what is already there rather than creating something artificial.

Professional photographers treat editing as an essential extension of the creative process. The camera captures the raw material; editing shapes it into the final vision. Even slight adjustments to exposure, white balance, and contrast can make the difference between a snapshot and a portfolio-worthy image.
Furthermore, photographers who shoot in RAW format must edit their photos, because RAW files look flat and dull without processing. More on that below.
RAW vs JPEG: Which Format to Use
When a camera captures a photo, it stores the image in a specific file format. The two main options are JPEG and RAW — and understanding the difference is critical for anyone serious about photo editing.
JPEG: Convenient but Limited
JPEG is the default format on most cameras and smartphones. It is the universal image format used across the internet, social media, and messaging apps.
When a camera saves a JPEG, it compresses the image data significantly. The camera also applies its own processing — boosting colors, adding sharpness, and adjusting contrast — so the image looks polished straight out of camera.
The downside? That compression discards image data permanently. When editing a JPEG, there is far less information to work with. Pushing exposure, recovering highlights, or heavily adjusting colors will quickly introduce banding, noise, and visible artifacts.
JPEG summary:
- Small file size, easy to share
- Looks good straight out of camera
- Limited editing flexibility
RAW: Maximum Flexibility
RAW files are uncompressed (or minimally compressed), retaining every bit of data the sensor captured. They have greater bit depth (typically 12-bit or 14-bit vs. JPEG’s 8-bit), which means far more color information and dynamic range to work with.
RAW files come out of the camera looking flat and dull — no sharpening, no contrast boost, no saturation enhancement. They are meant to be edited. But because they retain so much data, it is possible to recover shadow detail, pull back highlights, adjust white balance after the fact, and make extensive color corrections without degrading image quality.
RAW summary:
- Exceptional editing flexibility and dynamic range
- Larger file sizes (typically 20–80 MB per image)
- Requires editing before sharing
HEIF and ProRAW: Smartphone Formats
Modern smartphones have introduced additional formats worth knowing about. HEIF (High Efficiency Image Format) is used by iPhones and some Android devices as a more efficient alternative to JPEG — offering better quality at smaller file sizes while supporting 10-bit color depth.
Apple ProRAW combines computational photography (Smart HDR, Deep Fusion) with RAW flexibility, giving iPhone photographers the best of both worlds. Google’s Pixel phones offer similar RAW capture through the camera app.
The Verdict: Shoot RAW When Possible
For anyone serious about photo editing, shoot in RAW. The extra file size is a small price to pay for the dramatically increased editing latitude. Storage is cheap; lost image data is irreplaceable.
For casual snapshots, quick social media posts, or situations where storage is very limited, JPEG (or HEIF) is perfectly fine. Many photographers also use RAW+JPEG mode, capturing both formats simultaneously.
Also Read: JPEG vs RAW and Why RAW is Better
Photo Editing Software in 2026
Choosing the right editing software is one of the most important decisions for any photographer. The landscape has evolved significantly in recent years, with AI-powered features becoming standard and free alternatives gaining serious capabilities. Here is a look at the top options available today.
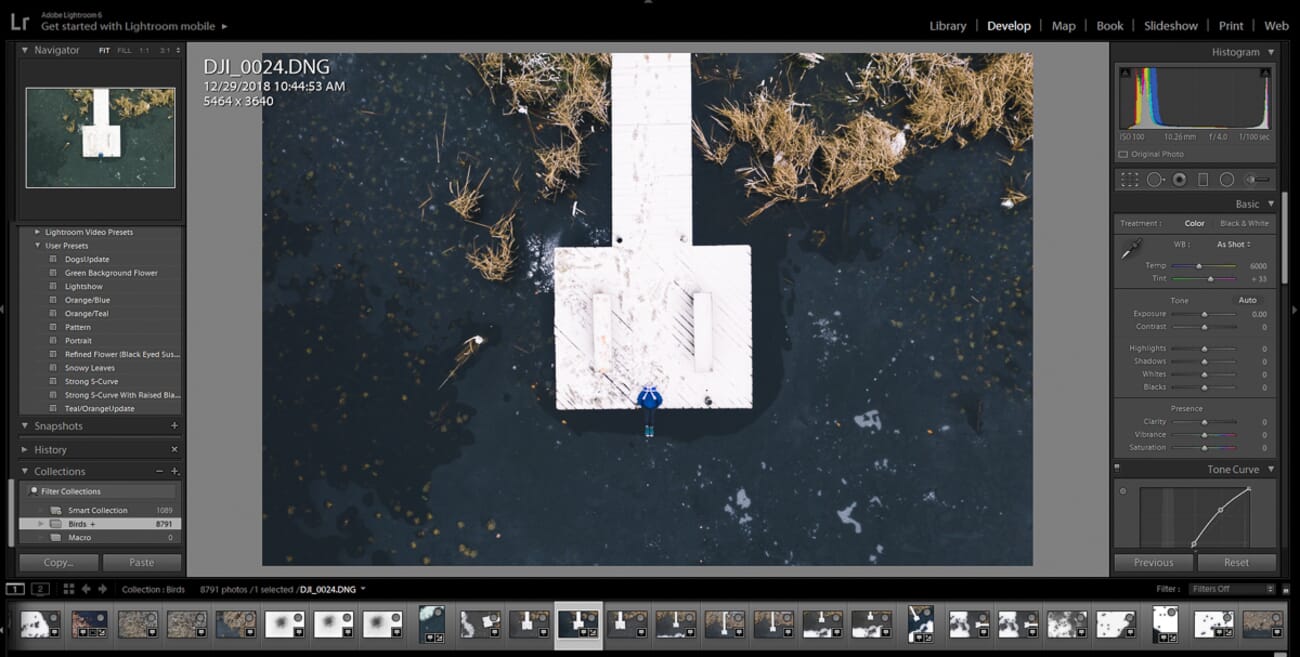
Adobe Lightroom Classic & Lightroom CC

Adobe Lightroom remains the industry standard for photo editing and organization. In 2026, it is more powerful than ever, with several AI-driven features that have transformed the editing experience:
- AI Masking: Automatically detect and select subjects, skies, backgrounds, and even specific objects with a single click. This eliminates the need for tedious manual selections.
- Denoise AI: A game-changing feature that removes noise from high-ISO images while preserving extraordinary detail — far superior to traditional noise reduction sliders.
- Lens Blur: Simulate shallow depth of field after the fact, adding natural-looking bokeh to any image.
- HDR output: Edit and export images with HDR metadata for compatible displays.
- Comprehensive organization: Star ratings, color labels, smart collections, keywords, and face detection make managing thousands of photos effortless.
Lightroom Classic is the desktop-focused version with a local file catalog — best for photographers with large libraries stored on local drives. Lightroom CC (cloud-based) syncs photos across all devices and is ideal for photographers who want to edit on desktop, tablet, and phone seamlessly.
Lightroom requires an Adobe Photography Plan subscription (starting around $10/month), which also includes Photoshop. While the subscription model is not for everyone, the value proposition is hard to beat.
Related Posts
Adobe Photoshop
While Lightroom handles 90% of editing tasks, Adobe Photoshop is indispensable for advanced retouching, compositing, and pixel-level manipulation. In 2026, Photoshop’s AI capabilities have made it more accessible than ever:
- Generative Fill: Select an area and type a text prompt to add, remove, or replace objects using AI. Need to extend a background, remove a person, or add clouds? Generative Fill handles it seamlessly.
- Generative Expand: Extend the canvas of any image and have AI fill in the new area naturally.
- Remove Tool: An AI-powered tool that intelligently removes unwanted objects with a single brush stroke — far more effective than the older Clone Stamp for many tasks.
- Neural Filters: AI-powered adjustments for skin smoothing, color transfer, style transfer, and more.
- Advanced compositing: Layers, masks, blend modes, and adjustment layers for complex multi-image compositions.
Photoshop is included in the Adobe Photography Plan alongside Lightroom. For photographers who need to go beyond basic adjustments — retouching portraits, creating composites, or making precise local edits — Photoshop is essential.
Capture One
Capture One has become the go-to alternative for professional photographers who want best-in-class RAW processing and color science. Many commercial, fashion, and product photographers prefer it over Lightroom for its superior color handling and tethered shooting capabilities.
Key strengths include exceptionally accurate color rendering, powerful layer-based local adjustments, industry-leading tethered capture for studio work, and excellent handling of skin tones. Capture One is available as both a subscription and a one-time perpetual license.
Free Alternatives: Darktable, RawTherapee, and Photopea
Not everyone needs (or wants) to pay for editing software. Several free, open-source options have matured into genuinely capable tools:
- Darktable: A powerful open-source RAW editor with a non-destructive workflow, extensive module system, and masking capabilities. It is the closest free equivalent to Lightroom and runs on Windows, macOS, and Linux.
- RawTherapee: Another excellent open-source RAW processor known for its detailed control over demosaicing algorithms and color management. Great for photographers who want granular technical control.
- Photopea: A free, browser-based editor that closely mimics Photoshop’s interface and supports PSD files, layers, and advanced editing. No installation required — it runs entirely in a web browser.
Other Notable Options
Luminar Neo (by Skylum) focuses heavily on AI-driven one-click enhancements — sky replacement, portrait retouching, and atmospheric effects. It can be useful for beginners who want quick results, though it is less robust than Lightroom for professional workflows.

ON1 Photo RAW offers a perpetual license option with solid RAW processing, layers, and local adjustments. Affinity Photo (by Serif) is an affordable one-time-purchase Photoshop alternative with professional-grade retouching and compositing tools.
Mobile Photo Editing
Smartphone cameras have become remarkably capable, and mobile editing apps have kept pace. In 2026, it is entirely possible to capture, edit, and share professional-quality images using nothing but a phone.
Lightroom Mobile
Adobe Lightroom Mobile is arguably the most powerful free photo editor available on iOS and Android. The free version includes RAW editing, presets, selective adjustments, and the healing brush. A premium subscription (included with the Photography Plan) adds AI Denoise, masking, and cloud sync.
Lightroom Mobile can also capture photos in its own RAW DNG format, giving smartphone photographers the same editing flexibility as dedicated camera shooters.
Snapseed
Snapseed (by Google) is a completely free, ad-free mobile editor with surprisingly deep capabilities. Its selective adjustment tools, healing brush, perspective correction, and extensive filter collection make it one of the best options for quick, high-quality edits on the go. The “Stacks” feature allows non-destructive editing and easy re-editing of previous adjustments.
Apple Photos
The built-in Apple Photos app has evolved from a basic viewer into a surprisingly capable editor. It now supports RAW editing, selective adjustments, noise reduction, and a clean user interface that makes quick edits effortless. For iPhone photographers who want to keep things simple, Apple Photos handles the basics remarkably well.
VSCO and Darkroom
VSCO is popular for its film-emulation presets and social sharing features. Darkroom (iOS) offers a polished, powerful editing experience with batch editing, RAW support, and excellent integration with Apple’s photo library. Both are excellent choices for photographers who prioritize creative color grading on mobile.
AI-Powered Photo Editing
Artificial intelligence has revolutionized photo editing over the past few years. Tasks that once required extensive manual work — or were simply impossible — can now be accomplished in seconds. Here are the most impactful AI tools available in 2026.
Topaz Photo AI
Topaz Photo AI has become an essential tool for many photographers. It combines three critical functions into one application:
- Denoise: AI-powered noise removal that preserves significantly more detail than traditional methods. The results on high-ISO images are often remarkable.
- Sharpen: Intelligent sharpening that can rescue slightly soft images — including those with mild motion blur or focus issues.
- Upscale: Enlarge images 2x, 4x, or even 6x while adding realistic detail using AI models trained on millions of images.
Topaz Photo AI works as a standalone application or as a plugin for Lightroom and Photoshop. It is a one-time purchase with a year of updates included.
AI Background Removal
Removing or replacing backgrounds has become trivial with AI. Tools like remove.bg, Photoshop’s Select Subject + Generative Fill, and Canva’s background remover can isolate subjects with remarkable precision in seconds. This is particularly useful for product photography, headshots, and creative composites.
AI Upscalers
Need to print a photo larger than the original resolution allows? AI upscalers like Topaz Gigapixel AI, the free Upscayl (open source, desktop), and various online tools can intelligently enlarge images while generating realistic detail. While not a replacement for capturing at high resolution, these tools are invaluable for older photos, cropped images, and low-resolution source material.
When to Use AI vs. Manual Editing
AI tools excel at technical corrections — noise reduction, sharpening, background removal, and upscaling. For these tasks, AI is often faster and more effective than manual methods.
However, creative decisions still benefit from a human eye. Color grading, composition choices, mood adjustments, and artistic retouching involve subjective judgment that AI cannot replicate. The best approach is to use AI for the technical heavy lifting, then apply creative adjustments manually.
Basic Photo Editing Concepts
Before diving into a step-by-step workflow, it helps to understand the fundamental concepts that underpin all photo editing. These apply regardless of which software is being used.
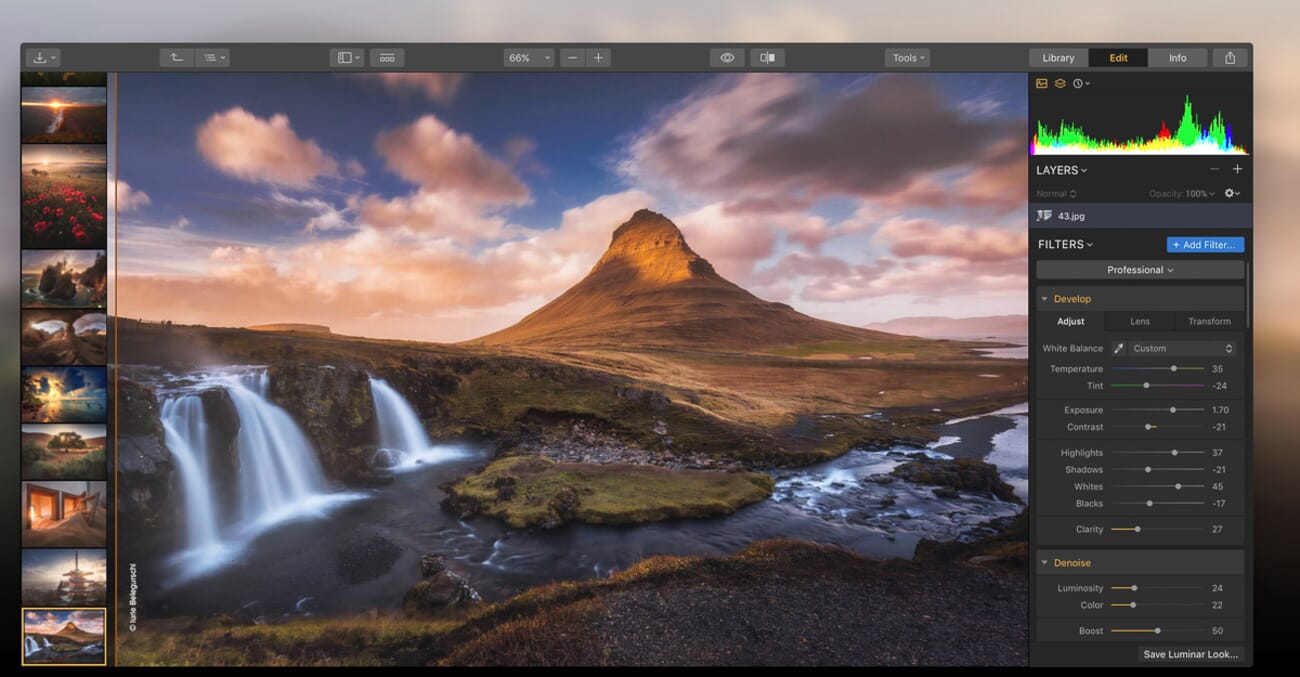
Global Adjustments
Global adjustments are edits that affect the entire photo. These include changes to exposure, contrast, saturation, white balance, highlights, shadows, and sharpening applied uniformly across the image.
Every editing session should begin with global adjustments. They establish the overall look and feel of the image before any fine-tuning begins. In many cases, global adjustments alone are all a photo needs.
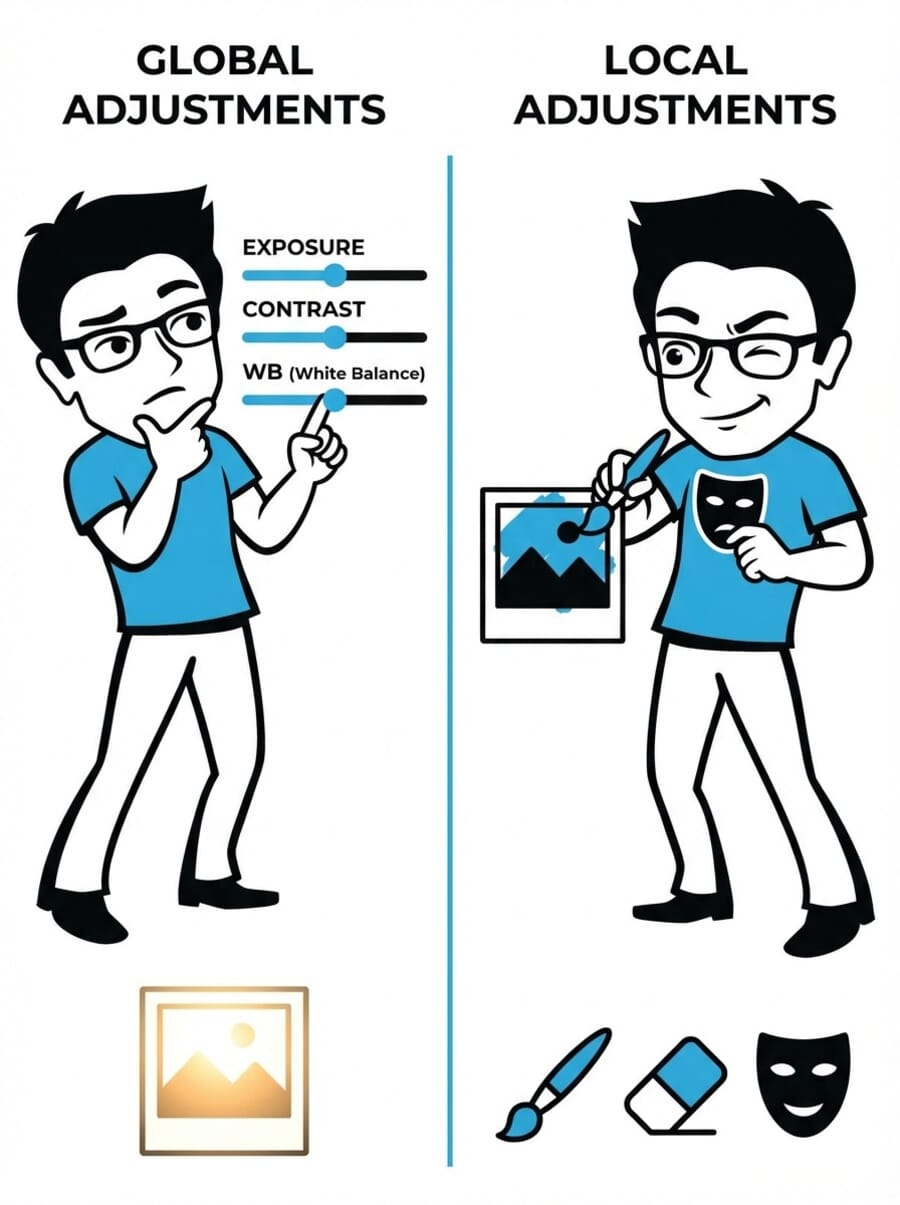
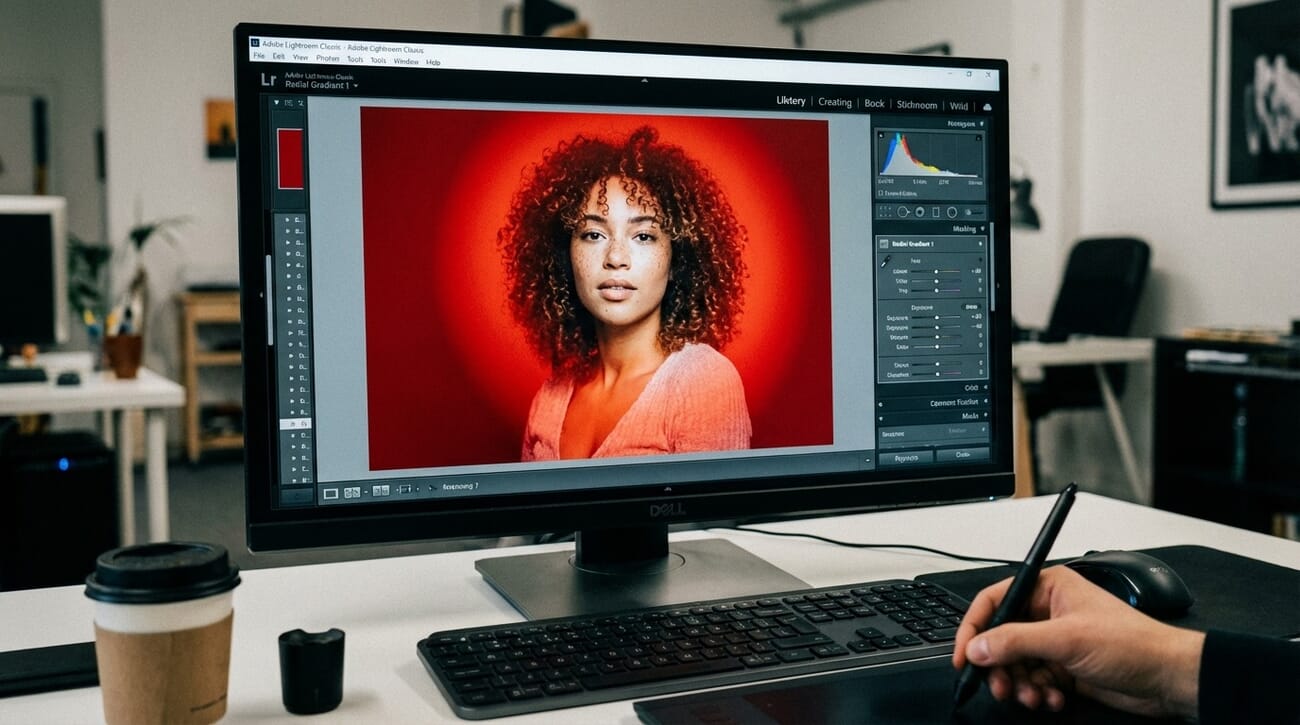
Local Adjustments
Local adjustments are edits that affect only a specific part of the photo. These include selectively brightening or darkening areas, removing spots, changing colors in one region, or applying sharpening only to the subject.
In Lightroom, local adjustments are made using the masking tools — brush, linear gradient, radial gradient, and AI-powered subject/sky selections. In Photoshop, layers and masks provide even more precise control.
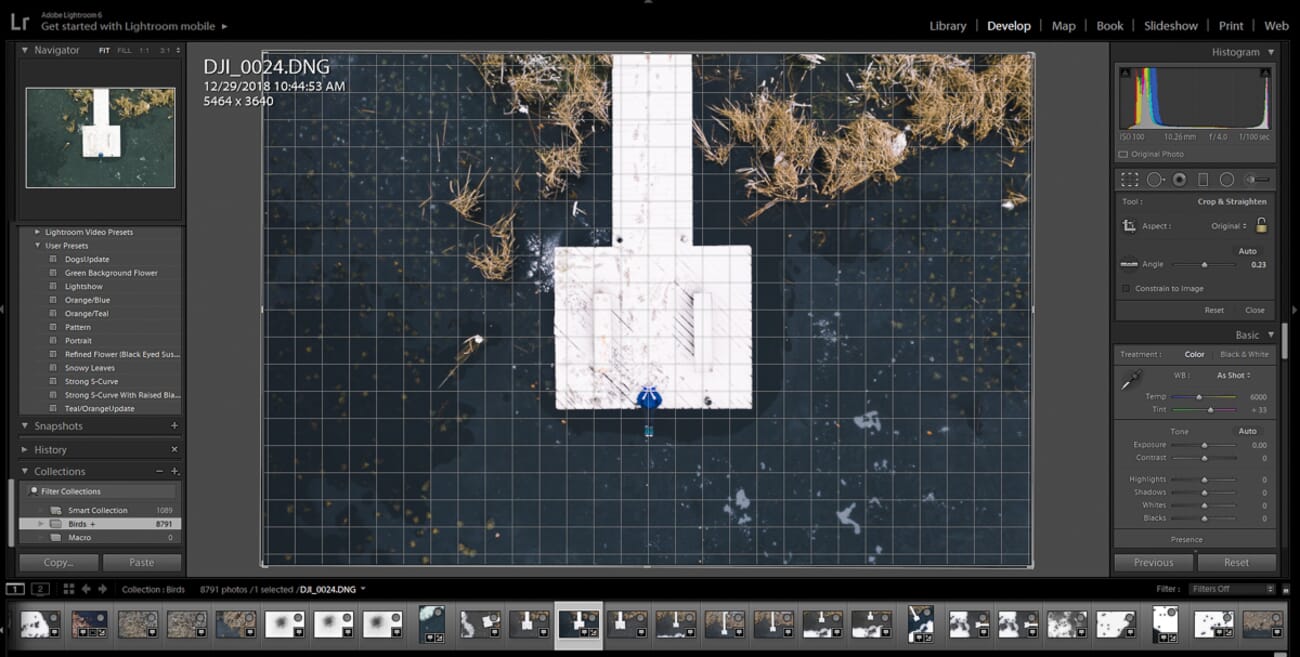
Cropping and Straightening
Cropping removes the edges of a photo, changing the composition by eliminating distracting elements and improving the visual balance. It is one of the most powerful yet simple editing tools available.
Straightening corrects a tilted horizon or crooked lines in the image. Most editing programs include a leveling tool that makes this adjustment quick and precise. A crooked horizon is one of the fastest ways to make an otherwise great photo look amateurish.
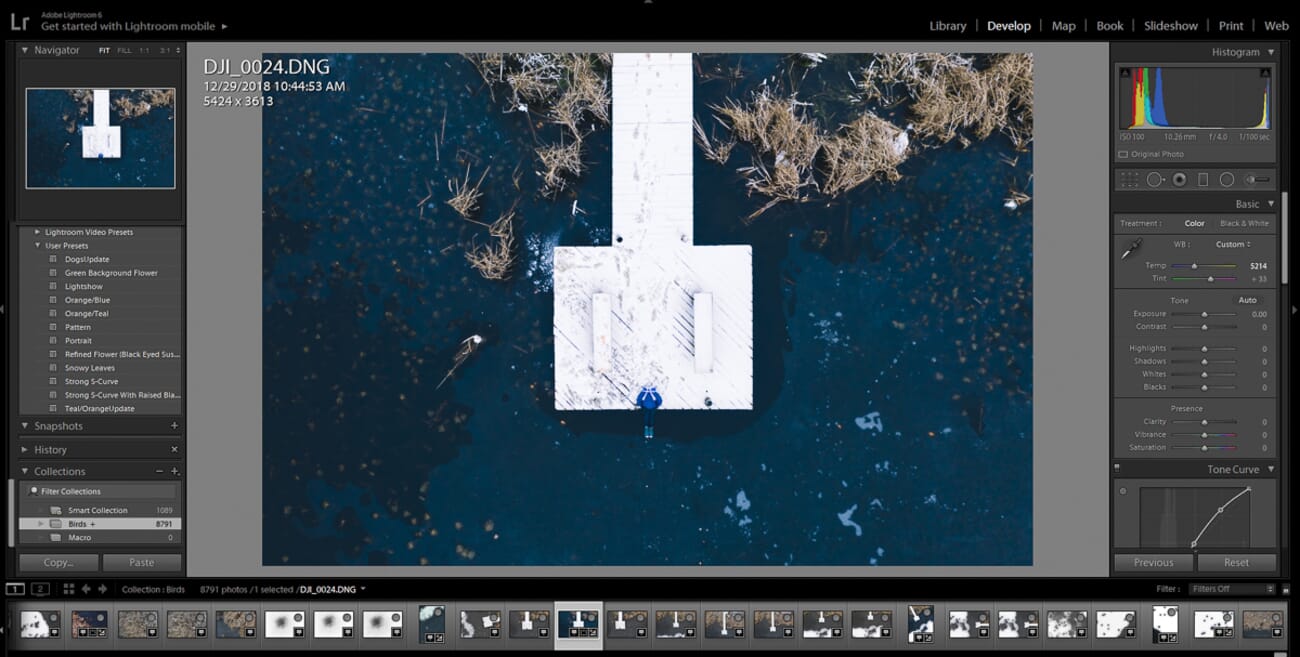
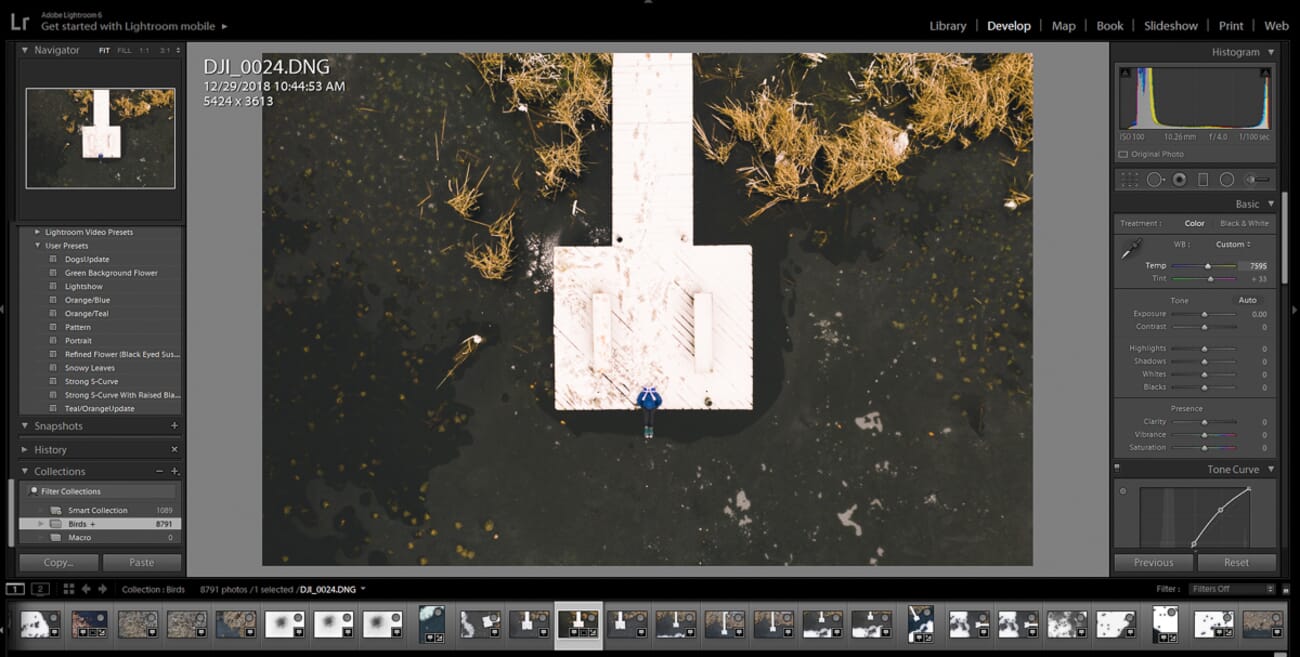
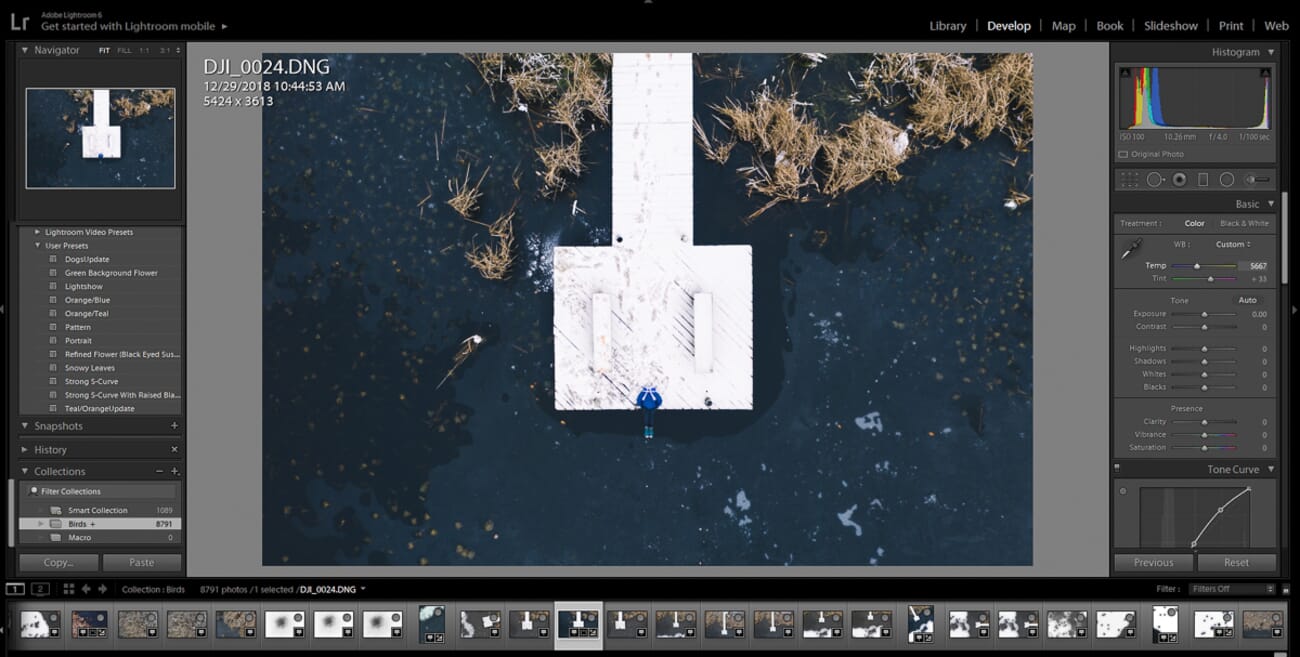
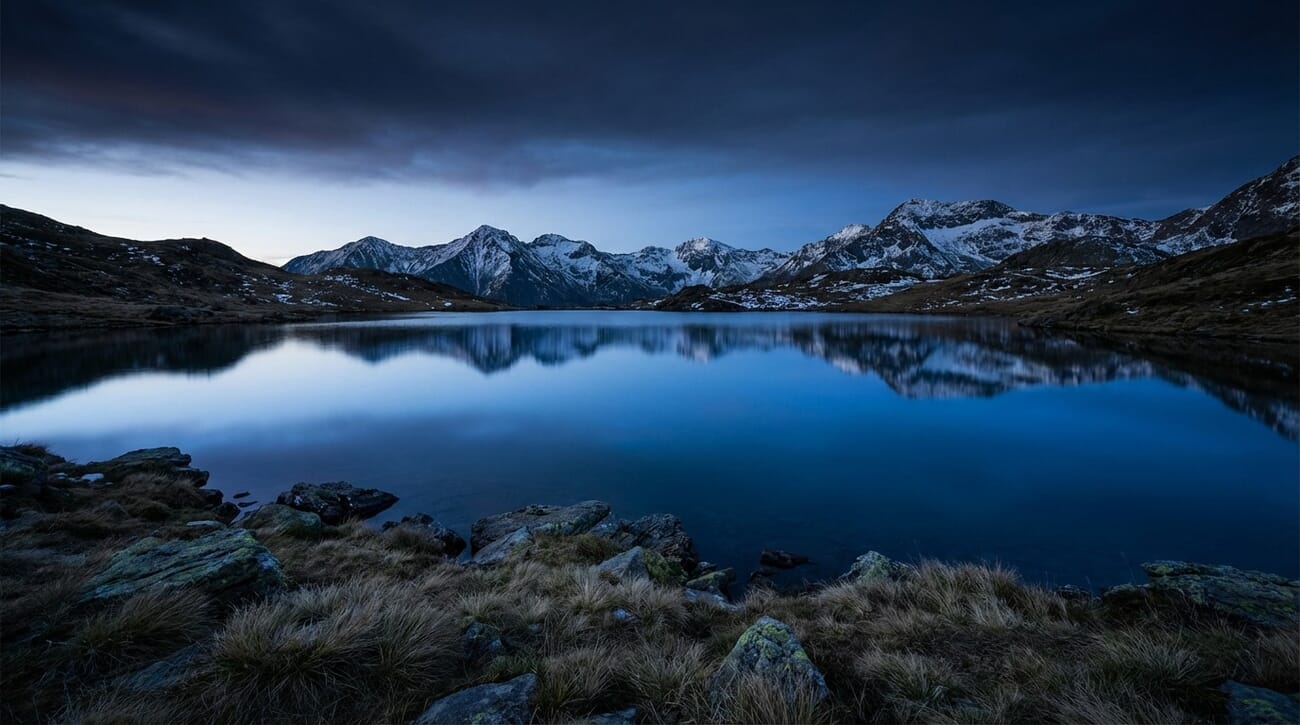
Temperature and White Balance
Color temperature refers to the overall warmth or coolness of an image. Warm images have a golden/orange cast; cool images have a blue cast. The temperature is influenced by the color of the ambient light at the time of capture.
White balance is the tool used to correct (or creatively shift) the color temperature. The goal is typically to neutralize unwanted color casts so that whites appear truly white. However, color temperature can also be used creatively — a slightly warm cast enhances golden hour shots, while a cool cast can emphasize a moody winter scene.
When shooting in RAW, white balance can be changed freely during editing with no quality loss — another major advantage of the RAW format. With JPEG, the white balance is baked in and can only be partially corrected.
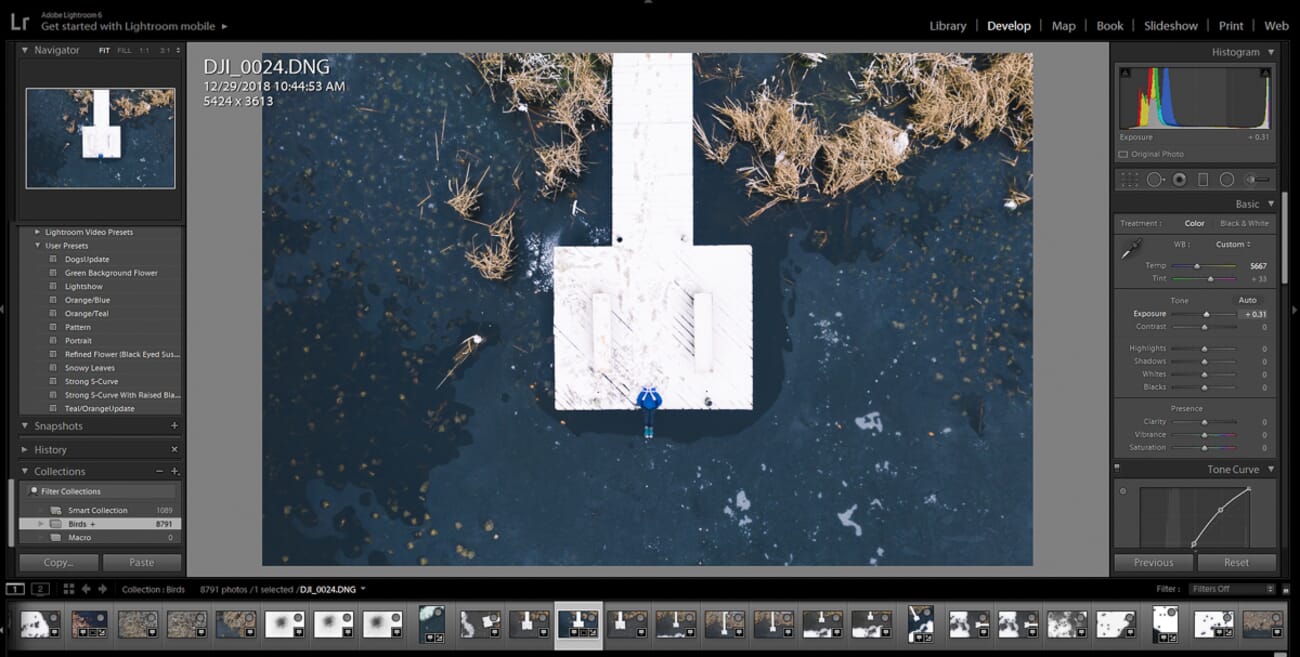
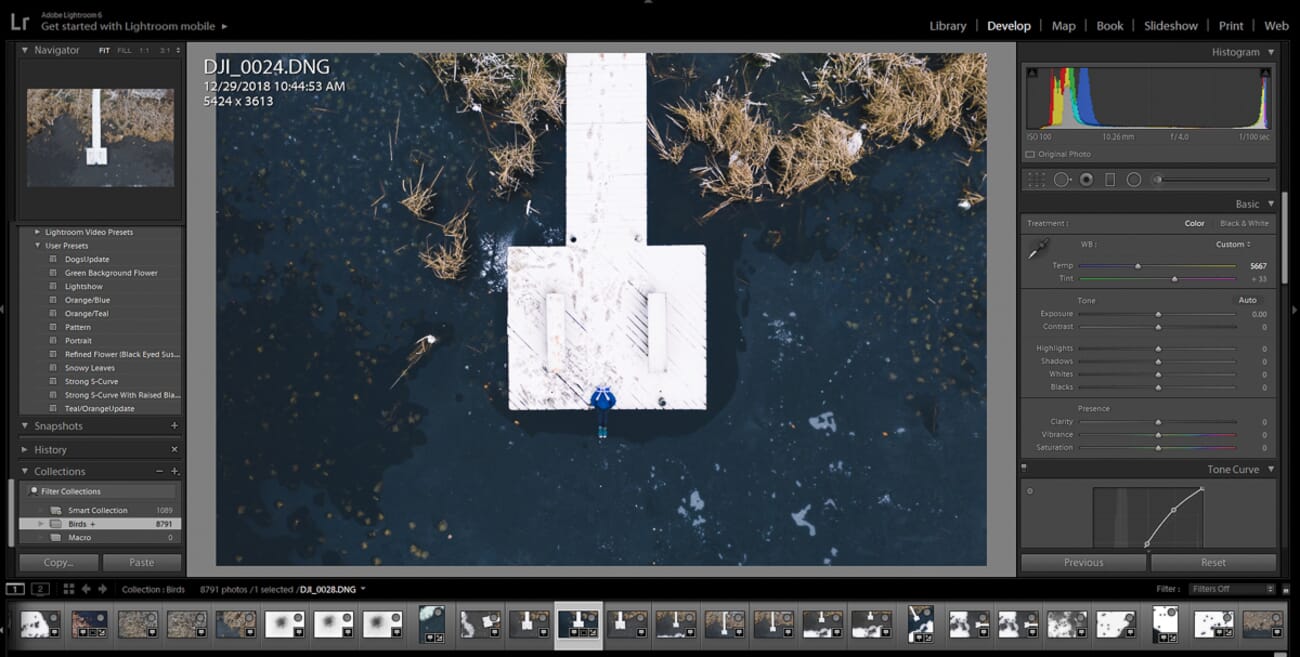
Exposure
Exposure refers to the overall brightness of an image. A well-exposed photo retains detail in both the brightest highlights and the darkest shadows.
An underexposed image is too dark, with lost shadow detail:
An overexposed image is too bright, with blown-out highlights:
Most editing programs provide an exposure slider along with more targeted controls: Highlights, Shadows, Whites, and Blacks. Using these in combination allows precise control over every tonal range in the image. The histogram — a graph showing the distribution of brightness values — is an invaluable tool for evaluating and correcting exposure.
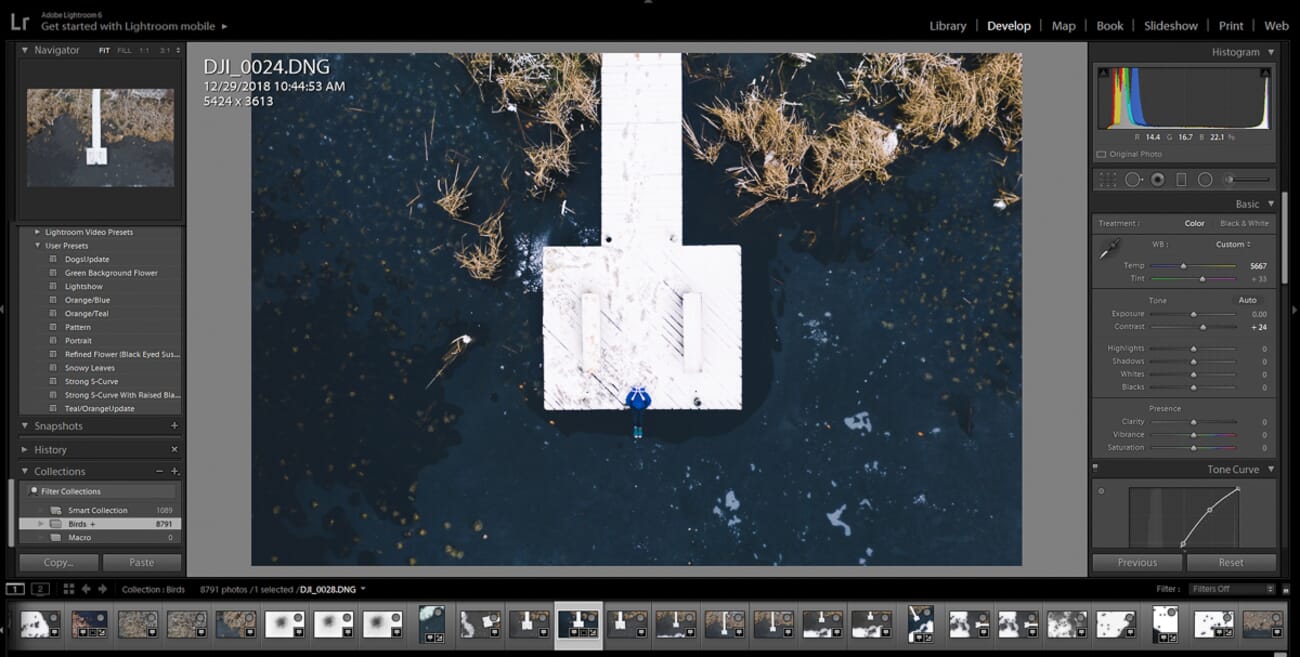
Contrast
Contrast is the difference between the lightest and darkest tones in a photo. A low-contrast image appears flat and washed out; a high-contrast image has deep blacks and bright whites with a punchy, dynamic feel.
Increasing contrast brightens the bright areas and darkens the dark areas, adding visual “pop.” Most photos benefit from a slight contrast boost. For more precise control, the tone curve allows targeting specific tonal ranges — darkening only the shadows or brightening only the midtones, for example.
Saturation and Vibrance
Saturation refers to the intensity of colors in an image. High saturation produces vivid, punchy colors; low saturation produces muted, subdued tones. Zero saturation results in a black-and-white image.
Vibrance is a more intelligent version of saturation. It selectively boosts the intensity of muted colors while leaving already-saturated colors untouched. This makes it much safer to use than the saturation slider, especially with portraits (where over-saturation can make skin tones look unnatural).
For more advanced color control, the HSL (Hue/Saturation/Luminance) panel allows adjusting individual colors independently — making blues deeper without affecting greens, for example.
Cloning and Healing
Cloning copies pixels from one area of the photo and pastes them over another area. Healing does the same but blends the copied pixels with the surrounding area for a more natural result.
These tools are used to remove unwanted elements — dust spots, blemishes, distracting objects, or sensor artifacts. In 2026, AI-powered removal tools (like Photoshop’s Remove Tool and Lightroom’s Content-Aware Remove) have made this process faster and more seamless than ever.
Sharpening
Sharpening increases the contrast along the edges of objects, making them appear more defined and crisp. It does not add new detail — it enhances the perception of detail that already exists.

Sharpening is typically applied in two stages: capture sharpening (to compensate for the inherent softening of digital capture) and output sharpening (optimized for the final display medium — screen, print, or social media). Over-sharpening creates ugly halos along edges and amplifies noise, so restraint is essential.
In 2026, AI-powered sharpening tools (in Topaz Photo AI and Lightroom’s Denoise AI) can recover detail from slightly soft images more effectively than traditional sharpening ever could.
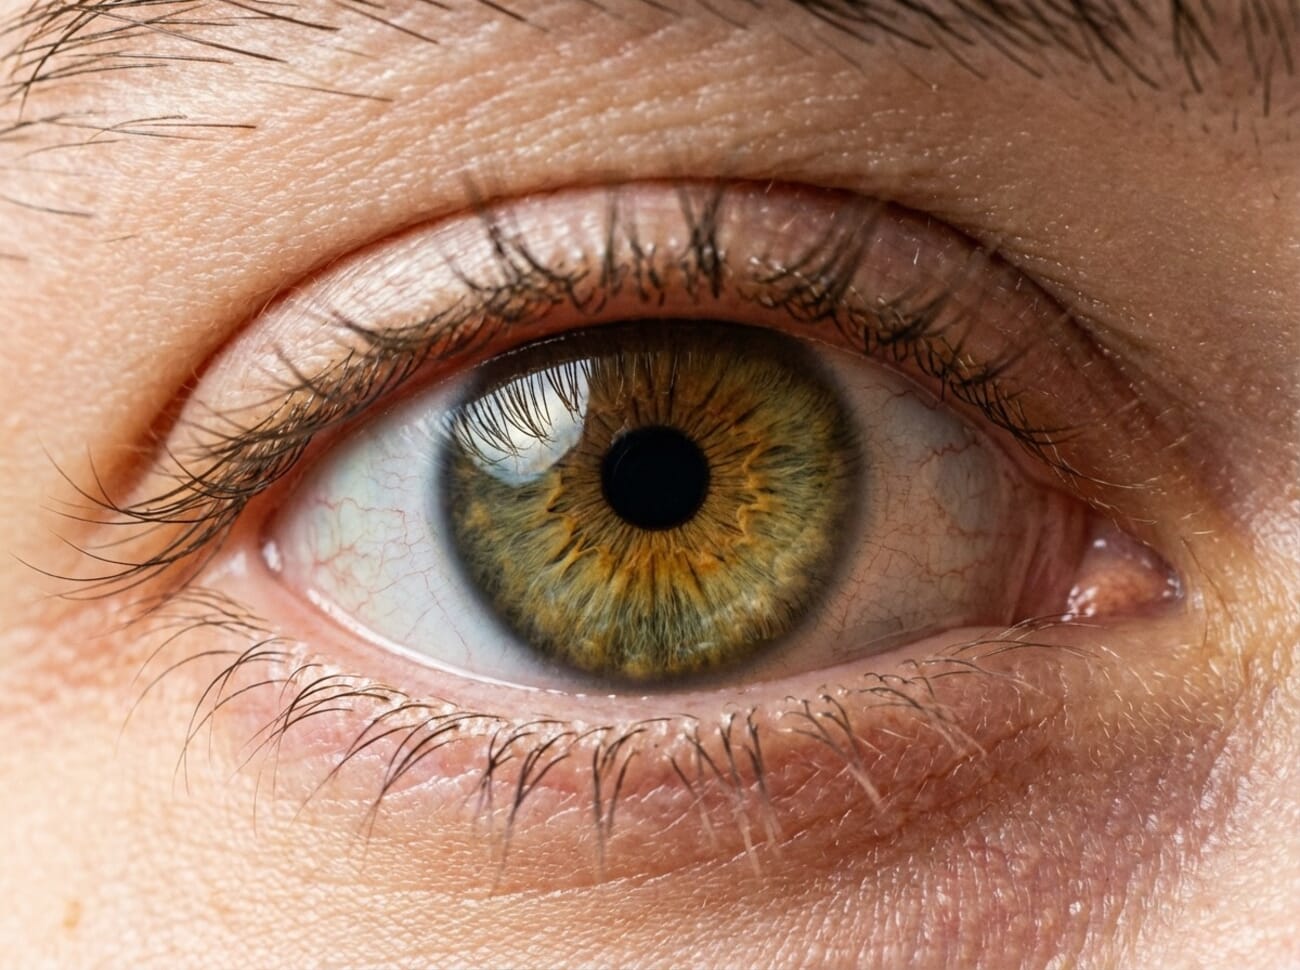
Noise Reduction
Noise appears as unwanted grain or speckling in photos, primarily caused by shooting at high ISO settings in low-light conditions. Noise is especially visible in shadow areas and smooth gradients.
Traditional noise reduction works by blurring the image slightly to smooth out grain — but this inevitably softens fine detail. AI-powered noise reduction (Lightroom Denoise AI, Topaz Photo AI) has fundamentally changed this trade-off. These tools can remove noise while actually preserving and sometimes enhancing fine detail — something that was impossible just a few years ago.
For photographers who frequently shoot in low light, AI denoise is arguably the single most impactful editing advancement of the past decade.
Also Read: Best Noise Reduction Software
Step-by-Step Editing Workflow for Beginners
Having a consistent workflow is the key to efficient, high-quality editing. The following step-by-step plan works in any editing program and produces reliable results. As skills develop, each photographer will naturally adapt this workflow to their own style and preferences.
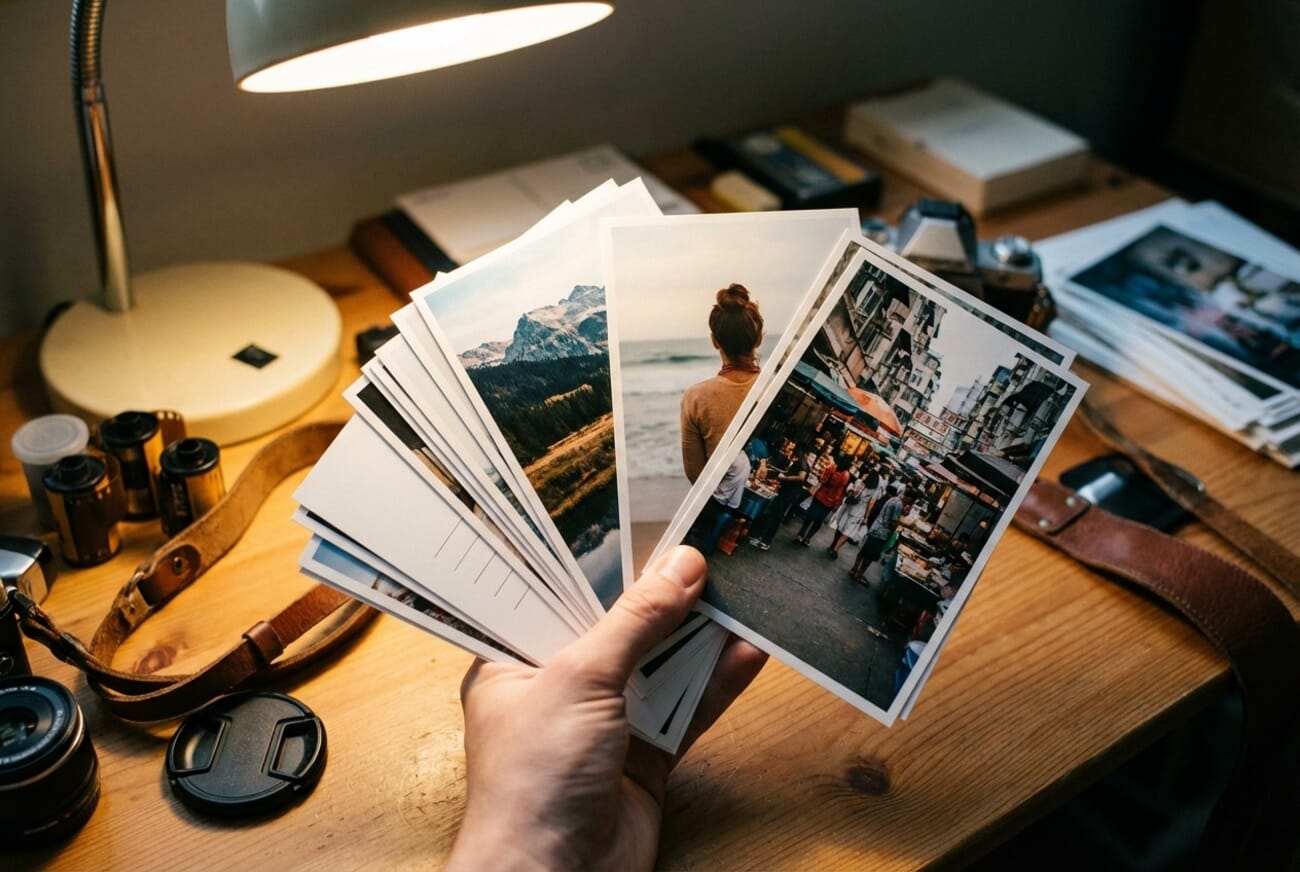
Step 0: Import and Organize
Before editing a single photo, start by importing all images into the editing program and organizing them. In Lightroom, this means importing into the catalog. In other programs, it means pointing to the folder containing the images.
Then perform a culling pass: go through all images quickly and flag or rate the keepers. Be ruthless — delete obvious duds, mark the best frames, and reject the rest. A second, more selective pass narrows the selection down to only the strongest images worth editing.

Related Posts
Step 1: Straighten and Crop
Begin the actual editing by straightening any crooked lines (especially horizons) and cropping for the best possible composition. This step comes first because all subsequent edits should be applied to the final composition — there is no point spending time editing areas that will be cropped away.
Tips for effective cropping:
- Use the rule of thirds grid as a guide
- Eliminate distracting elements along the edges
- Avoid cropping too heavily — excessive cropping degrades image quality
- Consider the final aspect ratio (4:5 for Instagram portrait, 16:9 for widescreen, etc.)
Step 2: Adjust White Balance
Next, correct the white balance to remove any unwanted color casts. The temperature slider adjusts the warm-cool axis, while the tint slider corrects green-magenta shifts.
Most programs offer white balance presets (Daylight, Cloudy, Tungsten, etc.) as well as an eyedropper tool that sets neutral white balance by clicking on something that should be gray or white in the scene. When shooting RAW, white balance adjustments are lossless and can be changed freely.
Remember: white balance is not just about technical accuracy. It is also a creative choice. Choose a temperature that supports the mood and atmosphere of the image.
Step 3: Correct the Exposure
Evaluate the overall brightness. Is the image too dark? Too bright? Check the histogram — a well-exposed image typically shows data spread across the full range without clipping at either end (though creative exceptions exist).

Use the Exposure slider for overall brightness, then fine-tune with Highlights (to recover bright areas), Shadows (to lift dark areas), Whites (to set the white point), and Blacks (to set the black point). This combination gives far more control than a single brightness slider.
Step 4: Add Contrast
Most photos benefit from a slight contrast boost. Start with the contrast slider, but for more nuanced control, use the tone curve. A classic “S-curve” — slightly darkening the shadows and lifting the highlights — adds pleasing contrast without being heavy-handed.
Alternatively, adjust the Blacks and Whites sliders to expand the tonal range. Dropping the blacks and lifting the whites creates a similar (and often more controllable) contrast effect.
The Clarity slider (available in Lightroom, Capture One, and most modern editors) adds midtone contrast, which enhances texture and detail. A small amount of clarity (around +10 to +25) works well for landscapes and architecture; negative clarity creates a dreamy, softened look sometimes desirable for portraits.
Step 5: Adjust Color and Saturation
With exposure and contrast dialed in, turn attention to color. A slight vibrance boost (+10 to +20) enhances colors naturally without the risk of oversaturation. For more control, use the HSL panel to adjust individual color channels.

Common color adjustments include:
- Deepening blue skies by increasing blue saturation and decreasing blue luminance
- Warming skin tones by shifting orange hue slightly toward yellow
- Making foliage more vivid by boosting green saturation
- Creating color harmony by slightly desaturating competing colors
Tip: The single most common editing mistake beginners make is over-saturating colors. When in doubt, less is more. Step away from the screen and return with fresh eyes before finalizing color adjustments.
Step 6: Apply Noise Reduction (If Needed)
If the image was shot at a high ISO or significant shadow recovery was applied during editing, noise reduction may be necessary. Zoom to 100% to evaluate the noise level before making adjustments.
For the best results in 2026, use AI-powered denoise (Lightroom Denoise AI or Topaz Photo AI) rather than traditional luminance/color noise sliders. The difference in quality is dramatic — AI denoise preserves far more detail while removing noise more effectively.
If AI denoise is not available, use the traditional noise reduction sliders conservatively. Over-application results in a waxy, detail-free look that is often worse than the original noise.
Step 7: Sharpen (With Restraint)
Sharpening should be one of the last steps in the workflow. It is not possible to fix a truly blurry image with sharpening — but appropriate sharpening makes a well-focused image look its best.
In Lightroom, the Detail panel provides Amount, Radius, Detail, and Masking sliders. Hold Alt/Option while dragging the Masking slider to see which areas will be sharpened — this prevents sharpening smooth areas (like sky or skin) where it would only amplify noise.
Related Posts
For images that need extra help, AI-powered sharpening in Topaz Photo AI or similar tools can recover detail from slightly soft captures more effectively than traditional sharpening.
Step 8: Local Adjustments and Retouching
Once the global adjustments are complete, apply any necessary local adjustments:
- Remove distractions: Use the healing/clone tool (or AI Remove tool) to eliminate dust spots, sensor artifacts, and distracting elements.
- Dodge and burn: Selectively brighten or darken areas to guide the viewer’s eye to the subject.
- Selective color: Use masking to adjust colors in specific areas — for example, enhancing just the sky or warming just the subject.
- Vignetting: A subtle darkening of the edges can draw attention toward the center of the frame.

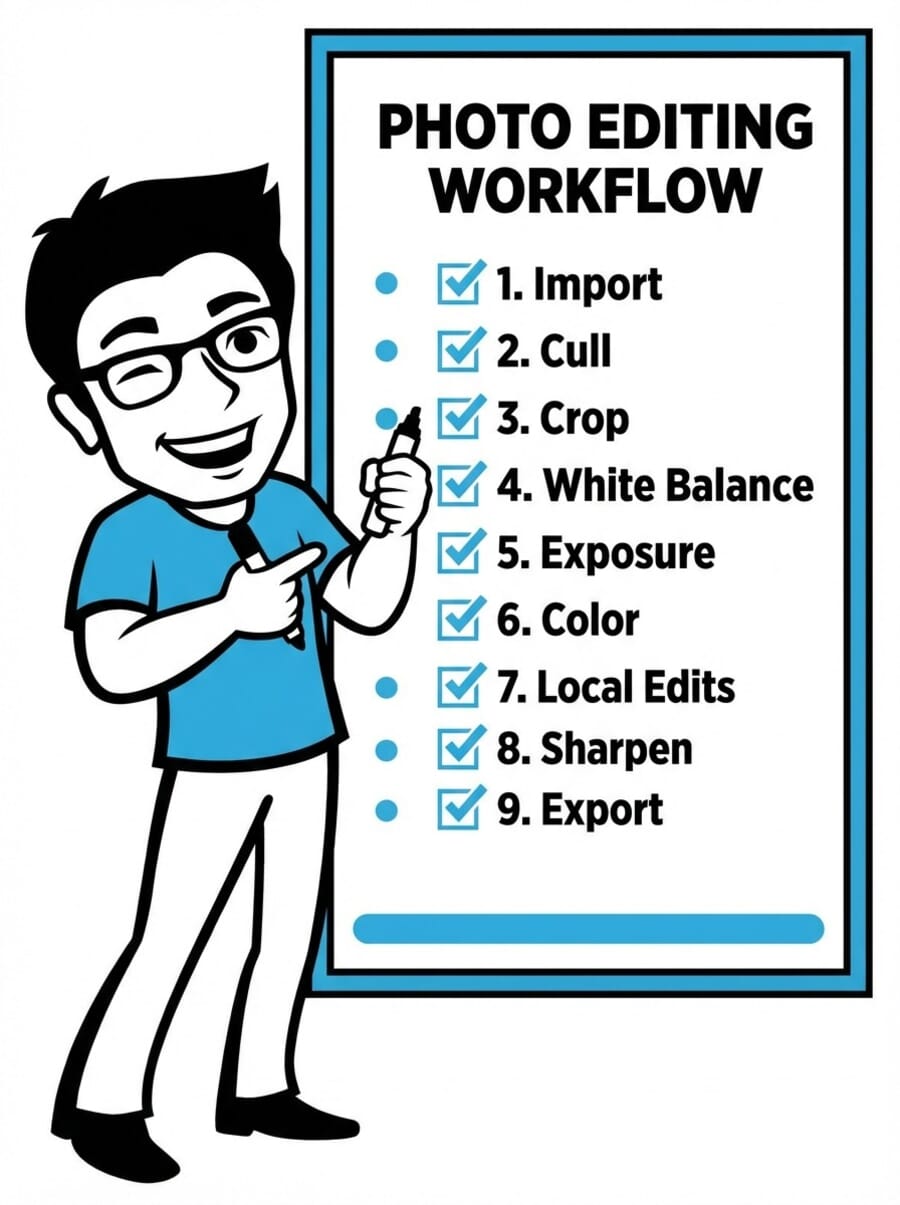
Editing Workflow Summary
Following this structured workflow ensures consistent, high-quality results:
- Import & Organize — Cull ruthlessly, keep only the best
- Straighten & Crop — Fix composition first
- White Balance — Remove color casts, set the mood
- Exposure — Correct overall brightness
- Contrast — Add punch and depth
- Color & Saturation — Enhance (don’t overdo) colors
- Noise Reduction — Clean up high-ISO grain (AI preferred)
- Sharpening — Enhance edge detail with restraint
- Local Adjustments — Retouching, dodge/burn, selective edits
- Export — Output for the intended medium

Sharing Photos: Export Settings for Web and Social Media
After editing, the final step is exporting the photo for its intended use. Getting the export settings right ensures images look their best on screen, in print, or on social media.
File Format
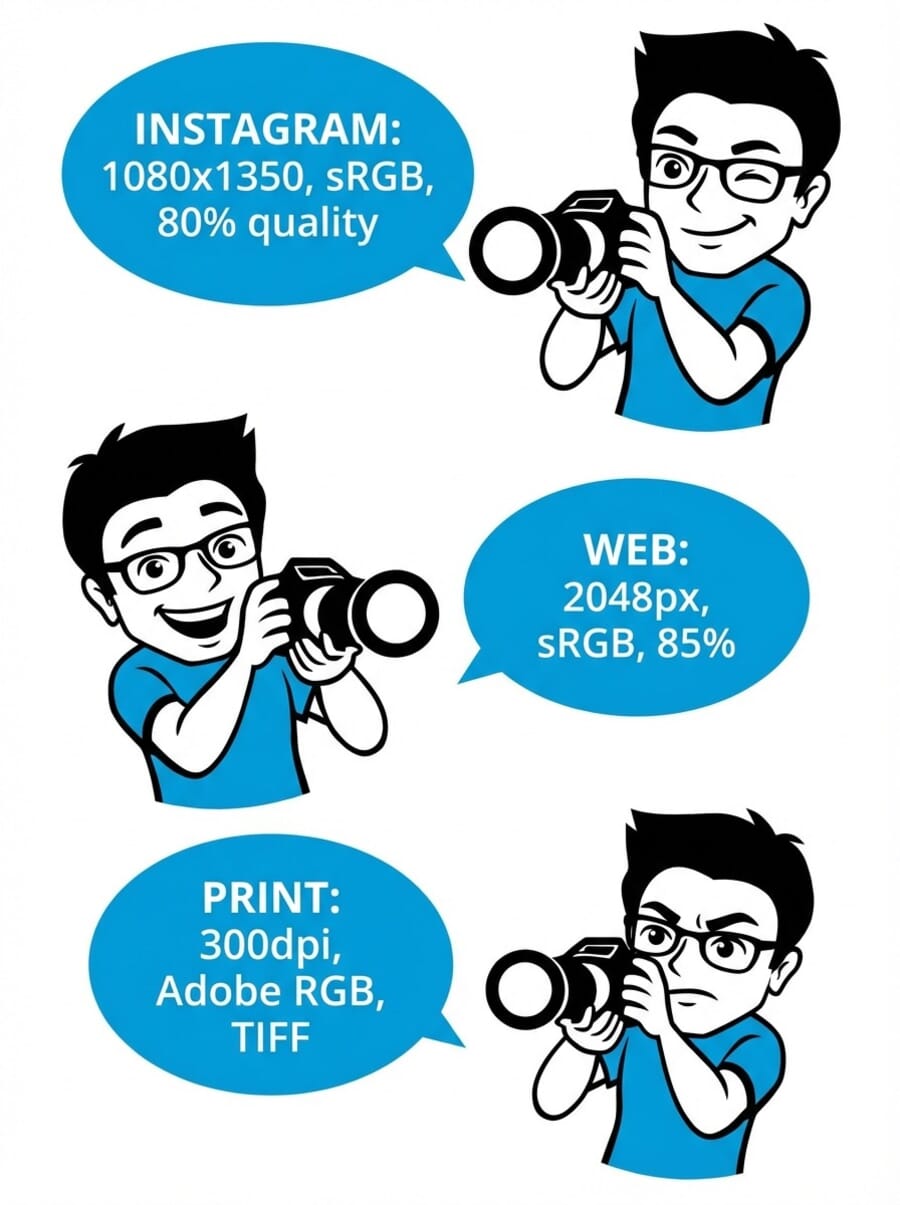
For web and social media sharing, export as JPEG. A quality setting of 80–90% provides an excellent balance between file size and image quality. For situations requiring transparency (logos, overlays), use PNG instead.

Color Space
Always export in sRGB for web and social media. The sRGB color space is the standard for web browsers and displays. Exporting in Adobe RGB or ProPhoto RGB will cause colors to appear washed out on most screens and social media platforms.
Image Size and Resolution
Recommended export dimensions for common platforms in 2026:
- Instagram Feed: 1080 × 1350 px (4:5 portrait) or 1080 × 1080 px (square)
- Instagram Stories/Reels: 1080 × 1920 px (9:16)
- Facebook: 2048 px on the longest edge
- Website/blog: 1500–2400 px on the longest edge (depending on layout)
- General sharing/email: 1920 px on the longest edge
- Print: Full resolution at 300 DPI
Output Sharpening
JPEG compression and image resizing both introduce slight softening. Apply a final round of output sharpening during export to compensate. In Lightroom, this is as simple as selecting “Sharpen For: Screen” with “Amount: Standard” in the export dialog. Other programs may require a manual sharpening step after resizing.
Metadata and Privacy
Consider what metadata to include in exported files. EXIF data contains information about camera settings, date, and potentially GPS location. For privacy, many photographers strip location data from images shared publicly. Lightroom’s export dialog provides options to include all metadata, copyright only, or none.
Photo Editing FAQ
Is photo editing important?
Yes, photo editing is critical for producing professional-quality images. Editing is how photographers go from good images to truly great ones. Even professional photographers who aim for a “natural” look still edit their work — adjusting exposure, white balance, and contrast to match what the scene actually looked like. A quick 30-second edit can dramatically improve virtually any photo.
Is RAW or JPEG better for photo editing?
RAW is significantly better for editing. RAW files have greater bit depth (reducing banding during extensive adjustments) and retain far more shadow and highlight detail that can be recovered during editing. JPEG files can still be edited, but the latitude for adjustments is much more limited, and aggressive edits will quickly degrade image quality.
What is the best photo editing software for beginners?
Adobe Lightroom is widely regarded as the best editing software for beginners due to its intuitive interface, non-destructive workflow, and comprehensive tutorials available online. For those on a budget, Darktable (free, open source) offers similar functionality. On mobile, Lightroom Mobile (free) and Snapseed (free) are excellent starting points.
What are global vs. local adjustments?
Global adjustments affect the entire photo — exposure, contrast, saturation, and white balance applied uniformly across the image. Local adjustments affect only a selected portion of the photo, allowing targeted edits like brightening just the subject, darkening the sky, or removing a specific blemish. Most editing sessions begin with global adjustments and finish with local refinements.
How much does photo editing software cost?
Options exist at every price point. The Adobe Photography Plan (Lightroom + Photoshop) costs approximately $10/month. Capture One offers both subscription and one-time purchase options. Affinity Photo is a one-time purchase around $70. And excellent free options exist: Darktable, RawTherapee, and Photopea cost nothing at all.
Can AI replace manual photo editing?
AI excels at technical tasks — noise reduction, sharpening, background removal, and upscaling. For these, AI tools often produce better results than manual methods in a fraction of the time. However, creative editing decisions — color grading, composition choices, mood, and artistic direction — still require human judgment. The best workflow combines AI for technical corrections with manual editing for creative vision.
How to Edit Photos: Conclusion
Photo editing is both a technical skill and a creative art. The fundamentals — exposure, white balance, contrast, color, and sharpening — apply regardless of which software is being used. Mastering these basics with a consistent, structured workflow will immediately improve any photographer’s output.
The editing landscape in 2026 is more powerful and accessible than ever. AI-powered tools handle the tedious technical work, free software offers professional-grade capabilities, and mobile apps bring sophisticated editing to everyone’s pocket. There has never been a better time to learn photo editing.
The best way to improve? Practice. Edit every day, experiment with different techniques, study the work of photographers whose style is inspiring, and — most importantly — develop a personal editing vision. The tools are just tools. The artistry comes from the photographer behind the screen.
