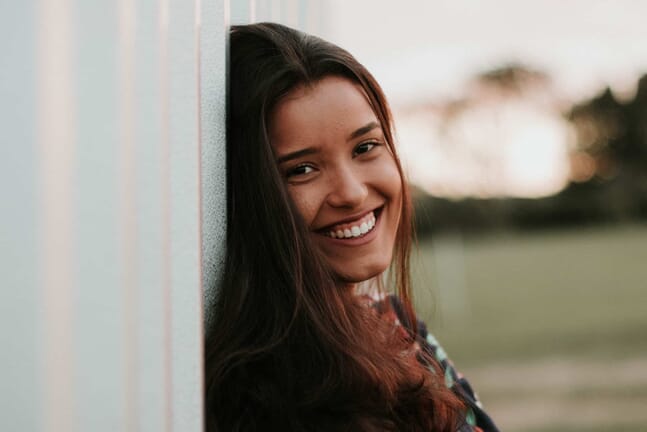
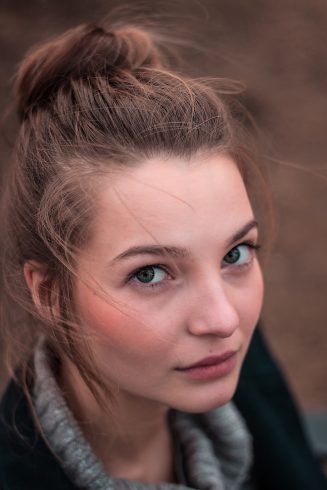
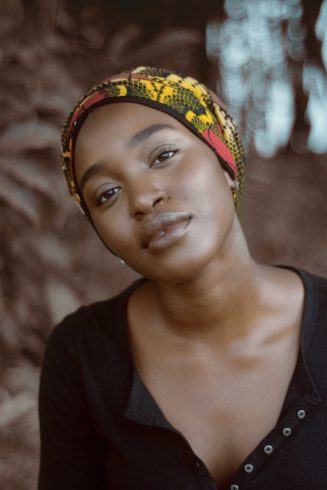
Editor’s Key Takeaways: Mastering Bokeh: Achieving Background Blur in Portraits

This post offers a detailed guide on how to achieve background blur and bokeh in portrait photography. The techniques are applicable whether shooting with a DSLR, point & shoot camera, smartphone or using Photoshop for editing.
The key to creating blur and bokeh with a DSLR is understanding aperture. Defined as the amount of light that enters the camera sensor, aperture is directly connected to focal length. The lower the f-stop number, the larger the aperture, leading to a smaller depth of field and a pronounced background blur.
Aperture Priority mode is useful for beginners to achieve this effect. It adjusts other settings like shutter speed and ISO according to aperture. The lens choice also plays a significant role.
Key points:
- Creating background blur and bokeh can be done with different types of cameras or Photoshop
- The larger the aperture, the smaller the depth of field and the more pronounced the blur
- Aperture Priority mode automatically adjusts shutter speed and ISO to match the aperture
- The lens choice significantly affects the final image
Introduction
Have you ever wanted to capture stunning bokeh and background blur in your portrait images?
Creating photographs with a focused foreground and shallow depth of field can be easily achieved with various techniques and an understanding of the basics of photography.
Creating background blur and bokeh can be done by shooting with a DSLR, point and shoot camera, smartphone, or editing in Photoshop.
Here is an in-depth breakdown of creating visually inspiring portrait images.
How to Blur the Background…
1. How to Blur the Background with a DSLR

Blurring the background and creating bokeh with your camera is all about understanding aperture.
Aperture refers to the amount of light that enters the camera sensor.
Aperture is directly related to focal length, which is noted on your lens in increments such as f/1.2, f/1.4, f/1.8, and so forth.
The standard rule for creating crisp blur and bokeh is that the larger the aperture, the smaller the depth of field. In simple terminology, the larger the aperture, the smaller the f-stop number and the smaller the aperture, the larger the f-stop number.
Related Posts
For example, if you are using a 50 mm 1.2 lens – you will want to set your aperture to an f-stop of 1.2 for the most effective background blur. While on the contrary, a larger f-stop such as f/2.2 will still create blur but will maintain more focus on the background elements.
When using a DSLR, there are pre-determined setting options that allow you to create background blur and bokeh effectively – this is called Aperture Priority mode.
Aperture Priority Mode
Aperture Priority puts your aperture at the focus and adjusts other settings such as shutter speed and ISO to follow suit. If adjusting your settings manually seems a bit daunting, this is the best option for you to start creating your ideal portrait images.
Picking the Right Lens
The last important point to note when attempting to create background blur and bokeh with your camera is to choose a lens that is specifically geared toward portraiture. For example, you will want to start by using lenses with small f-stop capabilities.
The best range for background blur is anywhere from f/1.2 to about f/2.8.
This range is where you will find the most out-of-focus background with an intact and detailed foreground.
Depending on your preference, you can set your aperture to values above 2.8, but will most likely create images where the background is more visible.
When choosing your lens, it is also important to take note of the focal length. For portraits, you will want to choose fixed, prime lenses – staying away from wide-angle options as they tend to create distortion.
For portraits, begin with a 50 mm focal length as this is the most popular among portrait photographers. You can also choose to use an 85 mm lens which will create even more proximity between you and your subject.
In all, remember to utilize lenses with long focal lengths and large apertures in order to create your desired look of background blur and bokeh.
2. How to Blur the Background with a Point & Shoot

Creating background blur and bokeh with a point-and-shoot camera is a slightly different process than using a DSLR.
Because point-and-shoot cameras have less technical aspects and smaller sensors, it will be unlikely that you will be able to manually adjust your aperture settings.
Instead, you will want to consider using the macro feature of your point and shoot for close-up shots. The Macro setting on your camera, usually identified by a flower icon, is the best way for you to create images with an out-of-focus background.
Another way to create background blur using your point-and-shoot camera is to create your own perception of physical depth.
Moving Closer Creates more Blur
This means that instead of relying on your lens focal length to set your stance, physically move closer to your subject to create a small depth of field.
The closer you are to your subject, the more your camera will focus on your foreground and create blur in your background.
3. How to Blur the Background with a Smartphone

Now if you’re looking to create portraits without the use of a professional camera, this can be achieved in various ways with the help of a smartphone.
If you choose to use your device as your method of capturing images, you can either use a manual settings application or the portrait mode capability available on certain iPhone models.
There are several applications that can be downloaded for your smartphone in order for you to have full control over your settings.
Related Post: Best Apps to Blur the Background of a Photo
An example is an iOS application called Manual, which allows you to adjust aperture, shutter speed, ISO, white balance, focus, and exposure compensation. Download the app for your smartphone, adjust your aperture, shutter speed, and ISO, and start creating bokeh-filled imagery.
Using Portrait Mode on iPhone
The other option is for those users of the iPhone 7 and above. In these models of the iPhone, you will have the capability of using Portrait Mode to create your images.
Portrait mode is achieved through the use of 2 telephoto lenses within the phone’s software. When capturing your portrait, you will be guided to adjust distance and depth as the camera sets its aim and focus on your subject.
Using Portrait Mode is an effective way to create background blur and bokeh for those with little knowledge of technical photography and the principles of aperture, shutter speed, and ISO.
The Portrait mode setting is best used in prime lighting conditions as it does not perform particularly well in low lighting. Yet, it does offer the ability to adjust your lighting preferences depending on your location such as natural light or studio light for indoor portraiture.
4. How to Blur Images Using Photoshop

The last technique for creating background blur and bokeh for your portrait images is in the editing process rather than during the actual shooting.
In order to create your desired look, you will need to use tools in Photoshop to create the blurred background effect. It is recommended that for this technique, you have a good knowledge of Photoshop, brush tools, and creating masks.
Here is a quick step-by-step guide on how to blur your portrait background in Photoshop:
- Begin by opening up your image in the program
- Create a copy of your original layer – this is where you will be making your edits
- You can rename the layer “blur” or “bokeh”
- Choose your copied layer and add a blurred filter. Navigate to the top menu > Choose Filter > Blur > Gaussian Blur.
- Adjust your value to make the background as out of focus as you wish.
- Add an adjustment layer (any will do), but do not adjust any values. This is used solely for our next step of masking.
- Drag your Adjustments layer below your Blur layer. Press the Alt key and hover the cursor between the ‘Blur’ and adjustments layer. A double-circle symbol will appear and left-click with the mouse. The ‘Blur’ layer icon will then move to the right.
- Choose the white rectangle in the Levels layer. Press Alt + Delete, so that your mask becomes black, showing your original image. Navigate to your left side tools panel and choose the Brush – select a soft-edged brush from the preset picker. Change your values of size to 500 pixels and opacity to 100%. Set your foreground color to white and paint over the background to reveal the blur.
- You can then fine-tune your mask and any areas that need attention to finish off your background blur.
How To Blur Backgrounds In Photoshop – Shallow Depth of Field Effect Using Lens Blur
Photoshop CC tutorial showing you how to blur your background to create the shallow depth of field effect using the Lens Blur Filter.
Conclusion: 4 Ways to Create a Blur Portrait Background
As you can see, creating a blurred background and bokeh effect for your portrait images can be done in 4 effective ways:
- through using a DSLR (using the right aperture value, e.g. f/1.4, f/2, f/2.8, or f/4)
- point and shoot camera (choose the macro mode, move closer),
- Smartphone (pick the portrait mode or install an app) or
- editing within Photoshop.
Do you have a preferred method or technique for creating blur and bokeh in your photography? Share with us your insight in the comments below!
