Editor’s Key Takeaways: Mastering Overexposure: Quick and Advanced Fixes
Dealing with overexposed photos can be daunting, but with the right techniques, you can restore your images to their former glory. Here’s a concise breakdown of the blog post’s key points:
- What Causes an Overexposed Image? – Overexposure occurs when too much light hits your camera sensor, often due to inappropriate settings such as a too-long shutter speed, too-wide aperture, or too-high ISO.
- Basic Methods – Simple fixes using basic editing tools in post-processing software can help recover some lost details.
- Advanced Methods – Advanced techniques in programs like Lightroom or Photoshop can provide more refined corrections to overexposed areas.
- Prevention Tips – The best way to handle overexposure is to avoid it altogether. Careful selection of appropriate camera settings is crucial.
- Next Steps – Learning how to prevent overexposure, and mastering both basic and advanced correction methods can make overexposed images a thing of the past.
By following these guidelines, you can ensure that overexposed photos become a rare occurrence in your photography journey.
Introduction
If you need to understand how to fix overexposed photos, then you’ve come to the right place.
Because while image overexposure can be a serious problem…
…with a little post-processing magic, you can often have the photo looking as good as new!
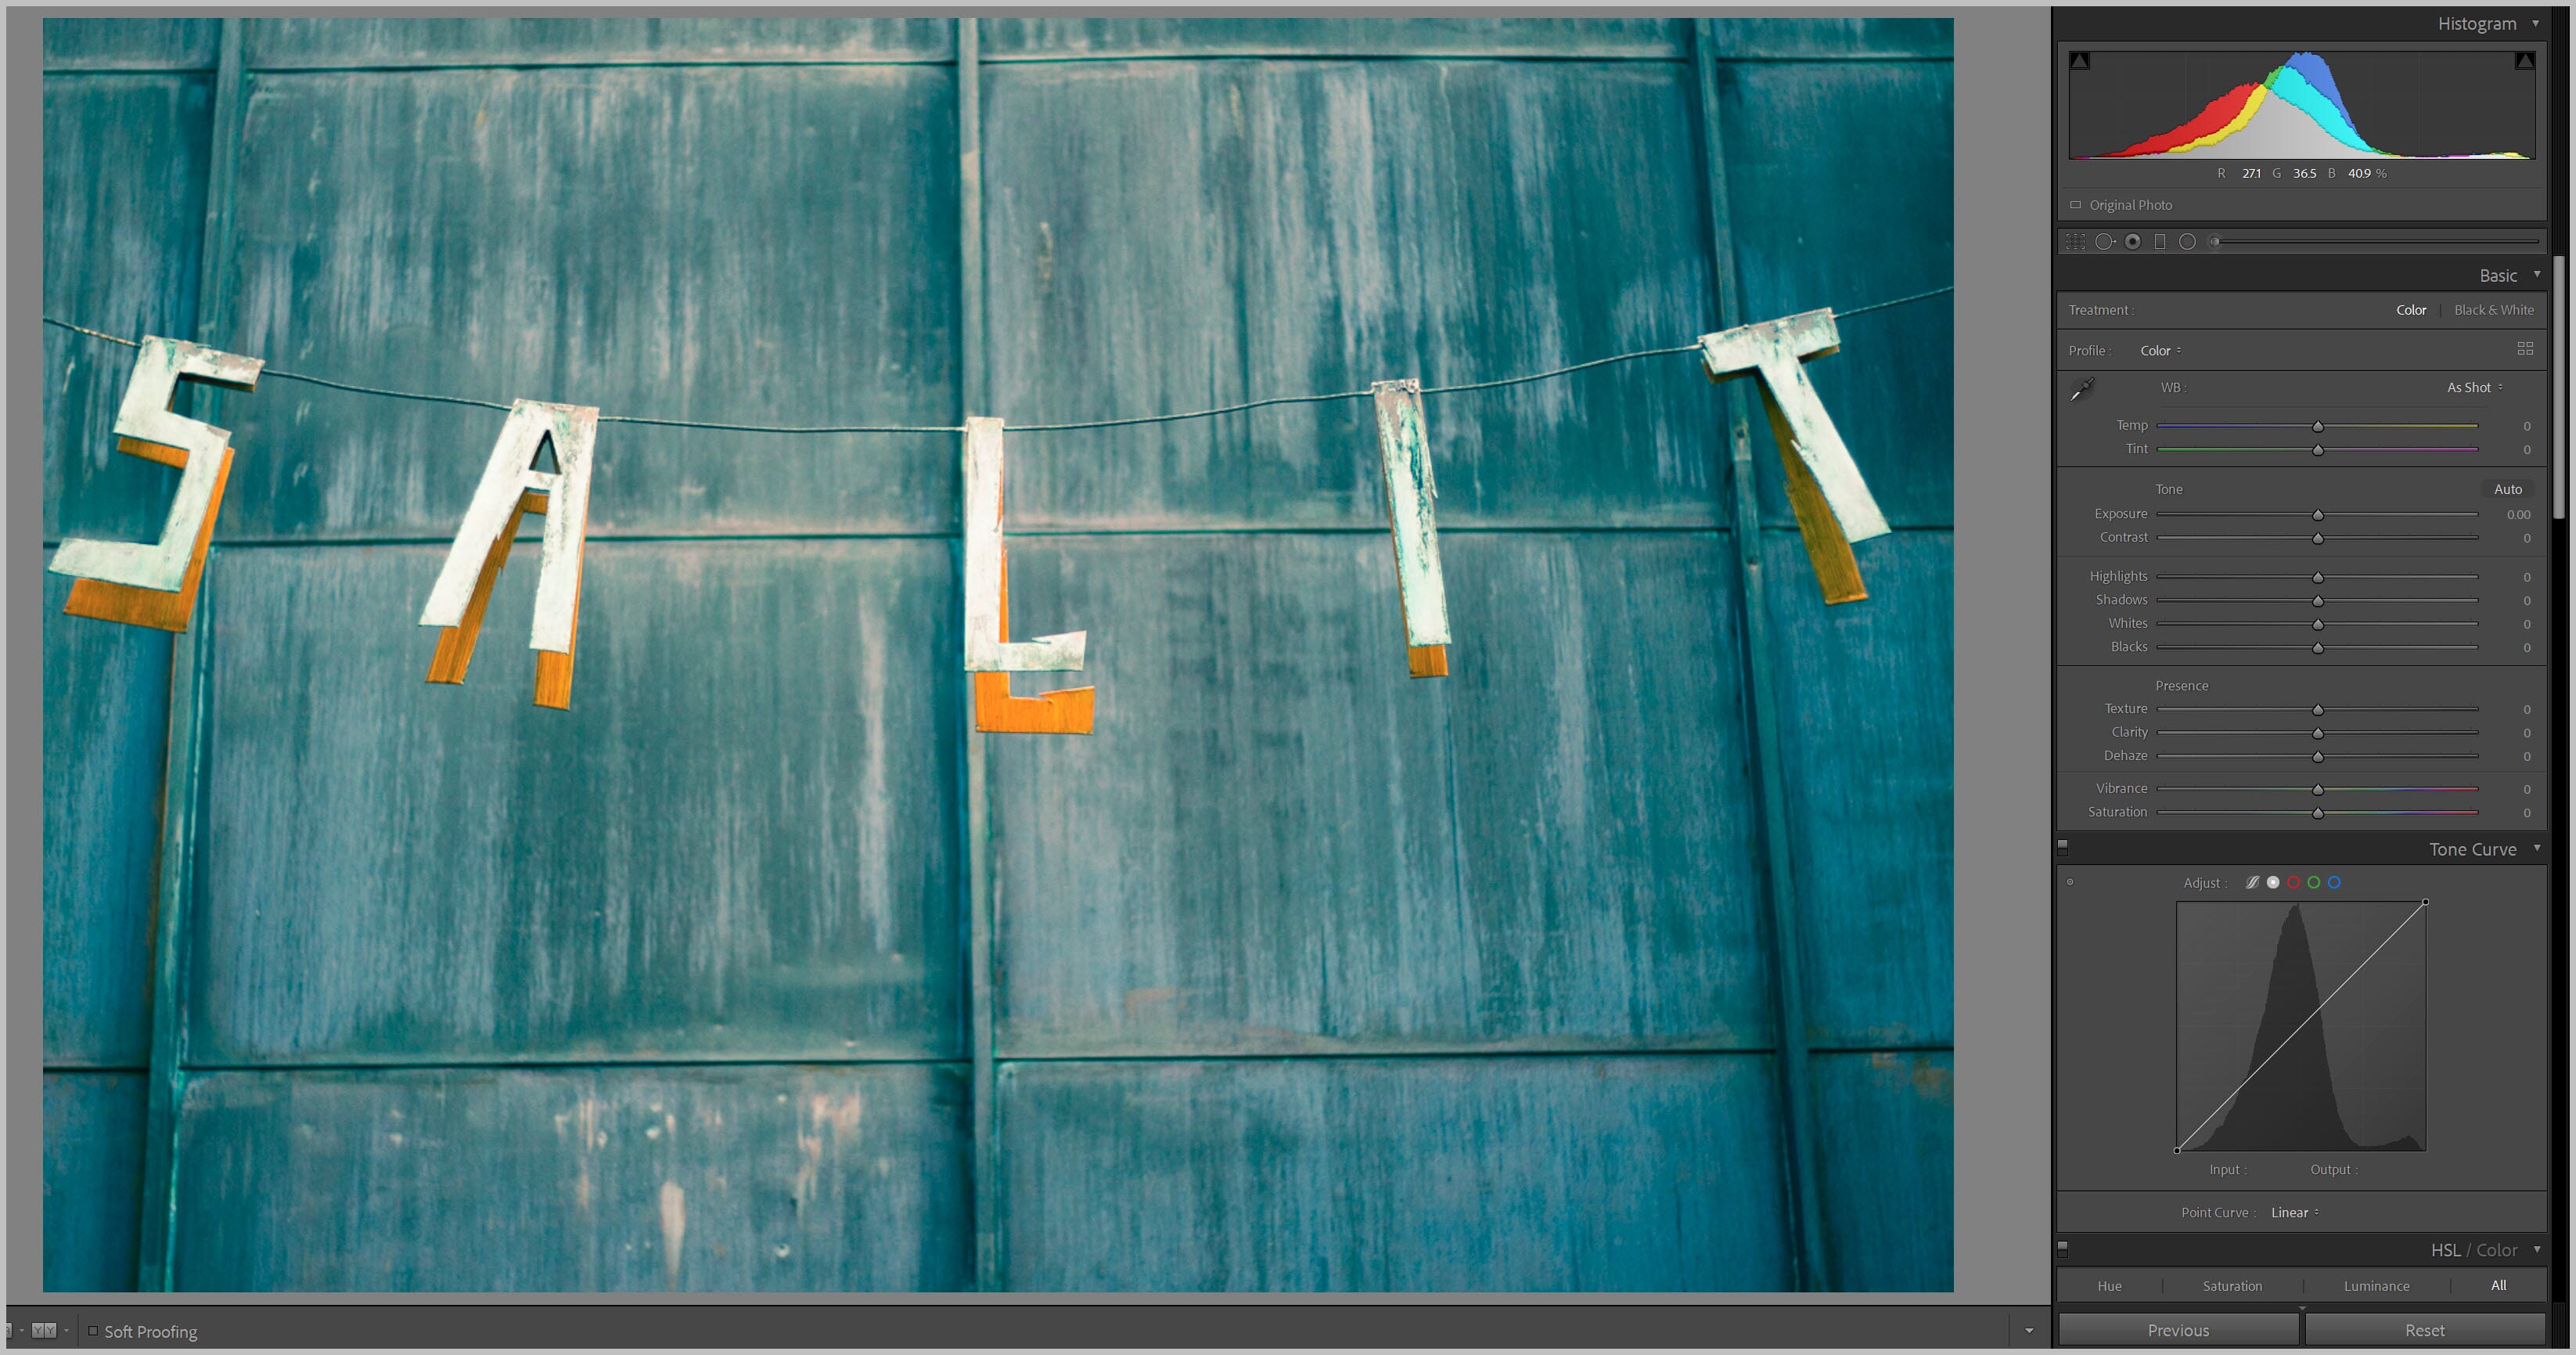
Fixing Overexposed Photos Tutorial:
In this article, I’m going to take you through a handful of methods for correcting overexposure, including quick, easy, general fixes – as well as more advanced fixes that take a bit of finagling in Lightroom, Photoshop, or an alternative post-processing program of choice.
I’ll finish up the article by discussing the quickest way to fix overexposure:
By avoiding it in the first place!
So if you’re ready to make overexposed images a thing of the past, then read on!
What Causes an Overexposed Image?
Overexposure is caused by too much light hitting your camera sensor.
See, whenever you take a photo, you’re exposing the camera sensor to light.
More light makes for a brighter image.
Less light makes for a darker image.
And too much light…
Well, it results in an image like this, with zero detail in the bright areas:
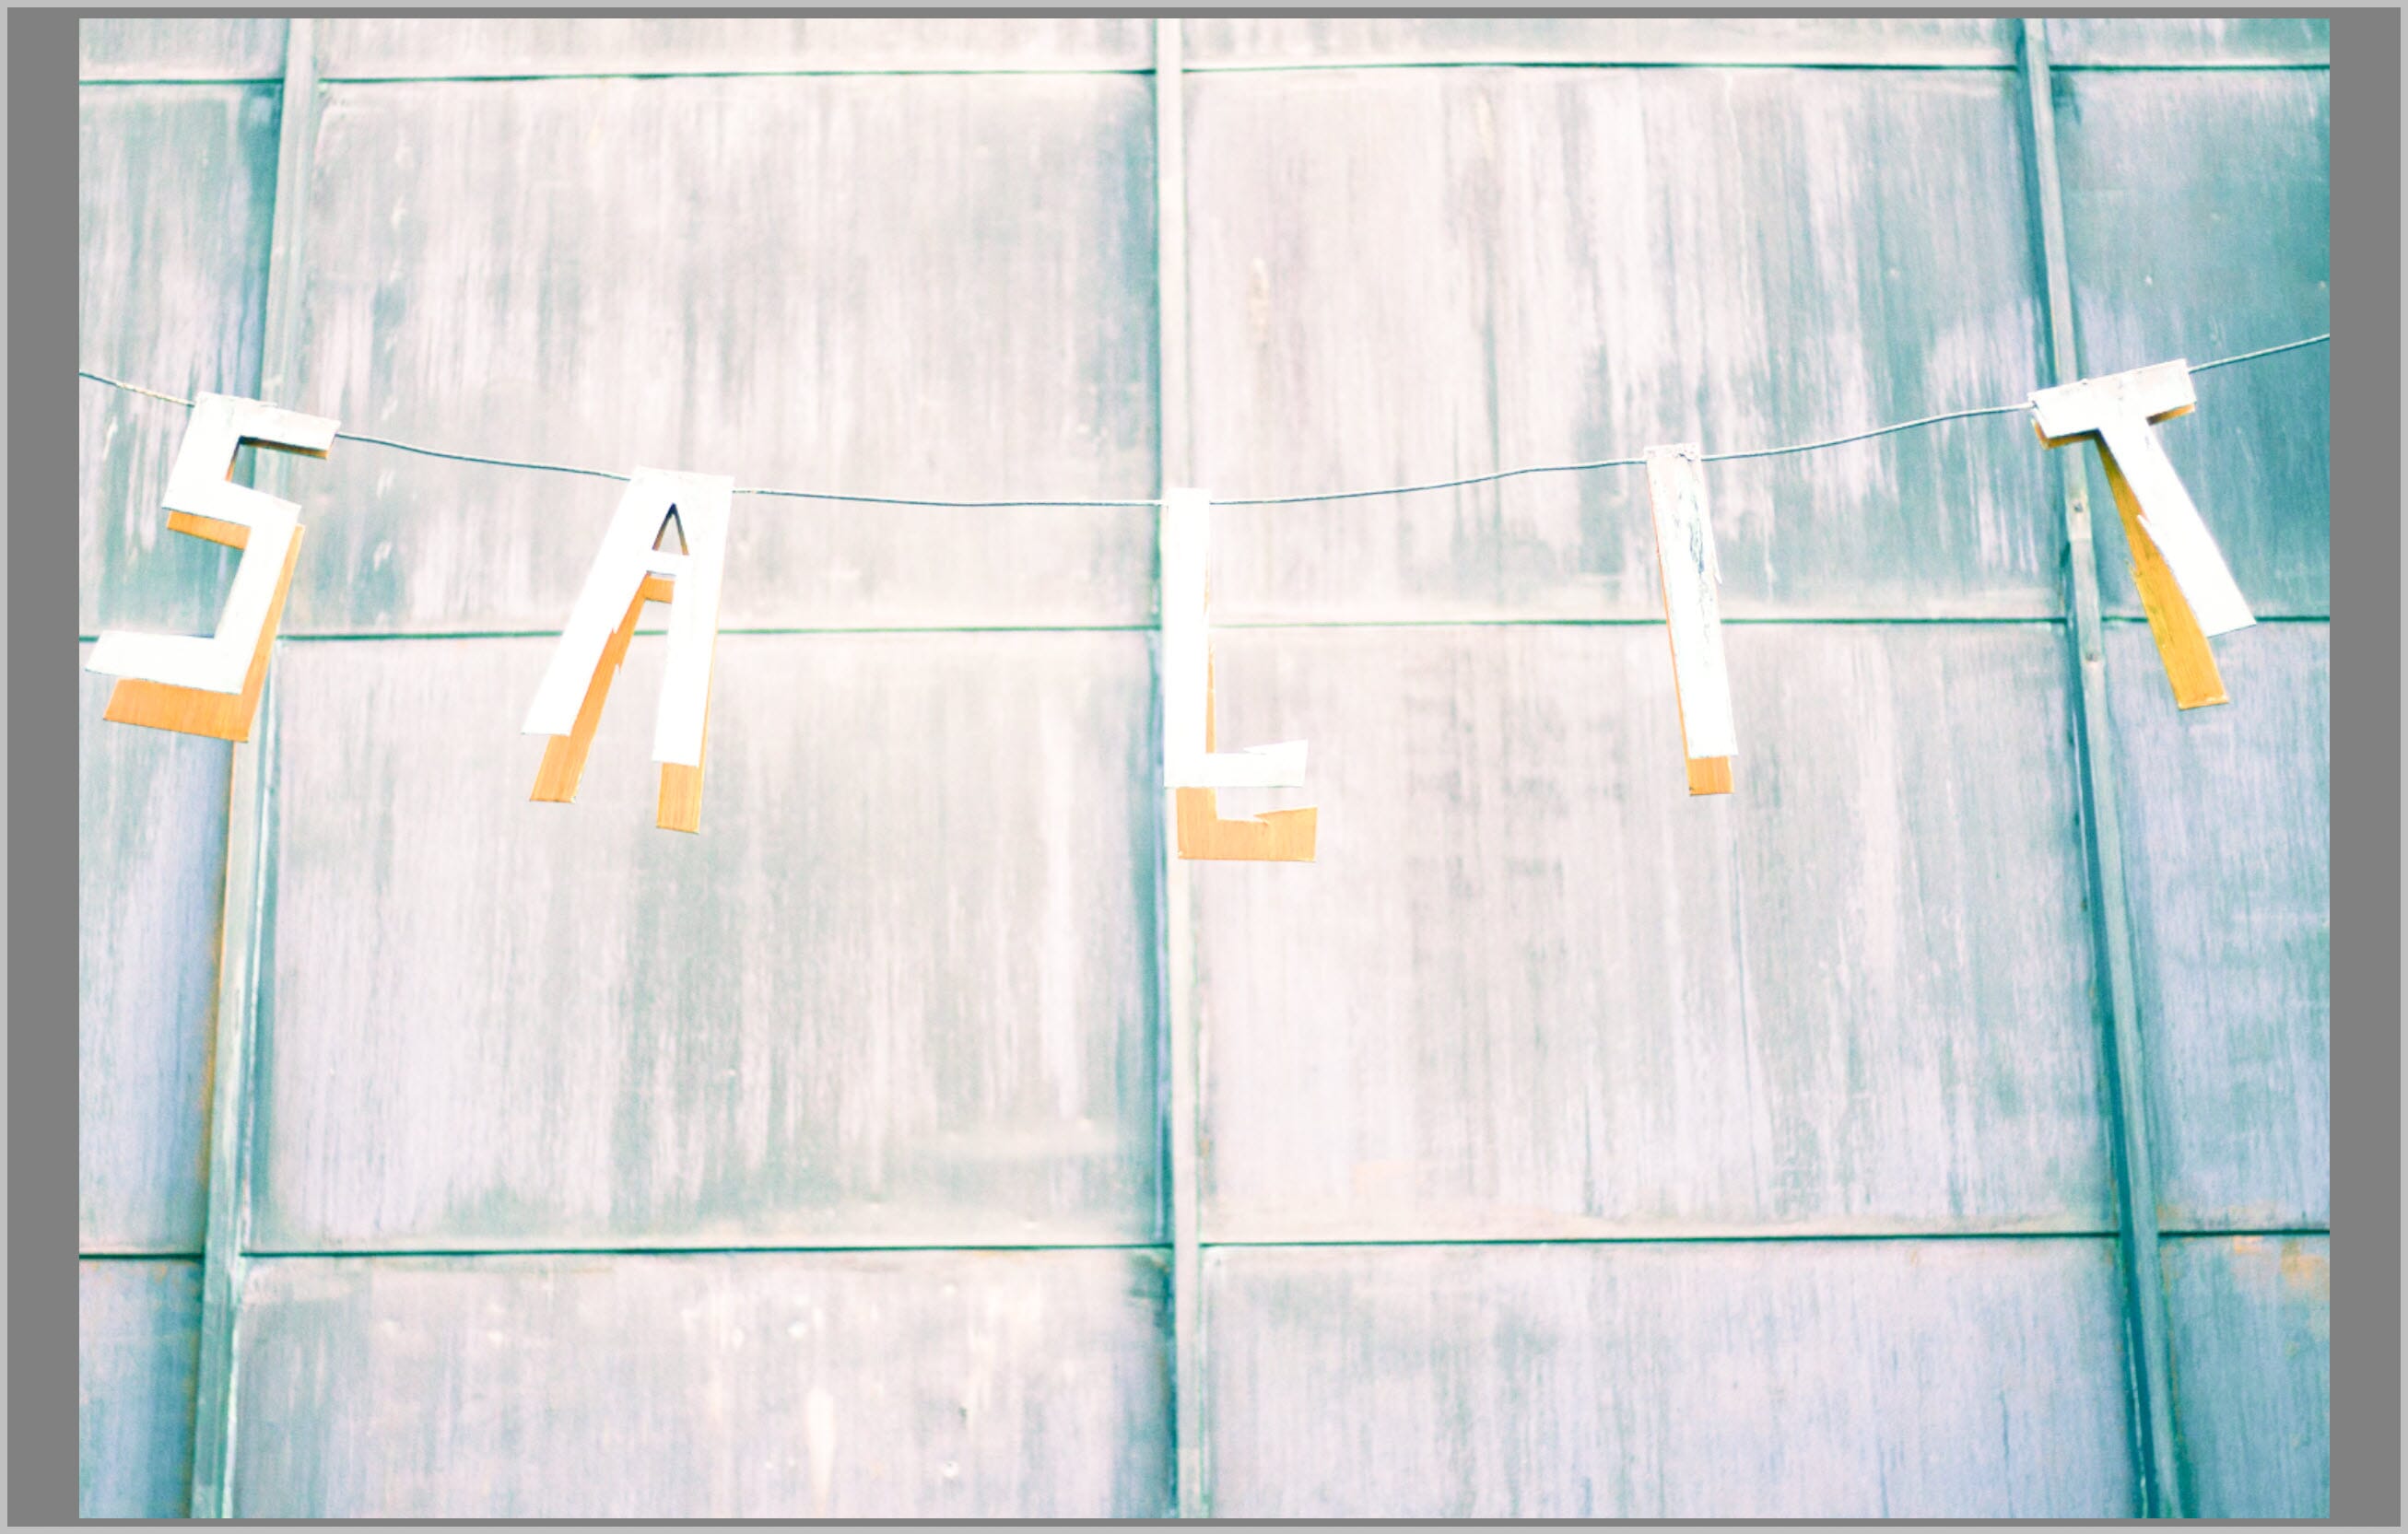
Determining the correct amount of light is a fundamental problem for photographers. And while this has become easier and easier with the invention of camera metering systems as well as digital playback and preview, you can still end up with overexposed images (I know I do!).
That’s why it’s important to pay careful attention to your camera settings at all times. A too-long shutter speed will result in overexposure, as will a too-wide aperture, or a too-high ISO.
So select your camera settings carefully.
(For more advice on selecting the perfect camera settings to prevent overexposure, see my comments in the last section of this article.)
Related Post: Exposure Triangle Explained
Of course, there are times when overexposure cannot be fixed in-camera; it’s too late, the photo is captured, and you’re forced to salvage what you can in post-processing.
And that’s where the techniques I share below come in handy. While they cannot correct the worst cases of overexposure, they’ll go a long way toward mending any exposure problems, and ensuring that your photos are full of rich, beautiful detail.
How to Fix an Overexposed Photo: Basic Methods
If you’re after a quick fix for an overexposed photo, you’ll find it in this section.
Note that I do use Lightroom and Photoshop in my instruction/demonstration, but you can apply these overexposure techniques using most editing programs, including Luminar Neo, ON1 Photo RAW, and ACDSee.
So don’t feel like you need to rush out and grab Lightroom and Photoshop to make these edits work for you.
Drop the Exposure Slider in Lightroom
Here’s the most basic method for fixing overexposed images:
Just head to the Basic panel in Lightroom.
Then move the Exposure slider to the left:
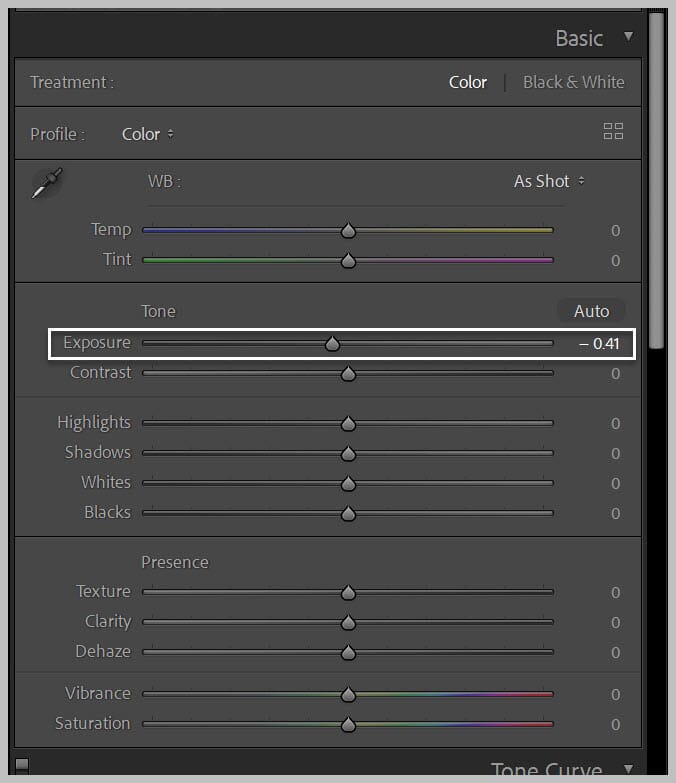
The more you move the slider, the darker your image will become.
Here’s an image before adjusting the exposure:
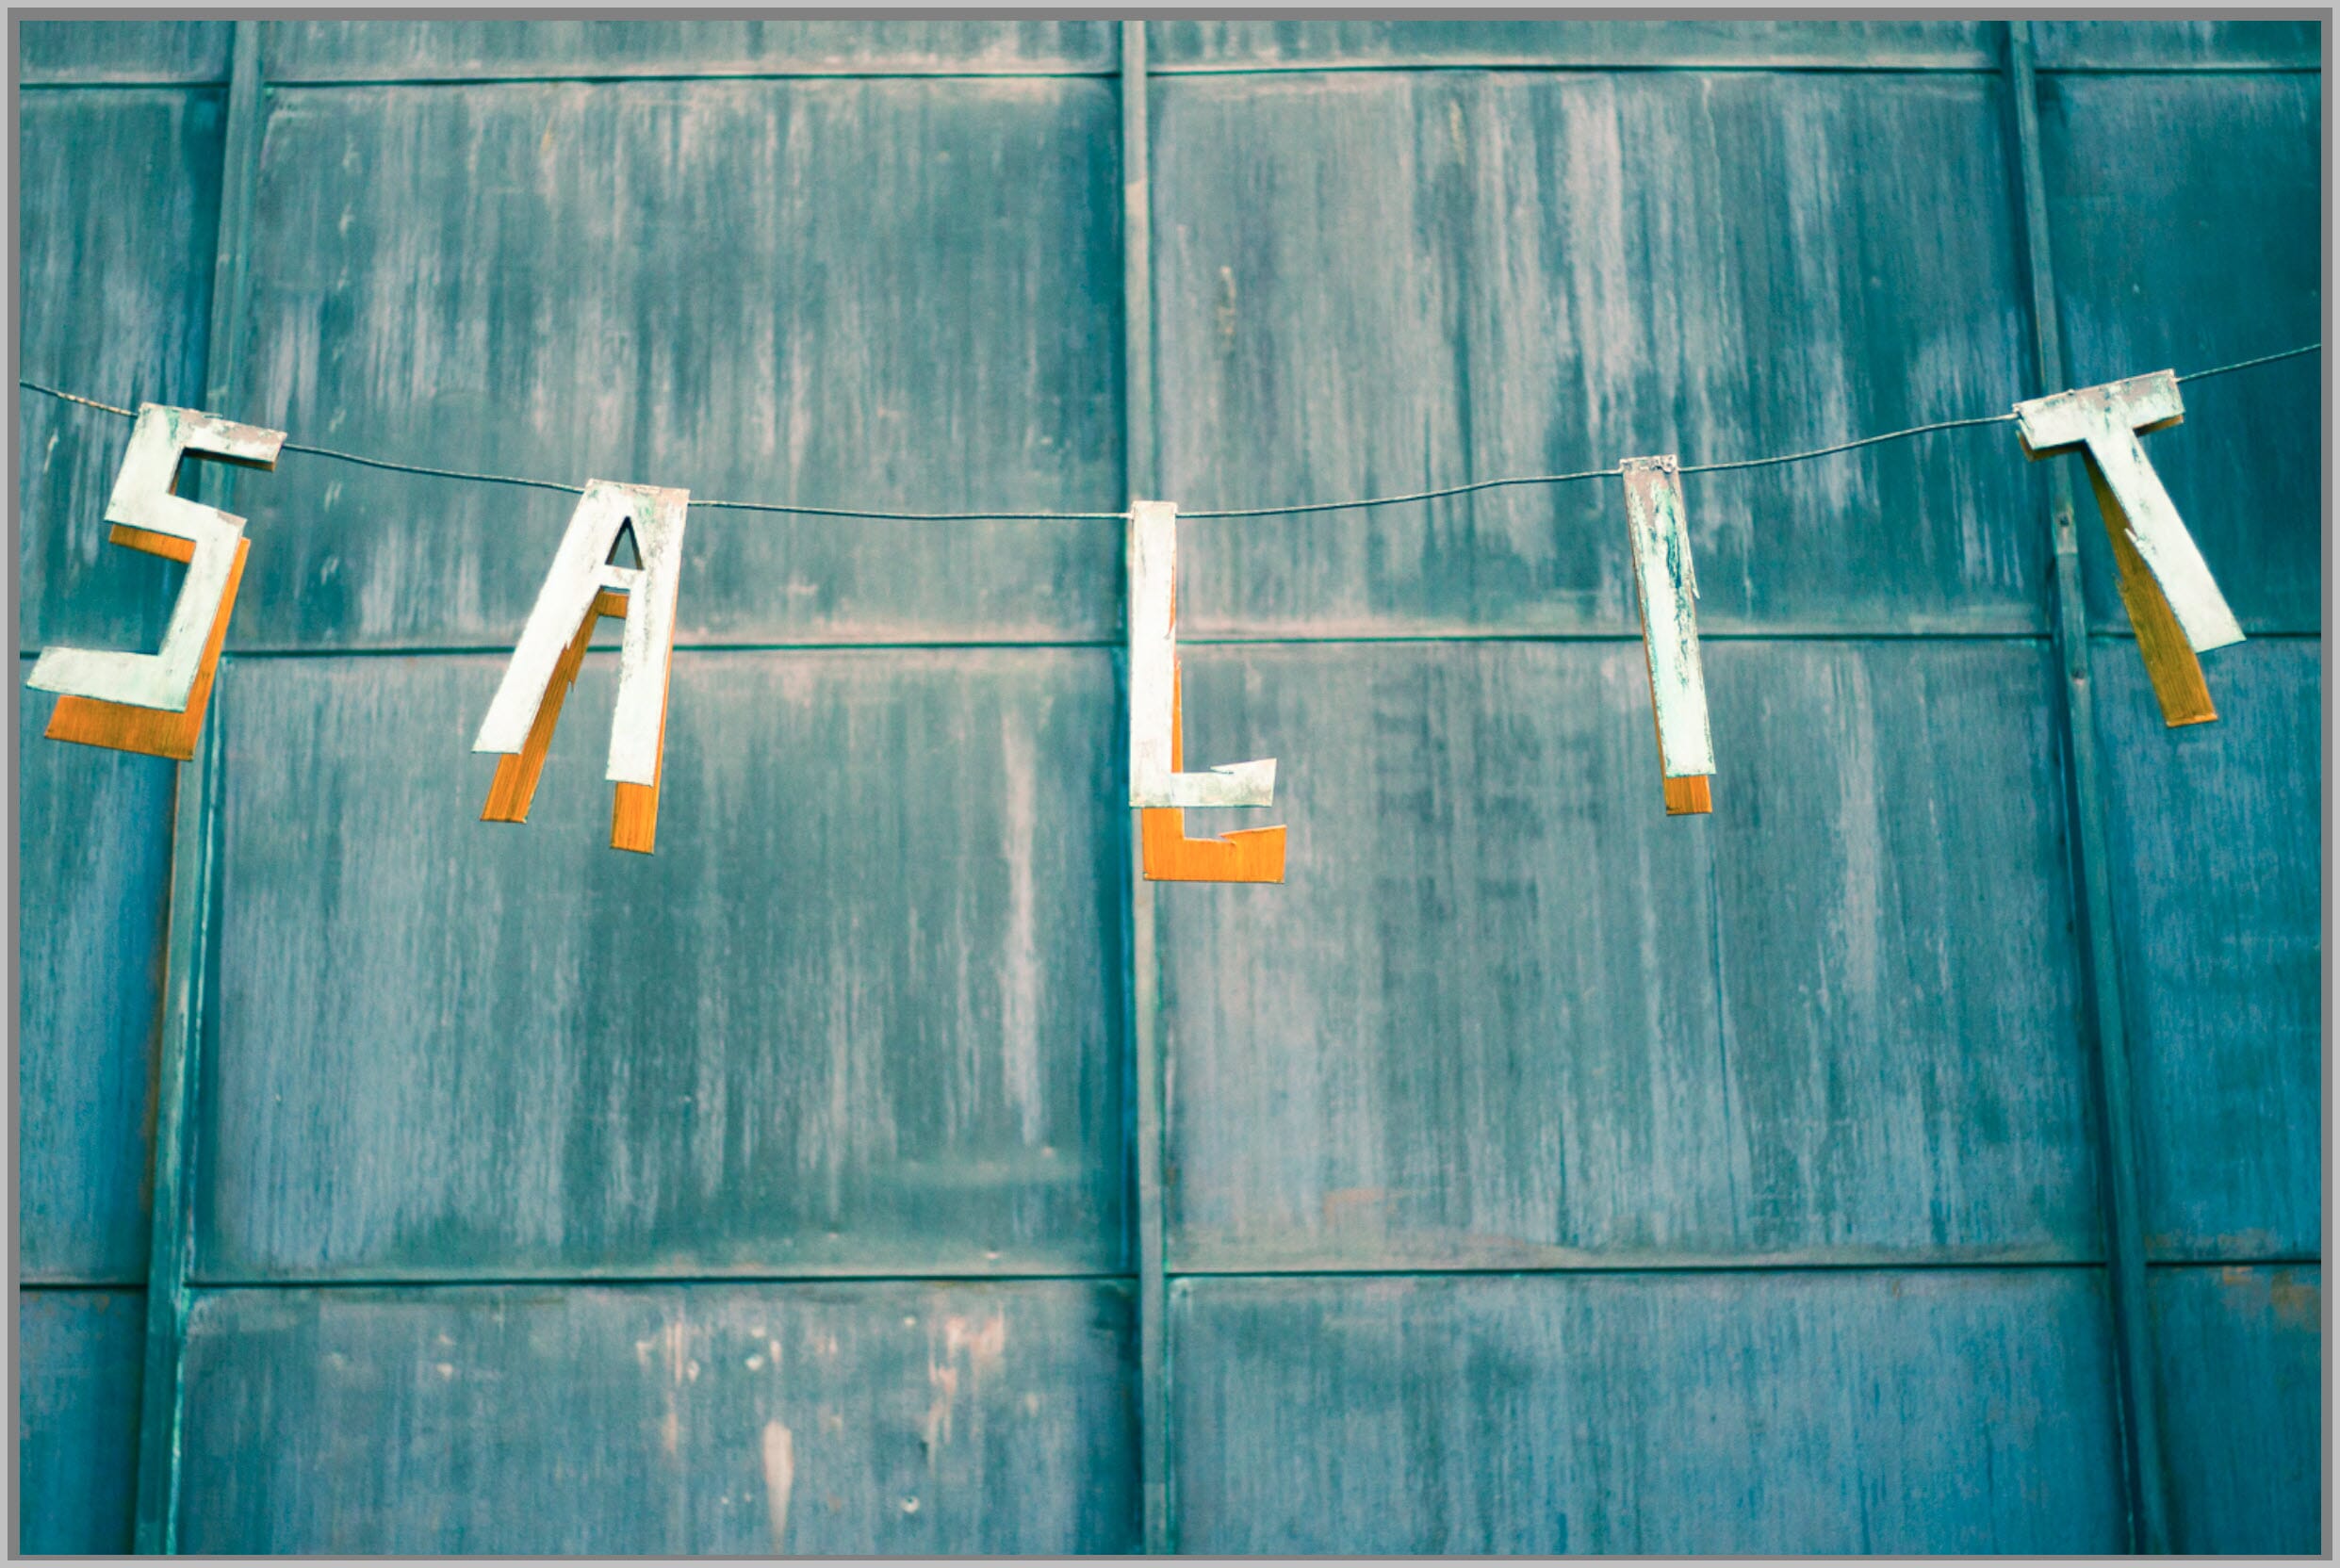
And here’s the same image after adjusting the exposure:
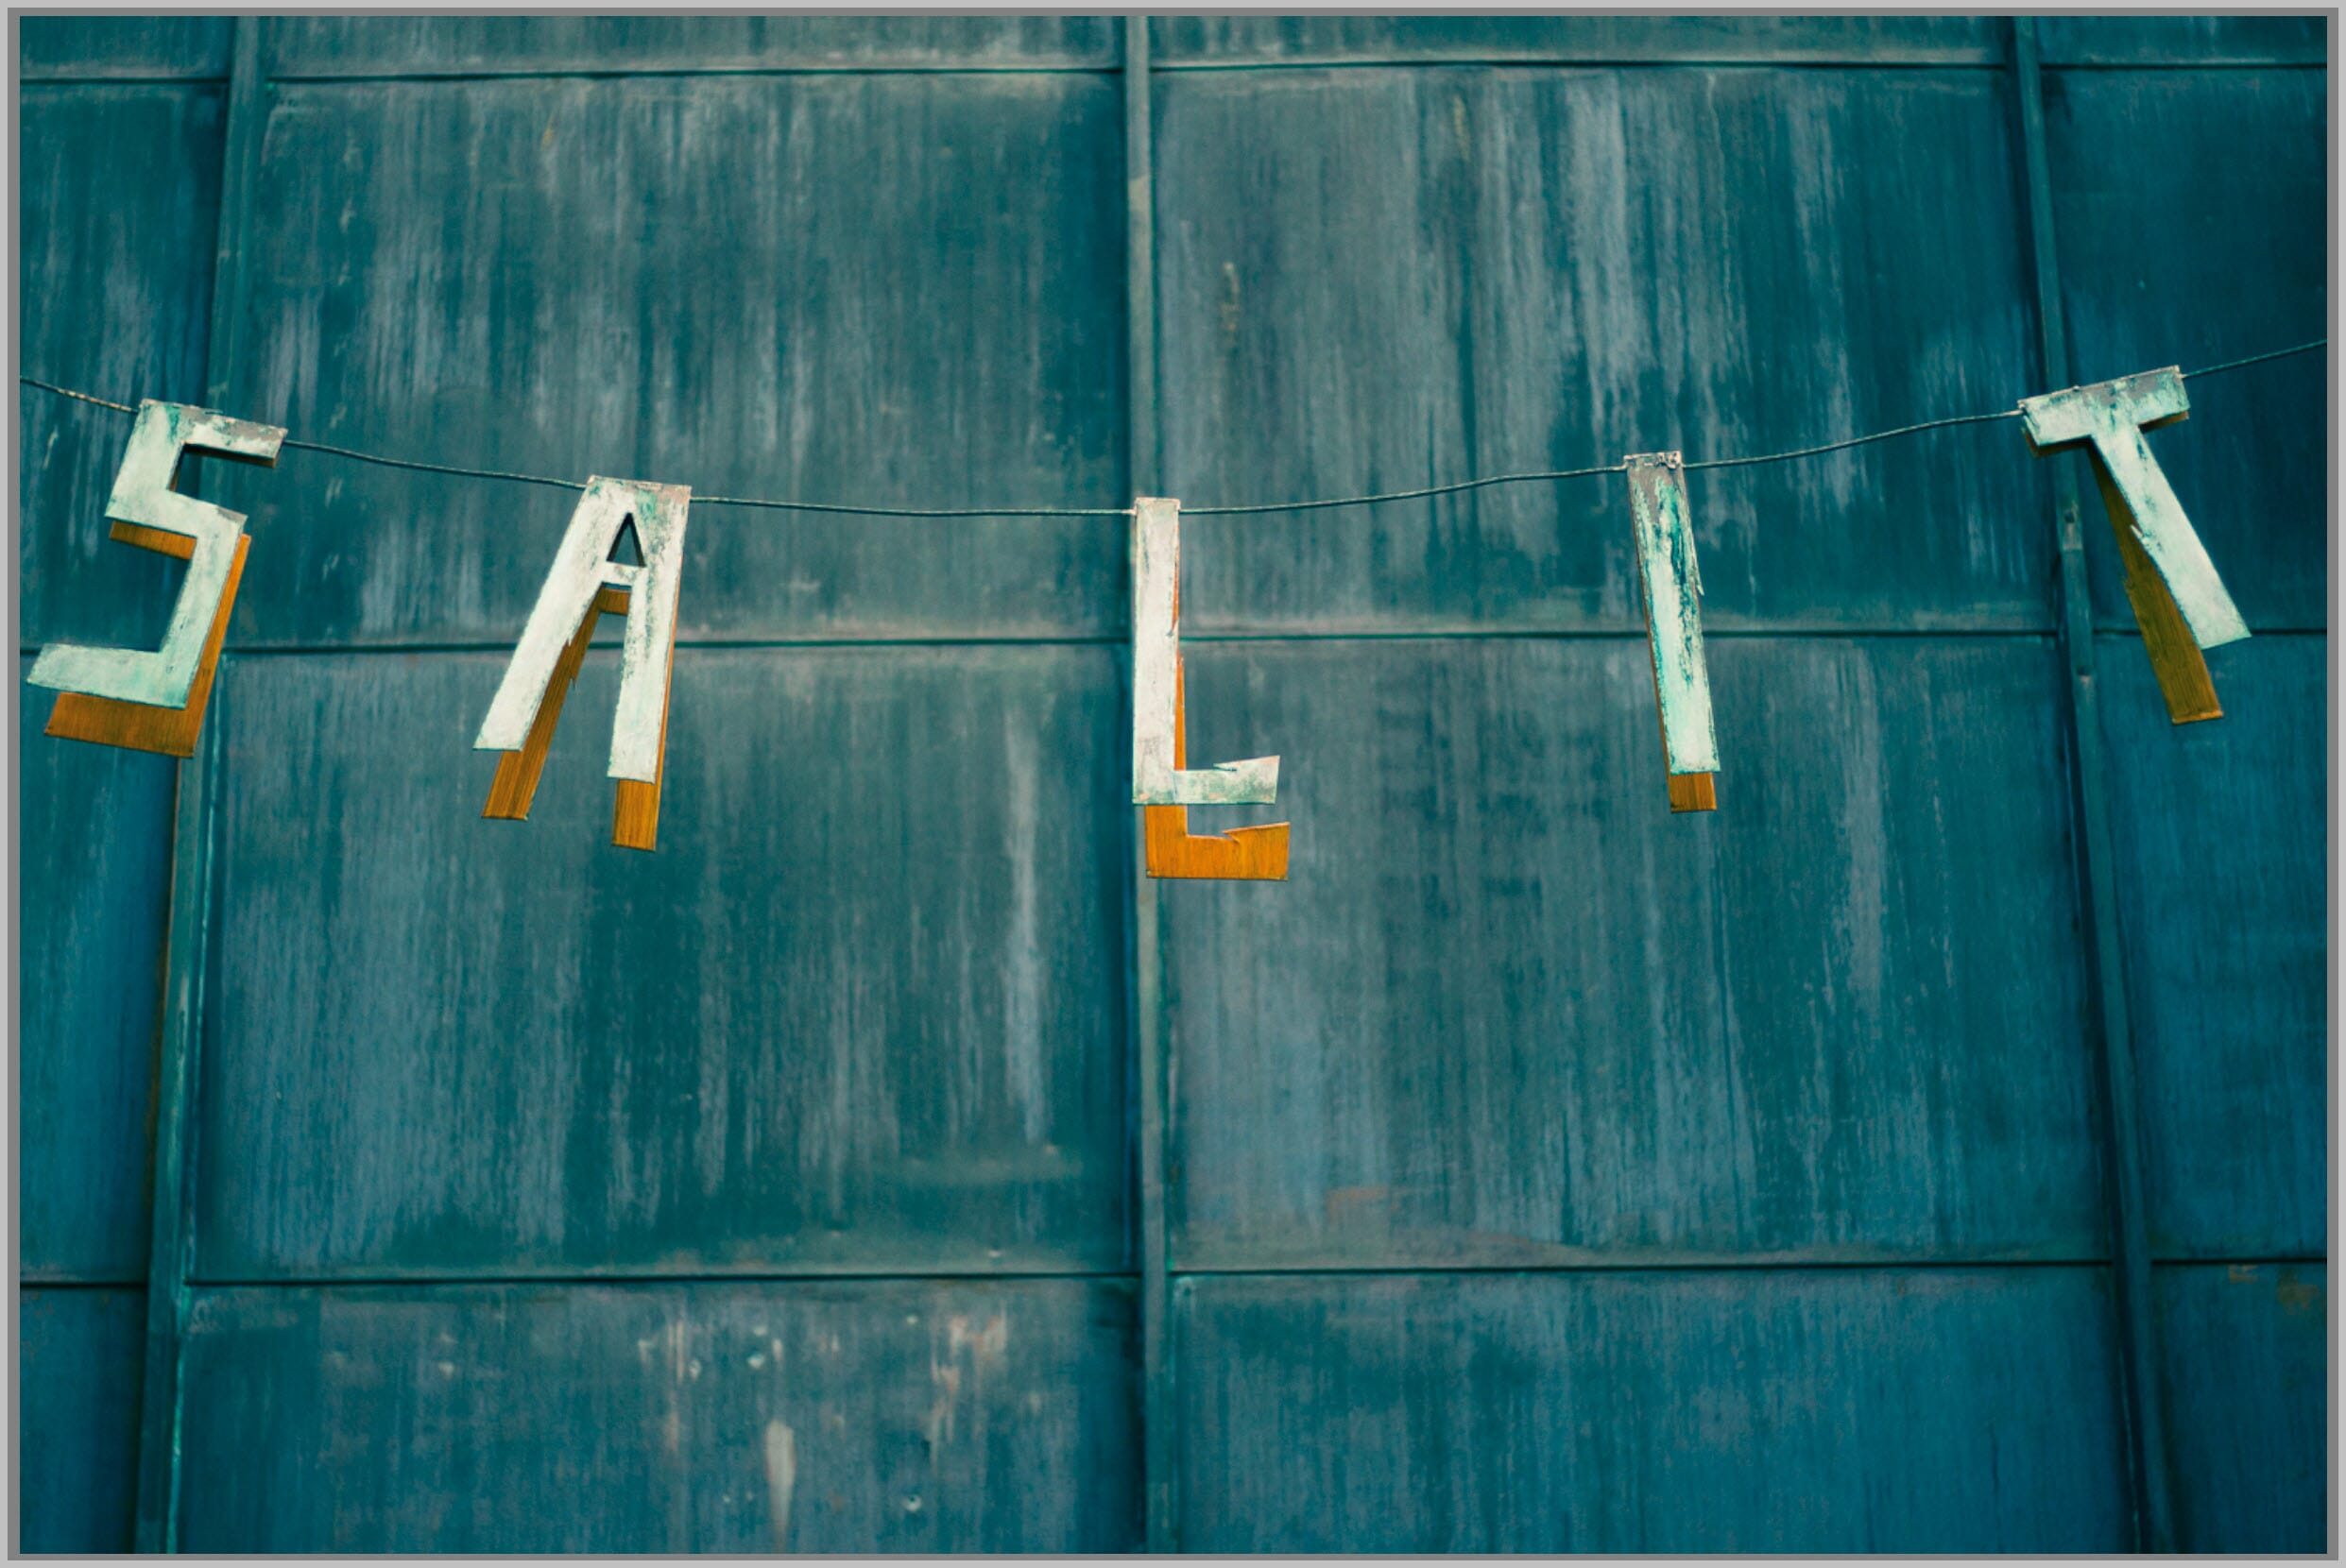
This is a perfect fix for images that are overexposed everywhere – that is, for images that have too-bright shadows, too-bright midtones, and too-bright lighter tones, as well.
But what if your image looks fine in the darker areas, but needs overexposure correction only in the lighter areas? What then?
Adjust the Highlights and Whites Sliders in Lightroom
You can find the Highlights and Whites sliders in the Lightroom Basic panel, beneath the Exposure slider:
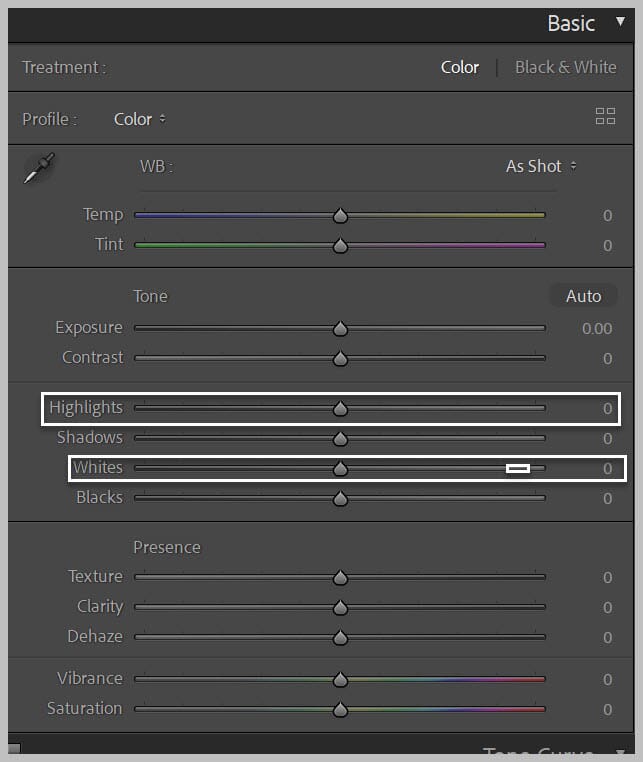
These sliders allow you to selectively adjust exposure by targeting the brightness of lighter-toned areas in your photo.
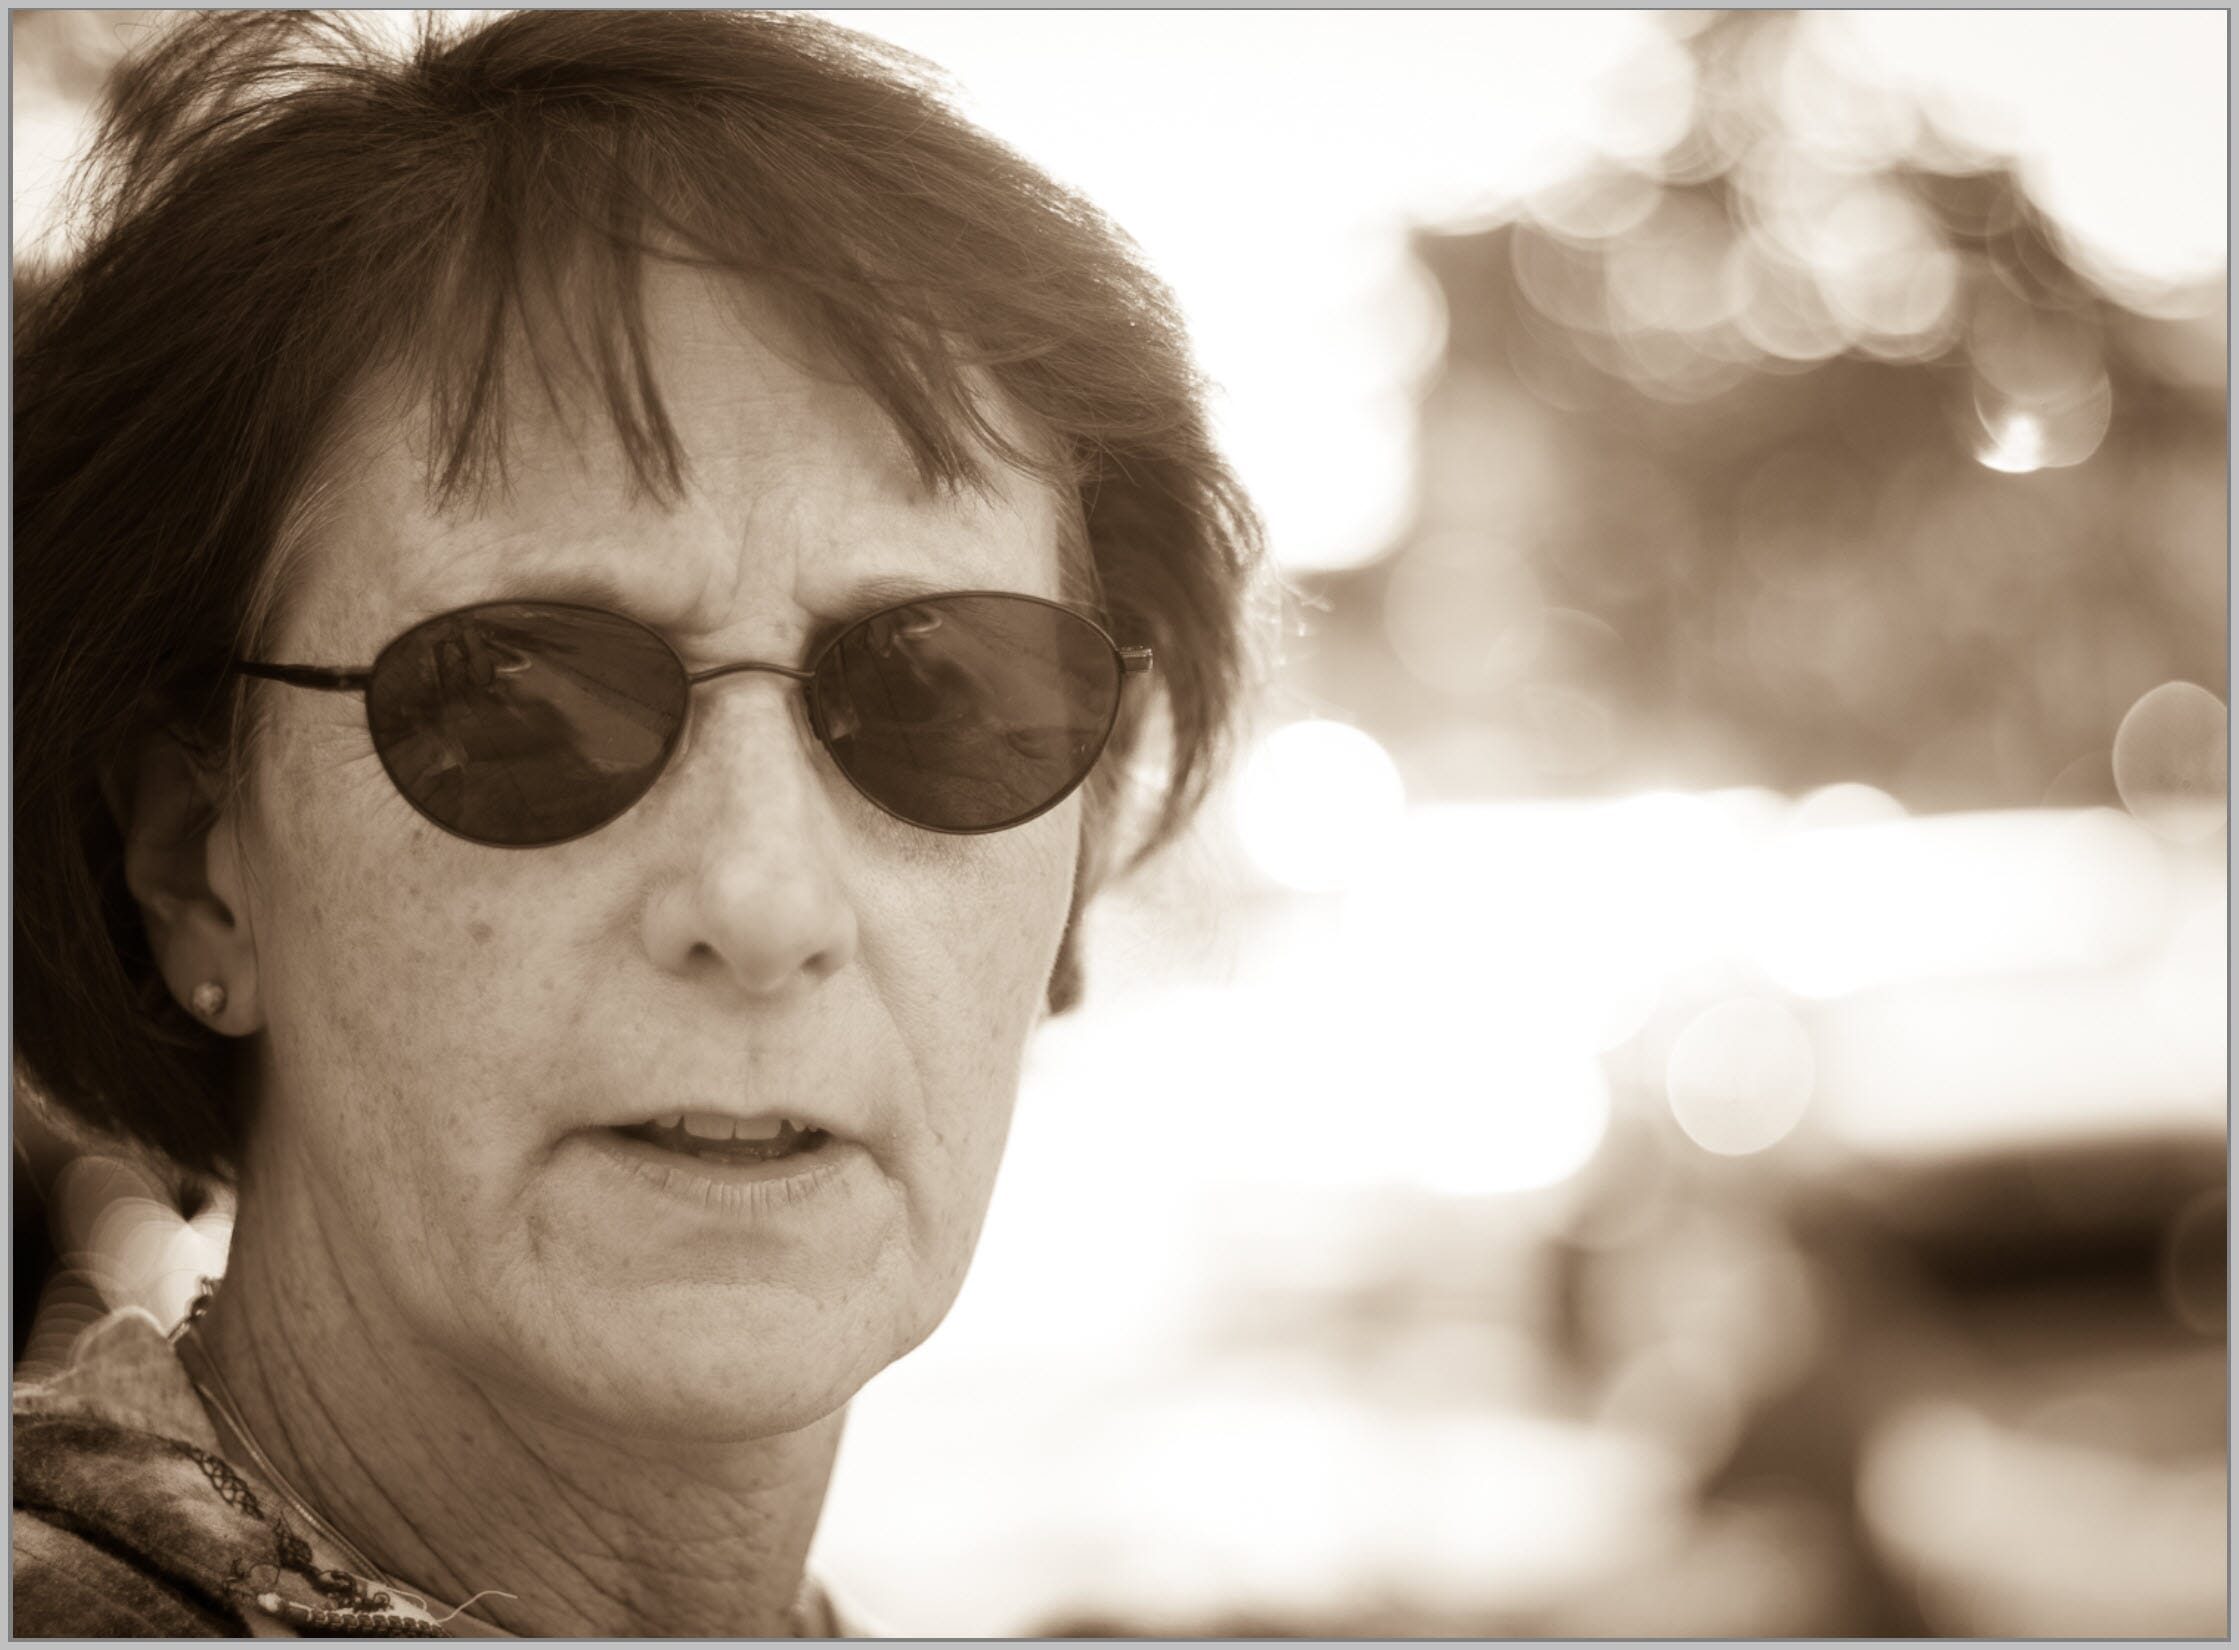
So if you have an image with a nicely-exposed subject but a too-bright sky (like in the example above), you can just slide the Highlights and Whites sliders to the left…
…and watch as any lost detail is recovered.
Now, the Highlights slider is more subtle than the Whites slider, so I recommend you start by pushing it to the left and watching as your overexposed details return. Then, if you still don’t have the result you’re after, you can try dropping the Whites slider, as well.
(You can also start by adjusting the Exposure slider, then moving on to the Highlights and the Whites; it’s all very image-dependent, so don’t be afraid to experiment.)
Use the “Multiply” Blend Mode in Photoshop
If you prefer to work with blend modes in Photoshop (or in other post-processing programs that support layers), then here’s a quick overexposure fix to try:
First, add a Levels adjustment layer to your photo:
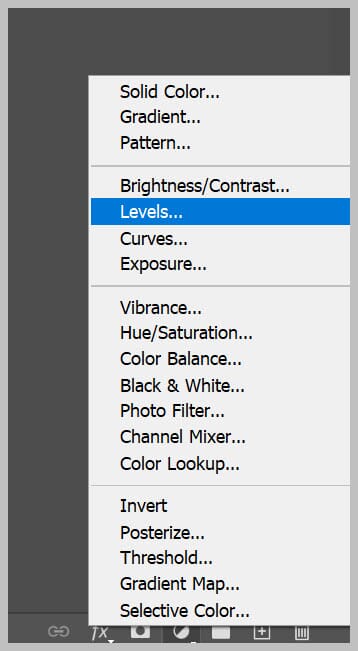
Then change the blend mode to Multiply:
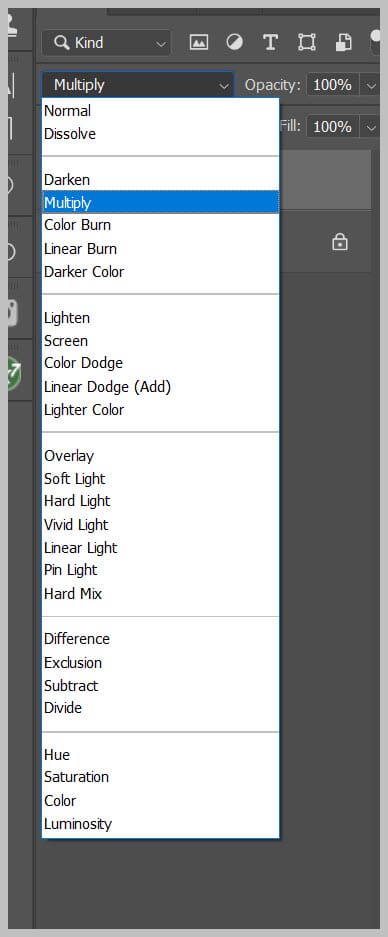
And watch as your image goes from this:

To this:

Now, the Multiply effect is pretty strong, so I recommend you drop the opacity until you find a look that you like:

One of the advantages of using this blend mode method, by the way, is that it keeps your image looking contrasty. Most methods for fixing overexposed photos reduce contrast, which you then need to add back later – but with the Multiply blend mode in Photoshop, you don’t need to worry about contrast one bit!
Use a Levels Adjustment in Photoshop
If you want to gain slightly more control over your exposure in Photoshop, then I highly recommend you work with a Levels adjustment layer.
Simply create a new Levels layer, as I explained in the previous section:

Then drag the midtones slider upward:
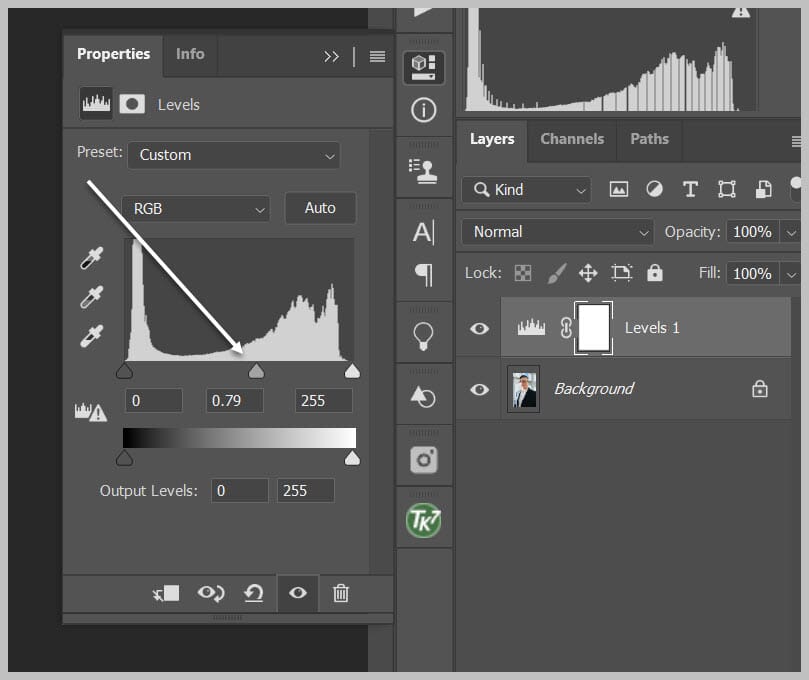
You can also drop the white point by dragging the whites slider on the bottom gradient to the left:
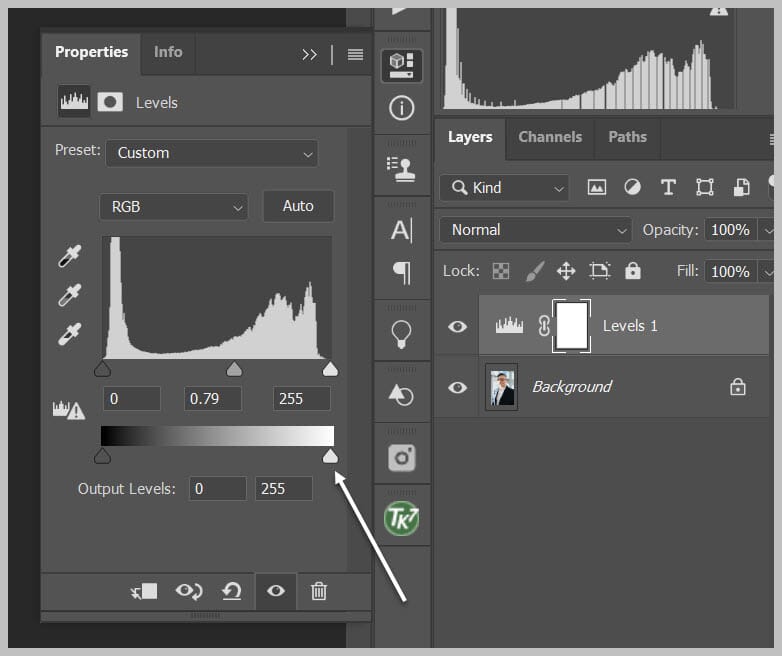
Note that these Levels adjustments will give a slightly different look compared to the Lightroom methods discussed above. It’s really all about personal preference!

How to Fix an Overexposed Photo: Advanced Methods
If you need to correct an overexposed image, and none of the options above do the trick…
…that’s when it’s time to more selective with your editing.
In this section, I’ll share with you three advanced methods for handling overexposure – all designed to handle the trickiest, most stubborn overexposed images.
For Careful Control, Use a Curves Layer in Photoshop
A Photoshop Curves layer gives you a tremendous amount of control over the tones in your images.
It looks like this:
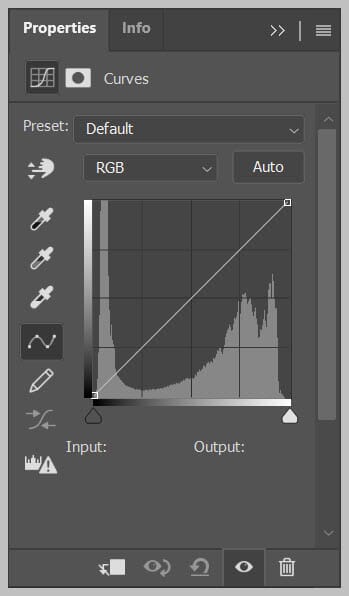
And you can use it to lighten and darken any tones in your image.
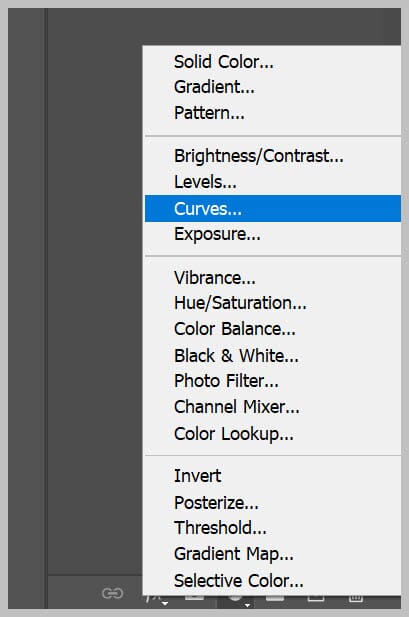
Simply create a new Curves adjustment layer:
Then start plotting points (you do this by clicking with your cursor):
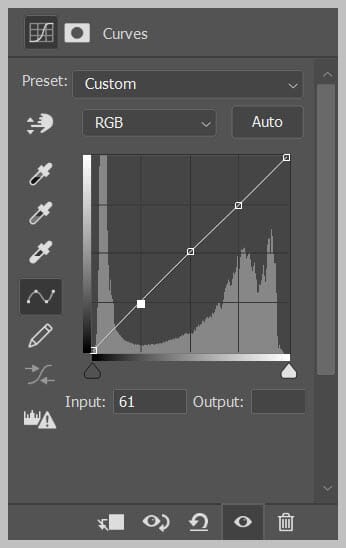
By creating points and dragging the curve downward, you darken the corresponding regions of your image (where the leftmost parts of the curve correspond to the darkest parts of the photo, and the rightmost parts of the curve correspond to the lightest parts of the photo).
In cases of general overexposure, you can always just drag down the entire curve:
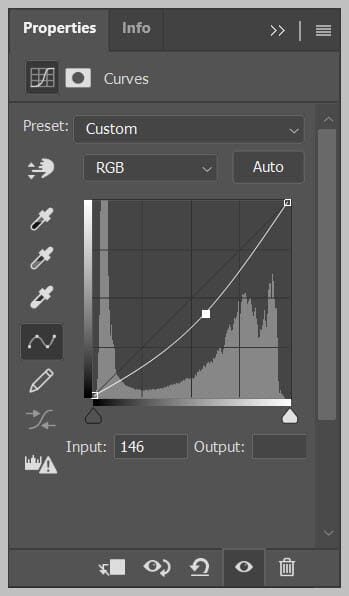
But you also have the option to darken only the highlights:
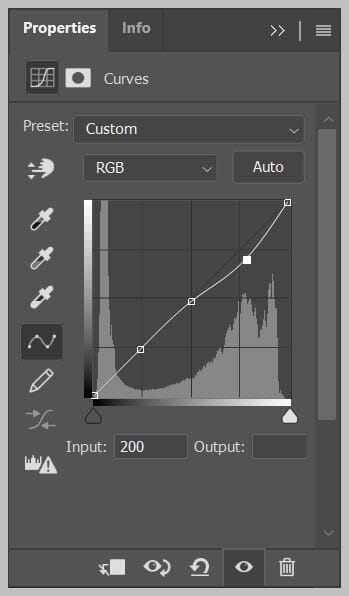
And you can even drag down the white point to keep your brightest tones looking a little more well-managed:
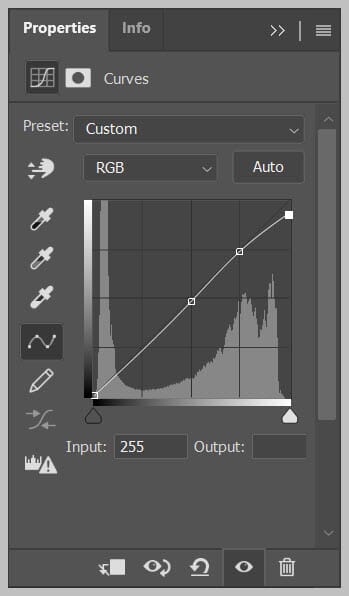
Here’s the final result:

To Fix Overexposed Skies, Use a Graduated Filter in Lightroom
A Graduated Filter creates a gradual darkening effect on the targeted part of a photo.
It’s perfect for dealing with overexposed skies, because you often need to darken only the top of your image, while the bottom is left alone.
Here’s how it works:
First, grab the Graduated Filter tool from the toolbar in Lightroom:
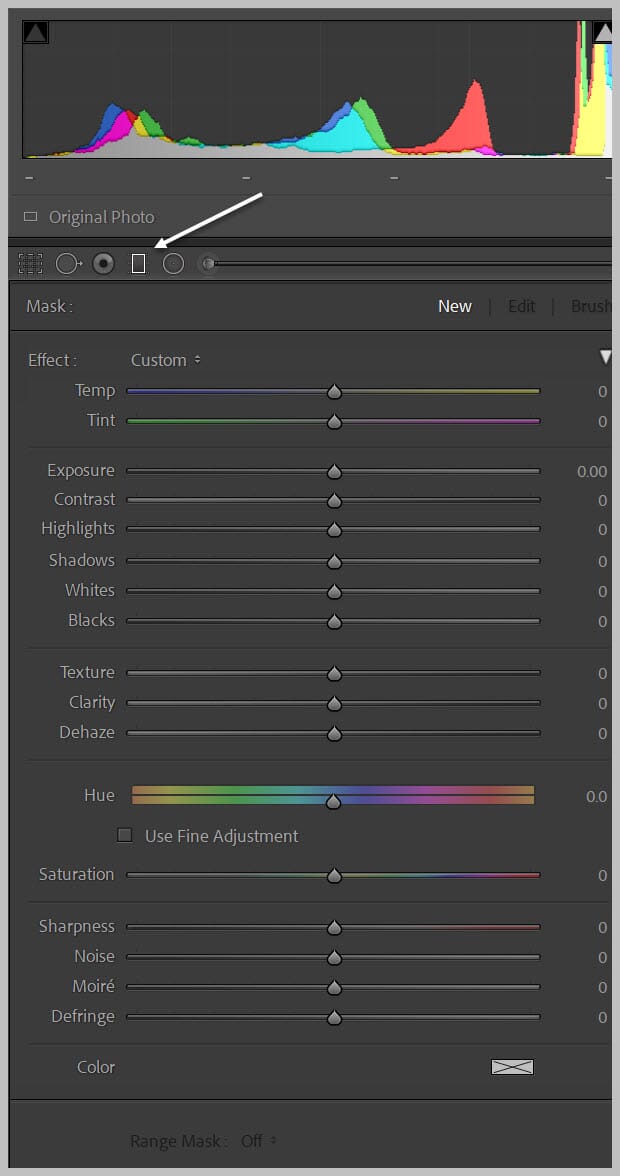
Then drop the Exposure slider.
Finally, drag the filter across your overexposed sky:
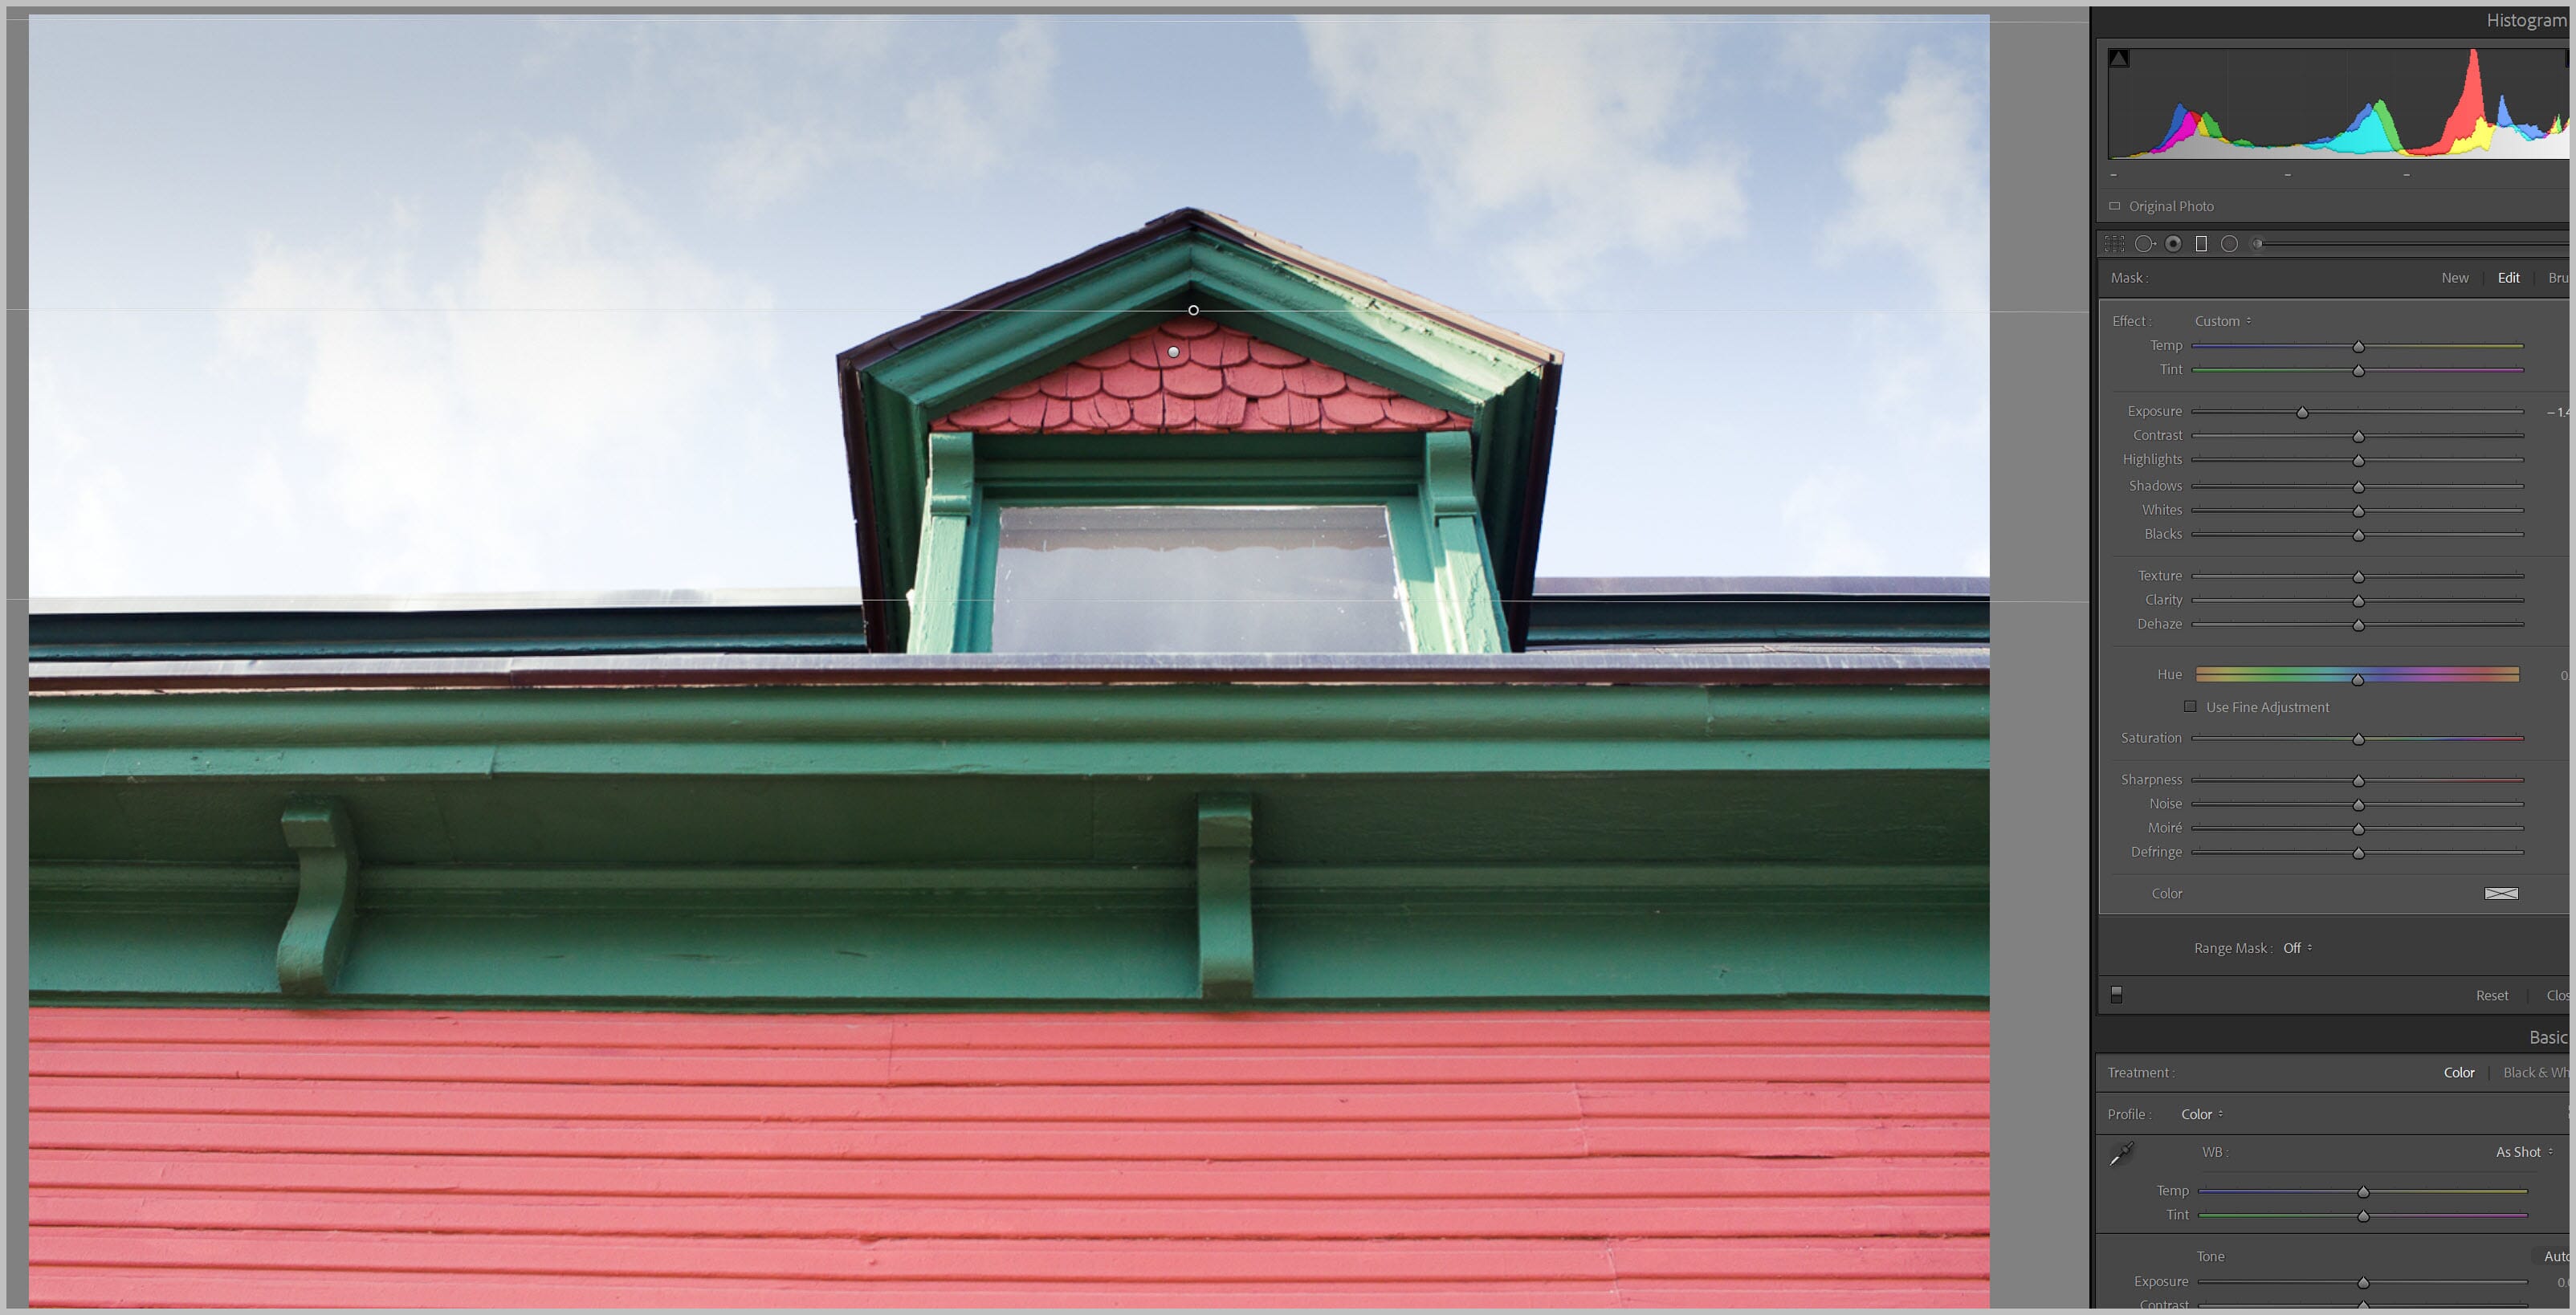
And watch as it’s brought to life!
(If the effect is too heavy-handed, you can always experiment with dropping the Highlights or Whites slider.)
To Handle Irreparable Damage, Add Detail in Photoshop
Here’s a final overexposure trick for you.
While it’s often possible to correct overexposure with the clever use of Lightroom or Photoshop sliders…
…sometimes this will fail, especially in cases where the detail just isn’t present in your image.
And that’s when you need to get creative.
Instead of recovering detail, you need to add a bit of detail of your own.
My favorite way to do this is with the Brush tool in Photoshop.

Simply identify the overexposed part of your image, such as the sun in the photo below:
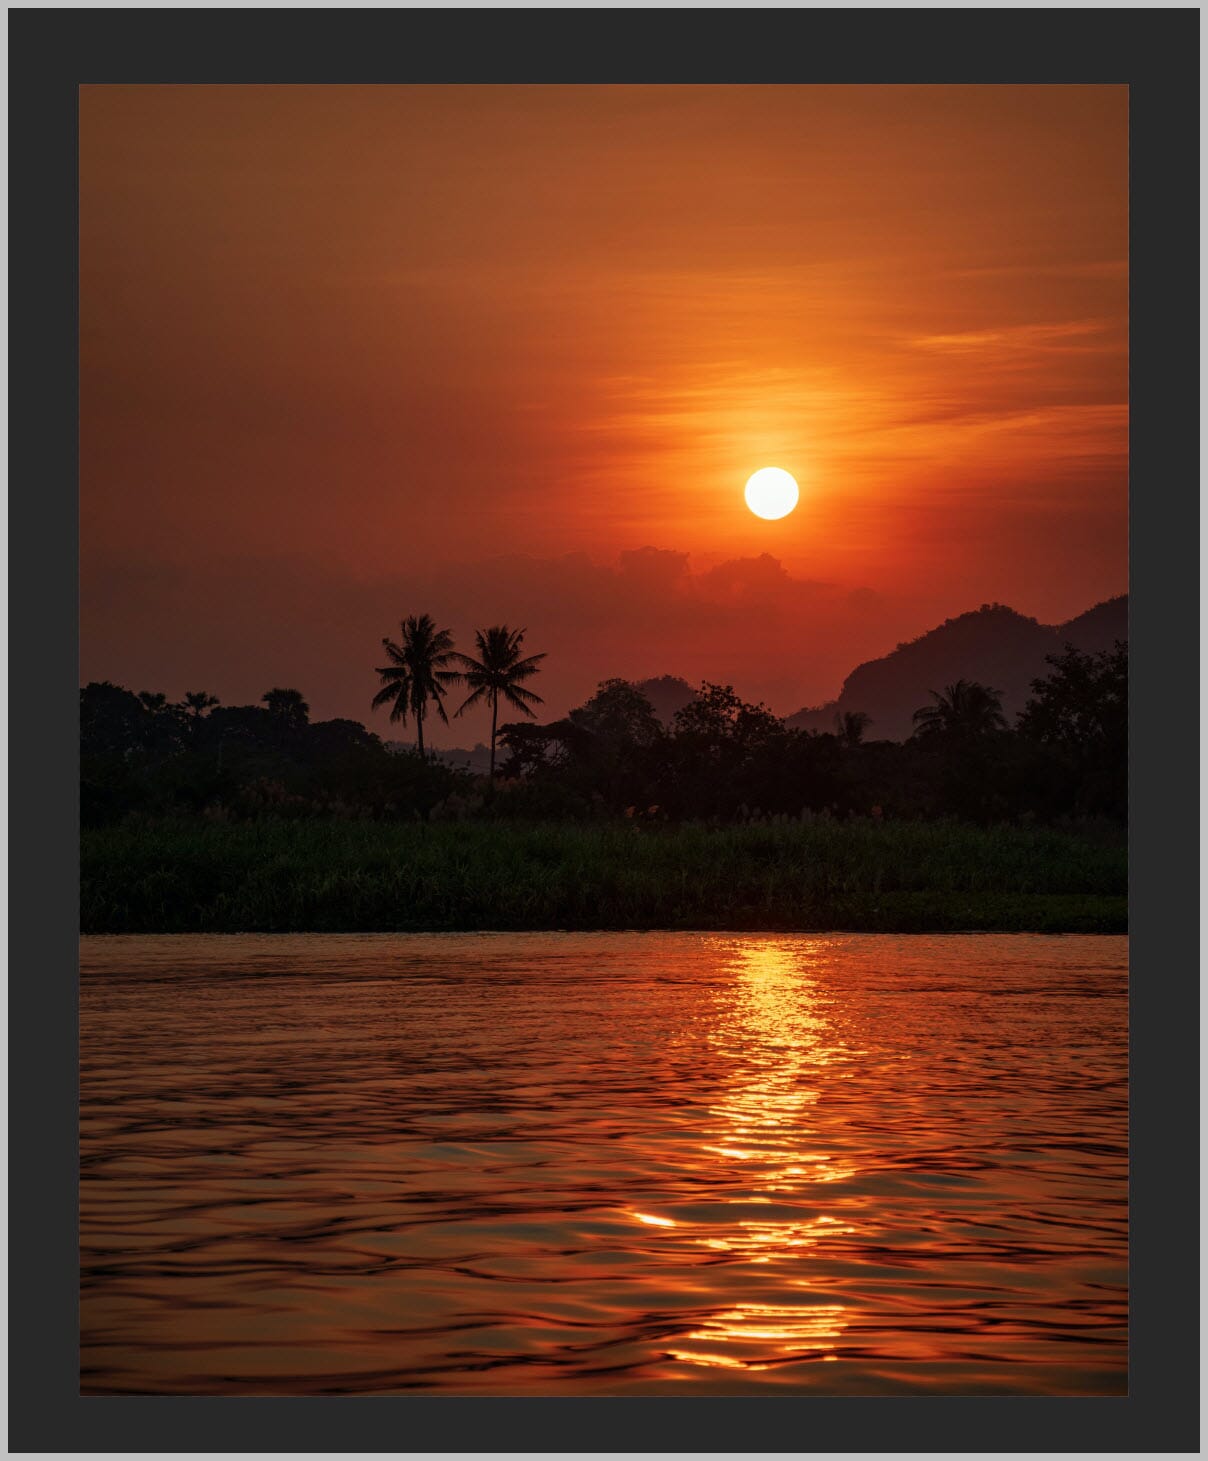
Then create a large, soft brush.
Select a color similar to the color present in the overexposed area, but drop the brightness slightly.
Create a new, blank layer:
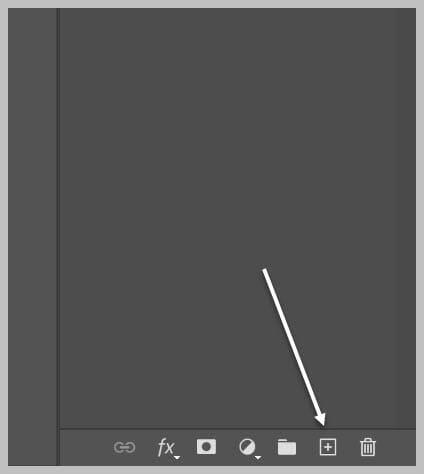
And paint on the overexposed portion of the image.
It might take a little practice, but you can create an interesting “glow” effect, especially when dealing with an overexposed sun or overexposed skies.
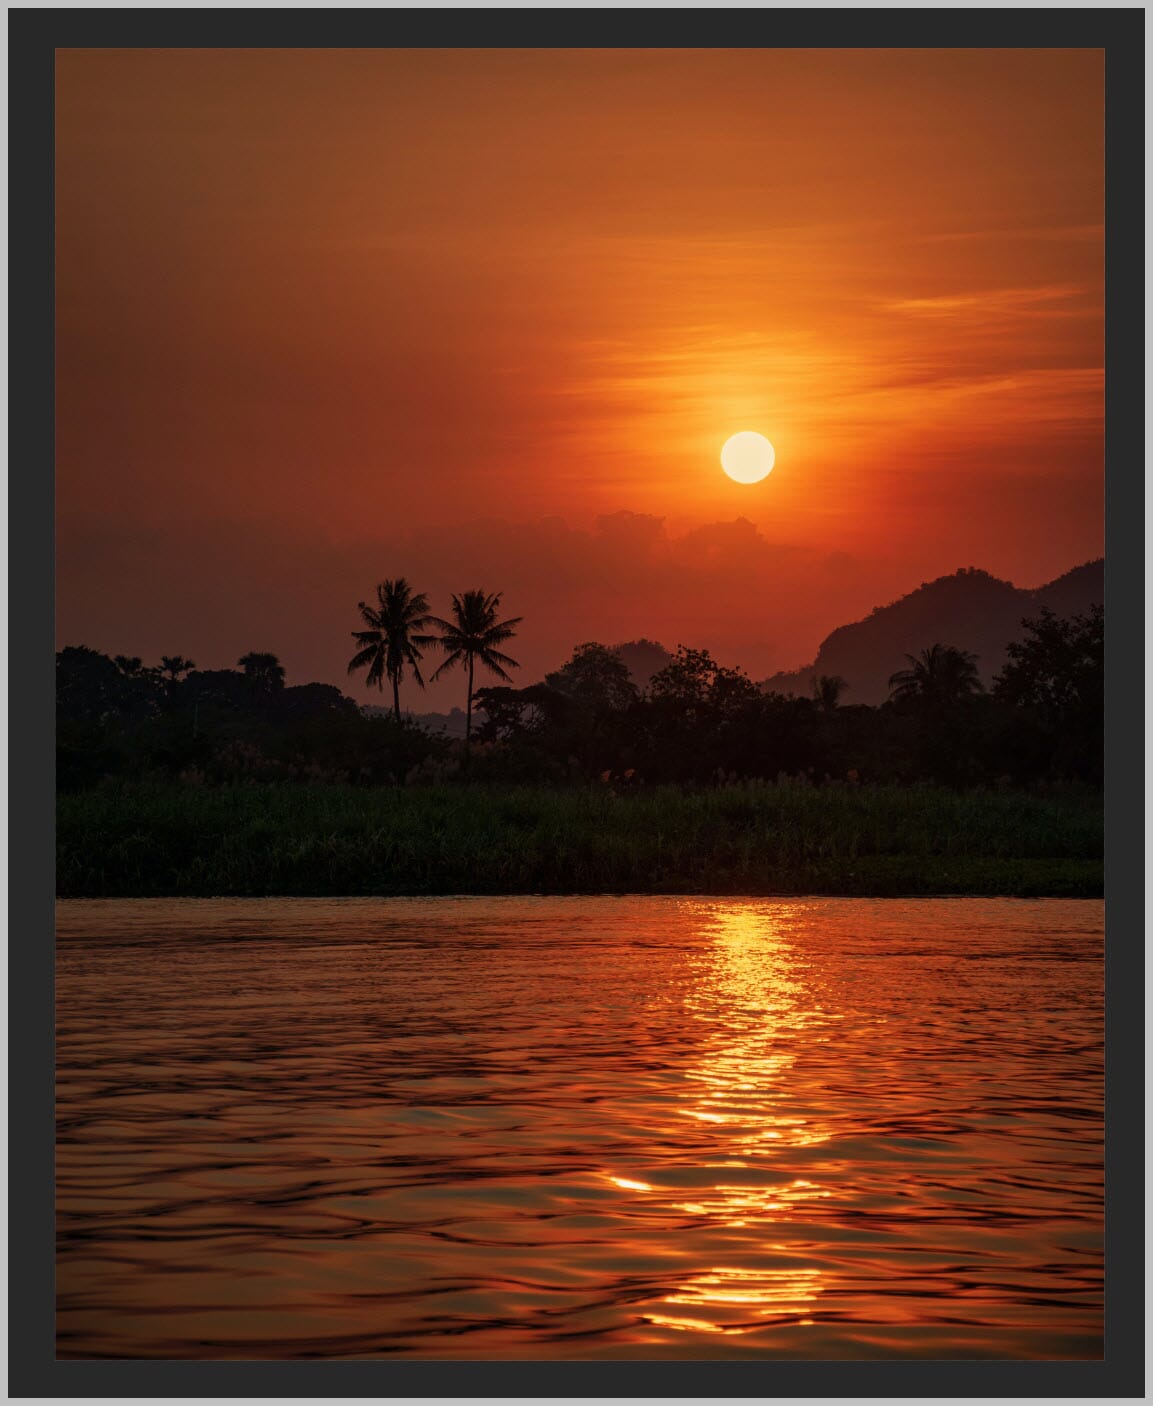
(Also, try experimenting with different blend modes and opacity levels – I’m a fan of blending with Overlay, as well as Soft Light.)
How to Prevent Overexposed Photos (From the Beginning!)
You should now be familiar with a half-dozen ways of dealing with overexposed images in post-processing.
But there are actually a few steps you can take at the time of capture to drastically reduce the chance of overexposure!
And I highly recommend you commit these methods to memory.
Because if you can prevent overexposure when out shooting…
…then you never have to spend time fixing it in Lightroom or Photoshop again.
Always Use RAW Files, Not JPEGs
Preventing overexposure begins with your image file settings.
If you want to capture as much detail as possible, then you must shoot in RAW.
Because while JPEGs look nice straight out of the camera, they don’t preserve every last detail. And often, in photography, every last detail counts.
So make sure you shoot in RAW. That way, you’ll maximize detail – and you’ll be able to do plenty of detail recovery later on, simply with the Lightroom sliders I discussed early in this article.
Now, RAW files do come with a serious drawback:
They’re not immediately shareable. You have to edit them using a program such as Lightroom or Adobe Camera RAW.
So if you desperately need instantly-shareable photos, what do you do?
Simply set your file settings to RAW+JPEG. That way, your camera will save both file types, and you never have to regret not shooting in RAW!
Related Post: RAW vs JPEG: Five Reasons You Should Be Shooting in RAW
Trust Your Camera’s Meter, But Don’t Be Afraid to Use Exposure Compensation
Overexposure can be caused in a few ways.
For one, your scene might include a mix of very light and very dark elements, and your camera might be unable to capture all that tonal range. So no matter what you do, you cannot help but poorly expose part of your image.
However…
Overexposure is also caused by letting your camera do all the work, without exercising any quality control of your own.
That’s why I recommend you start out using Program mode, Aperture Priority mode, or Shutter Priority mode – not Auto mode.
You see, in Program mode, Aperture Priority mode, and Shutter Priority mode, your camera does a lot of the heavy lifting for you. While you do choose an exposure setting or two, your camera uses its meter to determine the correct exposure for the scene – the amount of light that should hit the sensor for a well-exposed image.
But these camera modes also allow you to take control over your exposure if necessary, which is key if you want to capture consistently well-exposed images.
Now, the fact is that your camera’s meter is very good, and you can trust it in most cases.
But a meter can be fooled.
So if you capture an image, then check the LCD and notice that it seems too bright, that’s when it’s time to dial in exposure compensation.
(Exposure compensation simply darkens or lightens the scene in-camera; it’s like dragging down the Lightroom Exposure slider, except you do it before taking your shot, not after.)
If your image looks too bright, you can dial in -1 or -2 exposure compensation.
And if your image looks too dark, you can do the opposite: set your exposure compensation to +1 or +2, so that things stay nice and bright.
Got it?
Check Your Histogram Regularly
In the previous tip, I suggested you preview images on your LCD, then dial in exposure compensation based on what you observe.
But while this method does work, your camera LCD can be pretty unreliable, thanks to ambient light levels. Sure, if an image looks overexposed, it often will be – except when it’s not, and it’s just the LCD playing tricks on you.
That’s why I recommend you also check your camera’s histogram when shooting. A histogram looks like this:

It’s merely a graphical representation of the tones in an image.
So the peaks along the right side of the histogram represent the brighter areas of your photo, and the peaks along the left side of the histogram represent the darker areas of your photo.
Now, while there is no single correct histogram, if you see the peaks pressing up hard against the right side of the graph, it’s a sign of overexposure.
And since the histogram never lies, you can always, always trust it to show you what you need to correct.
Fix an Overexposed Photo: The Next Step
Now that you’ve finished this article, you know all about how to fix an overexposed photo – and you should be able to handle all of your too-bright images with ease.
So open up your favorite post-processing program.
Head to your overexposed images.
And correct them using the techniques I’ve discussed!
How do I fix overexposed RAW photos?
RAW photos are easy to fix, because they have so much information! Use a RAW editor such as Lightroom, and reduce the exposure and/or the highlights until you regain the lost detail.
How do I fix a photo that’s too bright?
If your photo is too bright, you can start by reducing the Exposure slider in a program such as Lightroom. You can also play with the Whites and Highlights sliders. If you prefer to use Photoshop, try using the Multiply blend mode on a Levels adjustment layer, or use a Curves adjustment layer to darken the image.
How do I stop overexposed photos?
To stop overexposure, I recommend you learn about the exposure triangle. By carefully selecting your aperture, shutter speed, and ISO, you can keep your images well-exposed and beautiful!
Why are my photos overexposed?
Your photos are overexposed because you’re either letting in too much light via the camera’s shutter speed setting, you’ve opened the lens’s diaphragm too much via the lens’s aperture setting, or you’ve increased the ISO past the required amount. To keep your photos looking nice and detailed, I recommend learning about camera metering while also starting to work with Program mode or Aperture Priority mode; that way, you can start preventing overexposure before it ever happens!
