
- Use f/1.4-f/2.8 for creamy bokeh in most outdoor portraits – see aperture guide.
- Match your settings to the light: sunny (ISO 100, 1/1000+), golden hour (ISO 100-800), overcast (ISO 200-800), rain (ISO 800-3200).
- Use spot metering in harsh light and evaluative metering when light is even – details here.
- Eye-detect AF is a game-changer for outdoor portraits – enable it if your camera supports it.
- Fill flash at -1 to -2 EV eliminates harsh shadows on sunny days without looking artificial.
- Shoot in RAW format to recover highlights and shadows in post-processing.
- Test your knowledge with our outdoor portrait settings quiz at the end.
Choosing the Right Aperture for Outdoor Portraits
Aperture is the single most important setting for outdoor portrait photography. It controls two things simultaneously: how much light enters your lens, and how much background blur (bokeh) you get behind your subject.
For most outdoor portraits, you want a wide aperture between f/1.4 and f/2.8. This creates that creamy, blurred background that separates your subject from distracting elements like trees, buildings, and passing cars. The wider you go, the more separation you get.
When you buy through links on our site, we may earn a commission at no cost to you. We evaluate products independently. Commissions do not affect our evaluations. As an Amazon Associate, we earn from qualifying purchases.
That said, aperture choice depends on the situation:
- Single subject headshot: f/1.4 – f/2.0 for maximum background blur
- Half-body portrait: f/2.0 – f/2.8 for a good balance of sharpness and bokeh
- Group portraits: f/4.0 – f/5.6 to keep everyone in focus
- Environmental portraits: f/5.6 – f/8.0 when you want context from the background
The best portrait lenses – like an 85mm f/1.4 or 50mm f/1.8 – give you the widest apertures for the most beautiful bokeh. If you are still learning how aperture works, our guide to wide vs. narrow aperture breaks it down.
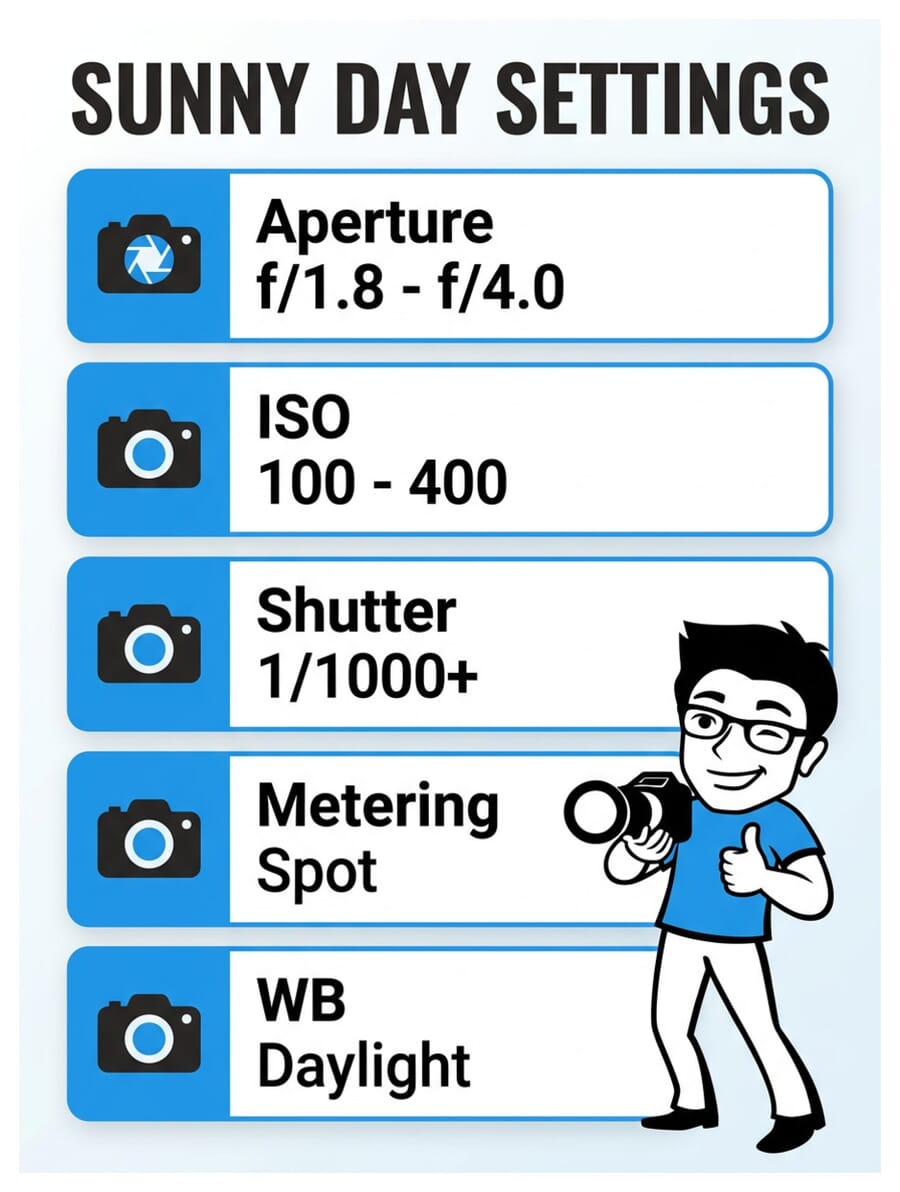
Sunny Day Settings

Bright sunshine is the most common outdoor shooting scenario – and ironically, one of the trickiest. The problem? Too much contrast. Shadows go pitch black while highlights blow out, and your subject ends up squinting into the sun.
Here is how to handle it:
- Aperture: f/1.8 – f/4.0 (wide apertures still work, but you will need fast shutter speeds to compensate)
- ISO: 100 – 400 (keep it as low as possible)
- Shutter speed: 1/1000 and faster – sometimes up to 1/8000 at wide apertures
- Metering: Spot metering on your subject’s face
- White balance: Daylight preset (around 5200K)
The key to sunny-day portraits is positioning your subject wisely. Turn them so the sun hits from the side or slightly behind (backlighting), then use fill flash or a reflector to open up the shadows on the face. Shooting with the sun directly overhead at noon is the hardest scenario – look for open shade from buildings or trees instead.
If you want to use a very wide aperture like f/1.4 in bright sun, you will likely hit your camera’s maximum shutter speed. That is when a neutral density filter becomes essential – it cuts the light entering your lens so you can shoot wide open even at noon.
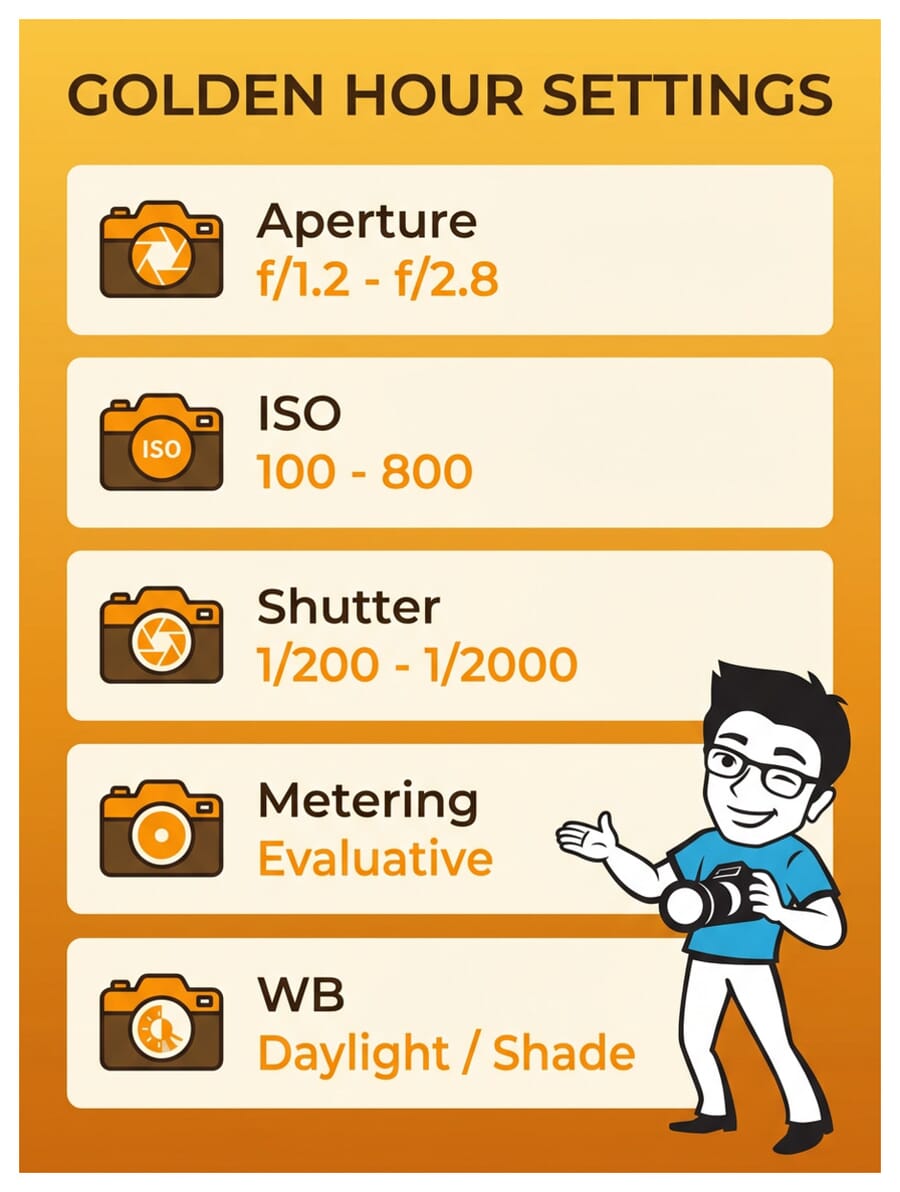
Golden Hour and Sunset Settings
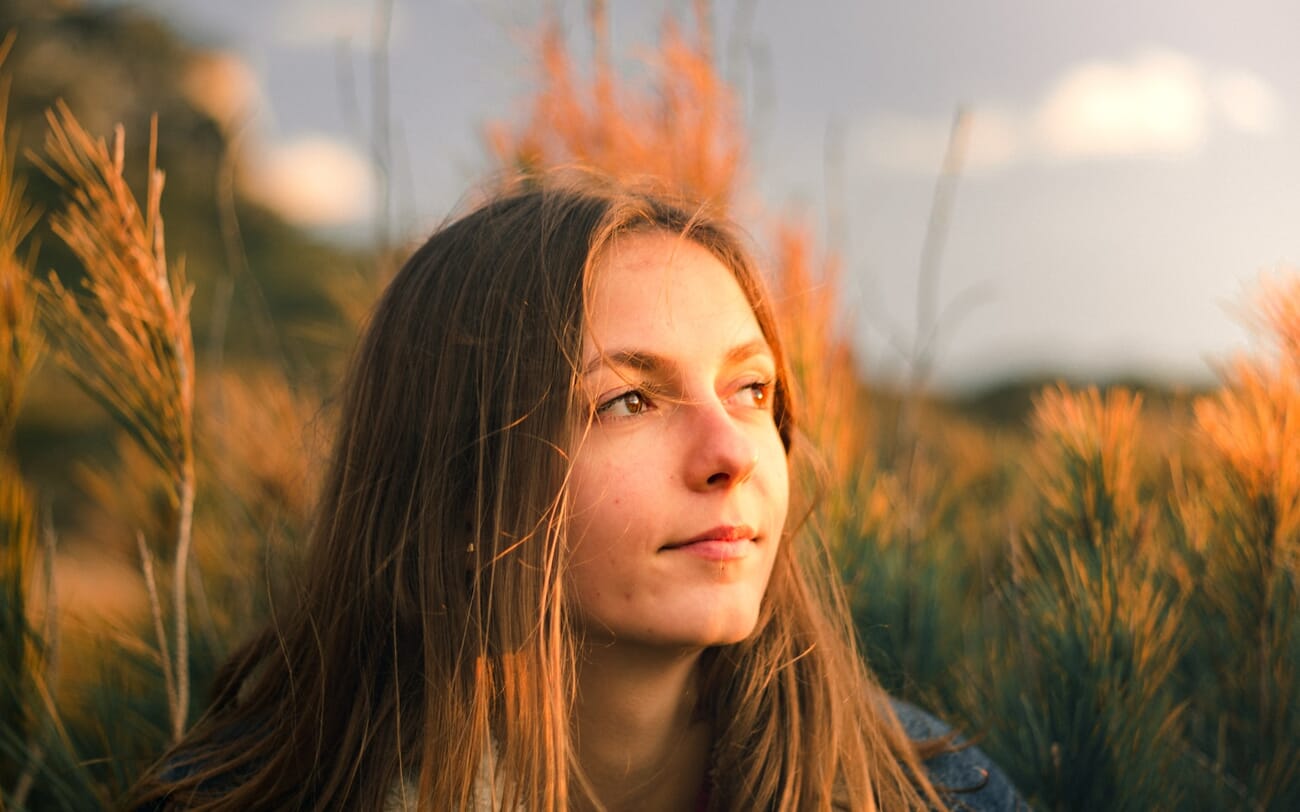
Golden hour – the first and last hour of sunlight each day – is the most coveted time for portrait photography. The light is warm, soft, directional, and incredibly flattering on skin. If you can only shoot at one time of day, make it golden hour.
Settings for golden hour portraits:
- Aperture: f/1.2 – f/2.8 (go as wide as you want – the softer light allows it)
- ISO: Start at 100 and increase to 400-800 as the sun drops lower
- Shutter speed: 1/200 – 1/2000 depending on remaining light
- Metering: Evaluative/Matrix metering (the even light makes it reliable)
- White balance: Daylight or Shade preset to preserve the warm tones
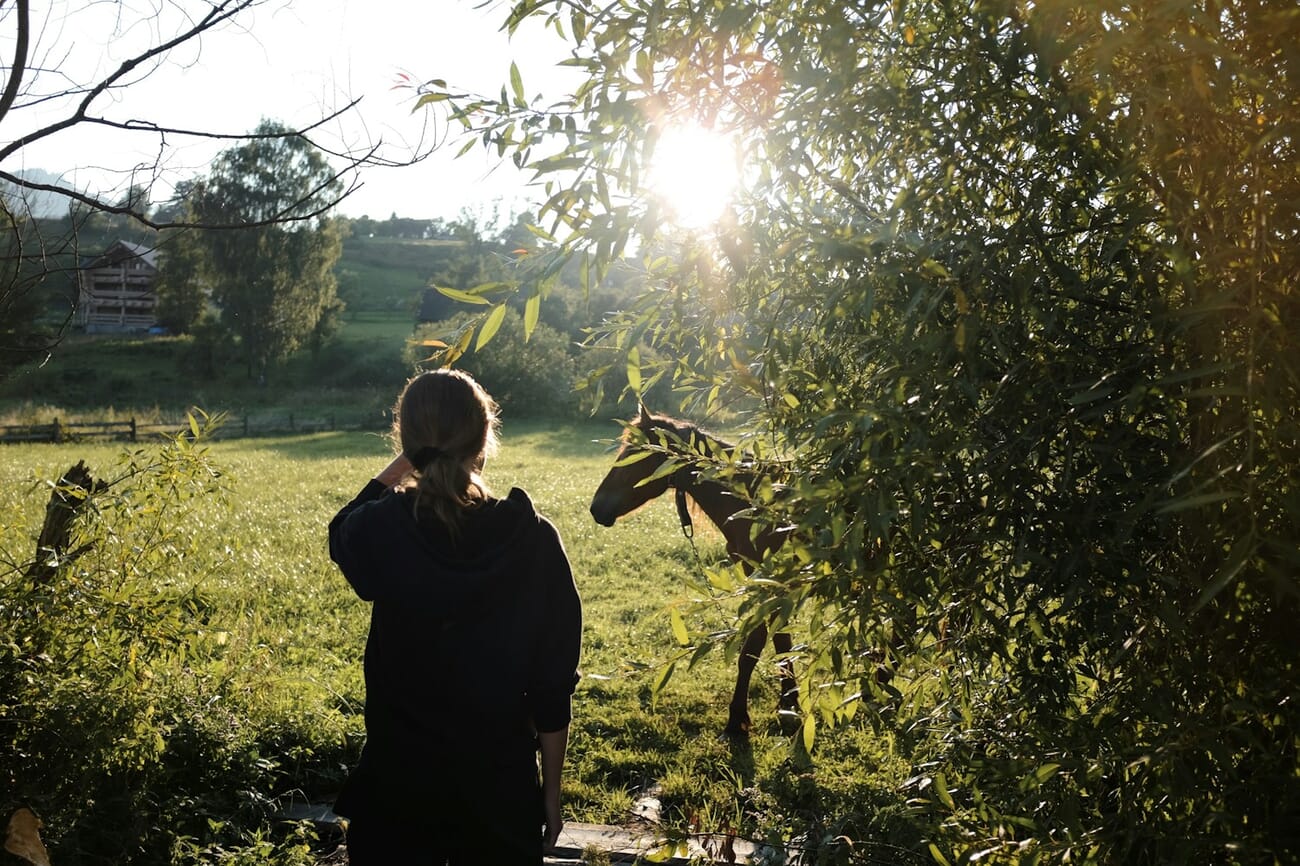
The most popular golden hour technique is backlighting – positioning your subject between you and the sun. This creates a beautiful rim light around their hair and shoulders. When you backlight, meter for your subject’s face (not the bright sky behind them), or your subject will become a silhouette. Our guide to sunset portrait settings goes deeper into this technique.
One important tip: the light changes fast during golden hour. Be ready to bump your ISO every few minutes as the sun drops. For sunrise, do the reverse – start at higher ISO and bring it down as the light grows.
Overcast and Cloudy Day Settings
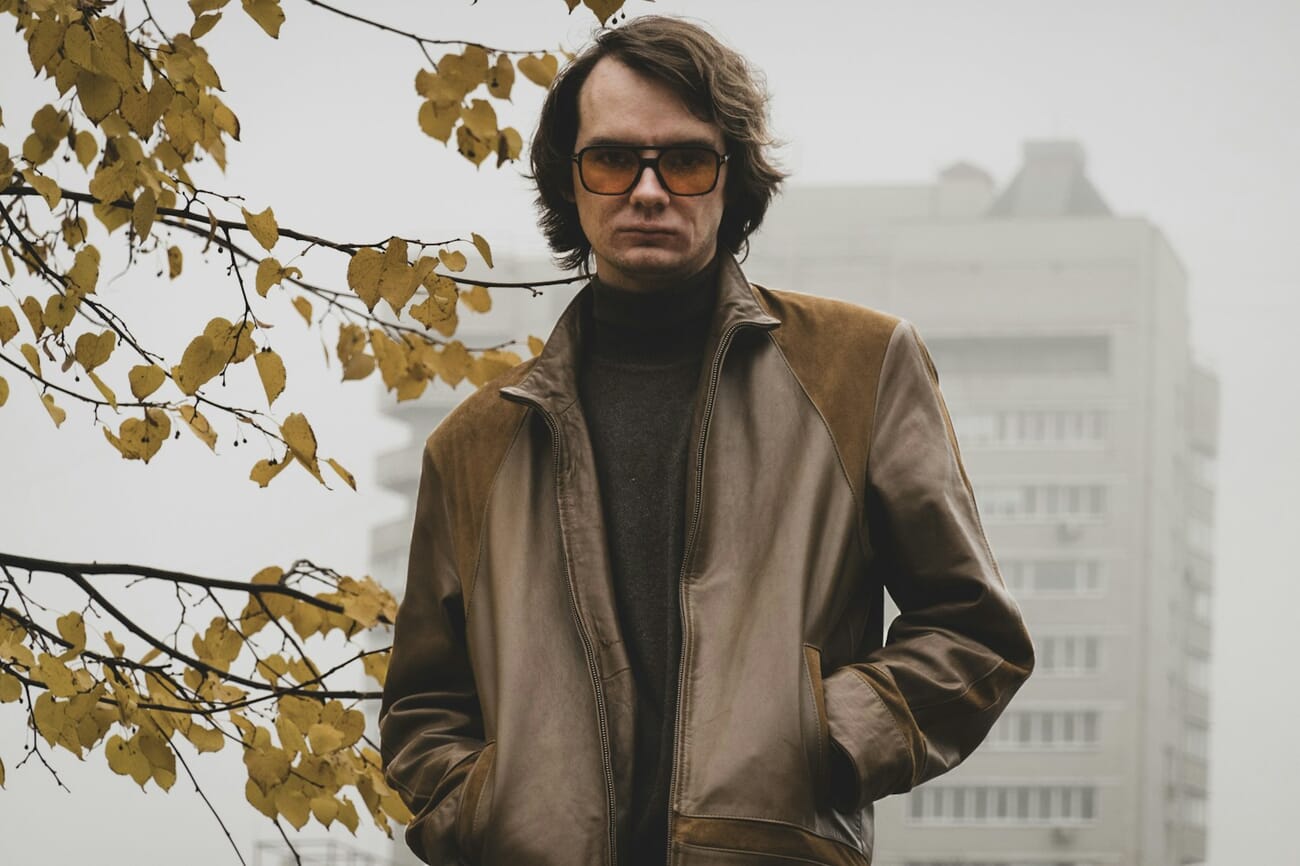
Overcast days are a portrait photographer’s secret weapon. The clouds act as a massive softbox, diffusing sunlight evenly across your scene. No harsh shadows, no squinting subjects, no blown highlights. Many professional portrait photographers actually prefer overcast light to direct sun.
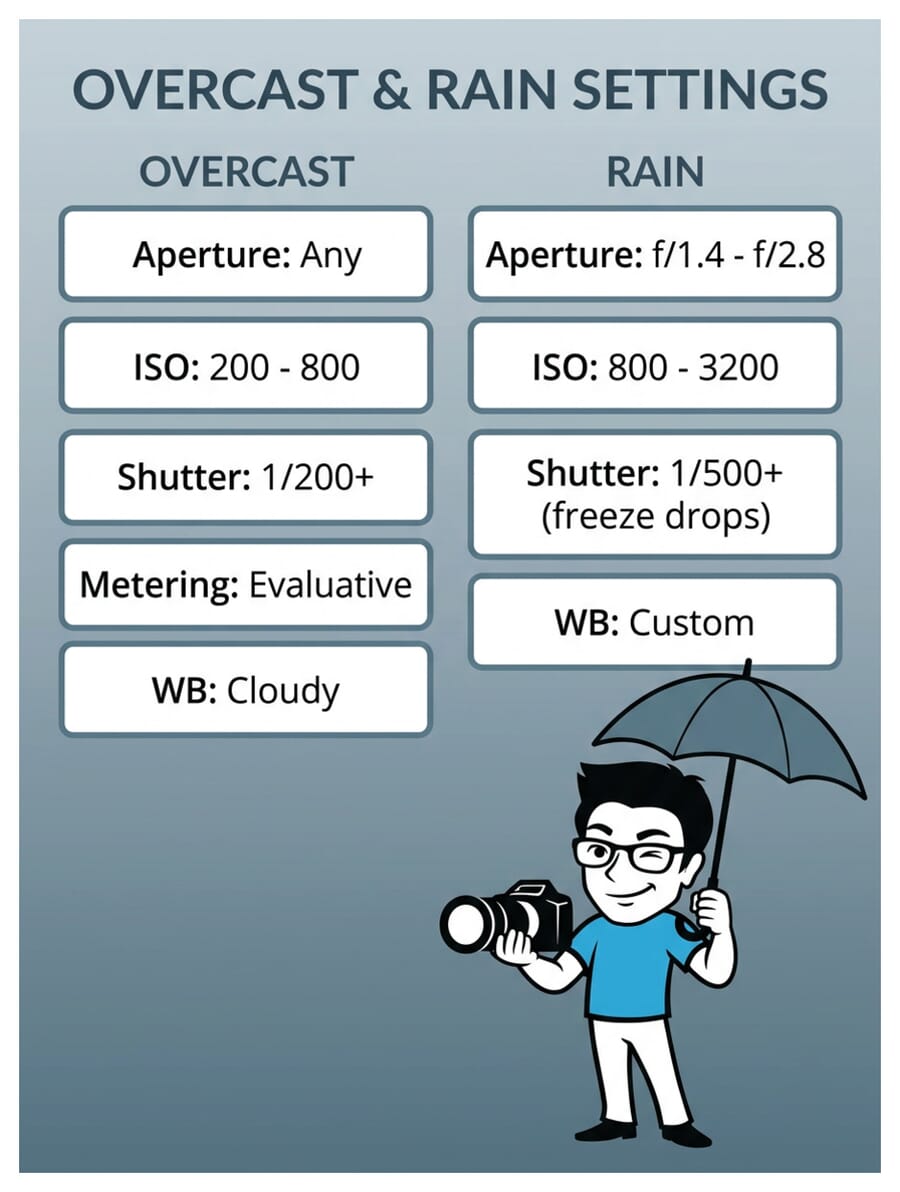
Settings for overcast portraits:
- Aperture: Anything you want – the even light is forgiving
- ISO: 200 – 800 (depending on cloud thickness)
- Shutter speed: 1/200 and faster (watch for wind causing motion)
- Metering: Evaluative/Matrix (works perfectly with even light)
- White balance: Cloudy preset (adds warmth to counteract the cool, flat light)
The only downside to overcast light is that it can look a bit flat and lifeless. To add dimension, try positioning your subject near a building or wall that blocks light from one side – this creates subtle directional lighting even under clouds. You can also use a reflector to bounce light onto the face and add catchlights to the eyes.
Rain and Snow Settings
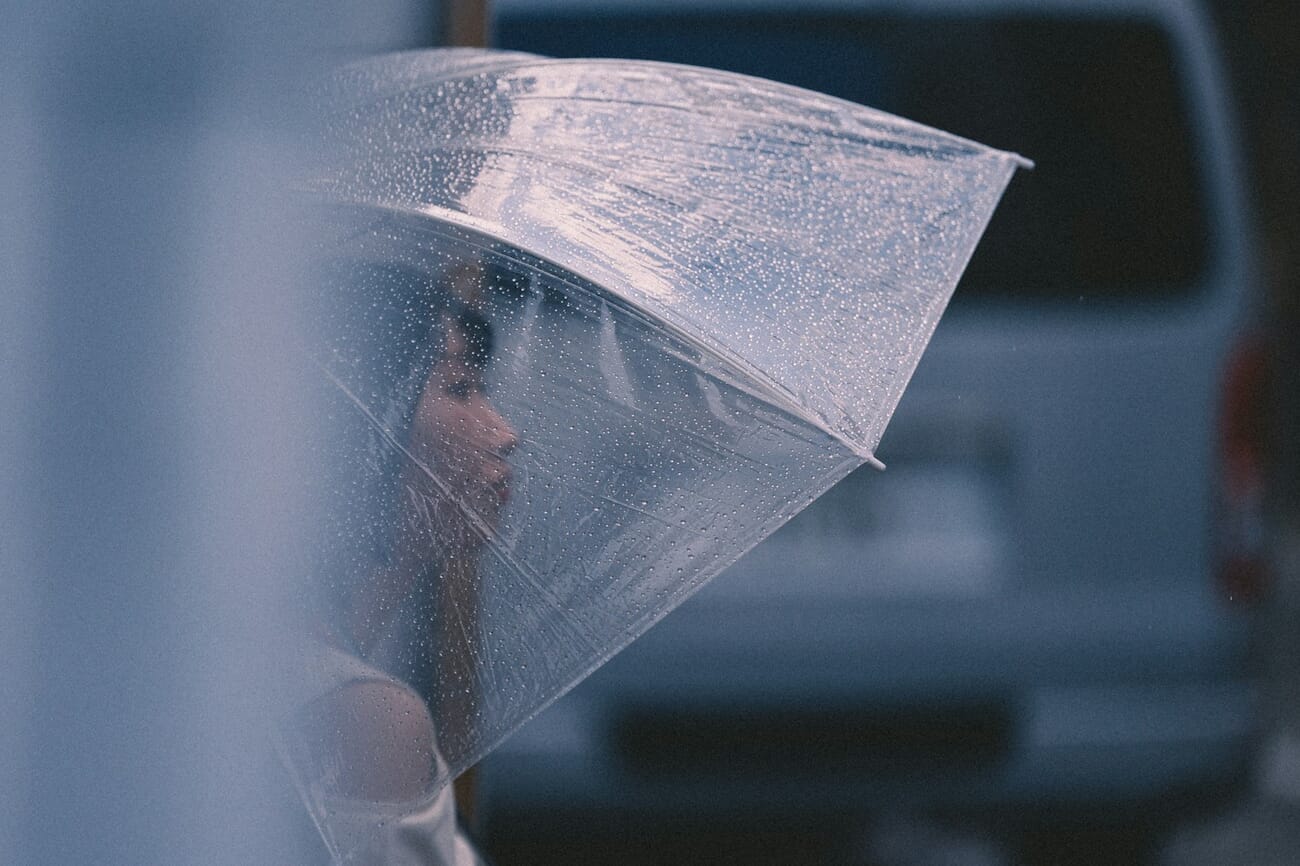
Rain and snow create some of the most dramatic portrait opportunities – but they also demand quick thinking with your settings. The light drops dramatically, and you need to protect your gear while nailing the exposure.
Rain Settings
- Aperture: f/1.4 – f/2.8 (wide open to let in maximum light)
- ISO: 800 – 3200 (it gets dark fast under storm clouds)
- Shutter speed: 1/500+ to freeze raindrops, or 1/60 for motion-streaked rain
- Metering: Spot metering on subject’s face
- White balance: Custom (rain light varies wildly)
A pro trick for rain portraits: backlight the rain with an off-camera flash or street light behind your subject. Raindrops are nearly invisible when front-lit, but they light up beautifully when backlit.
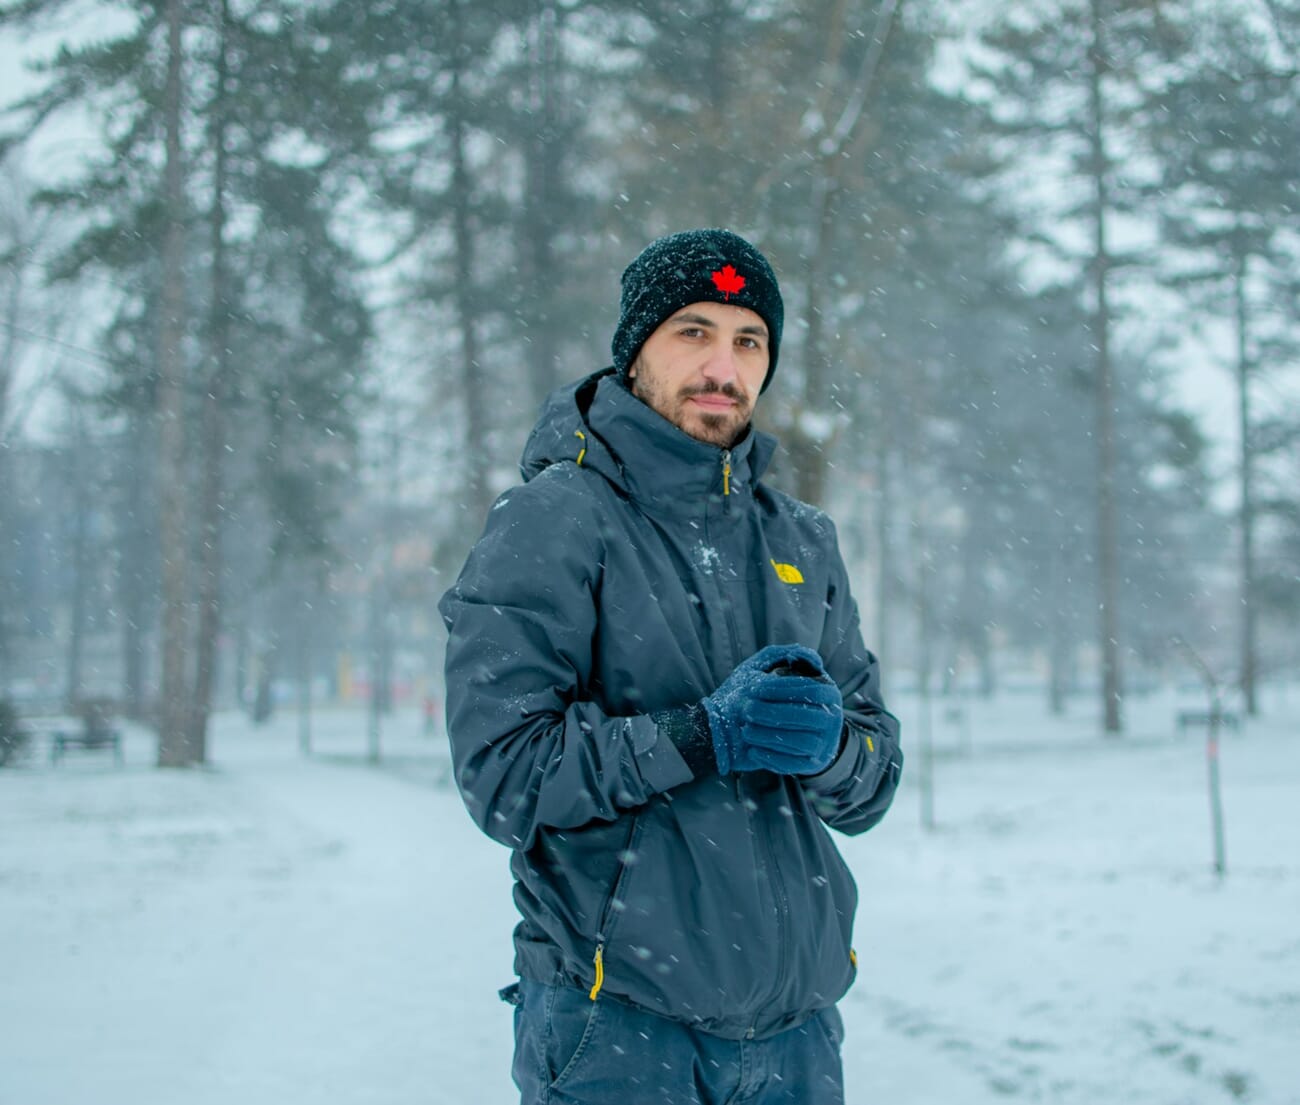
Snow Settings
- Aperture: f/4.0 – f/8.0 on sunny snow days (tons of reflected light); f/1.4 – f/2.8 during snowfall
- ISO: 100 in bright snow; 800-1600 during heavy snowfall
- Shutter speed: 1/500+ to freeze snowflakes; 1/1000+ in bright sun + snow
- Metering: Spot metering on subject (the snow will confuse evaluative metering)
- White balance: Custom or Daylight (auto WB often overcorrects snow to yellow)
- Exposure compensation: +1 to +2 EV to prevent gray snow
The biggest mistake in snow photography is trusting your camera’s meter. Snow is extremely reflective, and your camera tries to turn it into a medium gray. The fix is simple: dial in positive exposure compensation (+1 to +2 stops) or meter off your subject’s face with spot metering. Our guide to the exposure triangle explains why metering systems work this way.
Open Shade Settings
Open shade – the area just inside the shadow of a building, tree, or overhang – is one of the best-kept secrets in outdoor portrait photography. You get soft, even light without the harshness of direct sun, and the background can still be lit by sunlight for natural separation.
- Aperture: f/1.4 – f/2.8 (wide apertures work beautifully here)
- ISO: 200 – 800
- Shutter speed: 1/200 – 1/500
- Metering: Evaluative or center-weighted
- White balance: Shade preset (around 7000K) to counteract the cool blue cast
The trick with open shade is positioning your subject at the edge of the shadow, facing toward the open sky. This gives you soft, directional light with beautiful catchlights in the eyes. Avoid placing them deep in the shade where the light becomes too dim and flat.
One common issue: open shade light has a strong blue color cast because the light source is blue sky rather than direct sun. Set your white balance to the Shade preset or manually adjust to around 7000-7500K to warm things up.
Choosing the Right Metering Mode
Your metering mode determines how your camera evaluates the light in a scene to calculate exposure. For outdoor portraits, the right metering mode depends entirely on the lighting contrast.
- Spot metering: Best for high-contrast situations (sunny days, backlit subjects, snow). Meters only from a small area – point it at your subject’s face to expose correctly regardless of background brightness.
- Evaluative/Matrix metering: Best for even light (overcast, open shade, golden hour). Analyzes the entire frame and works well when there is not a huge difference between subject and background brightness.
- Center-weighted metering: A middle ground – prioritizes the center of the frame. Useful for traditional head-and-shoulders compositions.
When in doubt, spot metering on the subject’s face is the safest bet. You can always recover a slightly dark background in post, but an underexposed or overexposed face is much harder to fix. If you are shooting in manual mode, metering mode affects your light meter reading but not the actual exposure – you still control everything.
Focus Settings for Outdoor Portraits
Getting tack-sharp focus on your subject’s eyes is non-negotiable in portrait photography. Here are the focus settings that work best outdoors:
- Eye-detect AF (if available): Modern mirrorless cameras have eye-detection autofocus that locks onto your subject’s eye automatically. Enable it – it is a game-changer for portraits, especially at wide apertures where the depth of field is razor-thin.
- Single-point AF: If your camera lacks eye-detect, switch to single-point AF and manually position the focus point over the nearest eye.
- AF-S (Single Shot) for posed portraits: Focus locks when you half-press the shutter. Best for still subjects.
- AF-C (Continuous) for movement: Camera continuously adjusts focus as the subject moves. Use this for walking, candid, or action portraits.
A common focus mistake outdoors: at f/1.4 with an 85mm lens, your depth of field might be just a few centimeters. If you focus on the nose instead of the eye, the eyes will be soft. Always focus on the nearest eye – that is where the viewer looks first.
Using Fill Flash for Outdoor Portraits
Fill flash is one of the most powerful tools for outdoor portrait photographers, yet many beginners avoid it. The idea is simple: use a low-power burst of flash to fill in the shadows on your subject’s face while keeping the background exposure natural.
Here is how to use fill flash effectively:
- Expose for the background first using natural light settings (aperture, ISO, shutter speed)
- Set flash to TTL mode with -1 to -2 EV flash exposure compensation
- Bounce or diffuse the flash if possible for softer light
- Check your flash sync speed – usually 1/200 or 1/250. If you need faster shutter speeds, enable high-speed sync (HSS)
The key to natural-looking fill flash is subtlety. If the viewer can tell you used flash, you used too much. Dial the flash power down until it just barely opens the shadows. For more on flash technique, check out our guide to using off-camera flash.
Reflectors and Scrims
If flash feels too technical, reflectors and scrims are simpler alternatives that can transform your outdoor portrait lighting.
Reflectors
A reflector bounces existing light back onto your subject. They come in several surfaces:
- Silver: Strong, punchy reflected light (great for overcast days)
- Gold: Warm reflected light (mimics golden hour)
- White: Soft, subtle fill (most natural look)
- Black: Absorbs light to add shadow for definition (called a “flag”)
Position the reflector below your subject’s face to bounce light up into the shadows under their chin and eyes. A 5-in-1 reflector kit is one of the most affordable lighting upgrades you can make.
Scrims (Diffusers)
A scrim is a translucent fabric placed between the sun and your subject. It works like a cloud – softening harsh direct sunlight into beautiful, even light. The difference is dramatic: harsh shadows disappear, skin looks smooth, and your subject can comfortably keep their eyes open.
Scrims are especially useful during midday when the sun is directly overhead. Hold or mount the scrim above your subject and watch the light transform from harsh and contrasty to soft and flattering. With a scrim in place, your camera settings become much more moderate – lower shutter speeds, easier metering.
ND Filters and Polarizers
Lens filters solve specific problems that camera settings alone cannot fix.
Neutral Density (ND) Filters
Want to shoot at f/1.4 under bright midday sun? Without an ND filter, your shutter speed would need to exceed what most cameras offer. An ND filter is essentially sunglasses for your lens – it reduces the amount of light entering without affecting color.
- ND4 (2-stop): Light reduction for slightly overcast to sunny conditions
- ND8 (3-stop): Good general-purpose for bright days
- Variable ND: Adjustable from 2-8+ stops. Most versatile option for portrait work
Polarizing Filters
A circular polarizer reduces glare and reflections – useful when shooting portraits near water, glass, or any reflective surface. It also deepens blue skies and reduces atmospheric haze, giving your outdoor portraits richer colors and more contrast. The effect is strongest when shooting at 90 degrees to the sun.
Pro Tips and Common Mistakes
Shoot in RAW
RAW files contain far more highlight and shadow data than JPEGs. In outdoor portraiture where lighting is unpredictable, that extra data is insurance. You can recover a slightly overexposed sky or lift deep facial shadows without quality loss. The file sizes are larger, but the editing flexibility is worth it.
Use Burst Mode for Natural Expressions
Outdoor conditions cause blinking, wind-blown hair, and shifting expressions. Set your camera to high-speed continuous shooting and fire off bursts of 3-5 frames. This dramatically increases your chances of capturing a frame with perfect eyes open, natural smile, and hair in place.
Choose the Right Lens
Focal length matters as much as settings. For outdoor portraits:
- 85mm: The classic portrait lens. Flattering compression, great background separation.
- 50mm: More environmental. Shows more context, still flattering.
- 35mm: Environmental portraits and storytelling. Watch for edge distortion on faces.
- 70-200mm: Versatile zoom for varying compositions. Great compression at 200mm.
Avoid wide-angle lenses (24mm and wider) for close-up portraits – they distort facial proportions. Our guide to portrait camera settings covers lens selection in more detail.
Common Mistakes to Avoid
- Trusting Auto white balance in mixed light. AWB often shifts between frames, making batch editing a nightmare. Pick a preset or set a custom Kelvin value.
- Using evaluative metering in harsh backlight. Switch to spot metering when the background is much brighter than your subject.
- Shooting at the widest aperture for groups. At f/1.4 with multiple people at different distances, someone will be out of focus. Stop down to f/4 or more.
- Ignoring the background. A clean background with good composition elevates any portrait. Watch for poles “growing” out of heads, cluttered elements, and distracting colors.
- Shooting at noon without light modification. Midday overhead sun creates unflattering raccoon eyes. Use fill flash, a scrim, or move to shade.
Test Your Knowledge: Outdoor Portrait Settings Quiz
Frequently Asked Questions
What is the best camera mode for outdoor portraits?
Manual mode gives you the most control, but aperture priority (Av/A) is a great alternative if you want the camera to handle shutter speed while you control depth of field. Set your desired aperture and ISO, and the camera picks the appropriate shutter speed. Our aperture priority guide explains when to use it.
What ISO should I use for outdoor portraits?
Start at ISO 100 on sunny days and increase as needed. Overcast days typically need ISO 200-800, and rain or deep shade may require ISO 800-3200. Modern cameras handle high ISO well, so do not be afraid to push it rather than risk a blurry shot from a slow shutter speed.
How do I avoid harsh shadows on my subject’s face in direct sunlight?
Three main options: use fill flash at -1 to -2 EV to open up the shadows, position a scrim or diffuser between the sun and your subject to soften the light, or move your subject to open shade where the light is naturally soft and even.
Should I use autofocus or manual focus for outdoor portraits?
Use autofocus – specifically eye-detect AF if your camera has it. Eye-detect locks focus on the subject’s eye automatically, which is critical at wide apertures where depth of field is extremely thin. Manual focus is only recommended for stationary subjects on a tripod.
What white balance setting should I use for outdoor portraits?
Match it to your light source: Daylight preset for sunny conditions, Cloudy for overcast skies, and Shade for open shade. Shooting in RAW lets you adjust white balance freely in post-processing, so if you are unsure, shoot RAW and fine-tune it later.
Can I get good outdoor portraits with a kit lens?
Yes – kit lenses (18-55mm) work fine for outdoor portraits, especially in good light. The main limitation is maximum aperture (typically f/3.5-5.6), which limits background blur. For stronger bokeh, a 50mm f/1.8 lens is an affordable upgrade that dramatically improves portrait quality.
