
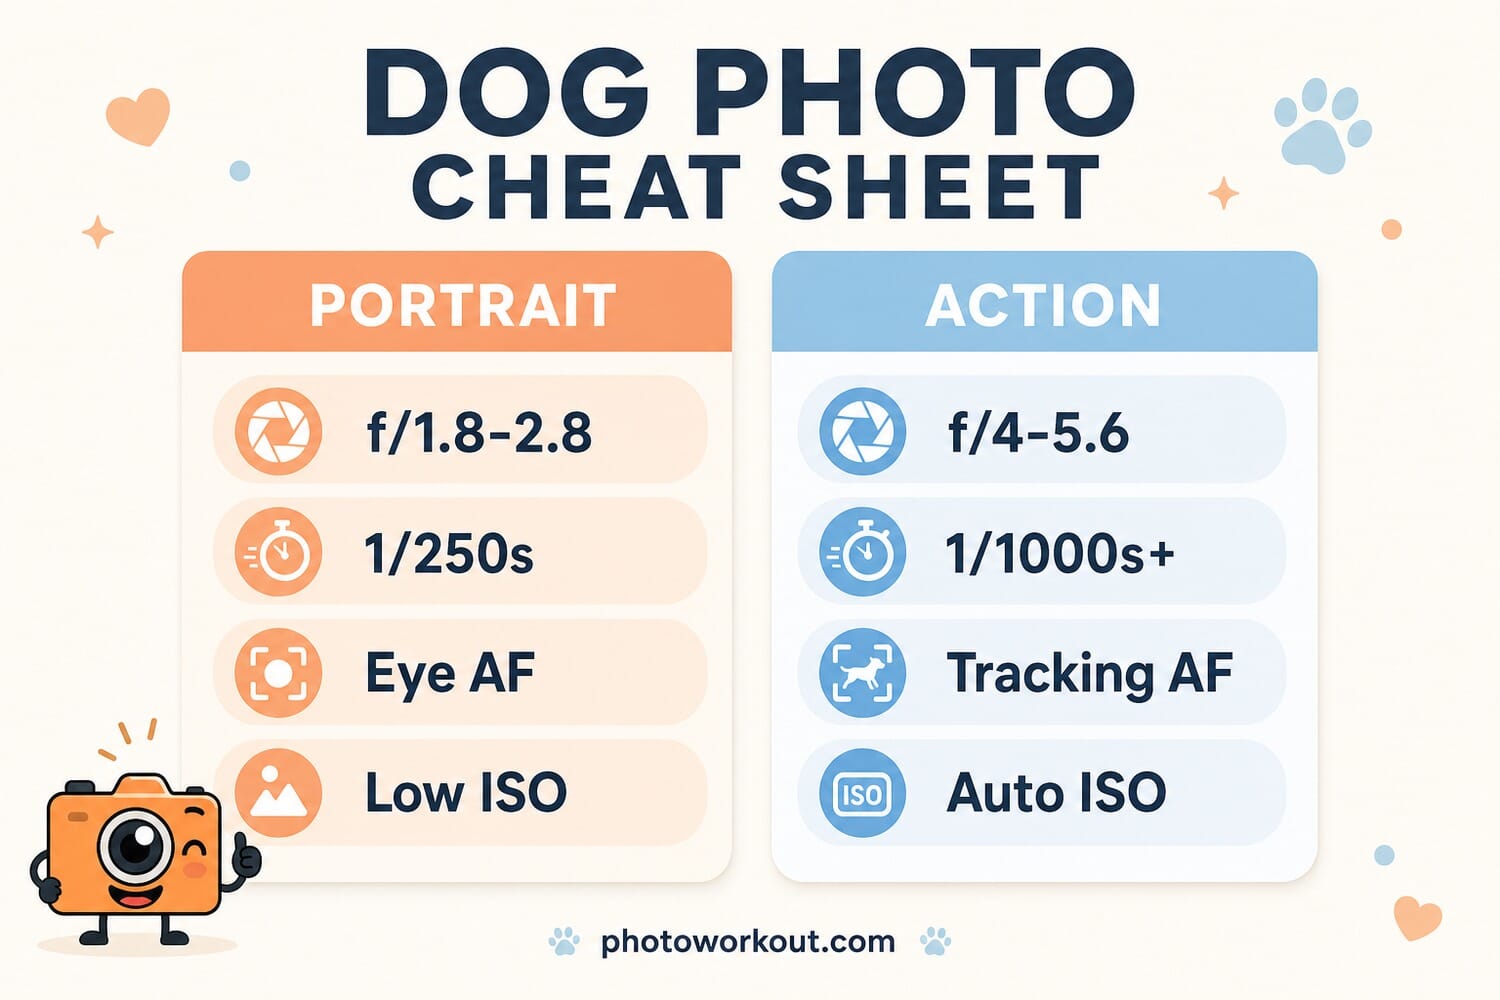
- Autofocus does the heavy lifting: turn on animal Eye AF and set the camera to continuous (AF-C / AF-Servo) so focus tracks a moving dog instead of locking once.
- Shutter speed is the make-or-break setting — 1/250s for a sitting dog, 1/500s walking, 1/1000s running, and 1/2000s for full-speed zoomies and jumps.
- Shoot in high-speed burst and let the camera spray; one frame in ten will have the ears, eyes and paws all right. Use the electronic shutter for the fastest, silent bursts.
- Open the aperture (f/1.8–f/2.8) to separate one dog from a busy background; stop down to f/4–f/5.6 when two dogs or fast action need more depth of field.
- Meter for the fur — black dogs fool the camera into over-exposing, white dogs and snow into under-exposing — and use a touch of fill flash outdoors for catchlights in the eyes.
Dogs don’t take direction. They bolt, they zoom, they freeze for exactly the wrong half-second, and they refuse to hold a pose the way a person will. That’s why dog photography frustrates so many people who own a perfectly capable camera — the gear isn’t the problem, the settings are. Get the autofocus, shutter speed and drive mode right and a mid-range body will nail shots that the priciest camera misses on the wrong settings.
This is a settings-first guide built for photographers who already know their way around a mode dial. It covers the autofocus configuration that actually tracks a running dog, the exact shutter speeds for each kind of movement, how to use burst mode without drowning in files, and the aperture, ISO, metering and fill-flash choices that separate a keeper from a blurry mess. Every sample photo below lists the real settings it was shot at, so you can reverse-engineer the look.
Start with autofocus: Eye AF plus continuous tracking
Modern autofocus is the biggest reason dog photography got easier, but only if it’s configured correctly. Two switches matter most. First, enable animal Eye AF (Sony calls it Real-time Eye AF for Animals, Canon “Animal Detection,” Nikon “Animal-detection AF”) — the camera finds the dog’s eye and pins focus to it, which is exactly where focus belongs in any portrait. Second, set the focus mode to continuous — AF-C on Sony/Nikon, AI Servo/Servo AF on Canon — so focus keeps adjusting as the dog moves toward or away from you instead of locking once and going stale.

For a calm, posed dog, single-point Eye AF on the near eye is all you need. The moment the dog starts moving, switch the AF area to a wide or zone tracking mode and let subject detection follow it — trying to keep a single point on a running dog by hand is a losing game. On bodies with subject-tracking sensitivity settings, nudge them toward “responsive” for erratic movement like fetch and zoomies.
Shutter speed: the setting that makes or breaks the shot
If you change one thing today, change this. A dog’s feet and head move far faster than its body, so the shutter speed that freezes a person walking will smear a trotting dog. Use shutter-priority (S/Tv) or manual with Auto ISO and set the floor by the dog’s pace:
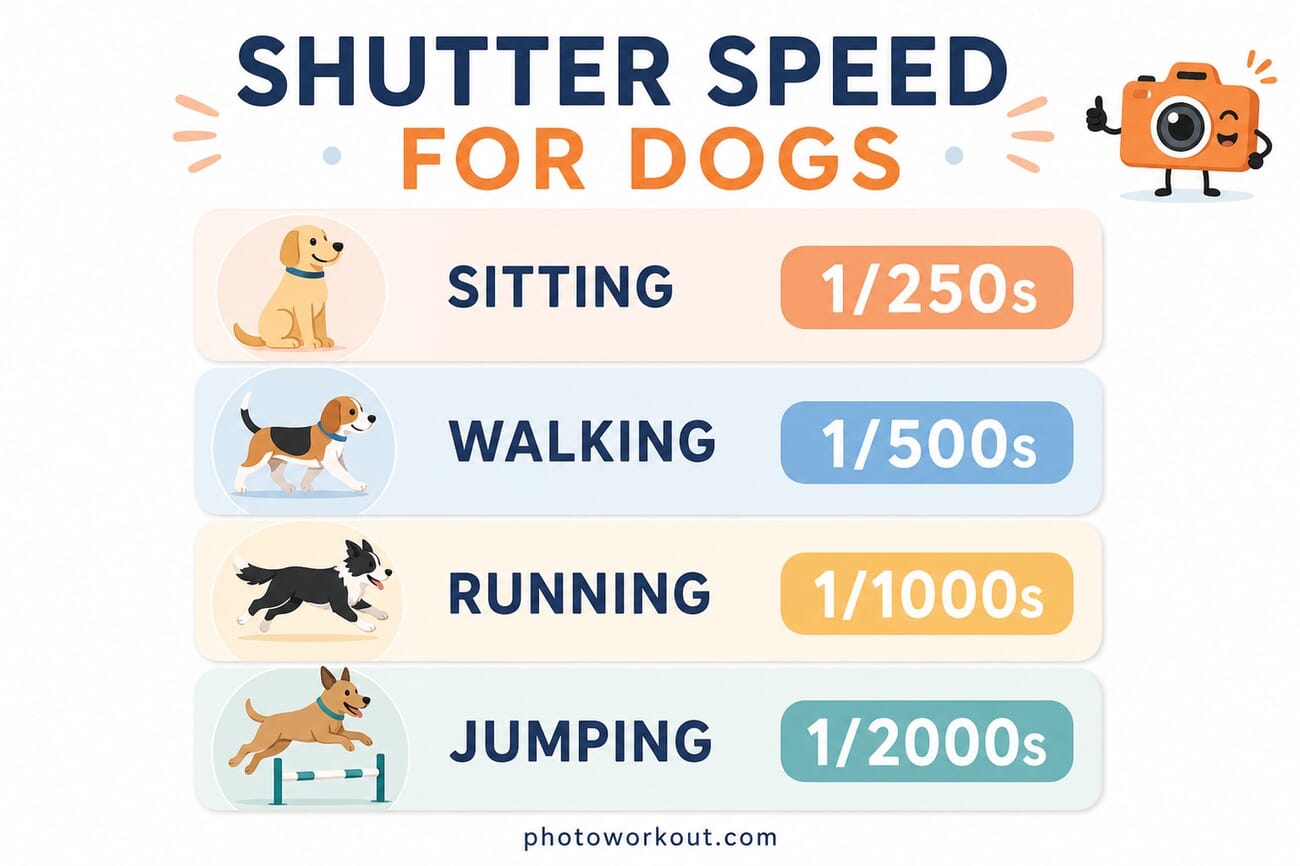
- Sitting / posing: 1/250s — fast enough for a head shake or a yawn.
- Walking / trotting: 1/500s.
- Running / fetch: 1/1000s.
- Jumping / full-speed zoomies / water: 1/2000s and up to freeze paws and flying ears.
When the light won’t support those speeds, raise ISO before you drop the shutter — a little grain is invisible next to motion blur. This is the same logic that drives sports and action photography, where a sharp, slightly noisy frame always beats a clean blurry one.
Burst mode: spray to catch the one frame that works
Even with perfect focus and shutter speed, the moment is a matter of milliseconds — ears up, tongue out, all four paws off the ground. You can’t time that by hand, so don’t try. Set the drive mode to high-speed continuous and hold the shutter through the action. At 10–20 frames per second (or 30–120 on flagship bodies using the electronic shutter), one frame in a burst will have everything aligned.
Two practical notes. The electronic shutter gives the highest frame rates and is silent — useful for skittish dogs — but watch for rolling-shutter skew on very fast pans; the mechanical shutter is the safer choice there. And shoot to a fast card with enough buffer headroom: nothing is worse than the camera locking up mid-zoomie because the buffer filled. Cull ruthlessly afterward — burst shooting means most frames get deleted, and that’s the point.
Aperture and depth of field: separate the dog from the chaos
A wide aperture (f/1.8–f/2.8) throws a busy backyard or dog park into creamy blur and makes a single dog pop off the frame — ideal for portraits where you’ve nailed focus on the eye. The trade-off is a razor-thin plane of focus: at f/1.8 on an 85mm lens, the dog’s nose can be sharp while its eyes aren’t, which is exactly why Eye AF matters so much here.

When there are two dogs, or the dog is running toward you, stop down to f/4–f/5.6. The extra depth of field buys margin so a fast-approaching subject doesn’t outrun your focus plane, and it keeps two pets both acceptably sharp. For action, depth of field is insurance.
ISO and metering: nail exposure on black and white dogs
Fur breaks a camera’s meter. A black dog fills the frame with dark tones, so the meter “helpfully” brightens the scene and blows the exposure — dial in negative exposure compensation (−2/3 to −1 1/3 EV) to keep the blacks black. A white dog or a snowy background does the opposite, fooling the meter into under-exposing; add positive compensation (+2/3 to +1 1/3 EV) so the whites stay white instead of muddy grey.
Spot or center-weighted metering off the fur gives you more control than evaluative metering in these high-contrast situations — our guide to metering modes breaks down exactly when to switch. For ISO, use Auto ISO with a sensible ceiling (many photographers cap it around ISO 6400 on modern bodies) so the camera protects your shutter speed automatically as the dog moves between sun and shade.
Fill flash: catchlights without the deer-in-headlights look
Outdoors in harsh midday sun or heavy shade, a touch of fill flash lifts the shadows under the brow and adds a catchlight that brings the eyes alive. The key word is touch — dial flash compensation down to around −1 to −1 2/3 EV so it fills rather than blasts. Bounce it or diffuse it whenever you can; bare direct flash flattens fur and creates harsh shadows.
If you’re combining flash with a fast shutter to freeze action in daylight, you’ll need high-speed sync (HSS) to shoot above your camera’s sync speed (typically ~1/200–1/250s). And introduce the flash gradually — let a nervous dog see and sniff the gear before you start popping it near their face.
Field tactics: get low, get close, get the expression
Settings get you a sharp frame; tactics get you a good one. Shoot at the dog’s eye level — crouch or lie down — for an intimate, dignified perspective instead of the flat top-down snapshot everyone else takes. Use a slightly longer focal length (an 85mm or a 70–200mm) to keep your distance from nervous dogs and compress the background. Keep treats and a favourite squeaky toy in your pocket: a squeak gets ears up and head tilts on demand, and a treat held by your lens gets eye contact.

Finally, work in good light and be patient. Early morning and the hour before sunset give soft, warm light and a calmer dog than the chaotic midday park. Tire the dog out a little first if you want stillness, or lean into the energy and shoot the run — just match your settings to the plan. The same settings-first discipline carries over to other fast subjects, like event and graduation photography.
Frequently Asked Questions
What shutter speed should I use for a running dog?
At least 1/1000s for a running dog, and 1/2000s or faster for jumping, full-speed zoomies, or water spray. A sitting dog only needs about 1/250s. When light is tight, raise ISO rather than lowering the shutter — motion blur ruins a shot in a way that a little grain never does.
What’s the best autofocus mode for dog photography?
Animal Eye AF combined with continuous focus (AF-C / AI Servo). For still portraits use single-point Eye AF on the near eye; for movement switch to wide-area or zone tracking and let subject detection follow the dog across the frame.
How do I photograph a black dog without losing detail?
Dark fur tricks the meter into over-exposing, so dial in −2/3 to −1 1/3 EV of negative exposure compensation, meter off the fur with spot or center-weighted metering, and expose to keep detail in the shadows. Shooting RAW gives you room to recover tones in the blacks afterward.
Do I need an expensive camera for good dog photos?
No. Any camera with animal Eye AF and a reasonable burst rate will do — and several sample photos in this guide were shot on bodies that are a decade old. Correct settings and being at the dog’s eye level matter far more than the price of the camera.
The bottom line
Dog photography rewards preparation over gear. Lock in animal Eye AF and continuous focus, set your shutter speed by the dog’s pace, hold down the burst, and adjust aperture, ISO and metering for the fur and the light. Then get down to eye level, bring treats, and shoot a lot. Do that and the keeper rate climbs dramatically — even with the camera you already own.
References and image credits for this guide:
Image Sources
- “Coastal Sentinel” (featured) — Shumilov Ludmila on SampleShots – Nikon D3200, 150mm, f/5.6, 1/500s, ISO 200
- “Curious Canine Gaze” — Angelos Michalopoulos on SampleShots – Canon EOS 5D Mark III, 50mm, f/2.2
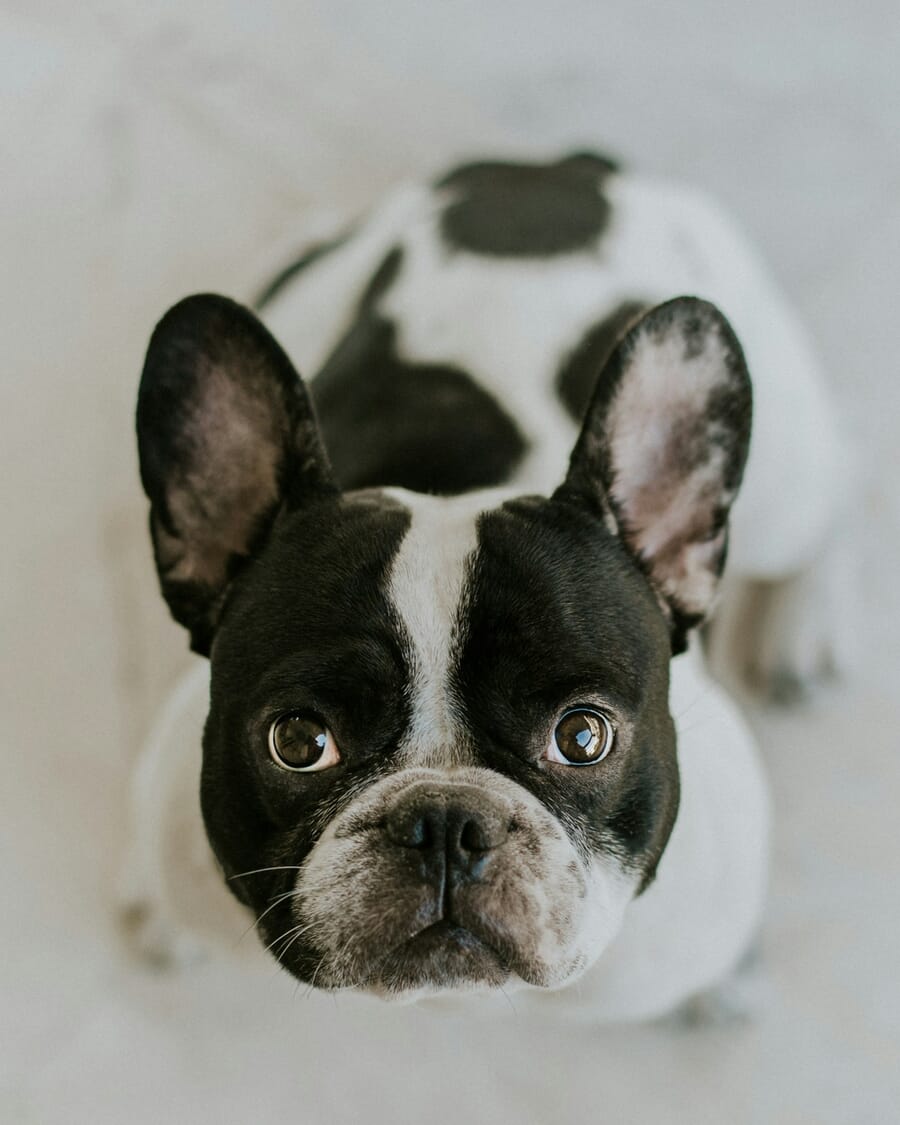
- “Cozy Downtime” (bulldog) — Sébastien Lavalaye on SampleShots – Sony a7 III, 85mm, f/1.8
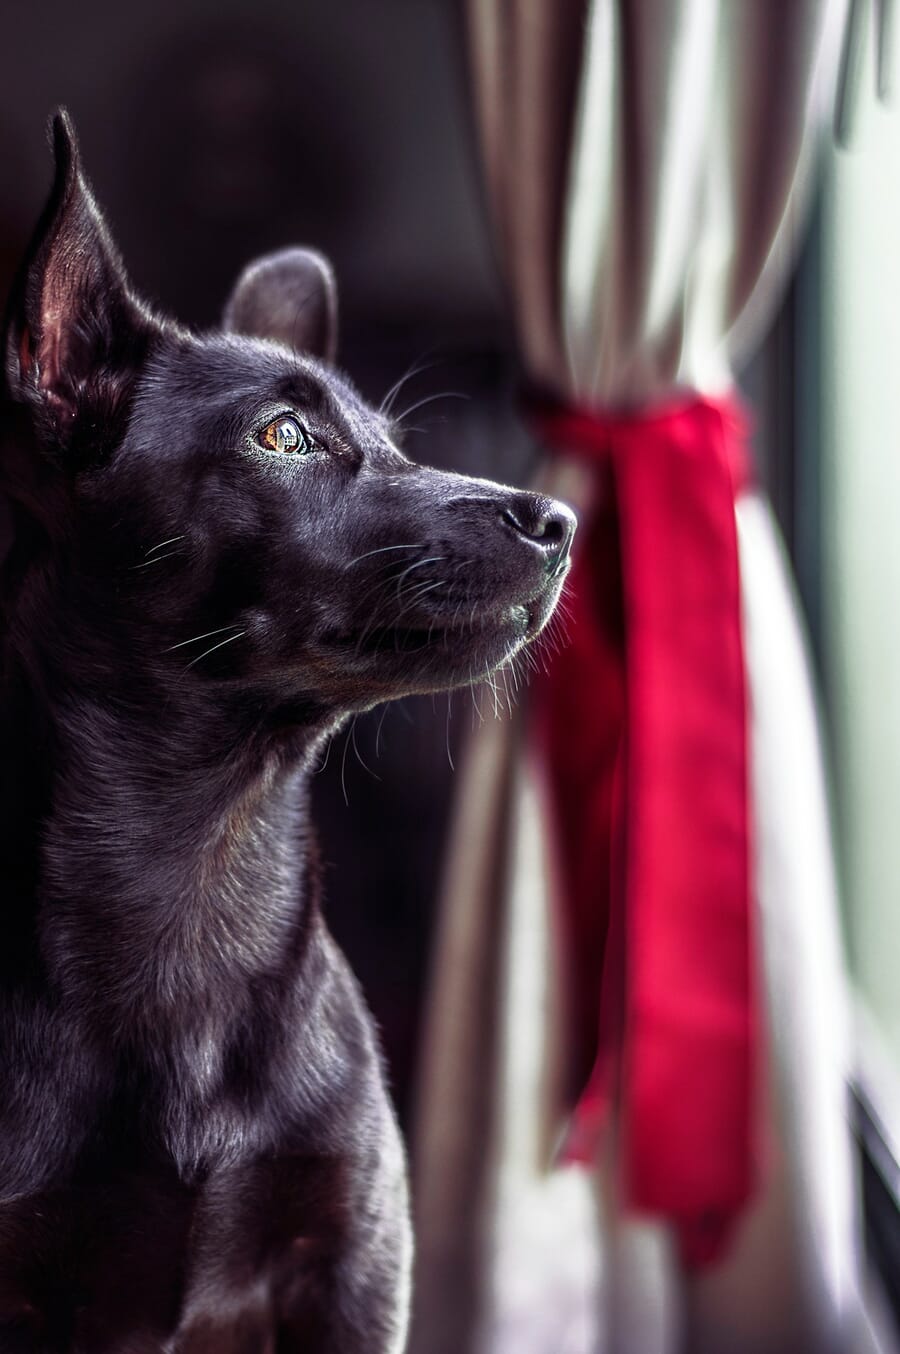
- “Noir Gaze by the Window” — Albert Siong on SampleShots – Nikon D300, 50mm, f/1.8
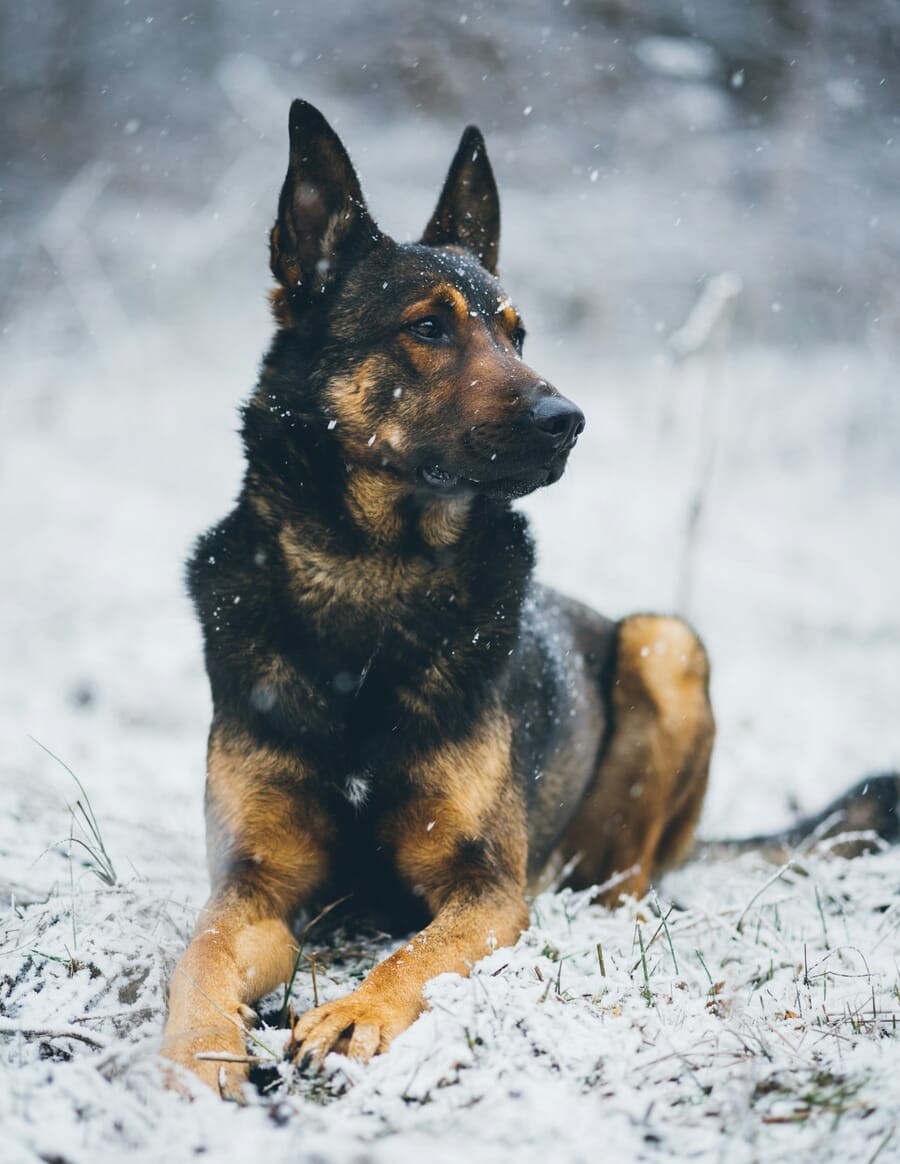
- “Silent Watcher in a Winter Wonderland” — Tahoe on SampleShots – Sony a7 II, 85mm, f/1.8
- Settings infographics + pin — stylized PhotoWorkout illustrations – Created in-house (gpt-image-2)


