Editor’s Key Takeaways: Mastering Exposure Compensation for Stunning Photography

This comprehensive guide breaks down the use of exposure compensation in photography, an essential tool for adjusting brightness levels in images. It’s vital when your camera’s auto settings result in overexposed or underexposed photos. The guide explains how to use exposure compensation to instruct your camera to adjust brightness based on your judgment, and provides tips for various lighting conditions and artistic photography.
- Exposure compensation (EV) controls image brightness.
- Crucial in semi-automatic modes like Aperture Priority, Shutter Priority, and Program.
- Corrects improper camera exposure metering.
- Differs from post-processing exposure correction.
Introduction
Curious about exposure compensation and how it can enhance your photography?
This guide covers everything you need to master exposure compensation for stunning images. You’ll learn what it is, how to use it, and when it’s most effective. By the end, you’ll confidently apply exposure compensation to your photography.
What is Exposure Compensation?
Exposure compensation, or EV, is about managing the brightness of an image. A well-exposed photo is brightly balanced, neither too bright nor too dark.
In semi-automatic modes like Aperture Priority, you set some parameters, and the camera chooses the rest. However, the camera’s choice might not always be ideal, leading to overexposed or underexposed shots. Exposure compensation allows you to adjust these settings, instructing your camera to deviate from its meter reading to achieve the desired exposure.
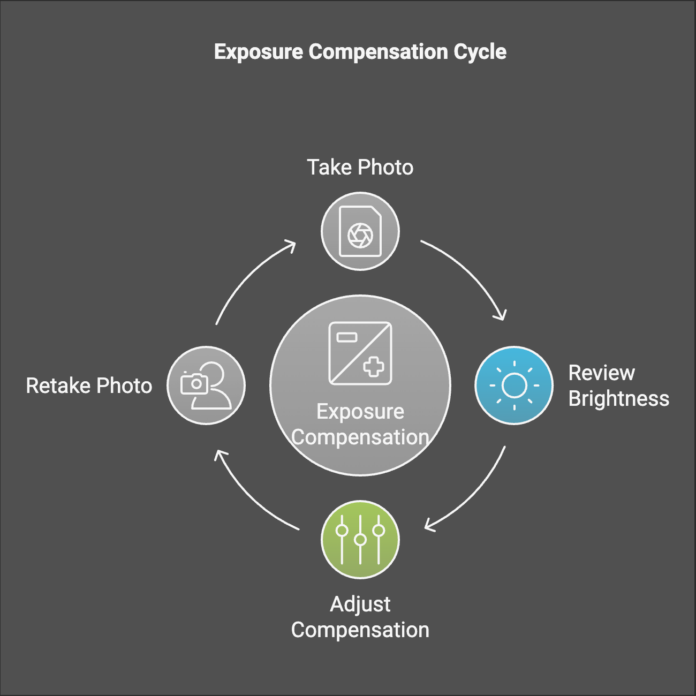
Here’s how you use exposure compensation:
- Take a shot and review its brightness.
- If it’s too dark or bright, adjust the exposure compensation accordingly.
- Retake the photo to achieve the perfect exposure.
Using Exposure Compensation: Camera Modes
Exposure compensation is available in Program, Shutter Priority, and Aperture Priority modes. To use it, look for a +/- button or wheel on your camera. The + symbol increases brightness, while – reduces it. Adjust the exposure in increments, typically 1/3-stop, to fine-tune your image.
When to Use Exposure Compensation in the Field
Sometimes you won’t know in advance if your camera will misjudge the exposure, so rely on the LCD to make on-the-spot adjustments. Be prepared to experiment with different levels of exposure compensation until you achieve the desired result.
Modern cameras have advanced metering, but it’s wise to anticipate common errors, like consistent overexposure or underexposure in specific conditions, and adjust in advance.
Exposure Compensation and Dark Subjects
Cameras often overexpose dark subjects because they aim for a middle gray. For truly dark objects, use negative exposure compensation to maintain their intended darkness. Start with -1 EV and adjust as needed.
Exposure Compensation and Light Subjects
Light scenes might be underexposed by your camera. Positive exposure compensation can correct this. For bright snow or white buildings, start with +1 EV and adjust after reviewing your shot.
Exposure Compensation and Artistic Photos
Use exposure compensation for creative effects. Overexpose for a bright, airy look or underexpose for moody, dark images.
Exposure Compensation Vs Exposure Correction in Post-Processing
While post-processing can correct exposure, it’s limited. Severe over- or underexposure can lead to loss of detail that cannot be recovered. Correcting exposure in-camera ensures better quality and minimizes noise.
Exposure Compensation Guide: Conclusion
Now equipped with the knowledge of exposure compensation, you’re ready to improve your photography. Experiment with this feature to achieve consistently excellent exposures. Embrace the outdoors and let your creativity flourish!