Key Takeaways: 50 Creative Product Photography Ideas

This guide by Aanabel provides 50 creative product photography ideas, showcasing different ways to present products attractively and professionally. The ideas are divided into six key sections:
- Outdoor & Natural Light
- Studio
- Flat-Lay Photography
- Styling Ideas
- Lighting Ideas
- Set Up Ideas
Highlighted ideas include:
- Shallow Depth of Field: Focuses attention on the product by blurring the background.
- In the Plants: Utilizes nature to create natural frames around the product.
- Natural Shadows: Takes advantage of ambient light to create intriguing shadow play.
These ideas are intended to spark creativity and help photographers present products in the most visually appealing way possible.
Introduction
Product photography is a lucrative, enjoyable, and in-demand photographic specialty – focusing on presenting a product in the most appealing and sellable light possible.
As such, there are boundless ideas of how to accomplish that goal.
Here are 50 of our favorite product photography ideas, to help expand your shooting horizons and get those inspiration gears turning. We have divided our product photo ideas into 6 sections:
Outdoor and Natural Light Product Photography Ideas
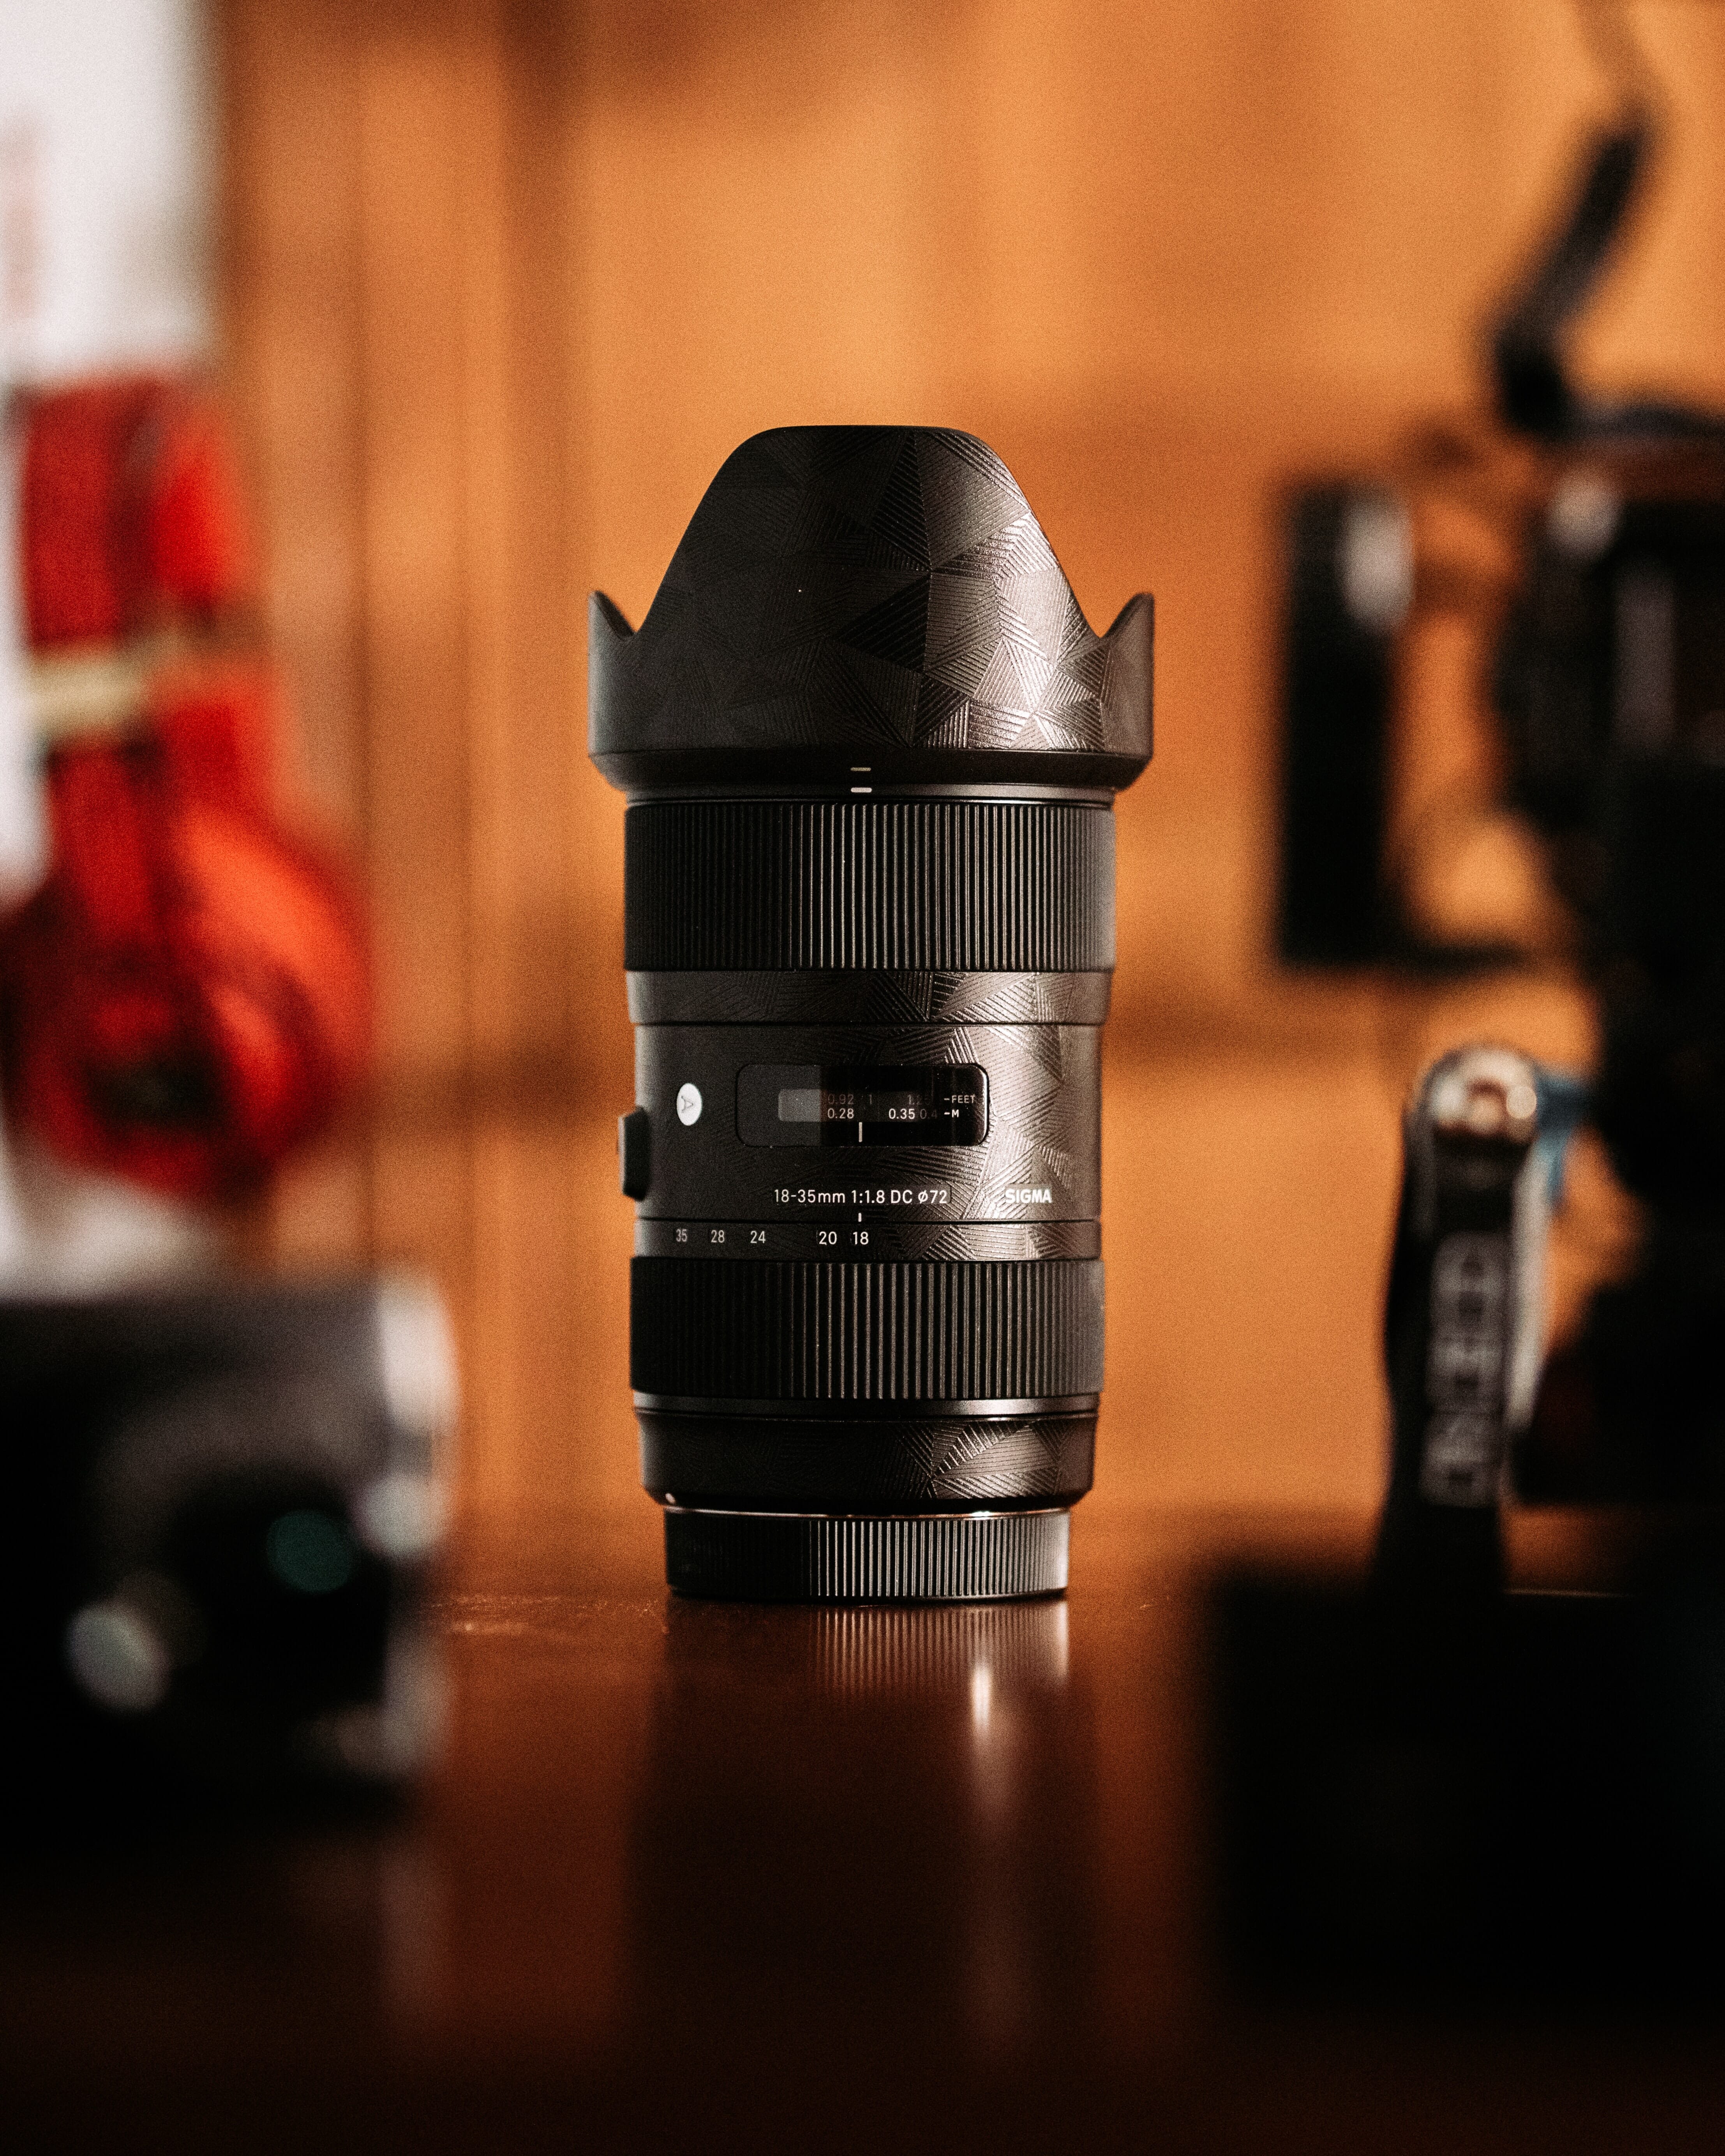
1. Shallow Depth of Field
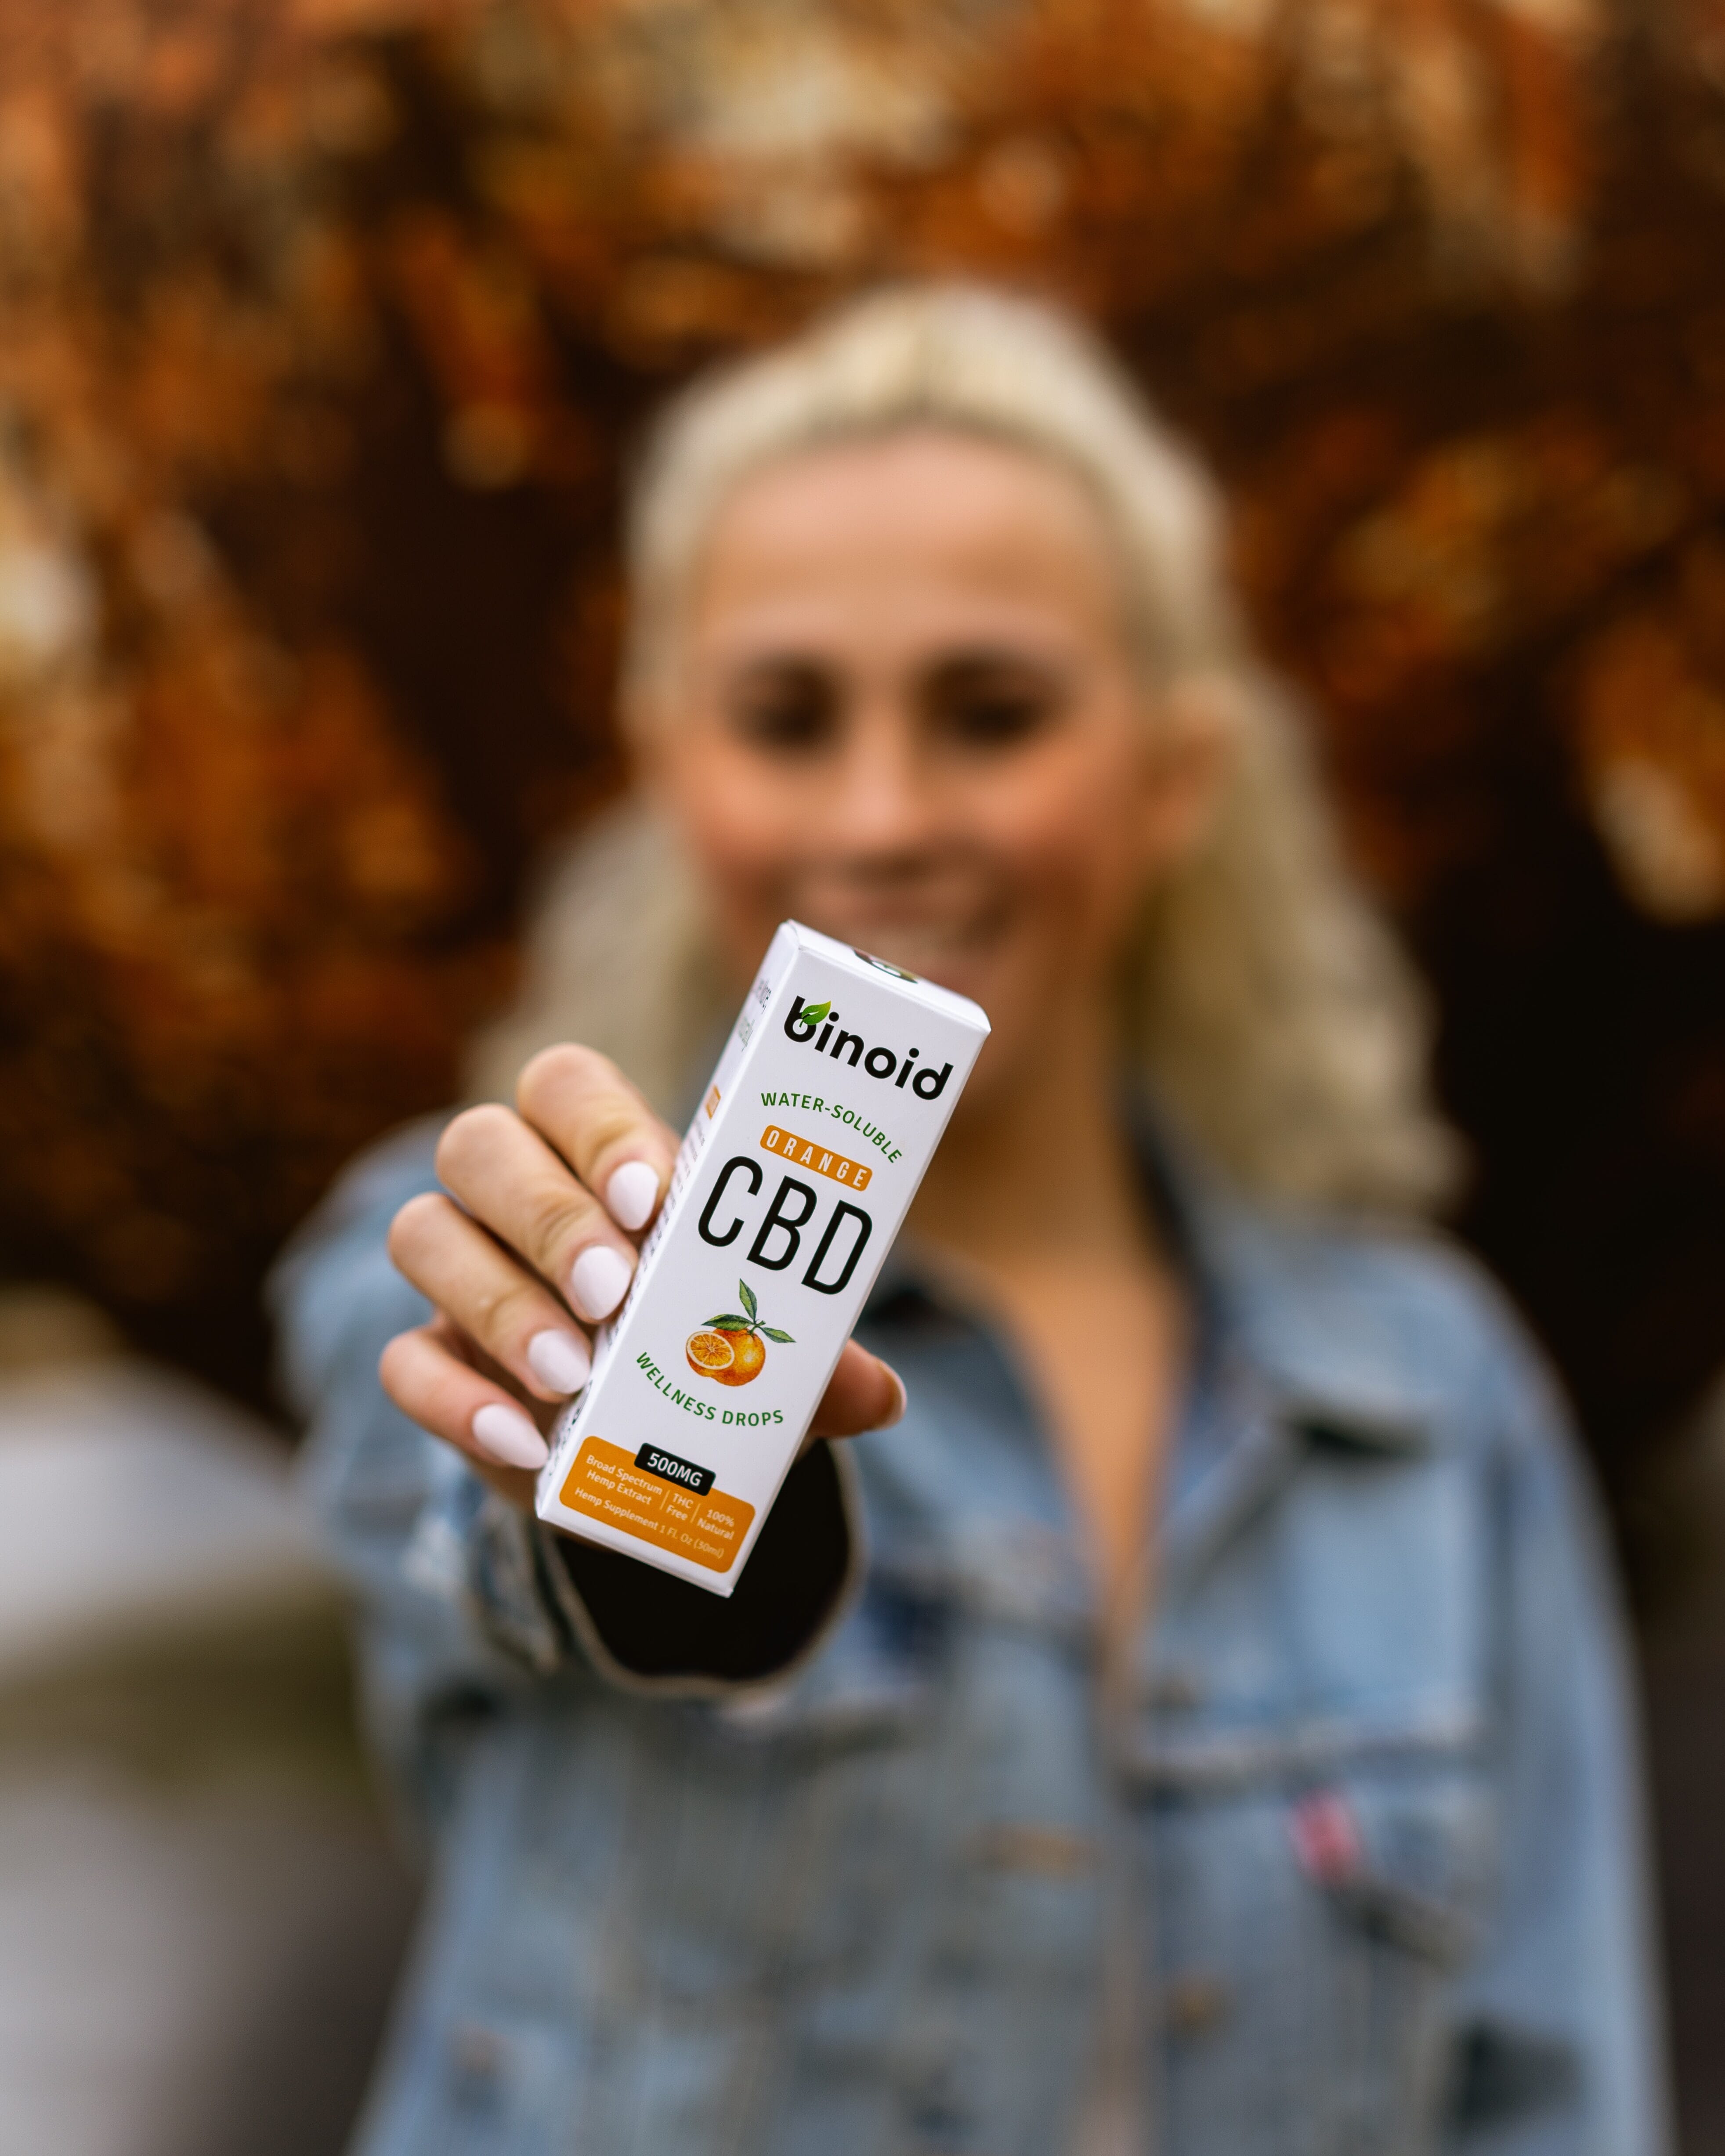
Shallow depth of field refers to photographs in which the subject is in focus and the rest blurs away into a beautifully creamy mush of color and texture. Although you can usually still make out what is supposed to be in the background, this effect puts all the focus on whatever is in, well, focus!
This is an extremely effective idea in product photography, in which you can add elements into the background that have to do with the product without being so blunt about it. For example, our sample photo with a person holding the bottle – it shows that the product is for people, but it doesn’t distract away from the bottle itself.
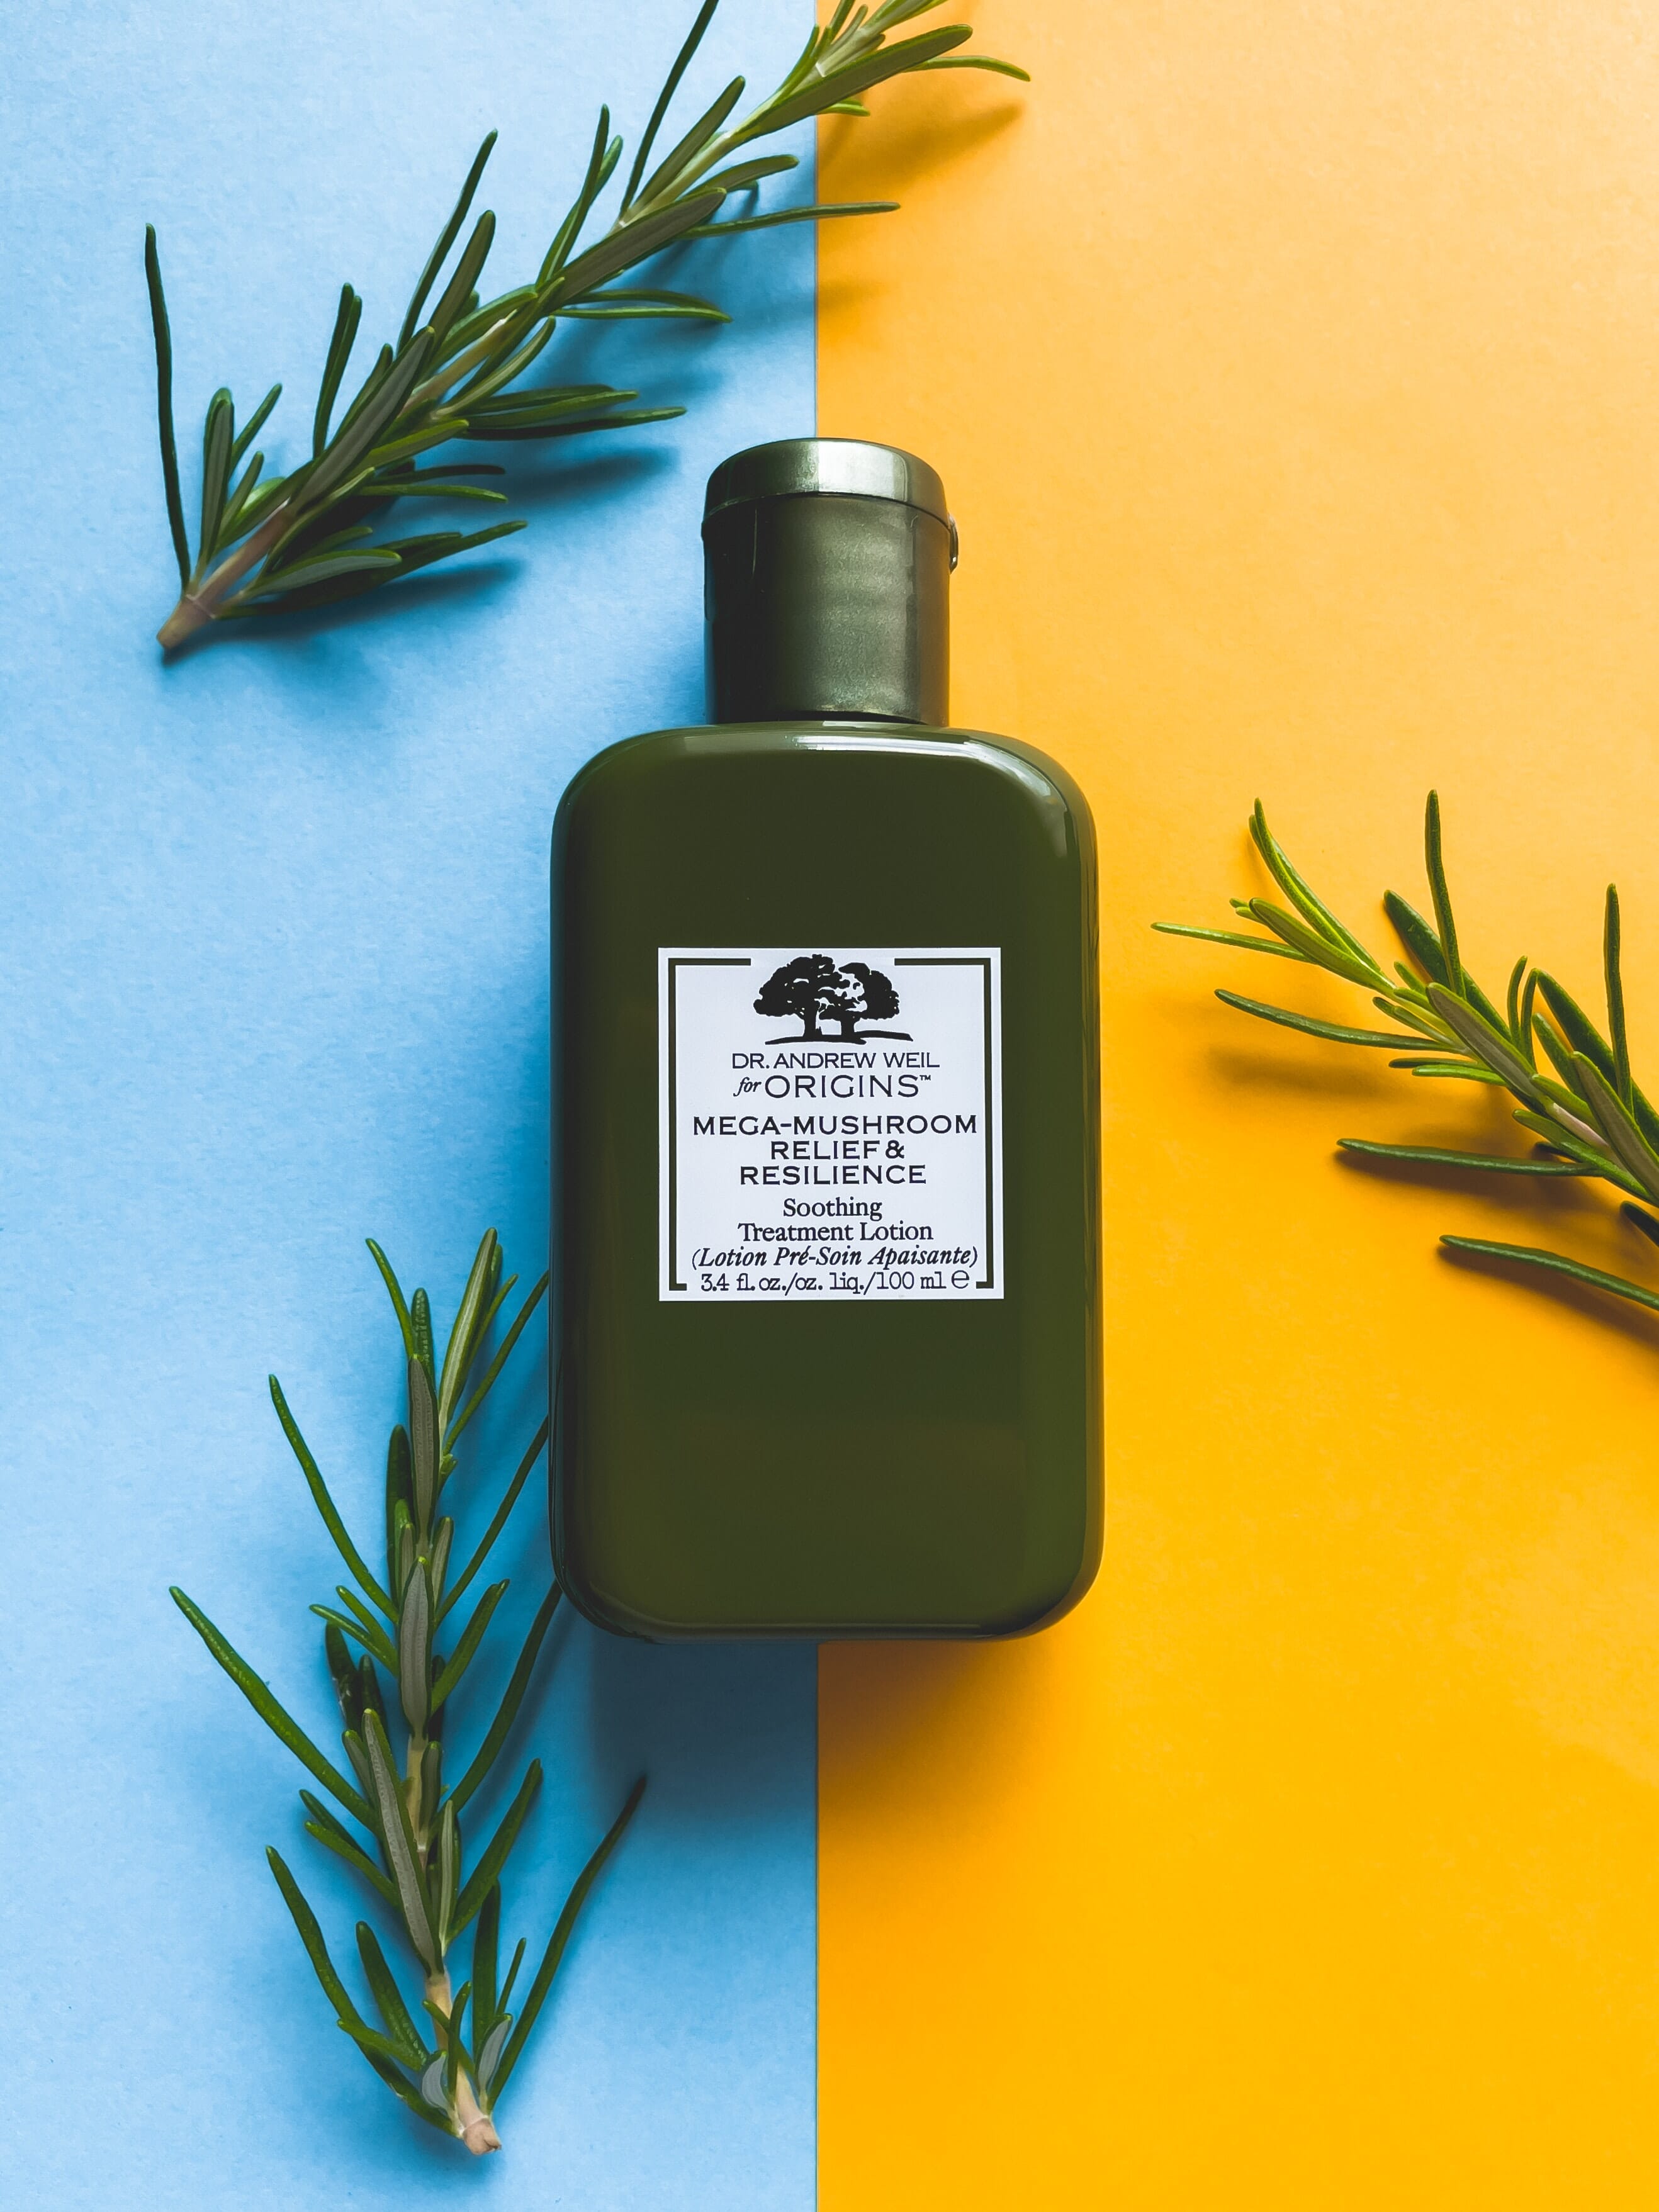
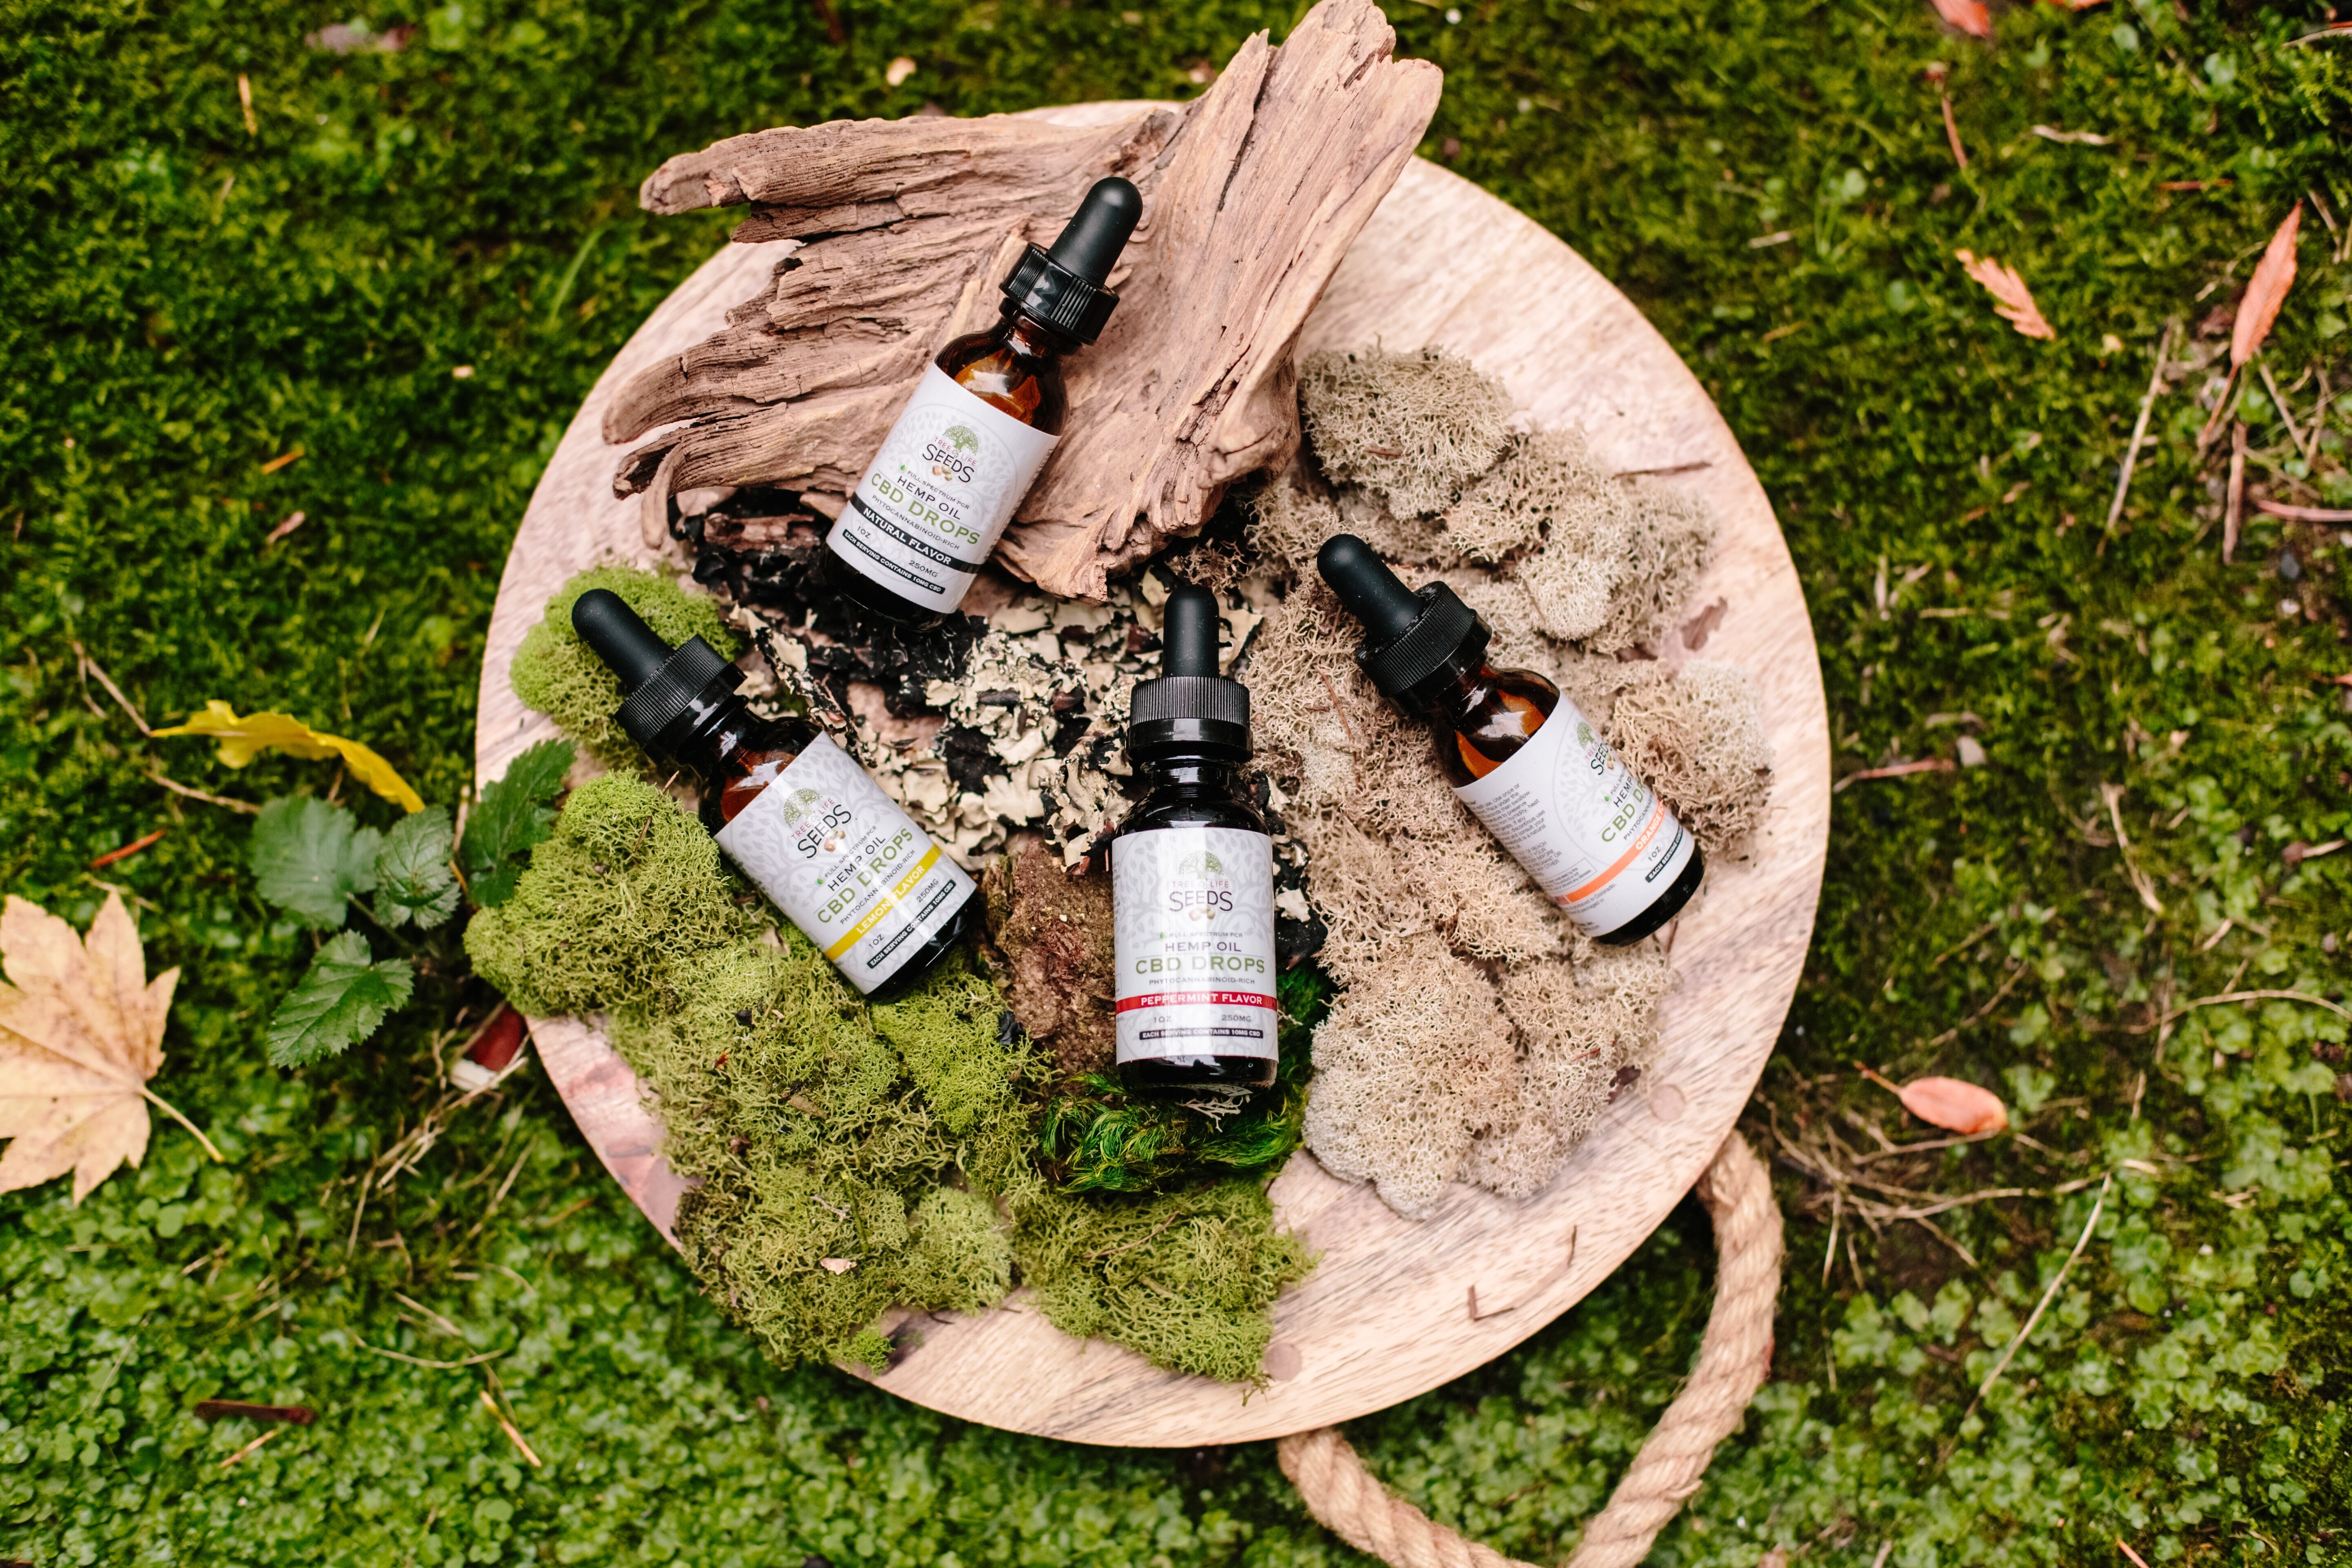
2. In the Plants
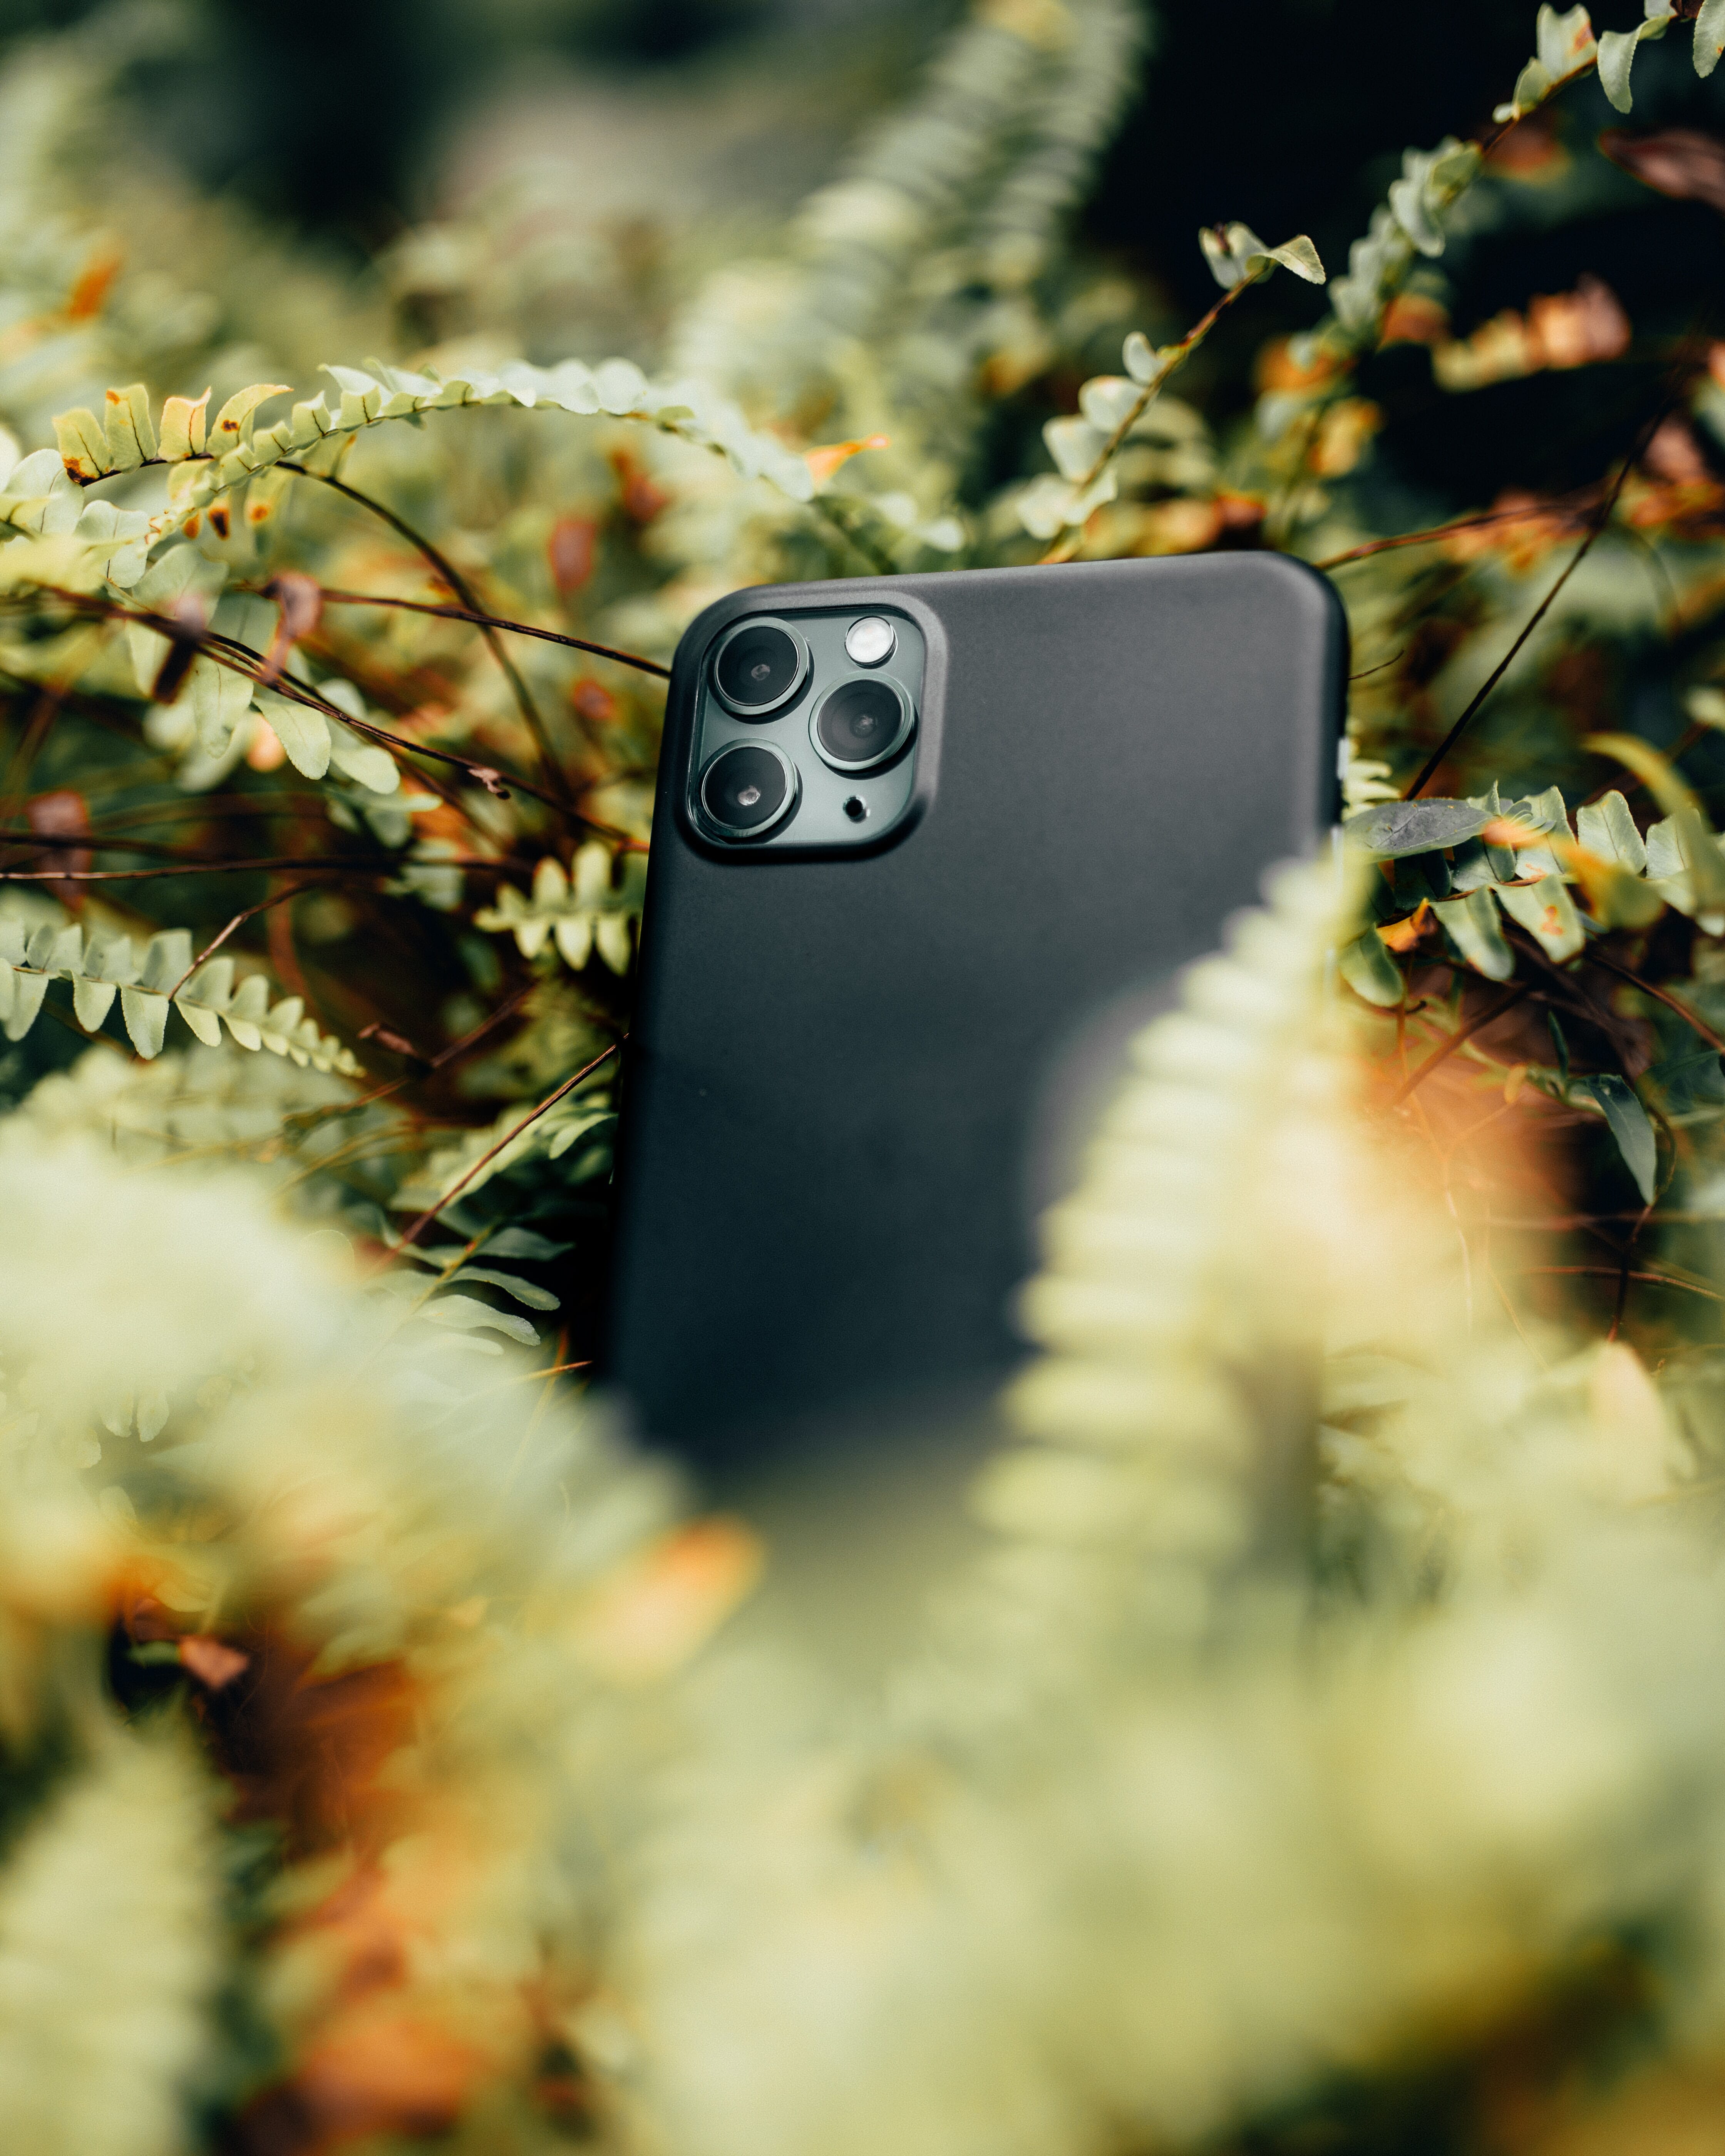
Become one with nature! Humans are biologically attracted to organic colors often found in nature, such as greens and browns. This can be a good pairing depending on what kind of product is being photographed! Look at utilizing shallow depth of field to have the plants make a compositional window or doorway towards the product.
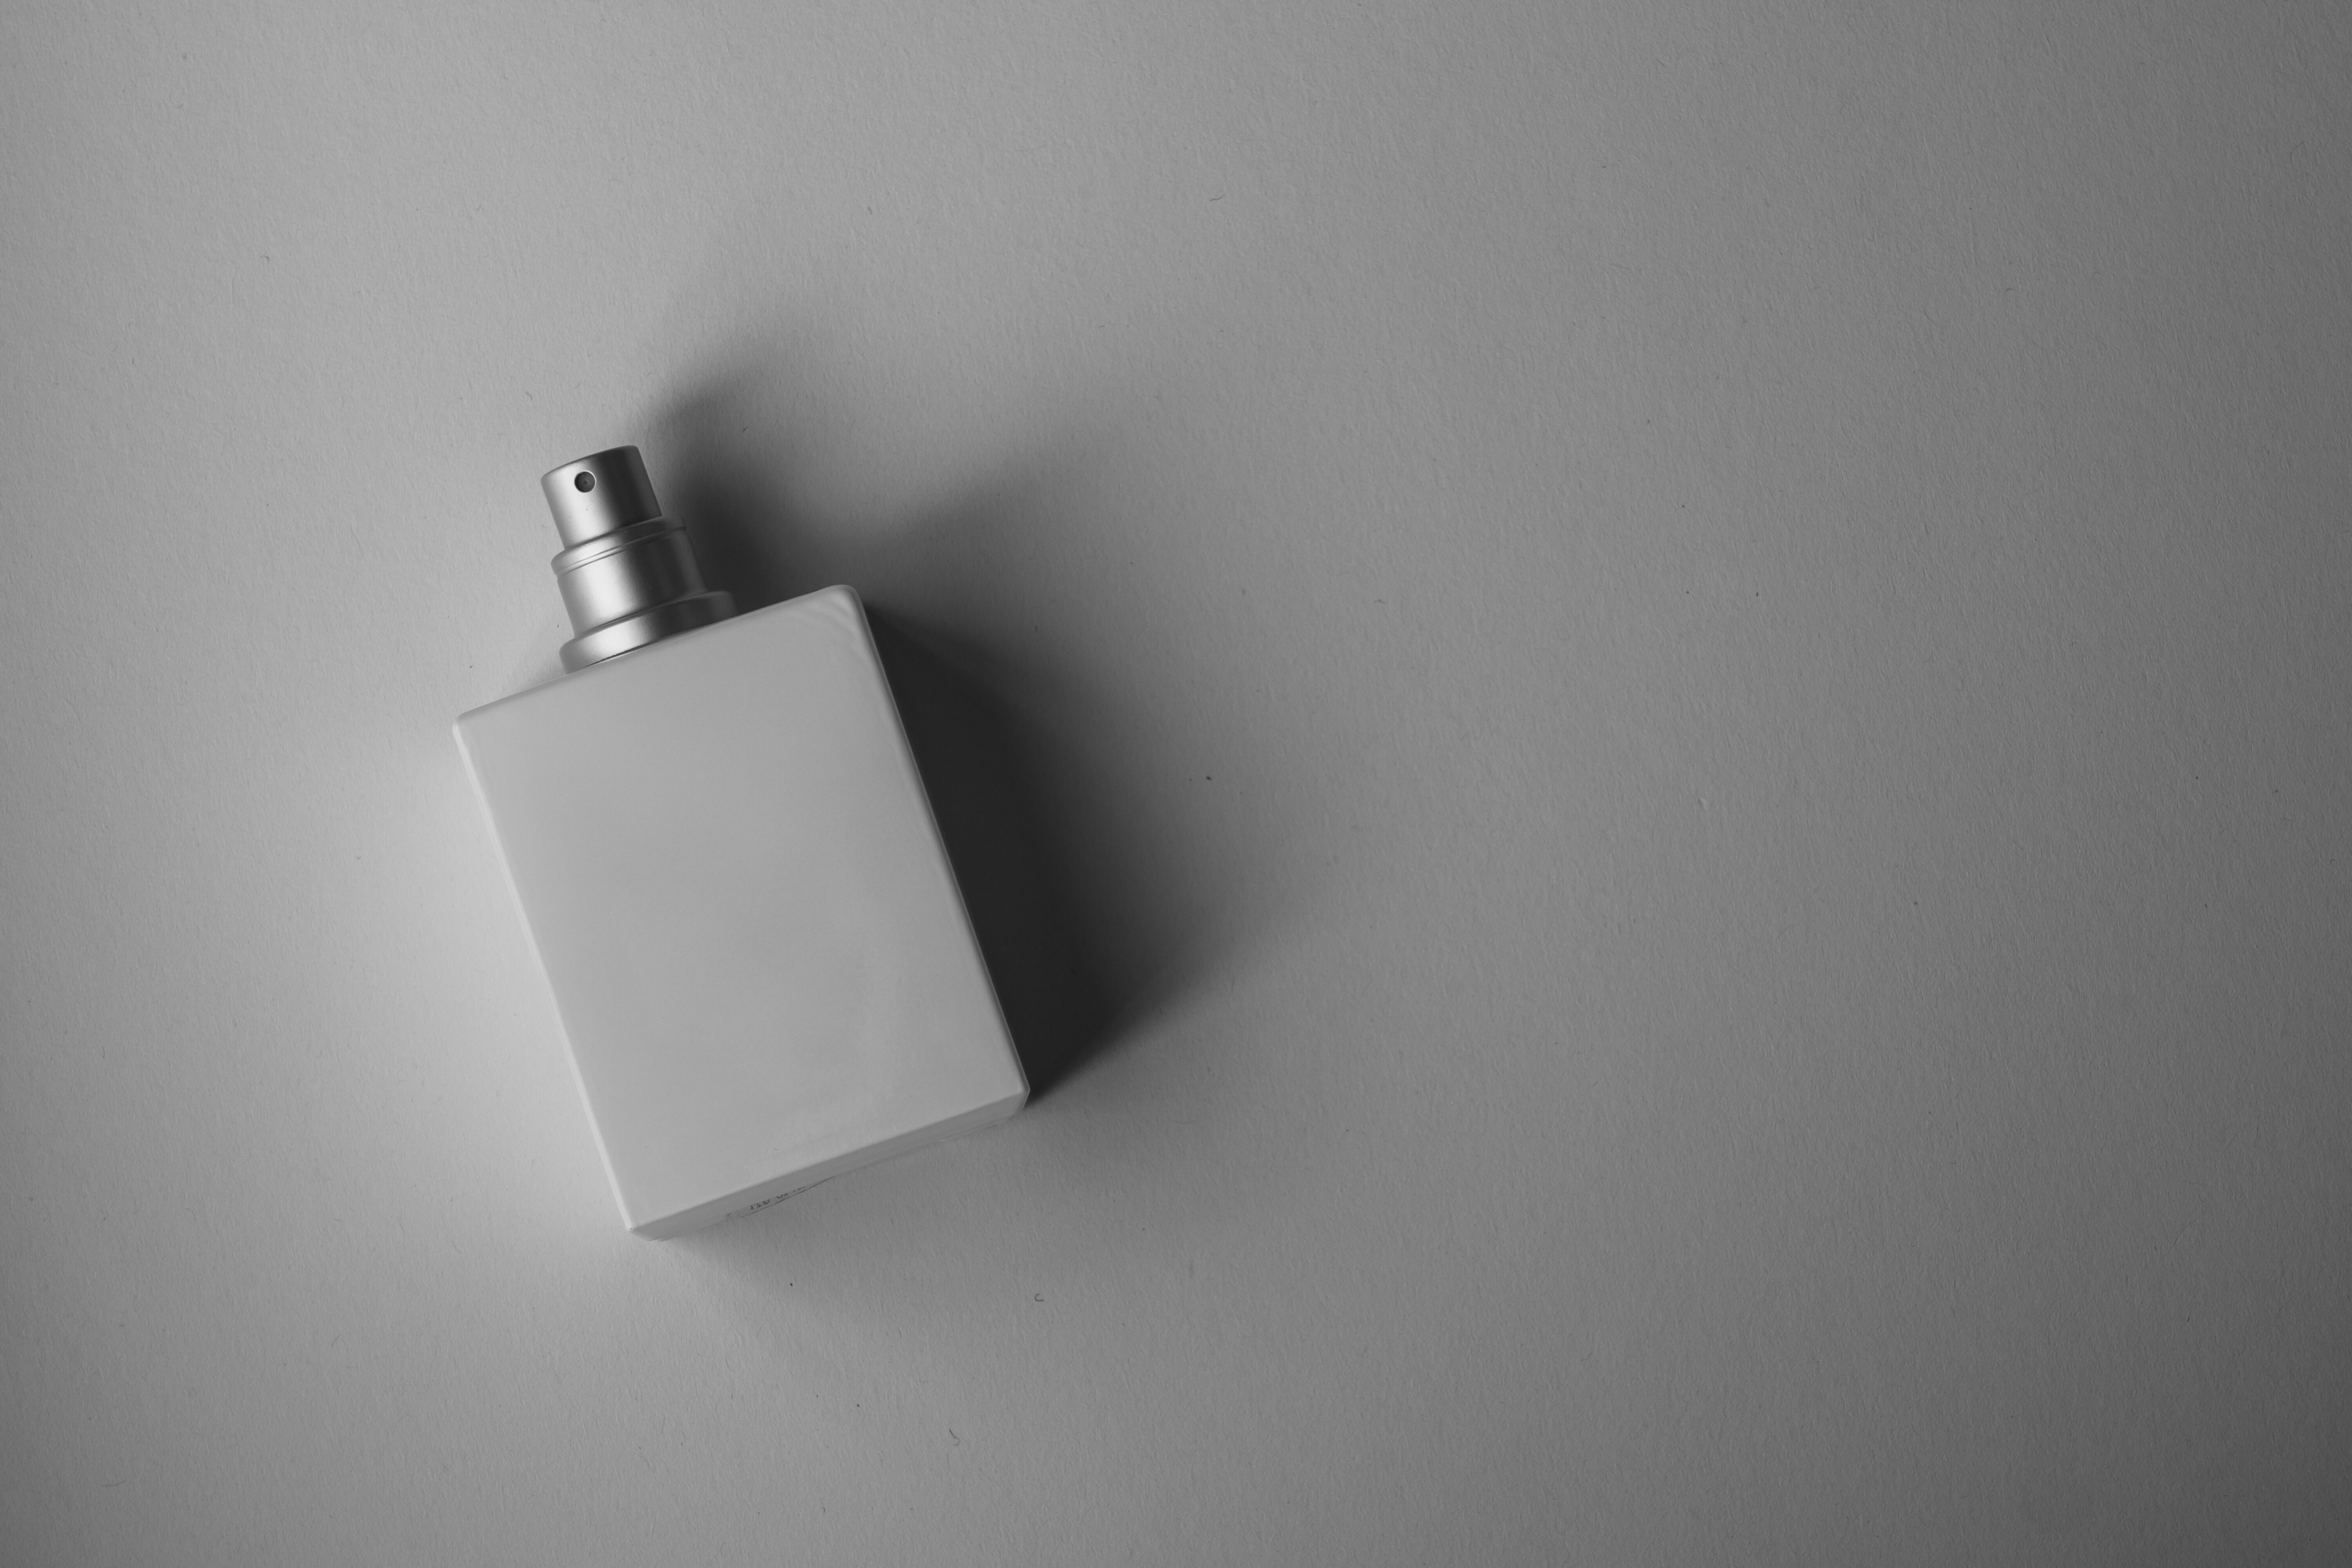
3. Natural Shadows
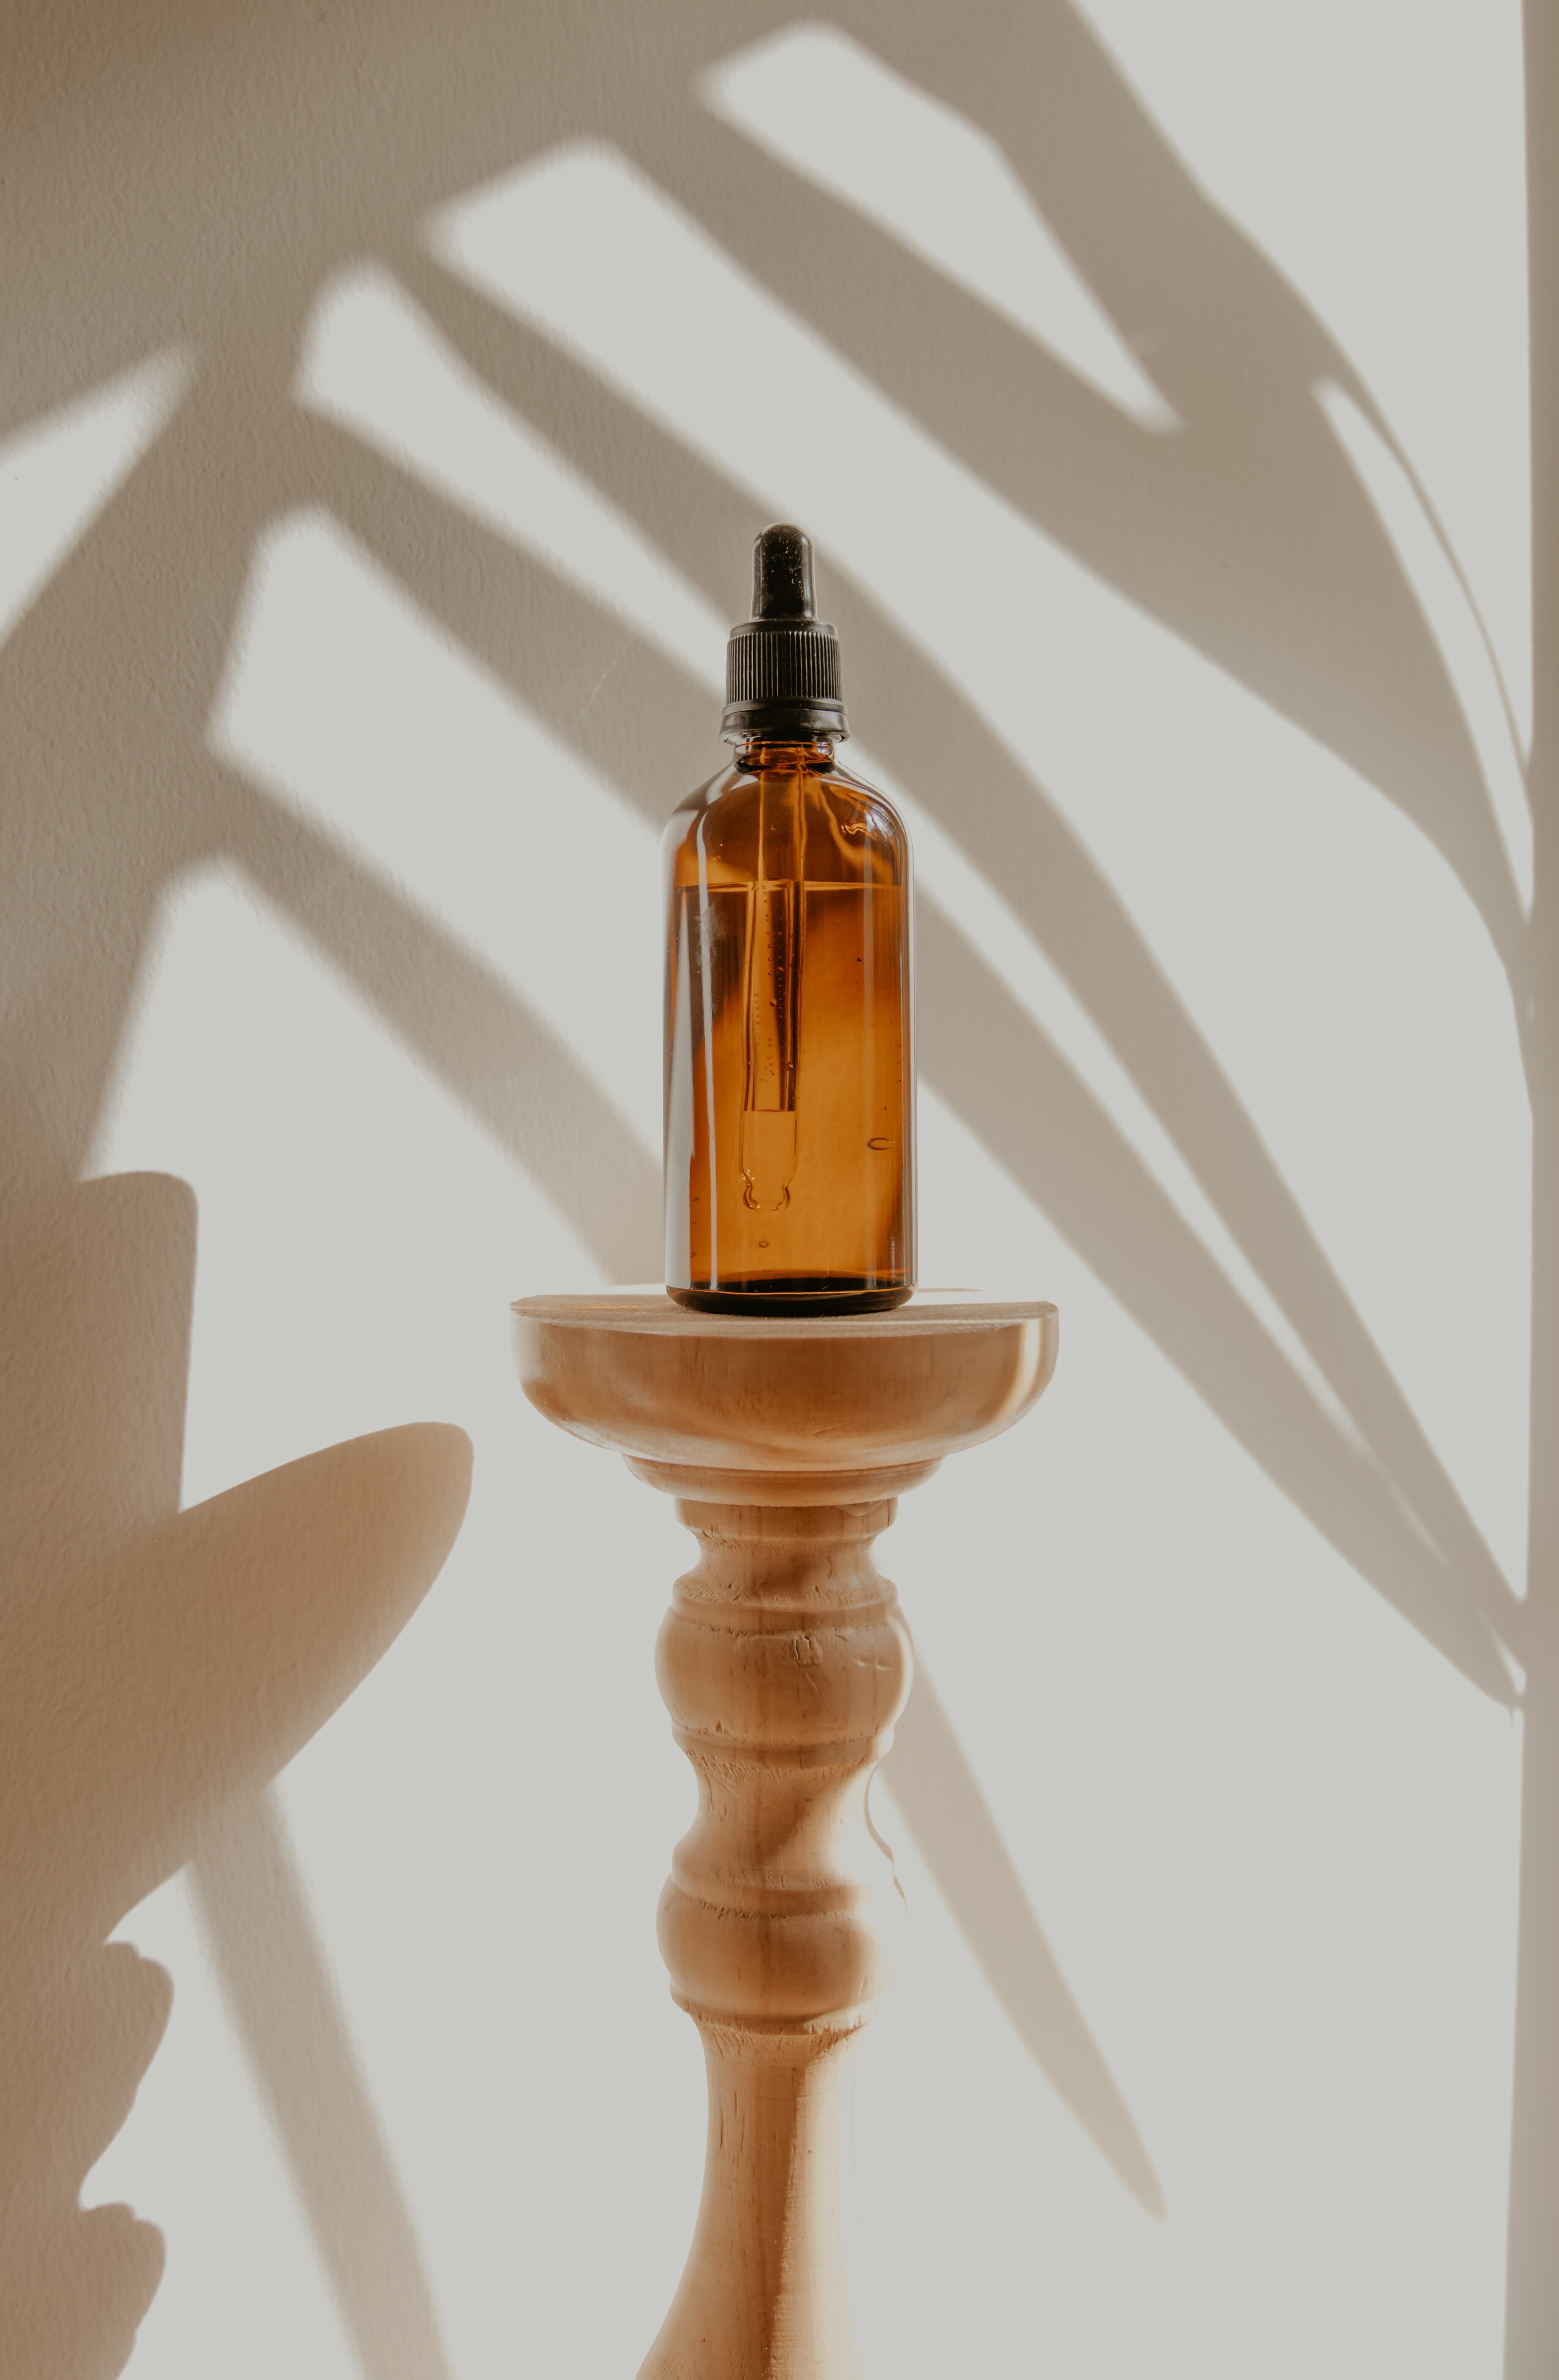
Naturally occurring shadows, such as a vase in front of a window, can make for really eye-catching images. Look around at the shadows created with ambient light and take advantage of them. This can be best seen with windows during noon light.
4. In the Setting
A product placed into the setting you’d likely find it can make for a fantastic editorial shot. Editorial photography is one of those terms that is often incredibly confusing, commonly referred to as one of those “you know it when you see it” things. Editorial photography, to put it simply, is photography that tells a narrative. This can be entirely visual or include text that conveys what is happening in the image.
Now, what this has to do with product photography is that placing the item into a natural setting equals an editorial shot that can help sell whatever it is you’re capturing! Shots like these tell a story and offer a look into how that product can fit into your life.
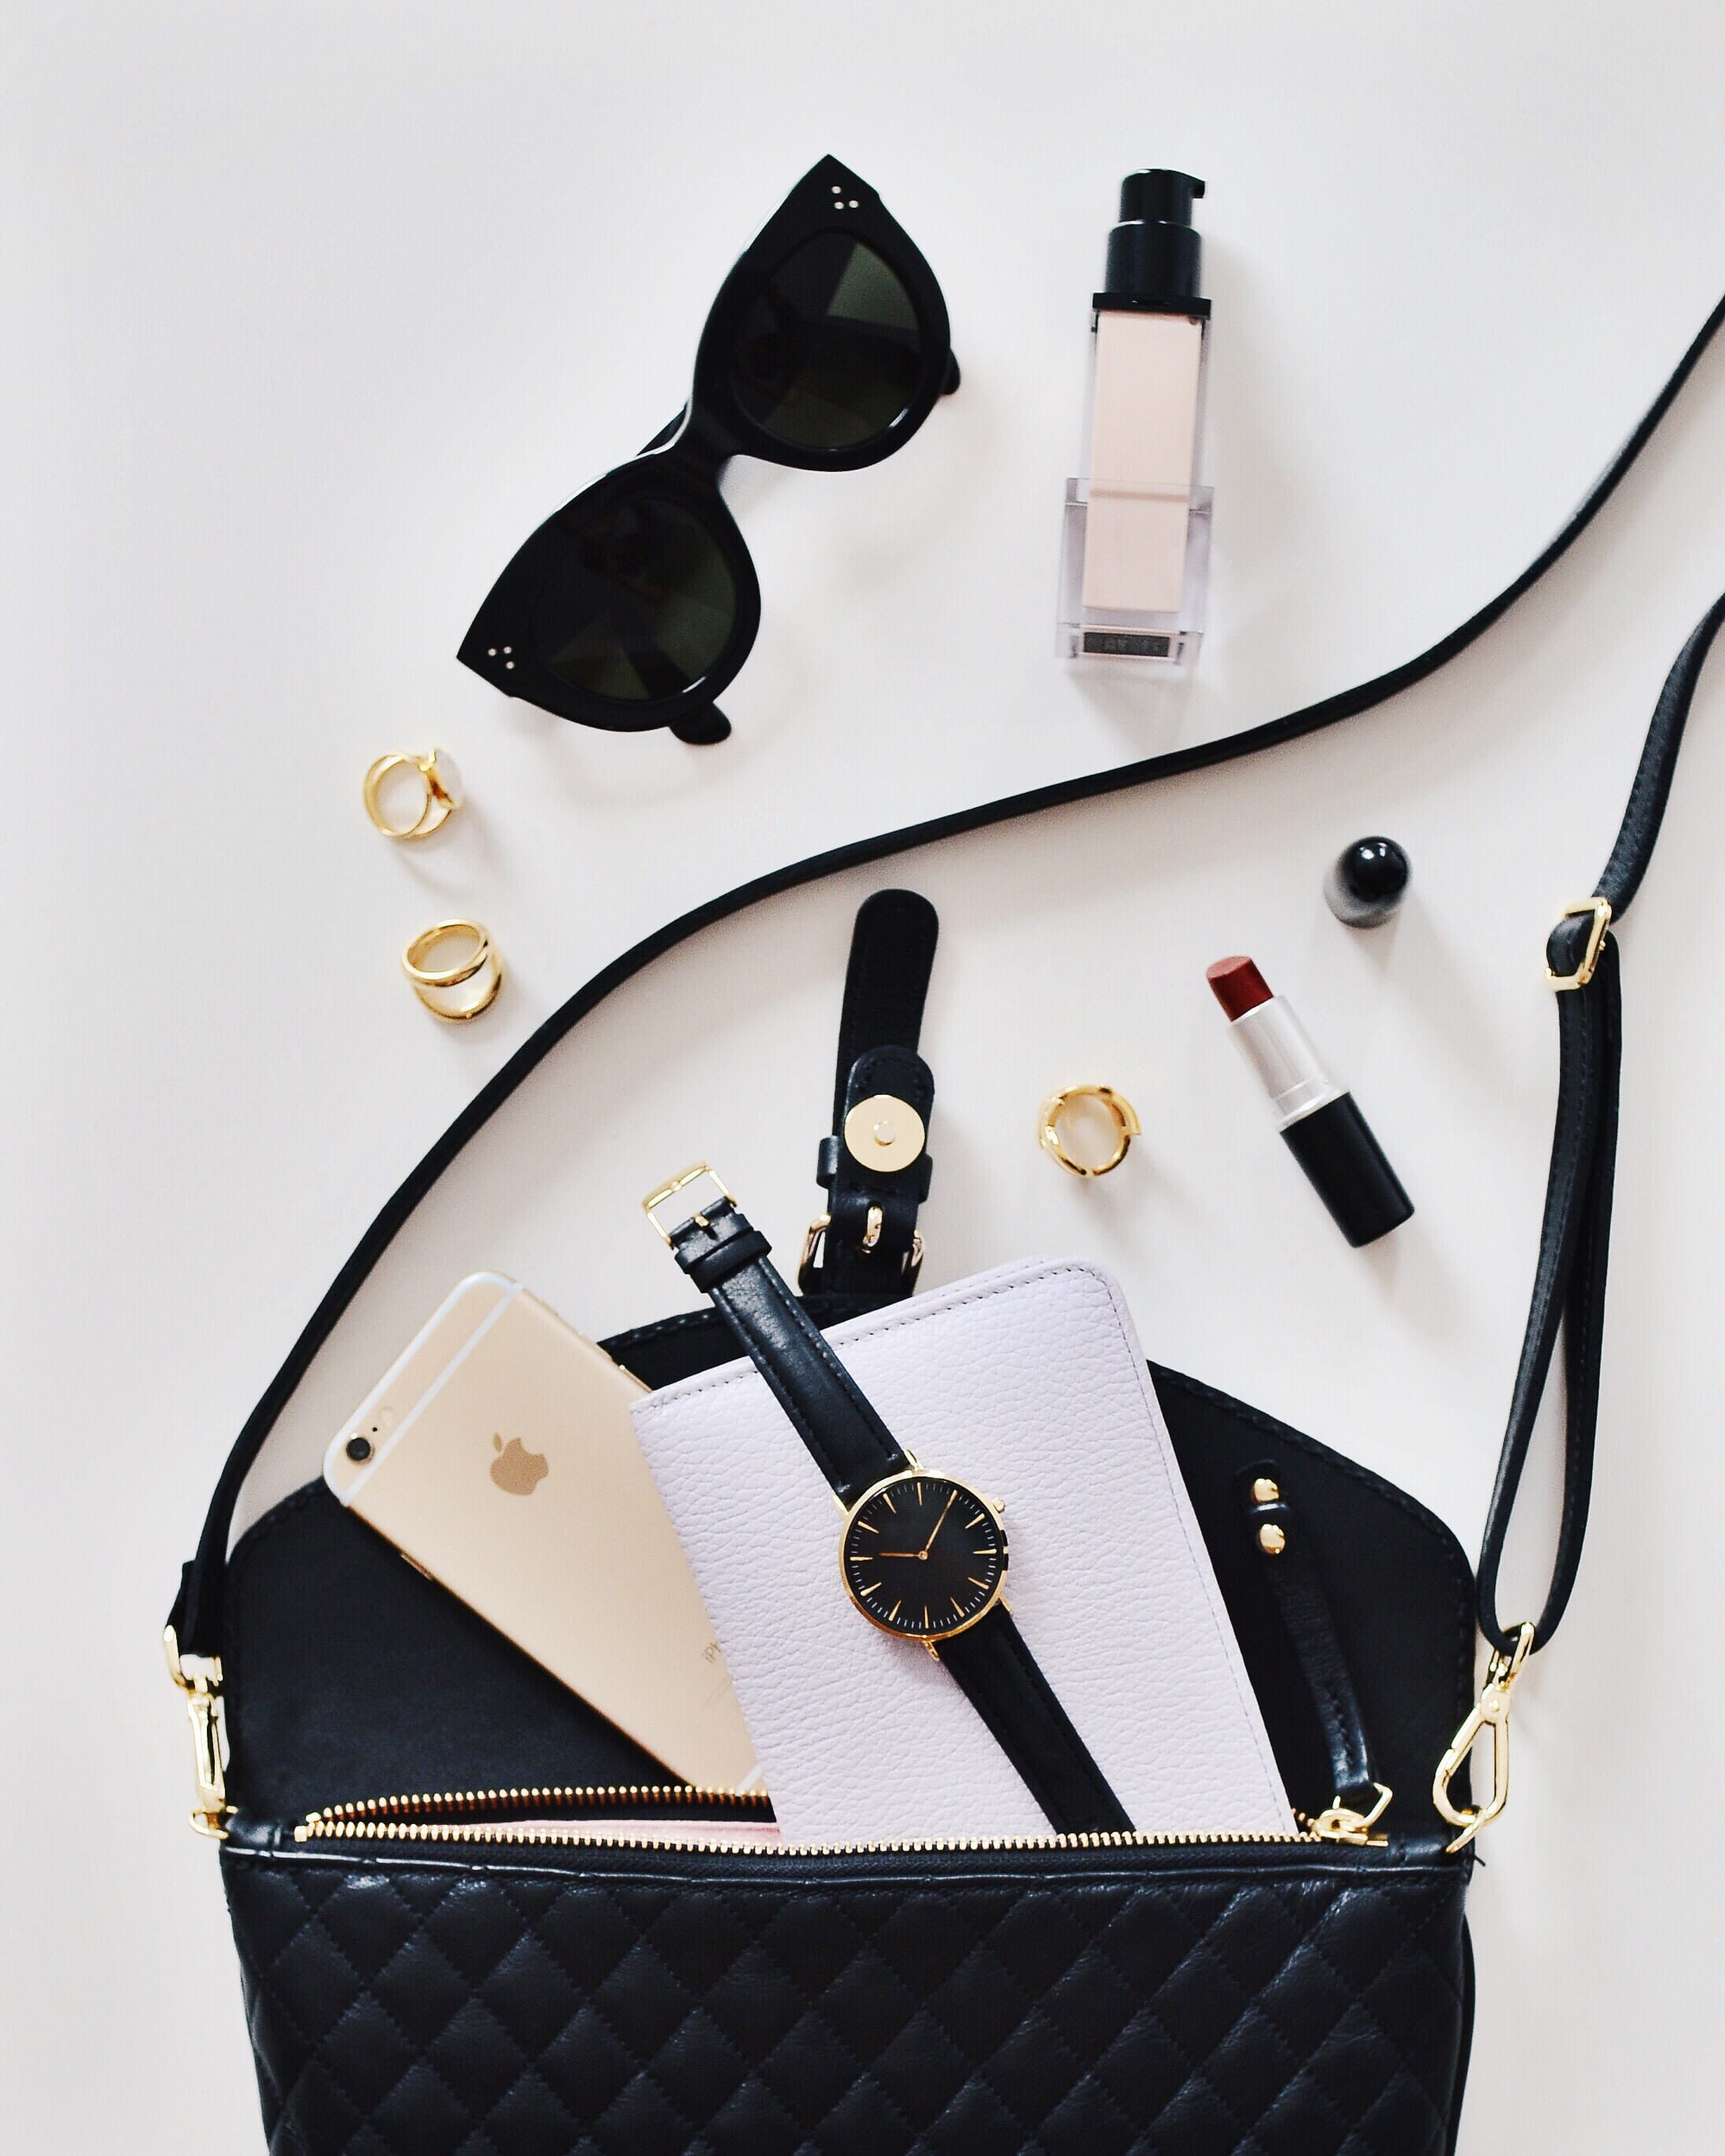
5. Candidly Placed
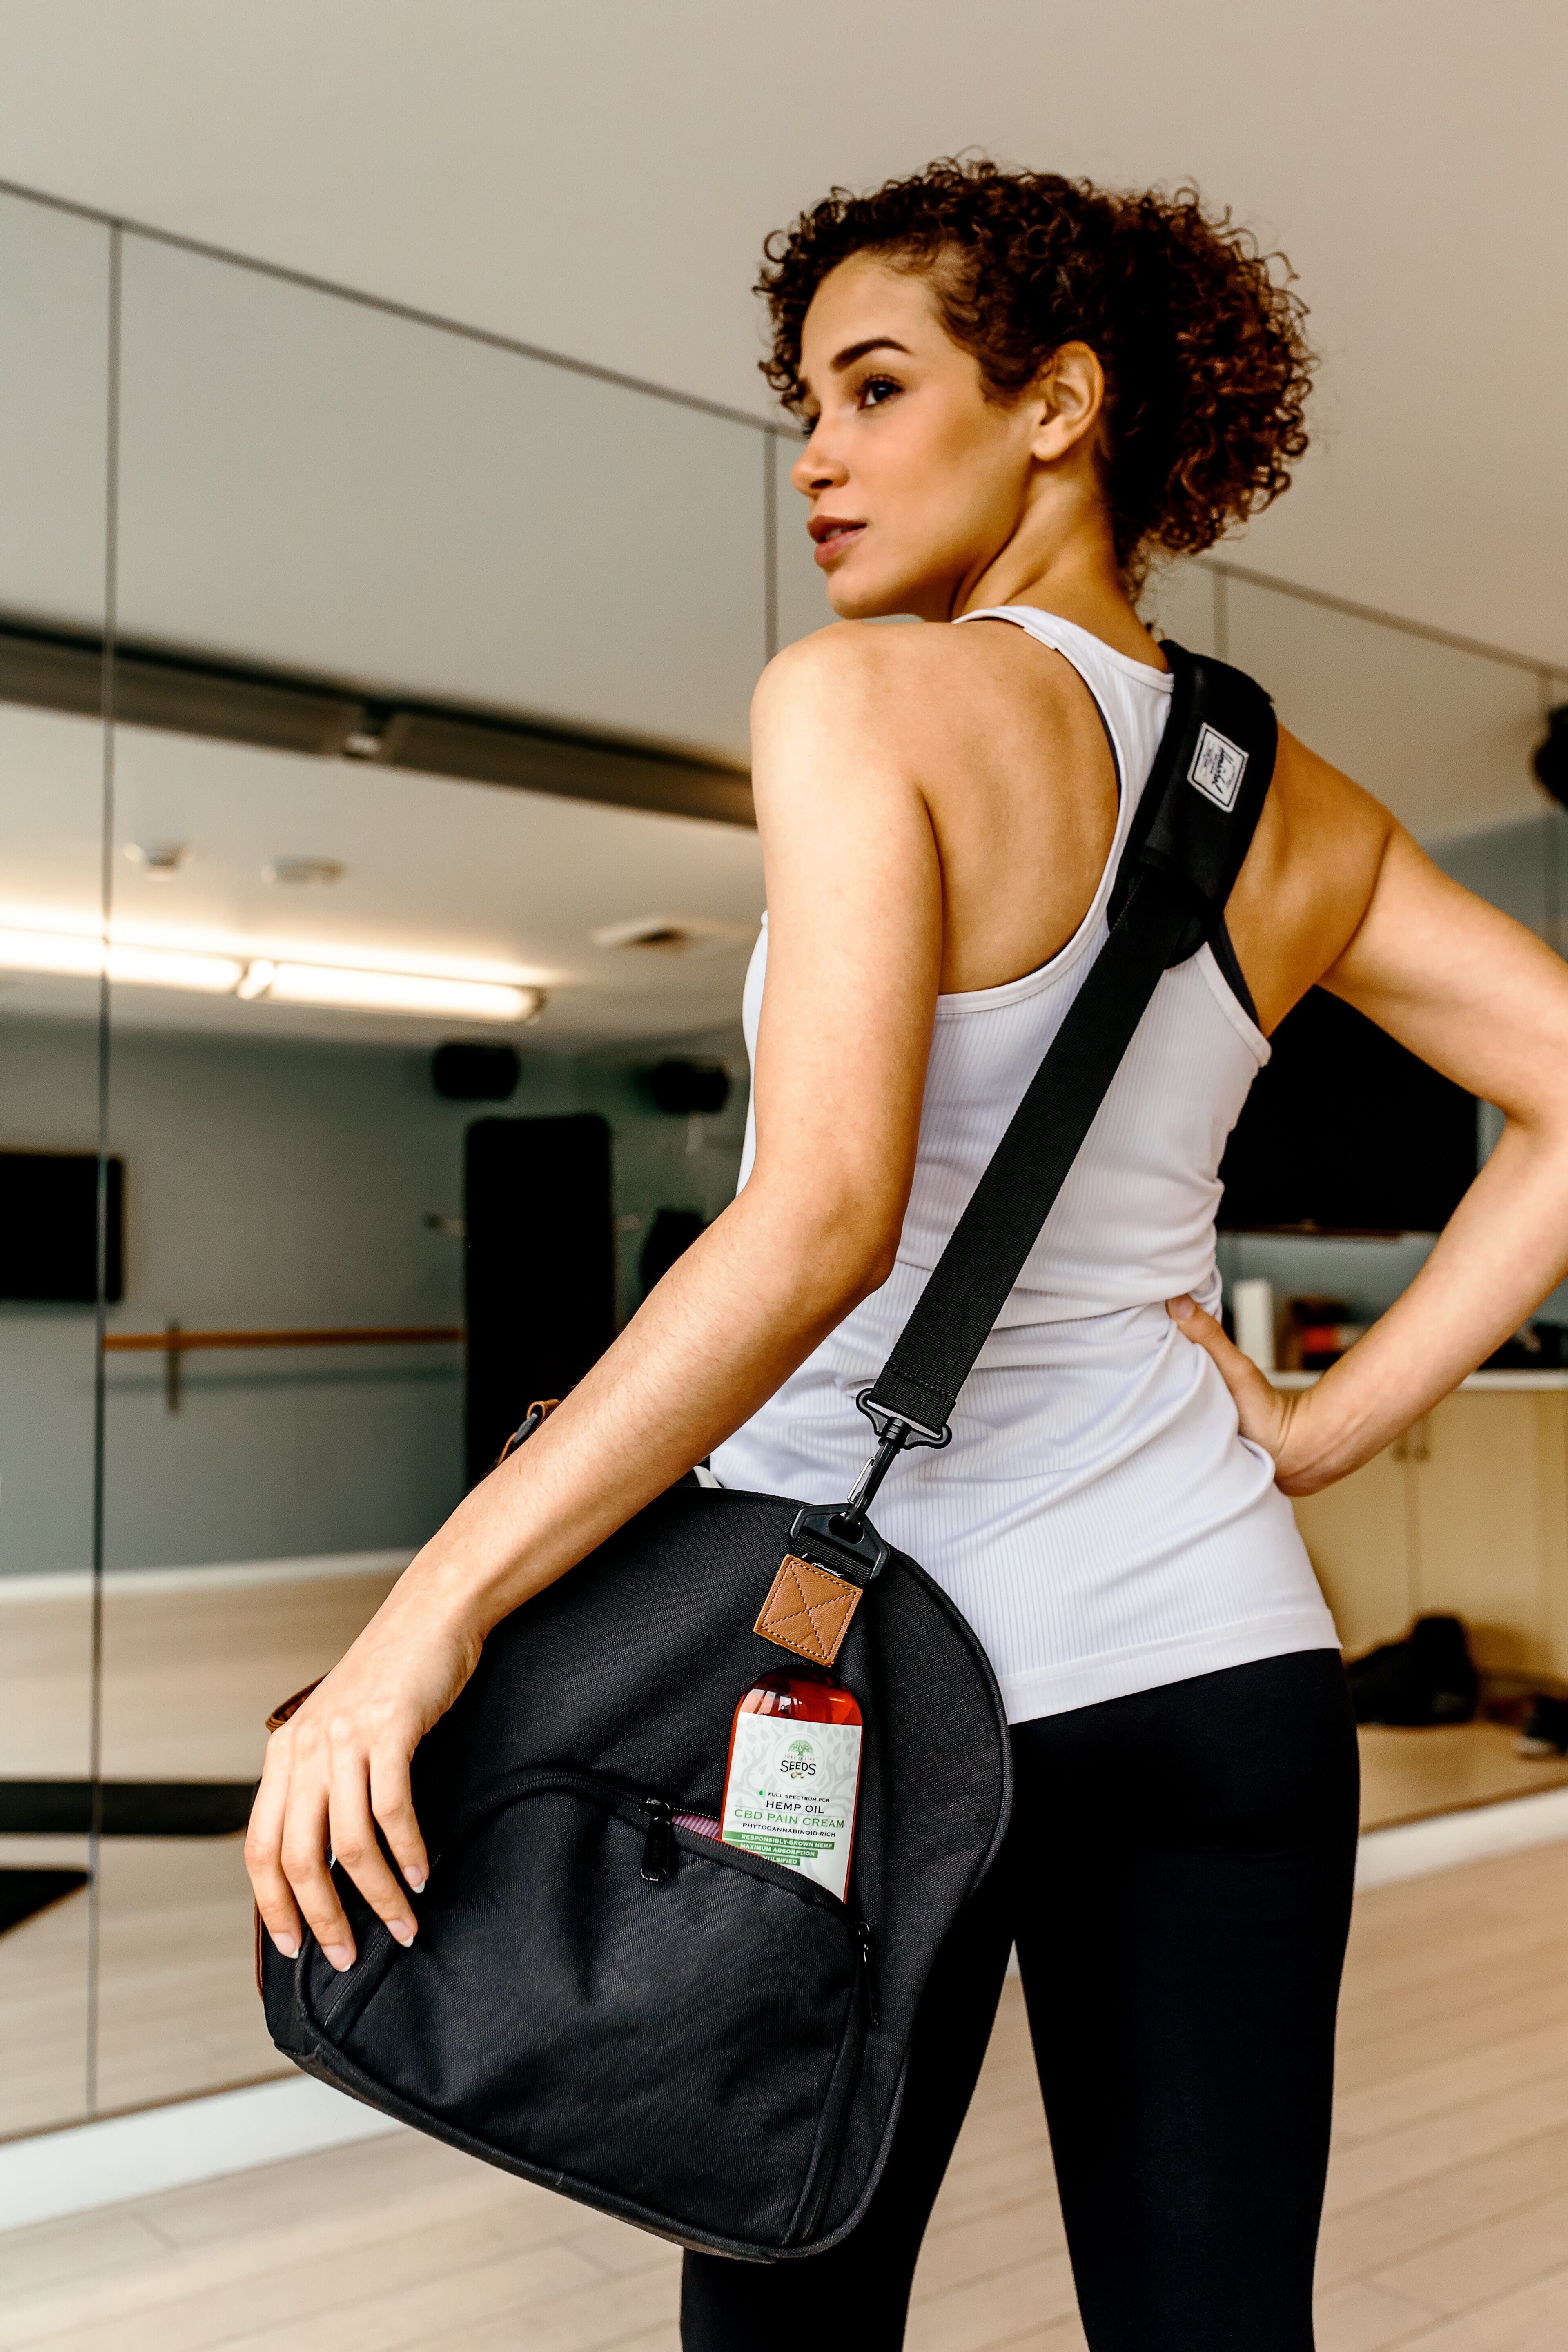
This leads to the strategically candidly placed images. Often using a human model, instead of placing the product in a setting like we mentioned above, you candidly place it into a field of view – like sticking out of a purse. This is great for products that are supposed to be travel friendly.
6. Use Hands
Hands have a significant influence on product photography. Hands offer a highly humanistic quality to photos, demonstrating that the items are used in a genuine way.
Hands are also a great compositional feature, since they bring movement to a shot that might otherwise be static. So, don’t be afraid to add your hands into it!
7. Look for Texture
Textures are a good compositional element to any image because even if you aren’t able to arrange all the elements the way that you want, you can still use textures to lead the viewer around the frame. If an entire image is flat and matte, there is not enough contrast or differentiation to keep a viewer interested. Play with a variety of different textures mixed in one!
This is also a great way to keep a shot looking monochromatic without being flat.
8. Enjoy the Sunset

The sunset has long been a favorite shooting time for photographers all over the world, primarily for portraits and landscapes. The warm rays fill the frame with a soft orange, and the sky lights up with reds and yellows.
You can use this for product photography as well, imagining your product as a portrait! Just remember to have the right settings because sunsets are fleeting.
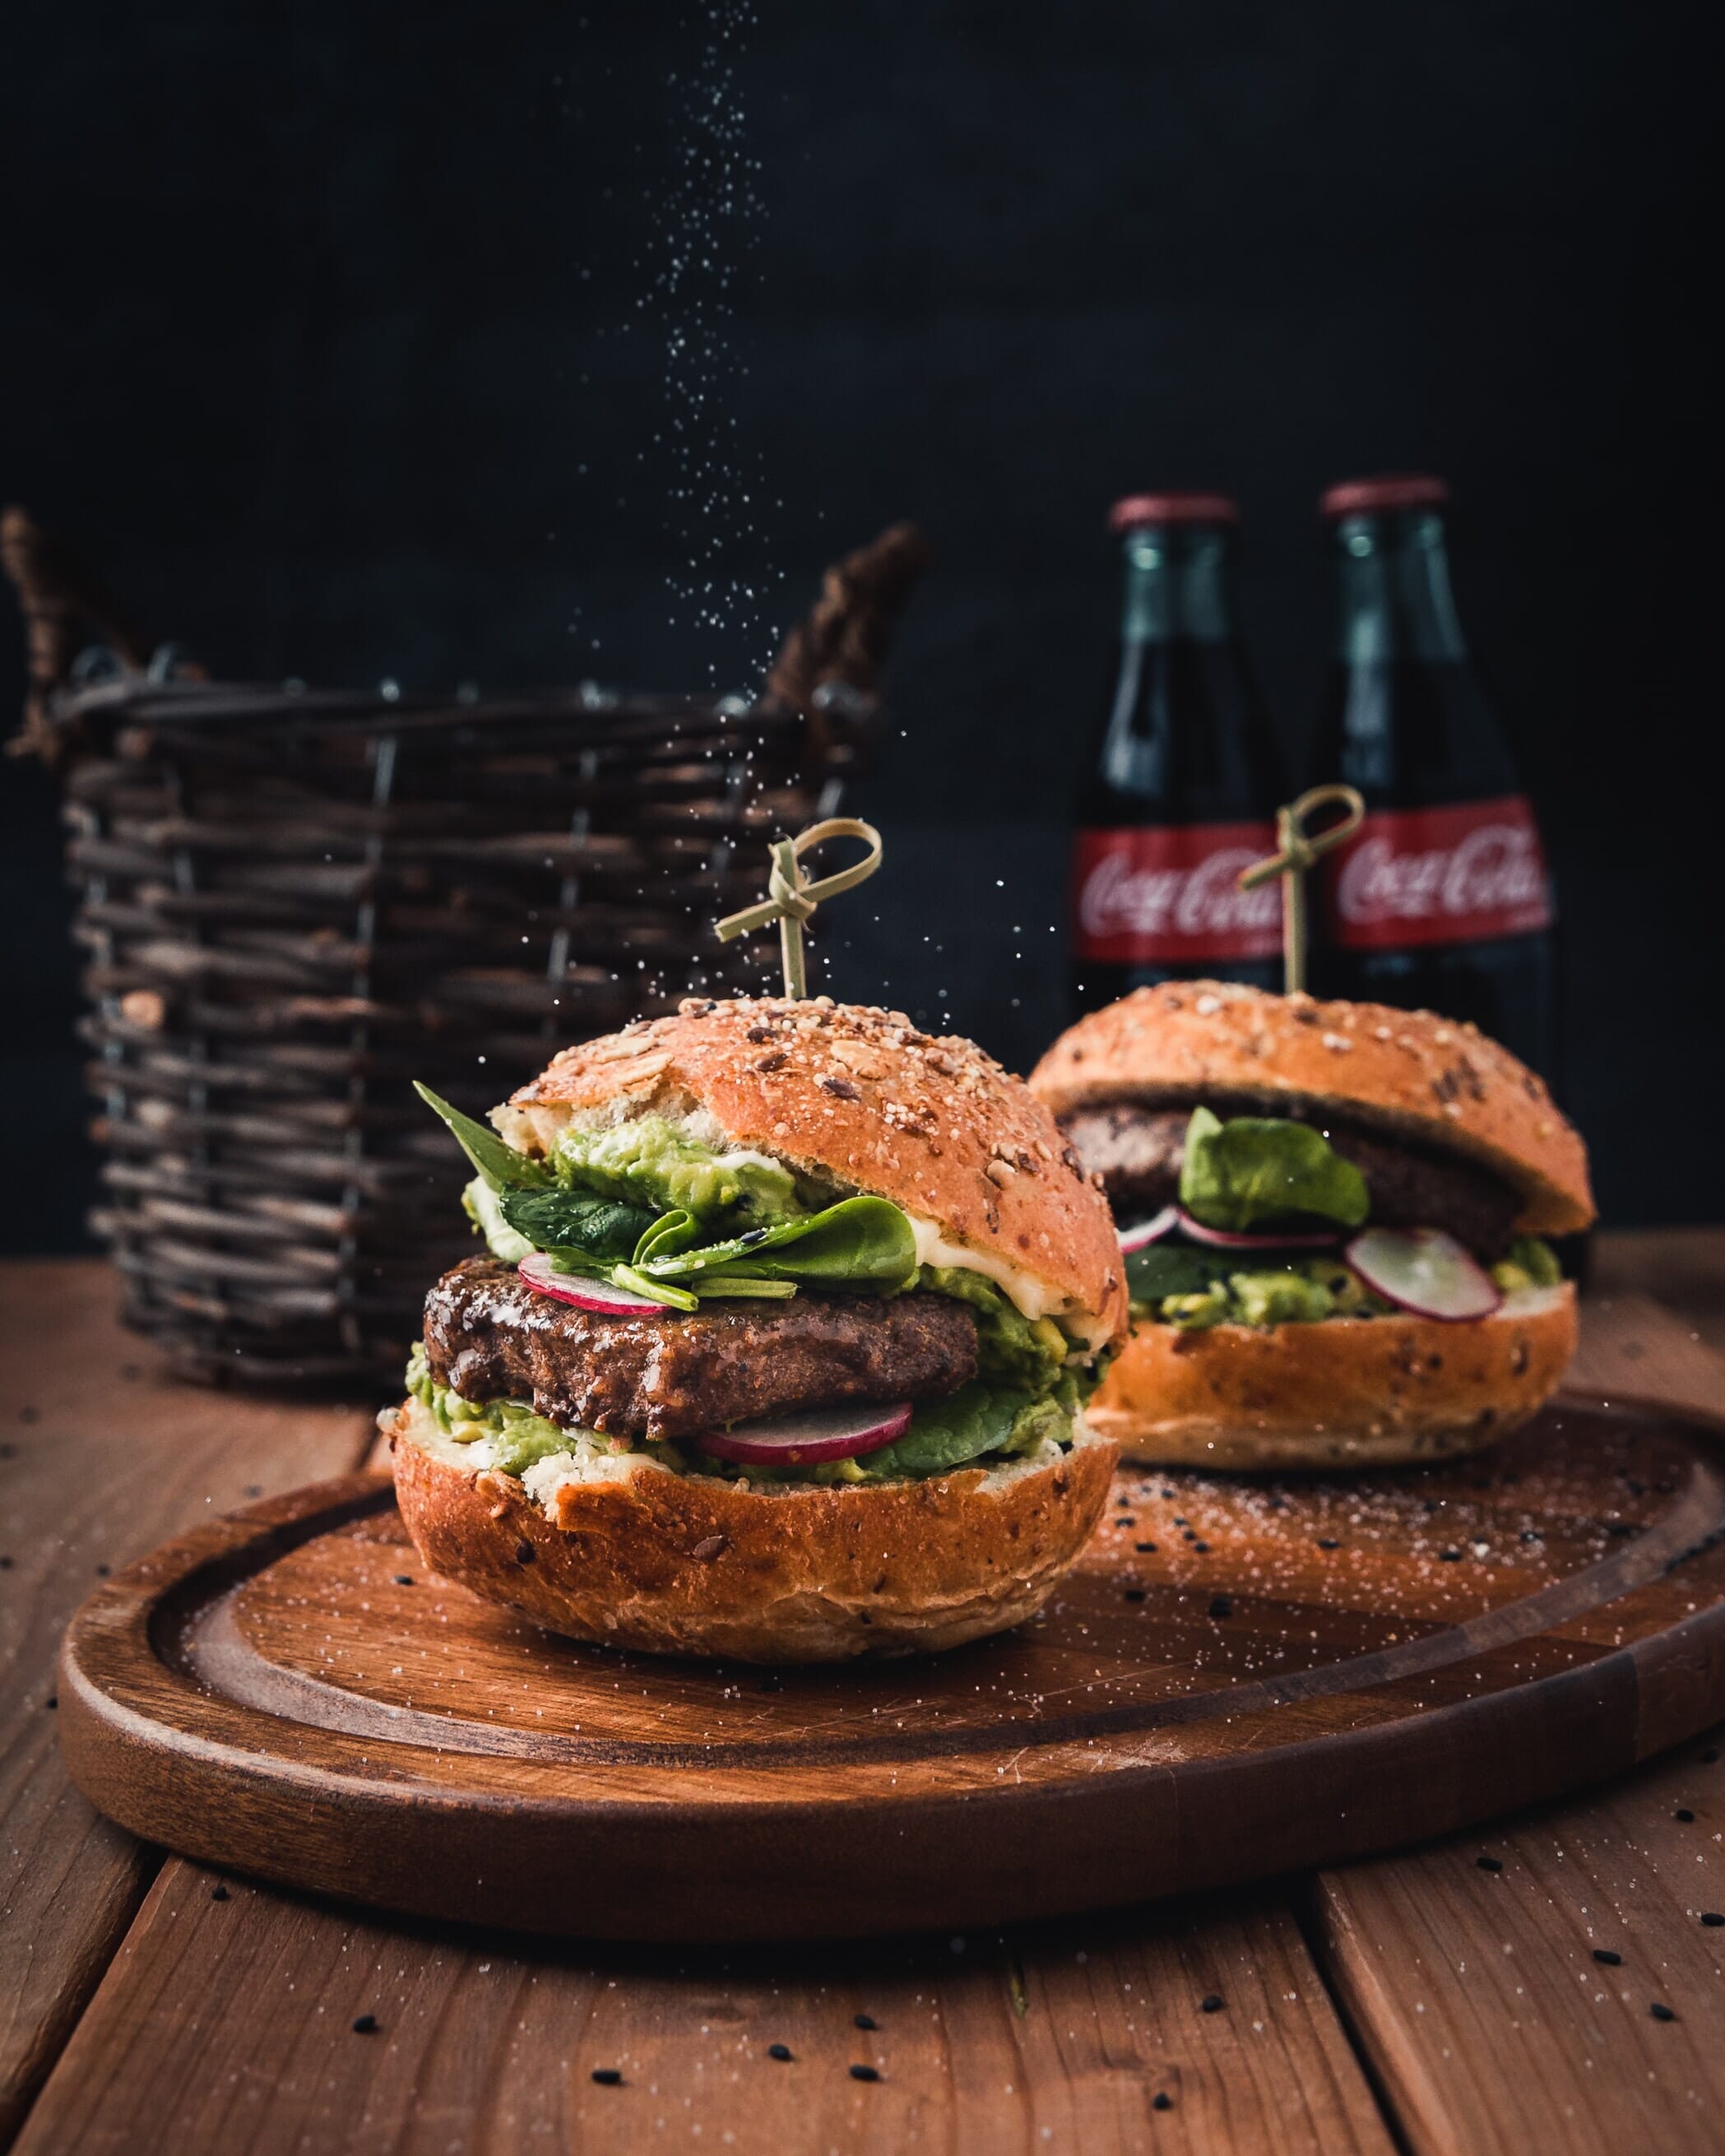
9. In Front of a Fire
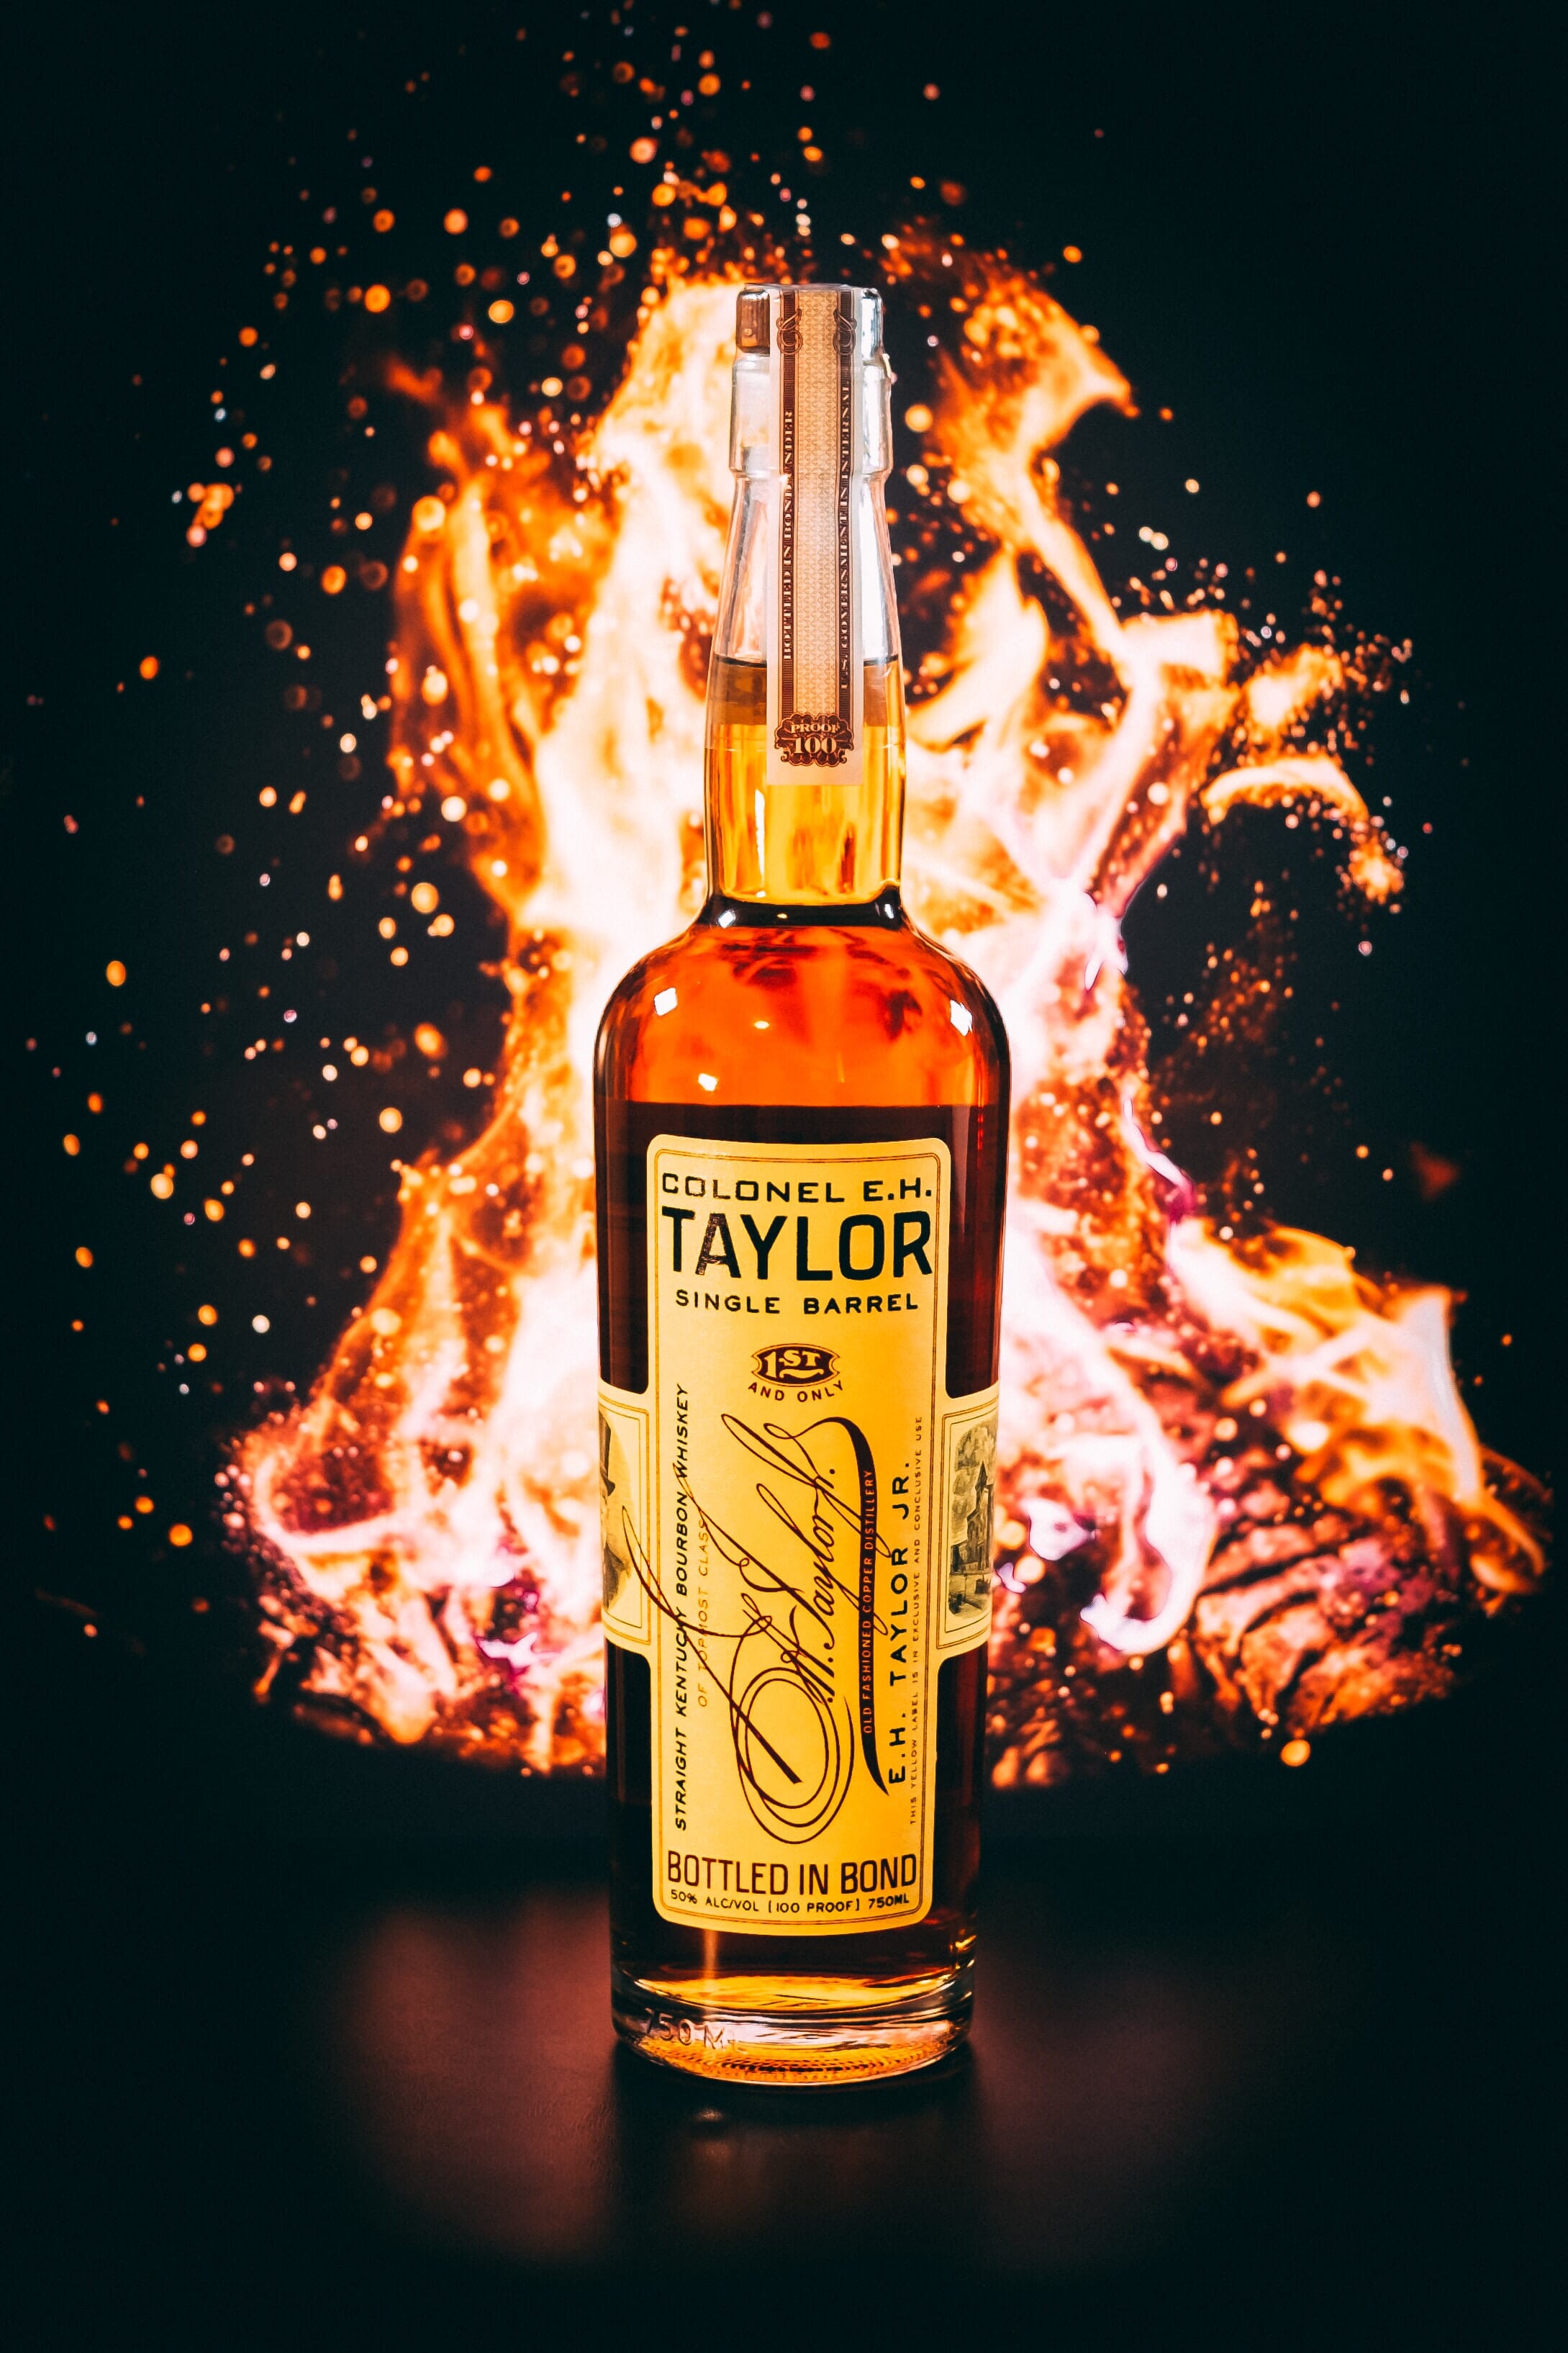
Speaking of warmth, photographing a product in front of a fire can be a very dramatic way to set the mood. Great for alcohols such as mead, the fiery flames are instantly attention-grabbing. Just make sure to illuminate the product on its own as well, or else you’ll get a backlit shot!
10. Set the Story Mood
Indoor ambience can really set the mood for your product photography, so focus on telling a story and using the available light to push that mood unto your viewer.
Studio Product Photography Ideas
11. Hanging
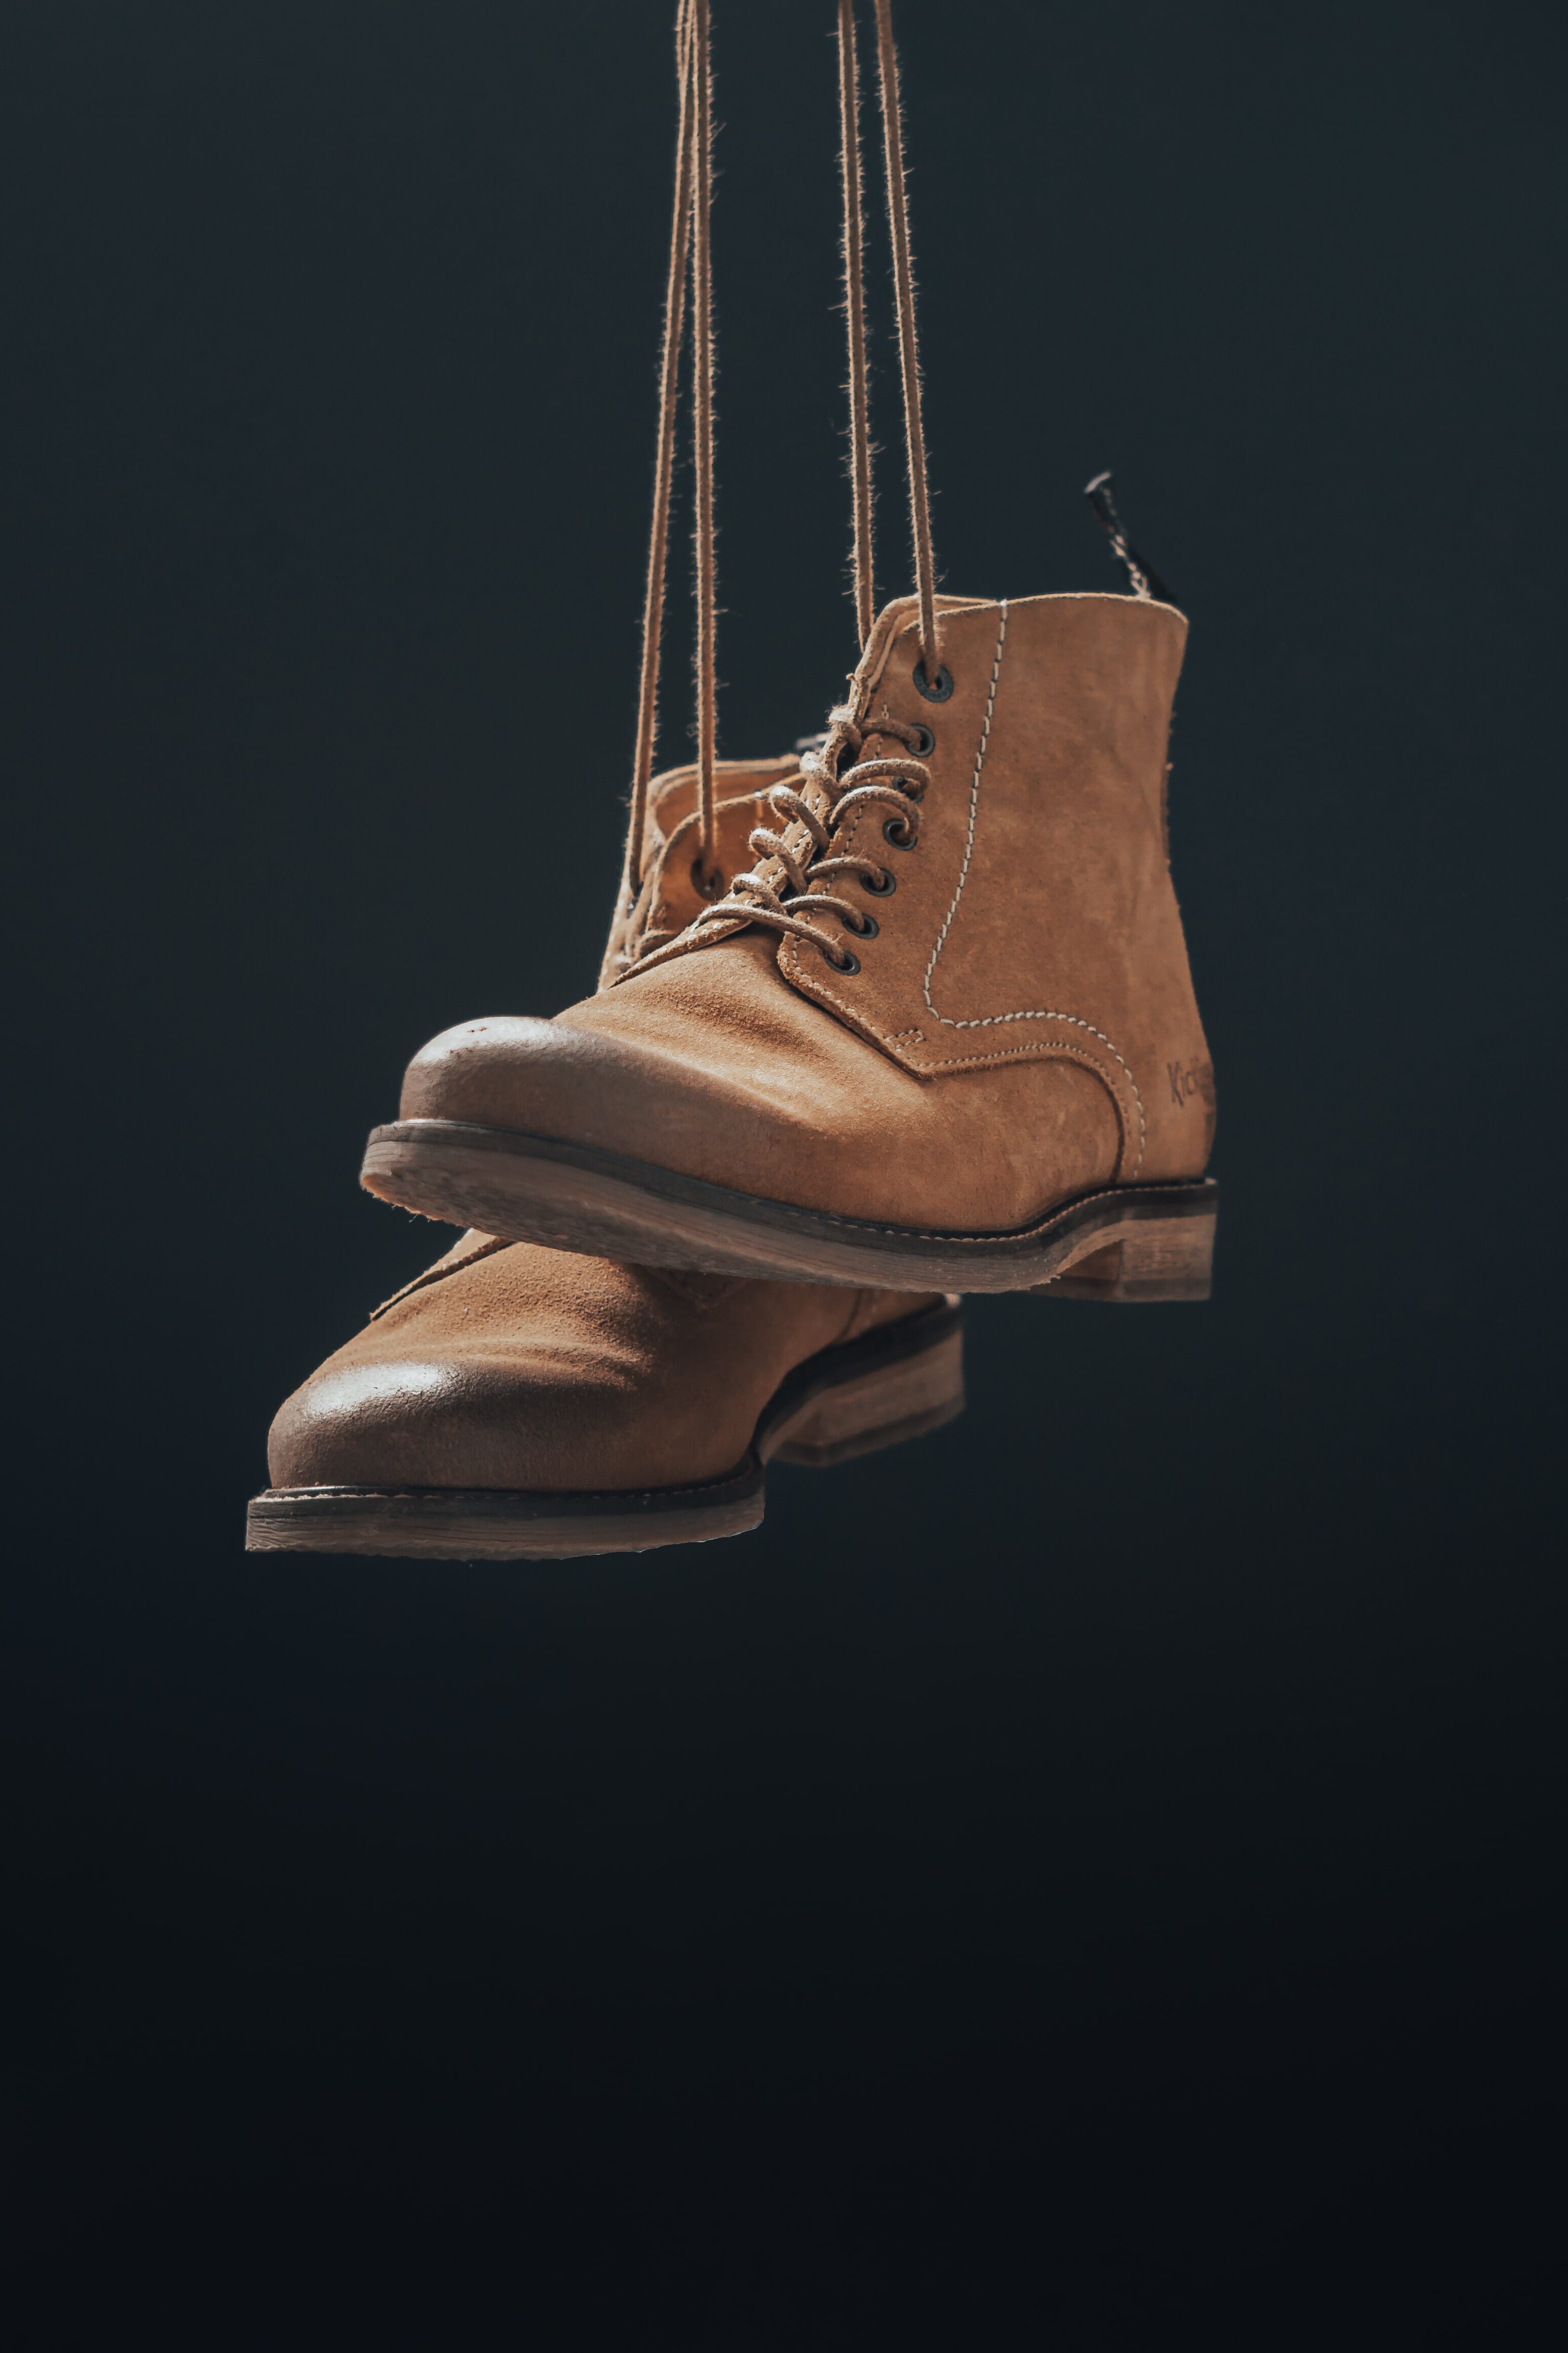
Why lay your products down when you can hang them? Awesome for clothing items, try to hang or hold them for your images! Keep the hanger or hand out of frame and capture the product in all of its unique glory.
Related Posts
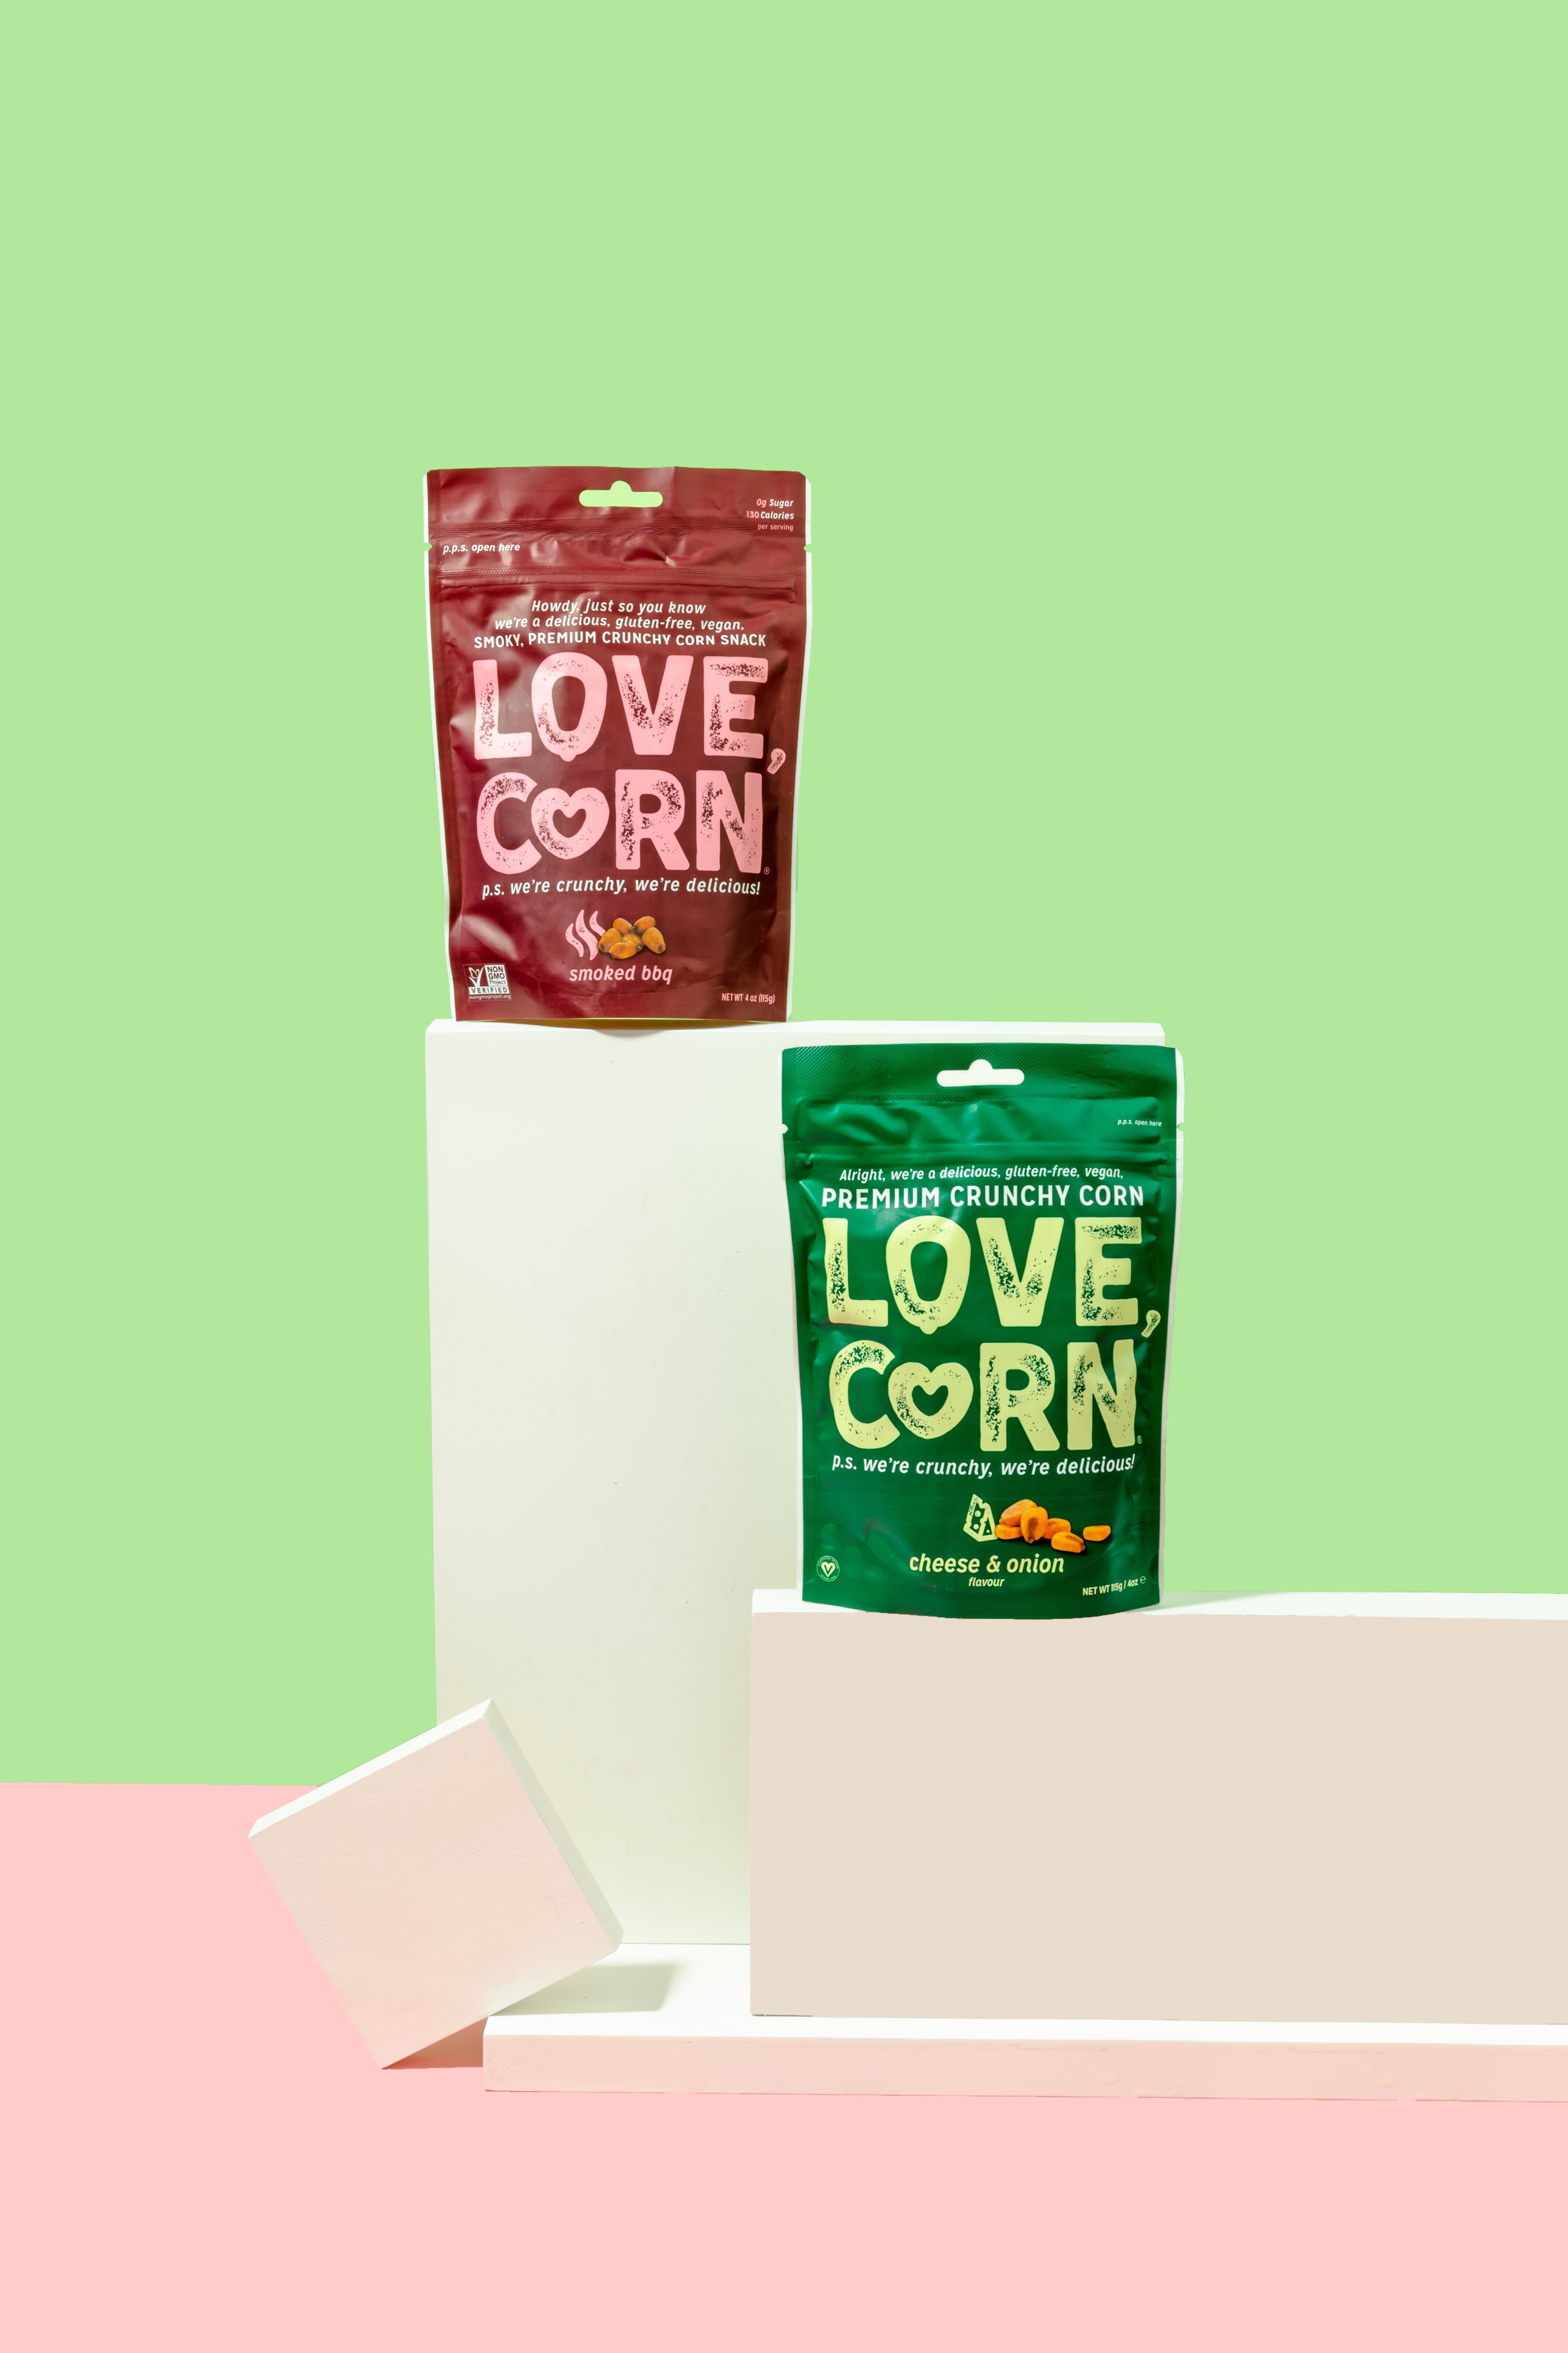
12. Complimentary Colors and Tones
Colors are powerful tools in photography, and this rings especially true with products. Color theory states that individual colors and their corresponding pairings equal an emotional response in people! So, study some color theory and implement complimentary colors and tones into your product photography.
13. Use a Mirror
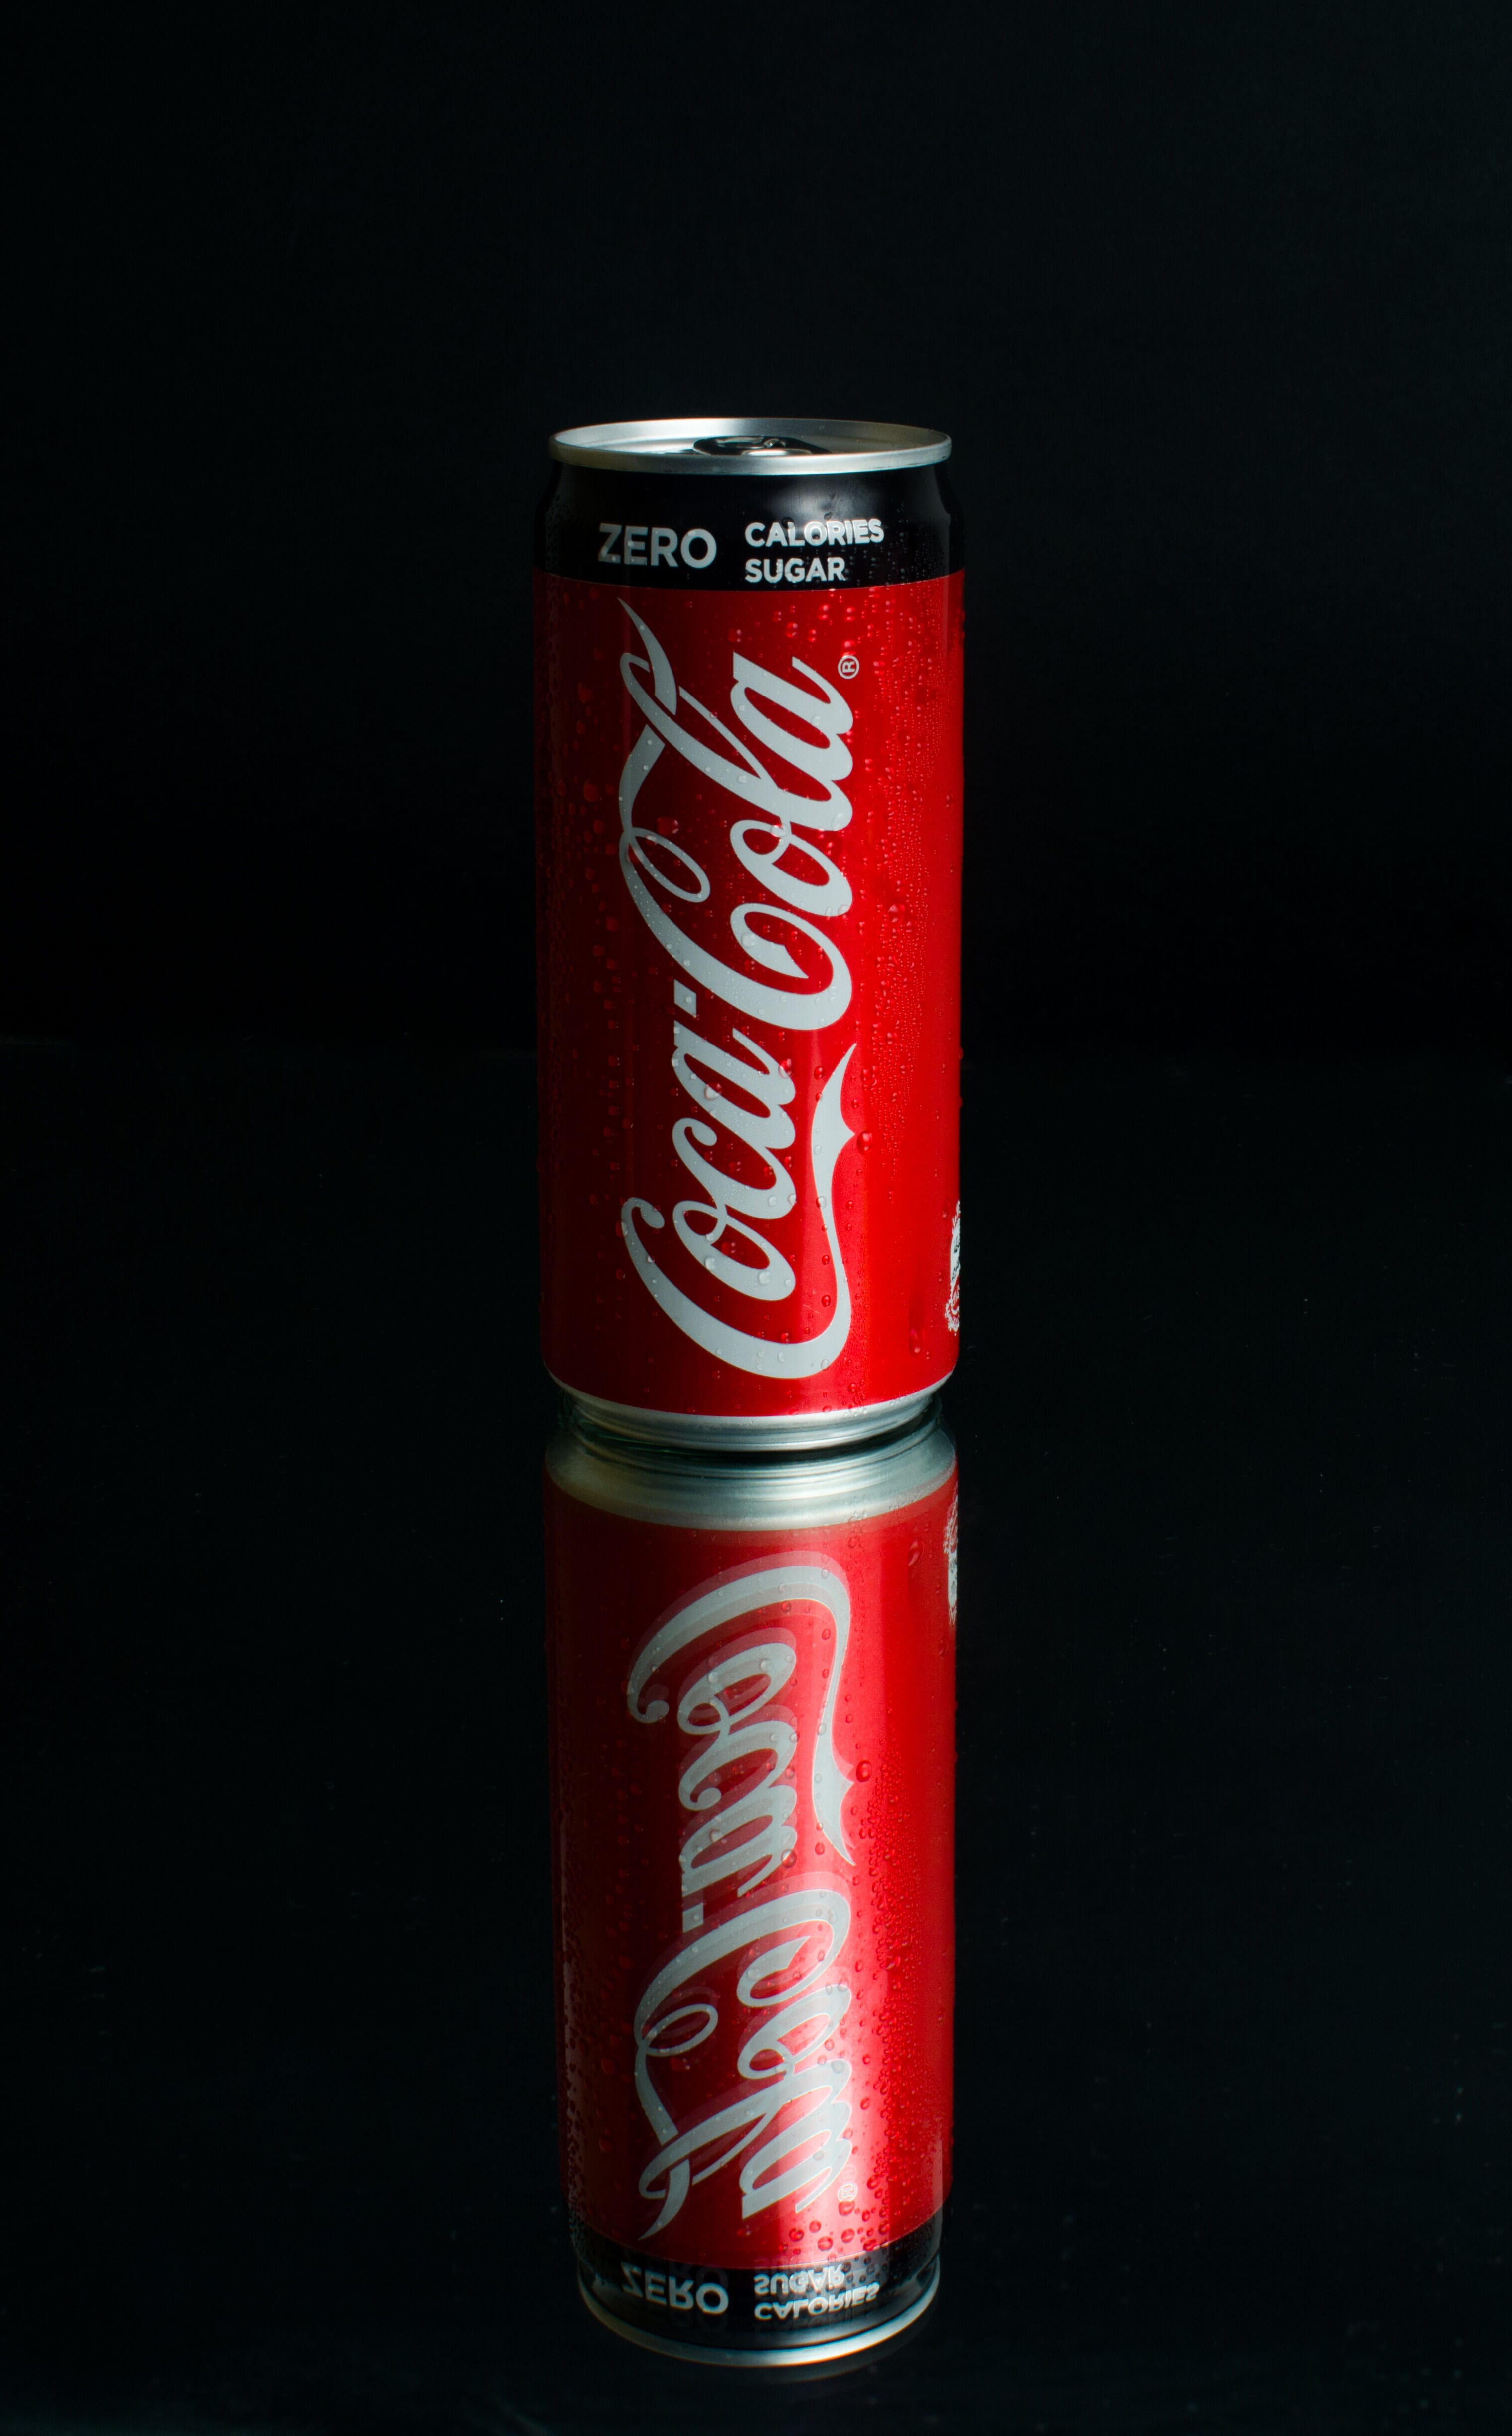
Reflections can be a great tool to create a “wow” image! Place the product on a reflective surface, such as a mirror, plastic sheet, or shiny surface. In a studio, you can control the reflections of your studio lights, so the final result can be stark and focused.
14. Add Movement
Images are static and lack context – so adding some energy and movement to the shot can make it a lot more dynamic! If you’re photographing food products or something liquid-based, play with all the different movements you can achieve. From sprinkling sugar to splashing water! Just remember to keep that shutter speed fast to freeze the action.
15. Sliver of Light
Sometimes, the simplest images are the most effective (even if they’re not that simple to achieve!).
By creating a sliver of light, essentially a triangular spotlight, on your product, you can lead the eye directly to what it is you need the audience to focus on uniquely!
Look into stencils or light flags to block some of the studio lighting and create that triangle sliver.
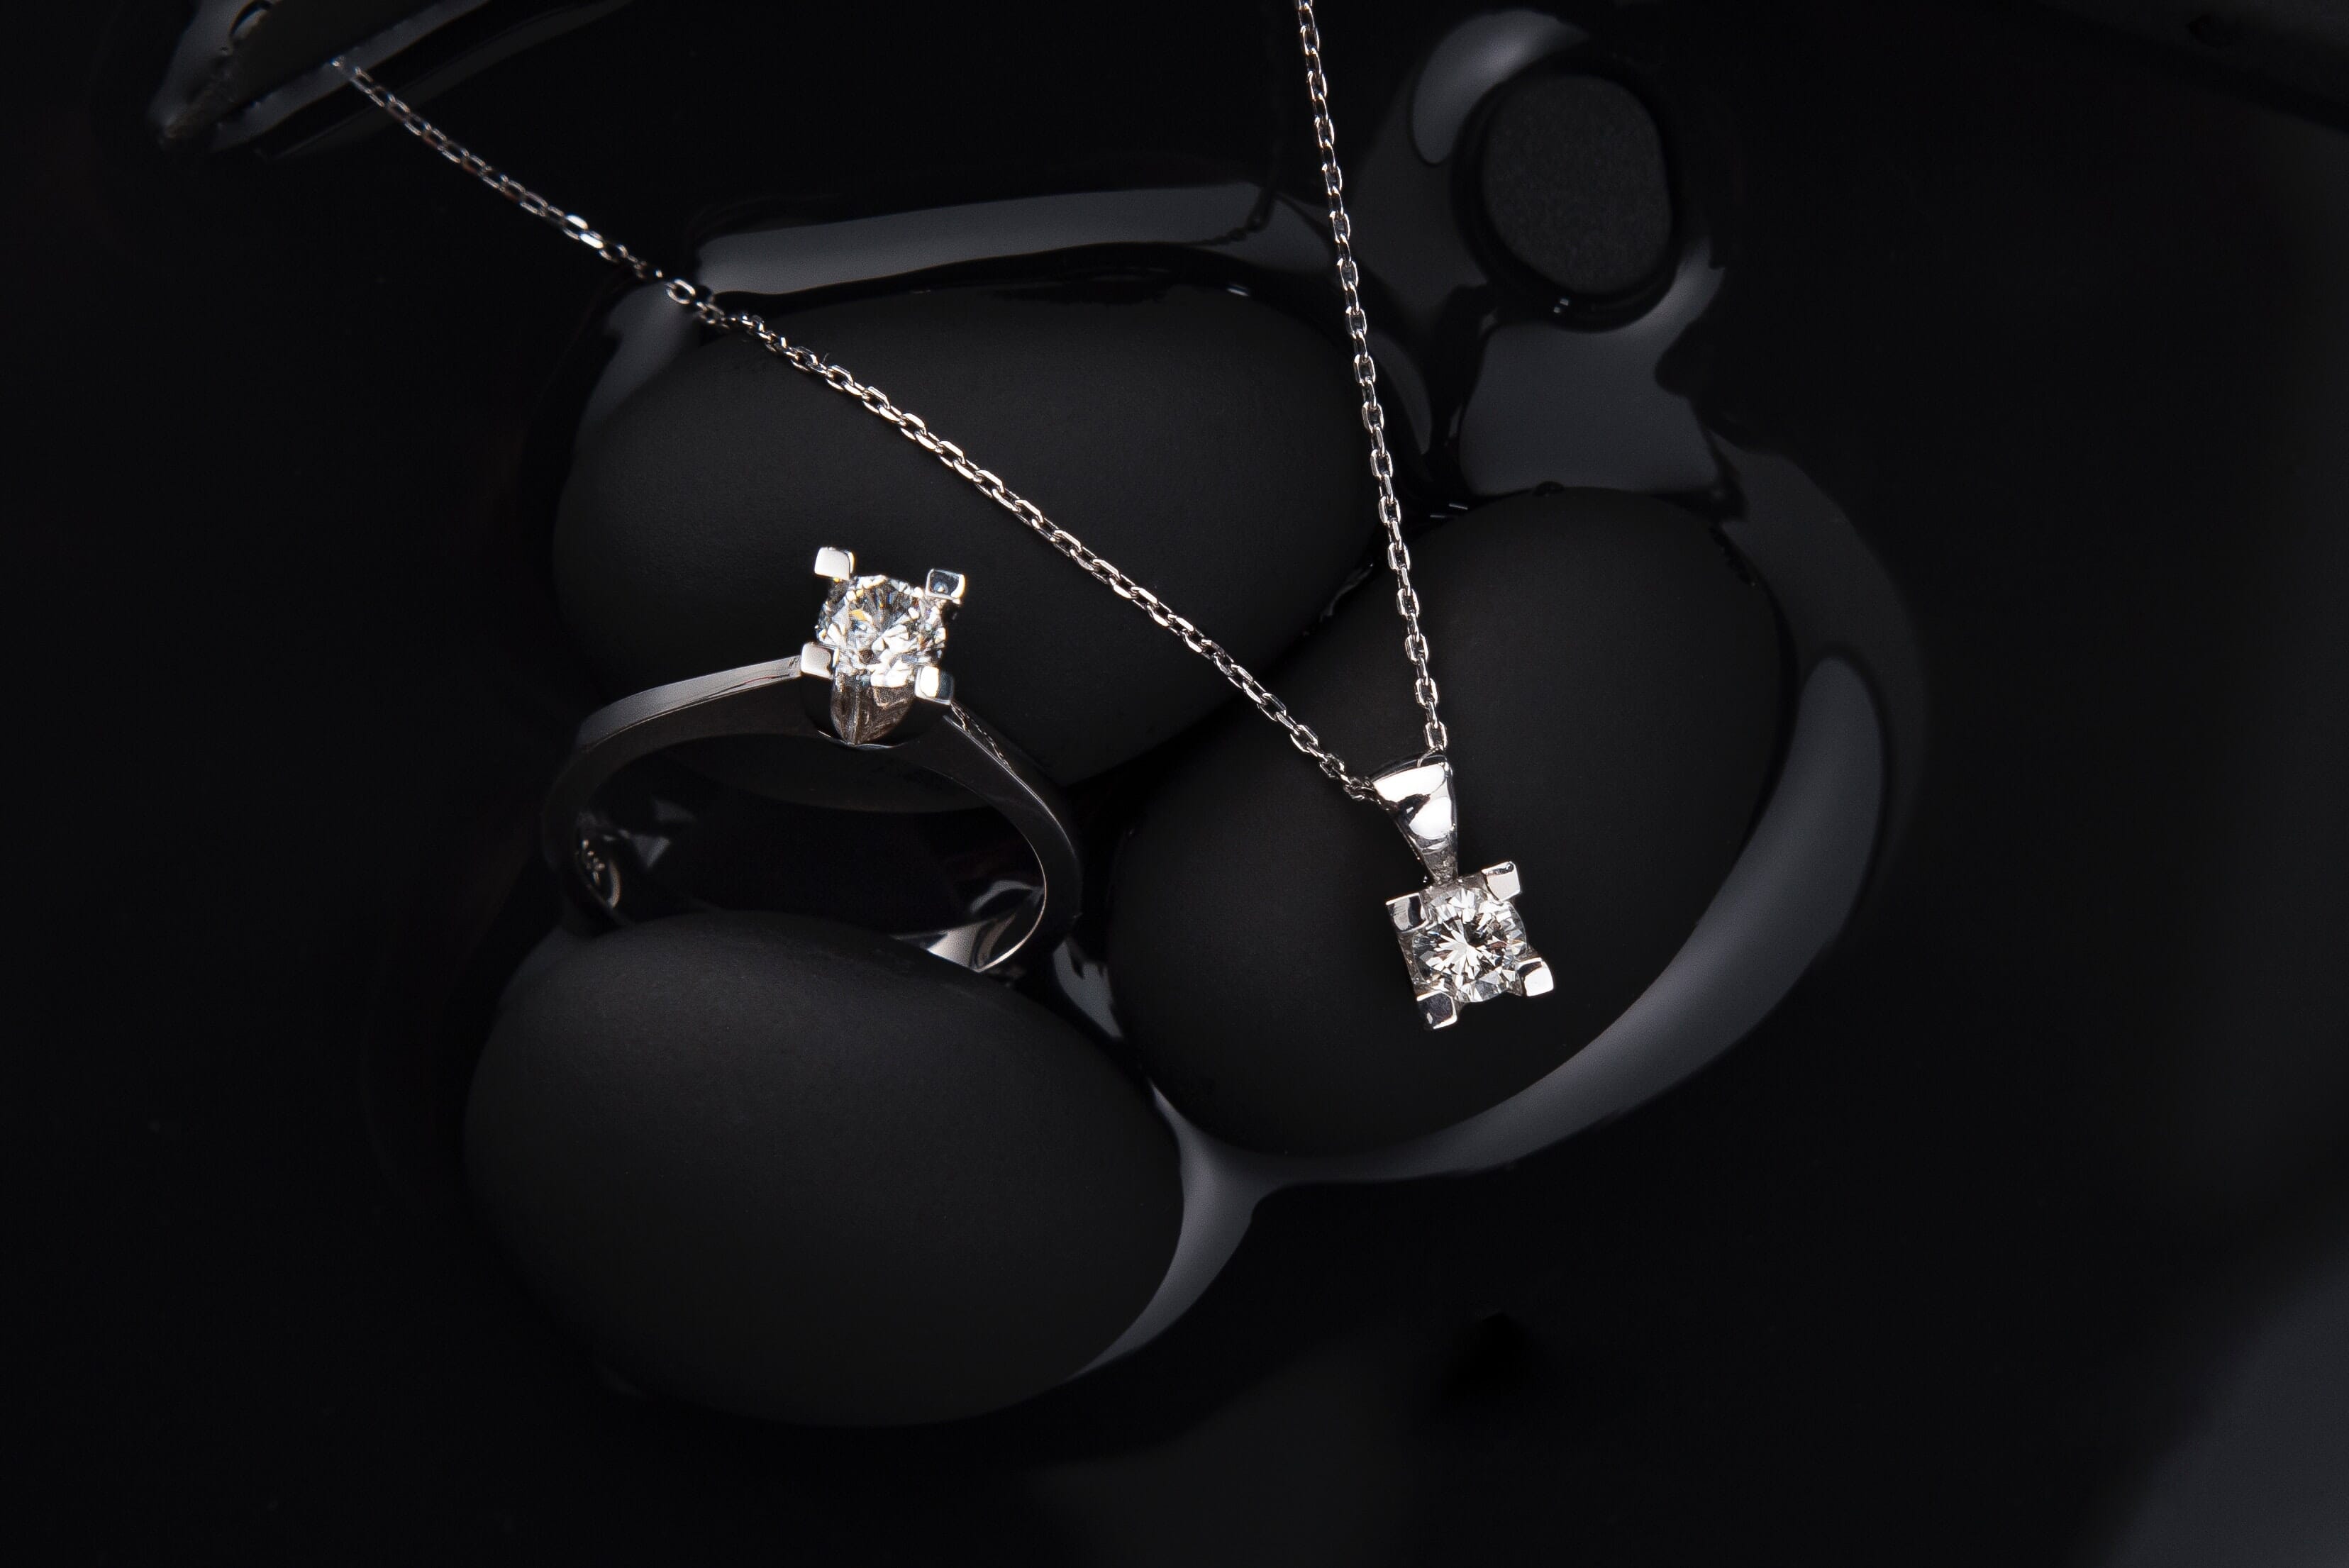
16. Use Bokeh Textures

Especially good when photographing jewelry, you can create various bokeh textures by using a vast aperture lens.
Take some glitter sheets, holiday lights, or anything else that sparkles and hangs it on the back of your studio.
Place the product close to yourself (and your lens), shoot it at apertures ranging from F/1.8 to F/1.2, and enjoy the dreamy results!
Related: Best Lenses for Jewelry Photography
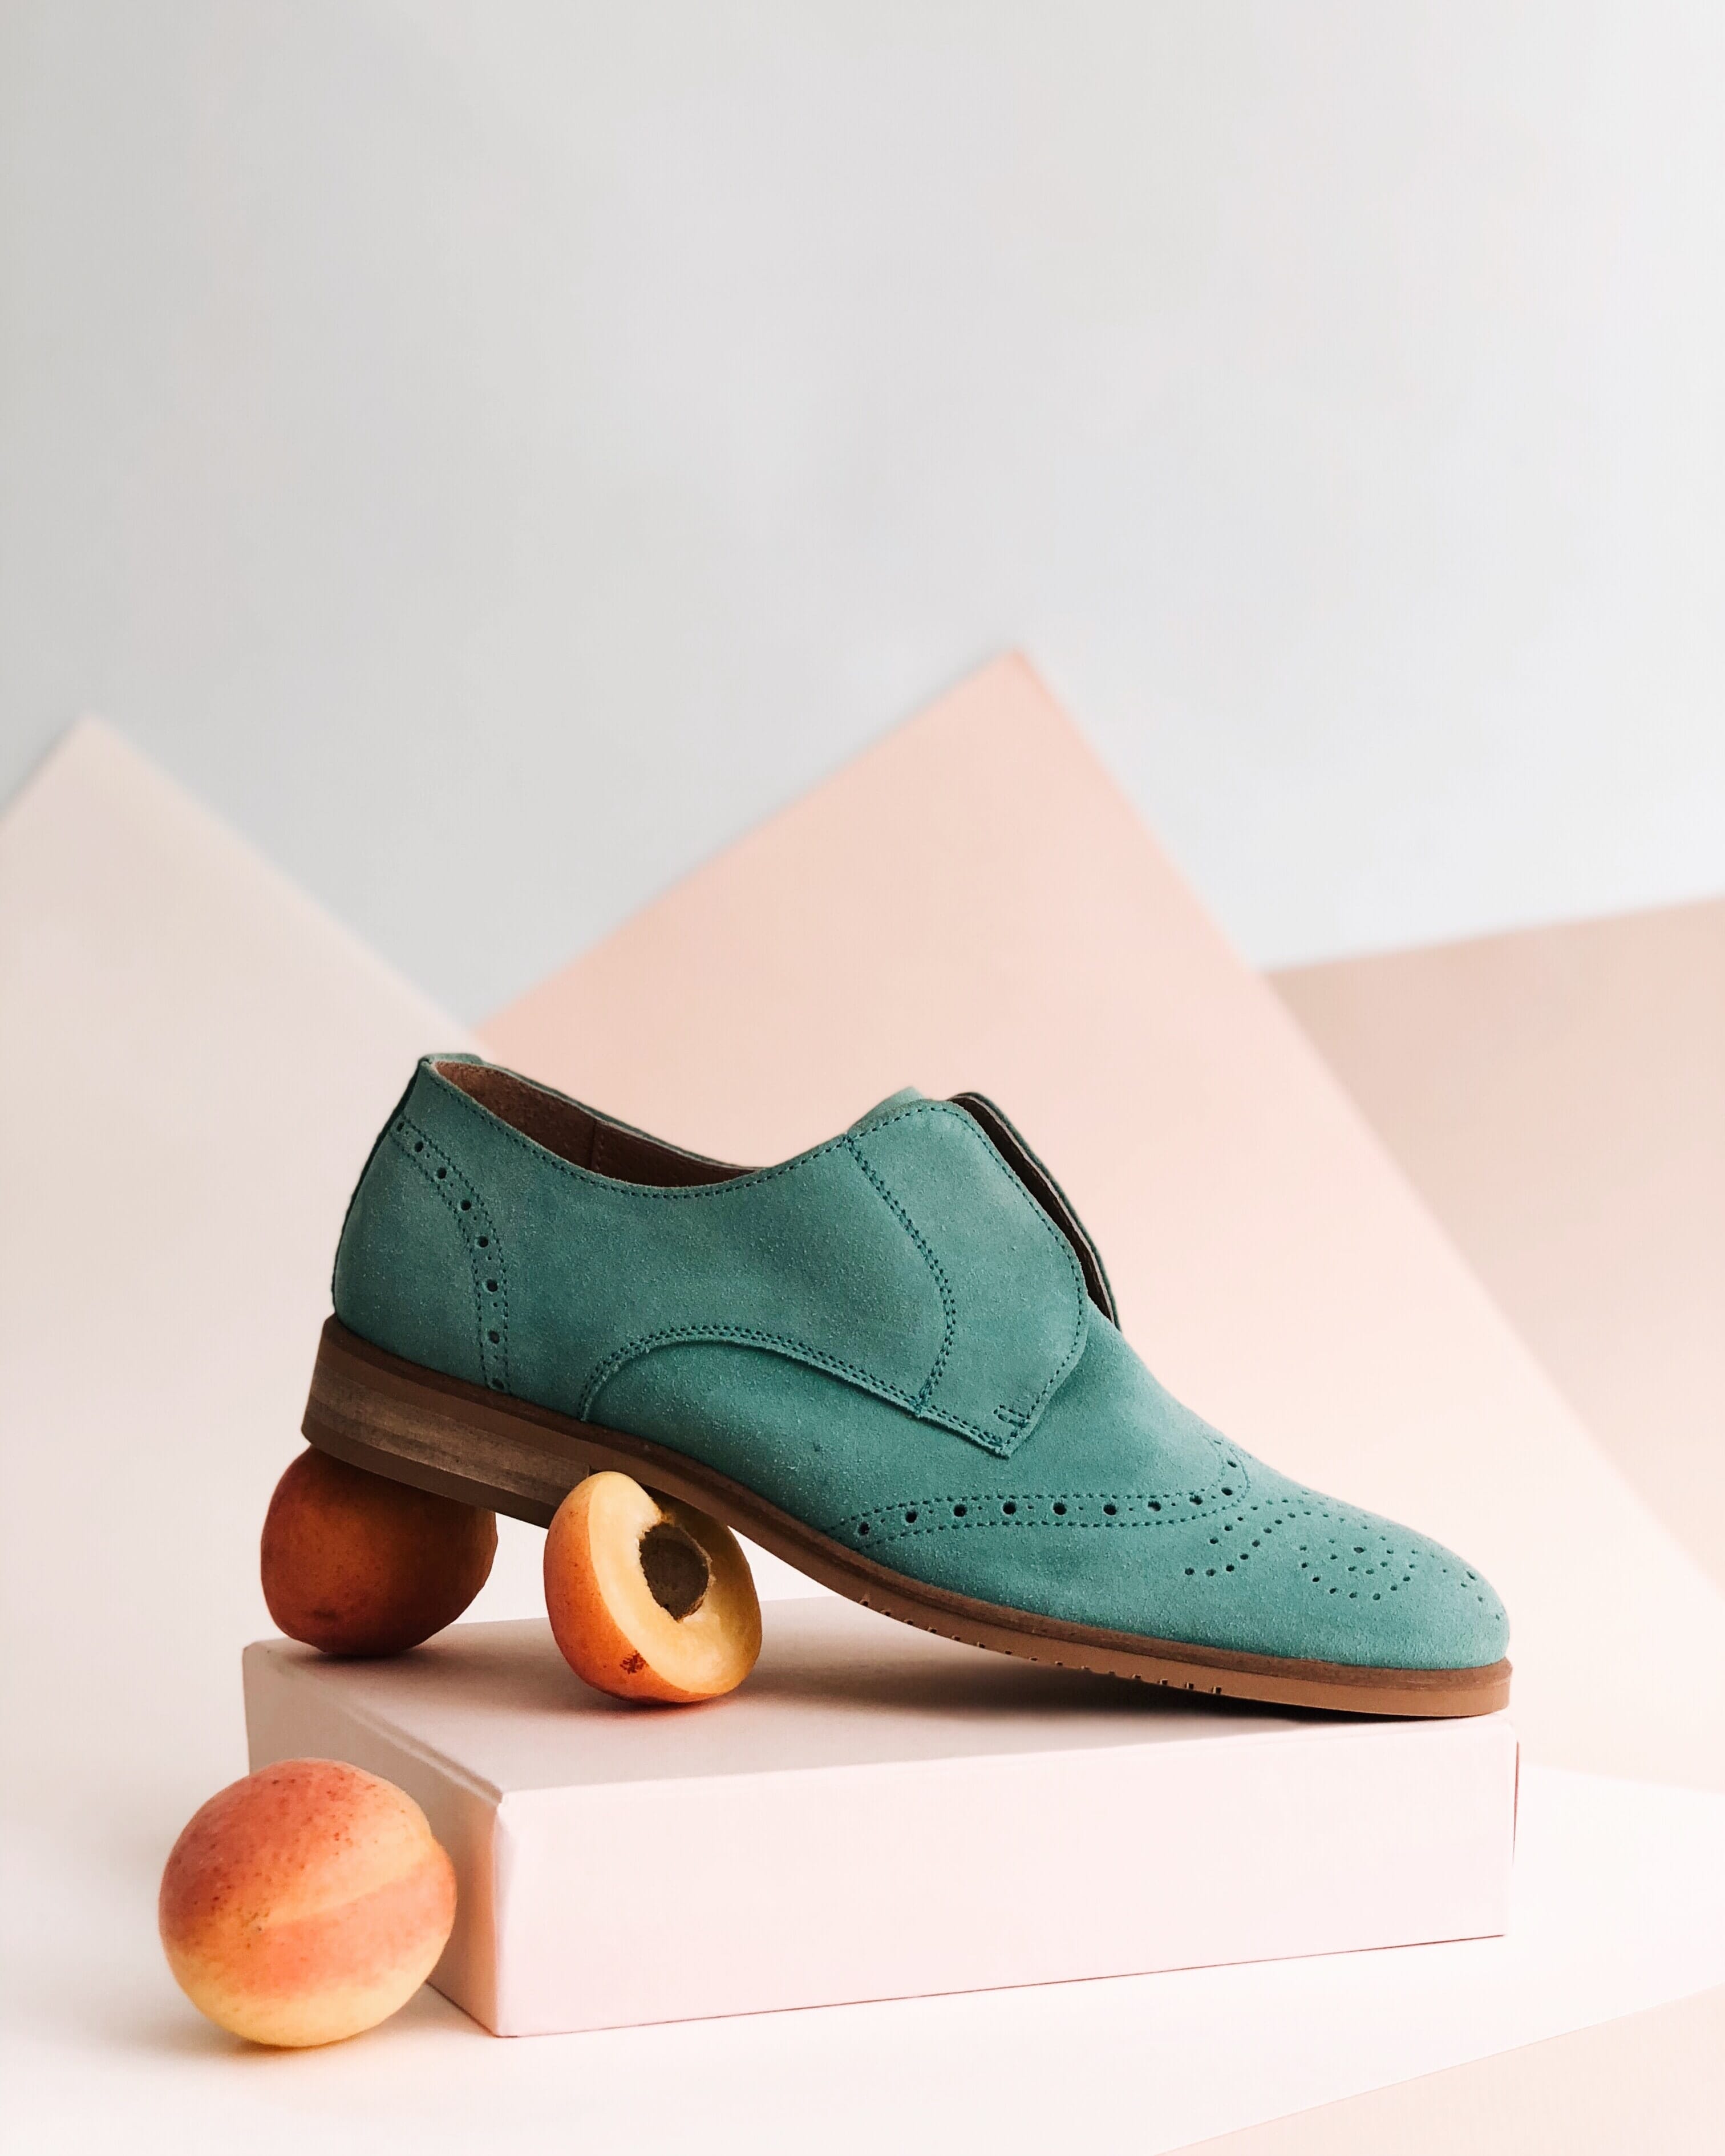
17. Play with Levels
Compositions work very well when playing with levels and stairs. This is especially grand when photographing more than one product in the shot, such as a product with different variations.
Use apple boxes, platforms, stands, and more to create mountains to place your products on!
18. Create a Story Set
Although we talked about telling a story in the section before this one, the studio opens up an even bigger world of possibility.
With the simple fact that you’re able to control every aspect of your studio, from the colors of the backdrops to the lighting itself, you have ample means to create an entire set exactly the way you want it. Play with props and storytelling to your heart’s content!
19. Use a Quirky Model
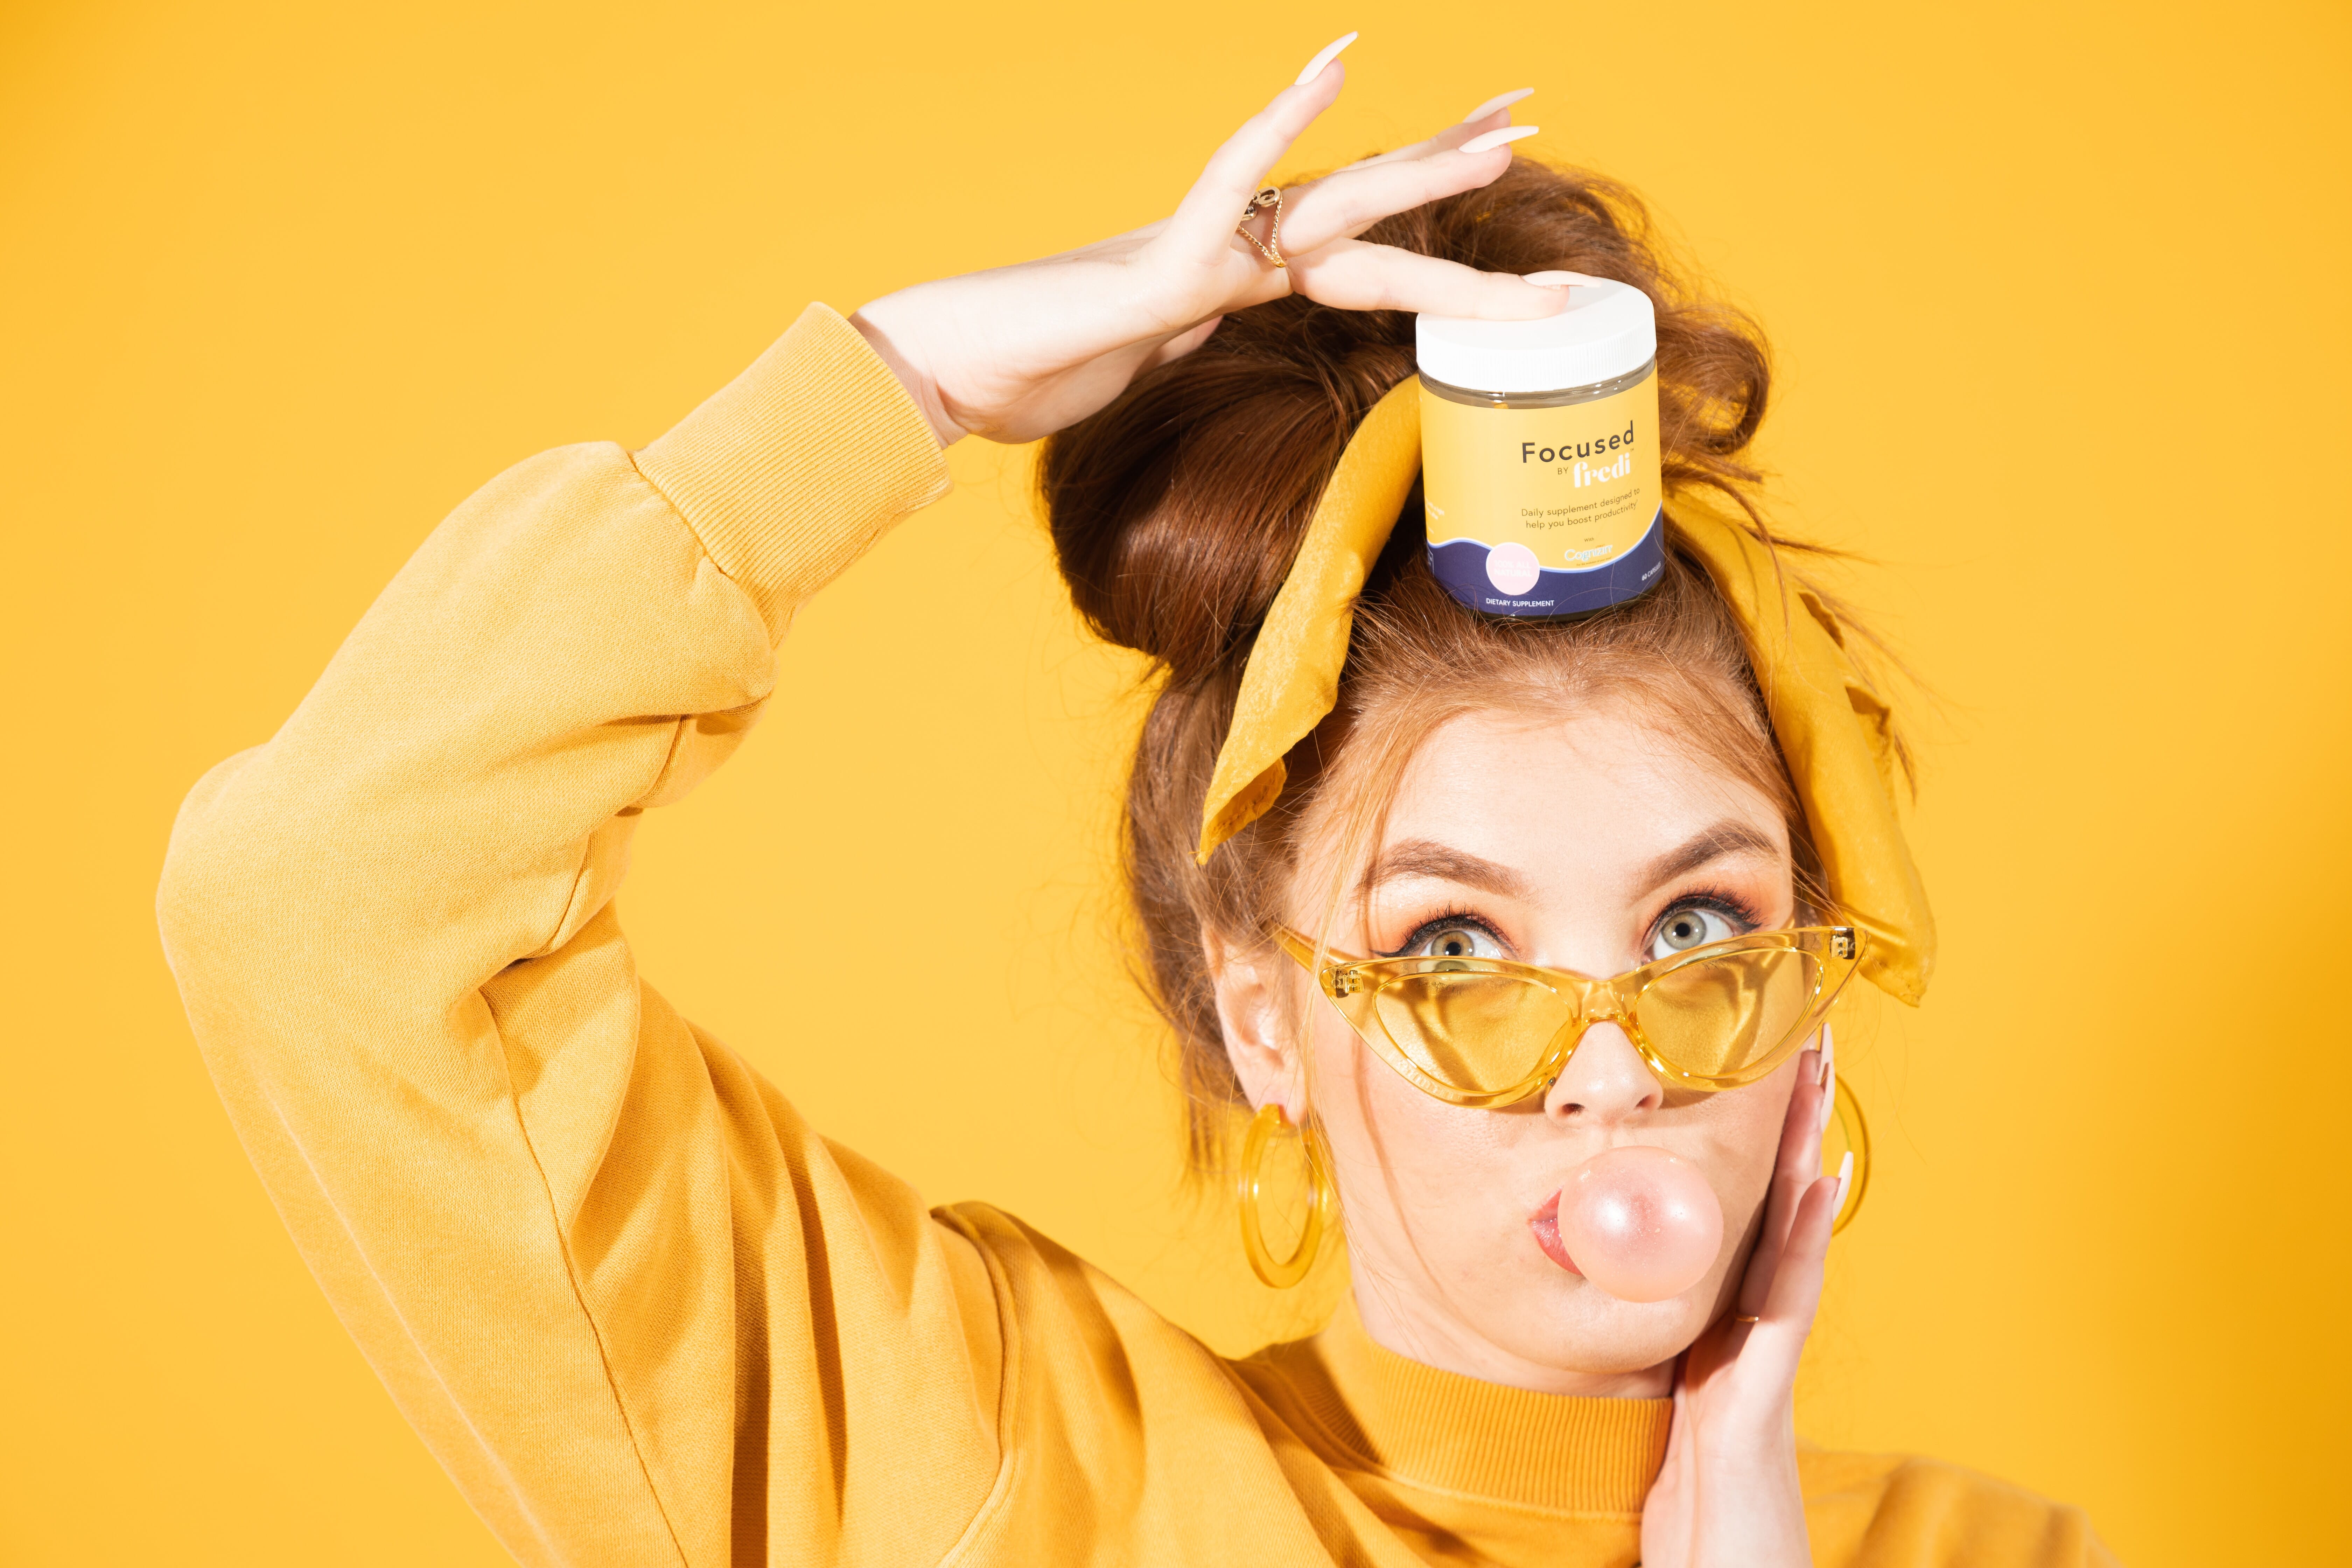
If you’re photographing a product that demands fun, spontaneity, and lively energy – hire a quirky model and start playing! Don’t be afraid to break traditional rules and put that bottle on your head or the hat on the models’ knee. If it feels like it came out of Alice in Wonderland, you’ve done right.
20. Rim Lights
Plenty of product photographers focus on just lighting the product straight on and forget about the sides.
Use rim lighting to illuminate those edges, helping push the product off the background and creating a very flattering outline! This is an attention-grabbing lighting that works for both living subjects (such as people and pets) and product photography.
Set Up Ideas
The way that you choose to set up your product photography can make a big difference, whether it’s in a studio or on-location.
21. Use a Reflective Surface
Reflections are cool – and they add a really brilliant compositional element to photography. Consider buying a piece of plexiglass, actual glass, or a mirror and put your product on top of it (assuming your item isn’t heavy enough to break it)! Shoot from the product’s vantage point and you’ve got a unique image that demands attention.
22. Let It Rain

Water is an amazing asset to product photography, primarily because of its gorgeous ebb and flow. By raising that shutter speed and setting the camera to burst mode, you can capture the water splishing and splashing through your content, making for some very interesting images.
23. Ultra Contrast
If you can, set up your product images to have significant contrast – helping push the subject out to the forefront. Sure you can do this with a color backdrop or something of the sort, but using an actual object makes it a bit more interesting.
24. Use a Window
The natural light from a window tends to be very flattering and can help display the product’s authentic colors. Pair this with, say, a tree branch or some sort of blind and you can use the organic shadows to add even more visual interest.
25. Don’t Underestimate Your Counters and Floors

Want to do a flat lay or something of the sort but don’t have actual flat lay boards? Don’t overlook your countertops and floors as they could be the perfect fit! Granite is an especially great surface to use thanks to its beautiful pattern. Tile and wood floors are also very popular choices.
Lighting Ideas
I often say that good lighting is what separates the professional photographer from the amatuer, and I stand by that statement! Lighting is even more fundamental in images of inanimate objects, like products.
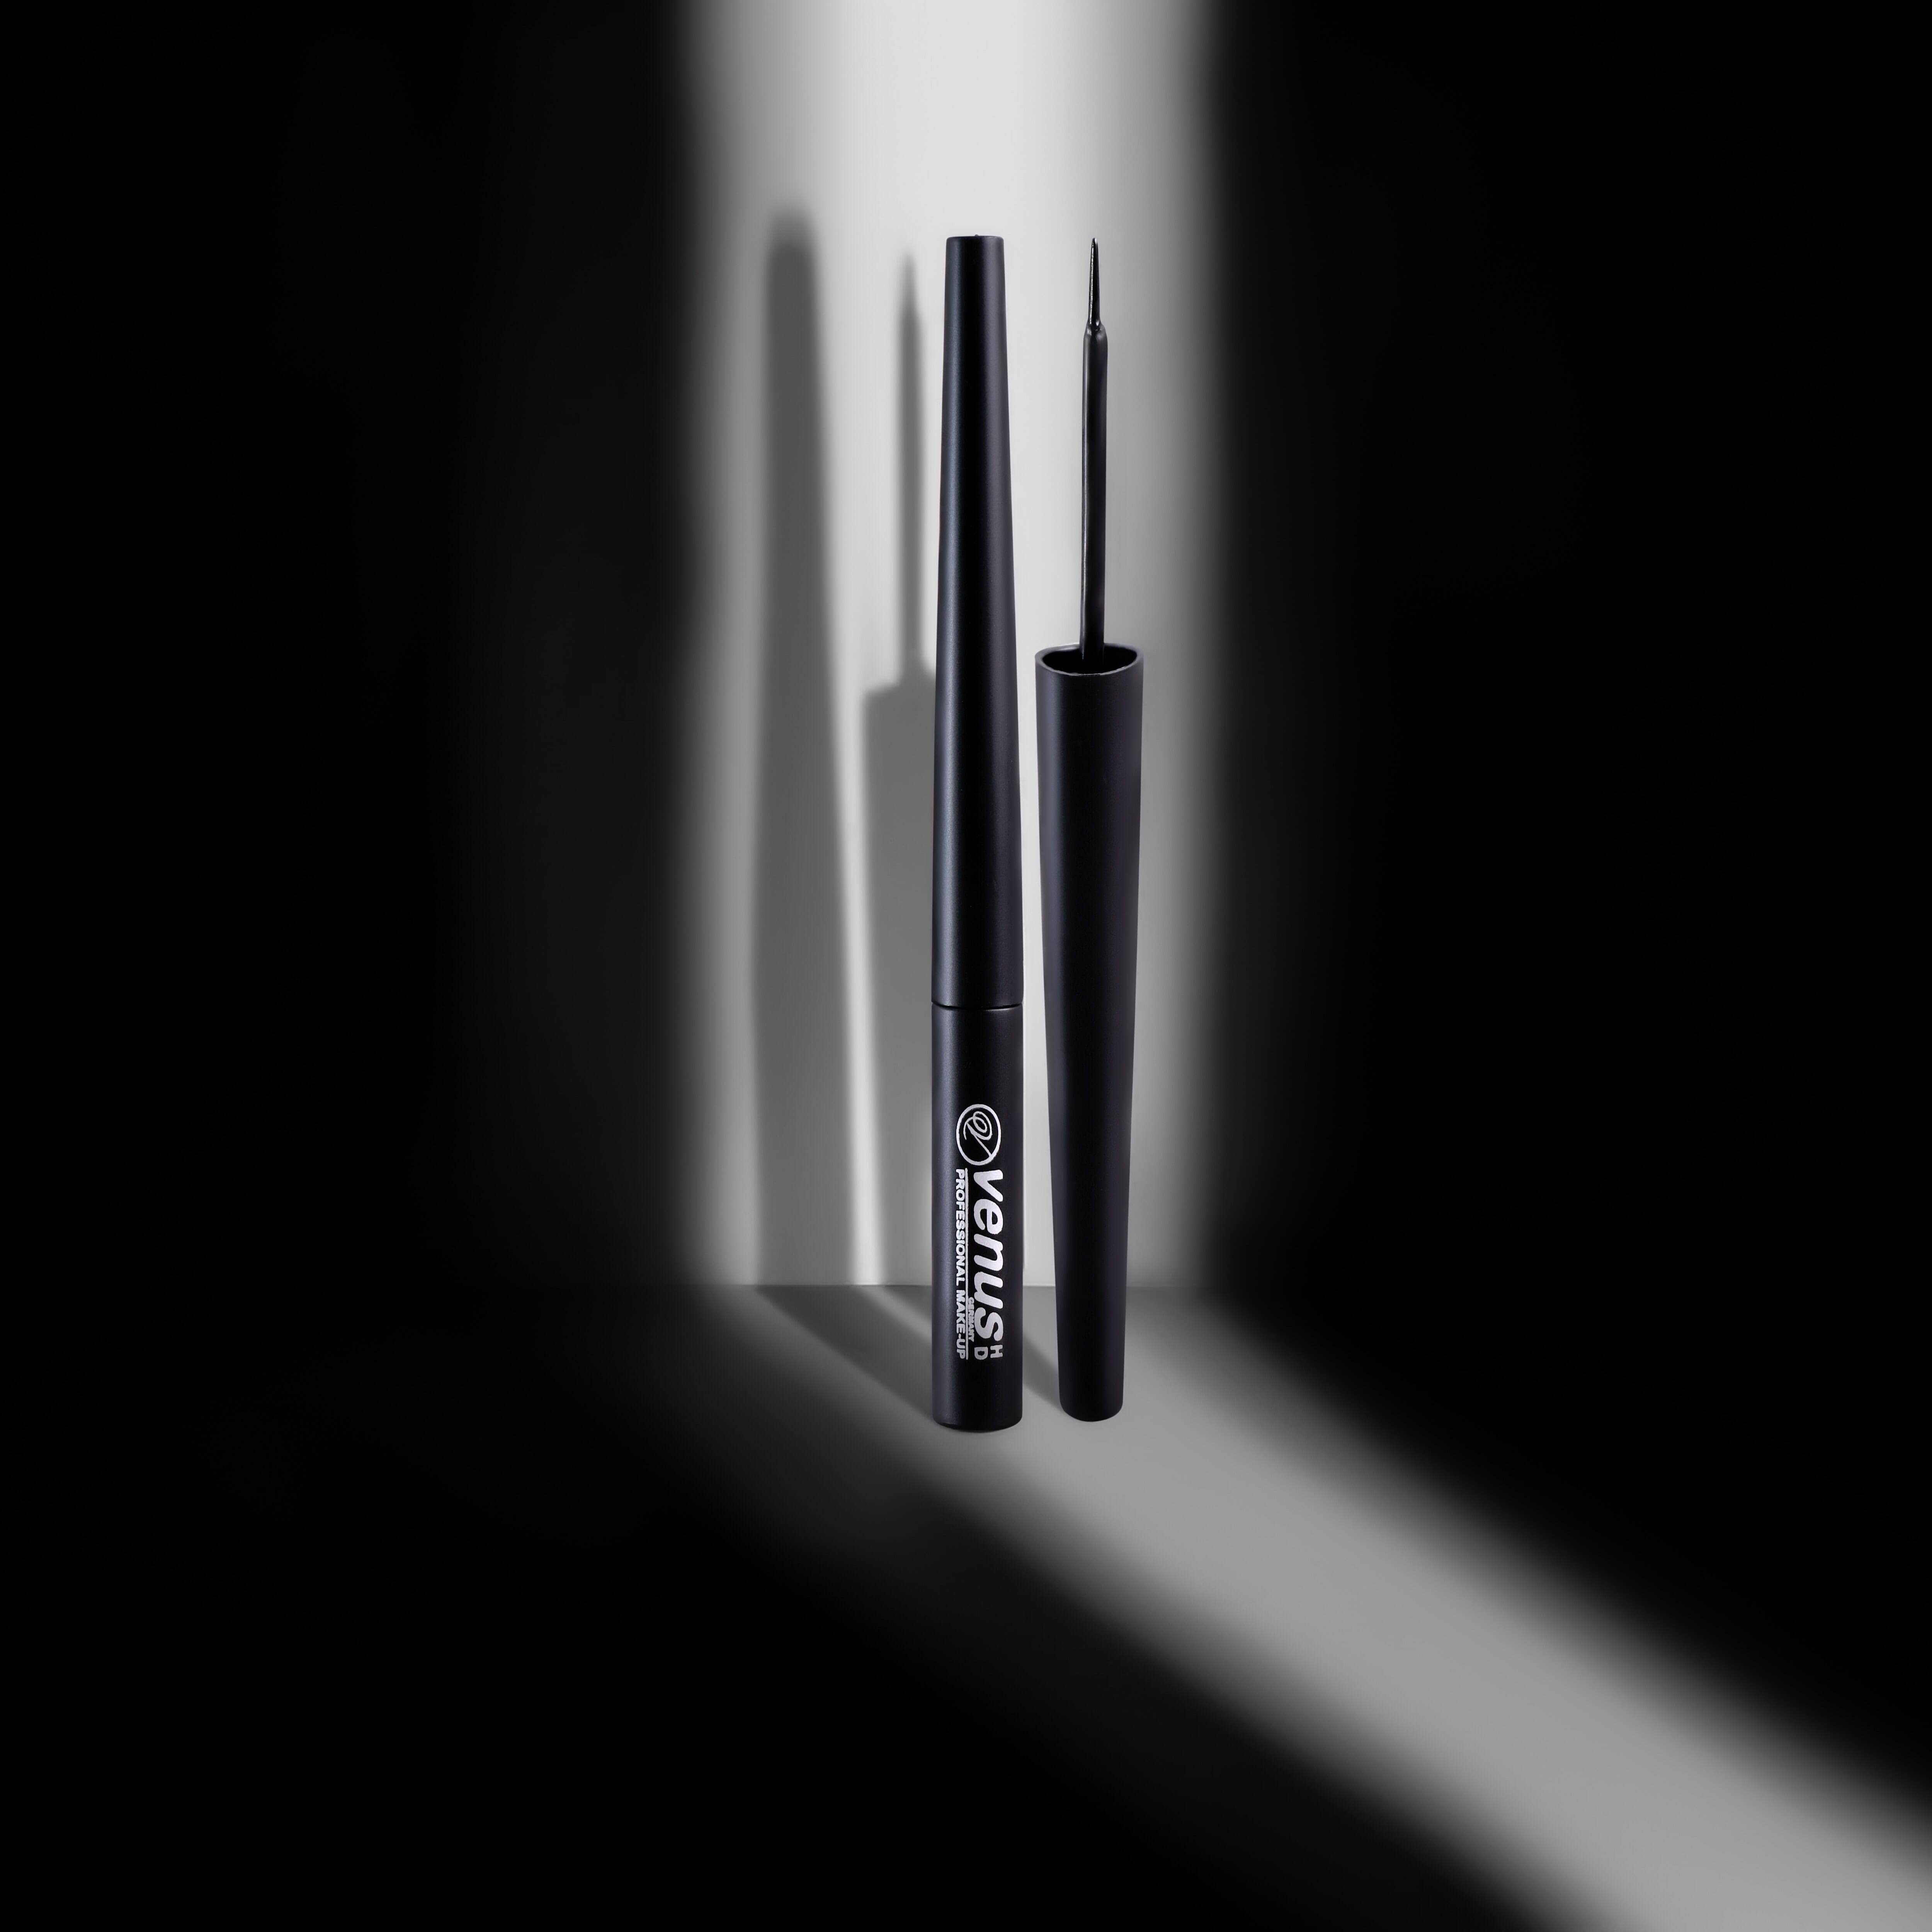
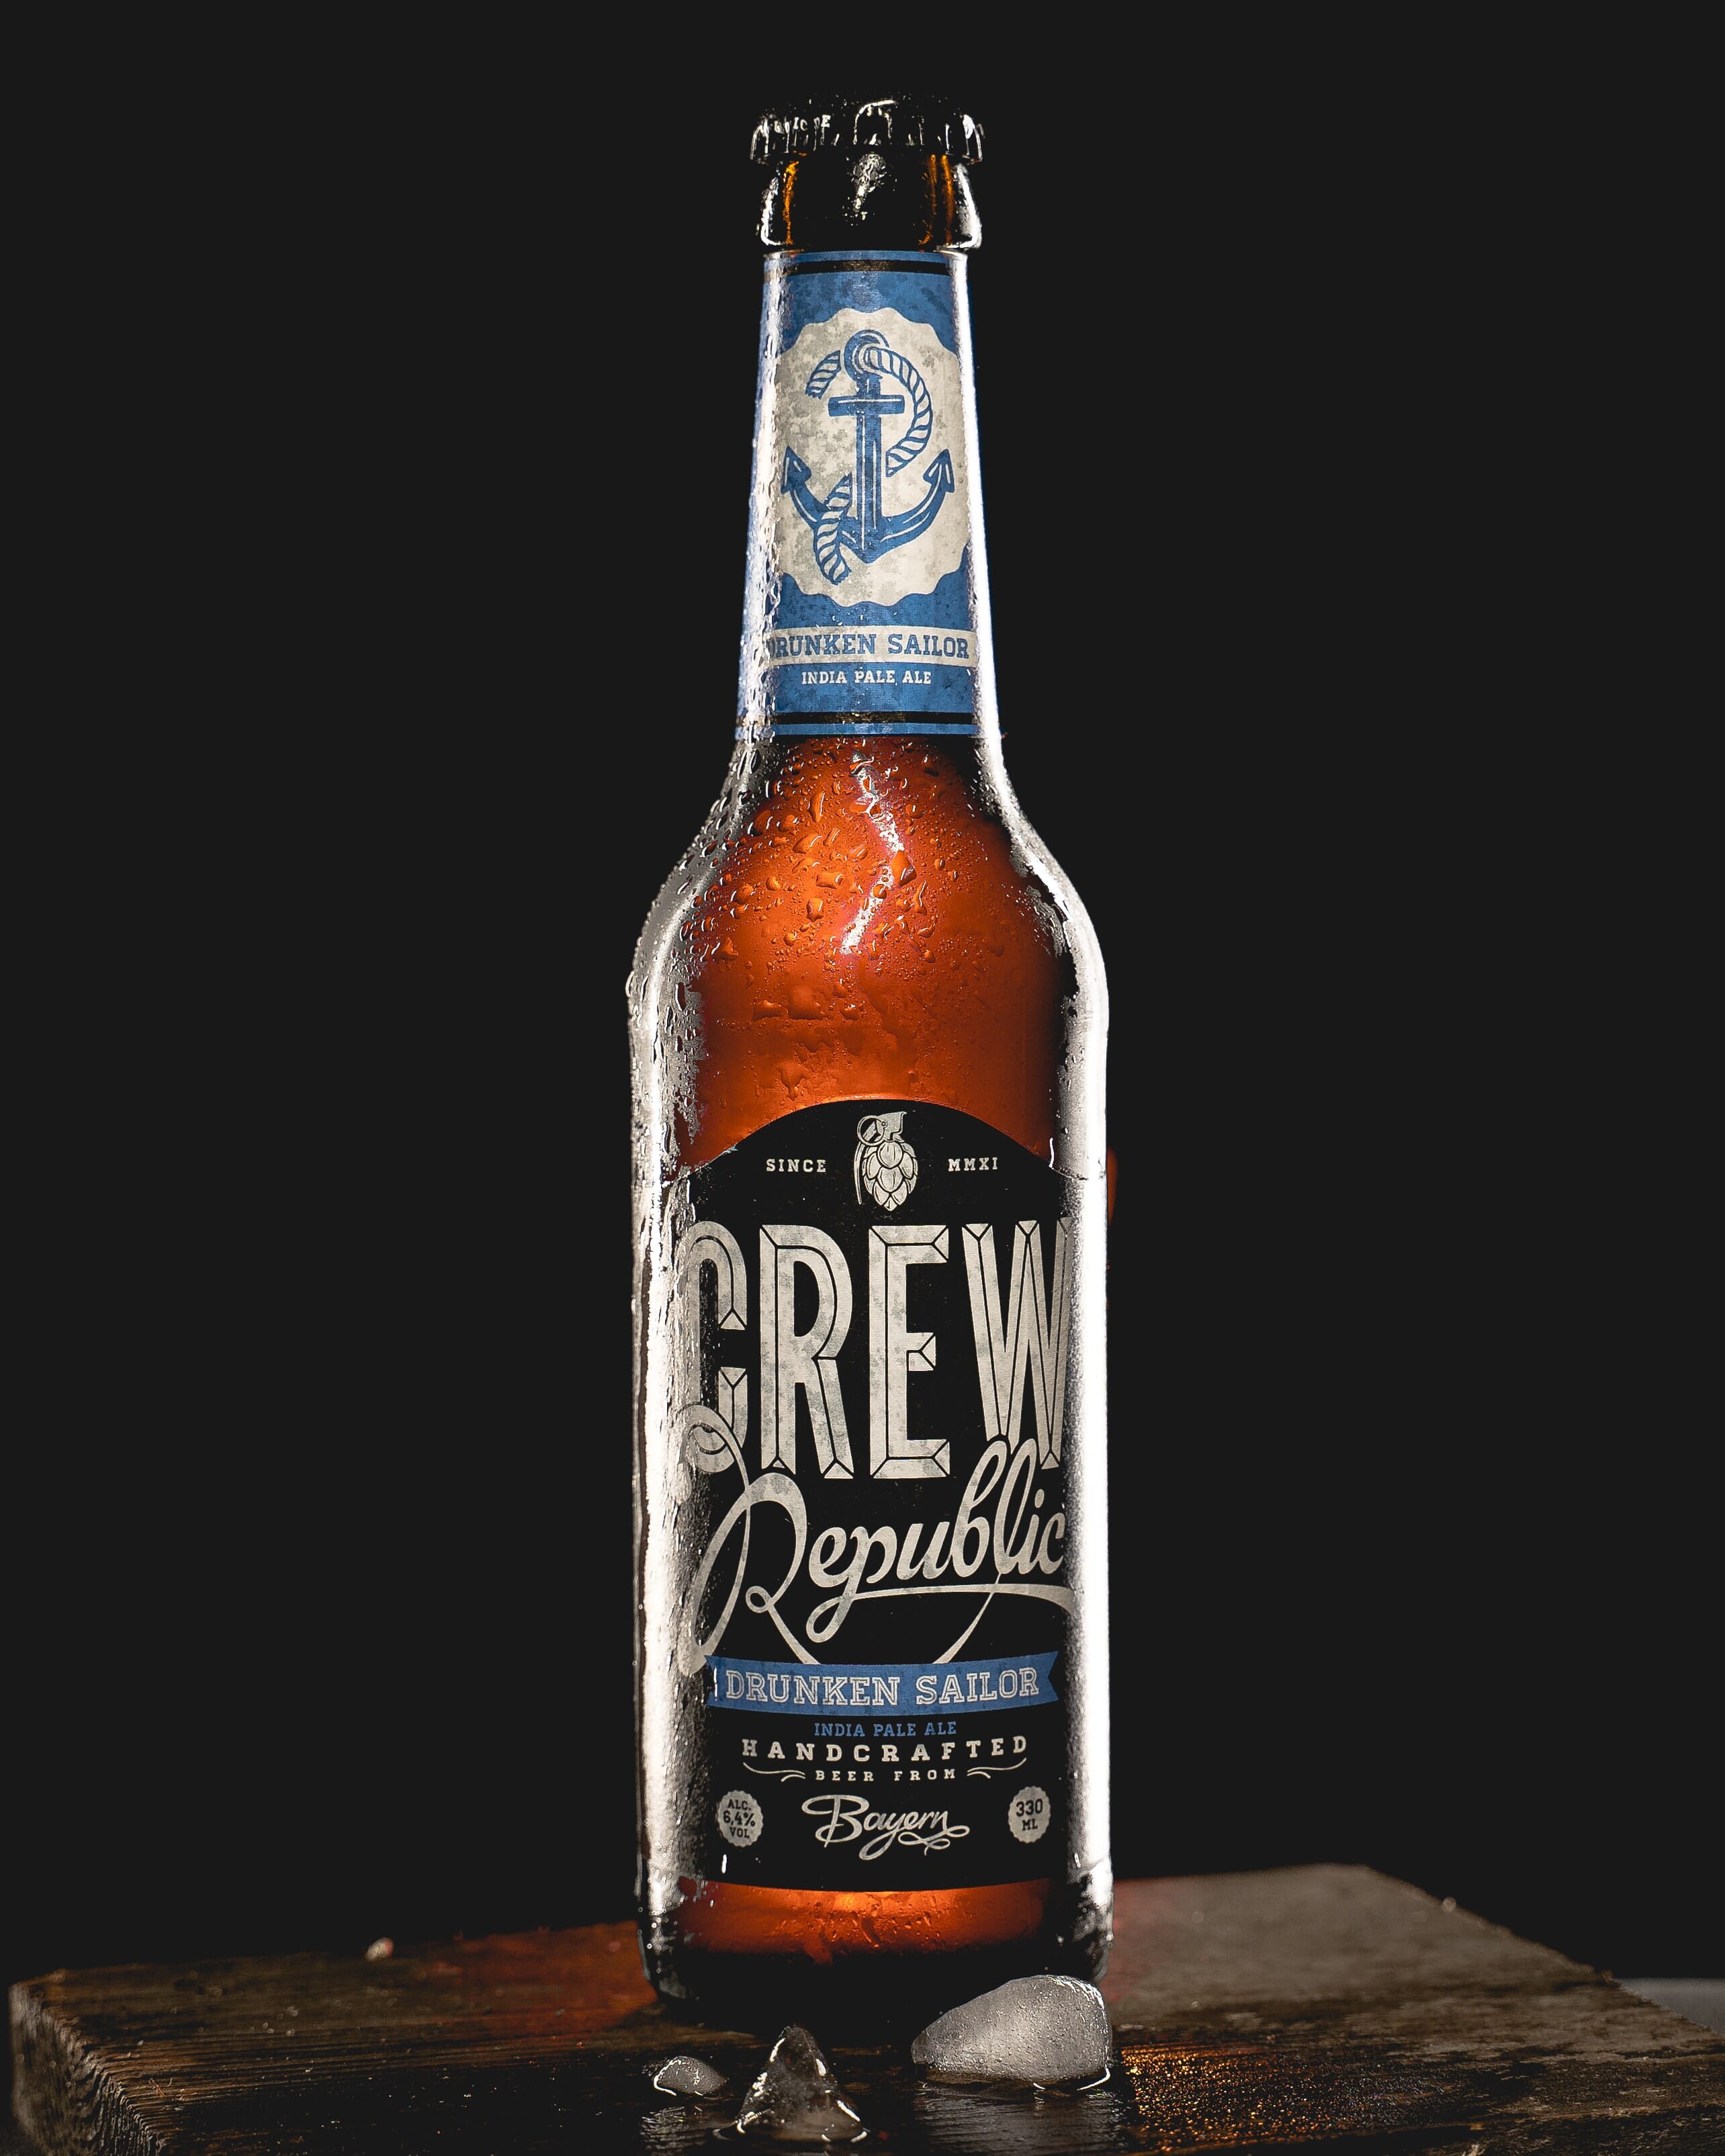
26. Be Bold, Be Dramatic
The drama is a brilliant way to sell products that need a bit of edge to them, such as wine! The best way to play with drama in lighting is to utilize a darker background and add little highlights here and there to your product.
This image was likely achieved with some form of the triangle arrangement. My best guess is that there was an overhead light pointed down at about a 45-degree angle to create the reflection at the top of the bottle, then two lights were placed on either side of the bottle diagonally angled towards it to create the rim light. If anything, that’s how I would achieve this look!
27. Don’t Be Wary of Colored Light
You don’t always have to use white light, adding a little bit of color can be pretty great for product photography. Just don’t get too carried away with it and begin altering the actual color of the product.
28. Mystery Can Be Good
Mystery keeps people intrigued, and adding a bit of this element to your shot can make quite the difference. You can achieve the idea of mystery by being very strategic on your lighting, ensuring only parts of your product are lit and the rest are up to the imagination.
29. Use the Shadows
By default, we tend to want to eliminate all shadows in product photography (as that is the e-commerce standard). But what about embracing them instead? Shadows can make for beautiful compositions and really show a product’s shape.
30. Golden Hour Lighting

The golden hour is a beloved time for all sorts of photography, whether it’s capturing living subjects like people and pets or documenting tremendous landscapes. But did you know that the minutes before the sunrise or sunset can also be pretty grand for product photography? The golden light and dramatic skies really enhance whatever it is you’re capturing.
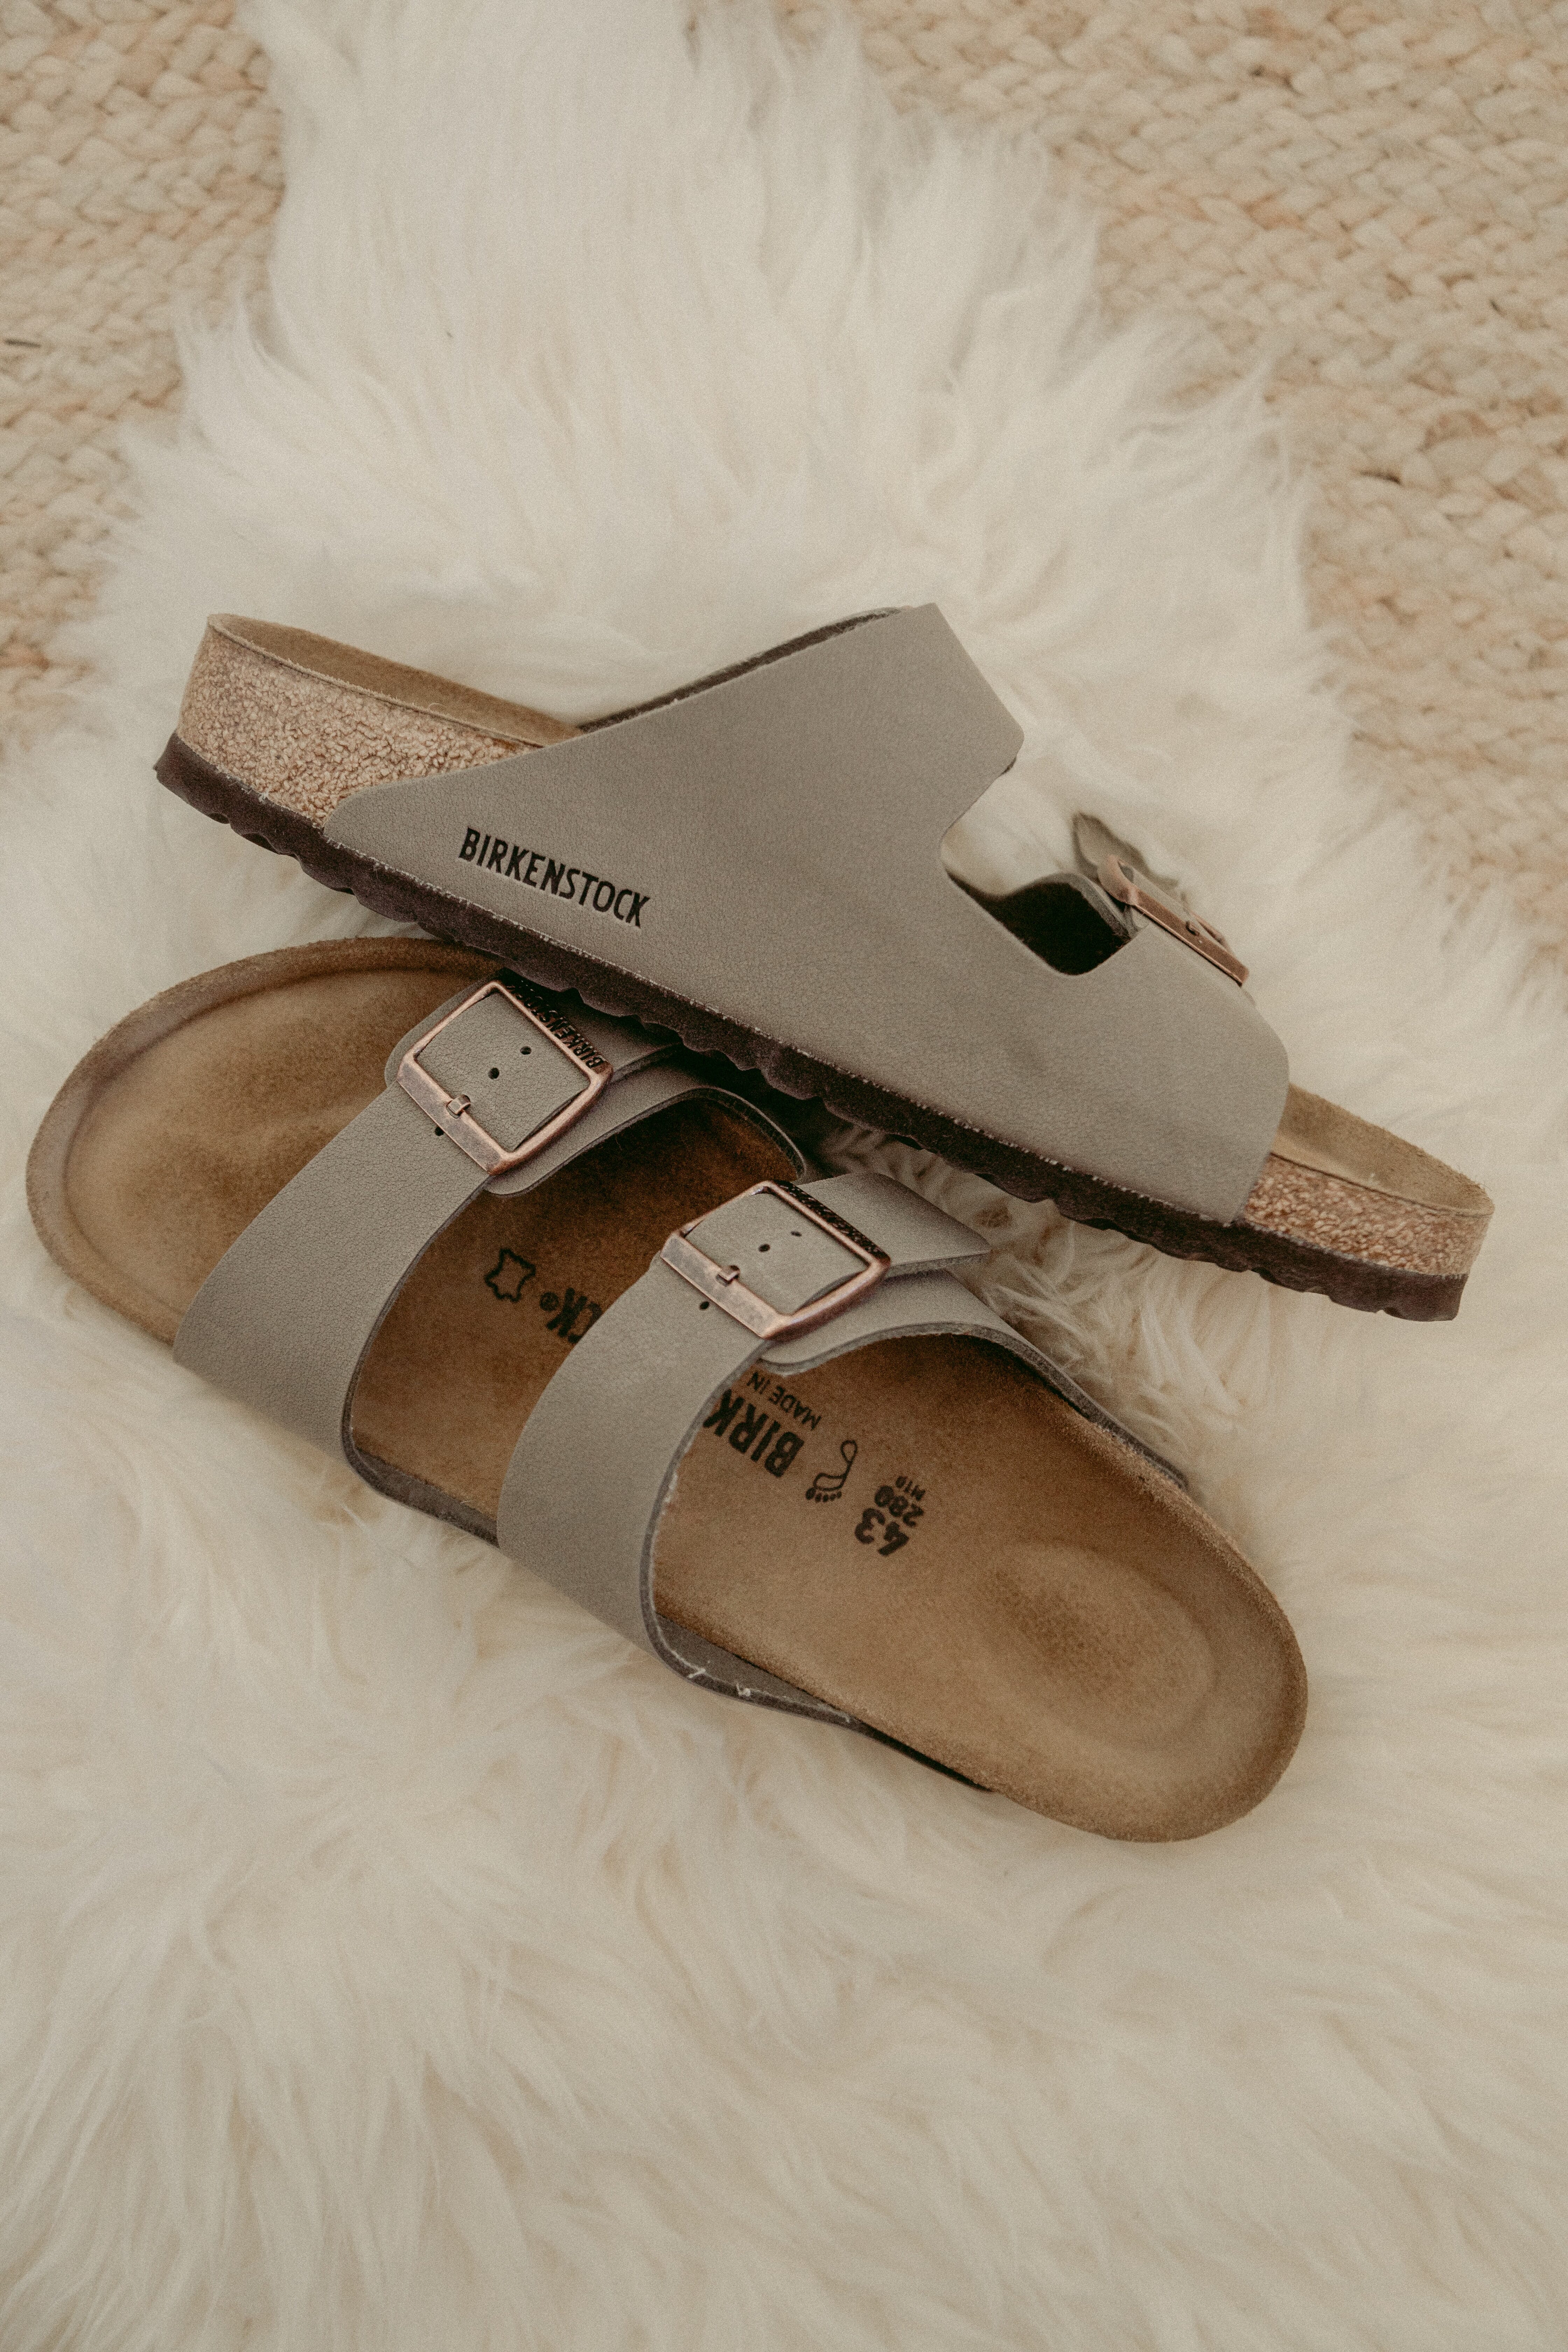
Flat Lay Ideas
Flat lays are when you place products down on something and shoot from above, effectively “laying” them down. This is a very popular way to showcase smaller items or sell a bit of a lifestyle idea.
31. Symmetry is Key

Us humans naturally gravitate towards symmetry, it makes for a pleasing composition. You can use our natural desire for organization to make effective flat lay images.
32. But Chaos Can Be Good Too
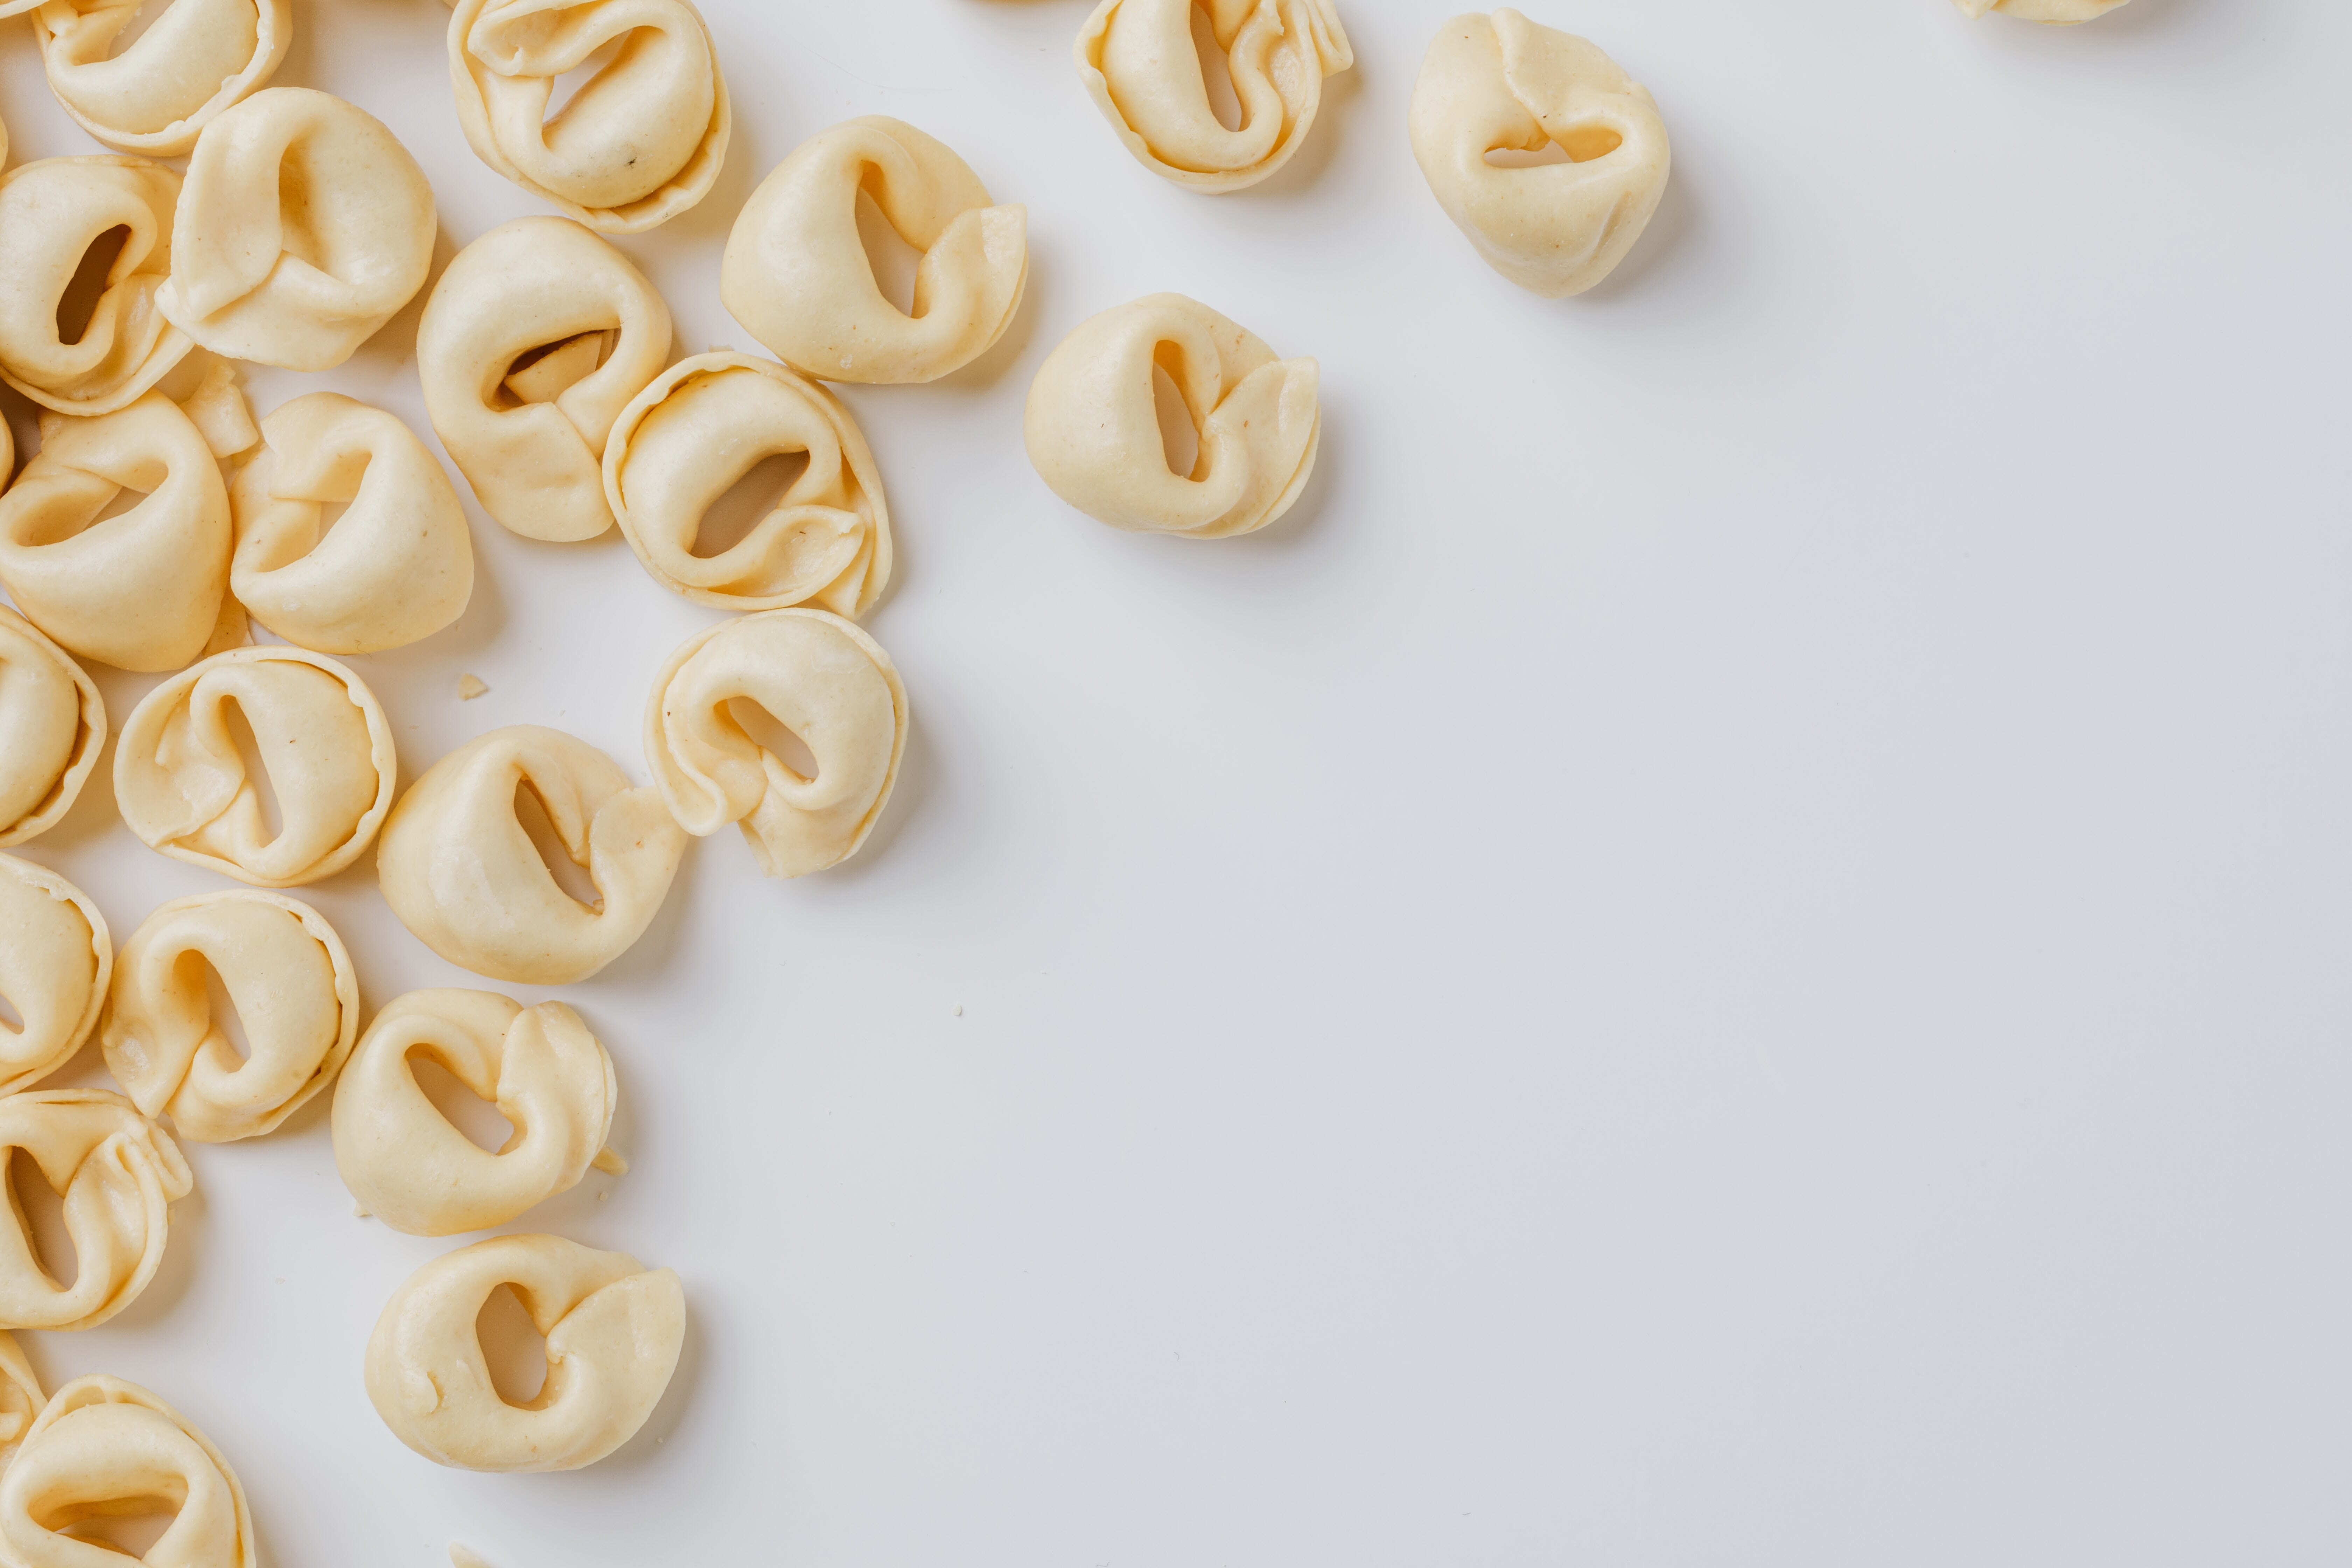
That being said, a bit of organized chaos is good too! Going back to an earlier point of images being static, we can add composition through movement as well – like this image of ravioli. Just remember to be tasteful about it, you don’t want the chaos to be so busy that the product gets lost in it!
Related Posts
33. Add Hands to Your Flat Lay
Not many think of flat lay images as having any sort of body part in them, and that’s a shame! Adding hands can really enhance your image and add a whole new compositional element. Just remember, again, not to crop at a joint (always between joints)!
34. Embrace the Season or Holiday
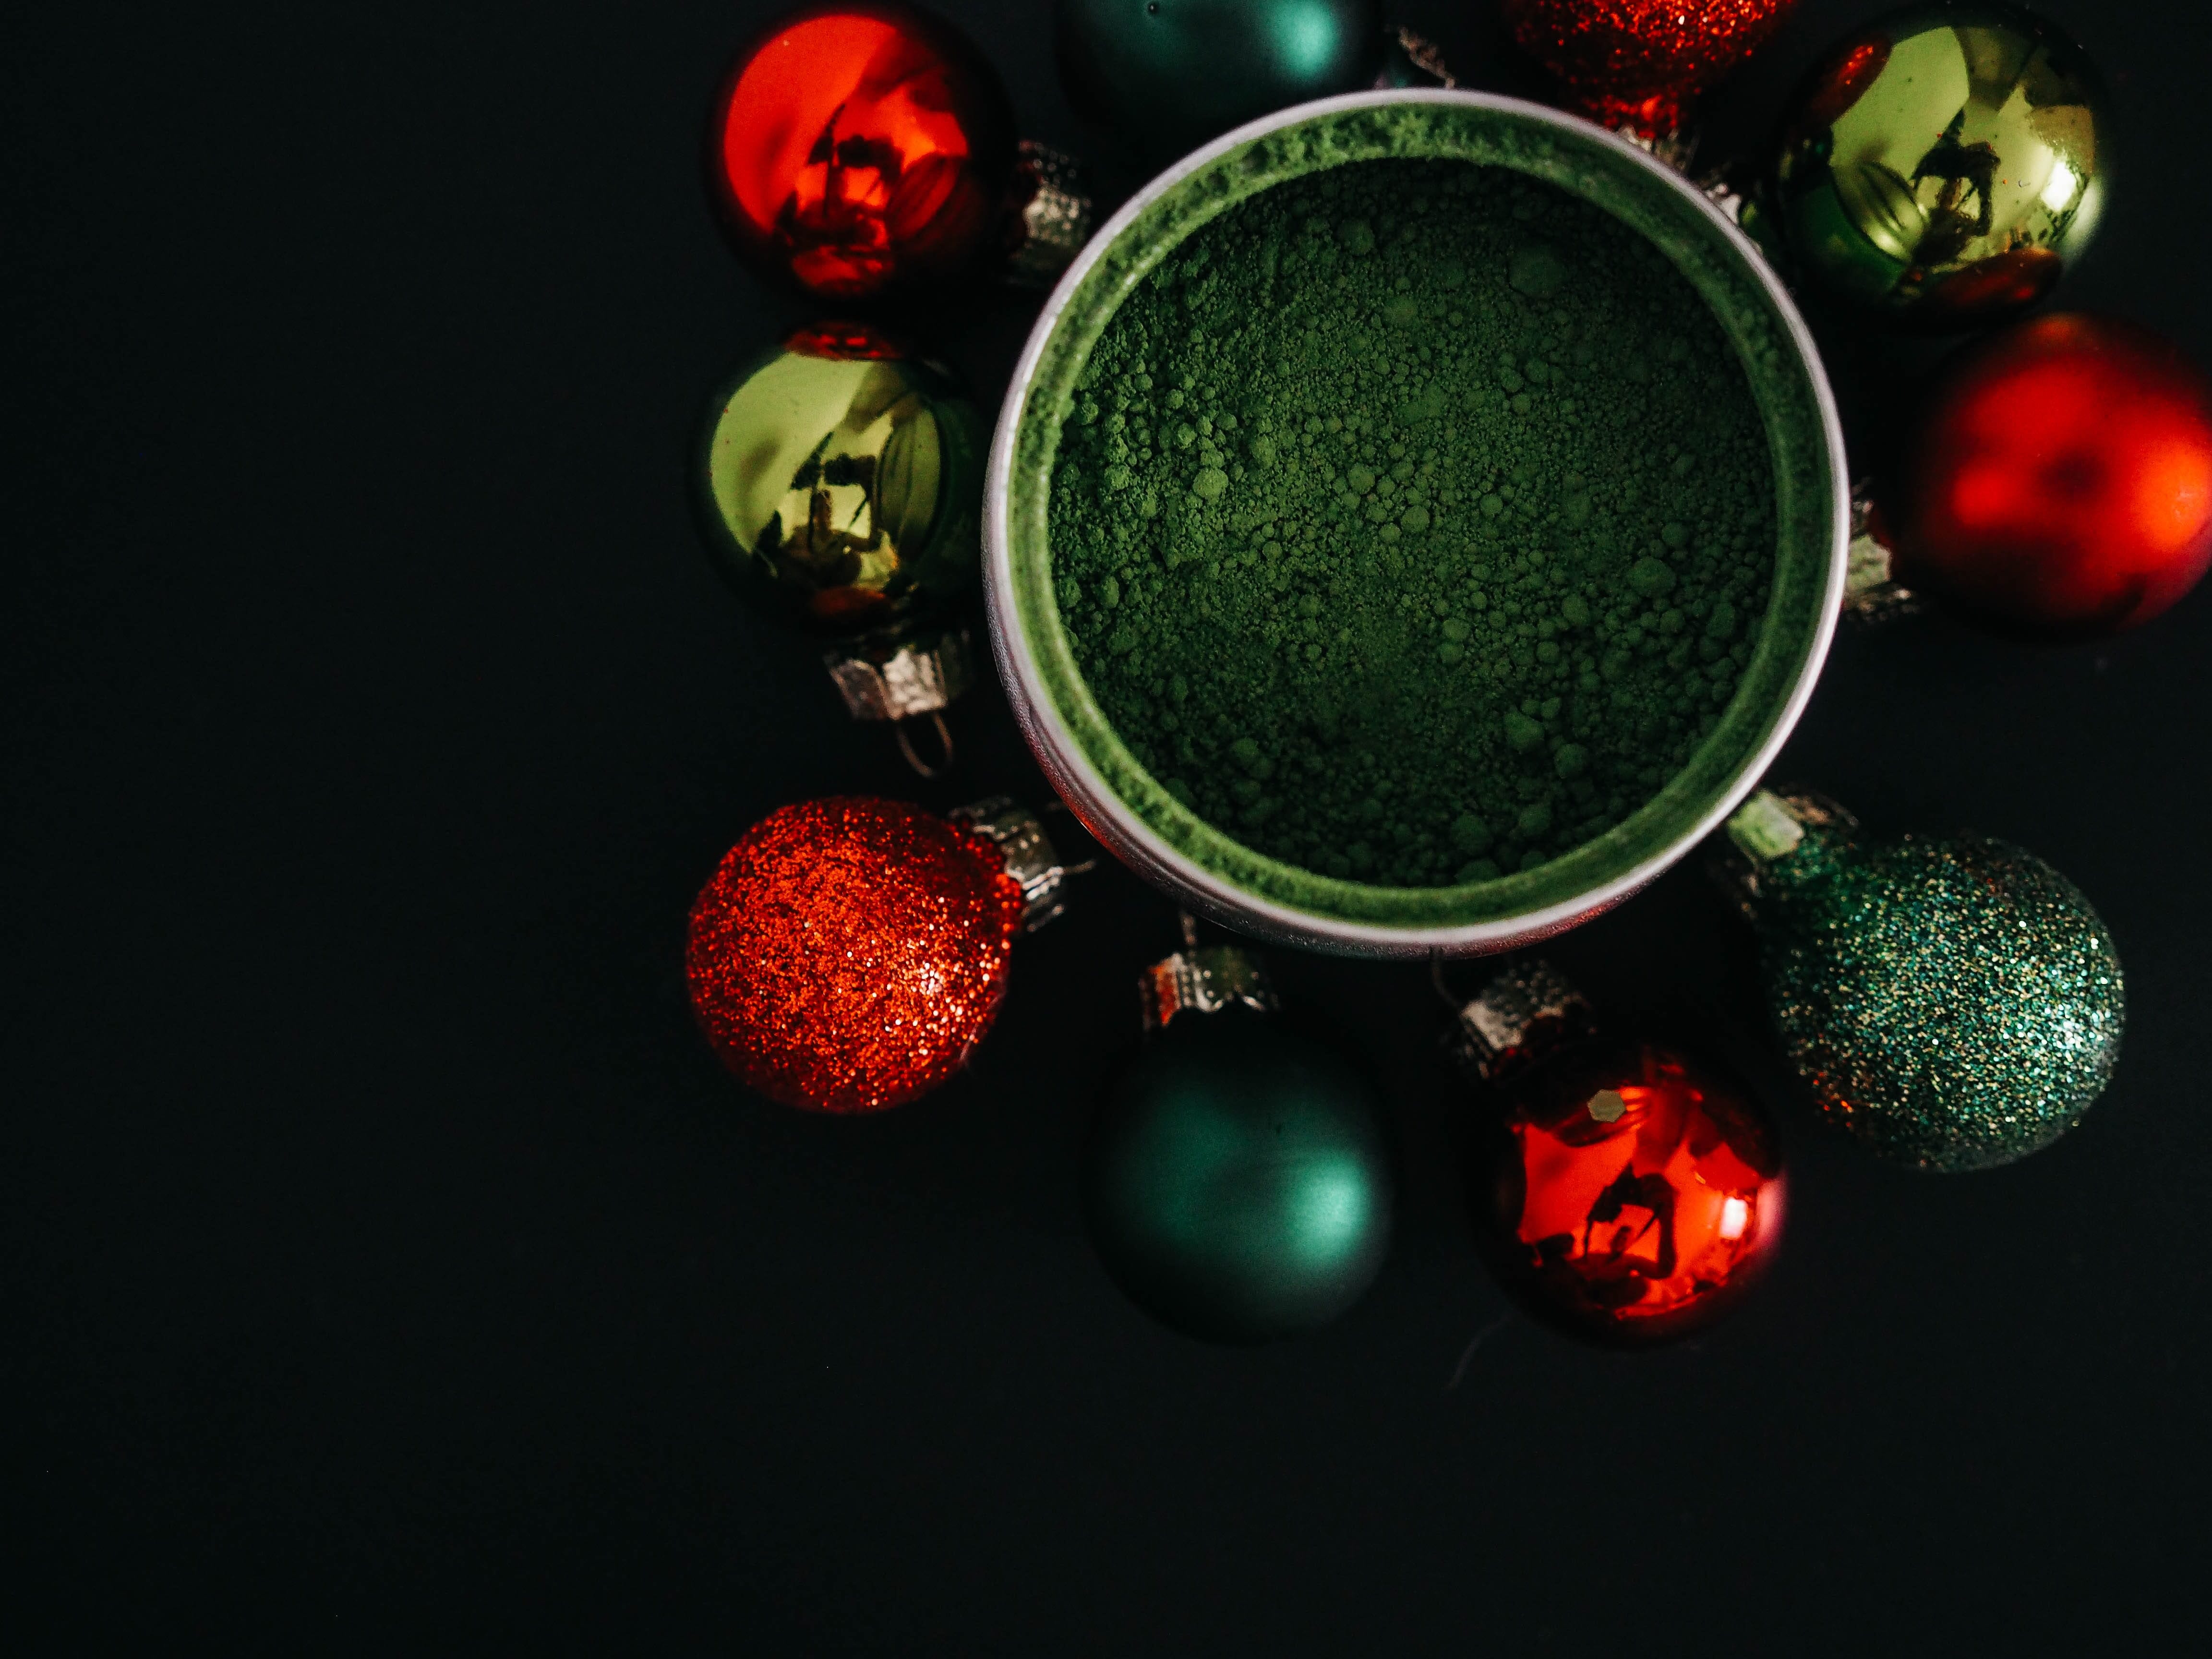
A lot of product photography now lives in the digital world via social media and websites. The best way to stay relevant with whatever happenings are going on virtually is to be present. This means creating content that matches whatever season, holiday, event, or trend is happening right now. Use that as a foundation for your flat lay.
35. Create a Character

Instead of making your flat lay all about whatever it is you’re needing to sell, why not focus on the life of whoever may buy the product? Create a character through adding objects that make sense for that individual to have alongside your product!
36. Color Split
Why only focus on one color when you can do two? By dividing your composition in even halves with two colors, you can add a lot of aesthetic interest and represent an emotion with the product.
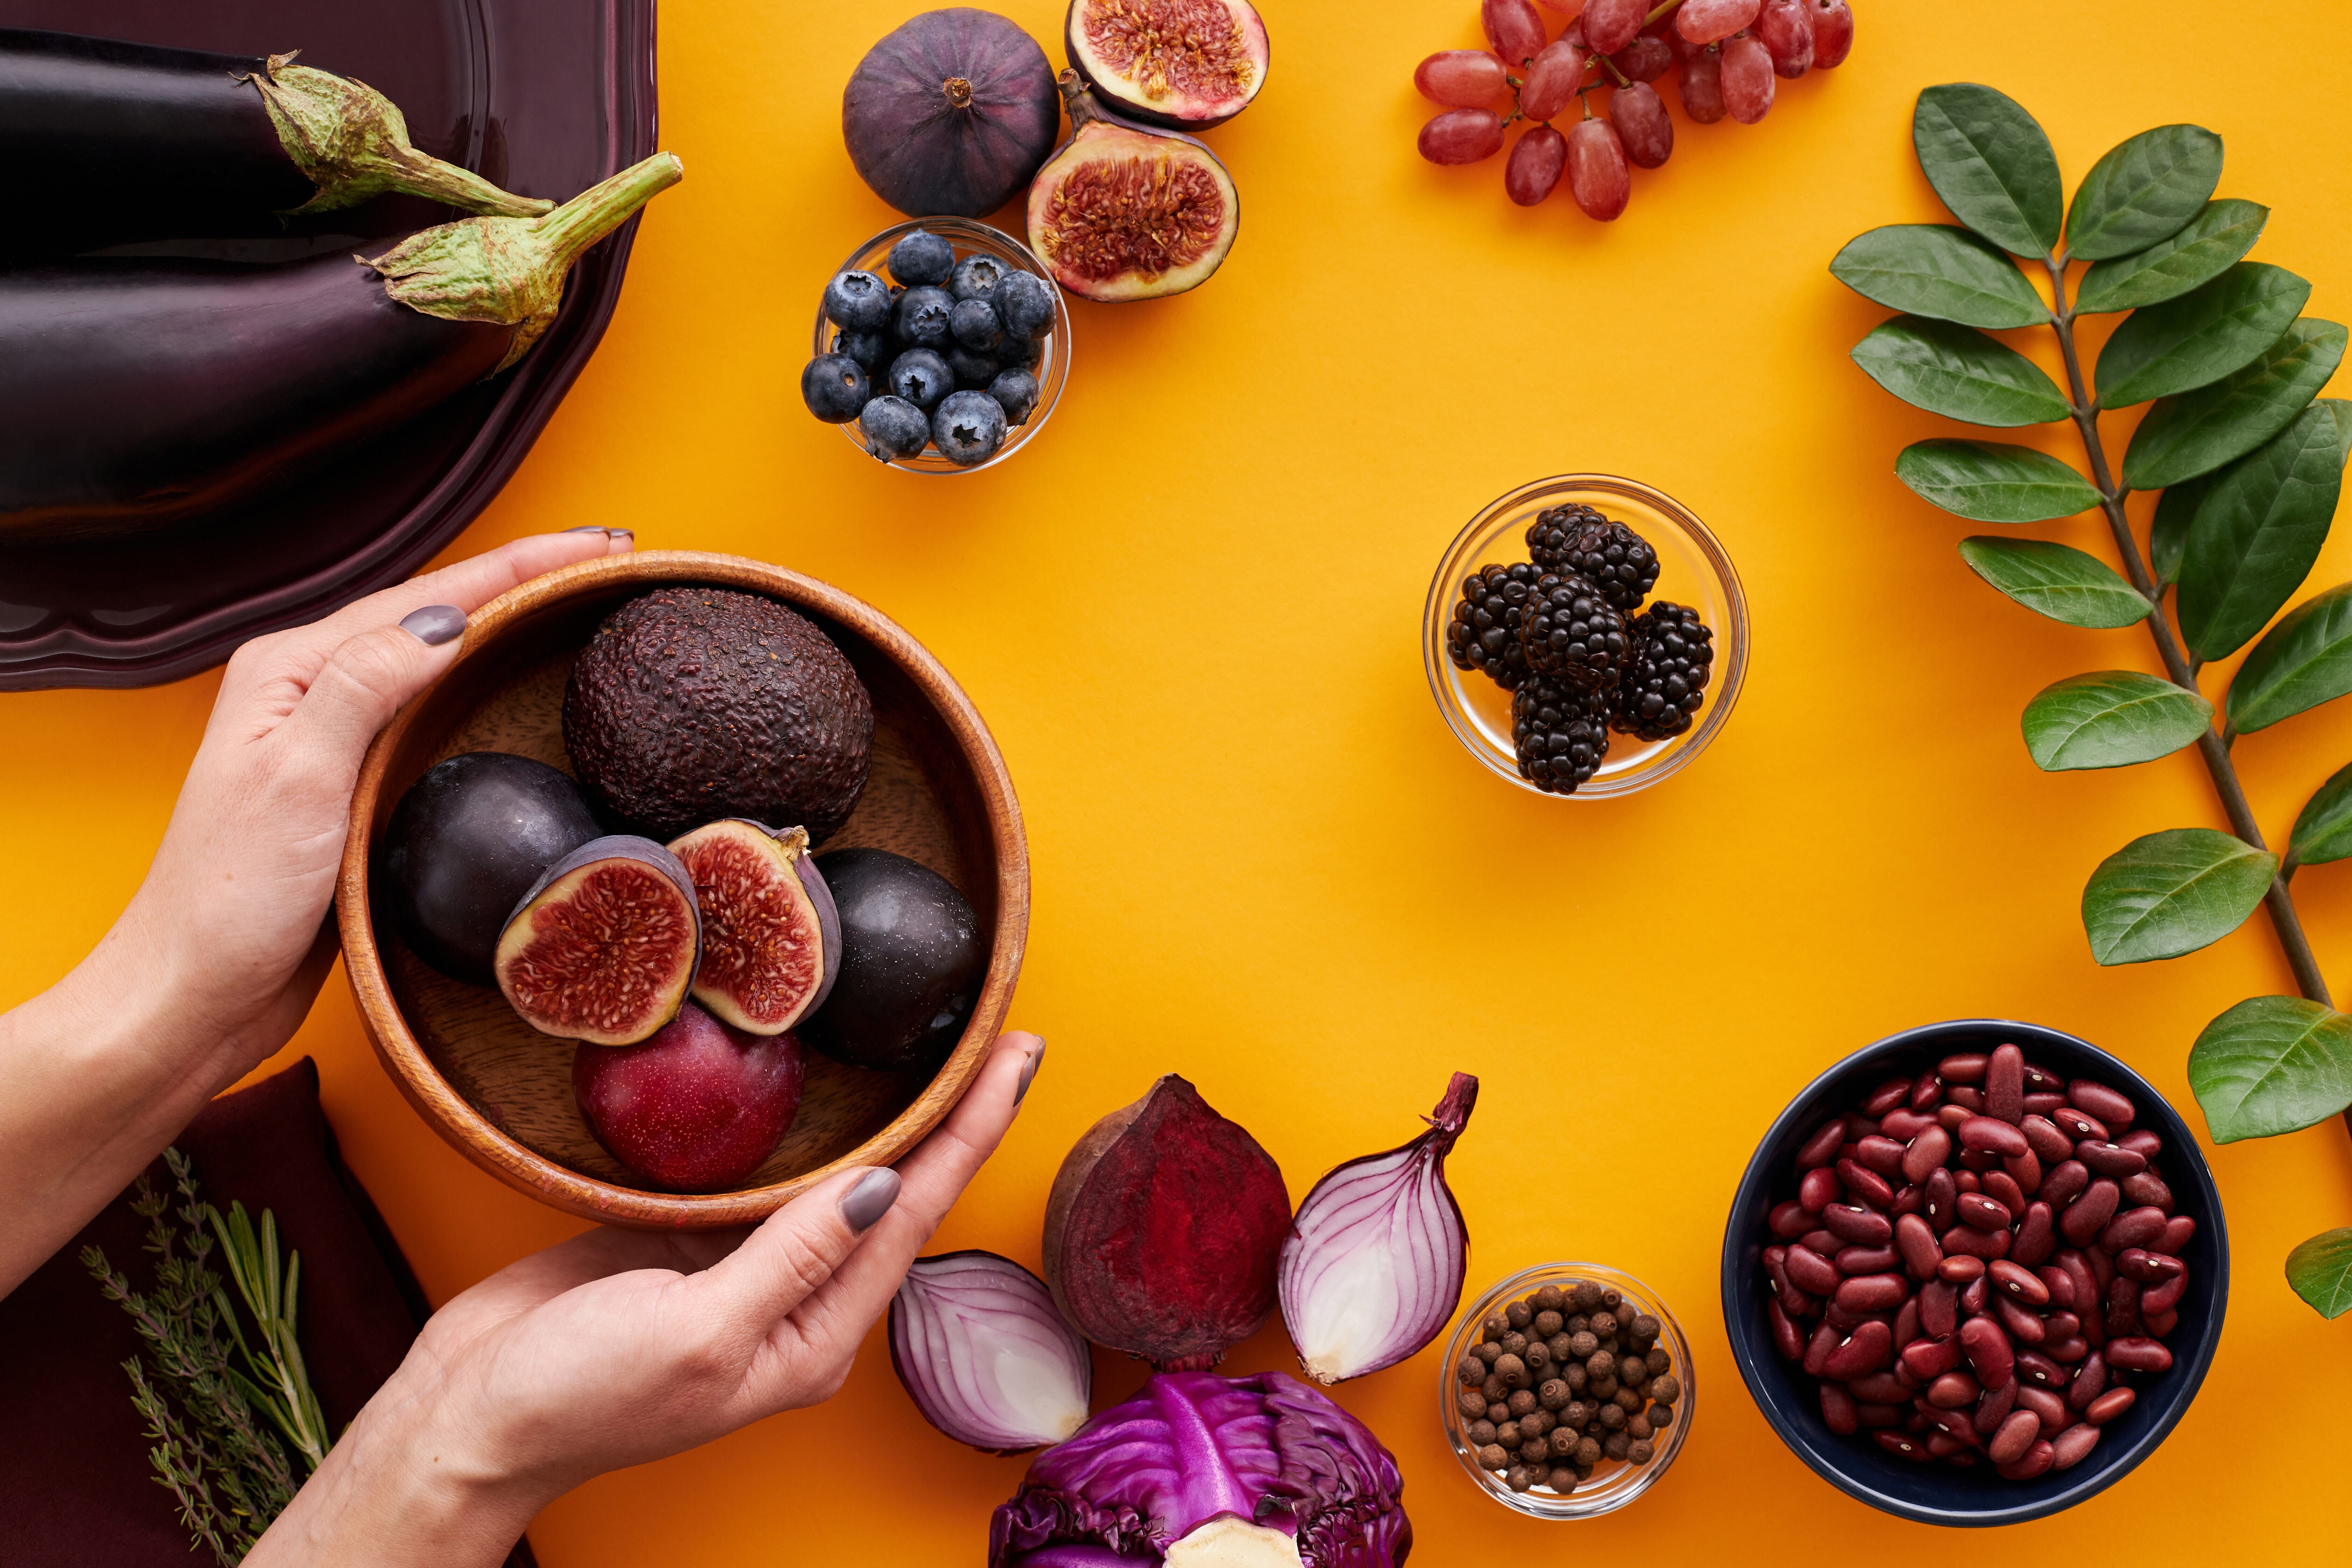
37. Organic Materials
A great layflat idea is to use the organic world around you – humans tend to be naturally attracted to the colors that appear frequently in nature, and you can use this to your advantage.
Biologically, much of the colors we understand come from nature, so incorporating this is a great way to get those eyeballs on your product.
38. Use the Ingredients
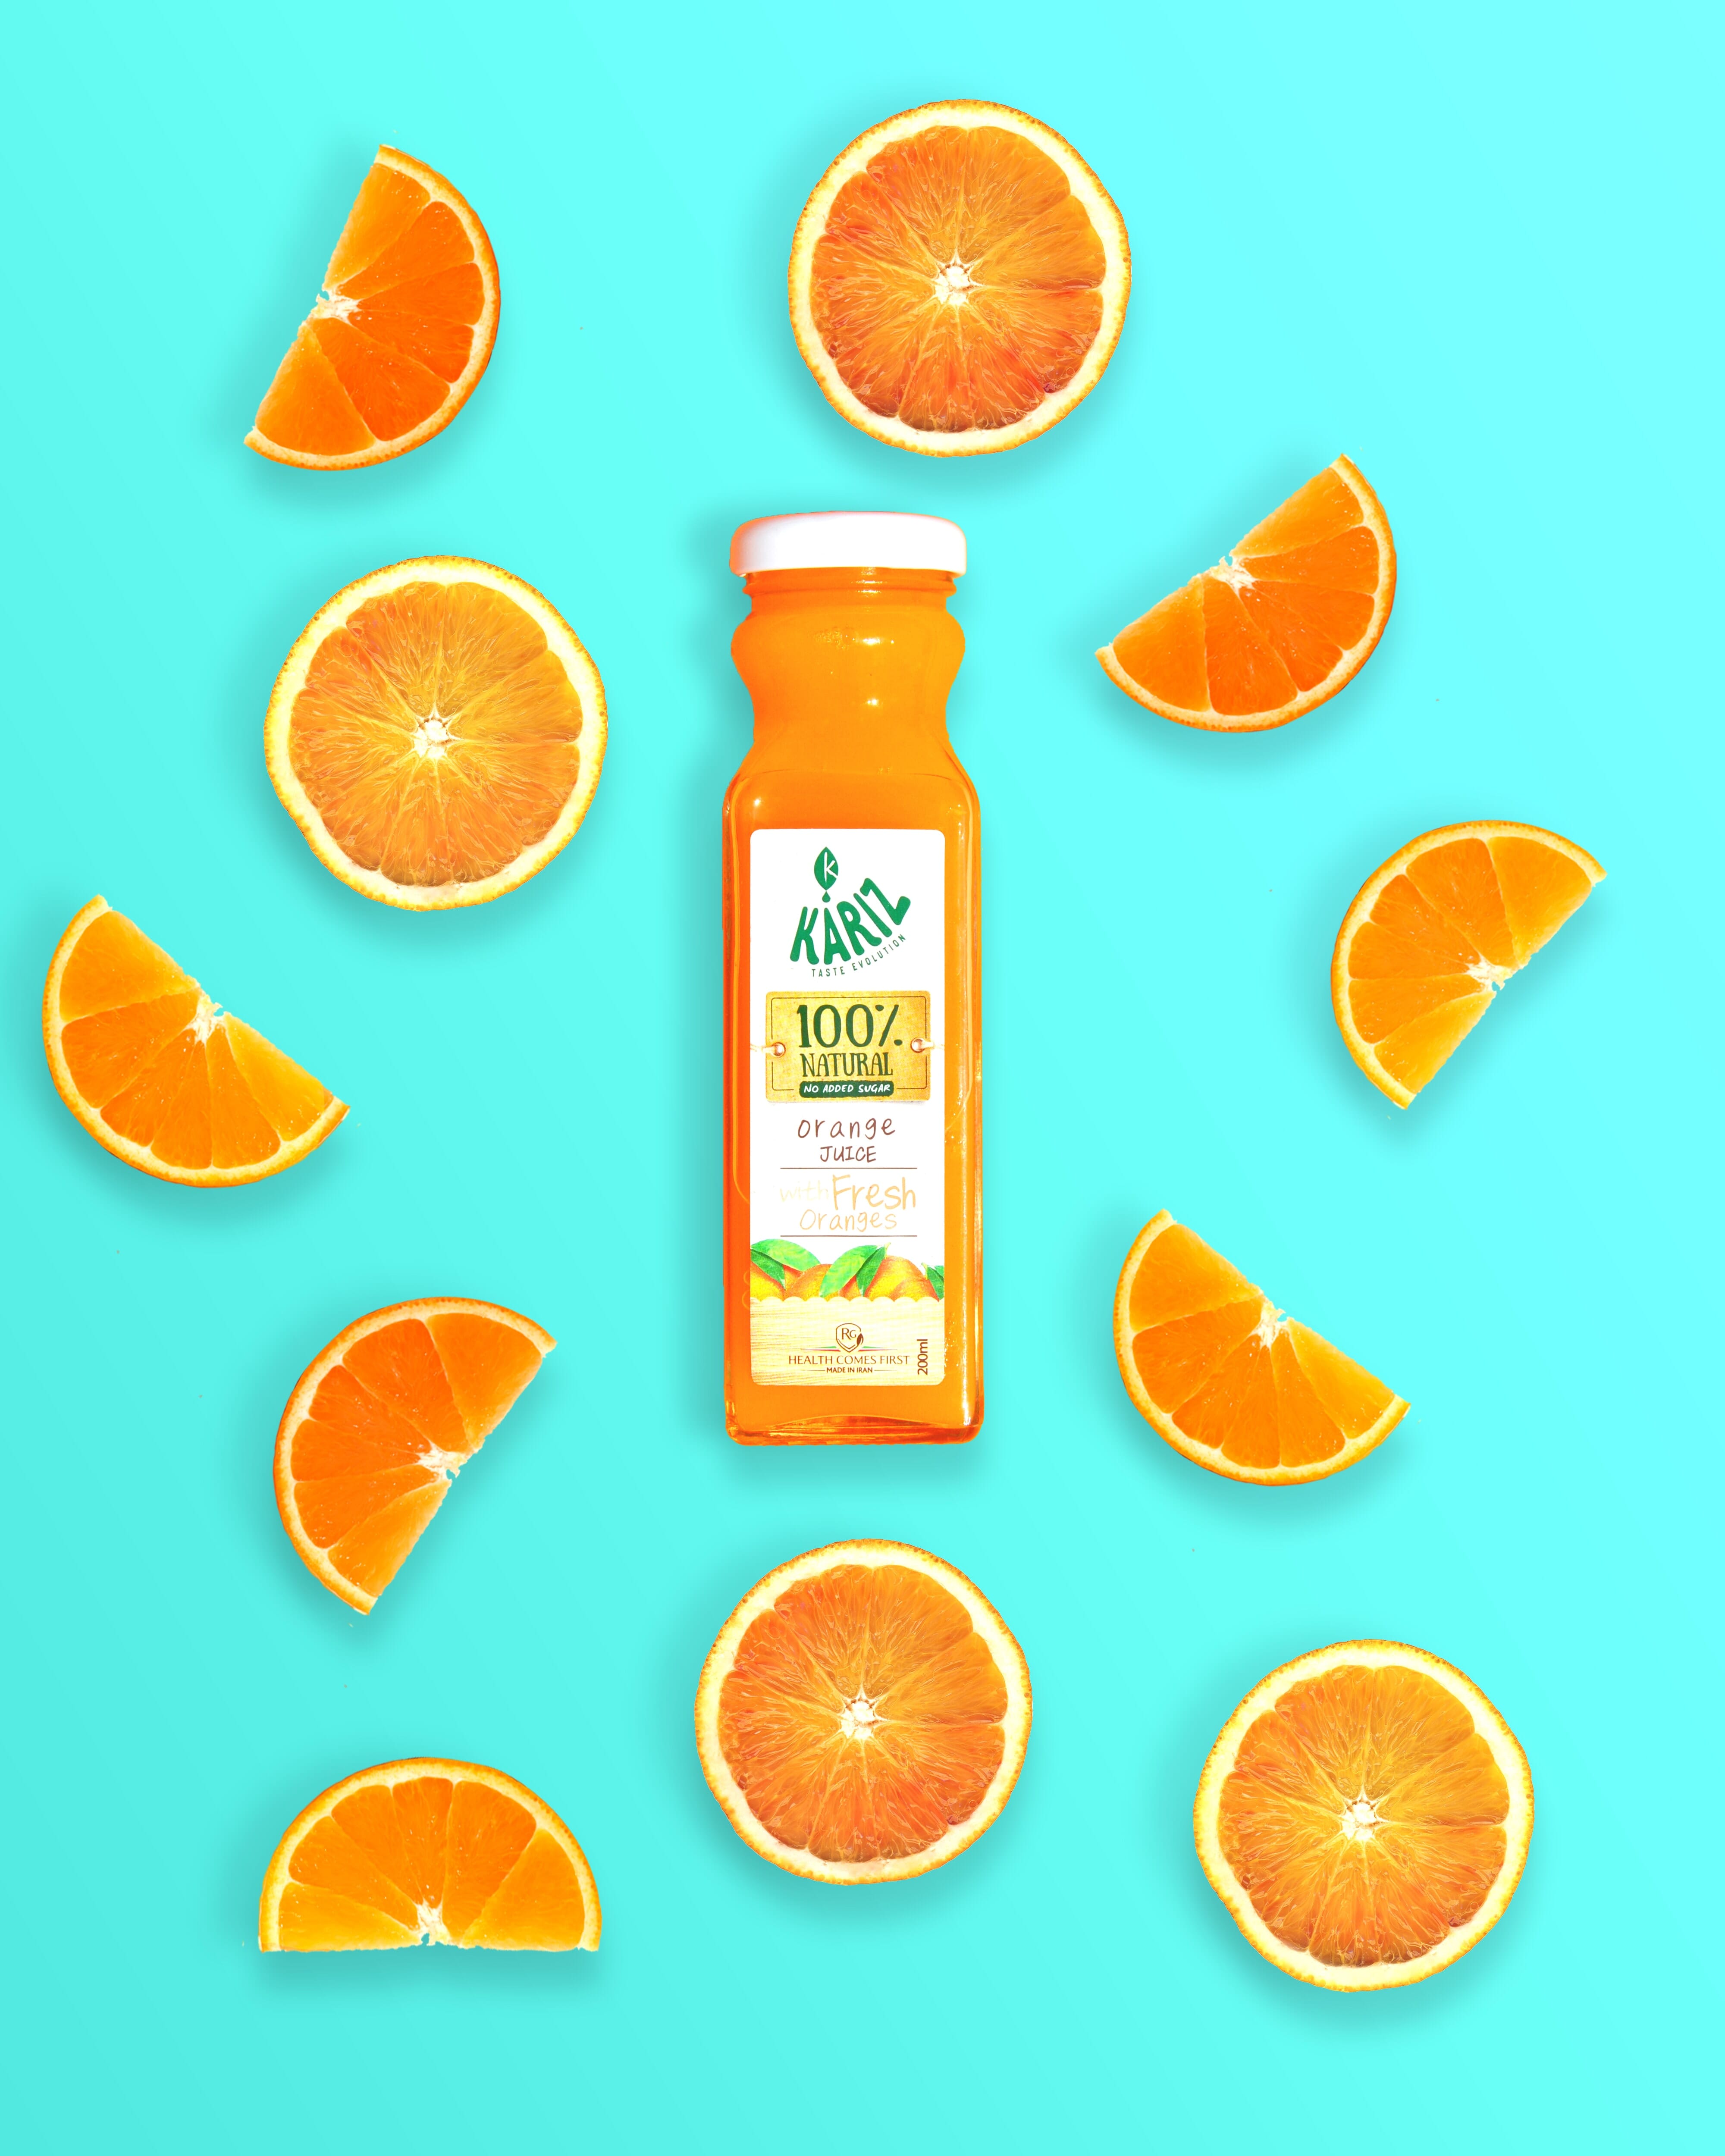
If you’re photographing an organic product, especially, using the ingredients in the layflat can make for a very effective image. It shows the viewer exactly what is in the product in a fun and exciting way, while also encouraging them to enjoy the image for what it is visually. Look for circular compositions to draw the viewer’s eye around the entire frame.
39. Skewed Compositions
Rules are meant to be broken – so long as you know the compositional rules well! Play with skewed or tilted composition to draw visual interest into your lay flat image. These compositions also add a feeling or mood to the image, often encouraging quirkiness and fun.
40. Sell a Lifestyle
As any marketing agent would tell you, so much of product photography has to do with selling a lifestyle or status that comes with owning said product. As such, this idea tends to be best represented in a visual format via photography or videography.
When doing layflats, look to pair the item you’re advertising with other products that sell the lifestyle idea to your audience.
Styling Ideas
Styling leads the narrative, and interesting product photographs feature a story.
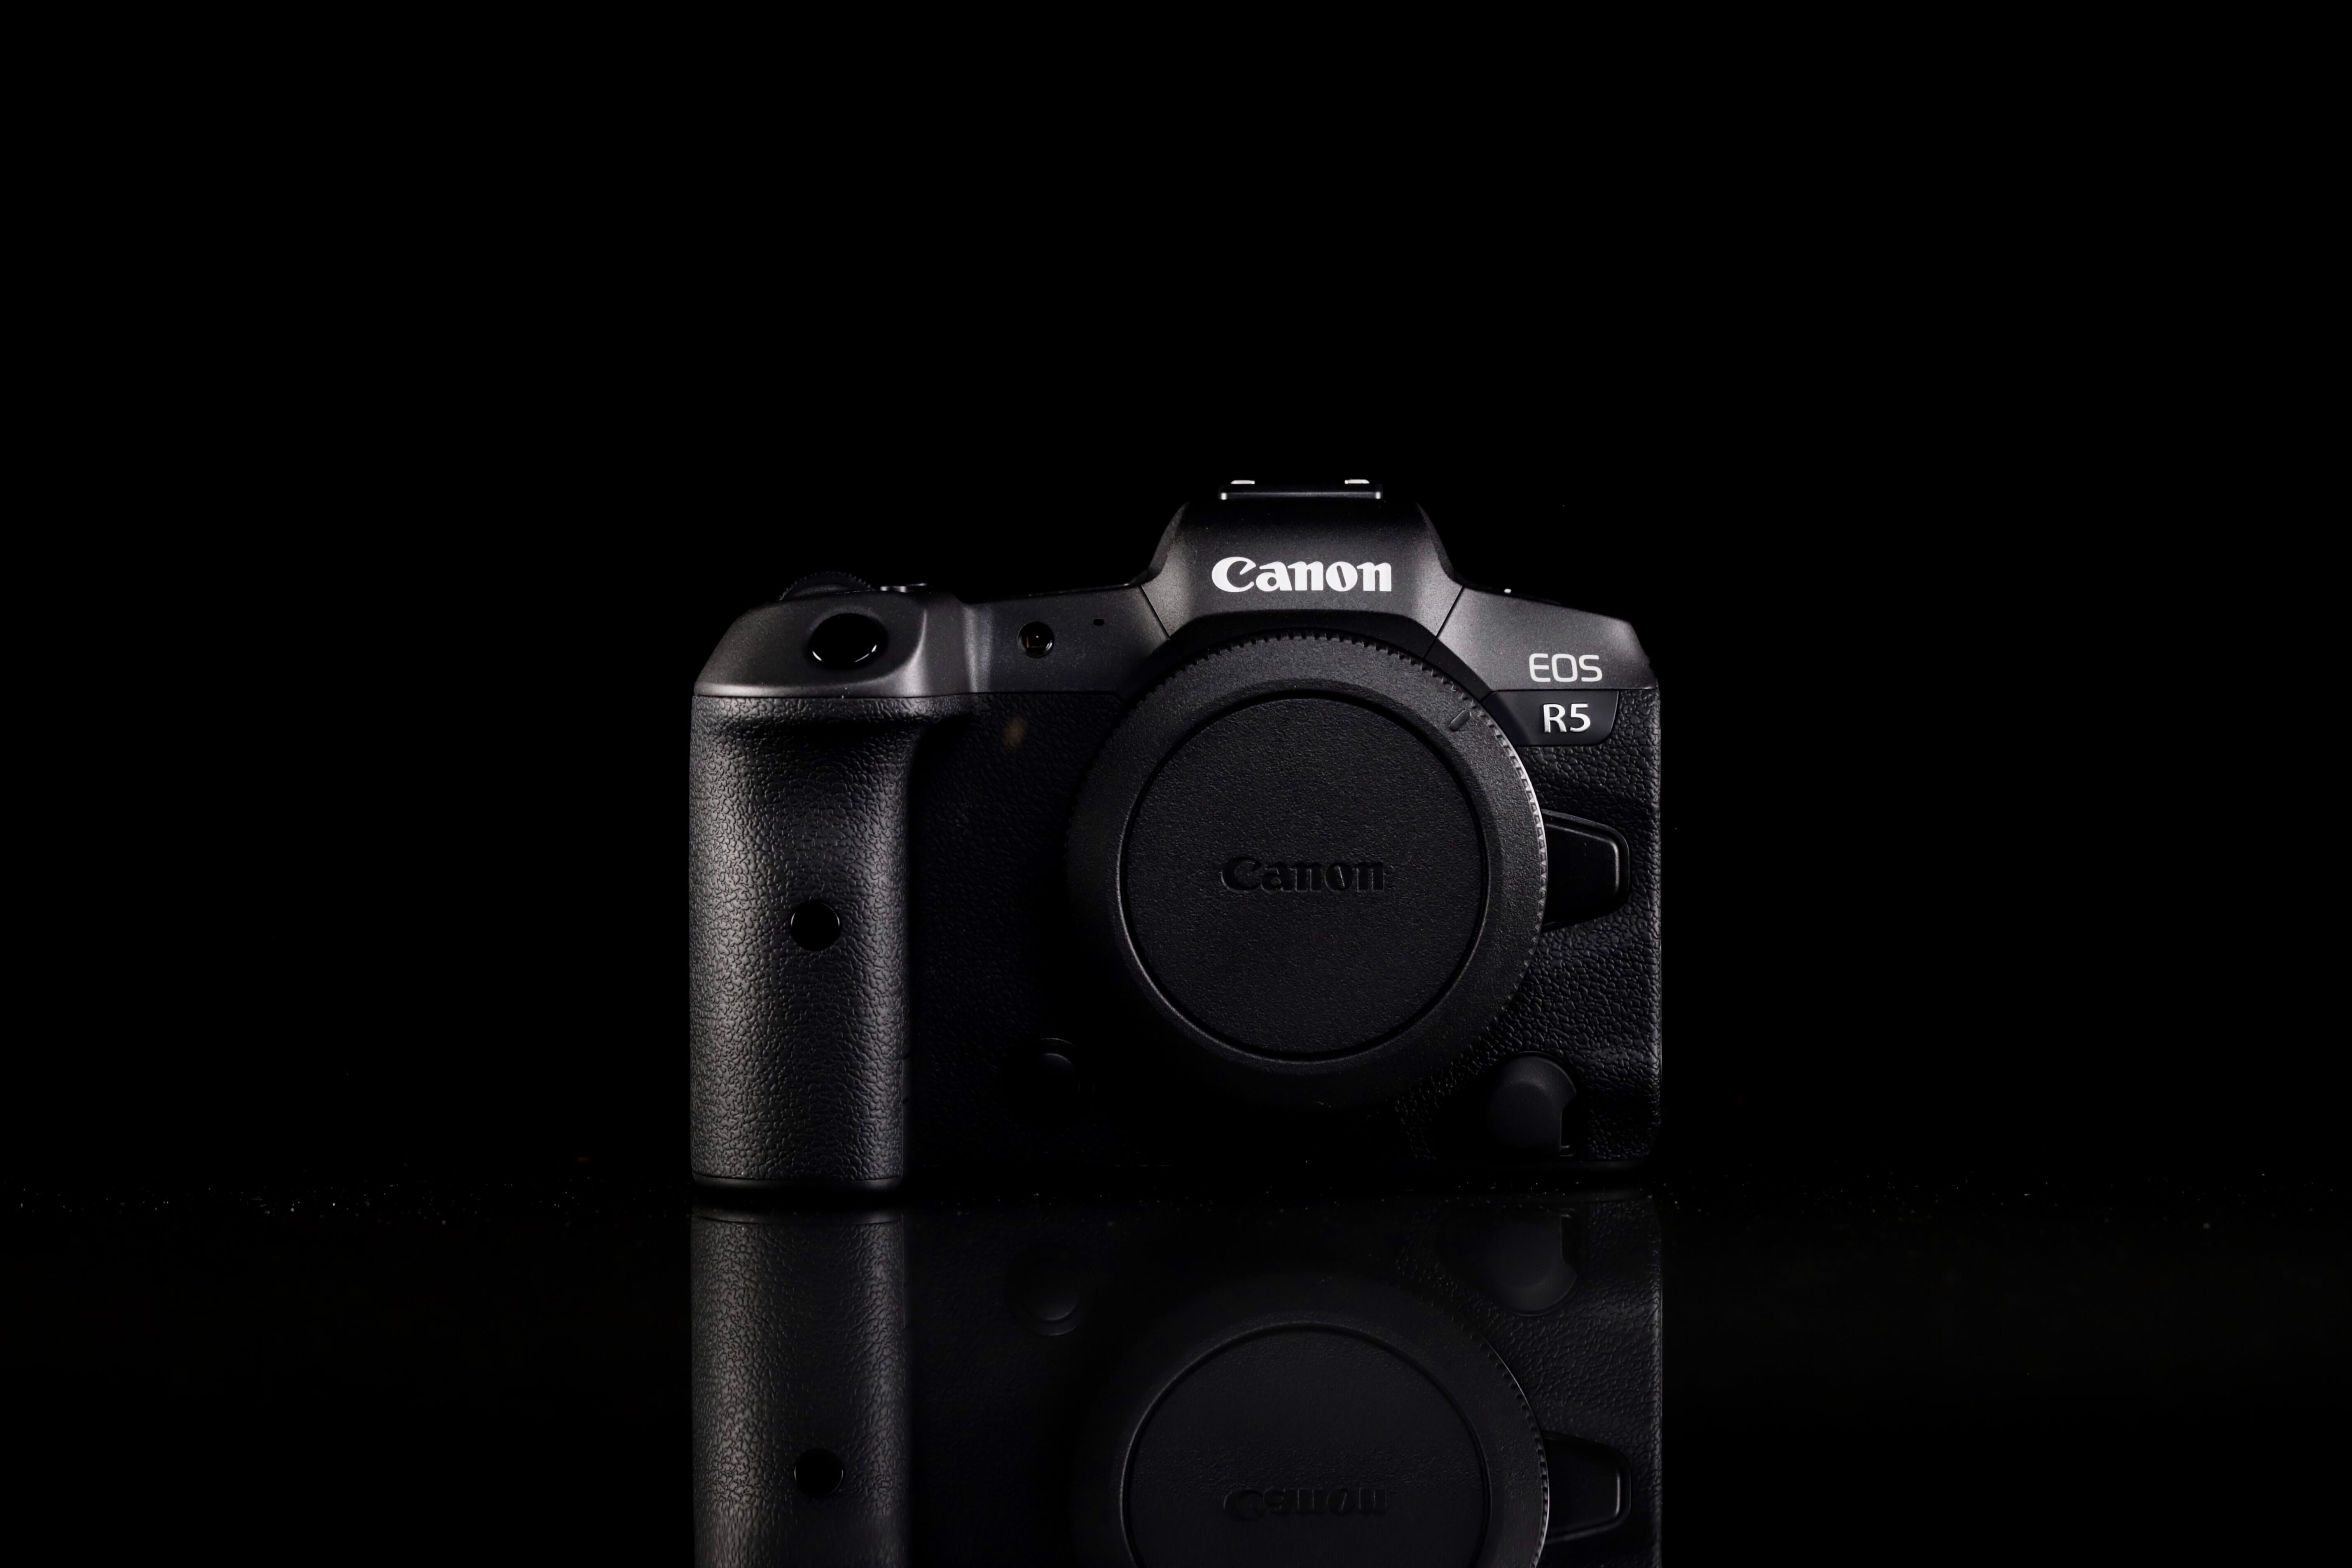
41. Monochrome
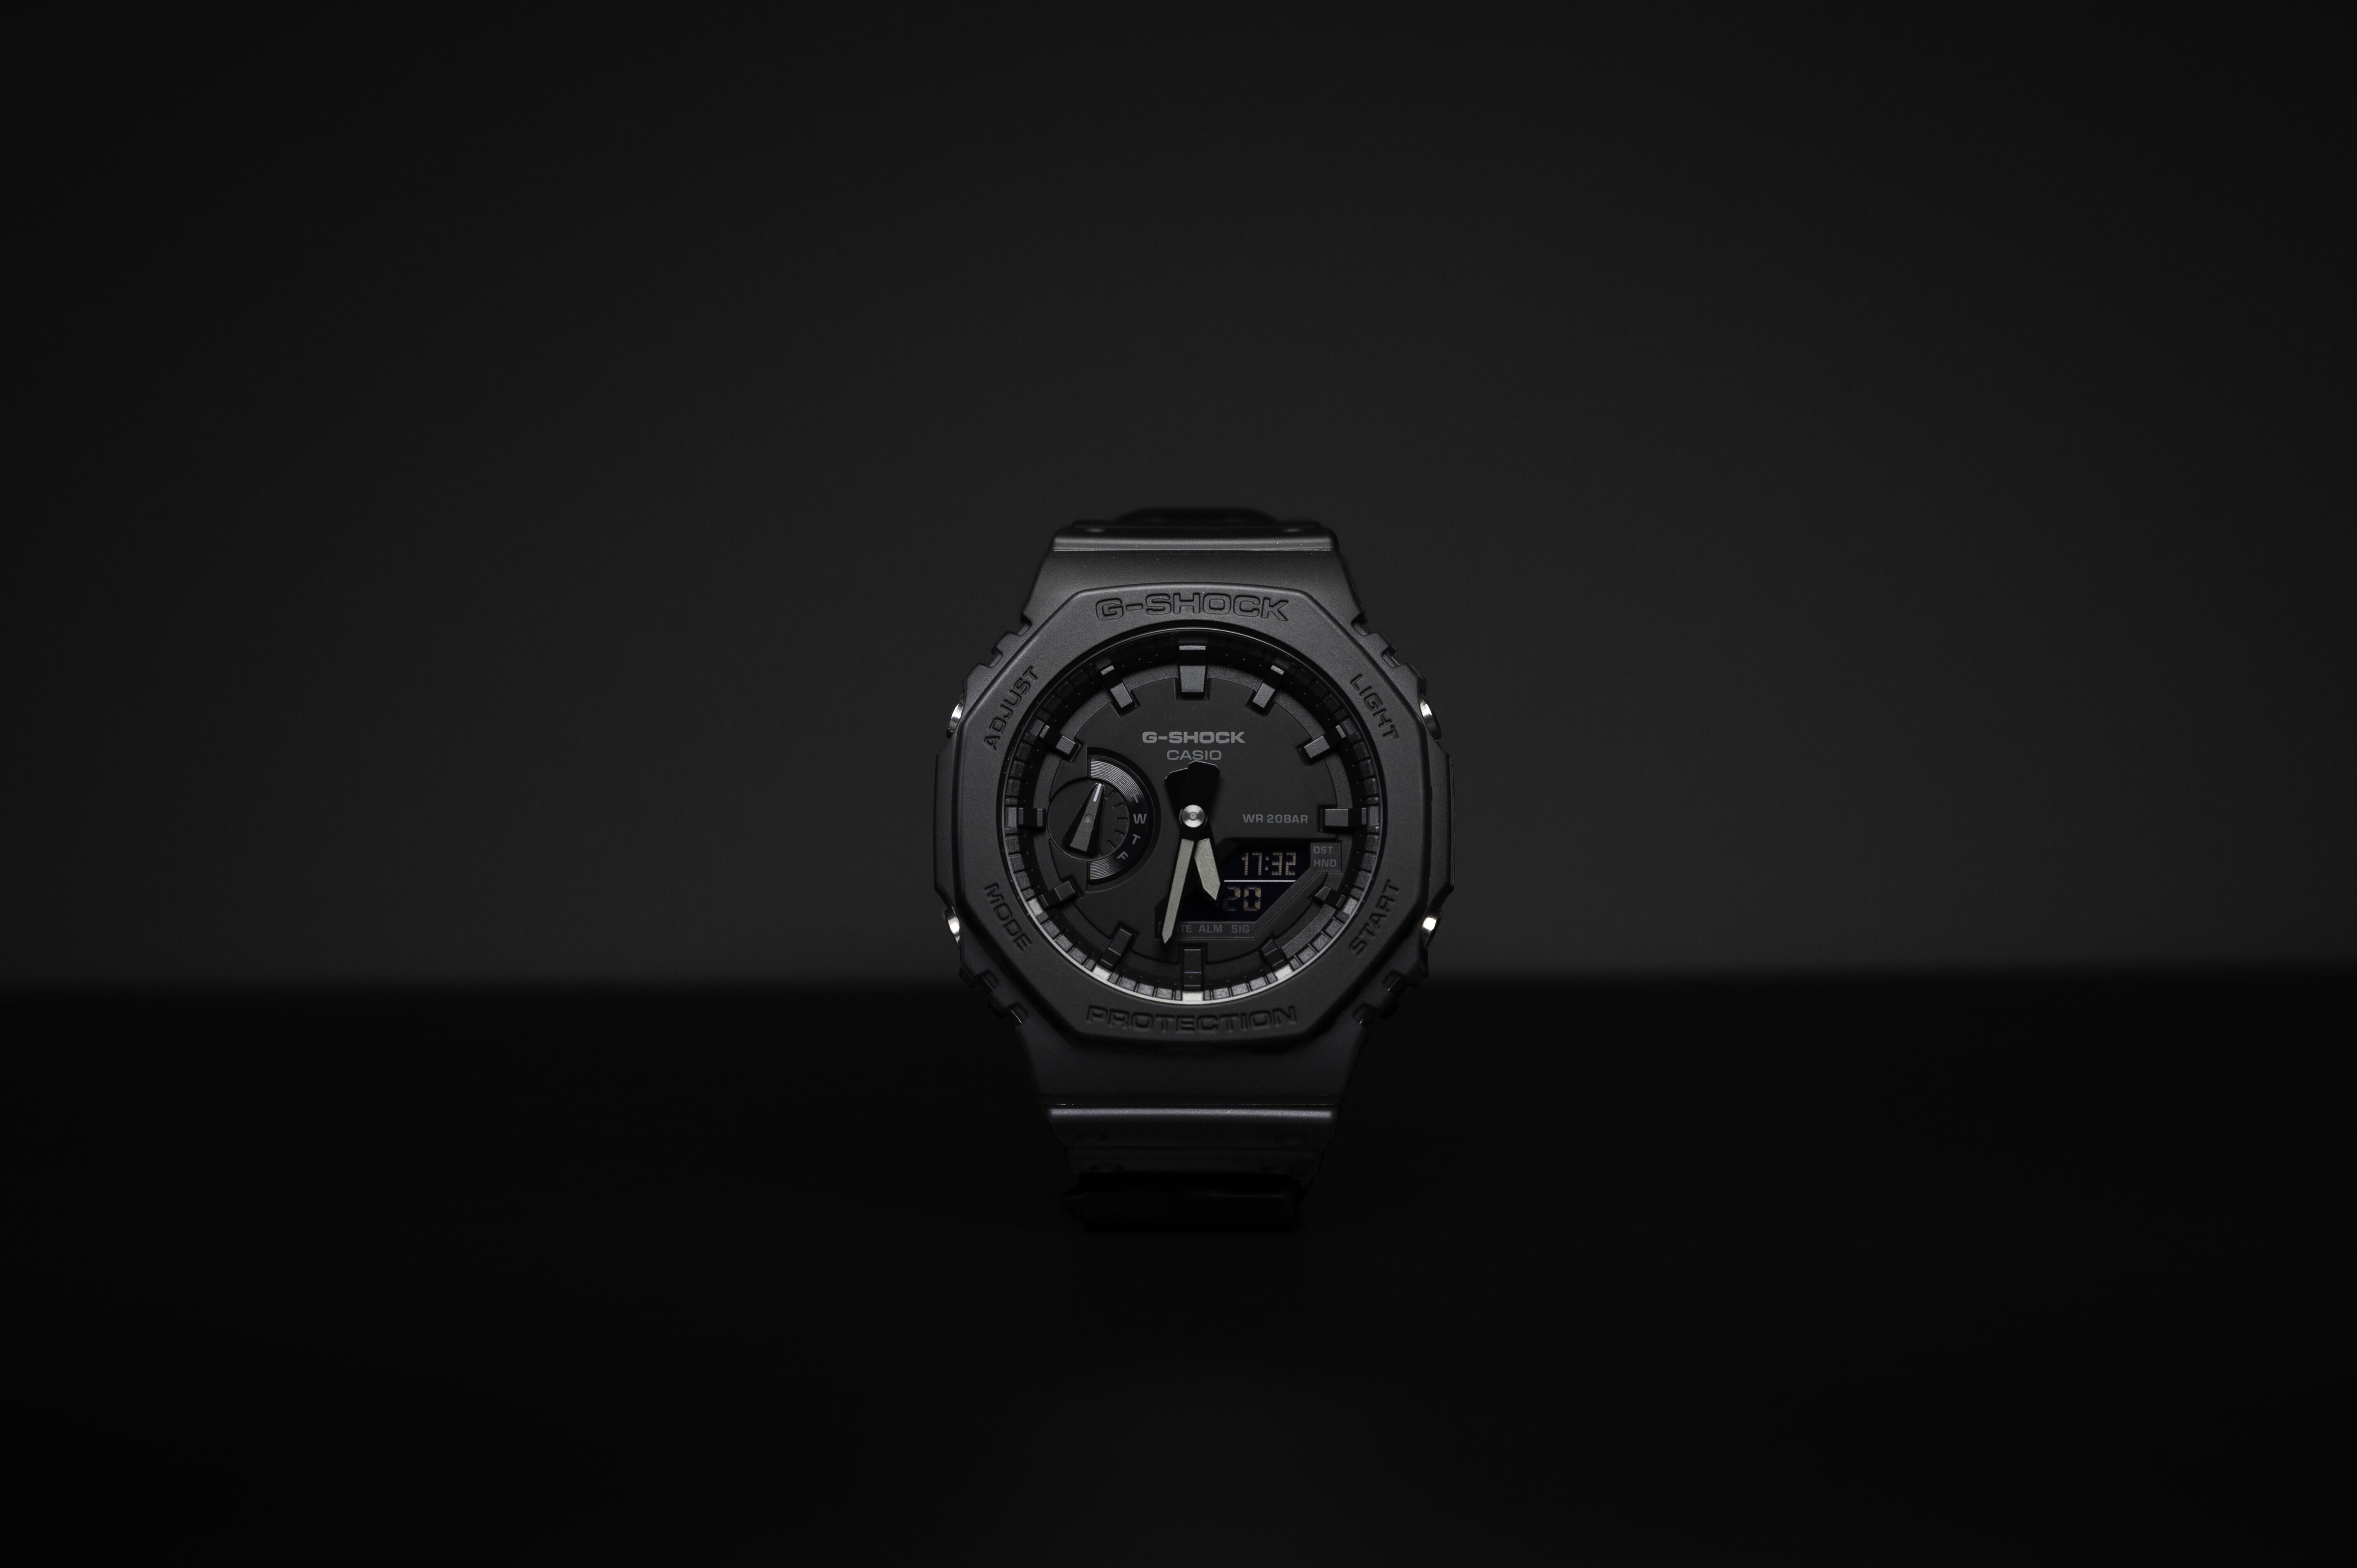
There is something really edgy and cool about monochromatic images. If you’re capturing a product that needs to look sleek or masculine, limiting the color pallet is a great way to go.
Just keep in mind that if you go black on black like seen here, your lighting better be top notch to help that subject isolate from the background!
42. Add a Moving Component
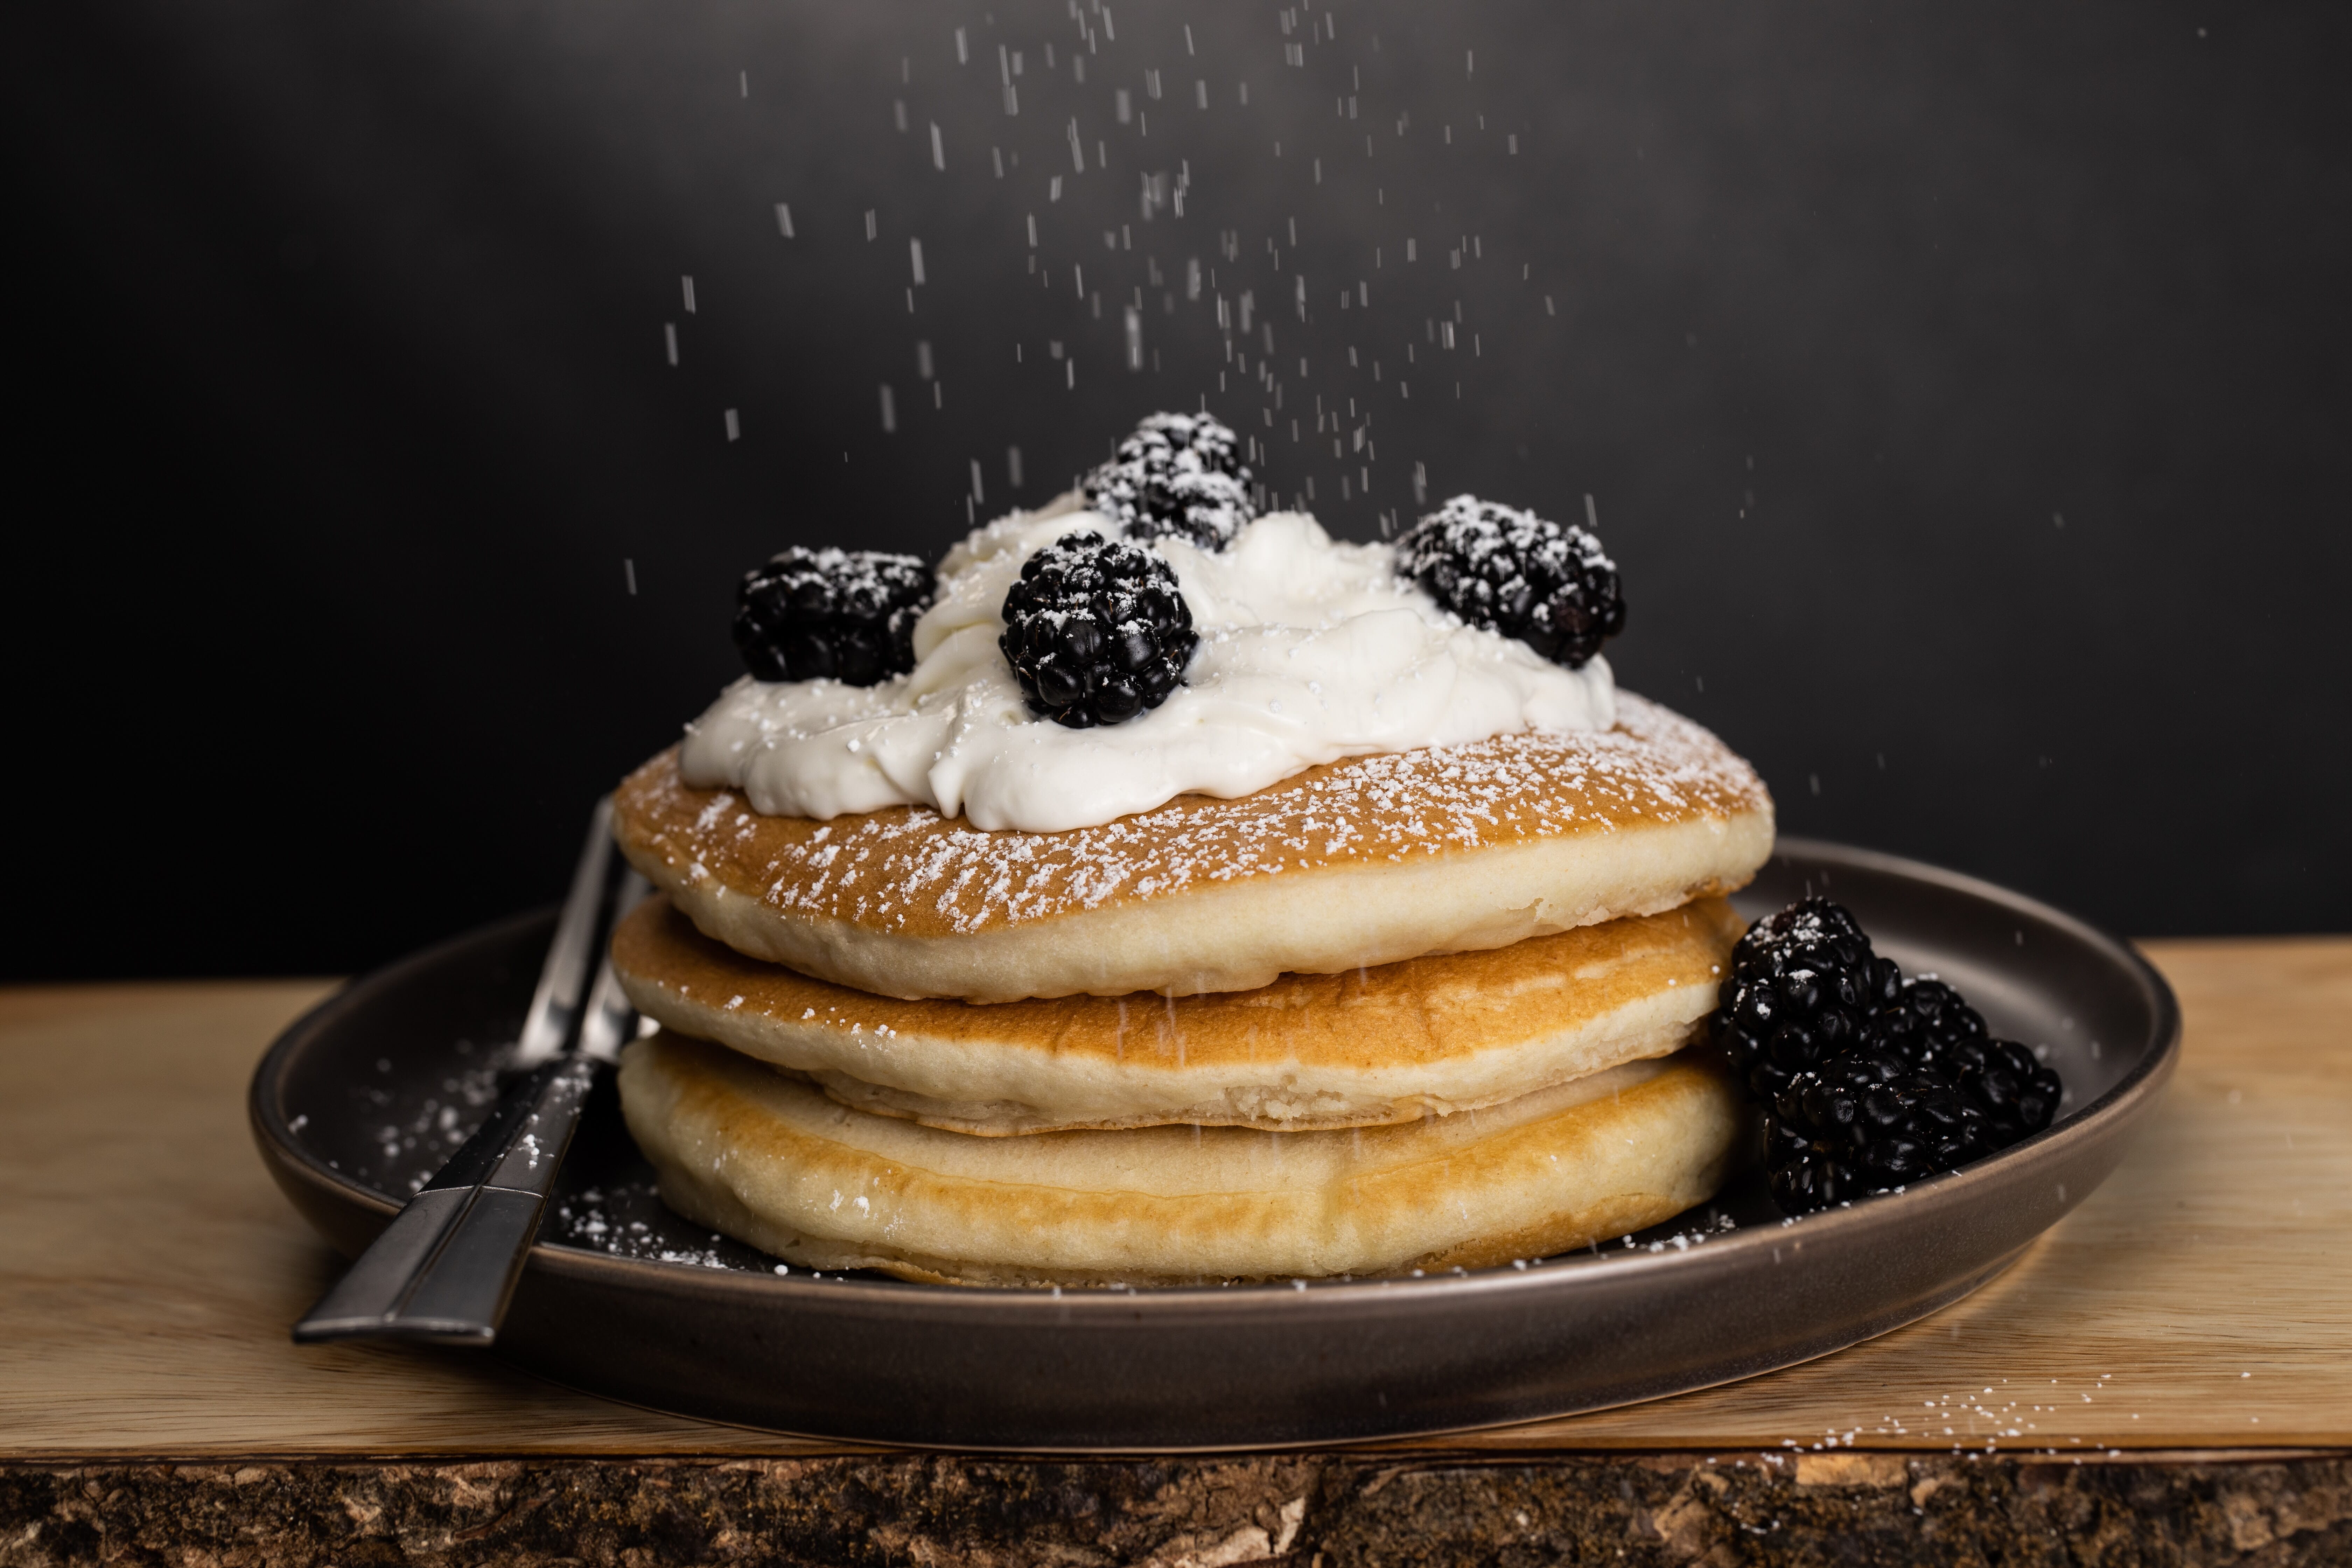
Photographs are two dimensional and static, which can be boring. Add a bit of liveliness and movement into the shot by adding a component that is able to move. For example, the sprinkling of flour into this food photography capture.
Just keep in mind that you don’t want the movement to be so chaotic that it takes away from the purpose of the image!
43. Use the Brand Colors
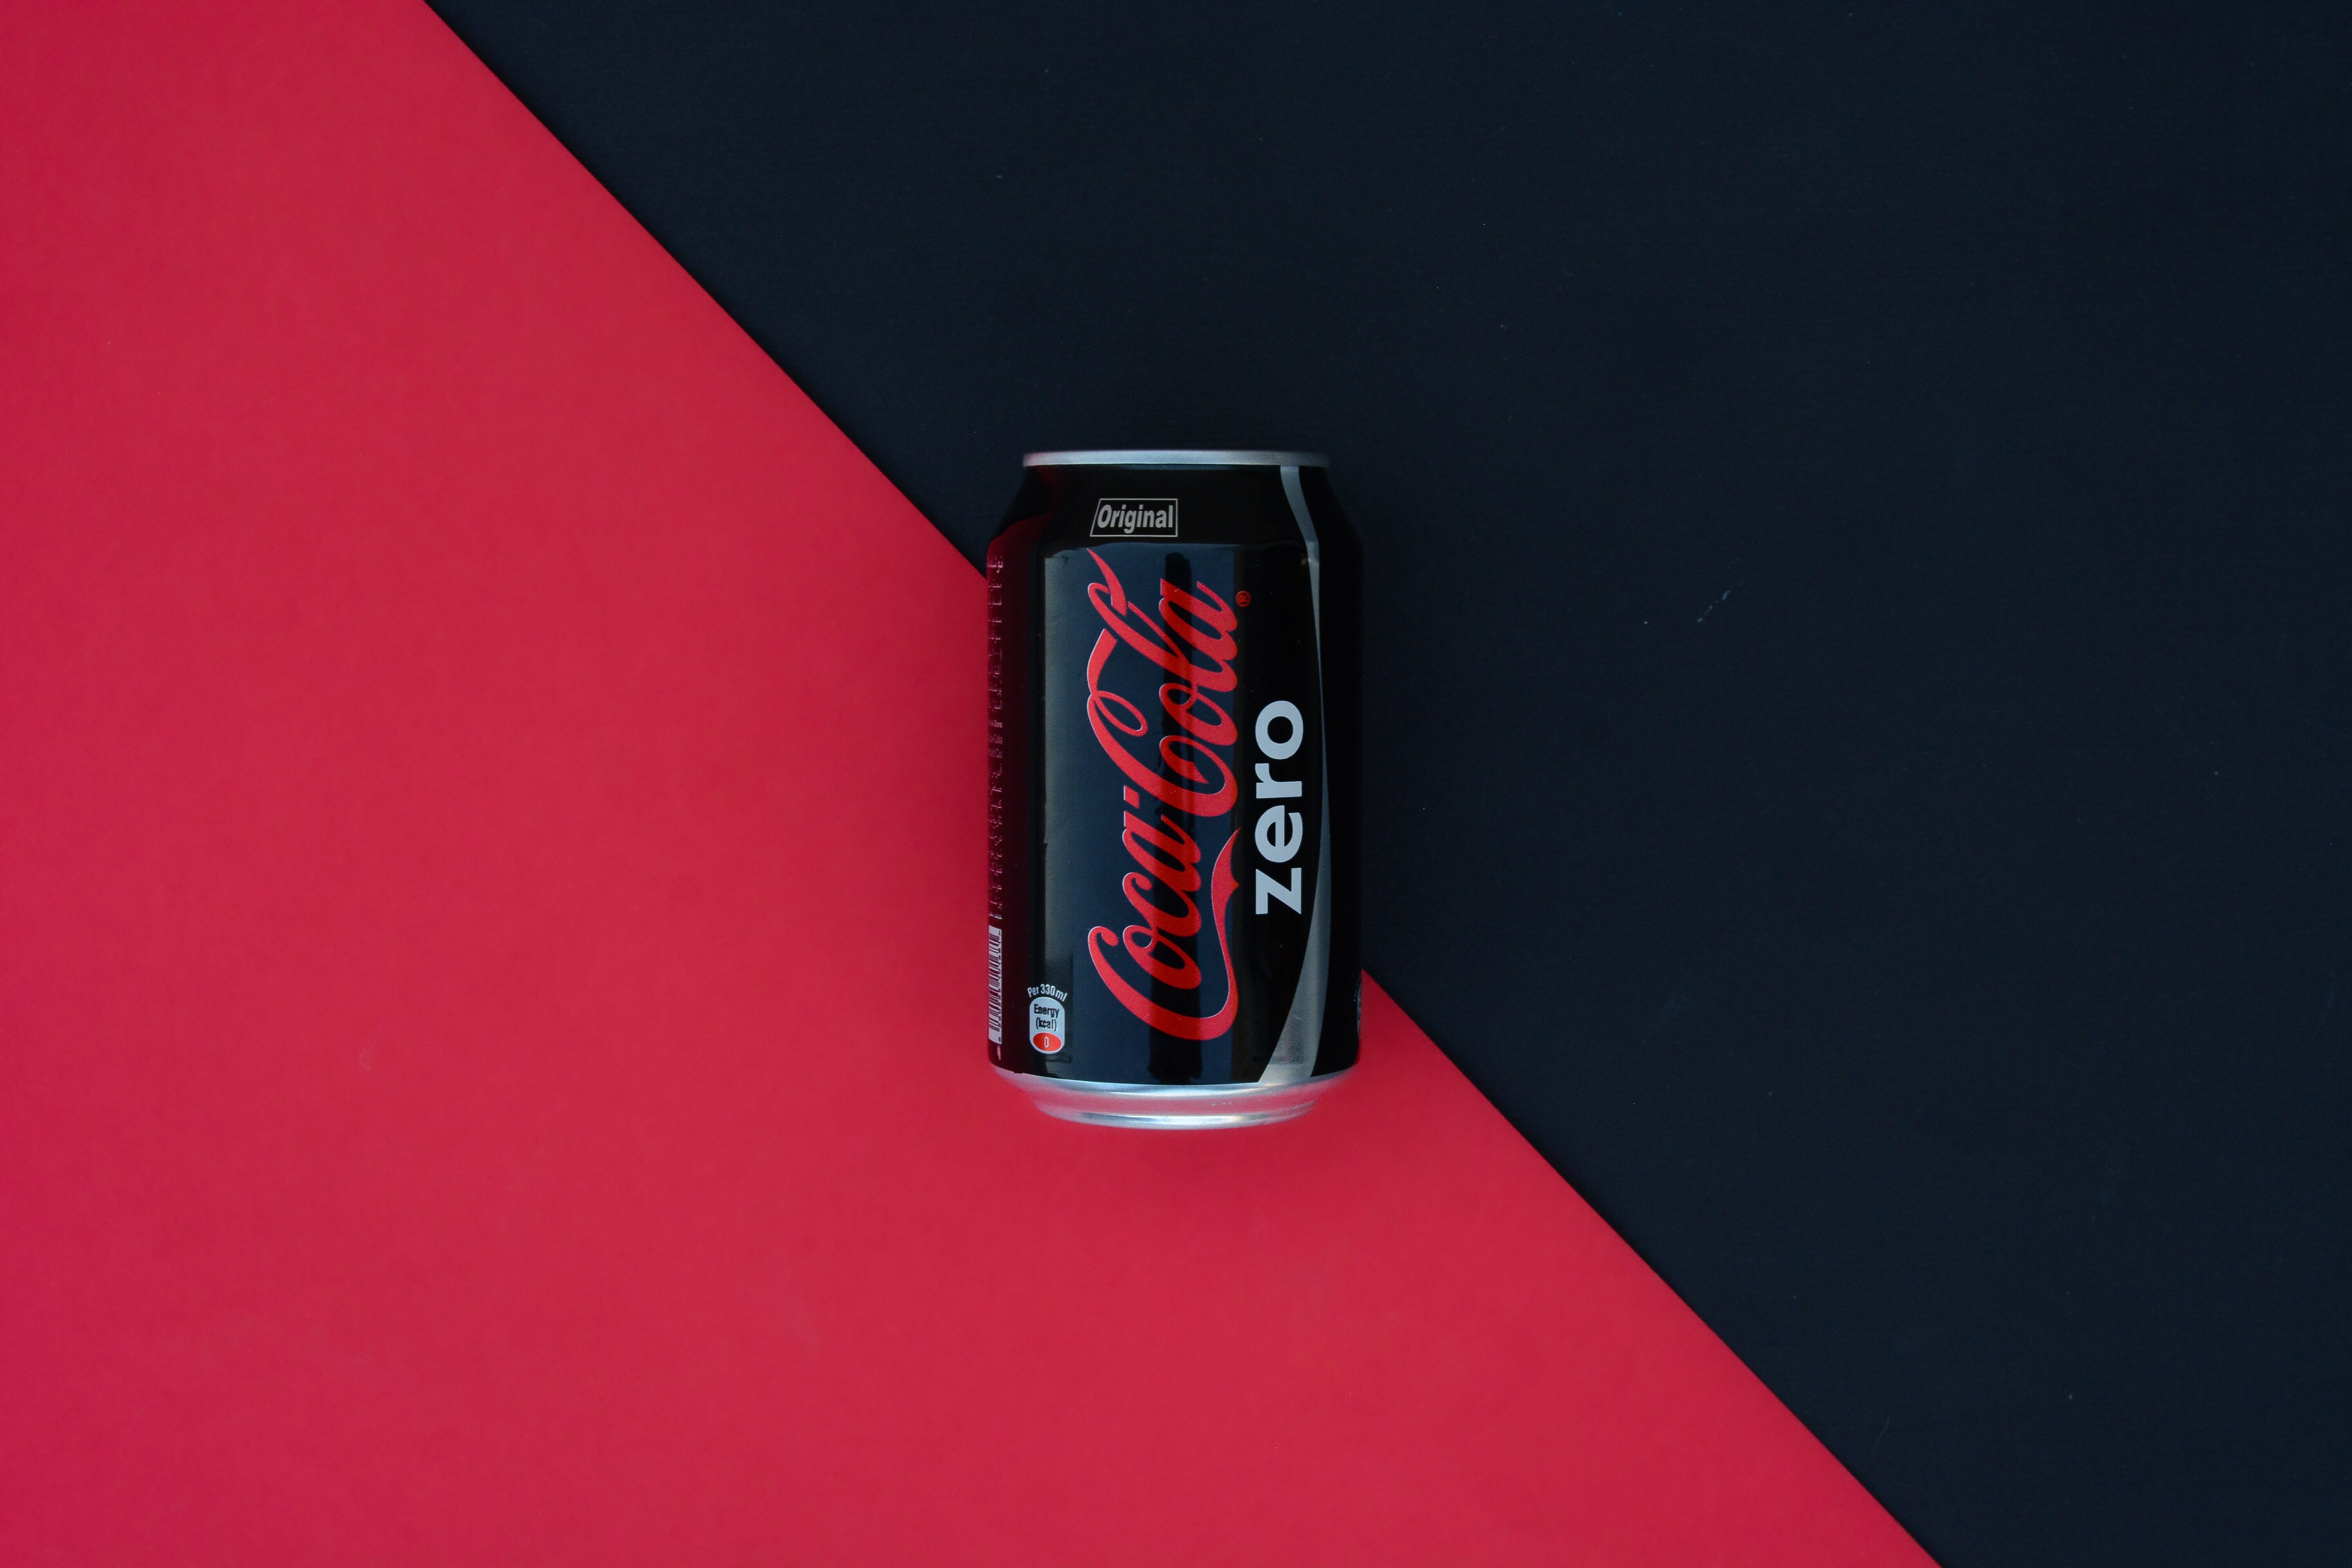
Brand identity is something all product photographers should keep in mind – and this includes the brand’s colors. As such, brand colors should be incorporated into product photography as much as possible (so long as it makes sense).
But, you don’t have to just sneak brand colors in there, you can go bold like our sample image here!
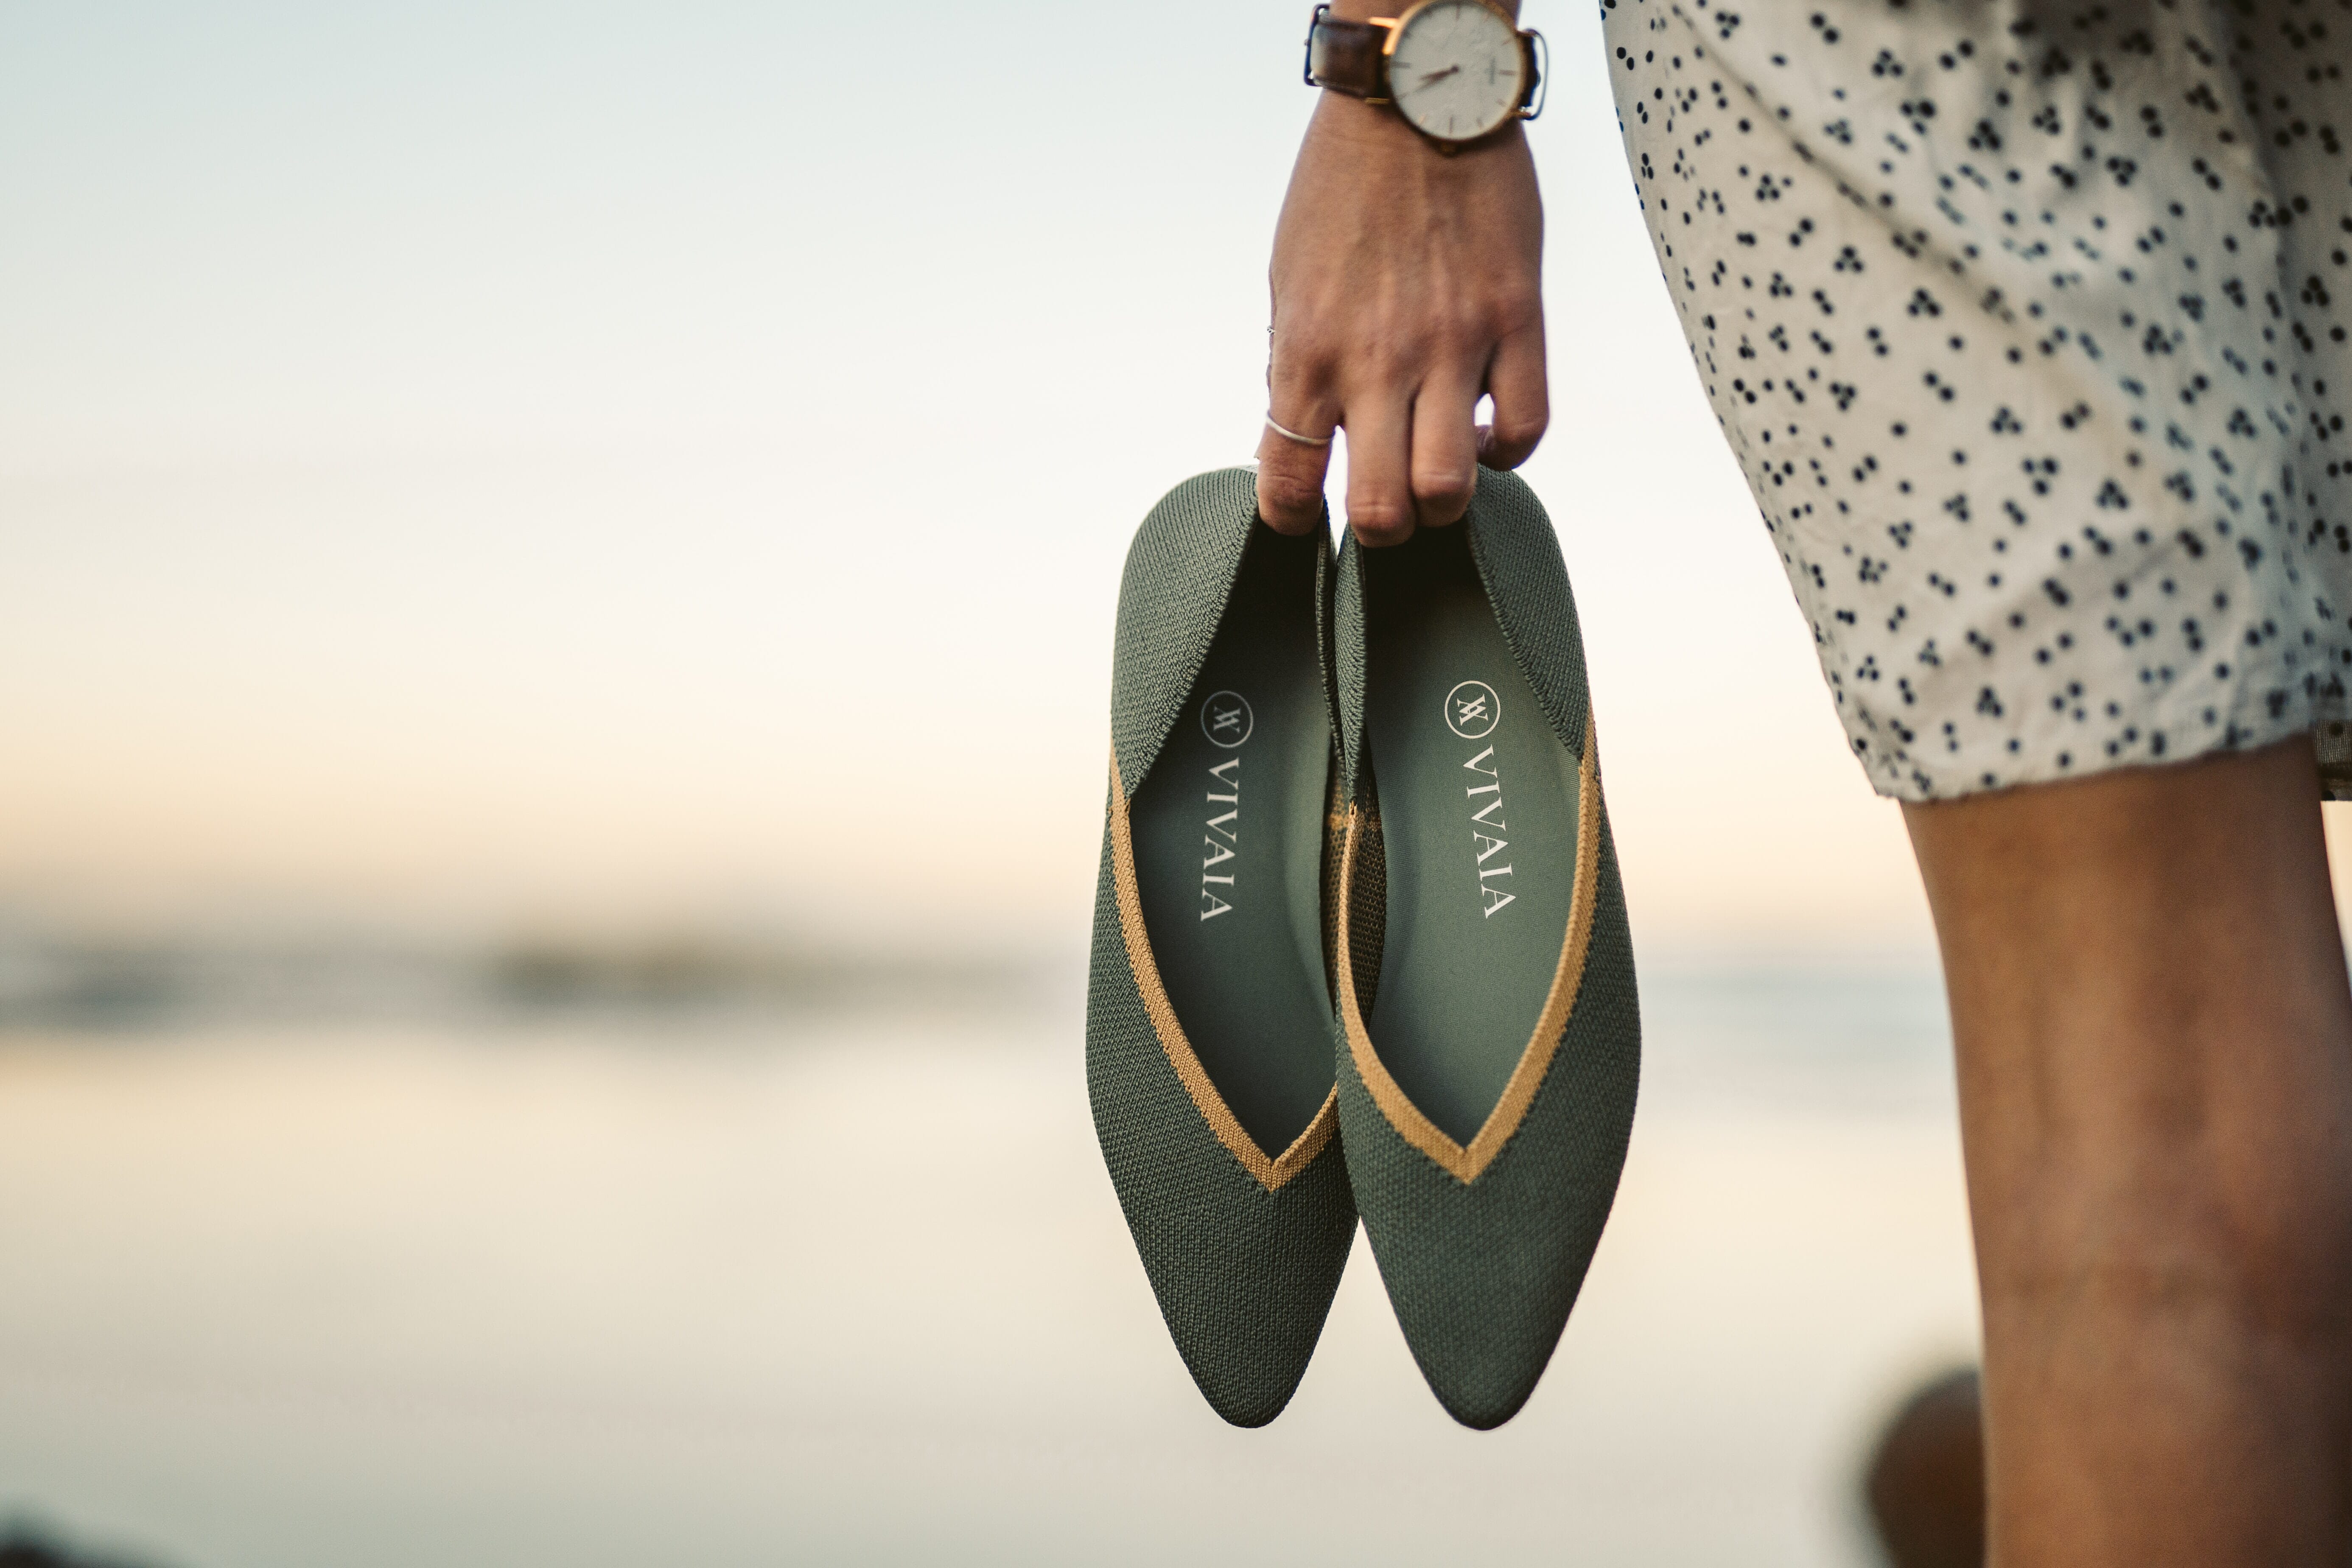
44. Use Scale to Show Size

Showing the size of something can be a great way to sell it (especially if the size is an important characteristic that helps the product stand out from competitors). Play around with different household objects that most people know the size of.
If all else fails, we know the average size of a hand, so go ahead and use hands for scale.
45. Go On Location to Sell the Lifestyle
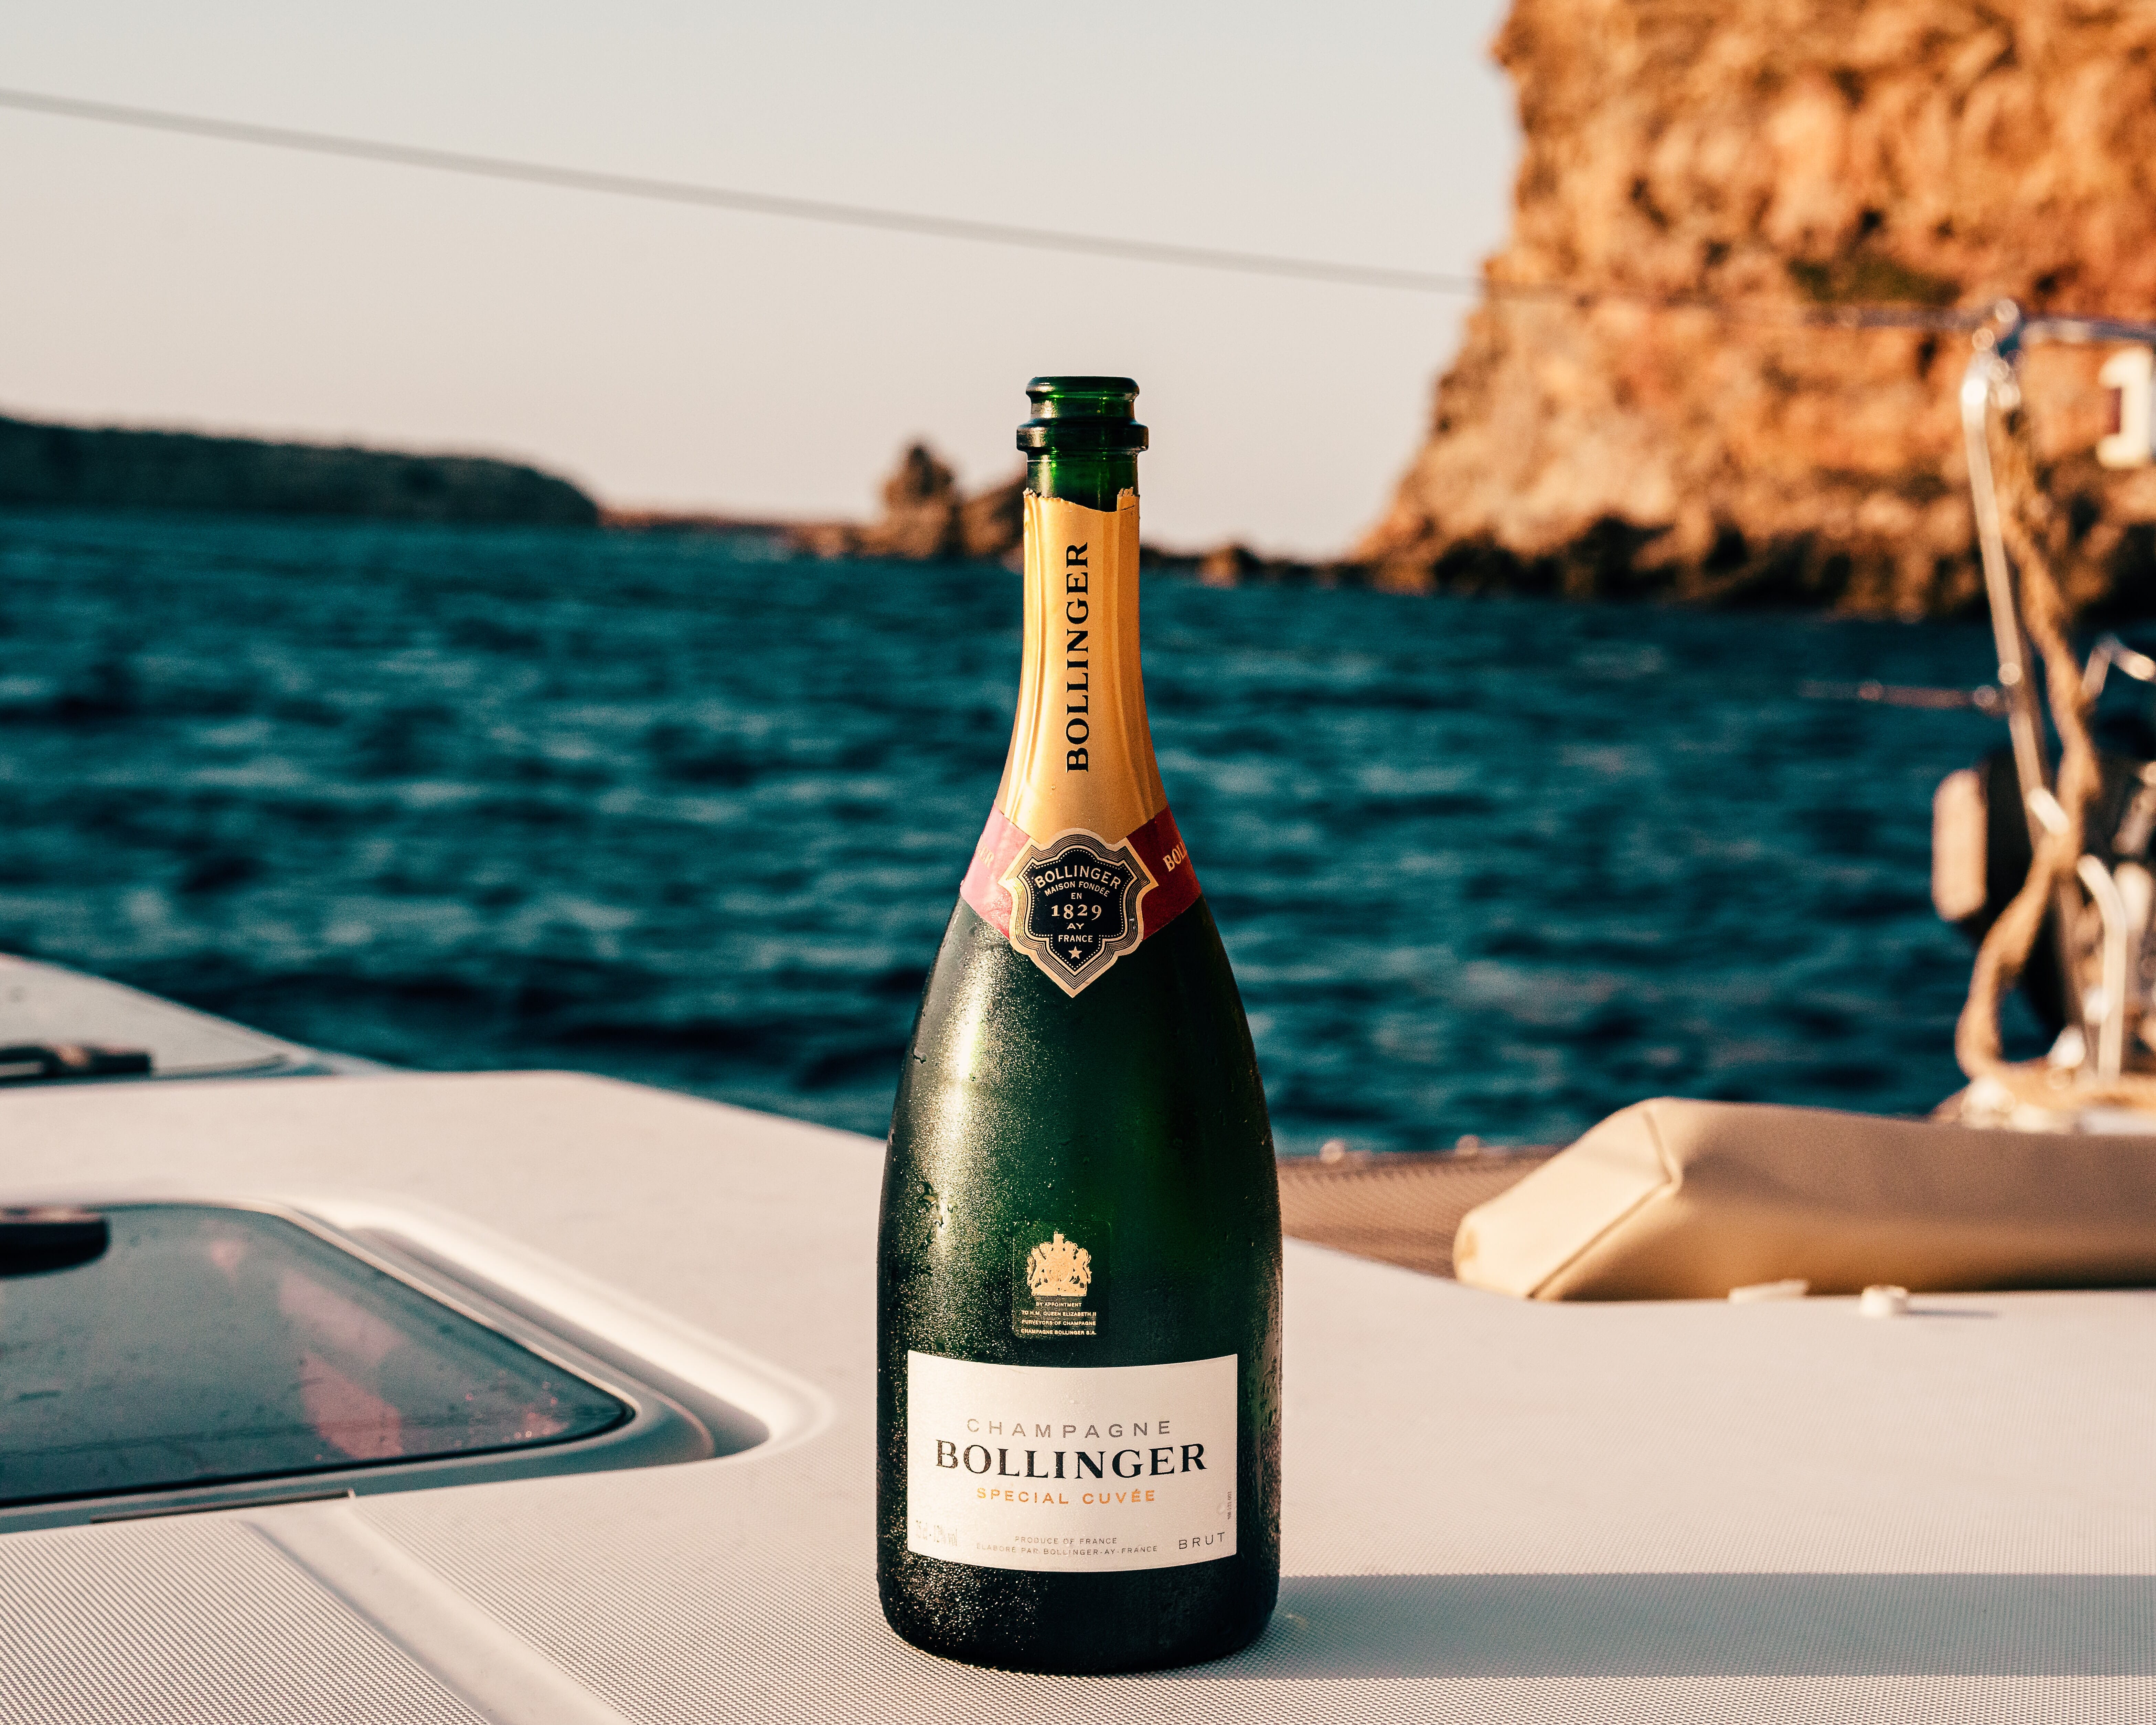
Notice how we keep repeating that lifestyle term? That’s because it’s very effective for sales. You want your audience to want that product because it’s like a gateway into the life they wish to live or the type of person they want to associate with. Just like this bottle of an adult beverage on a gorgeous boat with a beautiful sea – wouldn’t you want to enjoy that kind of vacation?
Ideas With a Model
You don’t have to feel stuck with still life shots only, adding a model or two into there can help tremendously!
46. Use Depth of Field
For the more lifestyle and candid look, use shallow depth of field to show that there is a person there, but keep that person ambiguous. The model blends into your scenery, which helps place the product into the space (and expresses that this is something one might have casually in their home) without the model becoming a distraction. This shoot looks to have been taken with something like an aperture of F/1.4.
47. Show the Product In Real Use

Go ahead and show that oil being used – the more your images explain what your product is, the more effective they will be! A lot of products used in product photography cannot be re-sold anyways as they’ve been opened and touched, so don’t be wary about actually opening the bottle and using it.
48. Use the Body As a Compositional Accessory
You can use the human body to compose your shot, such as hands to hold an object. You don’t even need the product to be something people would normally have in hand! This idea also helps you show the product in ways you wouldn’t be able to with it flat on the ground.
49. You Don’t Need to Show Faces

Believe it or not, you really don’t need to show faces in all of your product captures. In fact, not showing a face helps the viewer imagine themselves as the model in your photograph – therefore, using the product you want them to have an interest in. You can play with a variety of different ways to hide.
Just keep in mind that if you’re keeping your model ambiguous through cropping, don’t crop at a joint! Always crop between the joints so it doesn’t look like you handicapped your subject.
50. Keep it Casual

Gone are the days of models forcing a smile while holding up whatever it is you’re supposed to want to buy… keep it casual! Images that don’t scream “BUY THIS NOW” are more effective than those that are trying way too hard.
Ask your model to interact with the product you are capturing in whatever way feels organic and natural. Use wider, more landscape compositions to keep the shot from looking overwhelmingly like a commercial.
Our Final Thoughts
In conclusion, there are so many ways to tackle product photography that it would take a millennium to disclose all of them. We hope that this list of 50 ideas helps get your gears turning and inspires you to think a bit more out-of-the-box for your product photography offerings!
Happy shooting!
