
- Off-camera flash uses portable speedlights positioned away from the camera for full control over lighting direction, intensity, and quality.
- Choosing the right flash depends on budget, power (guide number), TTL vs. manual control, and compatibility with wireless triggers.
- Key accessories include light stands, flash mounts, wireless triggers, reflectors, and light modifiers like umbrellas and softboxes.
- Flash exposure is controlled by adjusting flash power while keeping shutter speed at sync speed, ISO low, and aperture set for depth of field.
- One-flash setups like 45-45 lighting, split lighting, and rim lighting can produce professional portraits with minimal gear.
- Two and three-flash setups add fill light, background separation, and creative cross-lighting for studio-quality results.
Introduction
Off-camera flash is one of the most powerful tools a photographer can add to their kit. Moving a speedlight off the camera and onto a light stand opens up an entirely new dimension of creative control — the ability to shape light, sculpt features, and eliminate unflattering shadows that plague built-in flash photography.
This guide covers everything needed to get started with off-camera flash — from choosing the right speedlight and accessories to mastering one, two, and three-flash lighting setups. Whether the goal is flattering portraits, dramatic low-key shots, or professional product photography, understanding flash fundamentals makes all the difference.
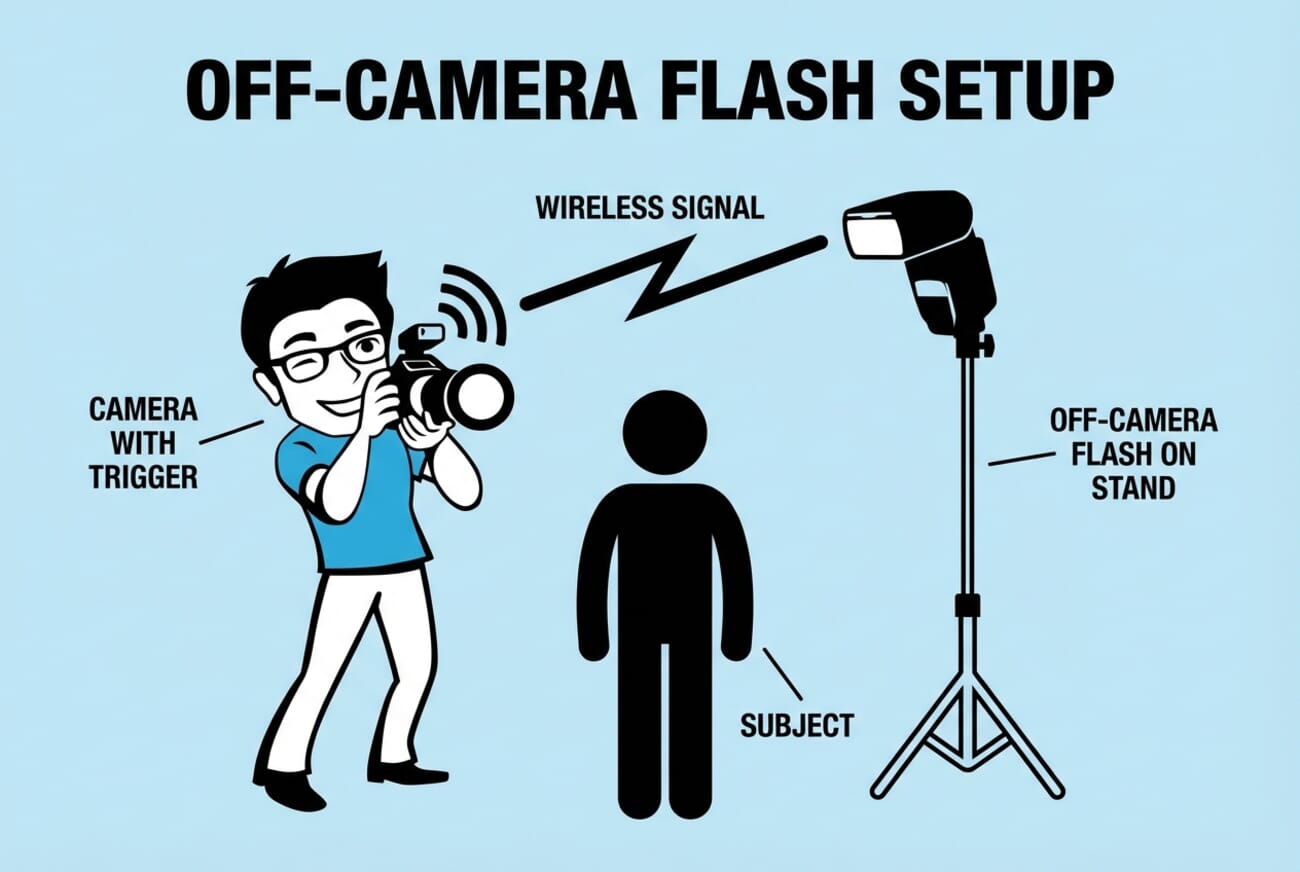
What Is Off-Camera Flash?
An off-camera flash (also called a speedlight) is a compact, battery-powered flash unit that operates independently from the camera. Unlike the built-in pop-up flash that fires head-on and produces flat, unflattering light, a speedlight can be positioned anywhere — on a light stand, handheld by an assistant, or mounted on a bracket — to create directional, shaped light.

It is important to distinguish speedlights from studio strobes (also called monolights). Studio strobes deliver significantly more power but require AC power or heavy battery packs, making them impractical for location work. Speedlights run on standard AA batteries (or proprietary lithium packs in newer models), fit in a camera bag, and can be set up in minutes. For a deeper comparison, check out this guide to strobe lights for photography.
For photographers who prioritize portability and versatility, investing in one or more speedlights is a smart move. Modern third-party options from brands like Godox, Yongnuo, and Neewer deliver TTL, high-speed sync (HSS), and built-in wireless capability at a fraction of what Canon, Nikon, or Sony charge for their first-party units.
What Can You Do With a Flash?
A single speedlight can dramatically transform photography. Here are some of the key creative possibilities it unlocks:
Control over ambient light. With a powerful light source under full control, the quality of available light becomes less critical. Shooting at dawn, dusk, midday, or indoors — a flash ensures consistent, high-quality results regardless of conditions. Moving to a darker area effectively eliminates ambient light, giving the photographer complete control over the scene.
Create high-key backgrounds. Ultra-white backgrounds convey a fresh, modern look that works beautifully for headshots, product photos, and fashion work:
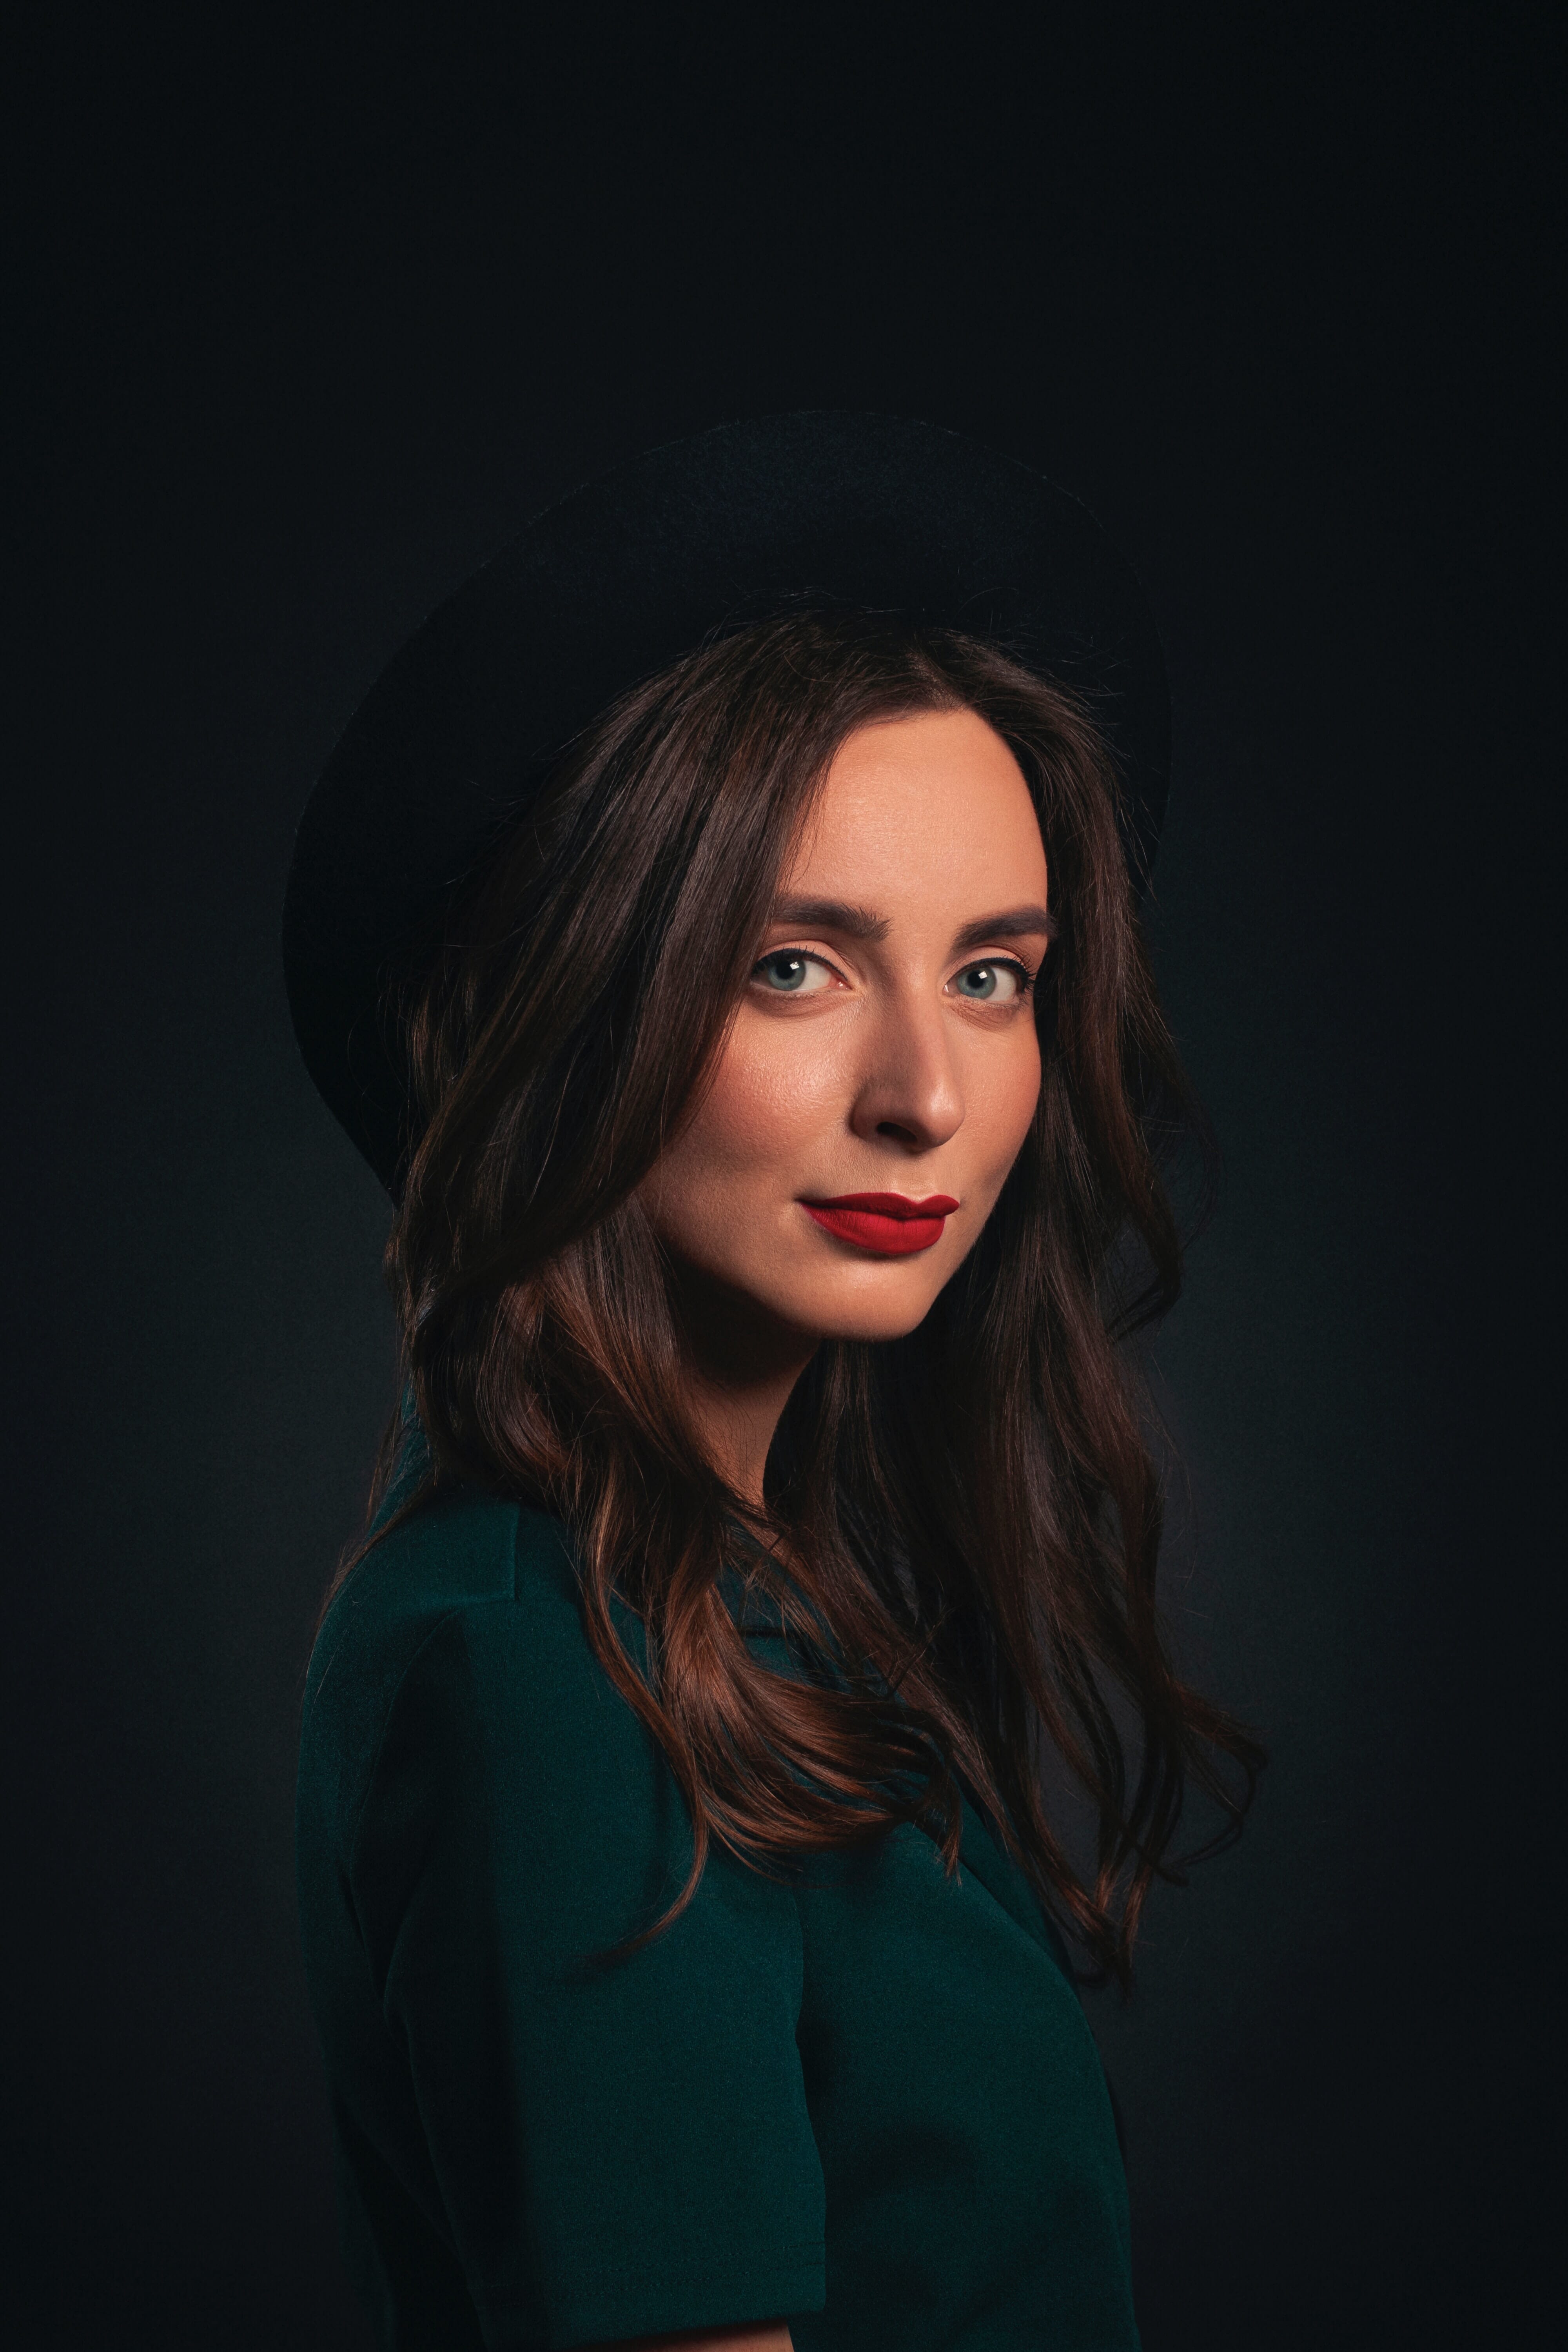
Achieve low-key backgrounds. Deep black backgrounds create moody, dramatic portraits — the opposite of high-key, but equally impactful:
Flattering portrait lighting. A flash can sculpt facial features from any angle — creating dramatic light, soft fill, rim light, and everything in between. The ability to shape light is what separates amateur snapshots from professional portraits.
Choosing the Right Off-Camera Flash
Selecting the right speedlight involves balancing several factors. Here is what to consider:
Budget. Speedlights range from $30 budget models to $500+ flagship units. Starting with one or two affordable flashes from Godox or Yongnuo is a practical way to explore flash photography without a large upfront investment. If the passion sticks, upgrading later is straightforward.
Power (guide number). The guide number indicates maximum flash brightness. In a small home studio, modest power is fine. For outdoor shoots or events where the flash needs to reach subjects at a distance, a higher guide number is essential.
Tilt and swivel. Some budget flashes lack the ability to tilt up or swivel side to side, which severely limits bounce flash and creative positioning. Any serious speedlight should offer full tilt and swivel capability.
TTL vs. manual. Through-the-lens (TTL) metering allows the flash to communicate with the camera for automatic exposure. Manual flash requires setting power independently. TTL is convenient for fast-paced shooting (events, weddings), while manual gives more consistent, predictable results once mastered. Many photographers prefer manual for studio-style work.
Wireless compatibility. Modern flash systems from Godox, Profoto, and others include built-in wireless receivers. If using a third-party wireless trigger, verify compatibility between the flash and trigger before purchasing.
Budget-friendly recommendations. The Godox V1 and V860III series offer TTL, HSS, and built-in wireless capability for under $200 — features that cost twice as much from Canon, Nikon, or Sony. The Godox TT685II is another excellent option at an even lower price point. These third-party speedlights have become the go-to choice for many working professionals.
Essential Flash Accessories
A flash mounted on the camera hotshoe works, but the real creative potential of off-camera flash comes from positioning the light in different locations relative to the subject. These accessories make that possible:
Light stand. A light stand functions like a tripod for the flash, enabling placement in front of, beside, or behind the subject. Quality stands are available for under $20, and a pair covers most setups.
Flash mount (cold shoe bracket). This attaches to the light stand and holds the flash securely. Many mounts include an umbrella holder for added versatility.
Wireless trigger. A wireless trigger mounts to the camera hotshoe and fires the flash remotely when the shutter is pressed. Popular options include the Godox X2T and Xpro series. Some camera-flash combinations support built-in wireless triggering, but a dedicated trigger offers more reliable results and greater range. For more on sync speeds and triggers, see this guide to flash sync.
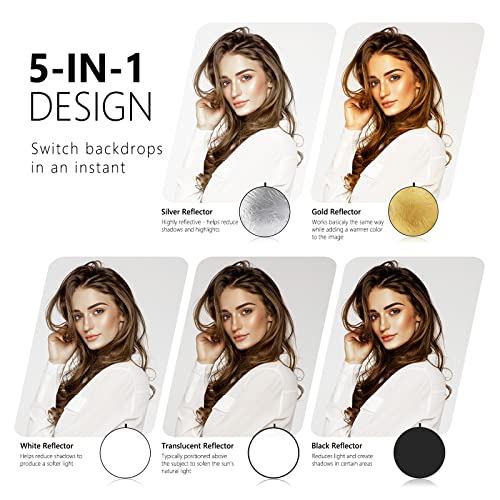
Reflector. A 5-in-1 reflector bounces light back onto the subject and doubles as a diffuser when held in front of the flash. An affordable essential for any flash photographer:
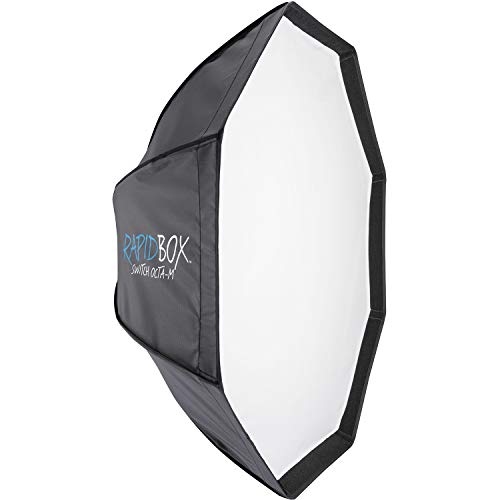
Light modifiers. Modifiers shape and soften flash output. At minimum, one modifier is needed to transform harsh speedlight output into flattering light. A white shoot-through umbrella is the best starting point — affordable, lightweight, and effective:

Flash lighting without a modifier tends to be harsh and unflattering. Even a simple umbrella makes an enormous difference in light quality. More modifier options are covered in the flash modifiers section below.
Flash Exposure Basics
Exposure with flash adds one variable to the standard exposure triangle of aperture, shutter speed, and ISO: flash power.
The recommended approach for manual flash photography is to lock in camera settings first, then adjust exposure solely through flash power:
- Shutter speed: Set to the camera’s flash sync speed (typically 1/200s or 1/250s). Since the flash duration is extremely short, shutter speed has minimal effect on flash exposure — it primarily controls ambient light.
- ISO: Keep at the lowest native setting (usually ISO 100 or 200). With flash providing ample light, high ISO is unnecessary.
- Aperture: Choose based on desired depth of field. f/8 is a safe starting point for general work; wider apertures (f/2.8-f/4) work well for portraits with background blur.
With those settings locked, adjust flash power to dial in exposure. Start at 1/16 power and take a test shot. Too dark? Increase to 1/8. Too bright? Decrease to 1/32. Each full stop doubles or halves the light output. Fine-tune with smaller increments (1/3 stops on most flashes) until the exposure looks right.
High-Speed Sync (HSS)
Standard flash sync limits shutter speed to around 1/200s-1/250s. High-Speed Sync (HSS) overcomes this by pulsing the flash rapidly during exposure, enabling flash use at any shutter speed. This is essential for overpowering bright sunlight while maintaining a wide aperture for shallow depth of field.
The tradeoff is reduced effective power — HSS eats into flash output significantly. But for outdoor portraits where ambient light needs to be controlled, it is indispensable. Most modern speedlights, including budget Godox and Yongnuo models, support HSS when paired with compatible triggers.
Hard Light vs. Soft Light
Flash photographers distinguish between two fundamental qualities of light: hard light and soft light.
Hard light creates high contrast with sharp, well-defined shadow edges. A bare (unmodified) flash produces hard light. It can look striking and dramatic, but is unflattering for most portrait work because it emphasizes skin texture and creates harsh shadows under the nose and chin.
Soft light produces gentle transitions between lit and shadowed areas, with shadows that fade gradually rather than cutting sharply. This is generally more flattering for portraits and is achieved by using light modifiers.
The key principle: larger light sources produce softer light. A bare speedlight is a tiny point source that creates hard shadows. Add an umbrella or softbox, and the effective light source becomes much larger, wrapping around the subject and softening shadows dramatically.
Flash Modifiers Explained
Modifiers transform the harsh output of a bare speedlight into shaped, controlled light. Here are the essential types:
Shoot-through umbrellas. The simplest and most affordable modifier. A white translucent umbrella is positioned between the flash and subject, diffusing light for a soft, even look. The downside is light spill — umbrellas scatter light in all directions, making them less ideal when precise light control is needed. For a deeper dive, check out this umbrella lighting setup guide.

Reflective umbrellas. Instead of shooting through the fabric, the flash fires into a silver or white interior and bounces back toward the subject. Silver produces punchier, more contrasty light; white gives a softer result. Reflective umbrellas offer slightly more directional control than shoot-through models.
Softboxes. These enclose the flash and diffuse light through a front panel, producing well-directed, soft light. They come in various shapes — rectangular, octagonal (octabox), and tall/narrow (stripbox). Softboxes offer better light control than umbrellas but are bulkier and take longer to set up.
Grids and snoots. These restrict light spread without softening it. Grids create a controlled cone of light, perfect for hair lights or background accents. Snoots narrow the beam even further for precise spotlight effects. Neither softens the light — they are about control, not quality.
For beginners, a white shoot-through umbrella is the best first modifier. It is cheap, lightweight, and produces beautiful results immediately. Softboxes, grids, and snoots become relevant as techniques advance and more specific light shaping is needed.
Creating Directional Light With a Flash
Where the flash is positioned relative to the subject determines the look and mood of the image. Understanding directional light is fundamental to lighting patterns in photography.
Frontlight
Frontlight hits the subject head-on, eliminating most shadows. This is what happens with on-camera flash — flat, featureless illumination that lacks depth:
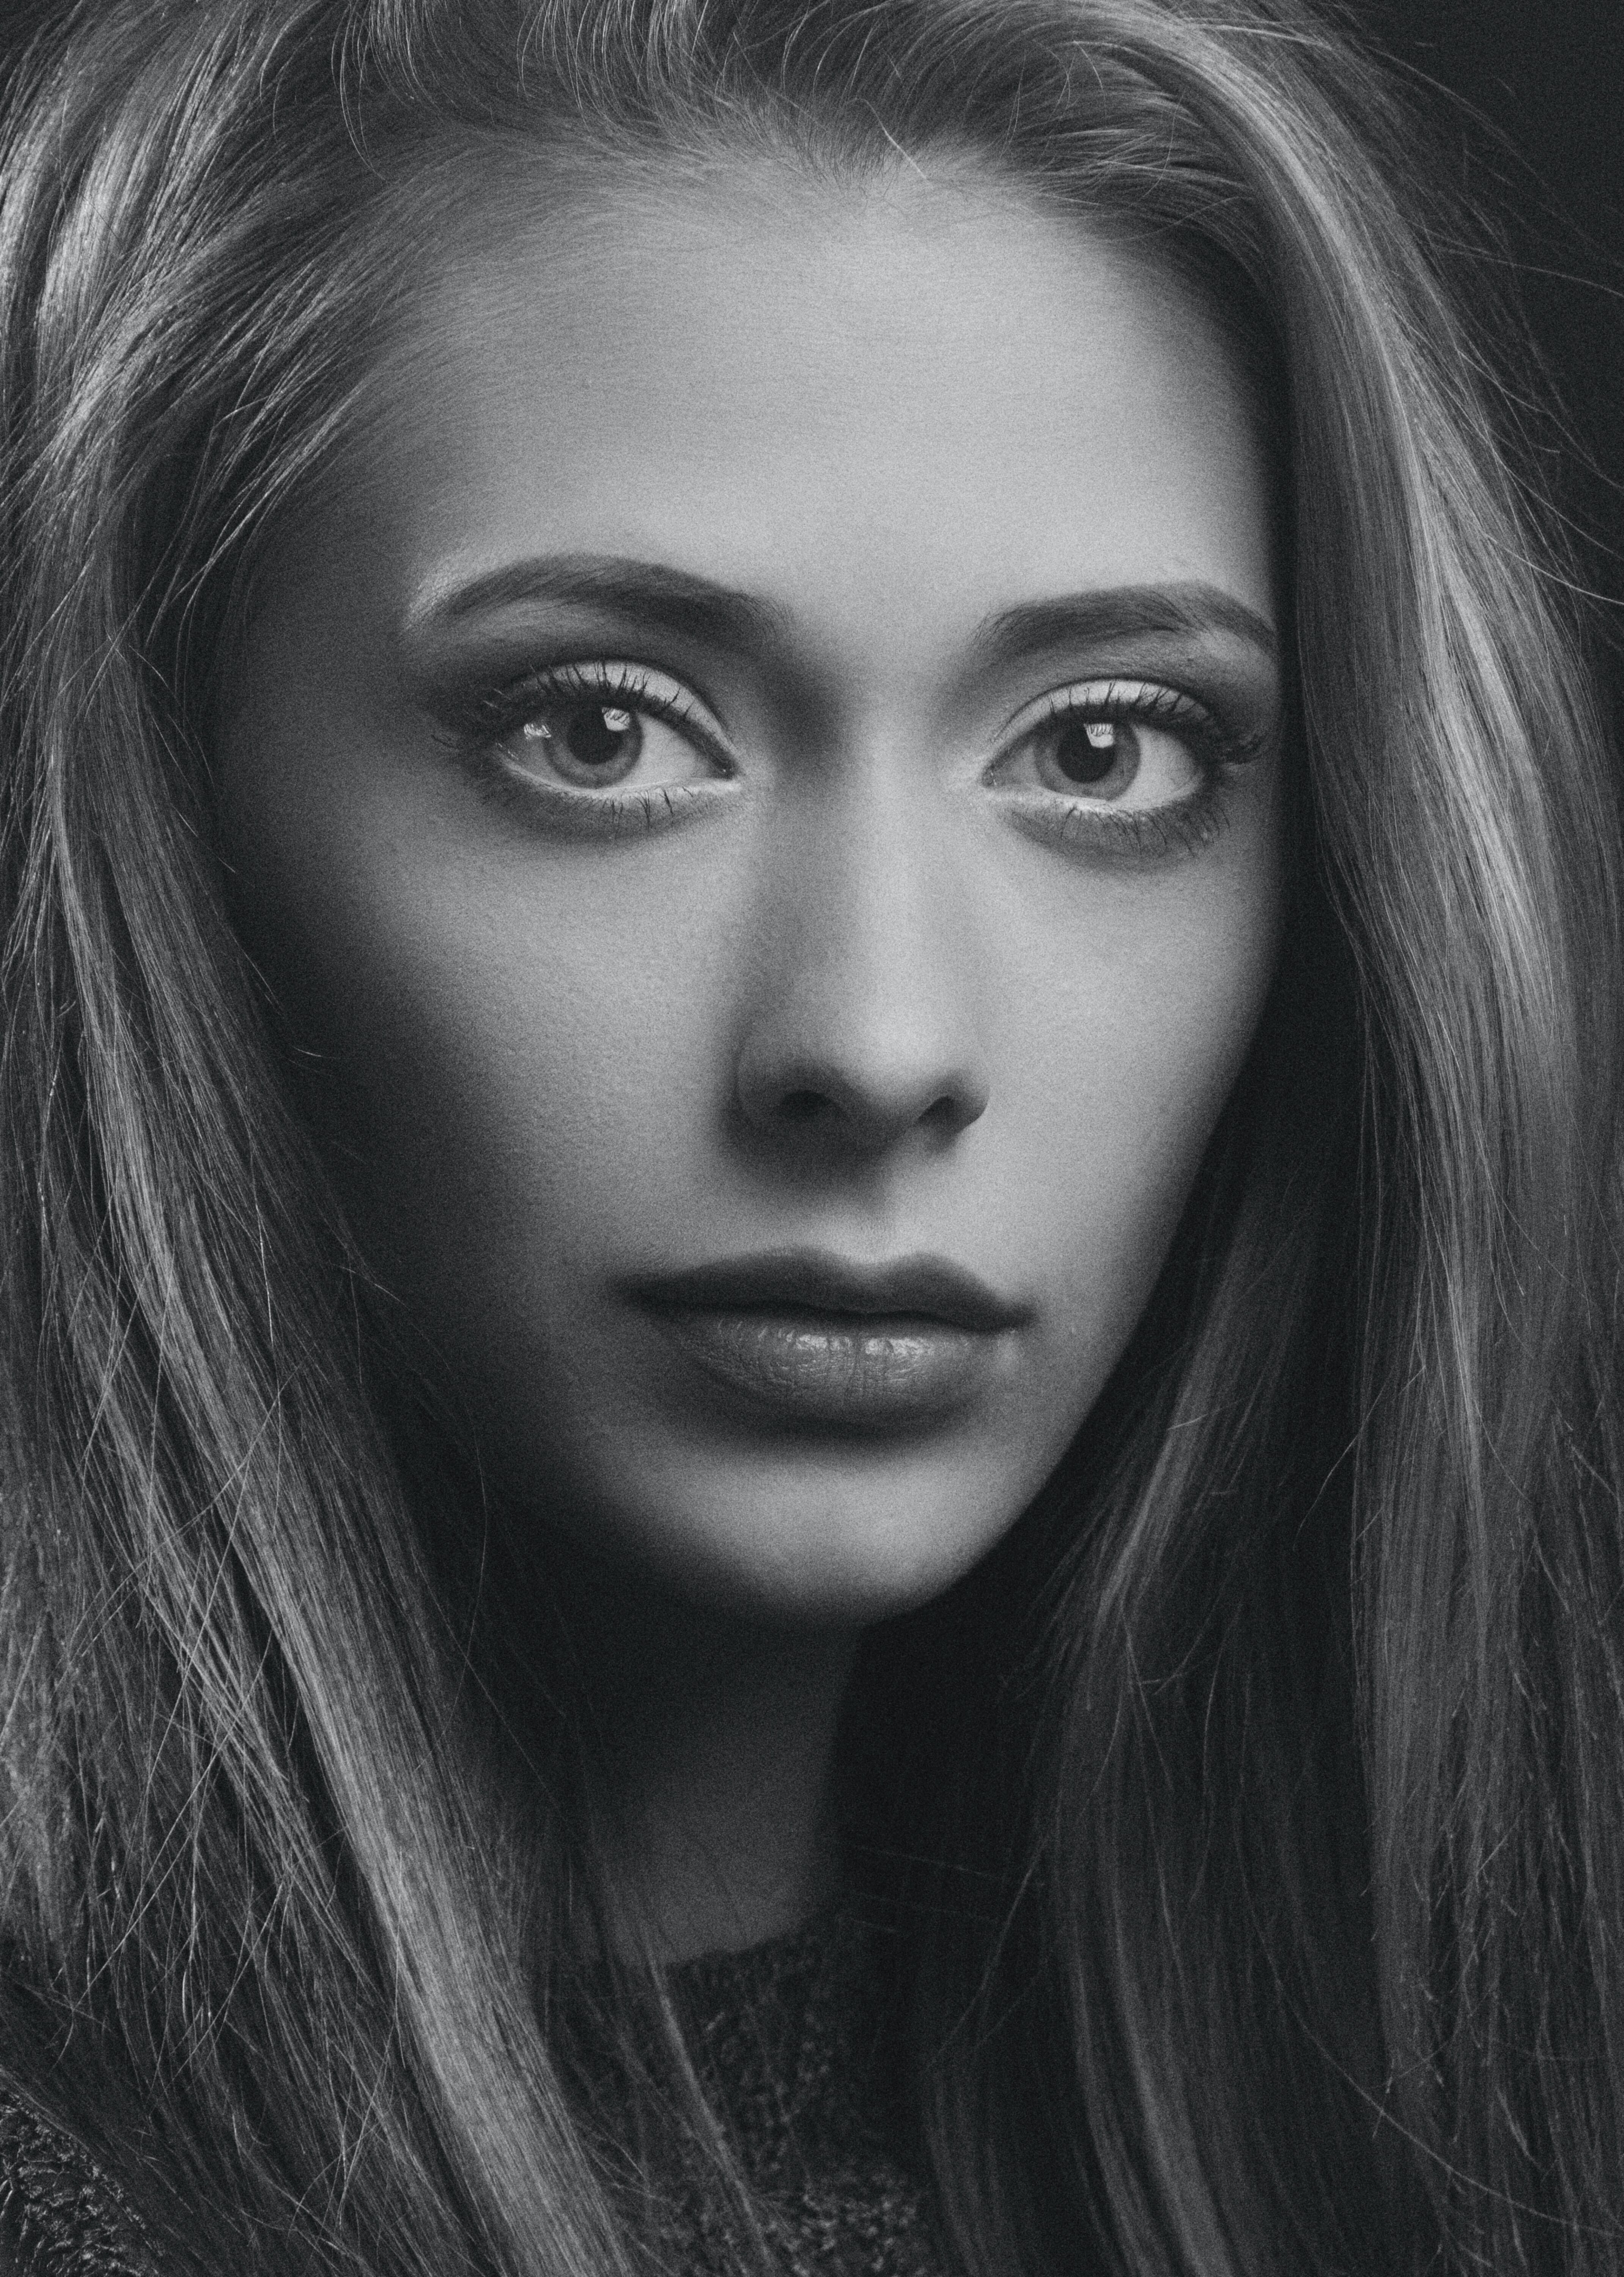
Frontlight should generally be avoided for portraits. A better variation is high frontlight, where the flash is positioned above the subject and angled down. This sculpts cheekbones and adds dimension — it is the basis for butterfly (paramount) lighting.
45-Degree Lighting
Positioning the flash at roughly 45 degrees to the side is one of the most universally flattering angles. It illuminates the subject while creating natural-looking shadows that add depth and dimension:
Adding elevation (45 degrees up AND 45 degrees to the side) creates a “window light” effect — warm, natural-looking illumination that flatters virtually any subject. This is often called 45-45 lighting and is covered in detail in the setups section below.
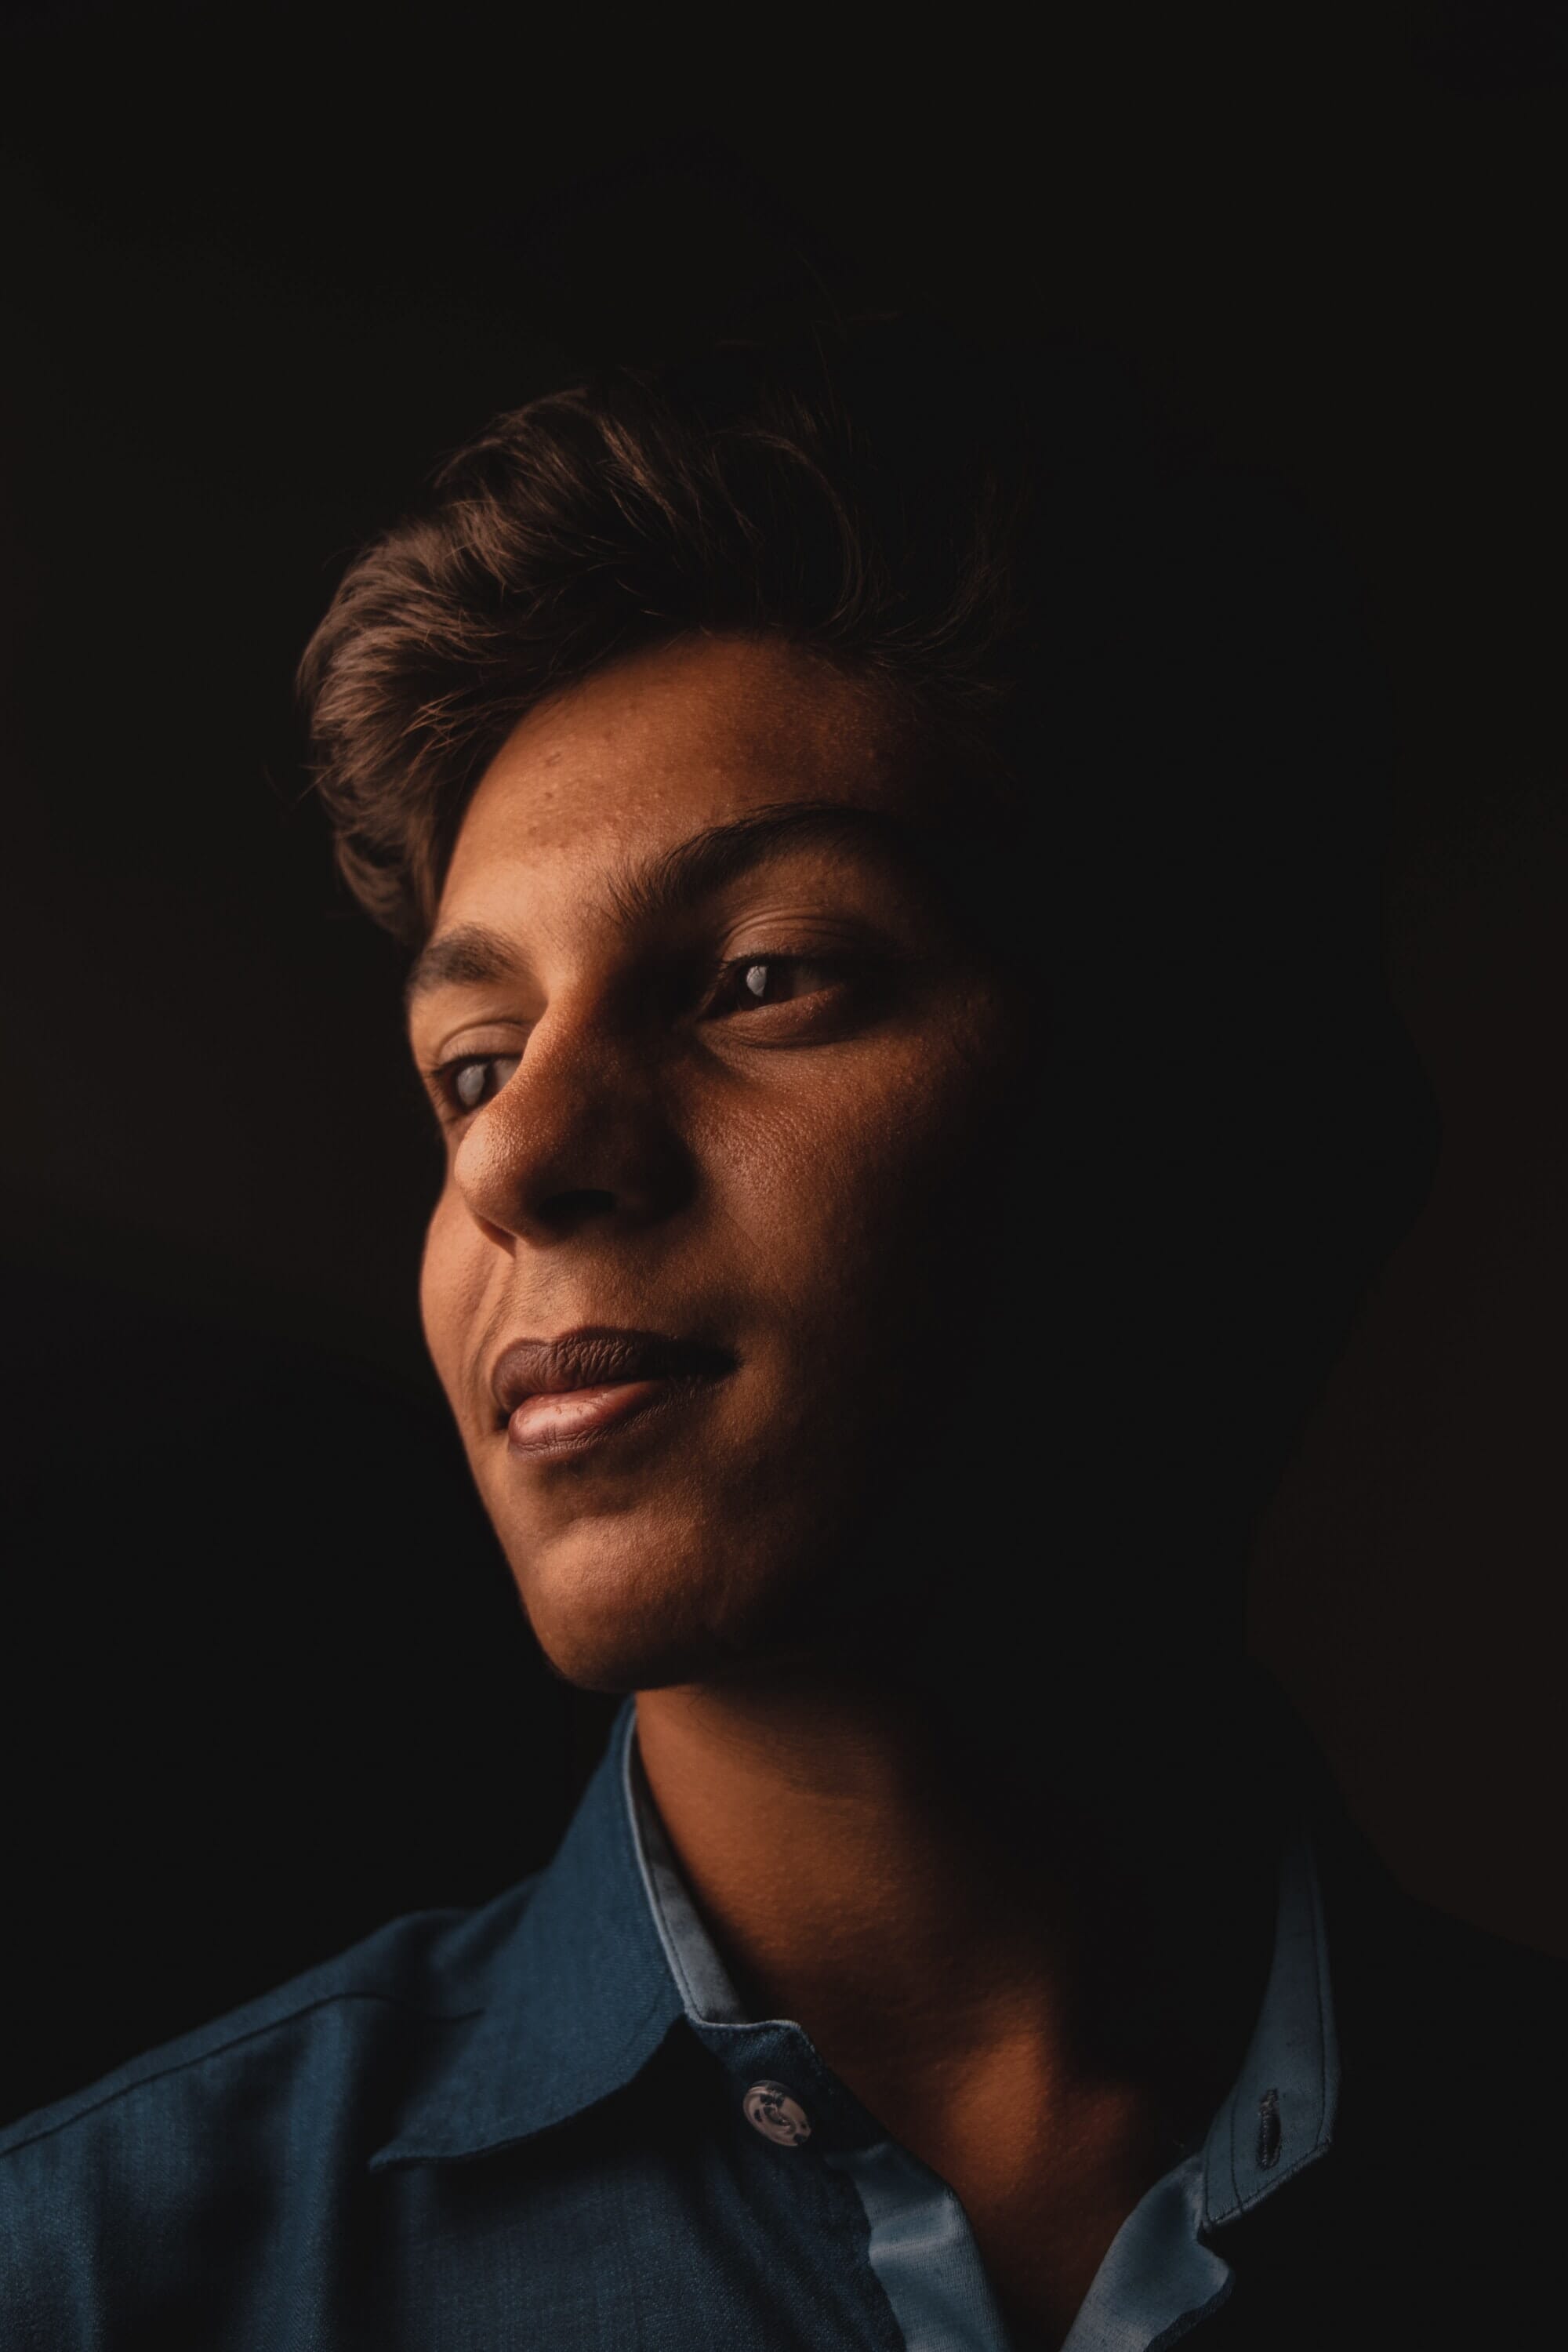
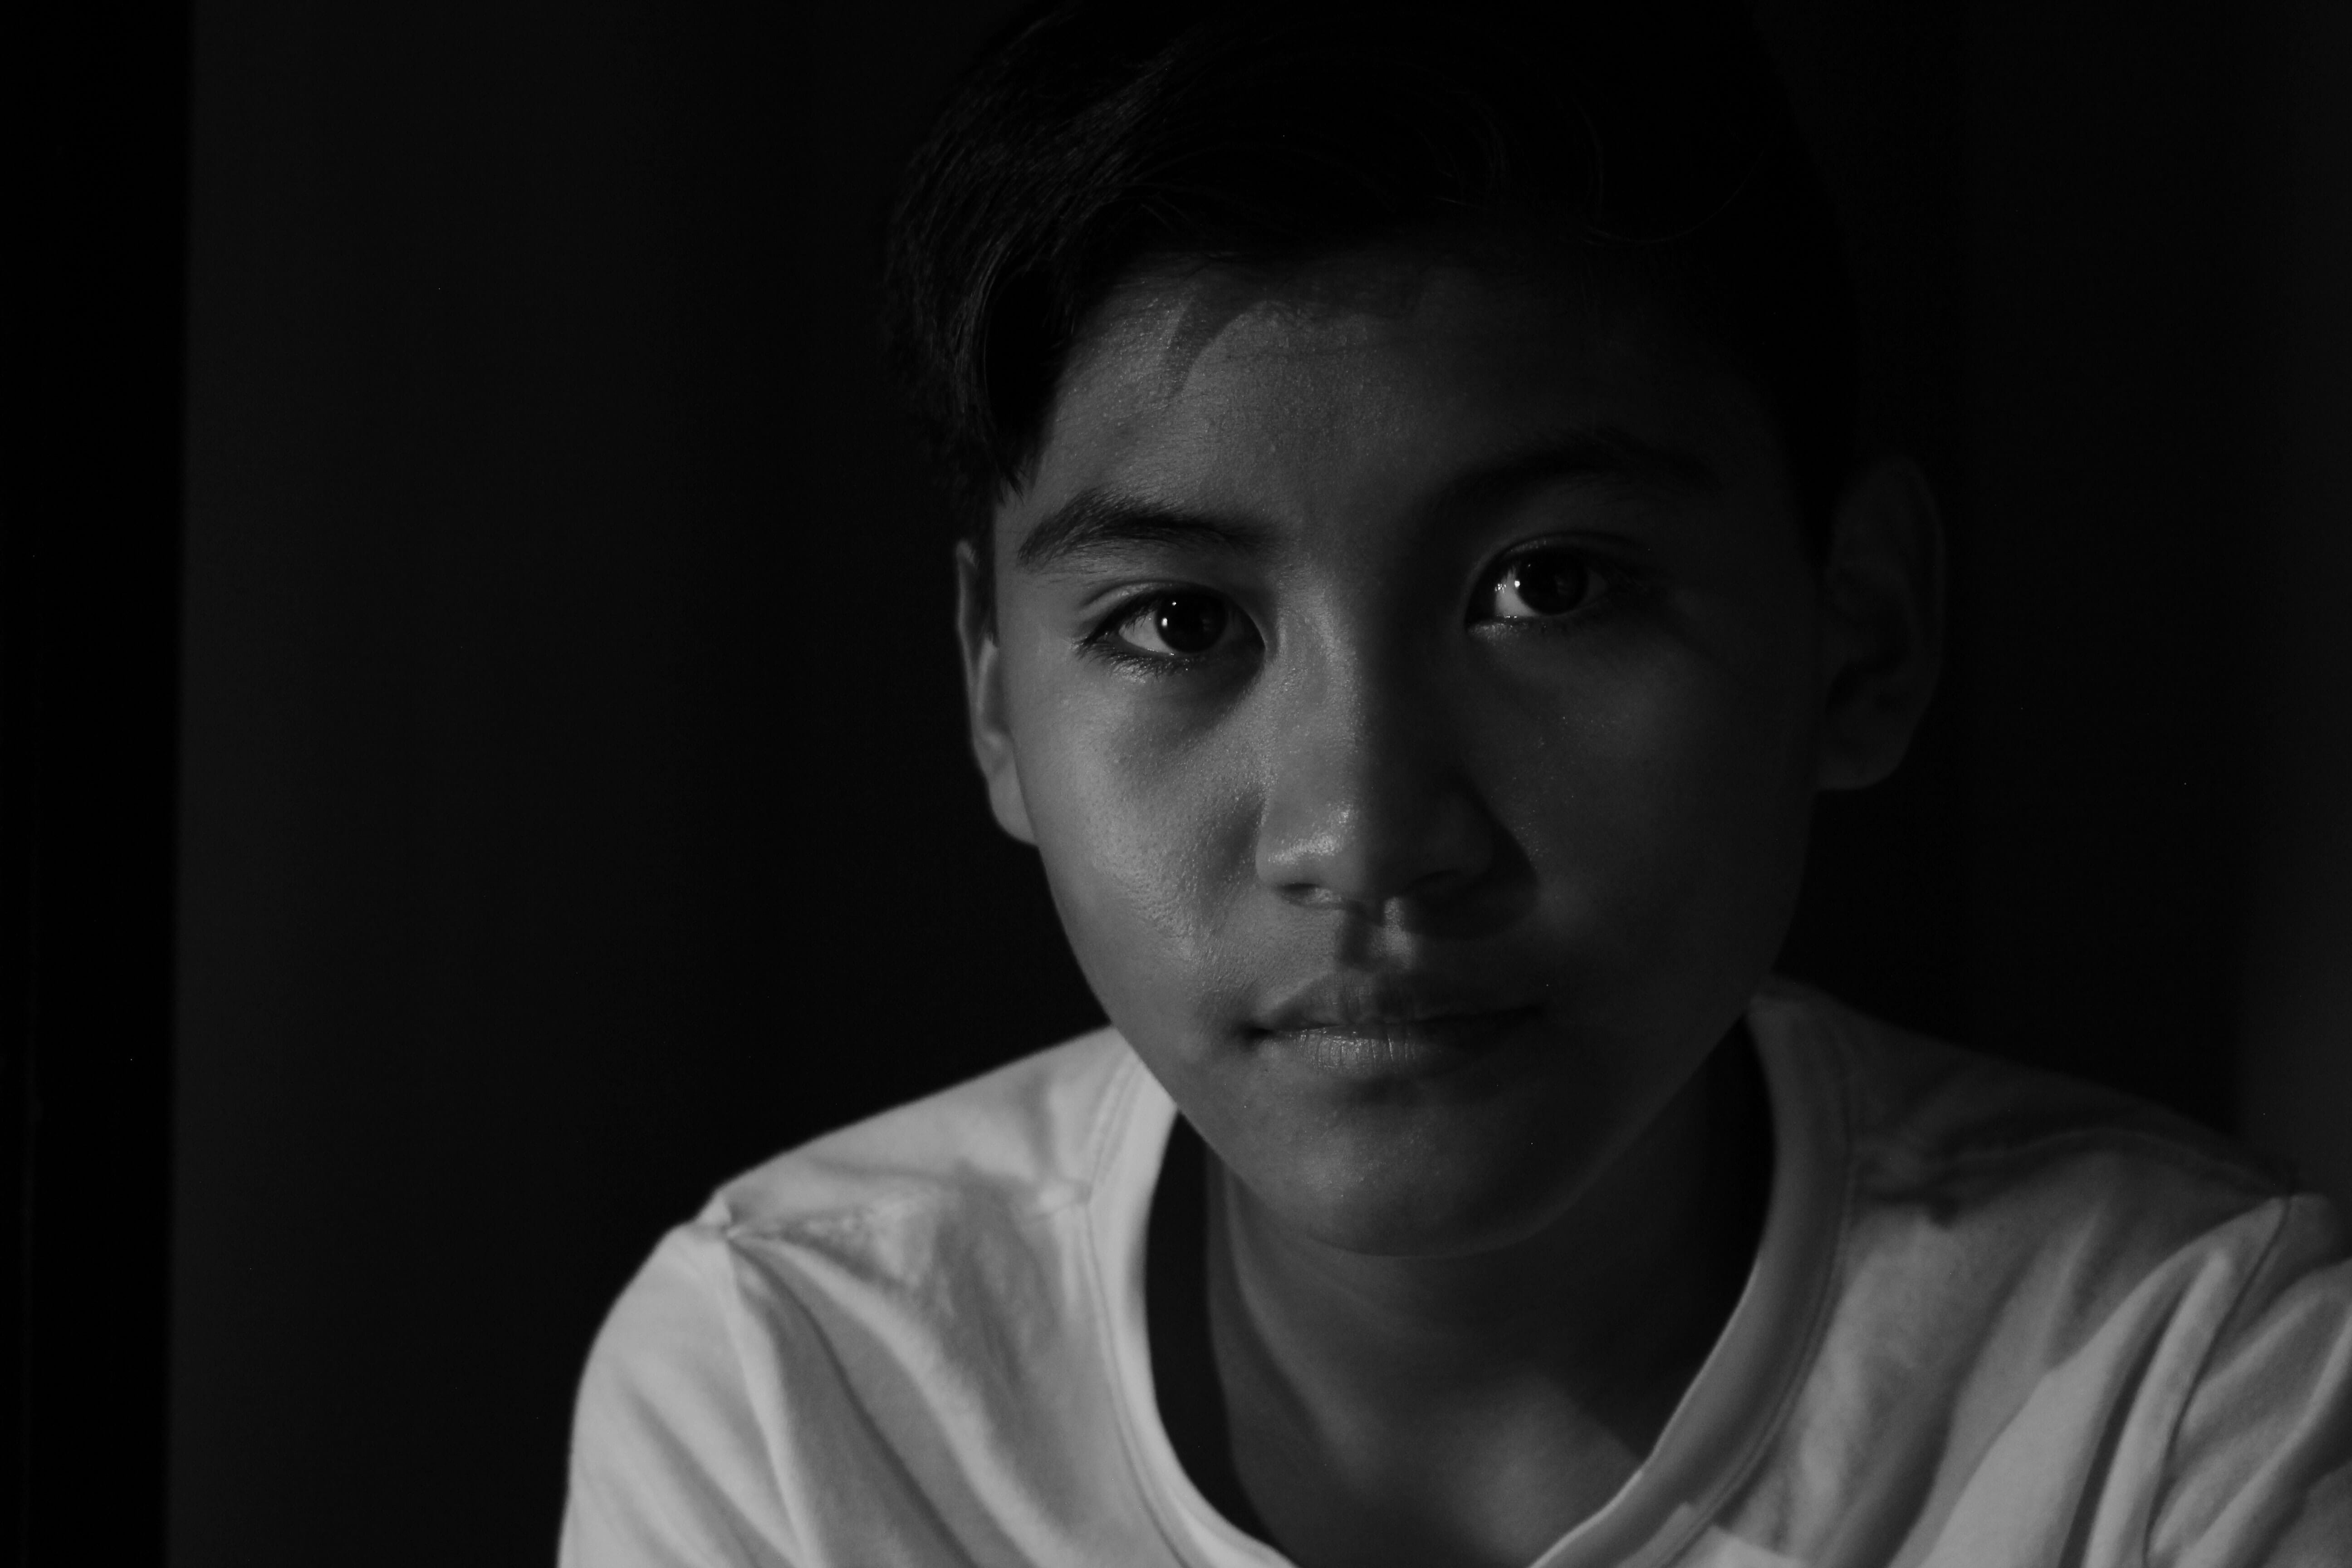
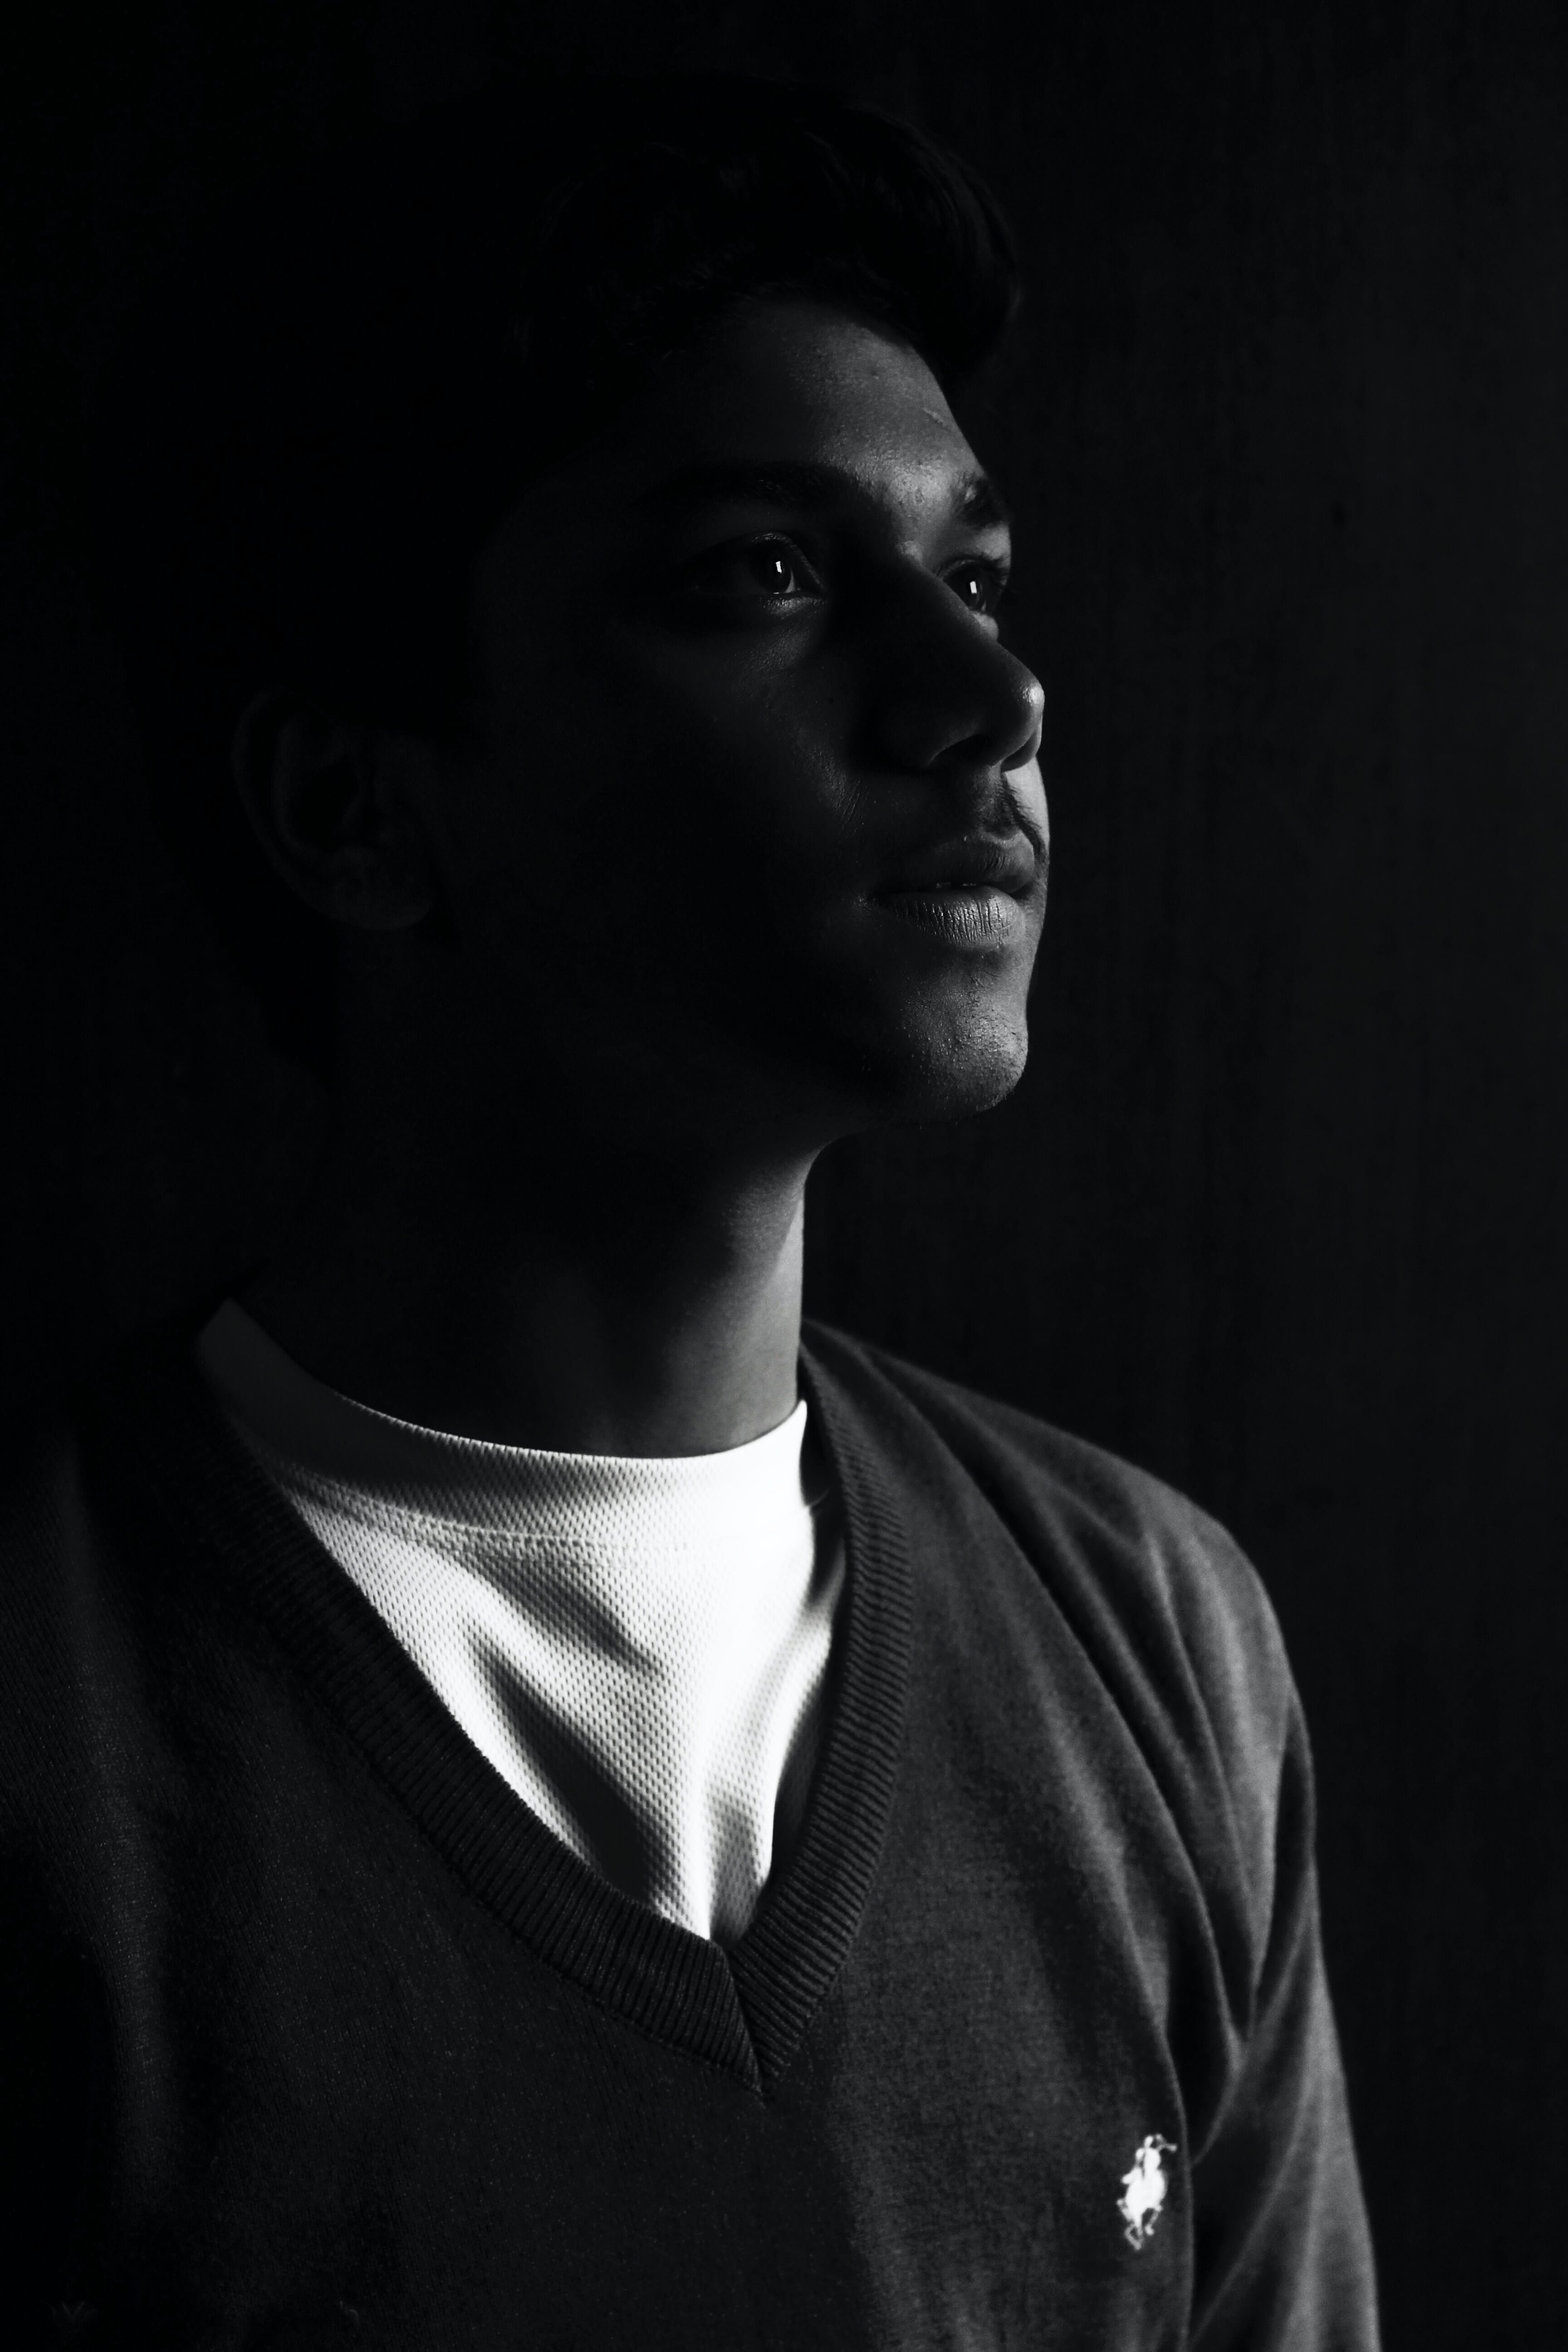
Sidelight
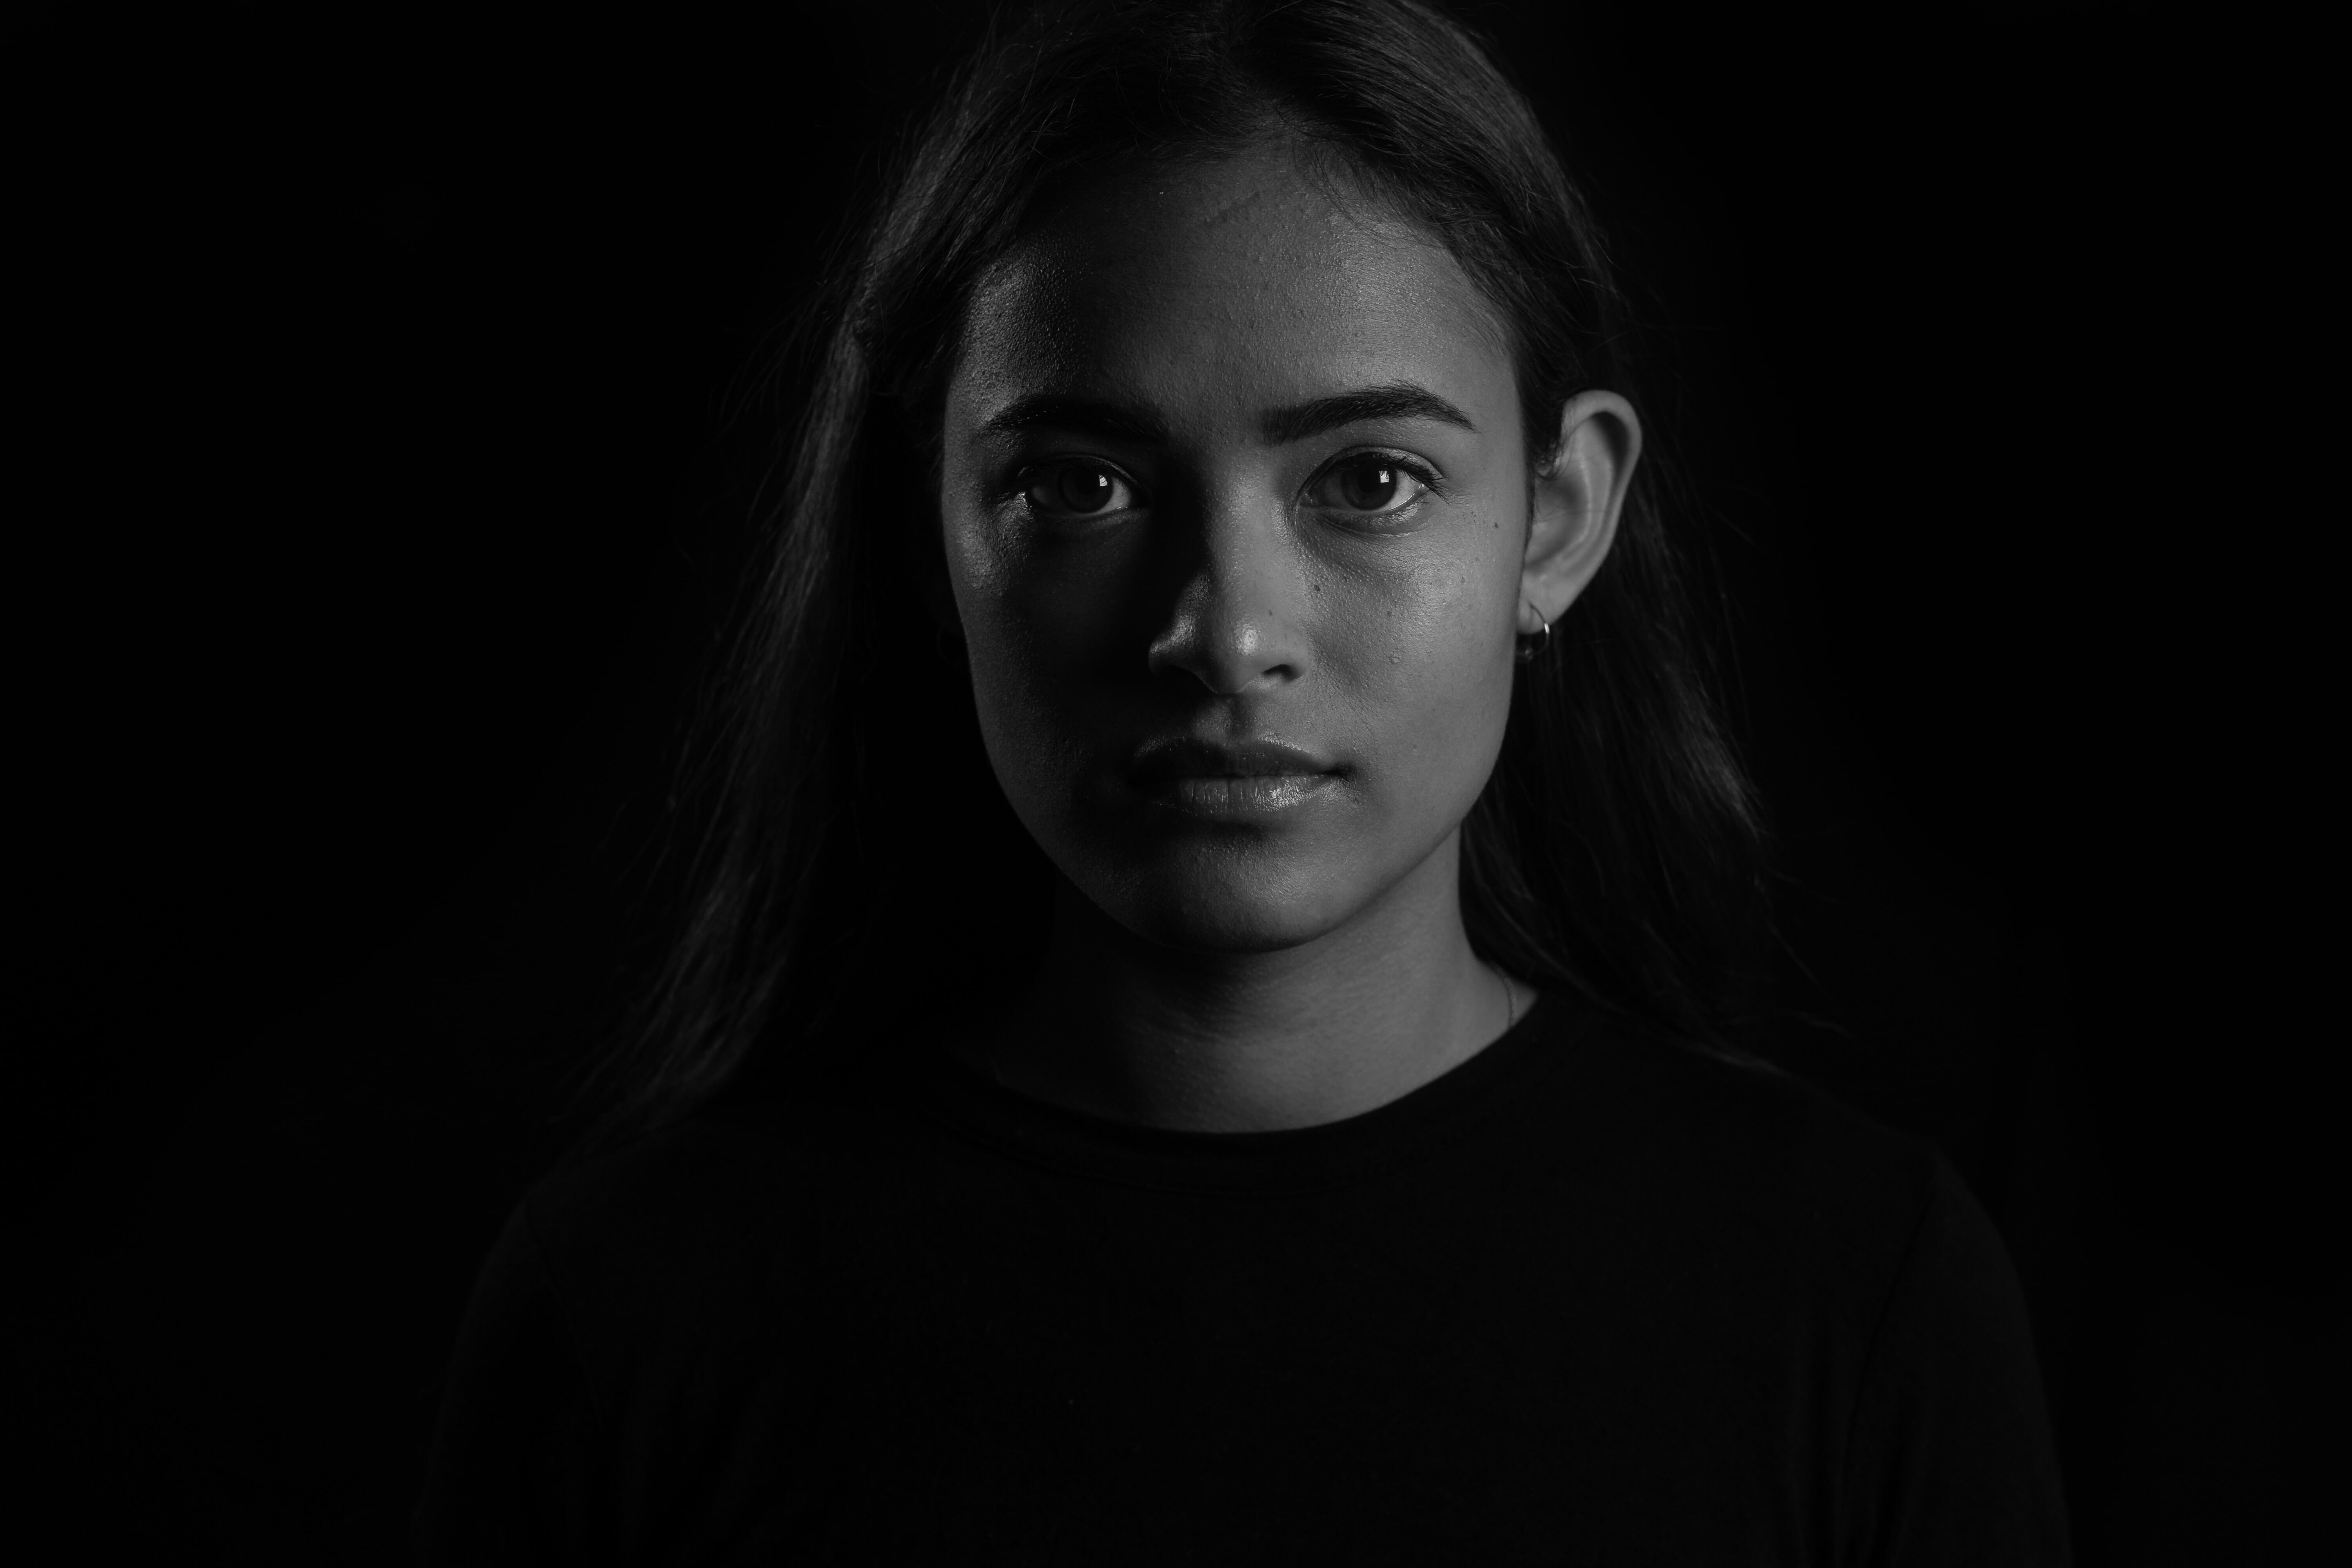
Sidelight originates from directly beside the subject, creating a dramatic half-lit, half-shadowed effect. This is the basis of split lighting:

Strong sidelight casts one half of the face in shadow while illuminating the other, producing a cinematic quality. Moving the light slightly forward softens the contrast:
Sidelit images often feature naturally dark backgrounds, since the flash falls off behind the subject. This makes sidelight a popular choice for moody, cinematic portrait work.
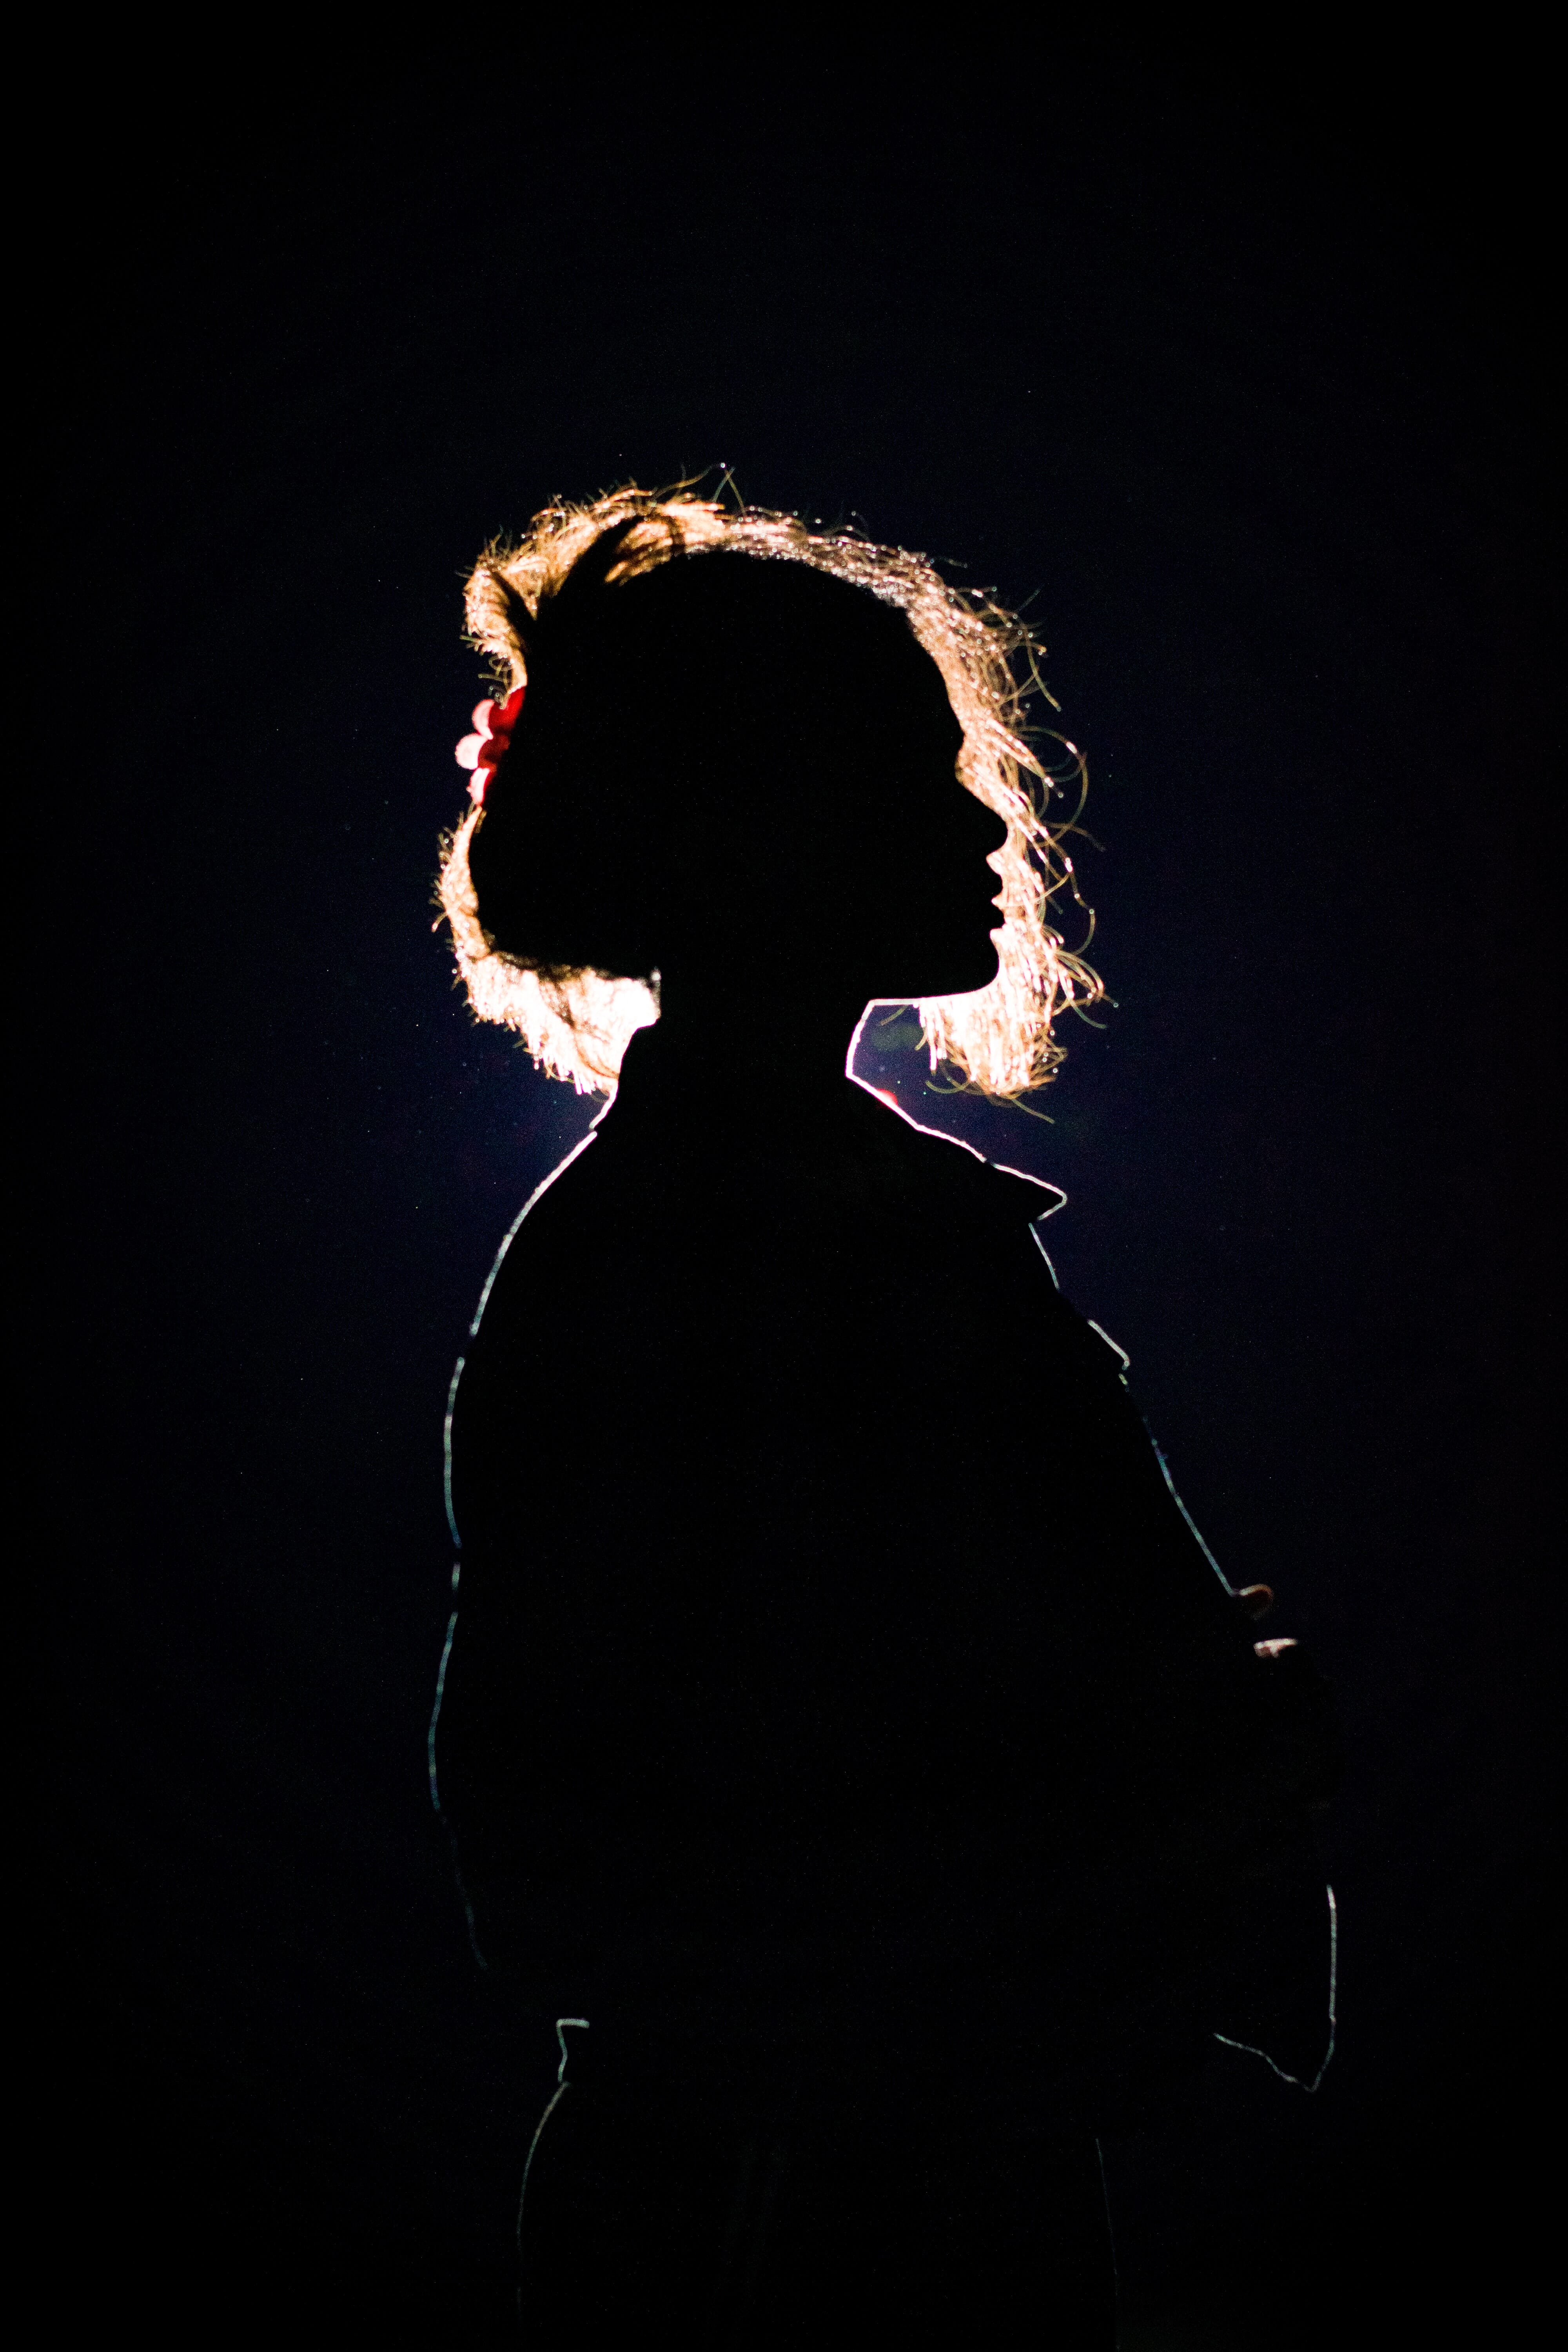
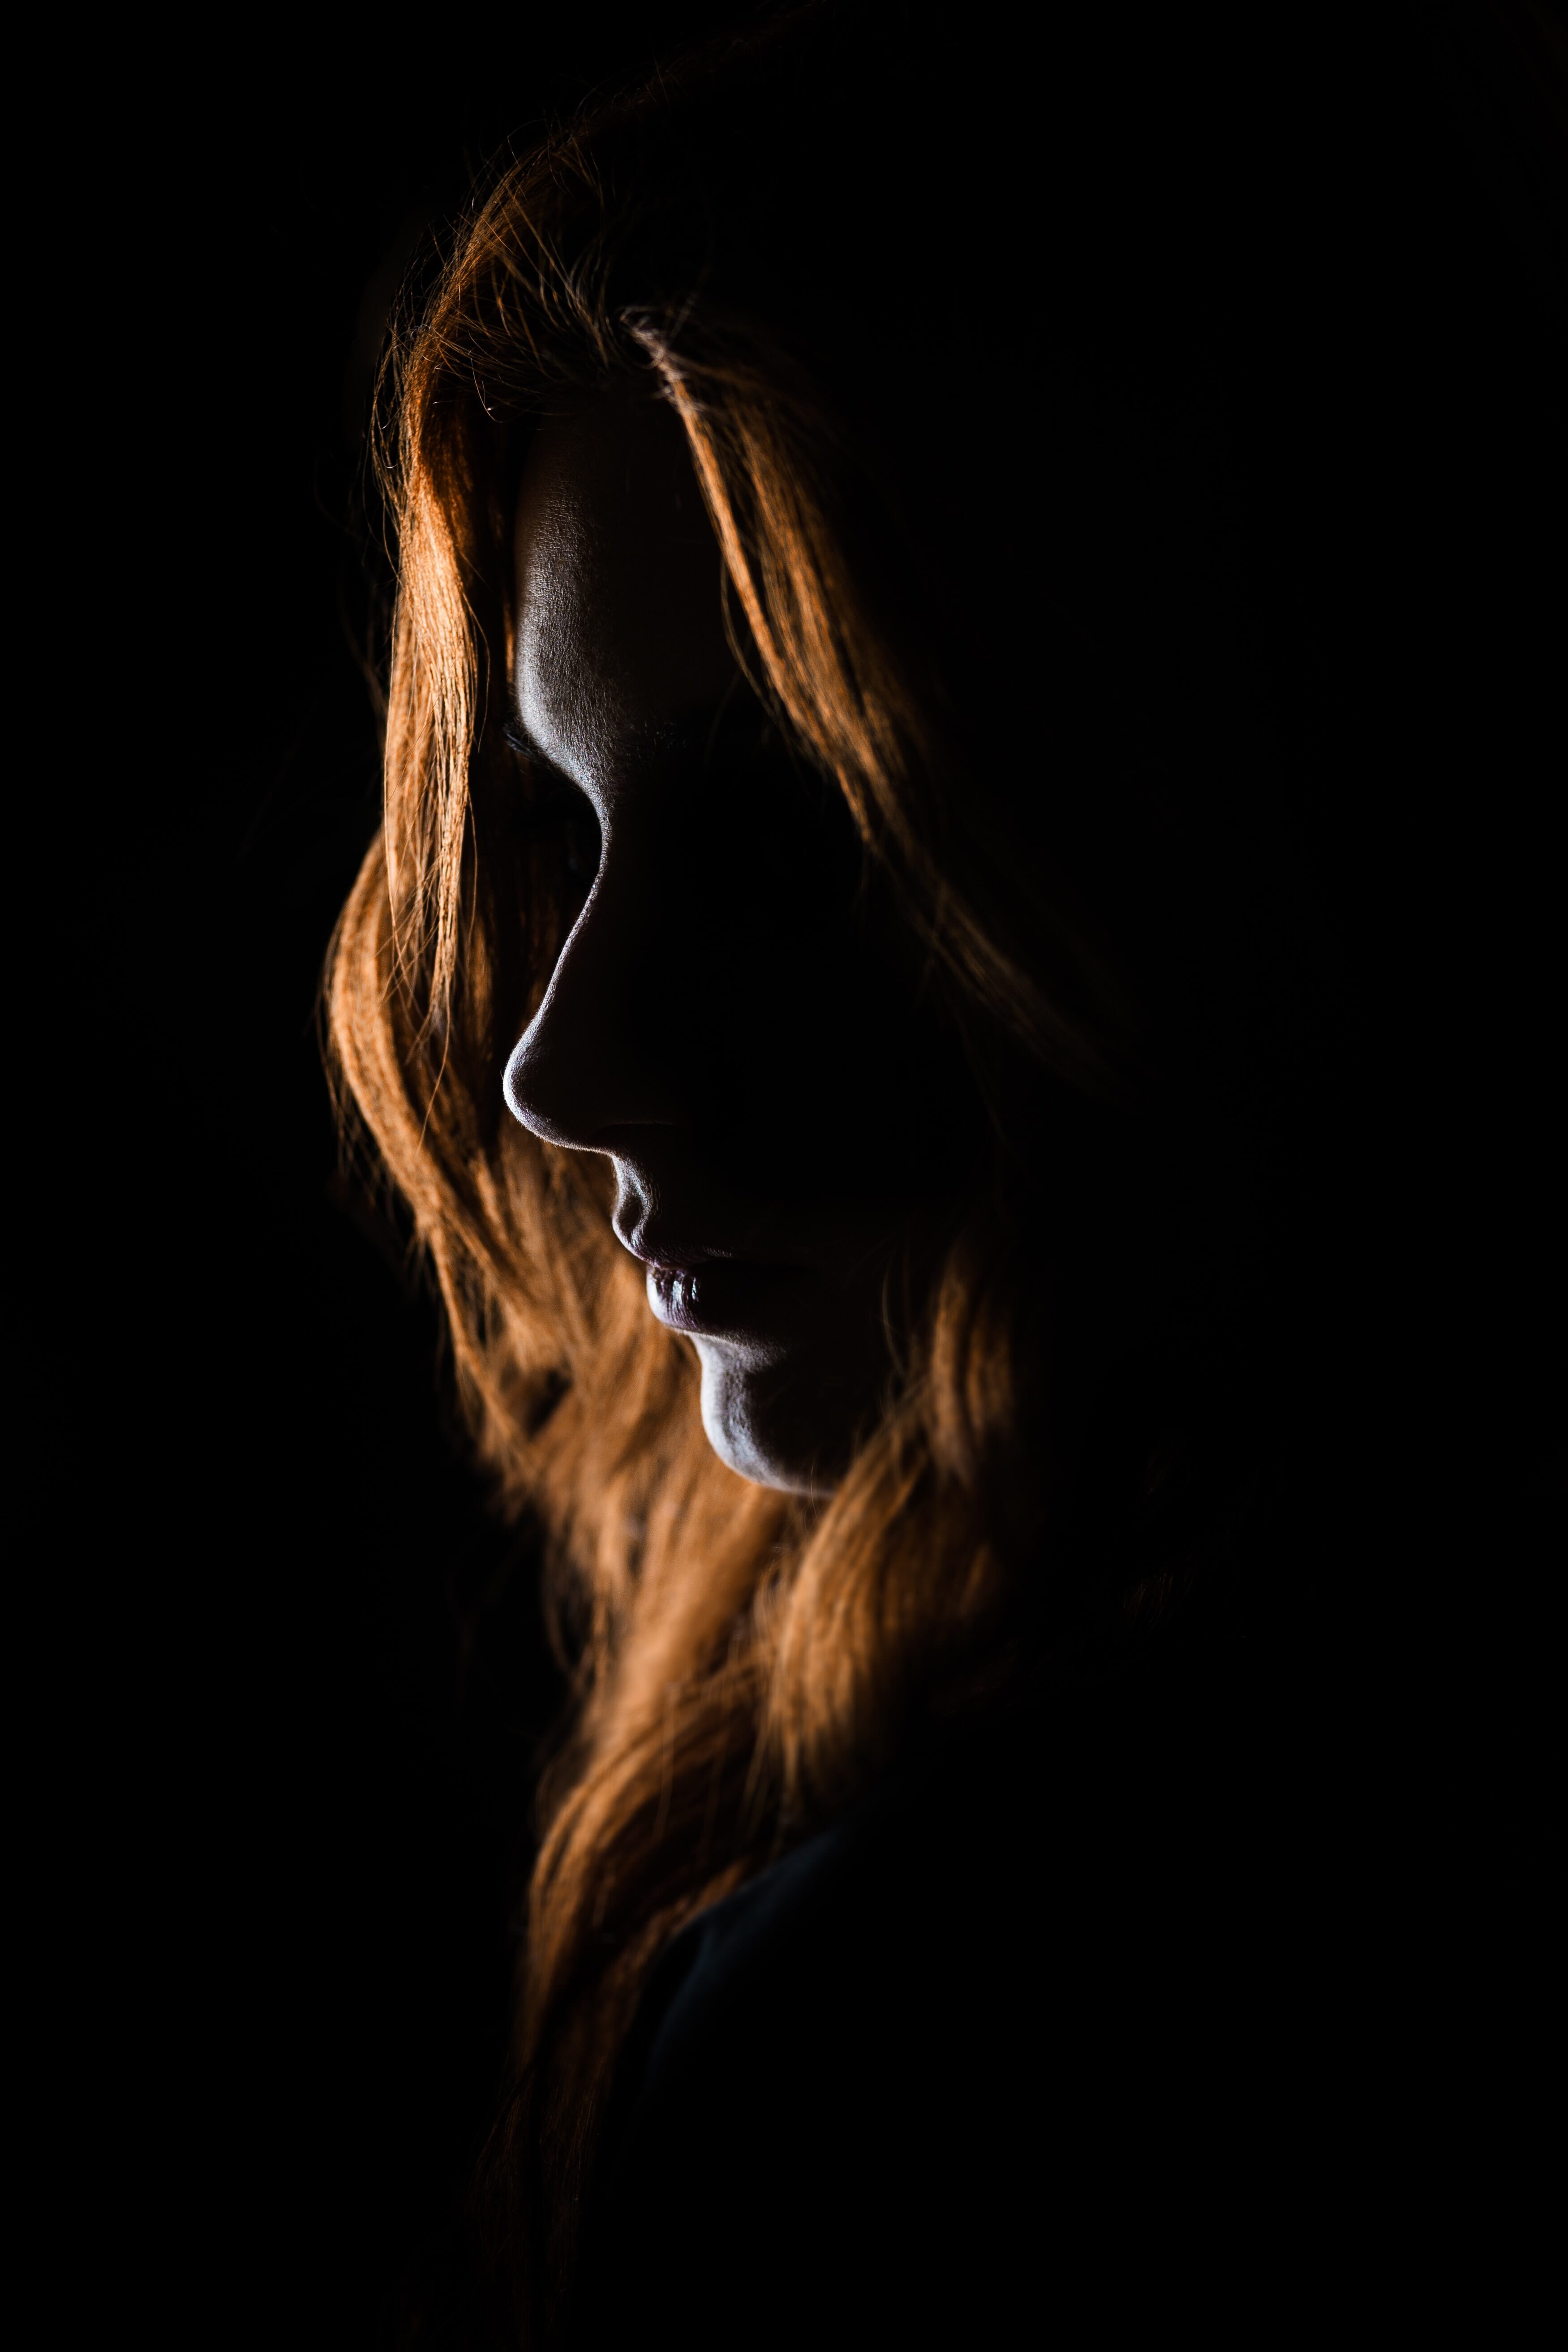
Backlight and Rim Light
Positioning the flash behind the subject creates backlight, which has several creative applications. Placing it directly behind or slightly to the side produces a rim light — a glowing outline that separates the subject from the background:
Rim light is striking on its own but also works as an accent light in multi-flash setups to add depth. For a high-key effect, pointing the flash toward a white background behind the subject creates a bright, white-background portrait. Backlight is also useful for photographing transparent objects like glass, where front-lighting would create unwanted reflections.
One-Flash Lighting Setups
A single off-camera flash is enough to produce professional-quality portraits. Adding a reflector helps, but is not strictly required. Here are the most effective single-light setups:
45-45 Lighting
Position the flash 45 degrees to the side and 45 degrees above the subject. This is the go-to default setup when unsure how to light a scene — it works for almost everything and produces pleasing, natural-looking shadows:
Using an umbrella with 45-45 lighting and shooting close to the background will make the background visible. To avoid this, block light behind the subject with a flag (a piece of cardboard works) or move the subject farther from the background for a pitch-black, low-key backdrop.
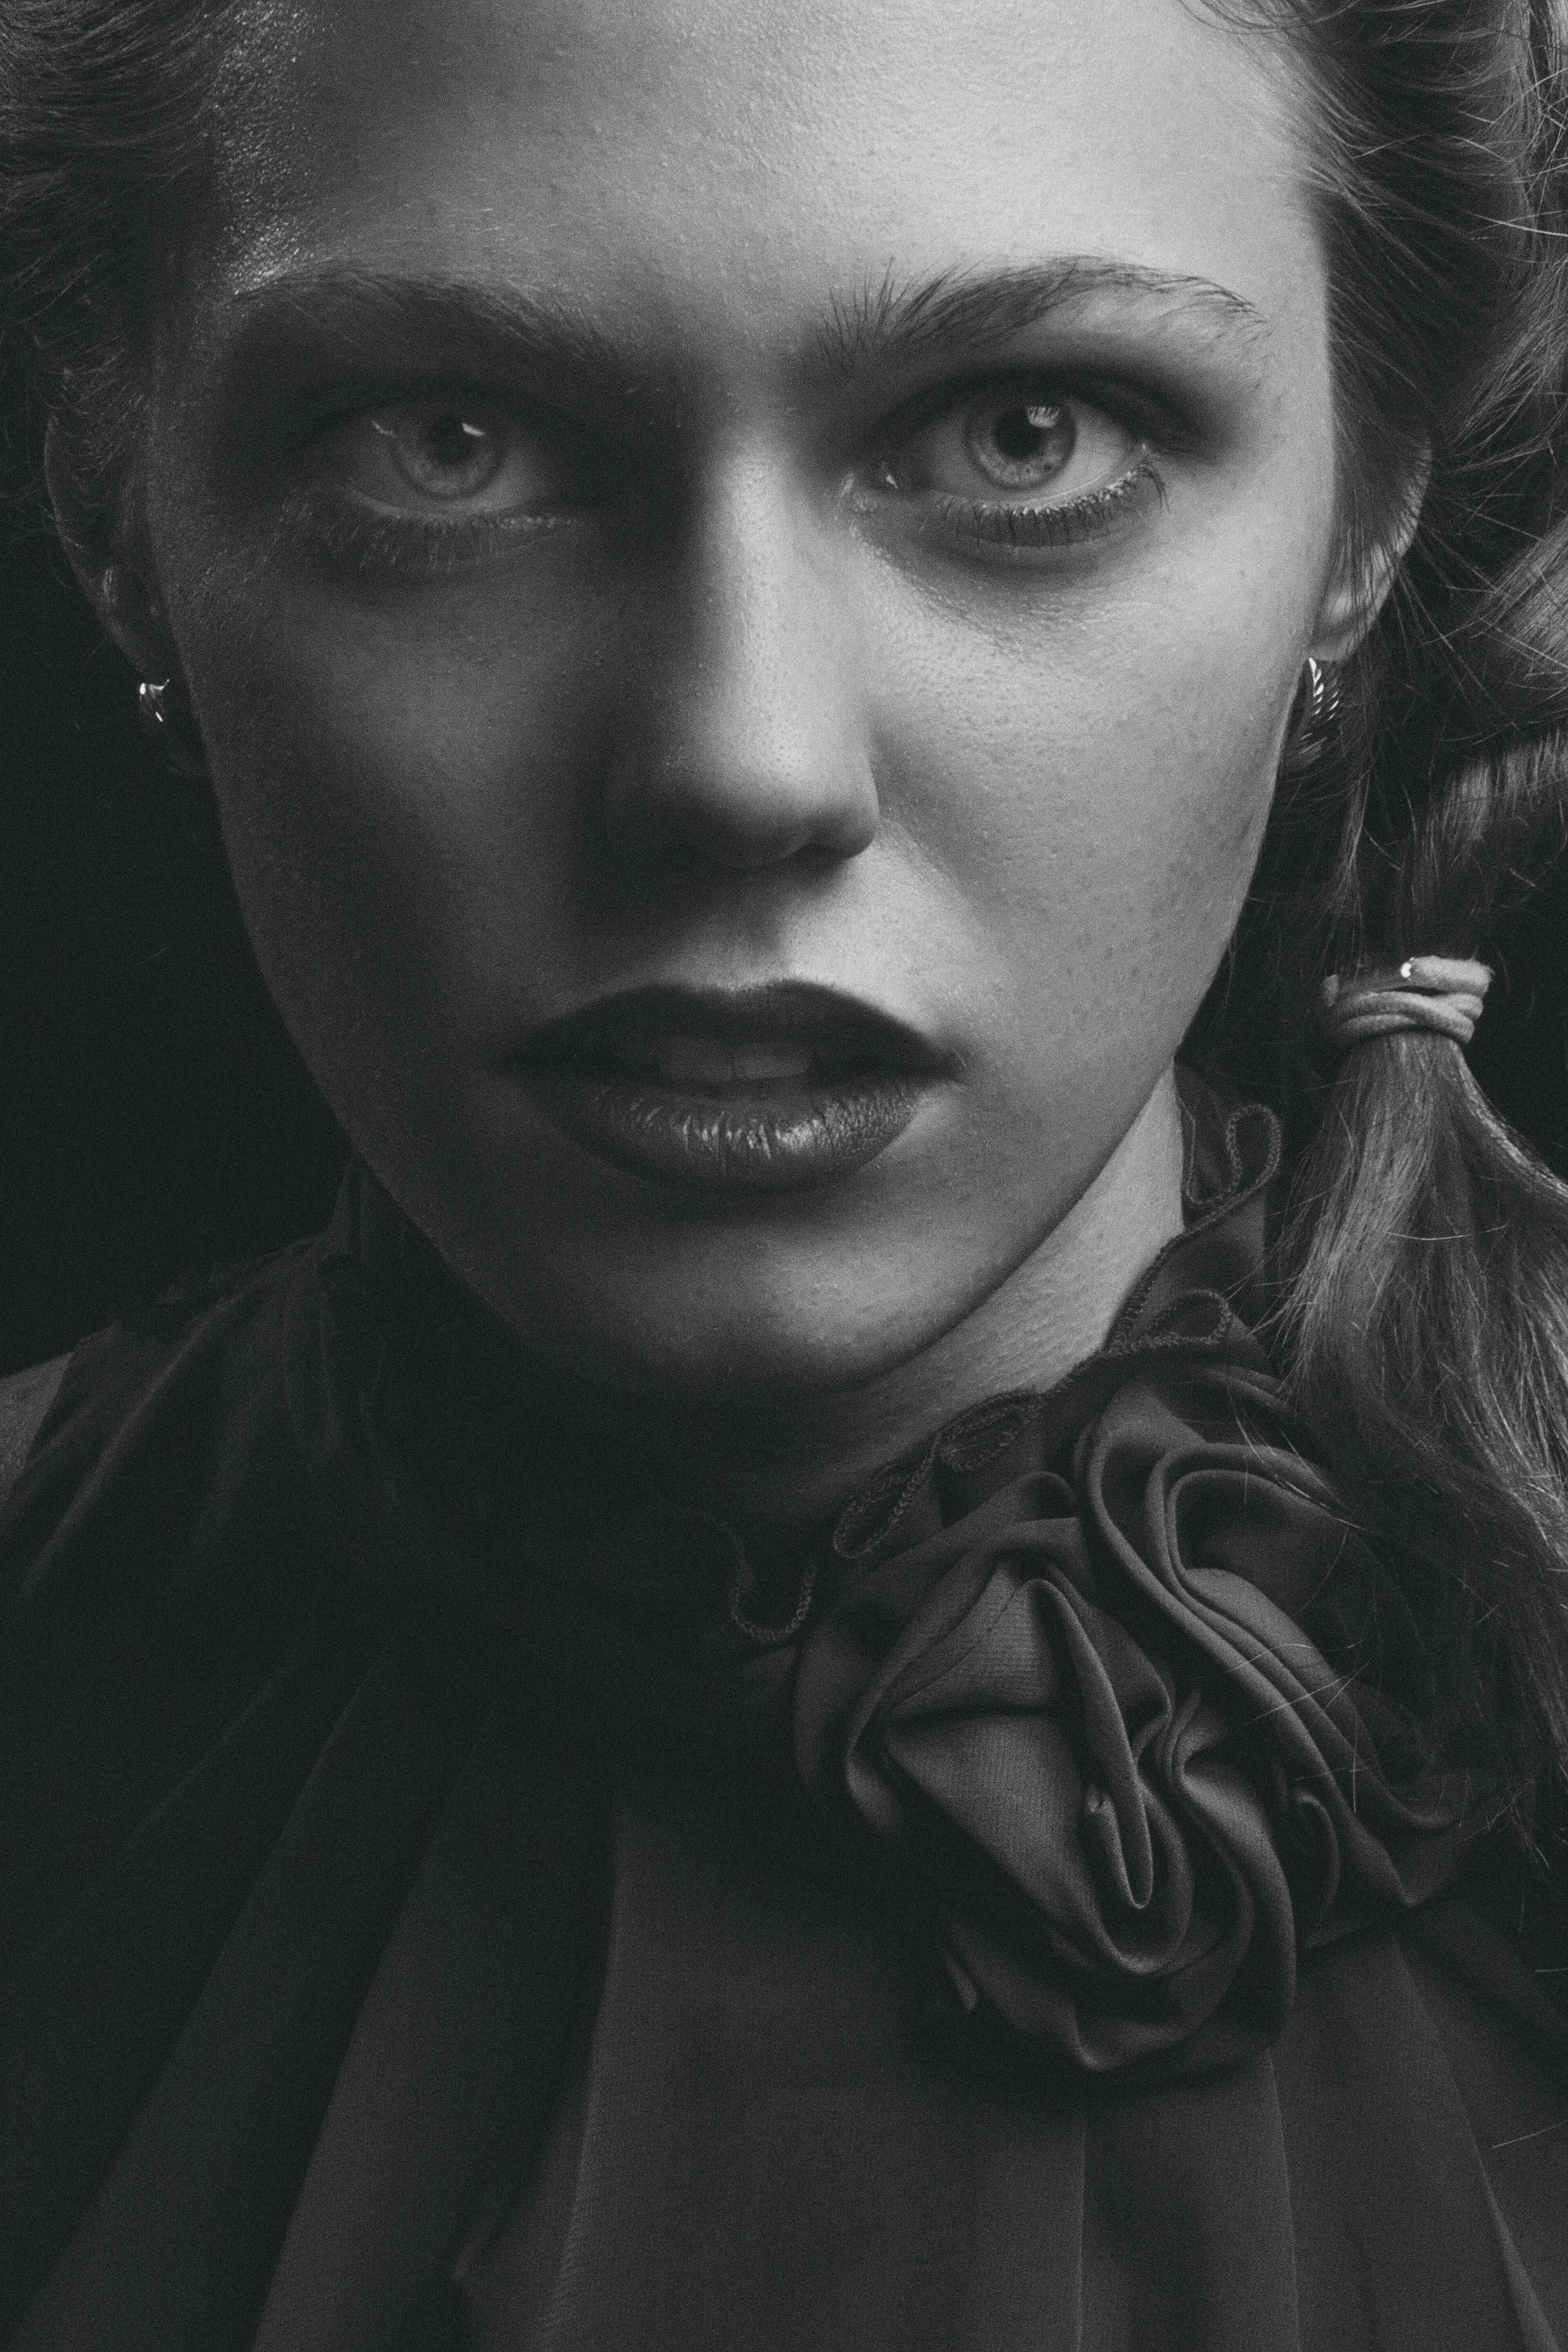
Split Lighting
Split lighting places the flash directly to the side of the subject (perpendicular to the camera lens), dividing the face cleanly into light and shadow. The result is dramatic and moody:
If the effect feels too intense, adding a reflector on the shadow side opens up the dark areas without eliminating the drama. This is a great way to get a “modified split” look without needing a second flash.
Rim Lighting
Rim lighting positions the flash directly behind the subject (or slightly off to one side) for a silhouetted look:
Unlike typical silhouette photography where the background is bright, rim lighting keeps the background completely dark while only the subject’s edges glow. Adding colored gels to the flash creates different rim colors for creative effect. Adjusting the flash position — directly behind vs. slightly to one side — controls whether the rim appears on both edges or just one.
Two-Flash Lighting Setups
A single light produces stunning results, but adding a second opens up new possibilities. The second flash typically serves as a fill or accent light, adding depth and dimension. In many cases, a reflector can substitute for the second flash when budget is a concern.
Clamshell Lighting
Clamshell lighting is a beauty/fashion staple that produces clean, even illumination with minimal shadows:
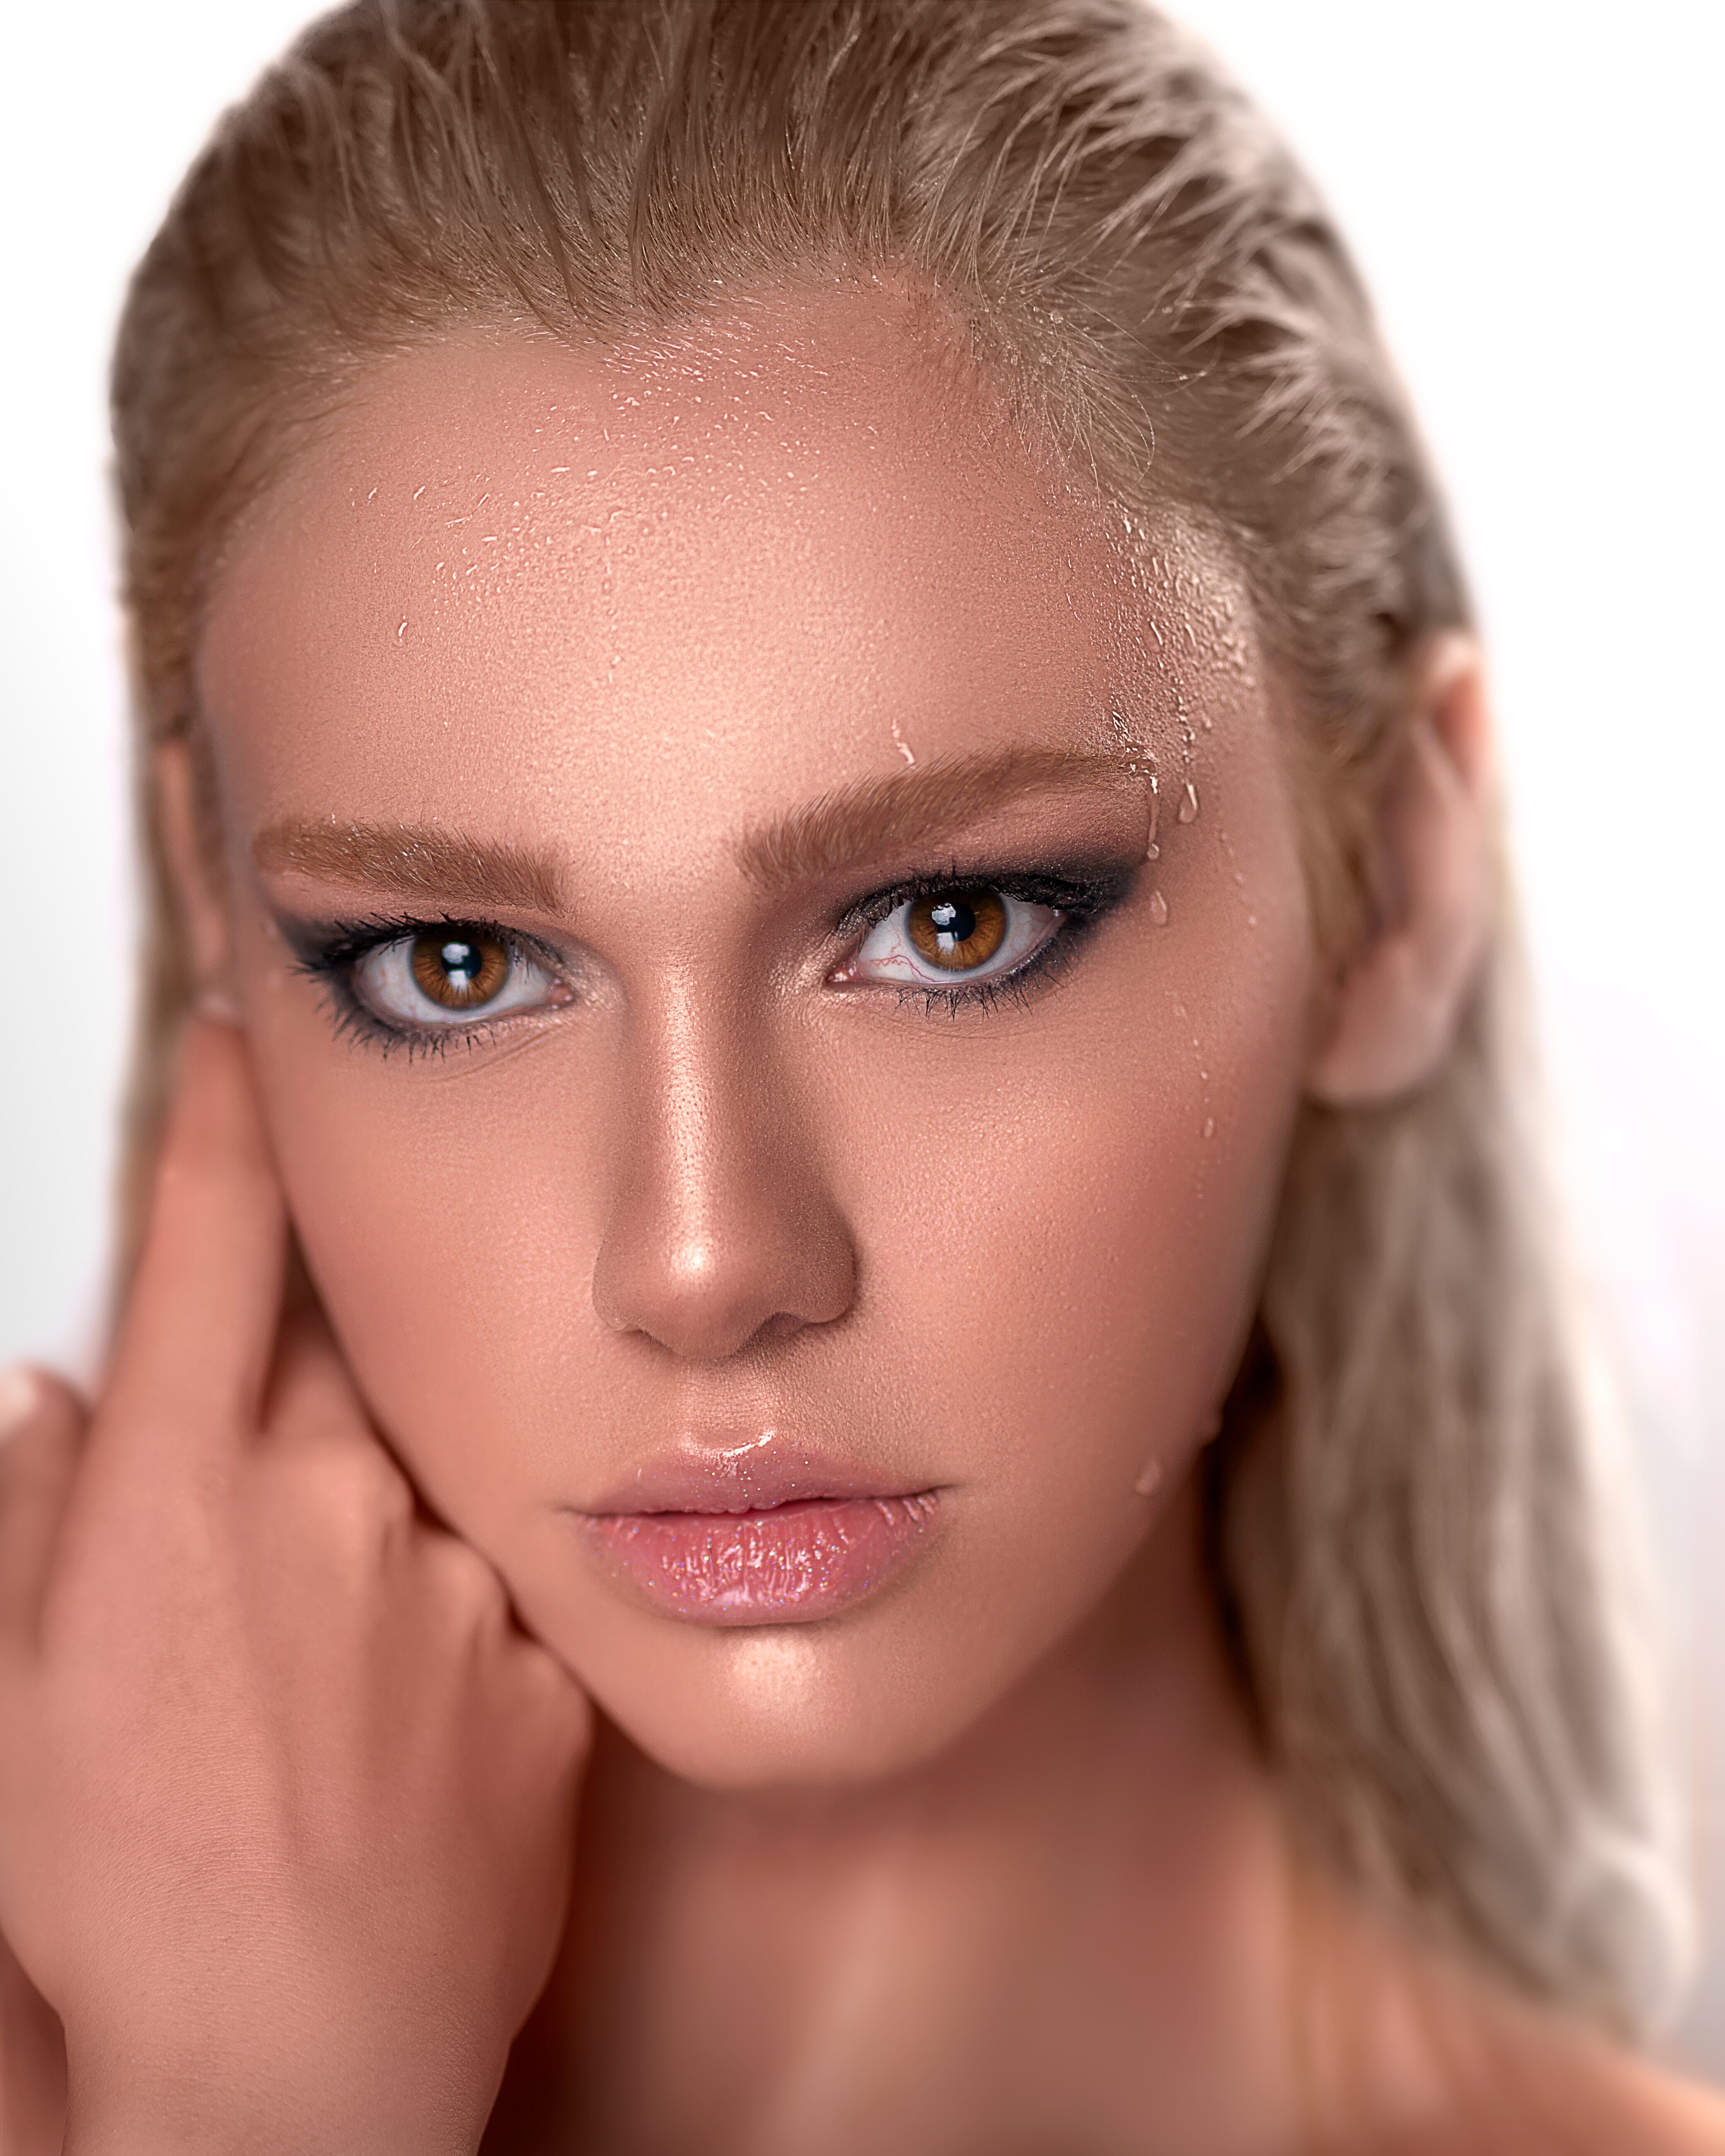
The setup: place one light above the subject, directly in front, angled downward (this alone is butterfly lighting). Then add a second, lower-powered light below the subject, pointed upward. The fill light should always be dimmer than the key light — its job is to open up shadows under the nose and chin without creating reverse shadows.
A reflector positioned below the subject can substitute for the second light in many situations. Experiment with reflector distance — closer fills more shadow, farther back creates a subtler effect.
Key Light Plus Fill
The most versatile two-light setup: start with a main (key) light using any single-light technique (45-45, loop lighting, Rembrandt lighting, split), then add a lower-powered fill light on the opposite side:
The fill light softens hard shadows created by the key light. Adjusting the power ratio between key and fill controls the mood: a low fill creates a dramatic, contrasty look, while a fill close to key power produces a bright, even image. This setup works for portraits, still life, and product photography — a genuinely all-purpose configuration.
Cross Lighting
Cross lighting uses two opposing light sources aimed at the subject from different directions. The results can be beautiful and dramatic:

Two popular cross-lighting variations:
- 45-45 cross light: One light at the 45-45 angle (front-side), the second opposite and behind the subject. The front light provides soft illumination while the back light creates a rim light effect for depth.
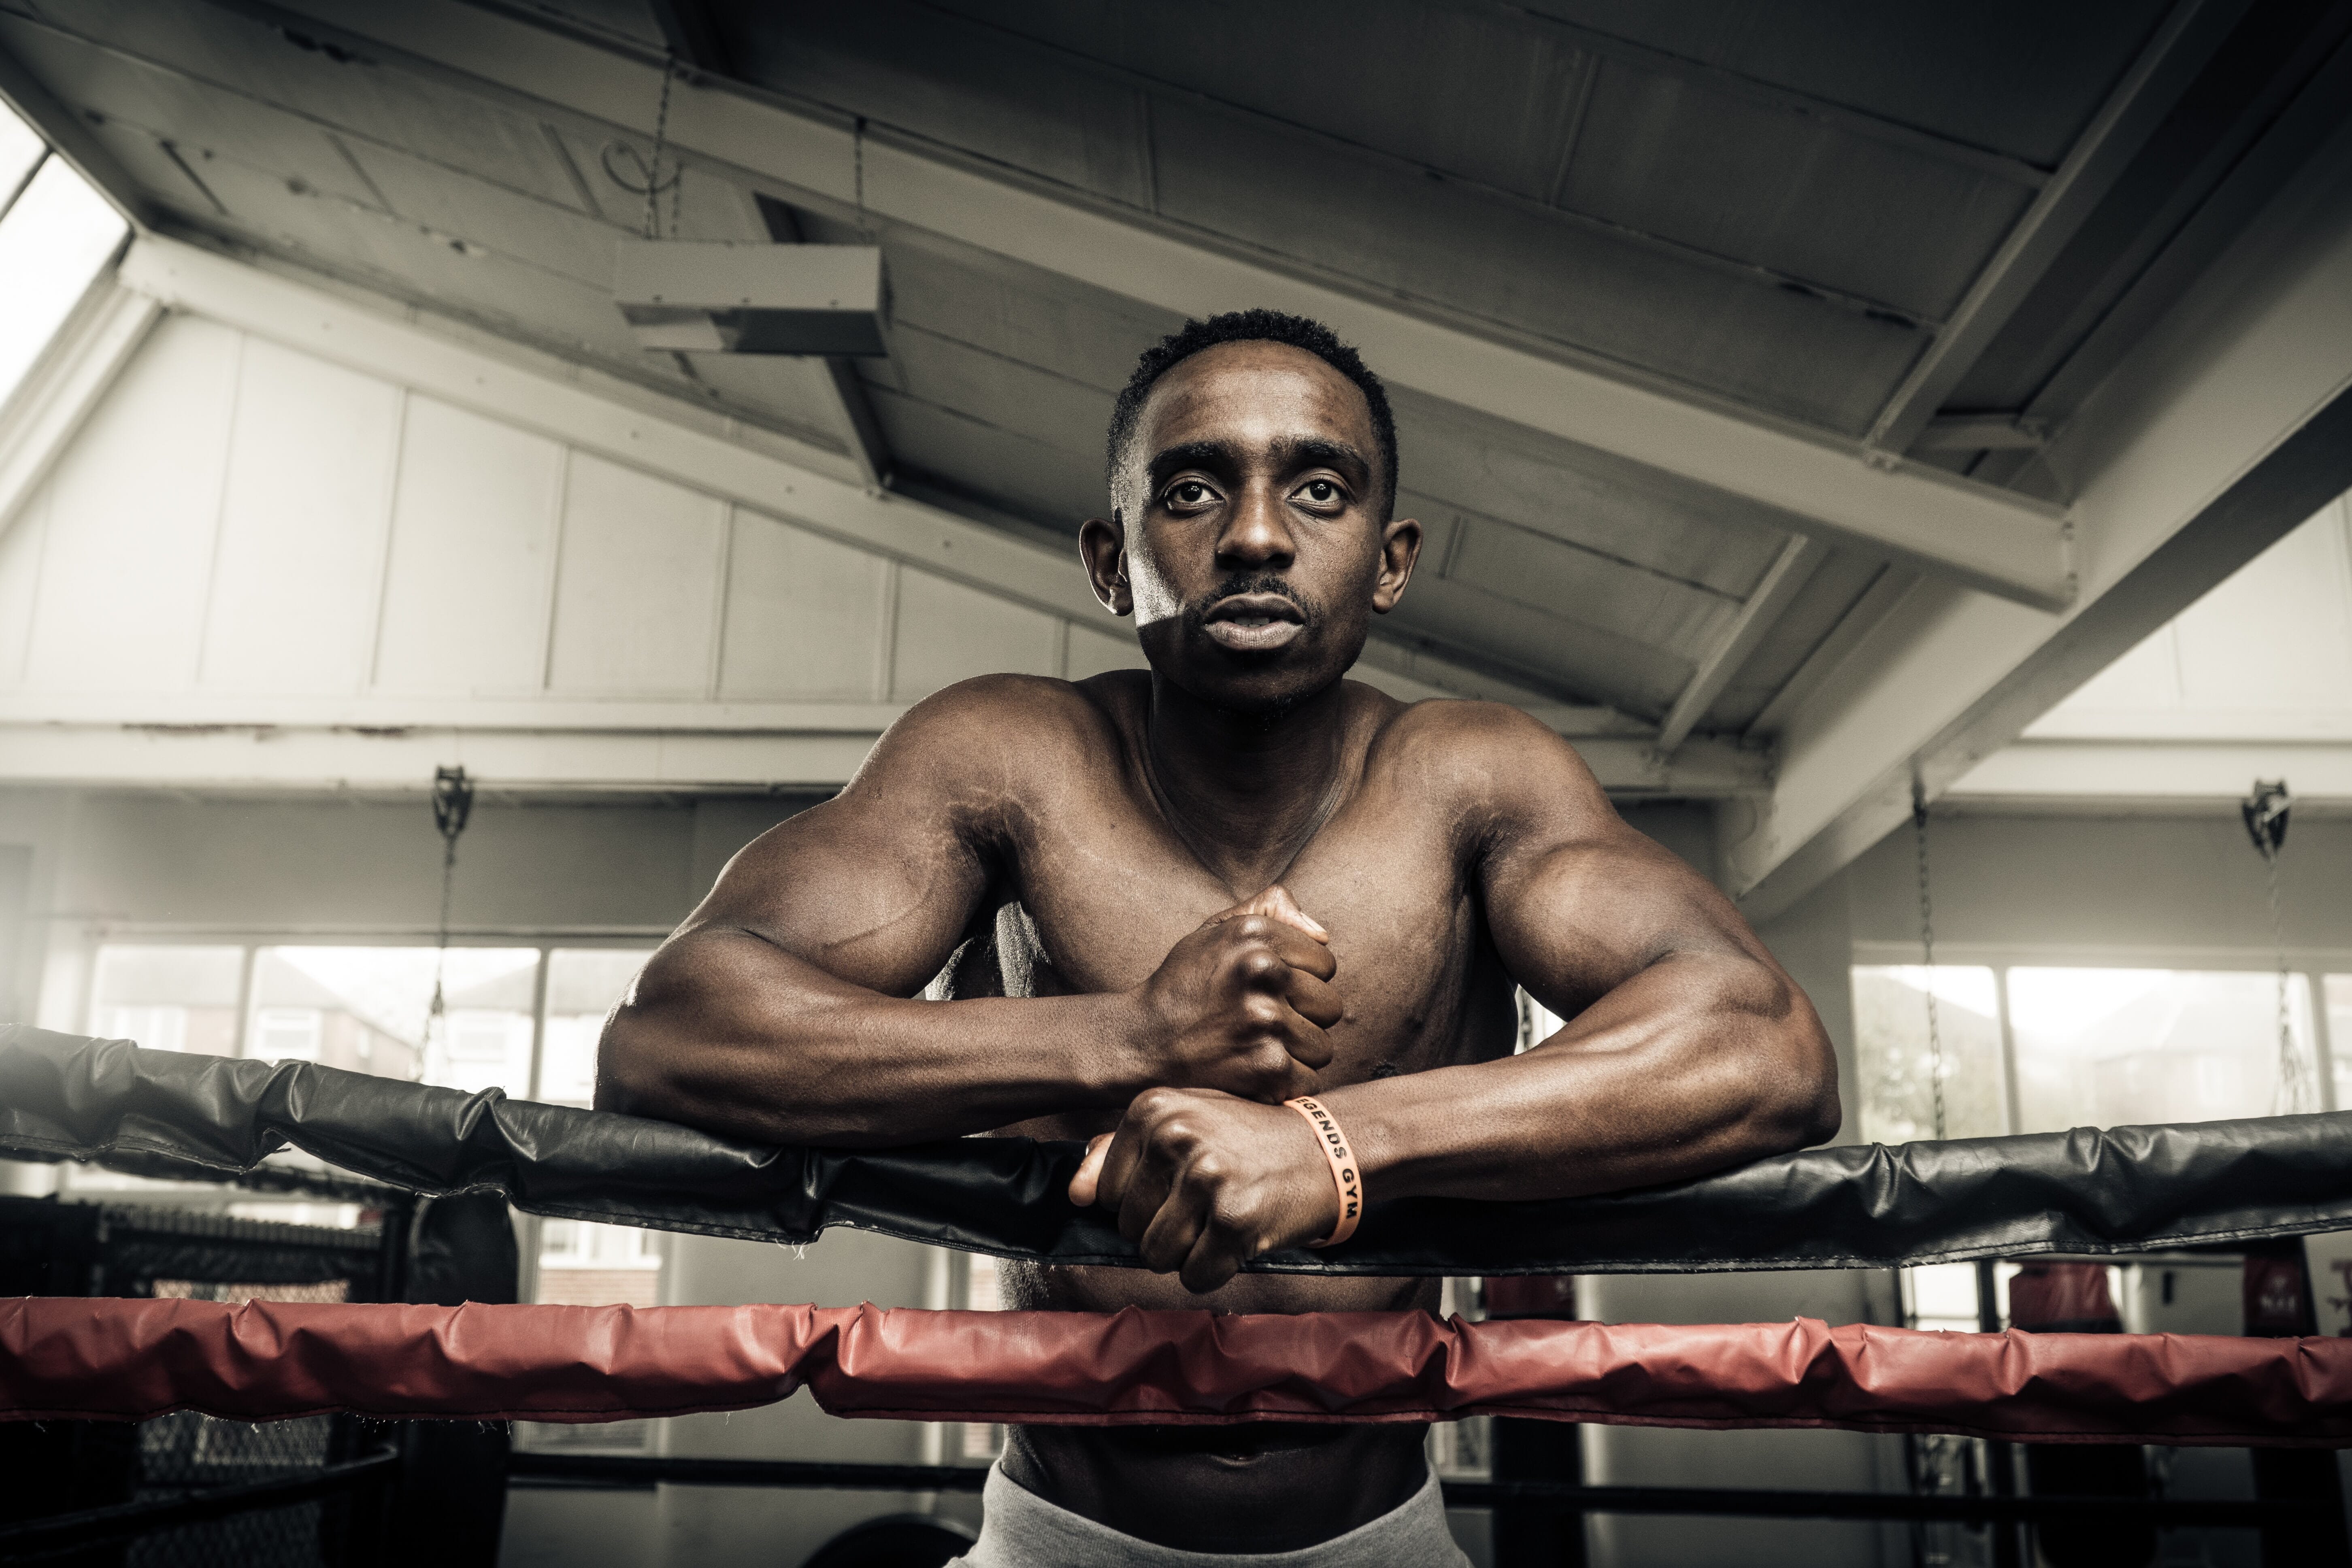
- “Athlete” setup: Both lights perpendicular to the lens, one on each side of the subject, with no modifiers for a hard-edged look. This produces the intense, gritty style commonly seen in sports and fitness photography:
Subject Plus Background Light
Illuminating the background separately from the subject creates depth and separation that transforms a portrait. Compare this single-light shot:
With this subject-plus-background setup:

To set this up: move the subject away from the background so the key light does not reach it. Light the subject with any one-flash setup (45-45, split, rim). Then aim the second flash at the background. Background flash power controls how bright the backdrop appears — low power for dark gray, high power for white. The angle of the background light matters too: firing from the side creates a gradient, while centering it behind the subject produces a circular hotspot.
Using different modifiers on the background light changes the effect. A snoot creates a tight, controlled splash; a softbox or stripbox produces broader, softer illumination. This two-light setup cannot be replicated with a reflector — two separate lights are essential.
Three-Flash Lighting Setups
Three lights allow for the most polished, professional configurations. The principle is simple: rather than pointing all three lights at the subject, distribute them across different zones — subject, background, and rim/accent. For more studio photoshoot ideas, three lights provide maximum creative flexibility.
Subject Plus Two Background Lights
Use one flash on the subject (any single-light setup) and two flashes on the background. The two background lights can be positioned at different heights or angles to create gradients, color washes (using gels), or even illumination across a wide backdrop. This is ideal for portable lighting setups where a polished background look is needed on location.
Classic Three-Light Portrait
The most common three-light configuration for portraits:
- Key light: Positioned at 45 degrees from the subject, slightly above eye level. This is the main illumination source and sets the overall mood.
- Fill light: Placed opposite the key light to soften shadows. Set at lower power than the key light to maintain some shadow detail and dimensionality.
- Rim (hair/accent) light: Positioned behind the subject, aimed back toward them. Creates a separation halo that makes the subject pop against the background and adds a professional, polished quality.
Experimenting with the power ratio among these three lights dramatically changes the mood. A powerful key with minimal fill and subtle rim creates drama. Balanced key and fill with a strong rim produces a clean, commercial look.
Tips for Mastering Off-Camera Flash
A few practical tips that accelerate the learning curve:
- Start with one light. Master single-flash setups before adding complexity. One well-placed speedlight with an umbrella can produce stunning results.
- Shoot tethered or review immediately. Flash photography is iterative — take a shot, evaluate, adjust power or position, repeat. The instant feedback loop is how skills develop fastest.
- Use manual mode. TTL is convenient, but manual flash forces an understanding of how light works. Once manual exposure clicks, it becomes faster and more predictable than TTL in controlled settings.
- Move the flash, not the power. Distance has a massive effect on light quality and intensity (inverse-square law). Moving the flash closer produces softer, brighter light; moving it farther gives harder, dimmer light. Adjusting position often achieves a better result than simply cranking power up or down.
- Add gels for creativity. Color gels (CTO for warm tones, CTB for cool, plus creative colors) are cheap and open up an entirely new dimension of flash photography. They cost almost nothing and can transform an ordinary shot.
- Study other photographers’ lighting. When viewing portraits online, analyze the catch lights in the subject’s eyes — they reveal the number, size, and position of light sources used. This is one of the fastest ways to learn professional lighting techniques.
Mastering off-camera flash takes practice, but the payoff is enormous. With even one speedlight and a basic modifier, the creative possibilities expand dramatically — from moody low-key portraits to clean high-key headshots and everything in between.
What is the difference between TTL and manual flash?
TTL (through-the-lens) metering lets the flash communicate with the camera to set power automatically based on the scene. Manual flash requires setting the power level independently. TTL is faster for run-and-gun situations, while manual gives more consistent, predictable results in controlled settings like studio portraits.
Do I need an expensive flash to get started with off-camera lighting?
No. Budget-friendly speedlights from brands like Godox, Yongnuo, and Neewer offer TTL, high-speed sync, and built-in wireless for well under $200. These third-party options deliver professional features at a fraction of the cost of first-party Canon, Nikon, or Sony flashes.
What is the best first light modifier for a beginner?
A white shoot-through umbrella is the ideal starting modifier. It is affordable (typically under $25), lightweight, and instantly transforms harsh speedlight output into soft, flattering light. It is the single most impactful accessory for new flash photographers.
What shutter speed should I use with flash?
Set the shutter speed to the camera’s flash sync speed, typically 1/200s or 1/250s. Since the flash duration is extremely short, shutter speed primarily controls ambient light rather than flash exposure. For faster shutter speeds, High-Speed Sync (HSS) mode is required.
Can I use off-camera flash outdoors?
Absolutely. Off-camera flash is commonly used outdoors to fill harsh shadows, overpower midday sun, create dramatic lighting at sunset, or add catchlights to outdoor portraits. High-Speed Sync (HSS) is particularly useful for outdoor flash work where faster shutter speeds are needed to control bright ambient light.
