Key Takeaways: Mastering Photography: Frame Within a Frame Technique

Out of all the fundamentals of photography, composition likely causes the most frustration. Beginners and even advanced shooters often struggle with creating consistently interesting shots. However, the frame within a frame technique can help improve compositions significantly and is easy to learn. This article explains the concept, benefits, types of frames used, and provides examples.
-
The Frame Within a Frame Method:
- Compose a second frame inside the first, using elements within the scene.
-
Benefits:
- Emphasizes the main subject
- Leads the viewer’s eye
- Adds depth and context
- Increases the intensity of the image
-
Types of Frames:
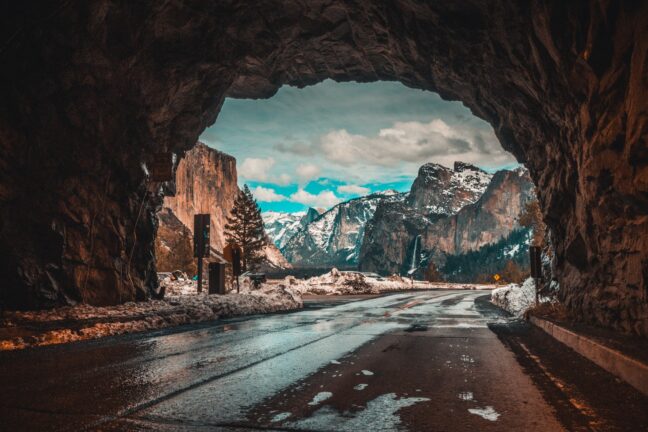
- Architectural frames (e.g., arches, tunnels)
- Windows or doorways
- “Cramming” frames within crowded scenes
- Leading lines to create frames
- Light frames (using light patterns or shadows)
This technique helps photographers organize a messy scene into an eye-catching image, making their compositions more compelling and structured.
Introduction
Out of all the fundamentals of photography, composition likely causes the most frustration. Beginners struggle for years to create well-structured images, and even advanced shooters often fail to compose consistently interesting shots.
Yet there are actually a handful of powerful techniques that can instantly make your compositions more compelling, including the frame within a frame approach. It’s one of my favorite ways to organize a messy scene into an eye-catching image, and it’s pretty easy to learn.
In this article, I explain everything you need to know about frame within a frame photography, including what it is and how it works. I also share plenty of examples of the approach in action so you can understand just how powerful it can be. Hopefully, these tips will help you effectively apply the technique in the field so you can be one step closer to becoming a master of composition!
What Is Frame Within a Frame Photography?
Whenever you take a photo, the image naturally has a frame: the area where the photo cuts off (i.e., the area that contains the photo). This is an ever-present frame. But when you go to compose an image, you can include a second frame: A frame within that first frame.
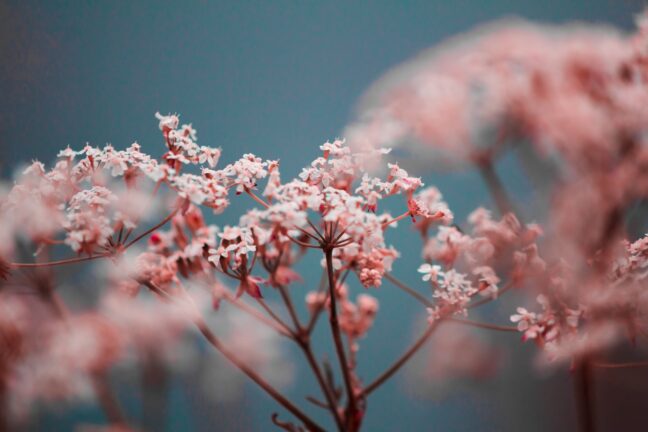
Look at the image below. Do you see how the composition includes a normal photo frame as well as a frame within that frame (the flowers)?

That’s how you get photos that feature a frame within a frame. And that’s what photographers are doing when they talk about framing the subject with other compositional elements.
This approach is very powerful, but it’s often neglected by beginners. For one, it can be difficult to find elements to frame a scene if you don’t know what to look for, and it’s also just not how photographers are taught to think.
That’s why including a second frame can be your secret weapon of sorts. By making sure you have a second frame within the first, you’ll be able to achieve powerful compositions that really draw in the viewer.
Why Should You Use the Framing Technique?
Frames within frames can do a lot for your photos. I’m not advocating that you use the approach in every image you create, but don’t be afraid to try it whenever you get the opportunity, especially if you’re looking to achieve any of the effects I’ve detailed below.
The technique is so effective because it helps:
1. Emphasize the Main Subject
If you have a single subject that you want to really pop, framing is a great choice. Why? Frames direct the eye, pushing the viewer toward the area within it.
For instance, if you’re photographing an interesting building, you might frame it with an archway. That way, viewers move through the archway and straight toward your main subject (the interesting building!).
Note that you can also use a frame to emphasize your main subject among a sea of distracting elements. If you’re standing before a field of flowers, you might find a frame that contains a single flower; that way, the viewer isn’t distracted by the other flowers but instead looks straight toward your main subject.
Of course, there is a downside to this method: If your subject already stands well on its own and is surrounded by other pleasing items, a frame will often detract from the image by cutting off key compositional elements that complement the subject.
So before you use a frame to emphasize your main subject, ask yourself: Does my subject already stand out, or could it use a bit of a boost? And are there elements around my main subject that complement it and should be included, or am I okay excluding the surrounding elements?
Based on your answers to these questions, you can choose whether to proceed with the technique!
2. Lead the Eye
This is a benefit that most photographers fail to take into account. Any lines in your photos – including edges! – will lead the eye, and since frames include edges, they’ll lead the eye, too, helping to move it around the photo.
Now, when you use the frame to emphasize your main subject, as discussed above, the eye naturally moves into the frame, especially if you place your subject smackdab within it.
But if you position your subject off to the side so that it intersects with one of the frame lines, the eye will often run along the frame until it reaches your subject, which is a great way to keep the viewer engaged.
So while you can use a frame to emphasize the main subject by pushing the eye in, you can also use it to lead the eye around toward your main subject. This is a slower, more dynamic method of using frames within frames, and it’s definitely one worth trying out.
By the way, if you want to create especially compelling leading lines, try tilting your frame so that it uses some diagonals. These lines are very powerful and are great at drawing in the eye! Just make sure that you point the diagonals toward your main subject. Otherwise, the eye will move along the diagonals in a direction away from the subject, which generally makes for a bad photo.
3. Add Depth

If you learn to use the framing technique creatively, it can also give your images a sense of depth. Some of the best photos often include a nice amount of depth, or three-dimensionality, which carries the viewer into the scene and keeps them moving farther and farther along.
Landscape photographers, in particular, strive to achieve depth in their photos, but even portrait photographers, who are often photographing a single subject on a non-distracting background, seek to achieve depth (by creating stunning bokeh or by adding strong rim lighting).
So if you can create depth, then it’s often worth pursuing, and that’s where framing comes in. By including a frame around the main subject of your image, you force the viewer to acknowledge the distance between the subject and the frame. There is generally a clear separation between the frame and the subject, which then creates the illusion of depth.
Note, however, that you will need to make sure your main subject is positioned far away from the frame; you won’t achieve any sense of depth if your subject is, say, standing directly within an archway. (Though you will still do a good job of emphasizing the subject, as discussed above!).
4. Add Context

Frames aren’t just another abstract compositional element. They come from somewhere, which means that they can tell a story.
The type of frame you use indicates something about the scene. And this will, in turn, influence the mood and story of the final image. If you frame a mountain using green trees, you’ll end up with a springtime-type shot; if you frame a mountain using bare branches, you’ll get a moodier, darker photo.
So by changing the type of frame you use, you can evoke different feelings.
5. Add Intensity
Another reason you might want to use this technique is to make your images more intense.
By closing off an image and making the edges inaccessible, a frame within a frame limits the viewer and even creates a sense of claustrophobia.
Related Posts
Of course, this isn’t ideal in images that are meant to feel expansive and free. But if you’re photographing a subject and you want to really give your photo that touch of severity, then add in a frame and try to contain the main subject as much as possible.
What Types of Frames Can You Use?
I’ve talked all about when you might want to use frames and why. But it’s also worth covering the variety of frames you have at your disposal so that you can easily find one when you’re out shooting!
Note that I can’t offer an exhaustive list of frames. After all, there are hundreds of possible frames available to the enterprising photographer! But here are five of the most common ones:
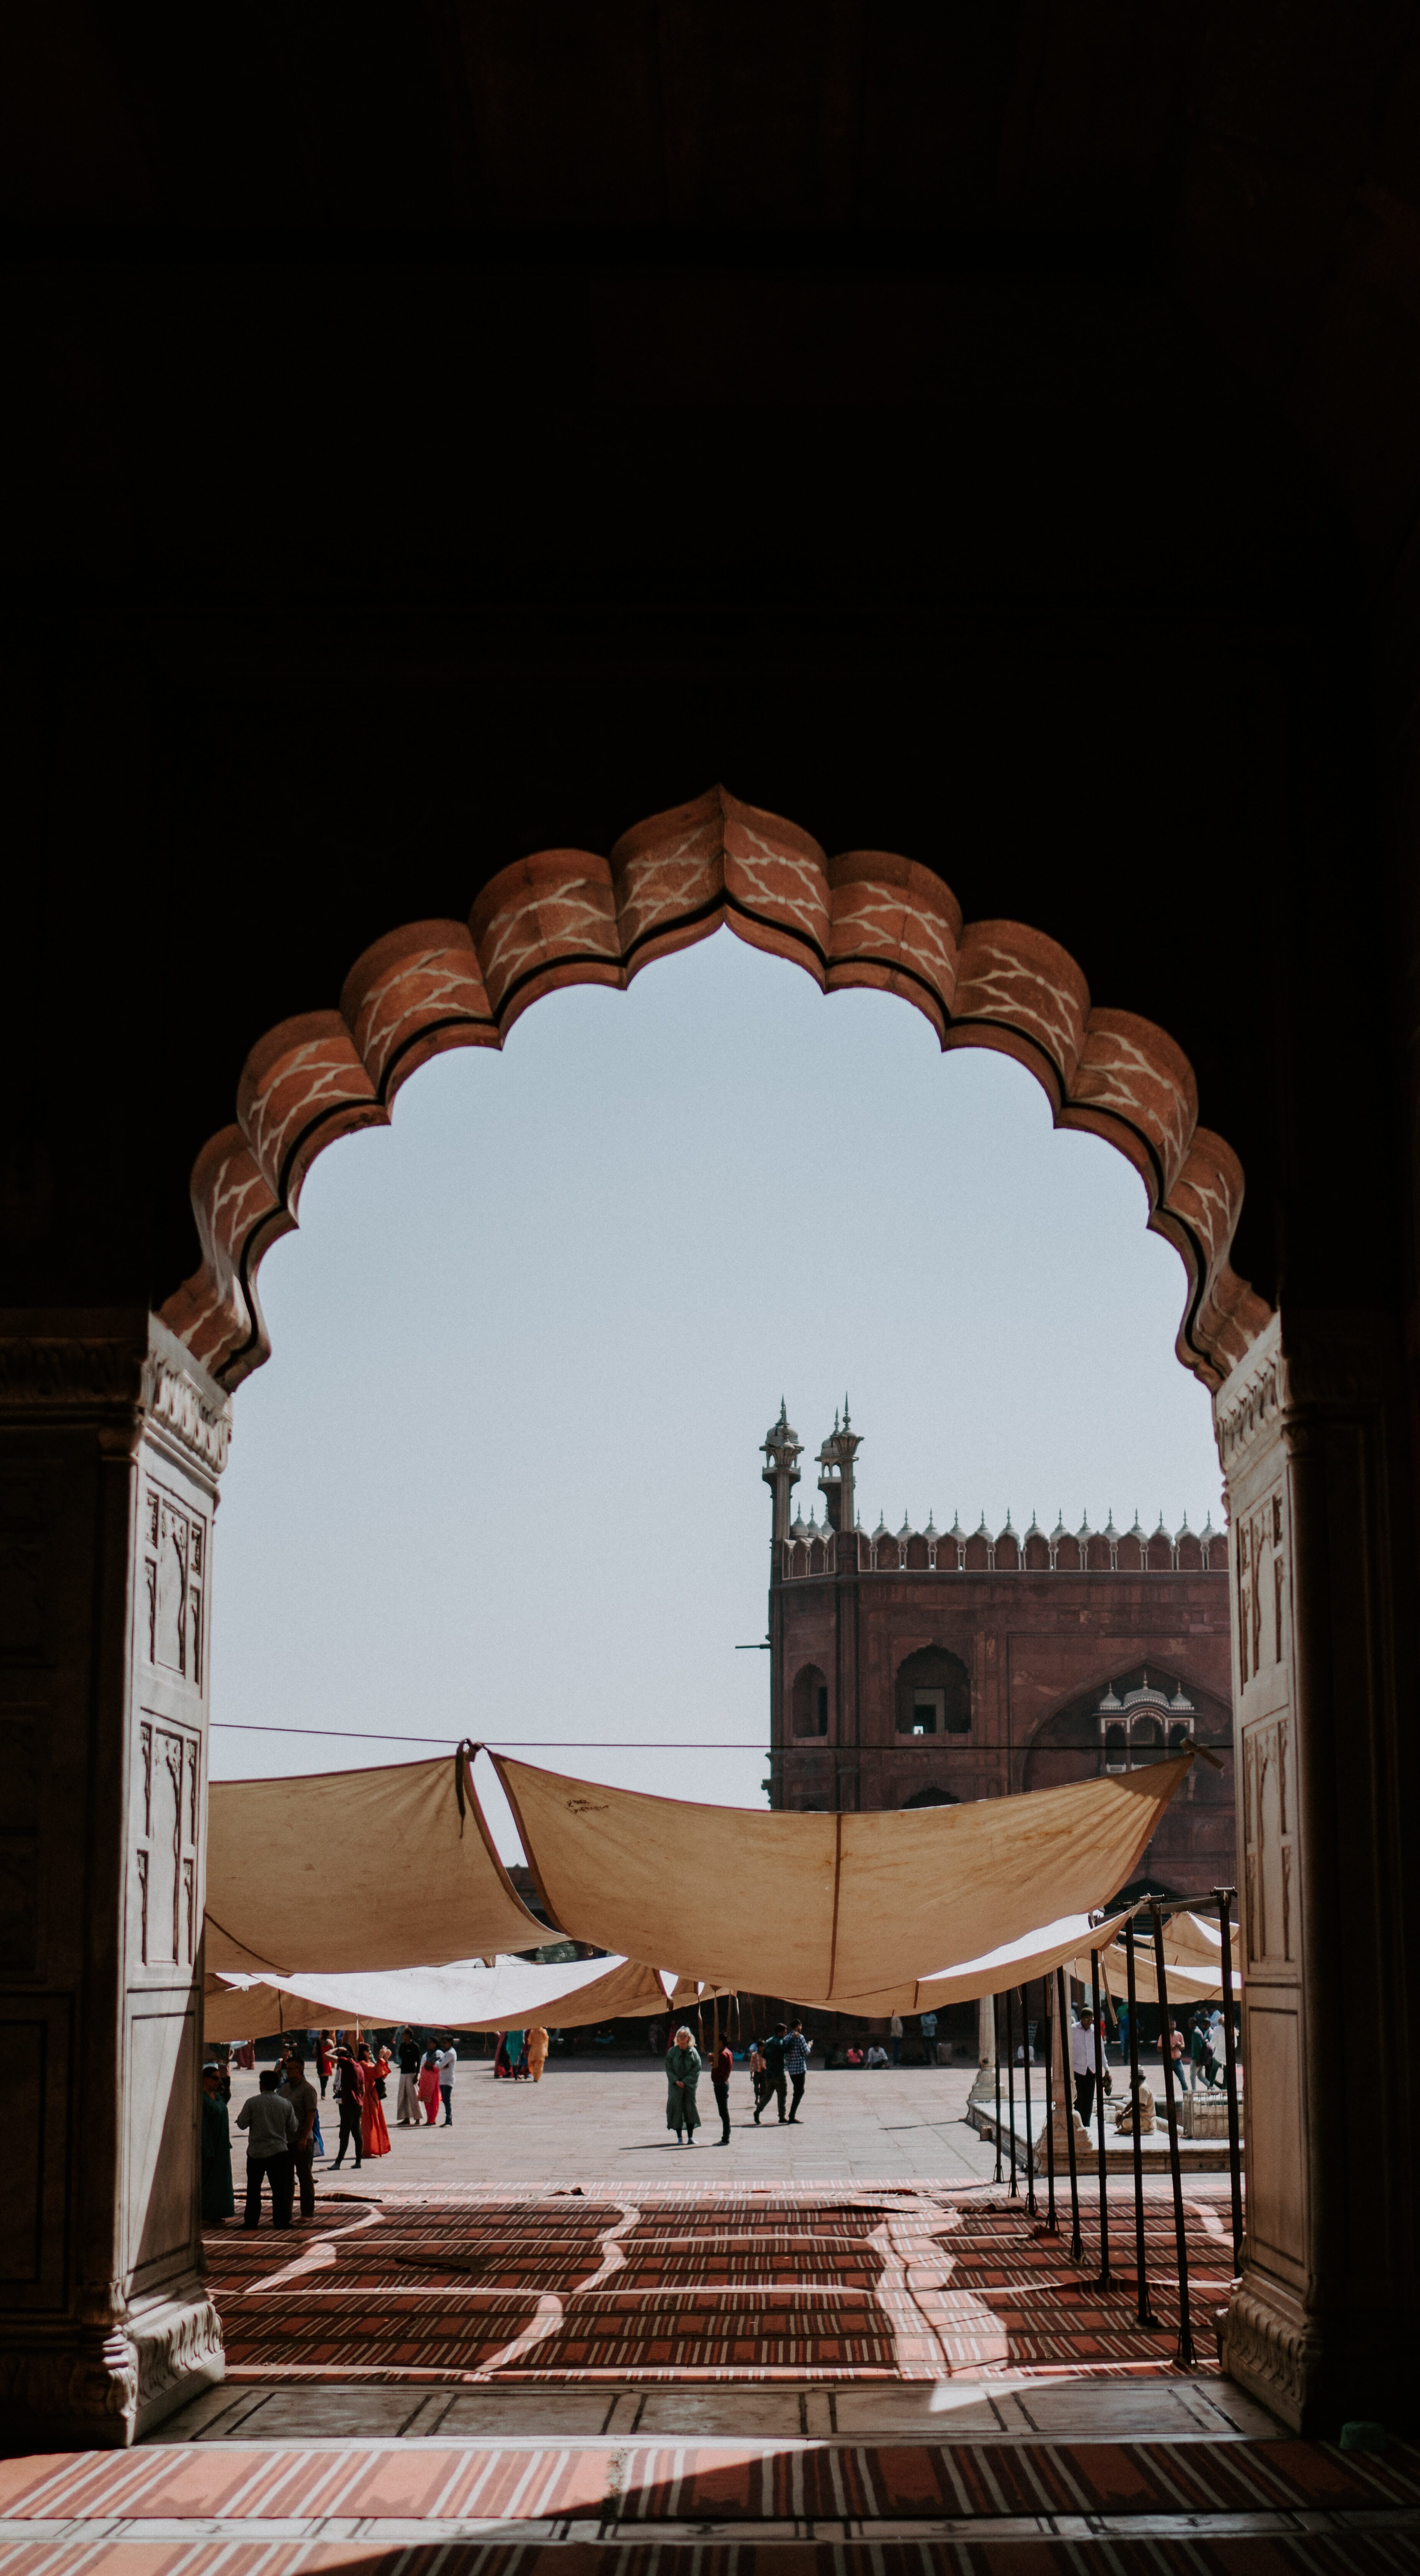
1. The Architectural Frame
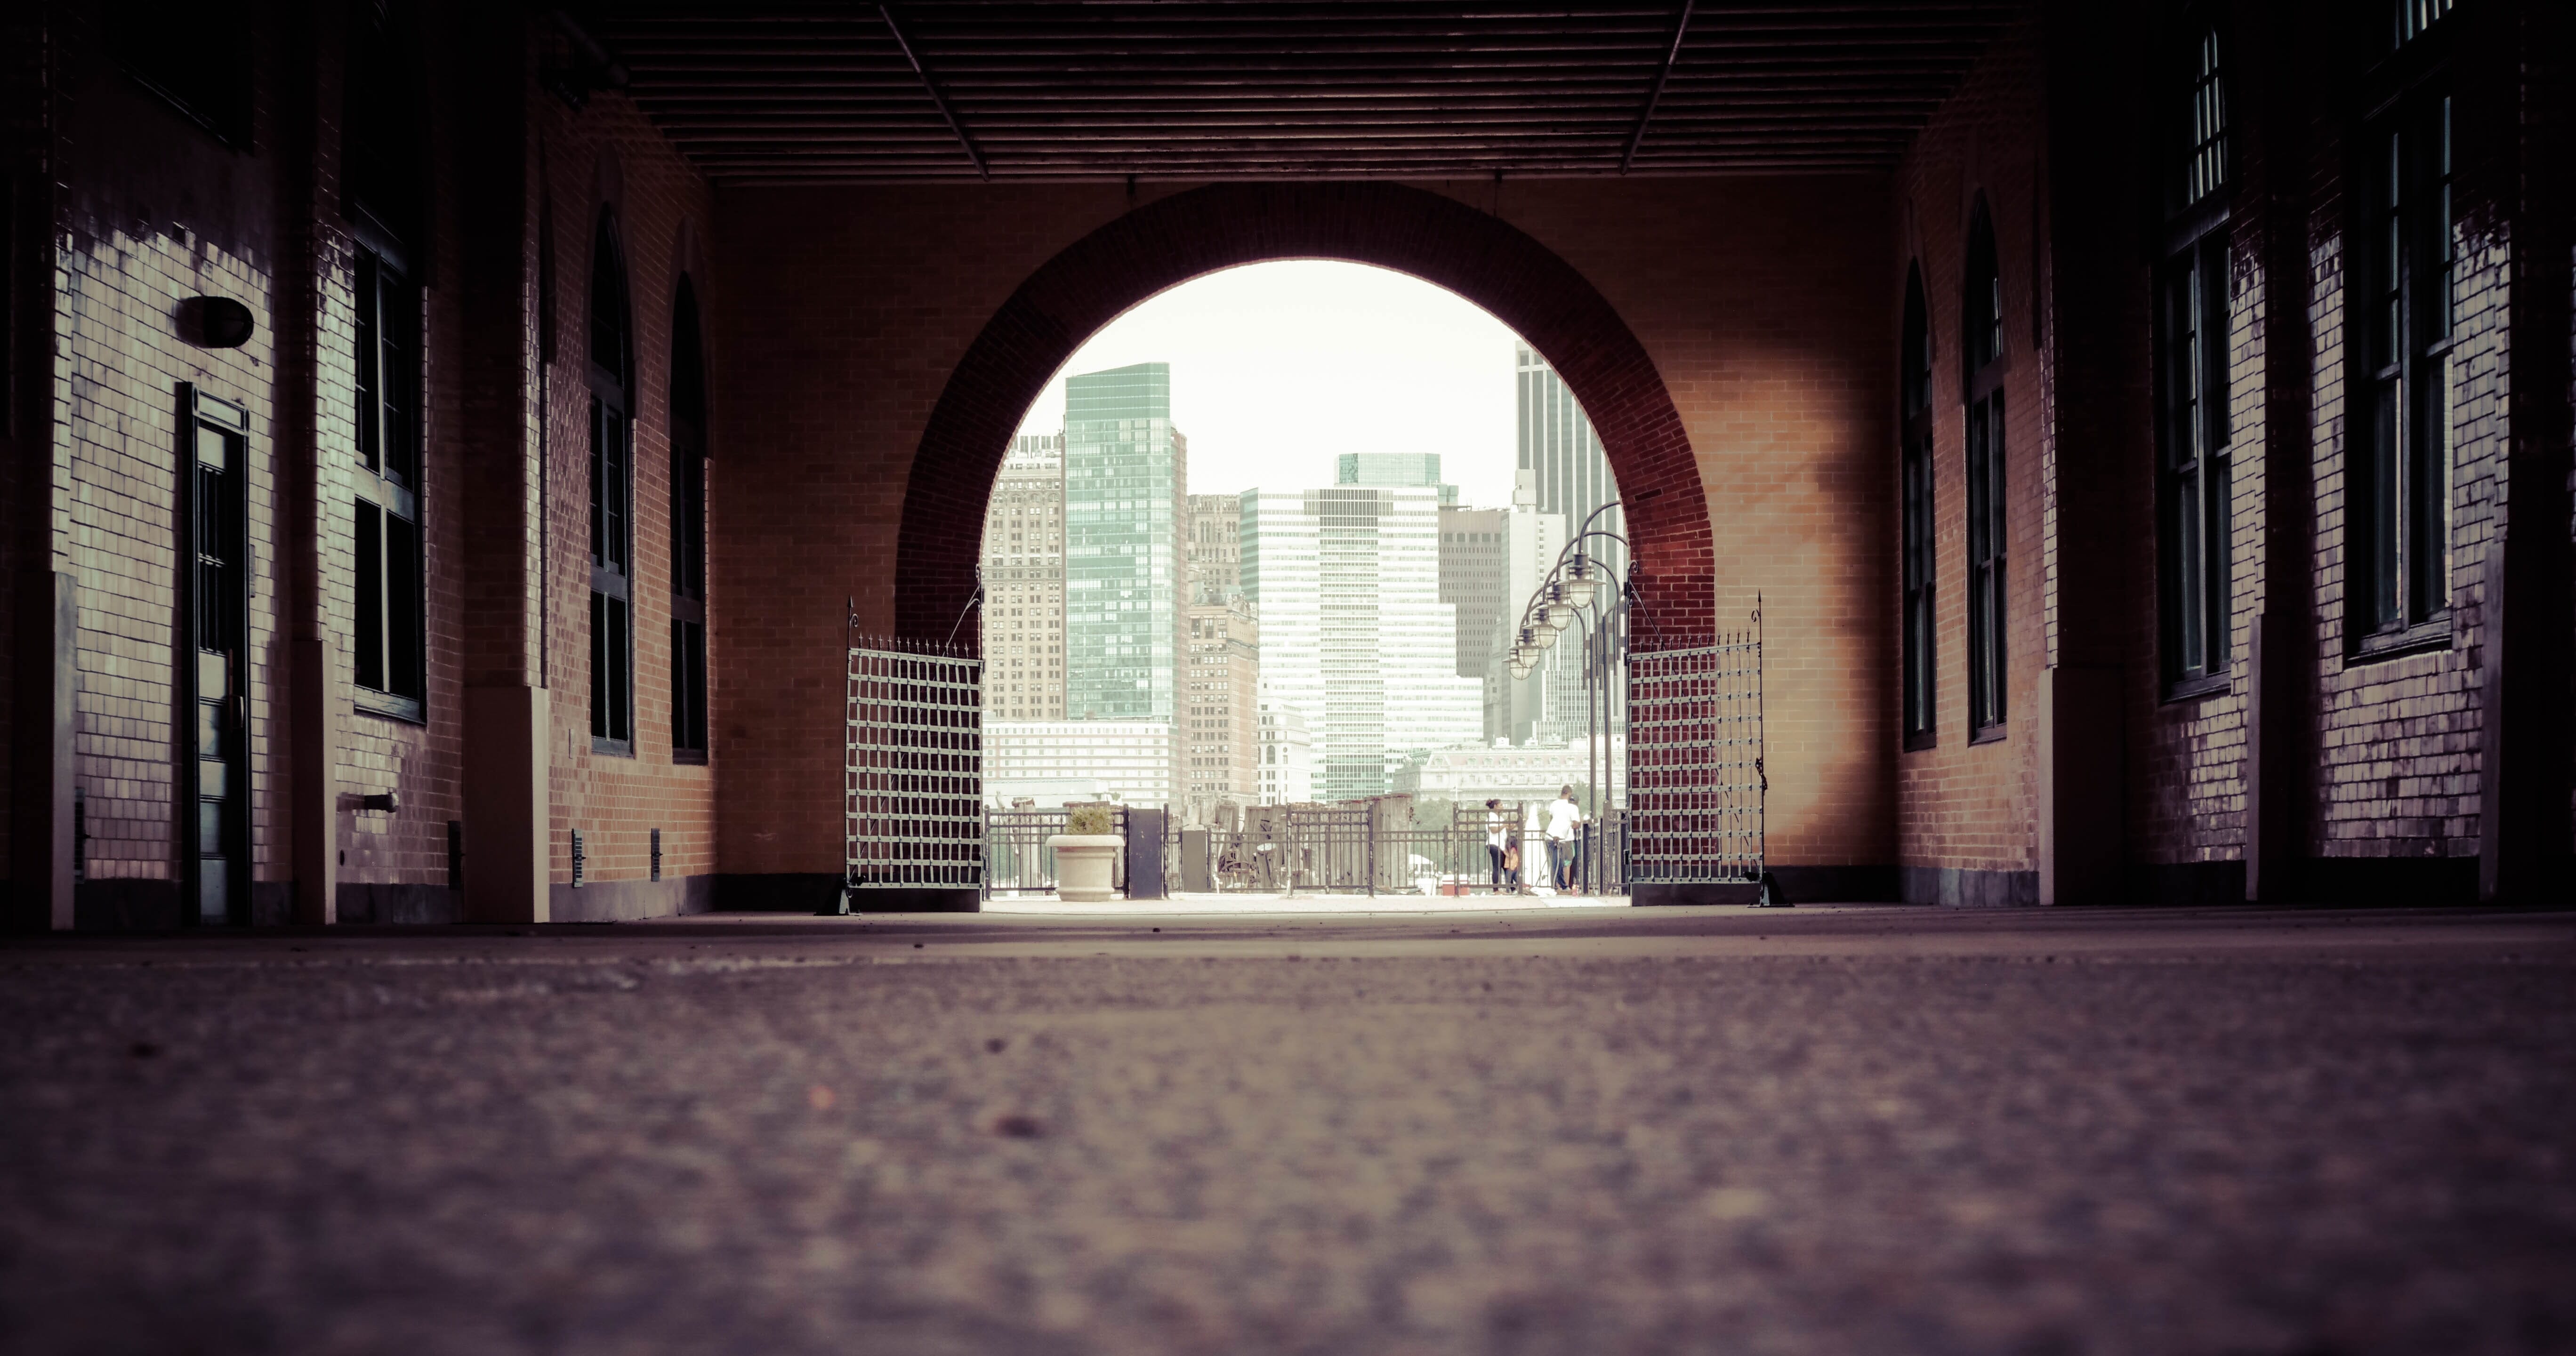
Cities often include archways, balconies, railings, and more, which all can be used to create interesting frames.
You can use an architectural frame indoors or outdoors. And you can use architectural frames to emphasize subjects of all types, from natural subjects such as trees to artificial subjects such as other buildings.
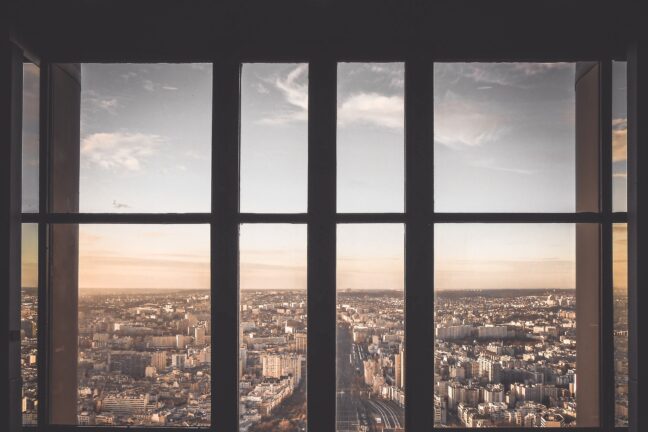
2. The Window or Doorway Frame
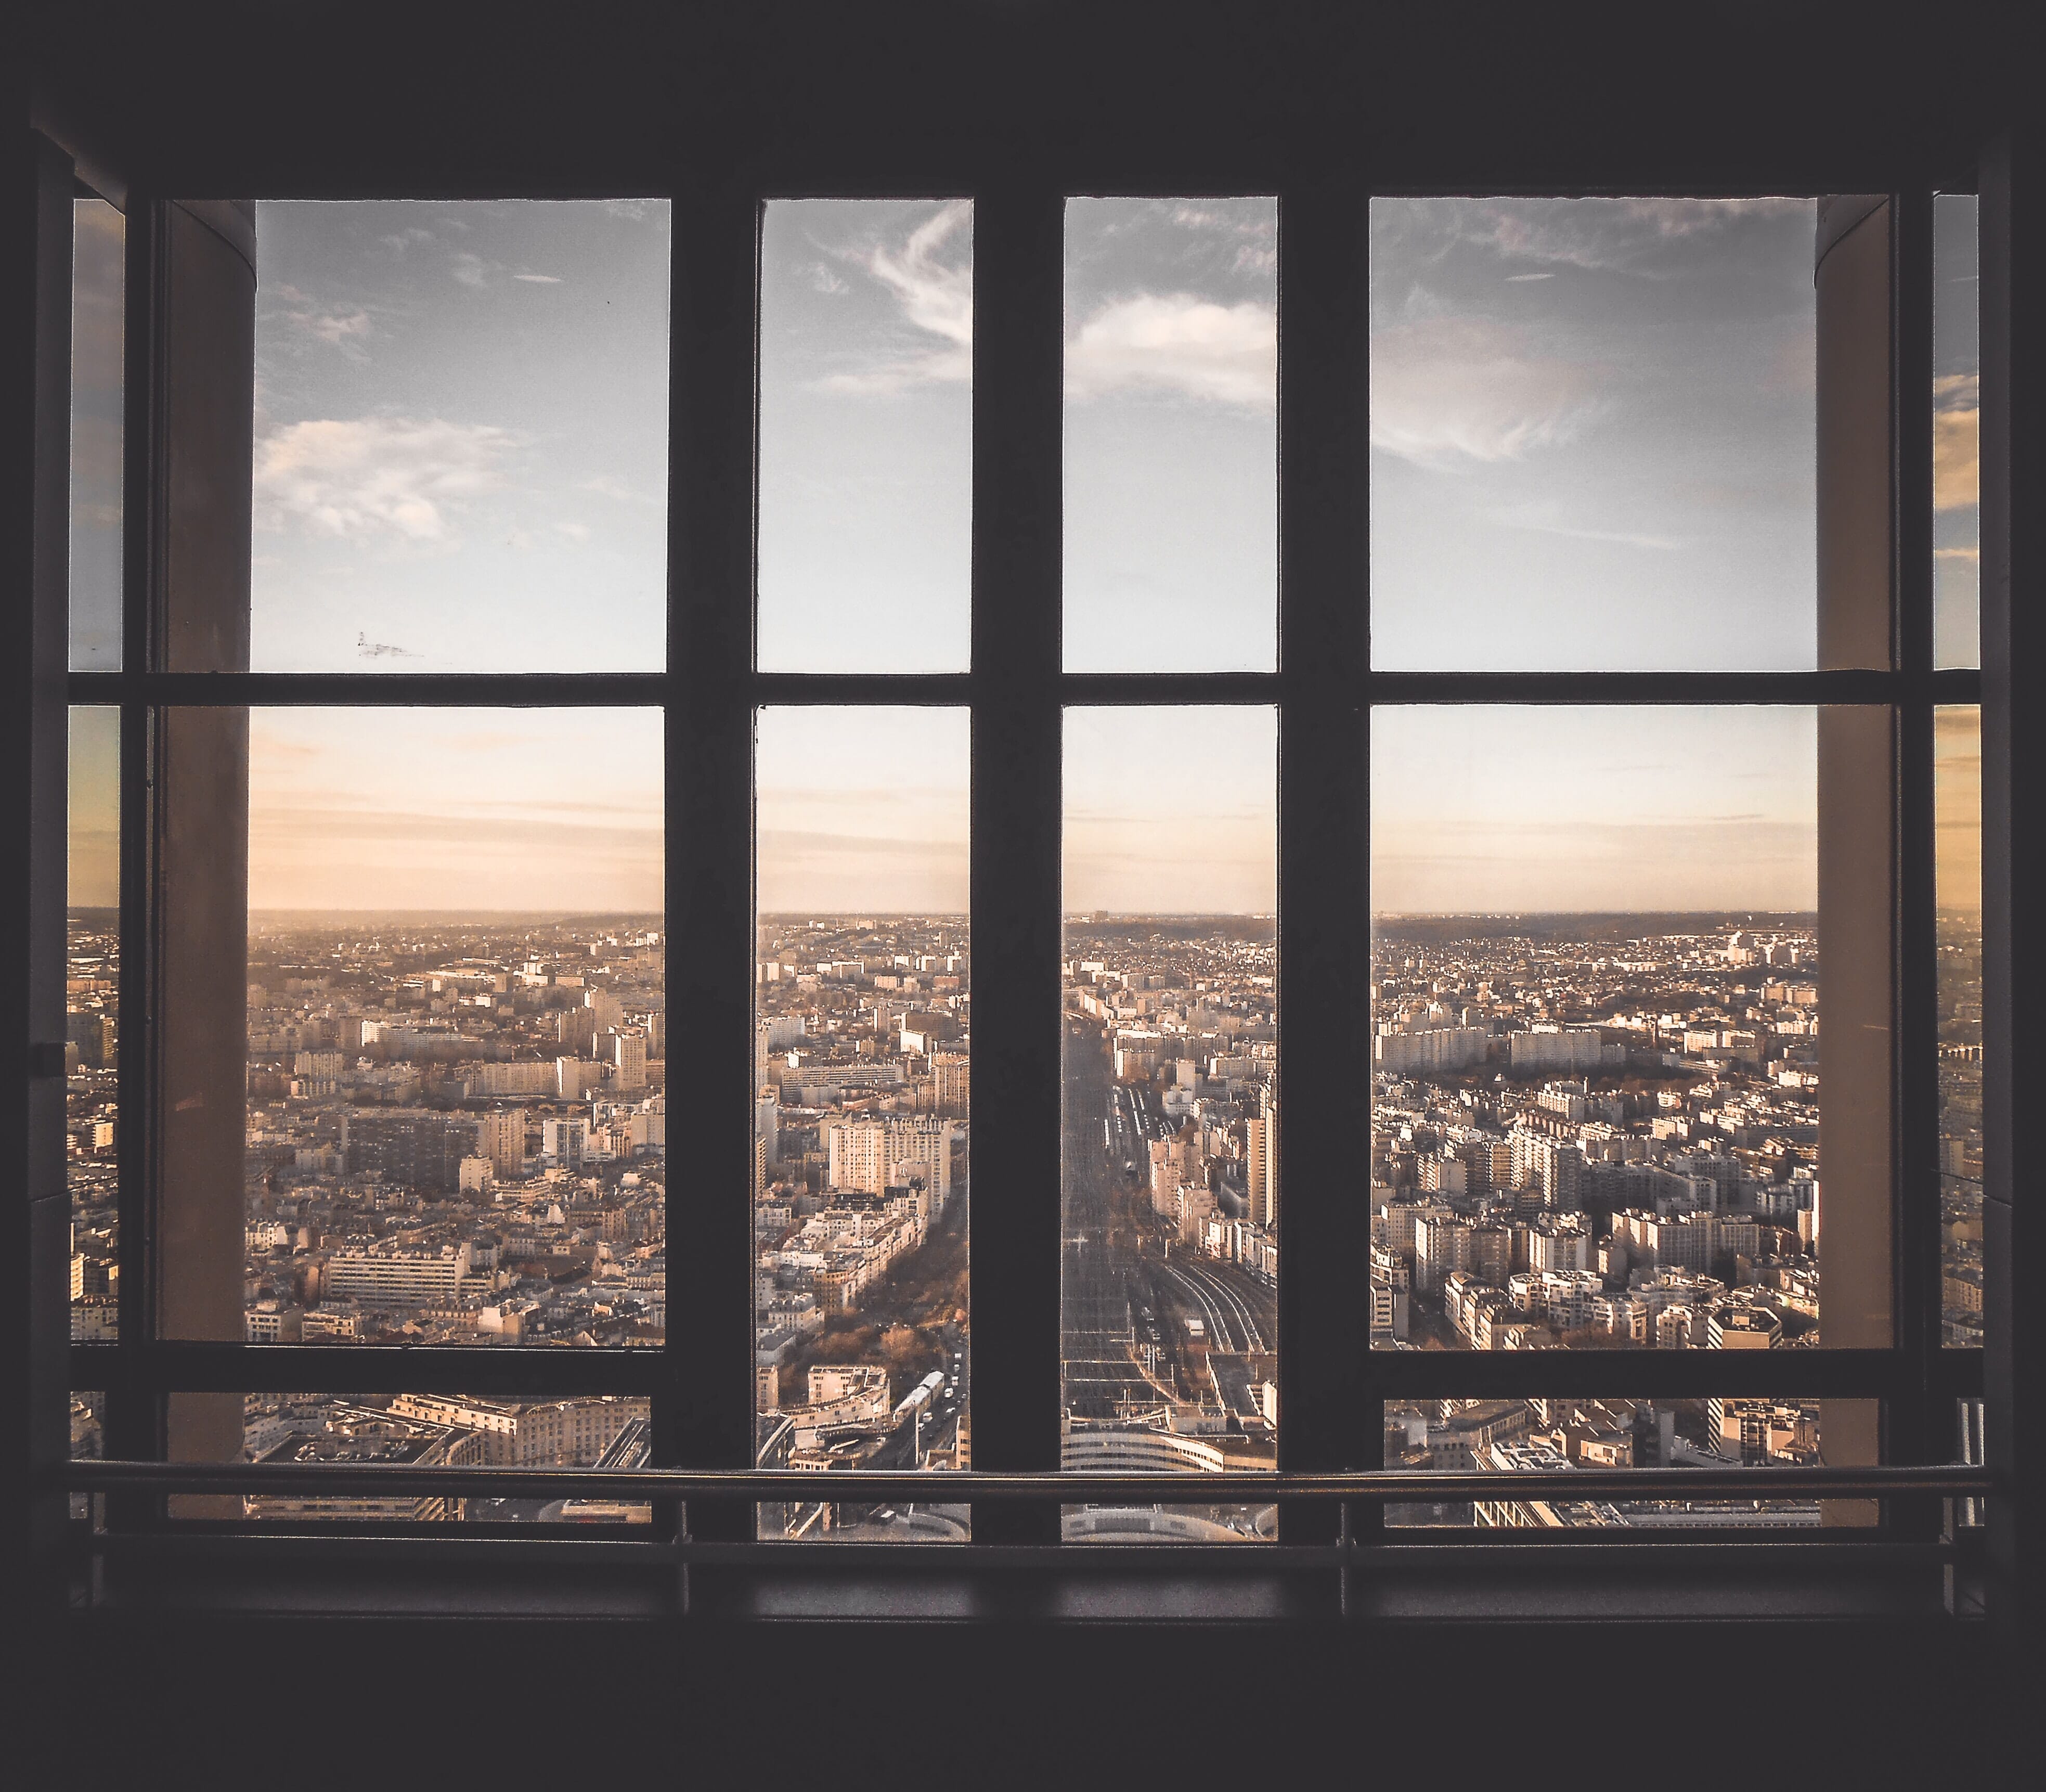
This one’s a classic because we’re so used to seeing windows as frames. You simply shoot through a window while keeping the window frame as part of your composition.
For a nice window frame, it’s generally a good idea to keep the subject and the window well-exposed; given how the inside portion of the window is often poorly lit, you’ll want to make sure you use an HDR technique to retain detail or use a camera with an exceptionally high dynamic range.
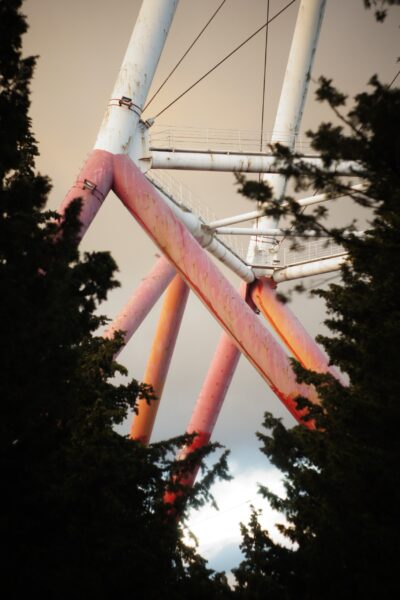
3. The “Cramming” Frame
The cramming frame is a favorite of macro photographers and wildlife photographers because it uses out-of-focus foreground elements to draw attention to the main subject.
Simply position a foreground element between your lens and your main subject, then make sure you use a wide aperture to create a beautiful wash. I’d recommend trying to get the foreground wash to surround your main subject and intersect with it as little as possible, but you’re free to experiment with different techniques!
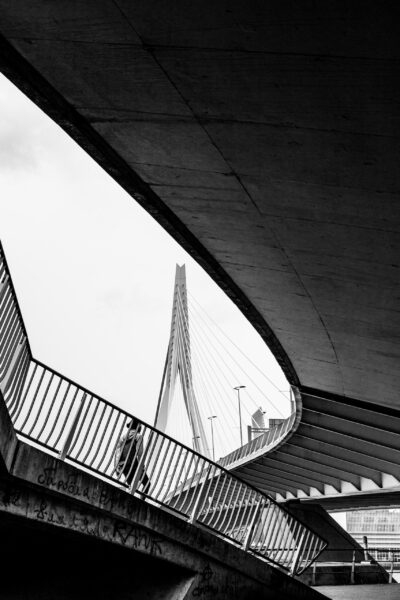
4. Frames Plus Leading Lines
While it’s true that frames can act as leading lines on their own, you can also try this technique: Frame your subject, and then use leading lines that move through the frame, or from behind the frame, toward your subject.
This type of frame is hard to find, but when you can find it it’s wildly effective, so it’s definitely worth a try.
5. Light Frames

Frames don’t always have to be composed of solid elements. Sometimes frames can be composed of pure light or shadow.
For instance, you can capture a beautiful sun flare effect that frames your main subject, or you can put your subject within light-based bokeh. Alternatively, you can make sure that your subject is positioned in the light, while the areas around the subject are dark.
(That last one is a sort of shadow frame, and it can look really, really cool!)
Capture Beautifully Framed Compositions!
Frame within a frame images are incredibly powerful and, as you can hopefully see, the technique isn’t especially difficult to use.
The trick is to give yourself time at each location to pause and simply look for potential frames. The more you practice, the better you’ll get, and pretty soon, you’ll be noticing opportunities everywhere!
Frame Within a Frame Photography FAQ
What is frame within a frame photography?
It’s a technique that involves composing with a frame around your subject. It’s a powerful way to isolate your subject, guide the viewer, and add depth to your images.
What can you use as frames in your photography?
Frames are everywhere! There are architectural frames, such as archways, windows, open doors, and bridges. There are also natural frames, such as leaves, branches, and flowers.
What types of photographers use framing?
The frame within a frame approach is most frequently used by portrait and travel photographers, who position subjects within a frame to push the viewer’s eye in the desired direction.
