Editor’s Key Takeaways: Master Zone Focusing for Sharp Street Photos

This blog post by macro photographer Jaymes Dempsey explains the concept of zone focusing, a valuable technique for street photographers and action shooters to ensure sharp results without manual focusing. Here is a concise summary of the article:
- Zone Focusing: A method of pre-focusing your lens to cover a specific range, enhancing the chances of capturing sharp images during spontaneous moments.
- Popular Use: Primarily employed by street photographers to focus less on technical details and more on composition and lighting.
- Aperture and Depth of Field: Understanding the relationship between aperture (diaphragm opening) and depth of field (DOF) is crucial. A wider aperture results in a shallower DOF, and a smaller aperture results in a deeper DOF.
- Depth of Field Explained: DOF determines how much of the scene appears sharp in an image. A shallow DOF blurs the background, while a deep DOF keeps more of the scene in focus.
- F-Stop Numbers: Different f-stop numbers (e.g., f/1.8, f/8) indicate different aperture sizes. Smaller f-stop numbers represent wider apertures, impacting DOF.
- Zone Focusing Guide: The post includes a step-by-step guide to applying zone focusing effectively in your photography endeavors.
Understanding zone focusing and its connection with aperture and DOF enables photographers to capture sharp, well-composed images even in fast-paced shooting environments.
Introduction
If you’re struggling to understand zone focusing, then you’ve come to the right place.
Zone focusing can be a tricky concept to understand–but in this article, I’m going to break it all down for you.
And when you’re done, you’ll be able to confidently employ zone focusing for amazing results.
What is Zone Focusing:
What Is Zone Focusing?
Zone focusing refers to a technique for prefocusing your lens so that you can ensure you get a sharp result.
It’s all about maximizing the chance of getting your subject in focus, even if you’re shooting action and you don’t have time to focus properly.
Street photographers, in particular, are fans of zone focusing. Instead of constantly trying to nail focus, a street photographer can use the zone focusing method to “set it and forget it.”
They’ll then be free to think about other important features, such as lighting and composition.
Make sense?
Now, to understand the details of zone focusing, you must understand the relationship between aperture and depth of field:
Aperture and Depth of Field
Aperture refers to a diaphragm in the lens which opens and closes depending on your camera settings.
And the wider the aperture, the shallower your depth of field.
What actually is depth of field?
Depth of field refers to the amount of the sharp scene.
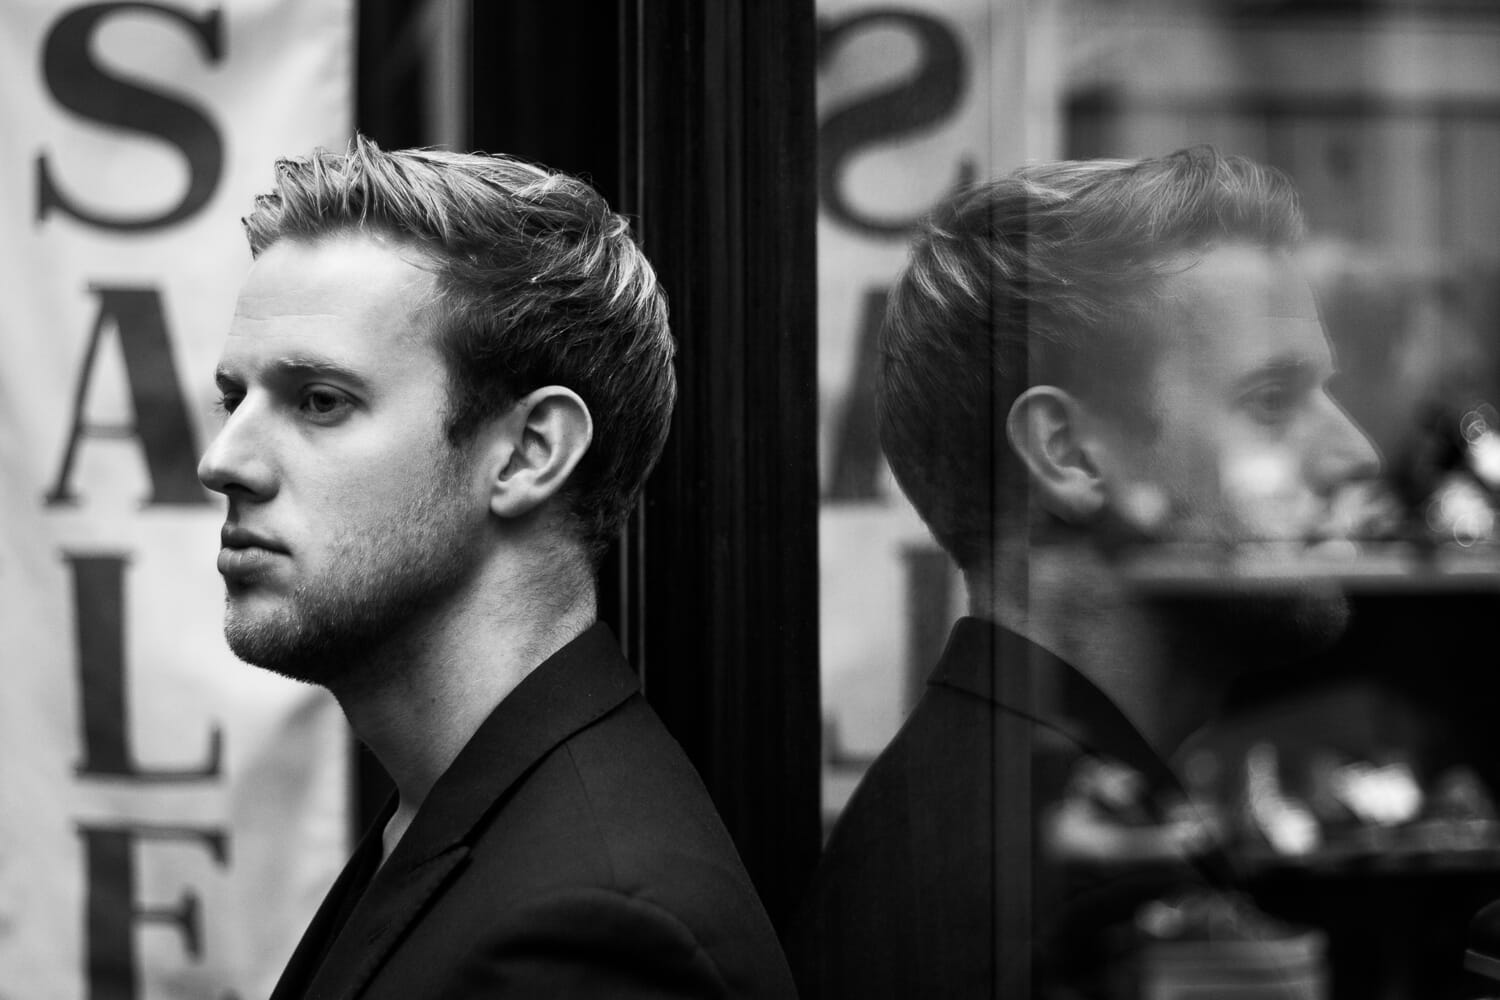
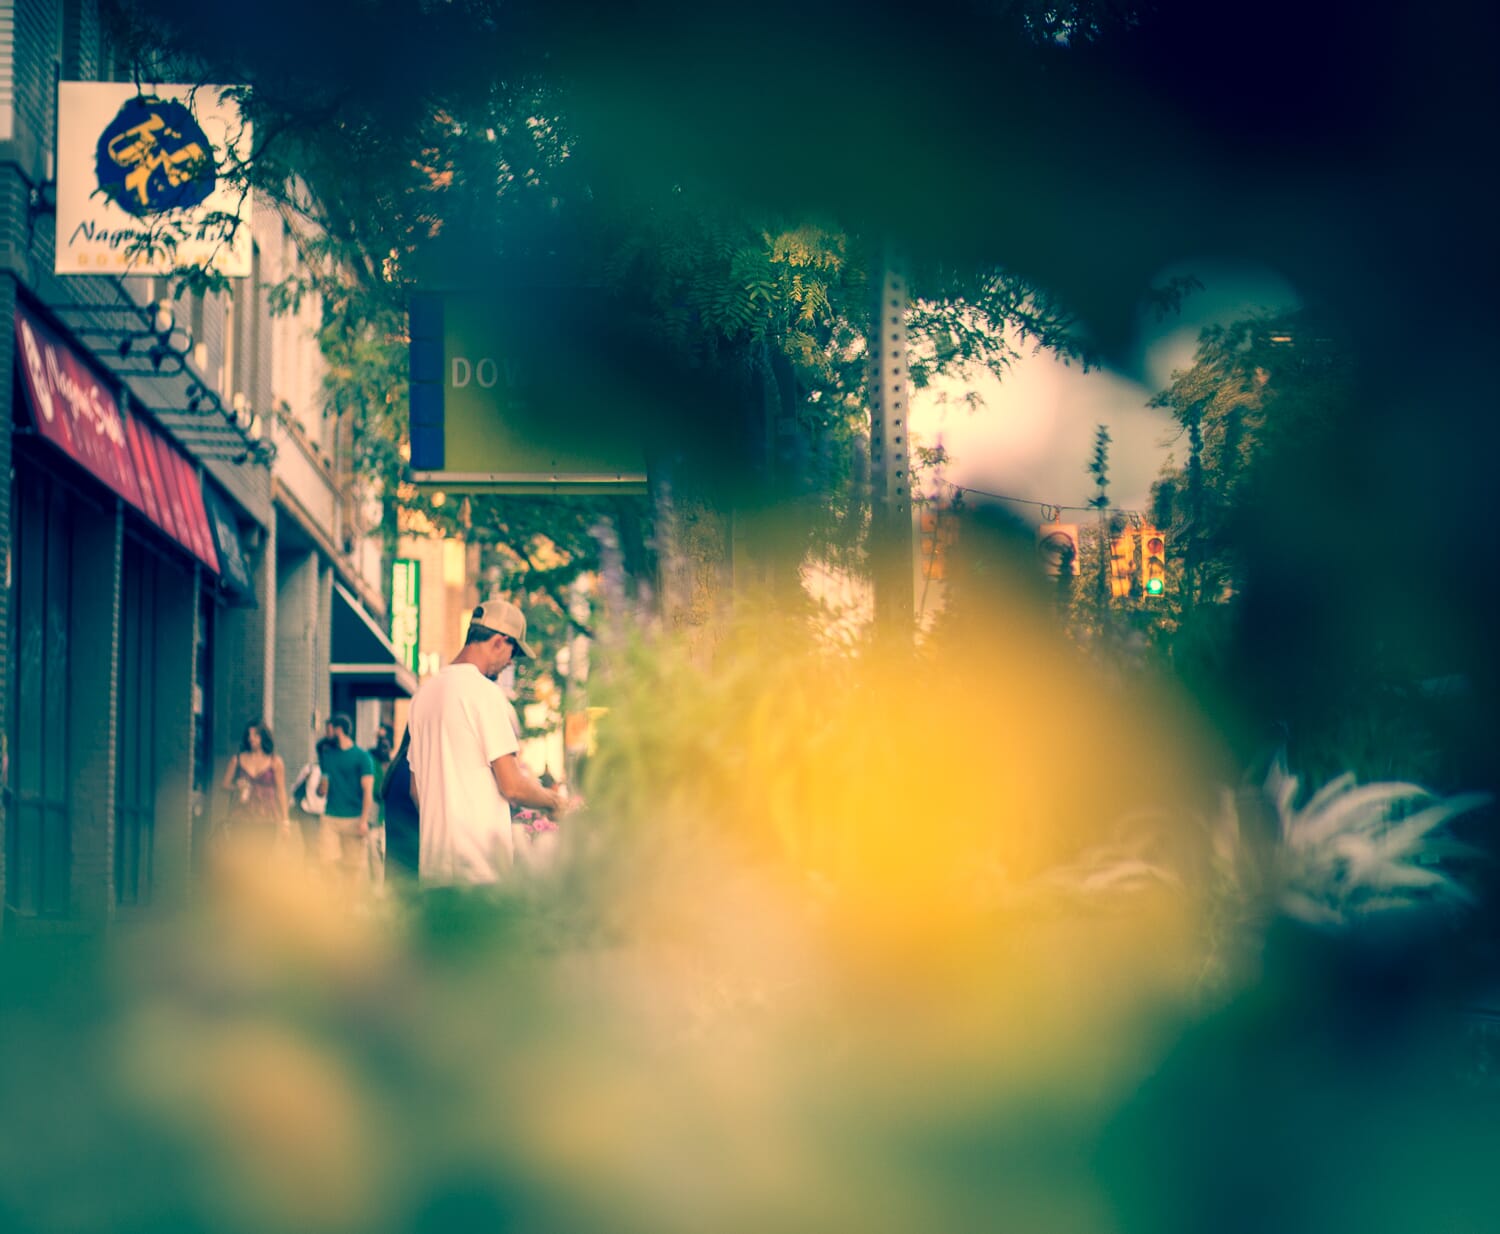
It’s possible to only have a sliver of the scene sharp, such as in this photo:

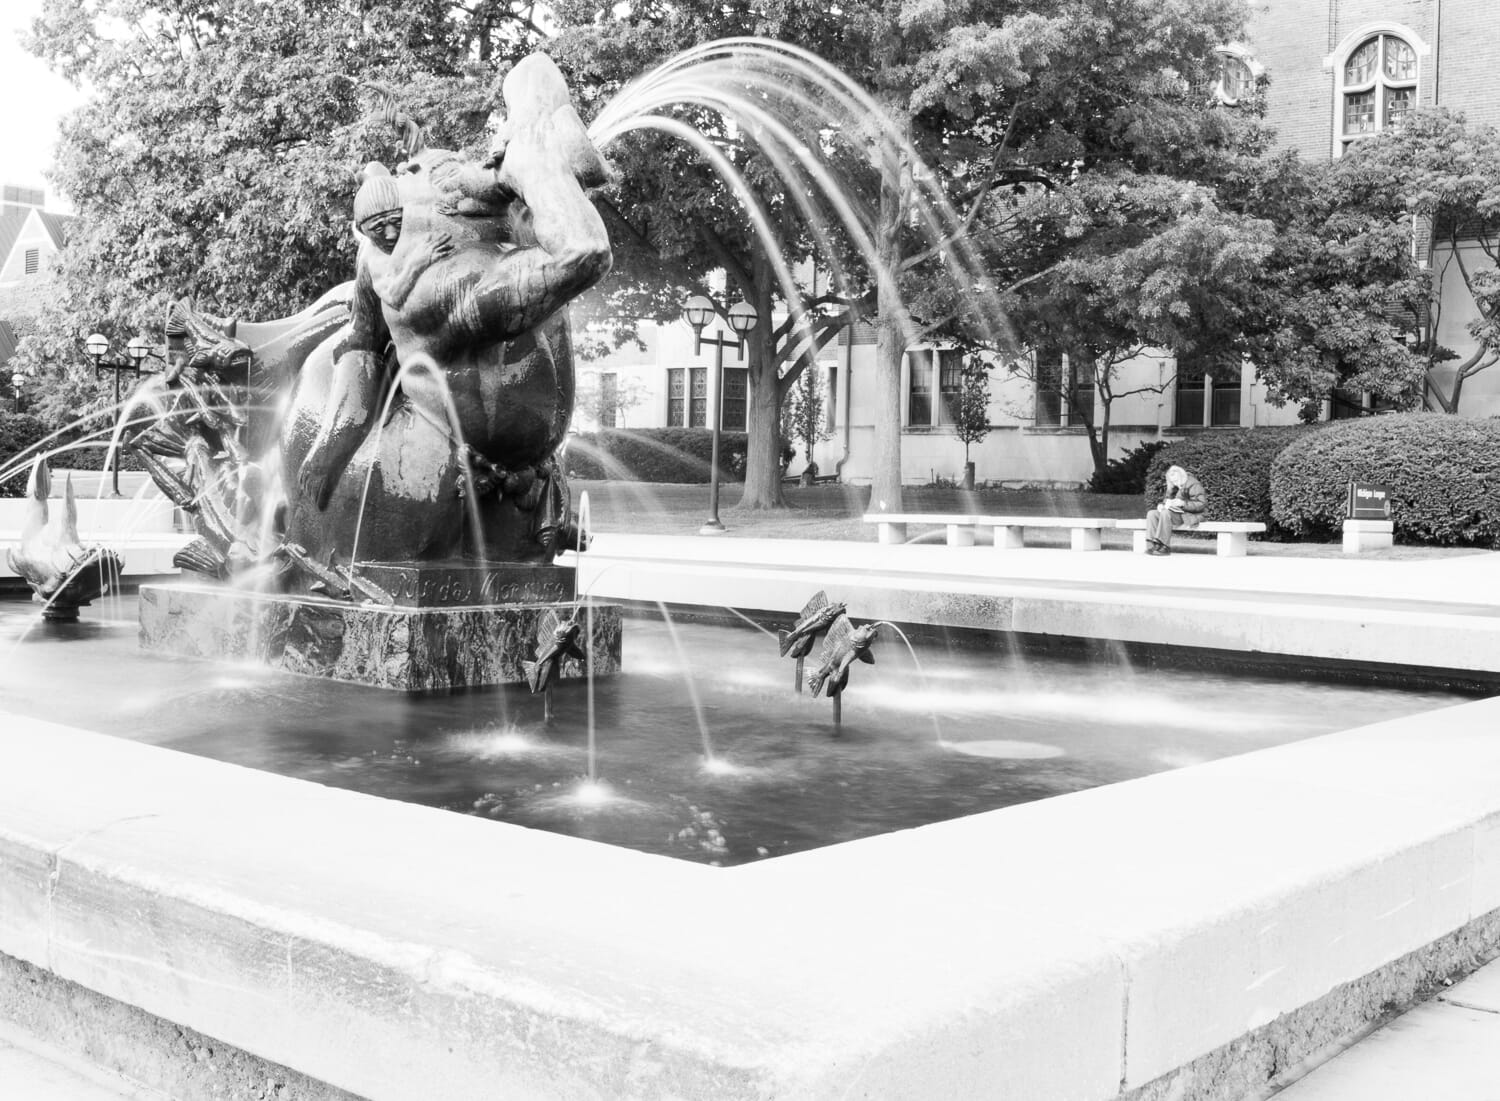
Or you can have the entire scene sharp, such as in this photo:

The first is an example of shallow depth of field, while the second is an example of deep depth of field.
Now, aperture controls depth of field.
And you control the aperture via your camera settings.
In particular, you can enter an f-stop, written like this:
f/1.8, f/2.8, f/4, f/5.6, f/8, etc.
Where each f-stop corresponds to different aperture sizes.
The smaller the f-stop number, the wider the aperture, so f/1.8 results in a very wide aperture, which produces a very shallow depth of field.
And f/16 results in a very narrow aperture, which produces a very deep depth of field.
Bottom line:
You set the f-stop, which controls the aperture, which controls the depth of field.
Also see: Example Images of Wide vs Narrow Aperture
The reason this is so important to photographers is that you want at least your subject to come out sharp.
So, you want to make sure you have enough depth of field to cover your subject.
And in some cases, you’ll want much more than your main subject looking sharp (i.e., within the depth of field range). You may want the entire scene to be rendered crisply, from a flower in the foreground to a mountain range in the background.
That’s when you need to pay careful attention to your aperture, to ensure that you get the depth of field necessary for the shot you’ve envisioned.
But there’s actually another important factor that affects depth of field:
Your point of focus.
Depth of Field and Focusing
I’ll state it outright:
The farther away your point of focus, the deeper the depth of field.
And the closer your point of focus, the shallower the depth of field.
So if you focus on a mountain in the distance, you’ll get a huge amount of depth of field to work with–hundreds of feet, most likely, even if you’re using a wide aperture.
But if you focus on a flower right in front of your lens, you’ll get a tiny amount of depth of field to work with, even if you use a narrow aperture of f/16.
What this means is that you cannot rely purely on your aperture to determine whether you have enough depth of field to keep your subject in focus.
Instead, you have to think about both the aperture and the point of focus.
And, if that’s not frustrating enough, you also have to think about the focal length–because having a longer focal length also decreases the depth of field, while having a shorter focal length increases the depth of field.
Zone Focusing: Putting It All Together
This may all seem overly complicated.
But what you need to realize is that, by adjusting your aperture, your point of focus, and your focal length, you’re able to ensure that at least some part of the scene is sharp.
Zone focusing takes advantage of this fact, and says, “Well, we’re generally trying to shoot subjects from around five feet to fifteen feet in front of us. And if we choose the right focal length and the right aperture and the right point of focus, we can make sure that our chosen swathe of the scene–from five to fifteen feet–is reasonably sharp. That way, we can focus our lens in advance, then forget about it completely, leaving us to think about other things such as composition.”
So, by carefully choosing each of these settings, you’re able to walk around with your camera hanging around your neck, snapping photos left and right without ever touching your camera’s focusing mechanisms.
It’s a neat trick, and one that’s great for casual photography, as well as street photography.
In fact, you can even use this trick so you can fire off photos without ever even looking in your camera’s viewfinder–for instance, if you’re taking photos of people while you walk but you don’t want them to know they’re being photographed.
Now let’s take a look at how, precisely, you set up zone focusing on your camera.
Zone Focusing: A Step-By-Step Guide
To zone focus, first pick your lens.
Wider lenses work far better for zone focusing; I really wouldn’t recommend going over 50mm, and 20mm to 35mm is better.
Then switch your lens over to manual.
This will ensure that you remain focused on the right place; if you let your lens focus for you, the zone focusing set up will disappear.
Next, determine the depth of field you’d like to work with. The example I used above–5 feet to 15 feet–works well in most situations, but you may have a different shooting style and different preferences.
Now comes the calculation part.
You have a few options here; for instance, you can use the scale offered on your lens, but not all lenses actually include this, plus it’s not especially precise.
Personally, I recommend using an app, which allows you to quickly calculate depth of field based on your focal length, aperture, and focusing distance.
So, for the five to fifteen feet zone focusing scenario I described above, enter in your focal length.
Then experiment with different focusing distances, until you arrive at your desired range. For a 35mm lens, you’ll find that you can focus about 8 feet away at f/8, and you’ll have a depth of field from around 5.5 feet to 15 feet.
If the range isn’t large enough, you’ll need to increase your aperture.
Last, set your point of focus based on the distance you calculated.
And leave it there! If you do have a subject walk too close, you can try to adjust focus at the last second, but make sure you always push the point of focus back to fit your original calculation.
That way, you have the best shot at nailing your photos, over and over again.
Make sense?

Zone Focusing: Conclusion
Hopefully, now that you’ve finished this article, you realize that zone focusing is far from complicated.
Plus, it’s a useful technique–one that will allow you to consistently capture sharp shots, even if you don’t have time to focus.
So make sure you memorize the instructions in this article. That way, the next time you’re out shooting, you can use zone focusing for great results!
Why should you use zone focusing?
Zone focusing is a great way to achieve sharp photos when you’re dealing with fast-paced shooting scenarios. You can use it to set focus so that you don’t have to worry about autofocusing at the moment. So if you’re doing street photography or other forms of walkaround photography, zone focusing is an excellent technique to try.
Do you use autofocus when zone focusing?
No. Zone focusing uses manual focus; if you were to use autofocus, your lens would shift focus away from your predetermined focus point, and the whole setup would stop working. Ideally, you identify your point of focus in advance, set it, and then leave it (with your lens set to manual focus so that it cannot be adjusted without moving the focus ring).
When should you use zone focusing?
I recommend zone focusing whenever you’re in a situation where you don’t have time to focus, but you’re confronted with a series of subjects within a predictable range. In other words, when you’re photographing street photos or doing casual walkaround photography. However, I don’t recommend using zone focusing when you’re doing photography that requires careful depth of field control for artistic purposes; the zone focus method will keep a range of the scene acceptably sharp, but won’t do an impressive job of producing background blur or a photo that’s sharp throughout.