
- A photographer’s itinerary is built around light, not landmarks. Used right, ChatGPT becomes a location scout, light-aware scheduler, and itinerary builder in one.
- The trick is the inputs: give it your city, date, starting point, transport, gear, photo genres, and weather constraints – then tell it to optimize for photography, not sightseeing.
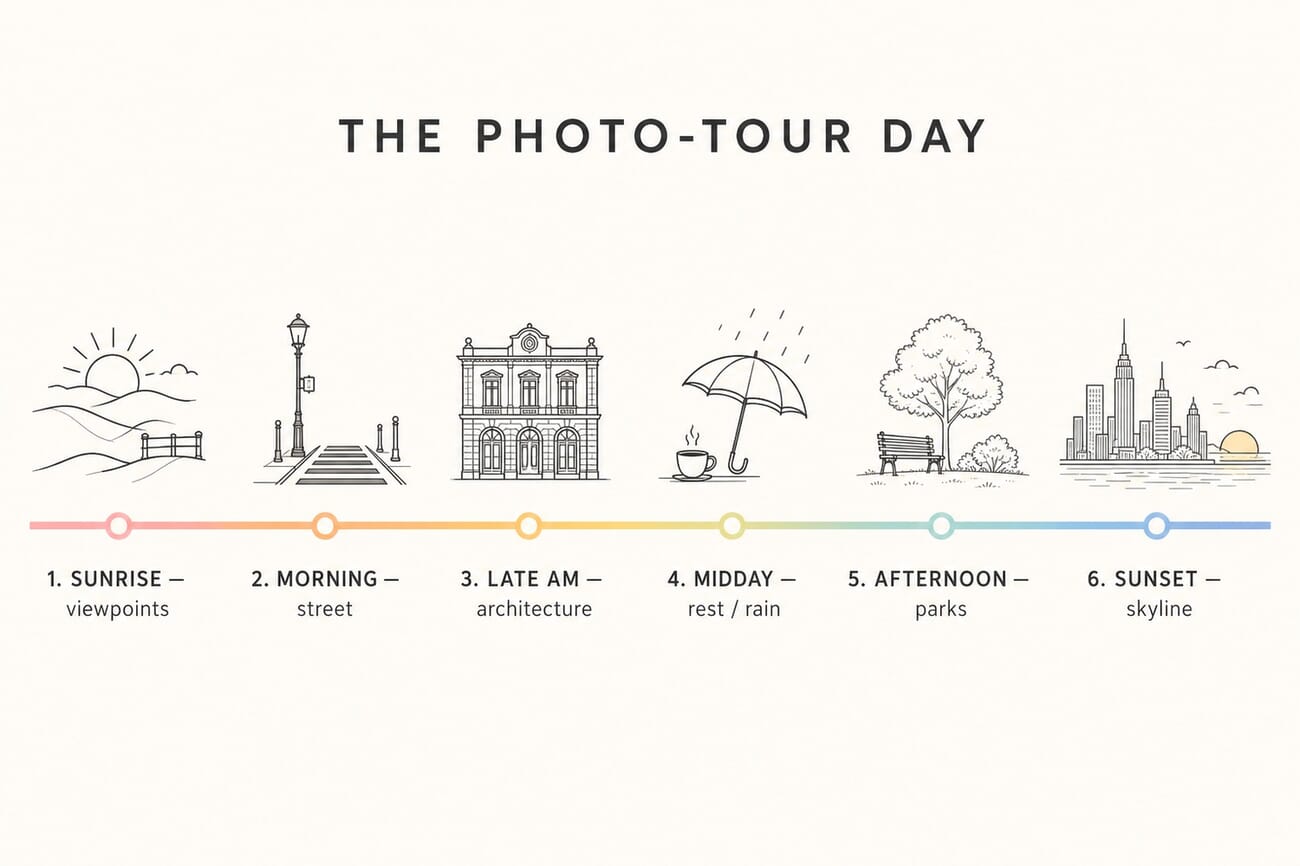
- Plan the day in ‘photo blocks’ (sunrise, morning street, late-morning architecture, midday rest, afternoon, sunset/blue hour) with arrival/leave times, travel buffers, and a rain plan.
- A second prompt turns the plan into a phone-friendly PDF with a QR code for every stop – so you navigate by scanning instead of typing while chasing light. Copy-paste prompts are below.
Planning a good photo tour is not the same as planning a normal sightseeing day. A tourist itinerary asks: what are the famous places? A photographer’s itinerary asks something far more specific – where should I be when the light is best, how long do I need there, how do I move between locations, and what do I do if the weather changes?
That is exactly where ChatGPT becomes surprisingly useful. Instead of asking it for a generic list of “top places to photograph,” you can use it as a location scout, assistant planner, weather-aware scheduler, and PDF itinerary builder. This is the same workflow we used to build our one-day New York photo route – from a DUMBO sunrise to a blue-hour skyline across the East River – which produced a practical PDF with a Google Maps QR code for each stop, arrival and departure times, travel estimates, sunrise and sunset planning, and rain fallbacks.
The key is not asking “where should I go?” It is giving ChatGPT the same constraints a working photographer would.
The Core Idea: Plan Around Light, Not Landmarks
A photo-tour itinerary should be built around four things, in this order:
- Light – where the best light is, and when
- Movement – how you get between stops without wasting good light
- Weather – what changes if it rains or the sky goes flat
- Photo value – how much a stop is actually worth shooting
Most travel plans put the famous attraction first. A photographer’s plan puts the best light first – sunrise viewpoints early, street photography after the city wakes up, sheltered or indoor locations during harsh midday or rain, architecture in overcast light, and sunset only if the weather and travel time make sense. For our New York route, the light set the order: a pre-dawn start in DUMBO, street and architecture as the city woke, the indoor Oculus and Grand Central as fallbacks for harsh light or rain, neighborhoods in the soft afternoon, and the skyline saved for sunset and blue hour.
Step 1: Give ChatGPT the Right Inputs
Don’t start with a vague prompt like “plan a photo tour of New York” – that produces a generic tourist list. Instead, hand it your actual shooting constraints:
- City
- Date
- Starting point
- Transport mode
- Fitness or mobility limits
- Gear
- Preferred photo genres
- Weather concerns
- Must-see or must-avoid locations
- Whether you want sunrise, sunset, street, landscape, architecture, people, food, or night
The more specific the constraints, the more ChatGPT can optimize the route rather than just list places.
Step 2: Ask for a Photo-Optimized Route, Not a Tourist Route
A normal itinerary sends you to the most famous attraction first. A photo itinerary should ask: where is the best sunrise view? Which locations work in soft morning light? Which places are better in overcast weather? Which stops are practical during rain? Where should you be before sunset, and what should you skip if you start late?
The one phrase that changes everything: “Optimize this for photography, not sightseeing.” That single sentence noticeably improves the quality of the itinerary.
Step 3: Make It Account for Sunrise, Sunset, and Weather
This is where the plan becomes genuinely useful. Ask ChatGPT to account for sunrise and sunset, civil dawn and civil dusk, golden hour and blue hour, the hourly forecast, rain windows, cloud cover, and (for scooters or motorcycles) road conditions.
Timing matters down to the minute. A sunrise viewpoint is useless if you arrive at sunrise – you generally want to be there 20-40 minutes before to park, scout a composition, and set up a tripod. For sunset, aim to arrive 45-75 minutes before, especially at popular viewpoints. So tell it: “Include the best arrival and leaving times for every location, based on light, weather, travel time, and photography potential.”
Step 4: Ask for Travel-Time Buffers
A map might say a ride takes 15 minutes; in real life a photographer often needs 30 – because of traffic, parking, bad roads, rain, unplanned photo stops, gear packing, the walk from parking to the viewpoint, and waiting for a clean composition. A good rule for readers: add 20-40% more travel time than the map estimate. That buffer is what keeps the whole day from collapsing the first time you stop for unexpected light.
Step 5: Build the Day Around “Photo Blocks”
Instead of planning by attraction, plan by photo block. A strong one-day route usually follows this rhythm:
- Pre-sunrise / sunrise – viewpoints, skylines, landscapes, bridges, mist, empty streets, blue-hour city lights
- Early morning – markets, commuters, street scenes, local life, soft directional light
- Late morning – architecture, museums, interiors, cafés, details, cultural stops
- Midday – rest, food, backup editing, indoor shooting, rain shelter, scouting
- Late afternoon – parks, viewpoints, waterfronts, neighborhood walks, reflections after rain
- Sunset / blue hour – skylines, rooftops, bridges, city lights, long exposures, silhouettes
This framework works in almost any city – it’s the backbone of the whole approach.
Step 6: Ask for a Rain Plan
Many photographers treat bad weather as a problem, but rain is often a gift: reflections, umbrellas, neon glow, moody clouds, wet pavement, mist, soft contrast, and fewer crowds. The trick is avoiding unsafe or impractical spots during the worst of it. Ask: “Create a rain-adjusted version of the route. Tell me which stops to keep, which to skip, and which locations work best in rain.”
Step 7: Turn the Itinerary Into a Scannable PDF
This is where the workflow beats a normal travel plan. Ask ChatGPT to produce a PDF with a route summary, start point, stop order, arrival and leaving times, travel estimates, the best subjects at each stop, a Google Maps QR code for every location, a full-route QR code, rain and late-start fallbacks, a gear checklist, and safety notes.
The QR codes are the practical magic. Instead of typing each place into Maps while standing on a roadside with a camera bag, you scan the next stop and start navigating – which matters when you’re moving fast, watching the sky, and trying not to miss the light.
Step 8: Ask for a Late-Start Version
A real photographer’s day rarely goes to plan – you oversleep, rain starts early, breakfast runs long, or a street scene is too good to leave. So build in a fallback: “If I start two hours late, what should I skip and what should I keep?” The answer should protect your highest-value photo blocks and drop the lower-value or longer-distance stops. That turns the itinerary from a rigid schedule into a flexible field guide.
What We Actually Built in the New York Example
To pressure-test the workflow, we ran it for real and published the result: a one-day New York photo route – start in DUMBO at sunrise, on foot and subway, summer timing – prioritizing viewpoints, street, architecture, and the skyline. The plan came out as: a DUMBO sunrise and a Brooklyn Bridge walk at golden hour, the Oculus and Grand Central for flat mid-morning light (and rain cover), a midday reset in Bryant Park, SoHo and the West Village in the soft afternoon, and Gantry Plaza in Long Island City for sunset and blue hour – delivered as a downloadable PDF with a Google Maps QR code for every stop.
Then a second prompt converted it into a PDF with stop-by-stop timing, arrival and leaving windows, scooter travel estimates, a Google Maps QR code per stop, a full-route QR code, and the rain and late-start adjustments. That is the system any photographer can copy.
The Repeatable Formula
The structure to reuse is: location + date + starting point + transport + photo goals + weather constraints + output format. Here is a strong master planning prompt – paste it in and fill the brackets:
Plan a one-day photo tour in [CITY] for [DATE].

Starting point: [EXACT AREA OR HOTEL]
Transport: [walking / public transport / car / scooter / bicycle]
Photography style: [street / landscape / architecture / wildlife / portraits / skyline / night / mixed]
Gear: [phone / mirrorless / DSLR / tripod / drone if legal / light kit]
Constraints: [rainy season / heat / limited walking / avoid unsafe areas / family-friendly / budget]
Priorities: [sunrise / sunset / blue hour / local markets / skyline / hidden spots]

Please optimize for photography, not sightseeing.

Include:
- Sunrise, sunset, civil dawn, and civil dusk times
- Best arrival and leaving time for each location
- Estimated travel time between stops
- Best subjects to photograph at each stop
- Suggested lenses or focal lengths
- Rain or bad-weather fallback
- Late-start version
- Safety and gear notes
- Google Maps links for each stop
- A final route order
Once the itinerary looks good, use a second prompt to build the PDF:
Turn this itinerary into a clean one-day photo-tour PDF.

The PDF should include:
- Title and date
- Starting point
- Route overview
- A table with each stop, arrival time, leaving time, travel time, and photo goal
- QR code for each Google Maps location
- QR code for the full route
- Rain fallback plan
- Late-start adjustment
- Gear checklist
- Notes for sunrise, sunset, and blue hour

Make the design easy to read on a phone.
Use short, practical notes rather than long paragraphs.
A Ready-to-Copy Example: One-Day New York Photo Tour
To see the formula in action, here’s a complete prompt for a New York City photo day. Swap the city and details for anywhere:
Plan a one-day photo tour of New York City for [DATE].

Starting point: [HOTEL / NEIGHBORHOOD], New York City.
Transport: walking + subway.
Photography style: cityscape, street photography, architecture, skyline, bridges, and blue-hour shots.
Gear: mirrorless camera, 24-70mm lens, 70-200mm lens, small tripod. No drone.

Please optimize this for photography, not sightseeing.
Use the actual sunrise, sunset, civil dawn, and civil dusk times for that date.
Check the likely weather and account for rain, harsh midday light, and subway travel time.

Create a route with:
- Best sunrise location
- Early morning street photography location
- Midday indoor or sheltered option
- Afternoon neighborhood walk
- Sunset skyline location
- Blue-hour or night photography location

For each stop, include:
- Best arrival and leaving time
- Estimated travel time from the previous stop
- Subway/walking notes
- What to photograph there and suggested focal lengths
- Backup option if it rains
- Safety/crowd notes

Also include a late-start version in case I begin at 9:00 AM instead of sunrise.
Two quick variations worth keeping in your back pocket: add a hard walking limit (e.g. “maximum 8 miles”) and “prefer fewer locations with better timing over rushed stops” for a tighter day; or ask for a dedicated rainy-day route, since cities like New York can be excellent in bad weather. The same skeleton handles all three.
Frequently Asked Questions
Can ChatGPT actually generate the QR codes and PDF?
Yes – ChatGPT can produce a downloadable PDF with embedded Google Maps QR codes and a formatted itinerary table. If a particular build doesn’t include working QR codes, ask it explicitly to generate scannable QR codes linking to each Google Maps location.
How accurate are the sunrise, sunset, and weather details?
Sun times are astronomical and reliable for a given date and city. Weather is a forecast, so treat rain windows as guidance and keep the rain and late-start fallbacks handy. For critical shoots, double-check the forecast the night before.
Does this only work for big cities?
No. The photo-block framework – light first, then movement, weather, and photo value – works for small towns and rural routes just as well as for New York. Run it for a rainy-season day in a hill town like Aizawl and the same structure holds: the inputs change, the framework doesn’t.
Which AI tools work for this besides ChatGPT?
Any capable assistant that can reason about timing and produce a document will do – the prompts here are model-agnostic. The key is the structured inputs and the “optimize for photography, not sightseeing” instruction, not the specific tool.
The Bottom Line
The difference between a tourist day and a photographer’s day comes down to one reframing: plan around light, movement, weather, and photo value – not around landmarks. Give ChatGPT those constraints, ask it to build the day in photo blocks with real arrival times and a rain plan, then have it output a phone-friendly PDF with QR codes for every stop. Do that once and you’ll never plan a shoot day the old way again. Start with the master prompt above and adapt it to your next destination.
Featured image and infographic: PhotoWorkout editorial illustration.
Tools and references referenced in this guide.
Tools
- OpenAI – ChatGPT – The assistant used to plan and build the itinerary
- Google Maps – Location links and QR-code navigation


