
- The six core portrait lighting patterns are butterfly, loop, Rembrandt, split, broad, and short lighting.
- Loop lighting is the most versatile and flattering – start here if you’re unsure which pattern to use.
- Rembrandt lighting and split lighting deliver increasing levels of drama and contrast.
- Broad and short lighting are modifier techniques that work with any pattern to widen or slim the face.
- Use the comparison table below for a quick reference on when to use each pattern.
What Are Lighting Patterns?
Lighting patterns are specific arrangements of light and shadow on a subject’s face, created by the position of the key light relative to the subject and camera. Each pattern produces a distinctive shadow shape – particularly around the nose and cheeks – that changes the mood, dimension, and perceived shape of the face.
Understanding these patterns is fundamental to portrait photography. Rather than placing a light arbitrarily and hoping for the best, knowing the patterns gives you a repeatable framework. You can walk into any shooting situation – studio, window light, outdoor sun – and deliberately choose a pattern that matches the mood you want.
Every pattern is defined by a single variable: the horizontal angle of the key light relative to the camera-subject axis. Move the light from directly in front of the subject to 90 degrees to the side, and you’ll pass through every major pattern in sequence – from butterfly to loop to Rembrandt to split.
The height of the light and the choice of modifier (softbox, umbrella, beauty dish) affect the quality of the light, but the pattern is determined primarily by that horizontal angle. Master the angles, and you master portrait lighting. For a deeper understanding of how the direction of light shapes every aspect of your images, see our guide to light direction in photography.
Butterfly Lighting (Paramount Lighting)
Key light position: Directly in front of and above the subject, centered on the camera axis.
Butterfly lighting places the key light directly above the camera, angled down at the subject. This creates a symmetrical, butterfly-shaped shadow directly beneath the nose. The name “Paramount lighting” comes from Hollywood’s golden age, when Paramount Studios used this pattern extensively to photograph leading actresses.
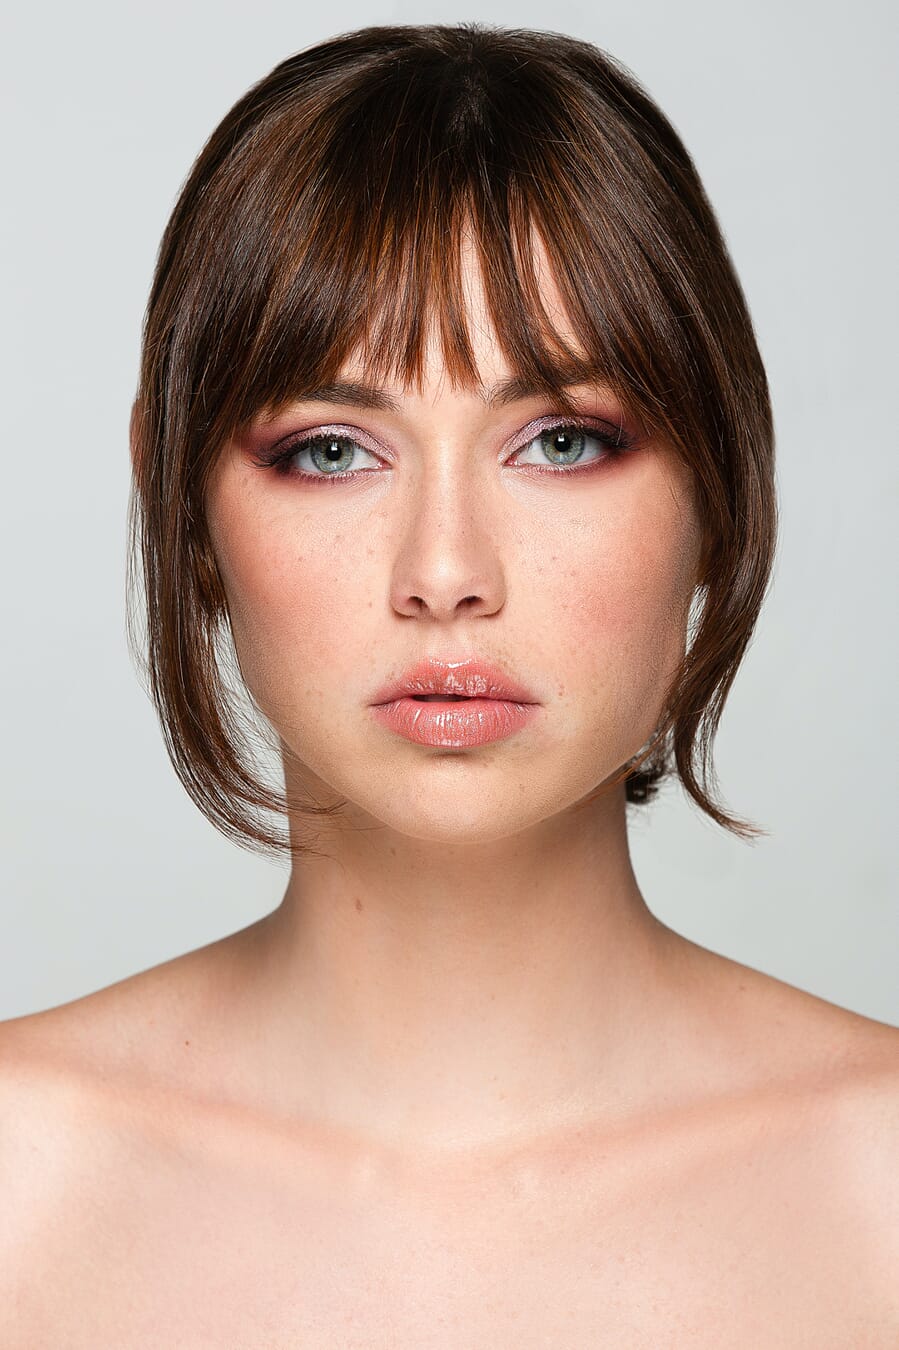
What it does: Butterfly lighting emphasizes cheekbones, minimizes texture and wrinkles, and creates a glamorous, polished look. The even, front-facing illumination produces minimal side-to-side shadow, which keeps the face looking smooth and symmetrical.
Best for: Beauty and fashion photography, subjects with defined cheekbones, glamour portraits, and any situation where a clean, flattering, front-lit look is desired.
Limitations: It provides almost no side-to-side dimension and can flatten round face shapes further. It also creates shadows in the eye sockets if the light is too high, so the height needs careful adjustment.
Clamshell Lighting
Key light position: Above the subject (like butterfly), plus a fill light or reflector below the face.
Clamshell lighting is a variation of butterfly lighting that adds a second light source (or reflector) below the subject’s chin, creating a “clamshell” of illumination that wraps around the face. The top light provides the primary illumination while the bottom fill softens shadows under the chin, nose, and eye sockets.
What it does: Produces extremely even, flattering light with minimal harsh shadows. The fill from below eliminates the under-nose and under-chin shadows that butterfly lighting creates, resulting in a smooth, polished look.
Best for: Beauty photography, headshots, corporate portraits, and any situation where the most flattering, lowest-contrast light is needed. It’s the go-to setup for close-up beauty shots and skin product advertising.
Limitations: Very low contrast and minimal dimension. It’s not the right choice when you want mood, drama, or strong character in a portrait.
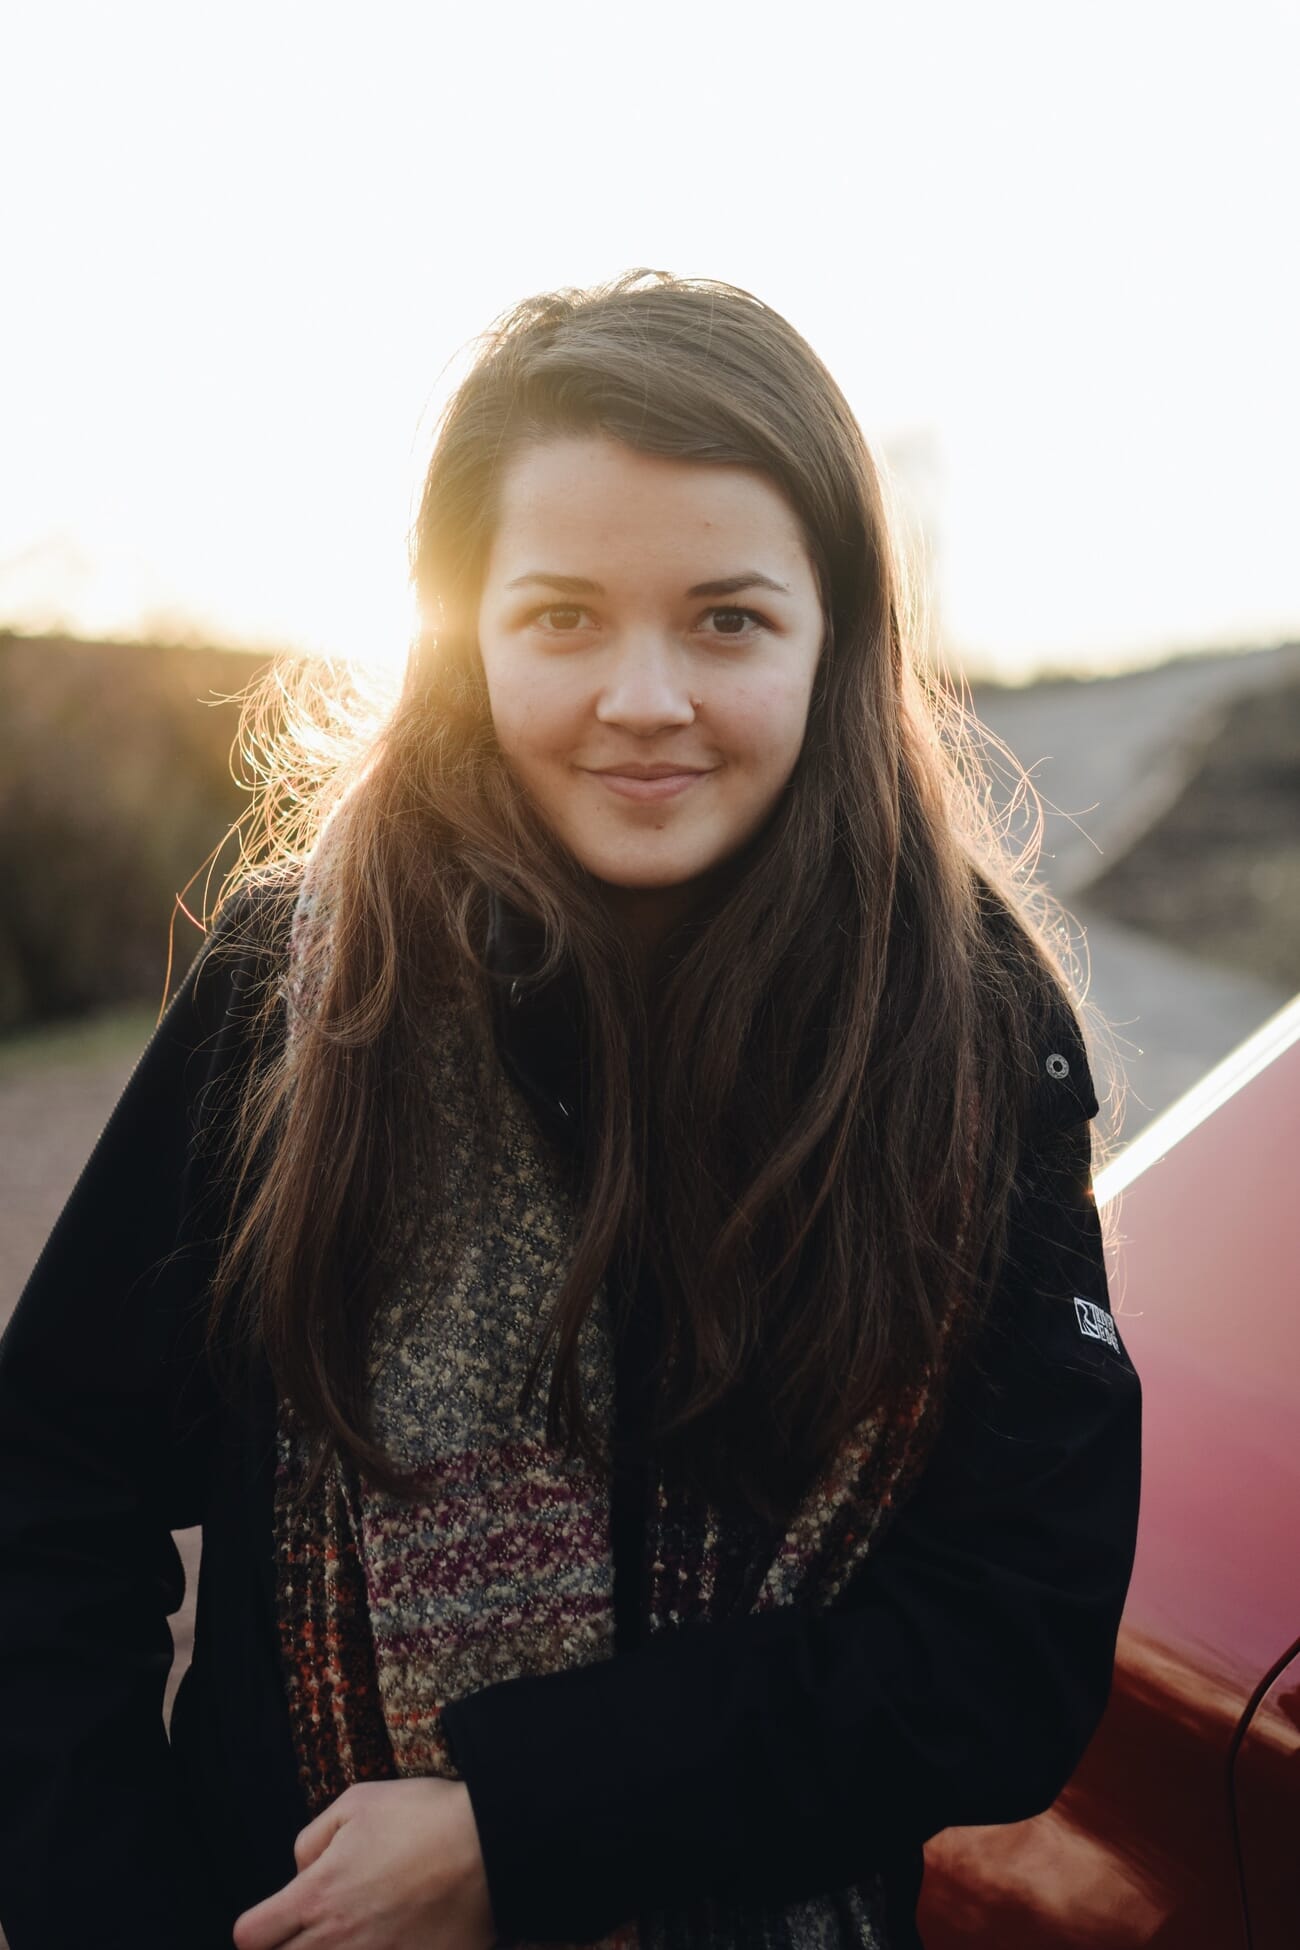
Loop Lighting
Key light position: 20-45 degrees to the side, slightly above eye level.
Loop lighting is the most widely used portrait lighting pattern and the safest starting point for any portrait session. It gets its name from the small, loop-shaped shadow that falls below and to one side of the subject’s nose.
What it does: Creates gentle, natural-looking dimension across the face. The shadow is subtle enough to flatter virtually every face shape while still adding depth and modeling. The nose shadow angles downward toward the far cheek but does not connect to the cheek shadow – that’s the key distinction from Rembrandt lighting.
Best for: Headshots, corporate portraits, social media content, client sessions, and any situation where you need a reliable, universally flattering result. It’s the default choice for photographers who shoot a variety of subjects in a single session.
Limitations: If you’re after high drama or intense mood, loop lighting may feel too safe and conventional. Move to Rembrandt or split for more contrast.
Read our complete loop lighting setup guide for step-by-step instructions, natural light techniques, and common mistakes to avoid.
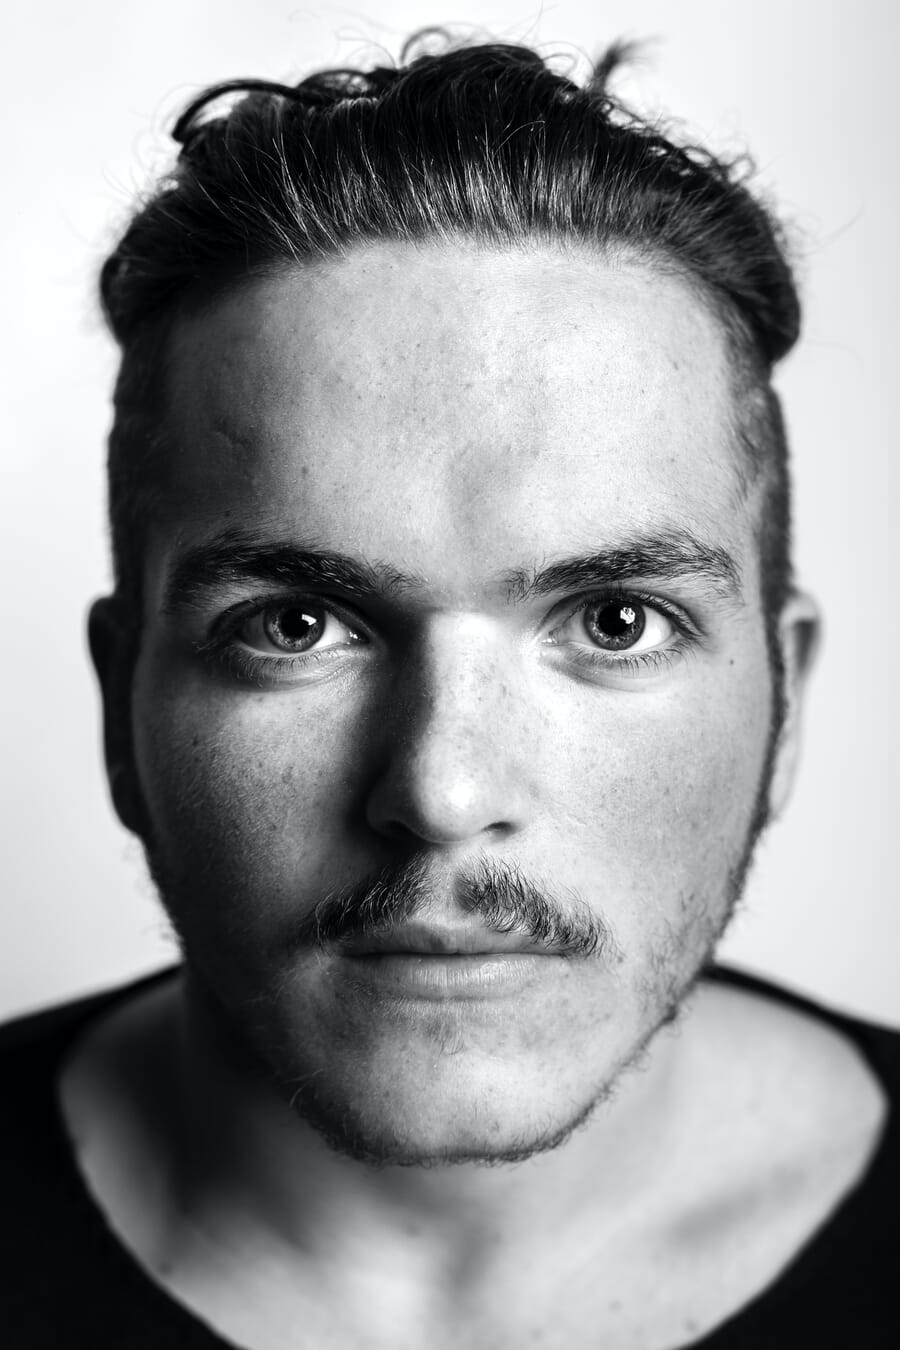
Rembrandt Lighting
Key light position: 45-60 degrees to the side, slightly above eye level.
Rembrandt lighting is named after the Dutch master painter Rembrandt van Rijn, who frequently depicted subjects with this characteristic illumination. The defining feature is a triangle of light on the shadow-side cheek, formed when the nose shadow extends far enough to connect with the cheek shadow.
What it does: Creates strong, dramatic contrast while still showing most of the face. The enclosed triangle of light on the shadowed cheek is the signature tell. The pattern conveys mood, gravitas, and visual depth – more dramatic than loop lighting but less extreme than split.
Best for: Fine art portraits, editorial work, character-driven headshots, and any situation calling for controlled drama. It’s especially effective for subjects with strong facial features and works well in both color and black-and-white.
Limitations: Not as universally flattering as loop lighting. The deeper shadows can emphasize asymmetry and may not suit all face shapes equally well.
Read our complete Rembrandt lighting guide for setup angles, modifier choices, and examples inspired by the painter himself.
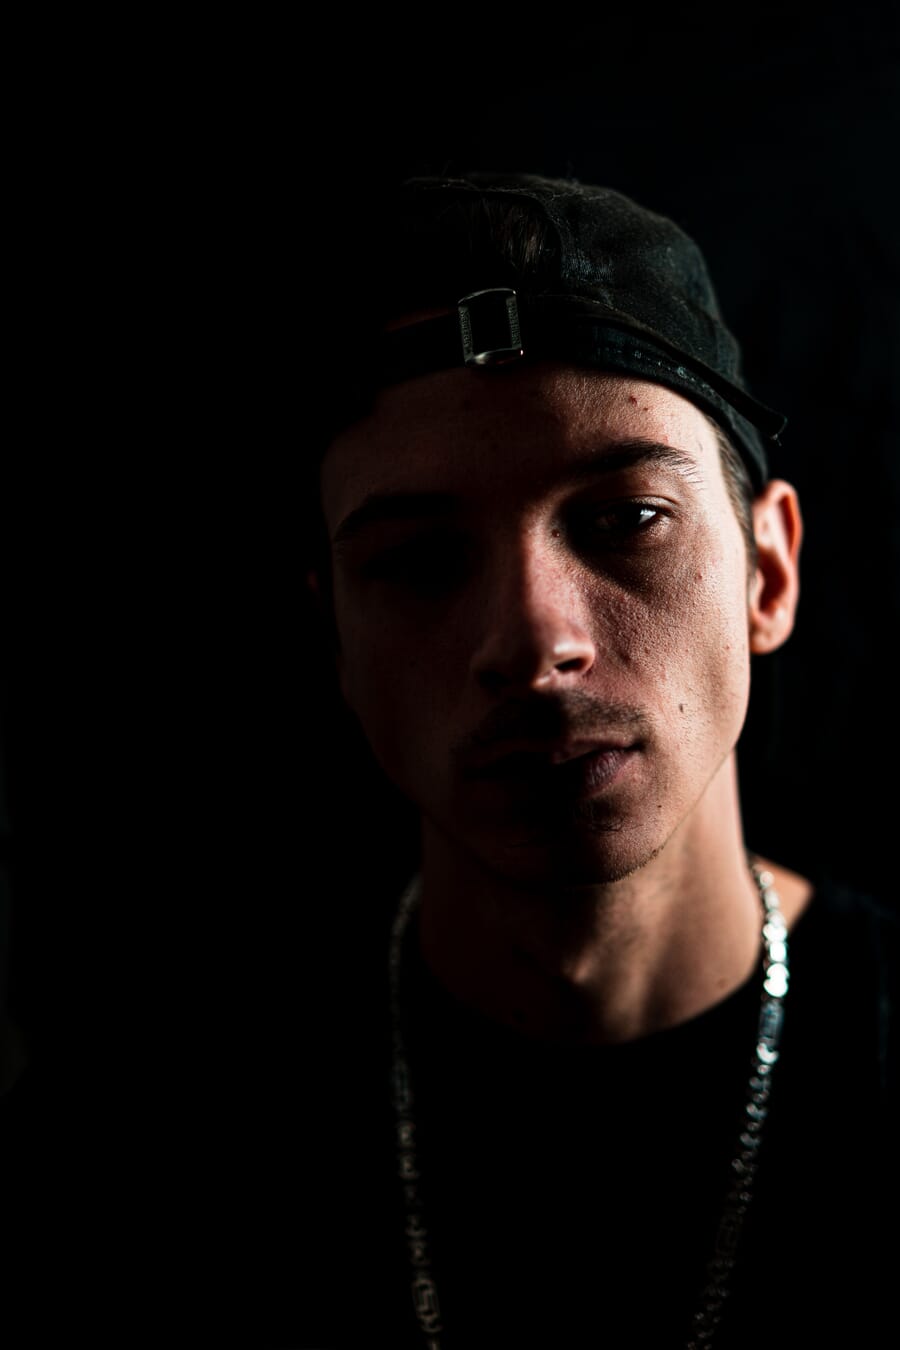
Split Lighting
Key light position: 90 degrees to the side (directly beside the subject).
Split lighting is the most dramatic of all portrait lighting patterns. The light is placed at a perfect 90-degree angle, dividing the face into two equal halves – one fully lit, the other in deep shadow. The dividing line runs straight down the nose bridge.
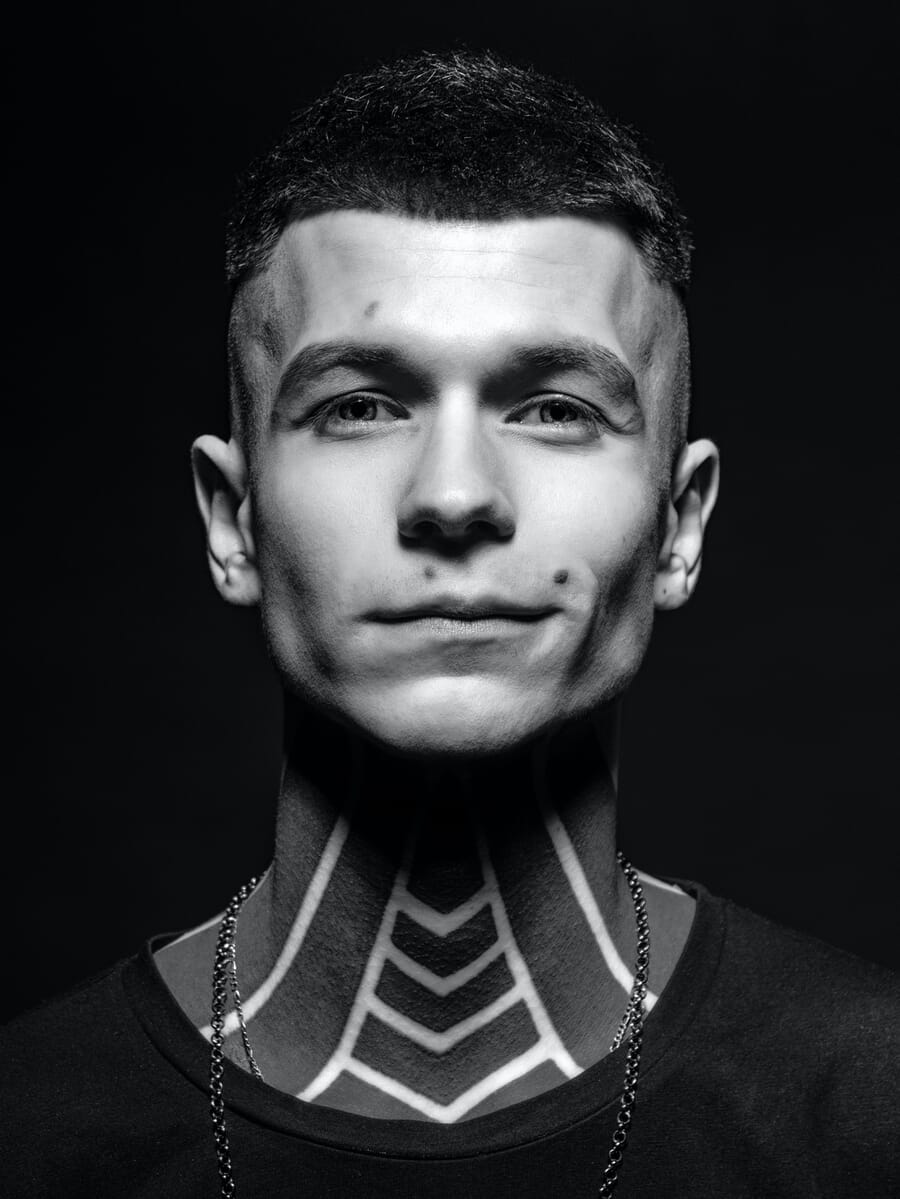
What it does: Produces maximum contrast and the most intense, dramatic mood of any standard pattern. It emphasizes texture, reveals surface detail, and creates a stark, cinematic look that references film noir and classic Hollywood drama.
Best for: Editorial portraits, fine art, film noir aesthetics, and character-driven work where visual impact matters more than conventional flattery. Works particularly well with strong facial features and in black-and-white.
Limitations: Too intense for most commercial headshots and client work. It accentuates every texture and blemish, and the extreme contrast can be unflattering for many subjects. For a deep dive into dramatic lighting techniques beyond split, see our high contrast lighting guide.
Read our complete split lighting guide for studio setups, natural light techniques, and creative gel combinations.
Broad Lighting vs Short Lighting
Broad and short lighting are not separate patterns – they are modifier techniques that work with any of the patterns above. They describe which side of the face (relative to the camera) receives the key light.
Broad Lighting
In broad lighting, the key light illuminates the side of the face that is turned toward the camera. The broader, more visible side of the face is the bright side. This widens the face visually, making it a good choice for subjects with narrow or thin face shapes who want a fuller appearance.
Short Lighting
In short lighting, the key light illuminates the side of the face turned away from the camera. The narrower, less visible side is the bright side, while the broader side facing the camera falls into shadow. This creates a slimming effect and adds more depth and dimension to the portrait.

When to use each: Short lighting is more commonly used because most photographers want to add dimension and a slimming effect. Broad lighting is useful when you want to fill in the face (thin subjects) or create a brighter, more open look. Both work with loop, Rembrandt, or any other pattern.
Lighting Patterns Comparison
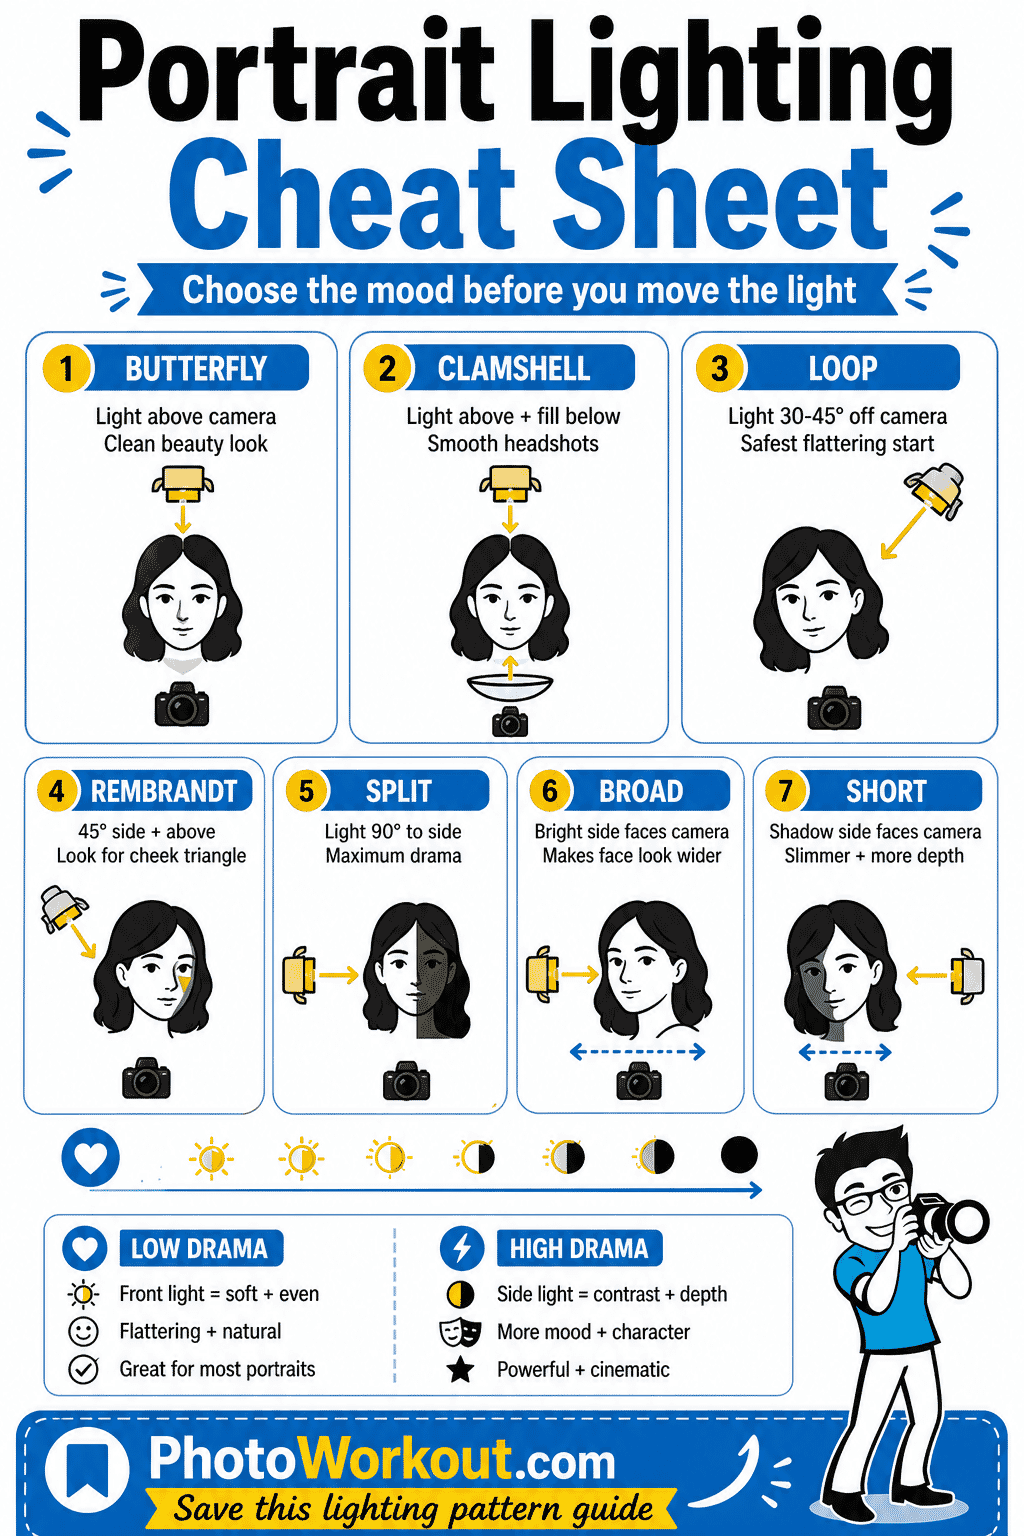
Here’s a quick reference for choosing the right pattern:
Use this portrait lighting cheat sheet to compare the core patterns before moving your key light.

| Pattern | Light Angle | Drama Level | Best For |
|---|---|---|---|
| Butterfly | 0 degrees (centered above) | Low | Beauty, fashion, glamour |
| Clamshell | 0 degrees + fill below | Very low | Beauty close-ups, headshots |
| Loop | 20-45 degrees | Low-medium | General portraits, headshots, client work |
| Rembrandt | 45-60 degrees | Medium-high | Editorial, fine art, character portraits |
| Split | 90 degrees | High | Drama, noir, editorial, fine art |
How to Choose the Right Pattern
Choosing a lighting pattern comes down to three questions:
1. What mood do you want? Low drama and flattering? Start with loop or butterfly. Moody and editorial? Rembrandt. Maximum intensity? Split.
2. What does the subject’s face need? Round faces benefit from short lighting with loop or Rembrandt patterns (the shadow side faces camera, slimming the face). Narrow faces can use broad lighting to fill out. Strong bone structure looks great under butterfly or Rembrandt lighting.
3. What’s the context? Corporate headshots favor loop lighting for its reliable flattery. Fashion and beauty work leans toward butterfly or clamshell. Gallery and editorial work can push into Rembrandt and split territory.
The patterns form a continuum from flat to dramatic. As the key light moves from directly in front to 90 degrees to the side, the shadows deepen, the contrast increases, and the mood intensifies. Think of it as a single dial: turn it up for more drama, turn it down for more flattery.
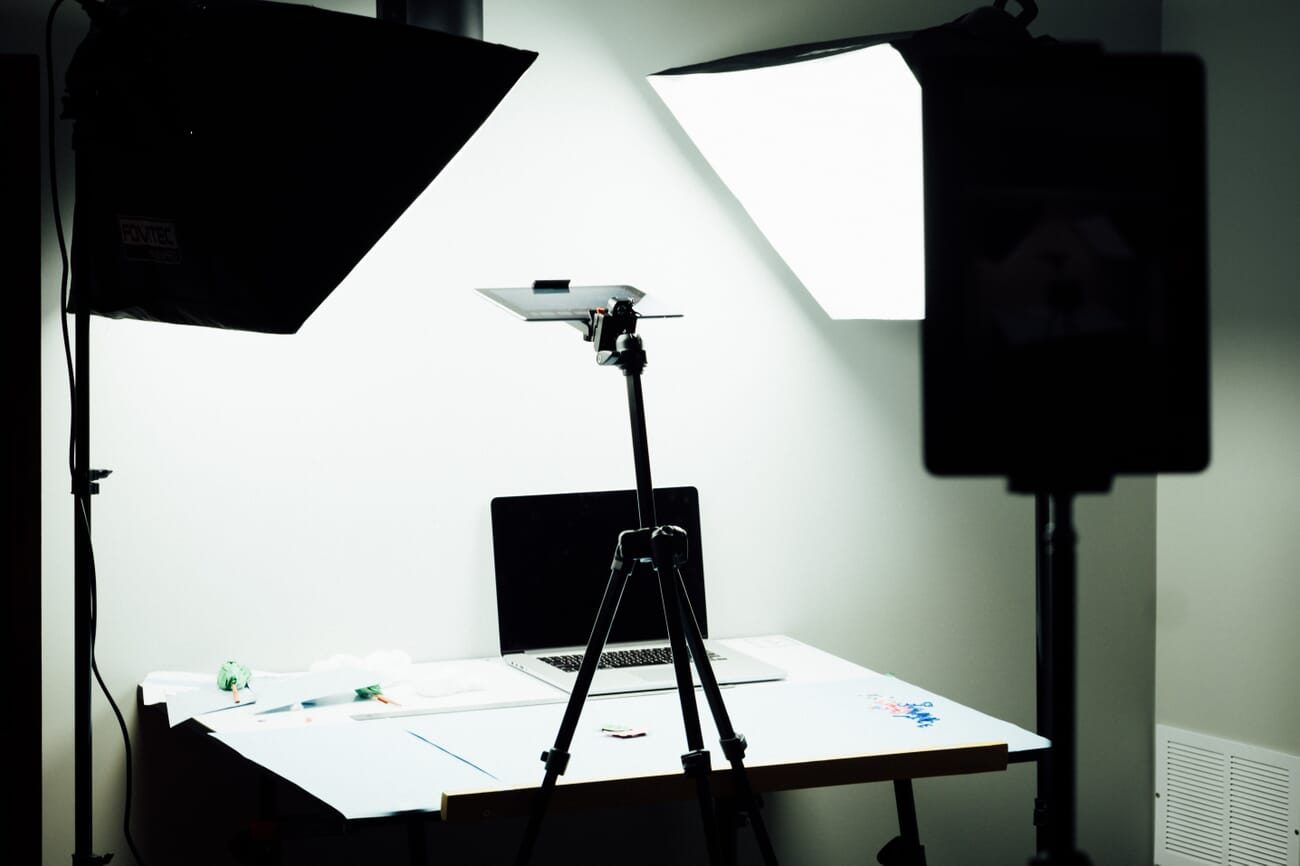
Equipment Essentials
Every lighting pattern can be created with minimal gear:
- One key light – Any directional source: strobe, speedlight, LED panel, or even a window. The pattern is defined by position, not price.
- A modifier – Softbox, umbrella, or beauty dish. Larger modifiers create softer shadows; smaller ones create harder edges.
- A reflector or fill light – Controls the lighting ratio (contrast between lit and shadow sides). A white reflector provides gentle fill; a second light offers more precise control.
- A light stand – Allows precise height and angle adjustment, which is critical for distinguishing between patterns.
Advanced setups may include a rim light (for subject-background separation), a background light, and color gels. But the core pattern is always created by the key light alone. For quick reference on matching camera settings to your lighting, see our camera settings cheat sheet.
Frequently Asked Questions
What are the main lighting patterns in portrait photography?
The six main patterns are butterfly (Paramount), clamshell, loop, Rembrandt, split, and the modifier techniques of broad and short lighting. Each is defined by the horizontal angle of the key light relative to the subject, ranging from directly in front (butterfly) to 90 degrees to the side (split).
Which lighting pattern is most flattering for portraits?
Loop lighting is the most universally flattering pattern. It adds gentle dimension and depth while working well on virtually every face shape. For beauty-focused work where minimal shadows are desired, butterfly or clamshell lighting is also highly flattering.
Do you need expensive studio equipment for lighting patterns?
No. Every standard lighting pattern can be created with a single light source – including a window. The pattern depends on the position of the light relative to the subject, not on the type or cost of the equipment. A $50 speedlight on a light stand can produce the same patterns as a $2,000 studio strobe.
What is the difference between broad and short lighting?
Broad lighting illuminates the side of the face turned toward the camera, making the face appear wider. Short lighting illuminates the side turned away from the camera, creating a slimming effect with more shadow visible. Both are modifier techniques that can be combined with any pattern (loop, Rembrandt, split).


