Editor’s Key Takeaways: Boost Your Editing Speed with Lightroom Batch-Editing
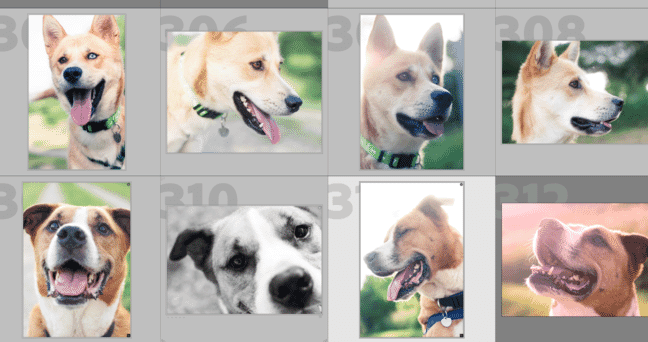
This article presents a guide on how to perform batch editing in Lightroom for a faster and more efficient workflow. It explains that batch editing in Lightroom allows for simultaneous editing of multiple images, speeding up the process and avoiding repetitive tasks.
- What Can Batch Editing in Lightroom Do for You?: This section expounds on how batch editing can significantly increase the speed of the Lightroom workflow. It’s a method that can edit all photos from a single shoot using the same settings or applying a similar aesthetic style to all images.
- Three Easy Methods of Lightroom Batch-Editing: This section highlights three methods for batch-editing in Lightroom. The Copy and Paste function allows for edits to be duplicated across images. The Sync Adjustments feature applies the same edit to a group of photos. Lastly, the Apply During Import option permits editing actions to be performed as photos are loaded into Lightroom.
Introduction
Do you want to know how to batch edit in Lightroom for a quicker, more efficient workflow?
That’s what this article is all about.
I’m going to take you through Lightroom batch edits–so that you’re well-equipped to speed up your Lightroom post-processing right away.
If you’re ready to double your Lightroom editing speed…
…then let’s get started!
How to Batch Edit in Lightroom:
What Can Batch Editing in Lightroom Do for You?
Batch editing in Lightroom refers to editing many photos at once.
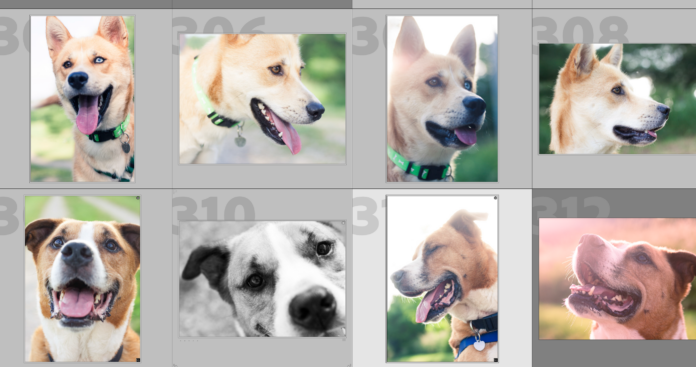
For instance, you might use batch editing to quickly apply the same settings to several photos in a series. Or you might use batch editing to apply the same settings to an entire hour-long photoshoot.
As you can imagine, batch editing can seriously increase the speed of your Lightroom workflow.
After all, Lightroom editing tends to be pretty slow; you’re often playing around with different sliders, working with all sorts of tools, etc.
And even though most edits are similar from photo to photo…
…with a standard Lightroom workflow, you’re stuck performing the same editing tasks over and over again.
But it doesn’t have to be this way.
Not with batch editing.
With batch editing, you can take all the photos from a single portrait shoot and edit them all in the same way.
Or you can apply the same vibrant style to all of your images.
Or you can give a blue, desaturated look to each of your photos.
How does batch editing work?
That’s what the next section is all about!
Three Easy Methods of Lightroom Batch-Editing
Lightroom offers three simple batch-editing options.
First, you can use the Lightroom Copy and Paste function to batch edit.
You can also use the Sync Adjustments feature to apply the same edit to a group of photos.
And you can use the Apply During Import option to edit photos before they’ve even made it into Lightroom.
Each of these three batch-editing options works well, as you see in a moment. But some are faster and more efficient than others.
So I recommend you try them all.
And choose the one that fits your needs best.
Copy and Paste
Here’s the first easy method of batch editing in Lightroom:
Copying and pasting edits.
You see, Lightroom allows you to copy edits from a photo.
Then you can paste them onto any photo you desire.
Here’s how it works:
First, head over to the Develop module and edit your initial photo.
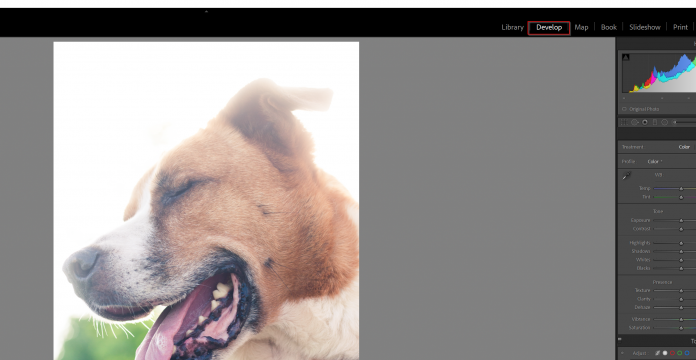
(You can use any adjustment during your edit, including local adjustments such as the Graduated Filter.)
Then tap Ctrl + Shift + C (Command + Shift + C on a Mac) to copy the edits.
A window will come up, asking you which specific settings you want to copy; this is up to you. It often makes sense to copy all global adjustments, but leave any local adjustments (i.e., changes made via the Adjustment Brush, the Radial Filter, and the Graduated Filter) uncopied.
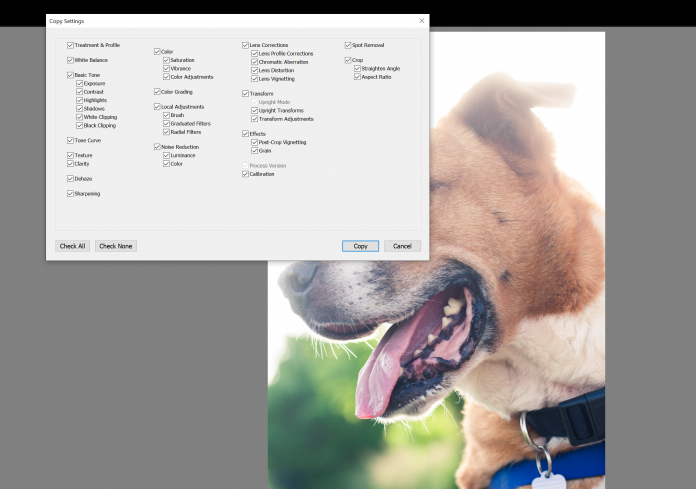
Click Copy.
Then find the image you want to paste the settings to, and tap Ctrl + Shift + V (Command + Shift + V on a Mac).
You also have the option of editing a photo, clicking on a new photo, and tapping Ctrl + Shift + V (Command + Shift + V on a Mac). This will activate the Paste Previous command, which applies the edits from the last-edited photo to the selected image.
Note that there is a key limitation in all Copy-Paste and Paste Previous cases:
You can only paste to one photo at a time.
So you can’t copy an edit, then paste it to a set of 100 photos in moments.
Instead, you’ll need to paste the edit onto one photo at a time, which is fine if your photo batch consists of a few images, but is frustrating if your batch consists of 200+ shots.
Which is why, if you’re aiming to batch-edit dozens of photos, I recommend this next method:
Sync Adjustments
Personally, I like the Sync Adjustments method of batch-editing best.
It allows you to edit a single image, then synchronize the adjustments across an unlimited number of additional photos.
And it’s really, really simple.
First, edit your initial photo.
Then Ctrl + Click or Command + Click on the photos you want edited in the same manner.
Hit Sync.
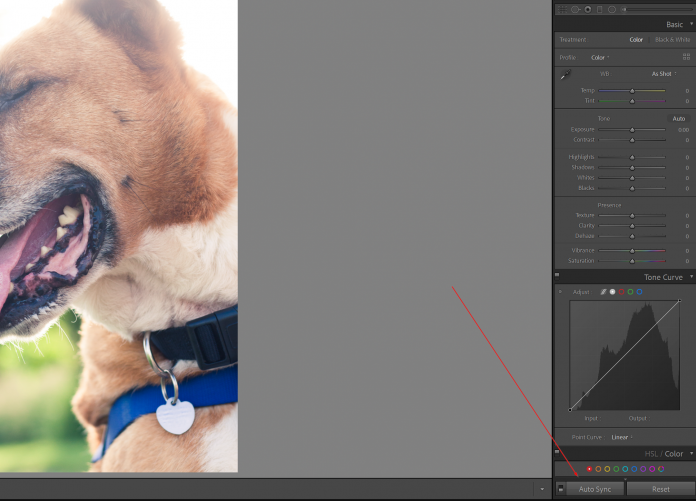
A window will come up, asking you to indicate the edits you want to synchronize.
Then, when you’re ready, hit Synchronize.
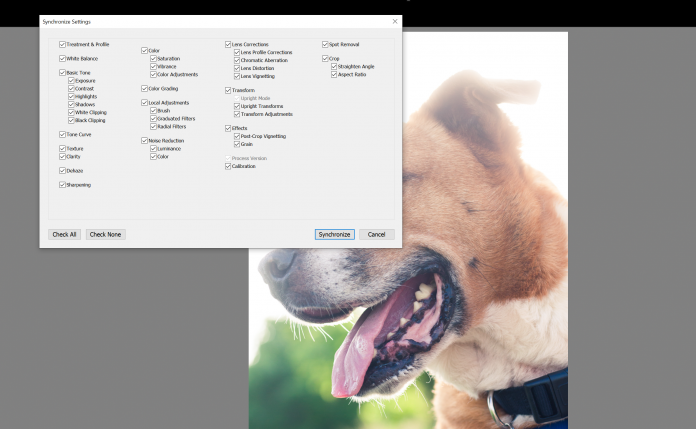
The edits from your “base” photo will be applied across the entire set of selected photos, for an instantly effective batch edit.
Nice, right?
This is a great option when you have dozens of photos you’d like edited in the exact same manner; for instance, if you’ve done a portrait photoshoot and want to color grade all the images in the exact same way.
Apply During Import
Here’s your final method of batch editing in Lightroom:
Applying edits during the Import process.
Start by navigating to the Library module and tapping Import:
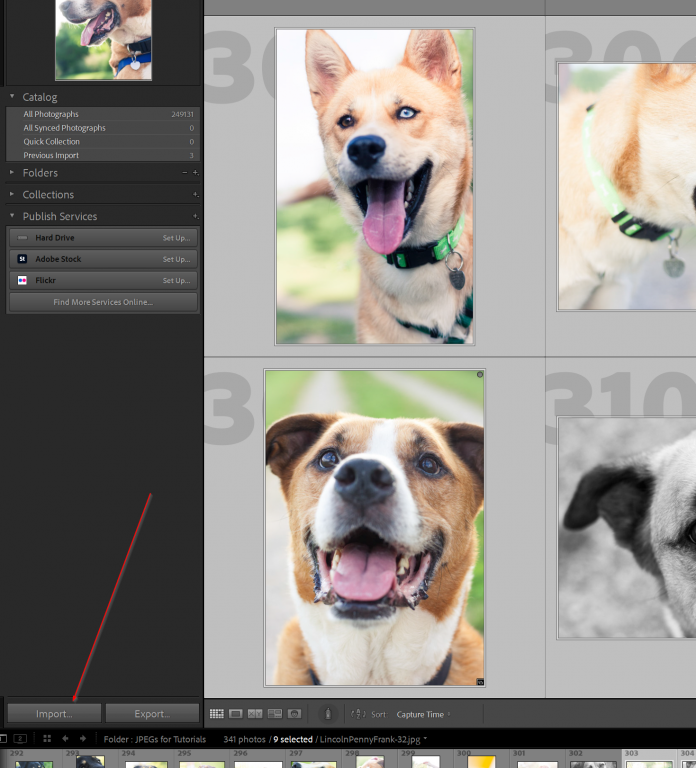
Select the images you wish to batch edit in the Import window.
Then, in the Develop Settings dropdown, choose from your presets:
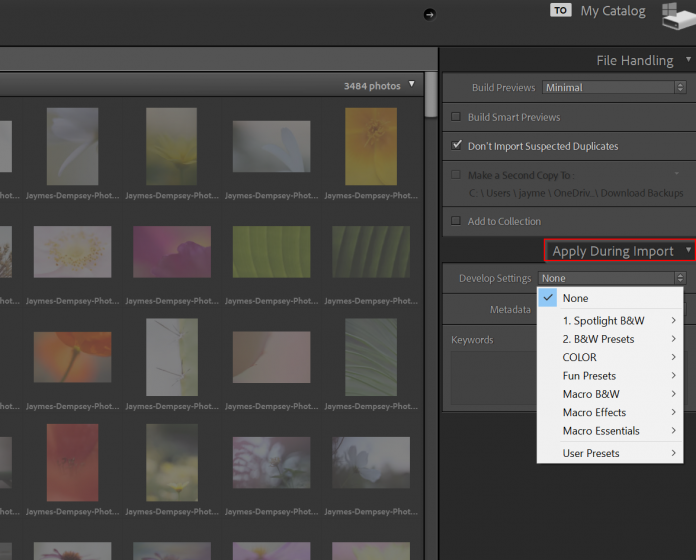
And hit Import.
Note that you can apply user presets, purchased/downloaded presets, or in-built Lightroom presets to your batch of photos.
However, you only get one shot at doing this; there’s no easy way to go back and reapply batch edits via the import process.
So if you do decide to use this method, make sure you get it right from the beginning!
Of course, you always have the option of using another one of the batch editing options I’ve shared (if you’re not satisfied with the Apply During Import process).
Tips for Batch Editing in Lightroom
Batch editing in Lightroom is easy.
But here are a few tips you can use to make sure you get the best batch editing results, consistently:
Apply Batch-Edits to a Single Setup, But Not More
Batch editing works great when you apply the same edit to a whole series of photos.
Why?
Because photos taken together tend to have the same subject matter, the same lighting, and the same colors.
So your exposure adjustments, contrast adjustments, and color adjustments all look good from image to image.
But as soon as you try to go beyond this–as soon as you start batch editing photos taken of different subjects at different locations–you’ll run into problems.
You see, every edit combines with the characteristics of an image. The edit and the image work together to get a great final result.
But that means that one edit won’t always give a gorgeous look to photo after photo after photo.
Instead, what looks great when applied to one photo might not look so great when applied to another photo with a different subject or different colors or different lighting.
So make sure you apply your batch editing tools selectively. Batch editing can be a great timesaver, but make sure that you don’t sacrifice your images in the process.
Batch Edit, Then Tweak
If you’re after a more efficient editing process, but you still want to have some additional control over how your images turn out, then here’s a method I’d recommend:
First batch edit your images so that you push them in the right direction.
But don’t stop there.
Instead, go through each individual image quickly–and tweak.
Adjust the exposure, the contrast, and the colors. Give a slightly different look to each image, depending on how the original batch edit looks.
In other words:
Use the batch edit, but then tweak the adjustments slightly (as if you’re adding seasoning to a well-made dish).
While this method will take more time than a standard batch edit, it may be worth it, especially if you’re looking to keep each of your photos looking as good (and unique) as possible.
Avoid Local Adjustments When Batch Editing
Here’s your final tip for a Lightroom batch edit:
Do any local adjustments separately.
In other words:
If you want to apply the Graduated Filter, the Radial Filter, or the Adjustment Brush to your images, do it separate from your batch edits.
For one key reason:
Local adjustments are applied via batch edits exactly as you applied them to the original photo.
So if you increase exposure with your Adjustment Brush in the original photo, you’re going to end up with a whole series of photos that have increased exposure in a very specific spot, which will turn out looking weird.
That’s why, instead of batch editing with local adjustments intact, only batch edit with global adjustments. Then add any local adjustments at the end.
Make sense?
How to Batch Edit in Lightroom: The Next Step
Now that you’ve finished this article, you know all about how to batch edit in Lightroom.
And you’re on your way to cutting down your editing speed substantially (without a drop in editing quality!).
So test out some of the methods I’ve shown you here today.
I guarantee they’ll be huge timesavers!
Can you batch edit in Lightroom?
Absolutely! Lightroom includes substantial batch editing capabilities. As I explain in the article, there are a few easy methods of batch editing, which means that you can choose the method that suits your needs and editing style best.
Why should you do batch editing in Lightroom?
Batch editing can significantly speed up your editing! With batch editing, you can make hundreds–even thousands–of adjustments in the blink of an eye. And, if you do batch editing properly, you won’t be sacrificing on quality, either. That’s why I recommend that everyone learn how to batch edit, even if you don’t use it all the time.
Is it a good idea to batch edit photos in Lightroom?
Batch editing in Lightroom is very helpful, and it can easily speed up your editing workflow. However, you should be careful. If you batch edit without considering the images you’re applying the edits to, you’ll end up with adjustments that look very out of place. Instead of blindly applying a batch edit to all your photos, you should instead only batch edit photos that are similar –shot in the same lighting, with the same colors. That way, you won’t get any unexpected effects. Of course, you can always experiment with batch editing a larger group of your photos (including images that aren’t similar to the original), but I’d highly recommend checking the photos once you’re done, before exporting them, to make sure you like the result.
How do you batch edit in Lightroom?
Batch editing in Lightroom is pretty easy, and you have a few methods open to you. First, you can use the copy-paste method, where you edit one image, then copy the adjustments and paste them onto another image. Second, you can edit one image, then sync the adjustments across all your selected images. Third, you can apply presets upon importing a set of images. Personally, I like the sync adjustment option, because it allows you to edit quickly, but also offers more flexibility–you’re not confined to a single preset, but you can edit as many images as you like in a single sweep.
