


- Avoid midday sun — shoot at golden hour or under heavy overcast to keep highlights tame on shiny paint.
- Manage car‑to‑light angle deliberately. A 10‑degree shift can flip an ugly reflection into a feature line.
- Master five named angles: front 3/4, low‑front hero, profile, wheel close‑up, and interior cabin.
- Run the pre‑shoot prep checklist: detail kit, microfibre, glass cleaner, tire dressing, lint roller for cabin shots.
- For 2026, a Sony A7R V, Nikon Z8, or Nikon Z6 III paired with a 24‑70mm f/2.8 covers 90% of automotive work.
- Lean on AI in post: Topaz Photo AI for noise and detail, Adobe Firefly Generative Fill for sky replacements and plate cleanup.
- For motion shots, drop to f/11, ISO 100, and pan at 1/60s — keep the wheels in frame so they spin.
- Always include the human element when possible. A driver in the seat sells the lifestyle the shot is selling.
Introduction
Car photography sits at the cross-section of product, lifestyle, and landscape work — and the best shots all share one thing: deliberate control of light, angle, and reflection on a very shiny, very curved subject. This 2026-refreshed guide walks through the 16 techniques automotive photographers actually use, plus a pre-shoot prep checklist, recommended mirrorless kit, and an AI post-processing workflow that Topaz Labs and Adobe Firefly have made viable in the last year. Whether the goal is a portfolio piece, a dealer brief, or an Instagram angle trending in 2026, the fundamentals below carry the work.
Before You Shoot: Car Prep Checklist
Half the work on an automotive shoot happens before the camera comes out of the bag. A car the client thinks is clean is almost never camera-clean: water spots streak the paint, brake dust darkens the wheels, and dashboard fingerprints catch the light in ways the eye filters out but the lens does not. Run the kit below and the post-processing budget drops by half.
- Detailing kit on the day of the shoot. Quick-detailer spray, two clean microfibre cloths, and a soft-bristle brush. Wipe the paint immediately before the first frame — dust settles fast outdoors.
- Glass cleaner and lint-free cloth. Streaks on a windshield are visible at any aperture and very hard to clone out. Clean inside and outside.
- Tire dressing. A matte (not glossy) tire dressing makes rubber read as fresh black instead of grey. Apply, wait 10 minutes, then wipe runoff before shooting wheel close-ups.
- Wheel cleaner and a soft brush. Brake dust kills wheel detail shots. Hit the spokes and barrel before the shoot, not after.
- Lint roller for the cabin. Pet hair, carpet fibres, and dust on dark seats are unforgiving. Roll the seats and floormats before any interior frame.
- Painter’s tape and microfibre. Tape over reflective trim that you do not want to catch the sky in tight three-quarter compositions.
- Polariser filter. Pack a circular polariser. It is the single fastest way to control glass reflections and deepen sky/paint colour.
- Reference shot from the brief. Pull up the client’s reference image on a phone and match the angle deliberately, not by feel.
This list is the difference between a 30-frame edit and a 90-frame edit — it is the most underrated tip in the whole guide and the one almost every beginner skips.
1. Choose the Right Time of Day to Shoot In
Just as portrait photographers avoid midday sun, automotive photographers avoid the same window. When the sun sits directly overhead, the light is at its harshest — shadows fall straight down, contrast spikes, and reflections on the paint blow out into clipped white patches that no amount of editing recovers cleanly.
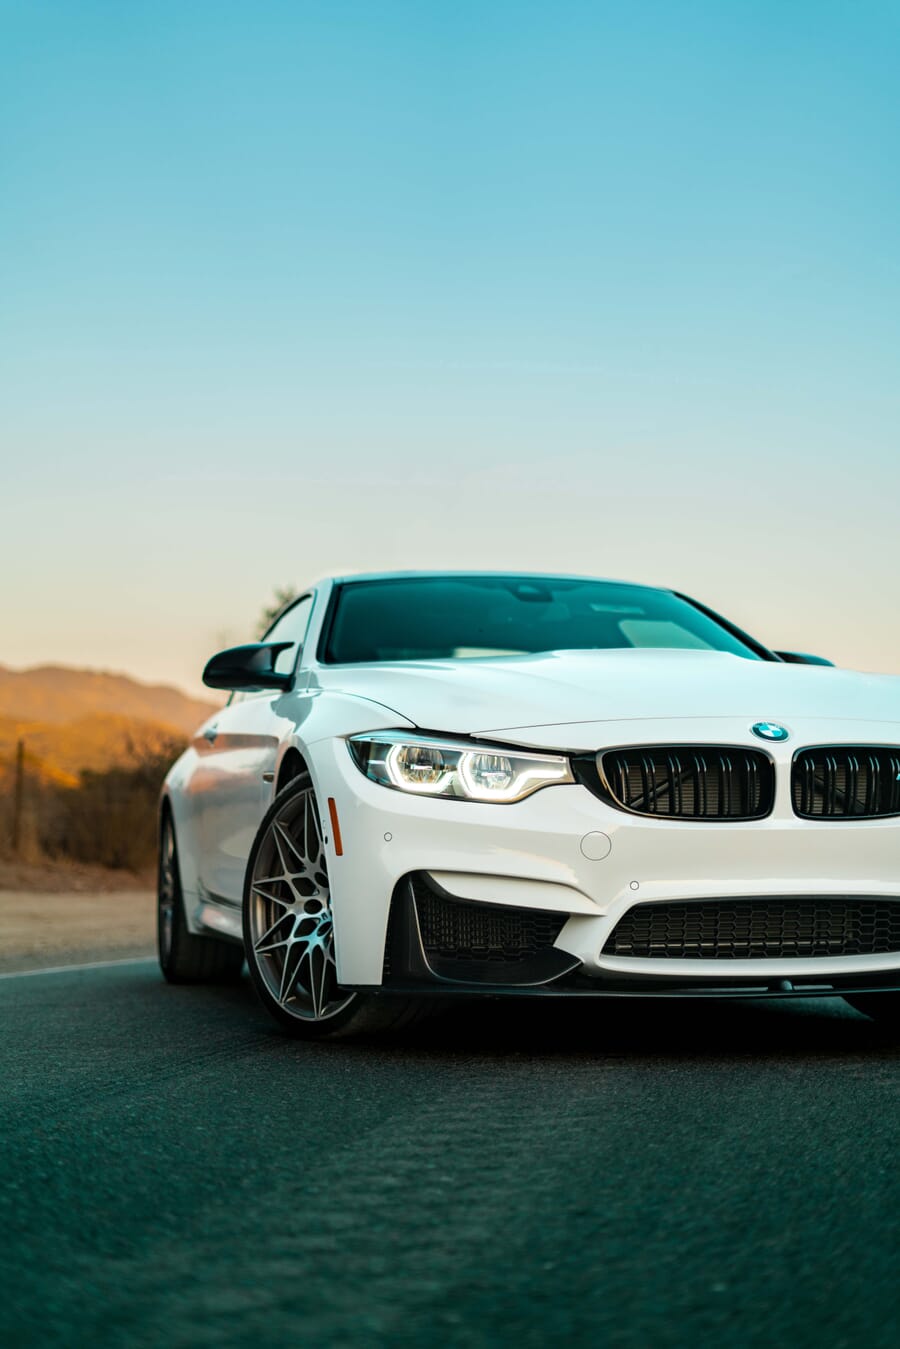
Golden hour, the 60 minutes after sunrise or before sunset, is the automotive industry default for a reason. The low angle warms the paint, fills the cabin through the side windows, and turns the entire car into a long, sculpted highlight rather than a hard glare.
Golden-hour positioning: the car-to-light angle
Most beginner shooters place the car parallel to the sun. The professional move is to angle the car so the light grazes one side at roughly 30–45 degrees relative to the front bumper. Pedal Commander’s automotive guide frames this car-to-light positioning as the single most important variable on a shoot — small shifts of 10 degrees flip the same paint between dull, blown-out, or beautifully sculpted.
Three positioning rules:
- Side-light at 30–45 degrees for the most three-dimensional look on the body lines.
- Back-light (sun behind the car) for halo and rim-light hero shots — see the technique covered in our guide to sun-behind-subject photography.
- Move the car, not the camera. A 6-inch nudge of the car can erase a reflection of yourself or a tree on the door panel — always cheaper than fixing it in post.
Heavy overcast is the second-best window. The sky becomes one giant softbox, and the spread of highlights along the body is naturally controlled — ideal for detail work and interior shots.
2. Be Careful of Reflections Emanating from the Surface of the Car
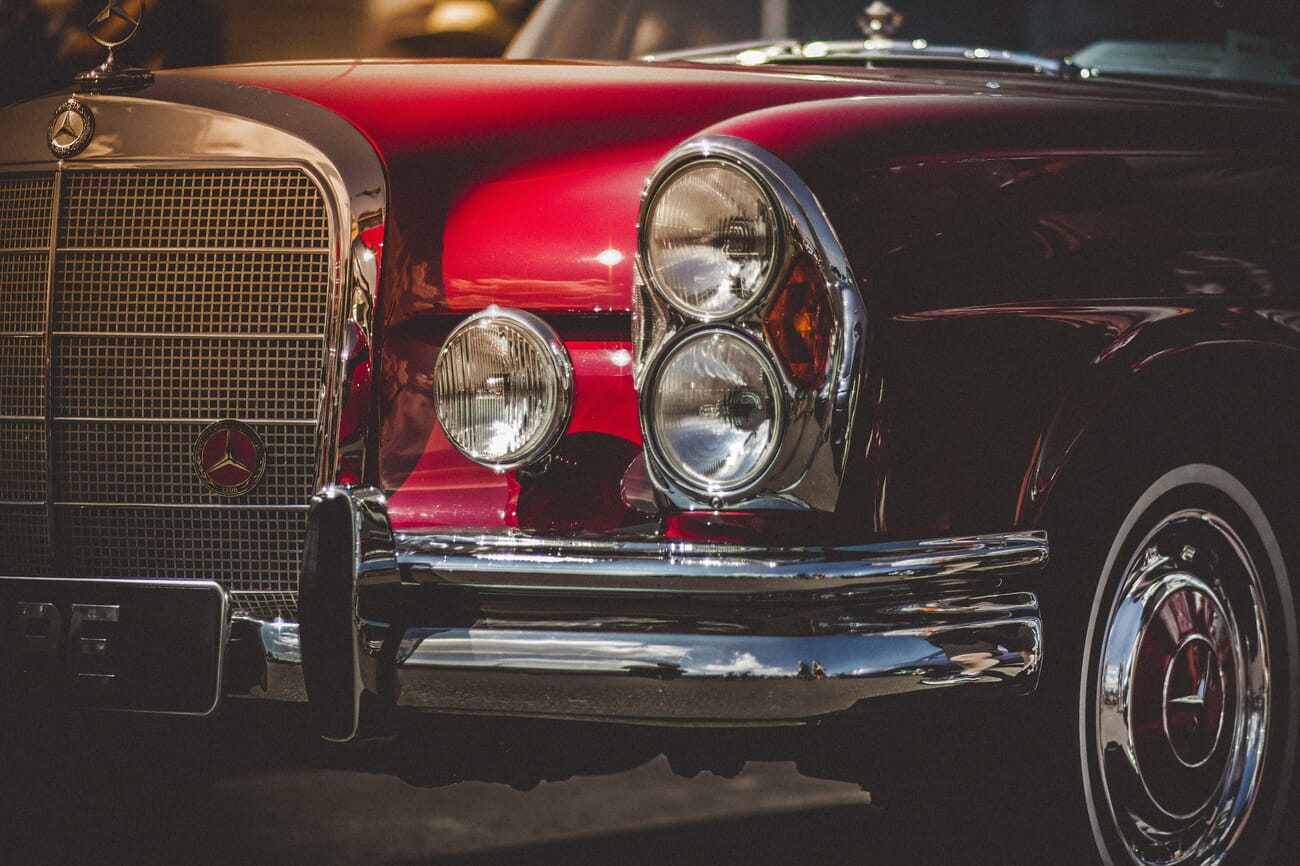
A shiny car under sun is functionally a mirror. Every area of the body picks up its surroundings, and many reflections will blow out into clipped highlights. Striking the right balance — paint dark enough to read as paint, highlights bright enough to read as gloss — is most of the exposure work on any automotive shoot. HDR bracketing is one tool; an ND-grad over the windshield is another; the simplest is just changing the angle.
The body will also reflect everything around it: trees, buildings, lamp posts, people. Best practice is to clear at least a 20-foot radius around the car of anything that should not be in the frame, then step back to verify.
On close-up shots that capture character lines, do not shoot at a strict 90-degree angle to the panel — that’s the angle most likely to catch the photographer’s reflection. An acute angle (roughly 20–30 degrees off the panel) keeps the reflection of the camera and tripod out of frame.
3. Try Different Angles — The Five Named Shot Types
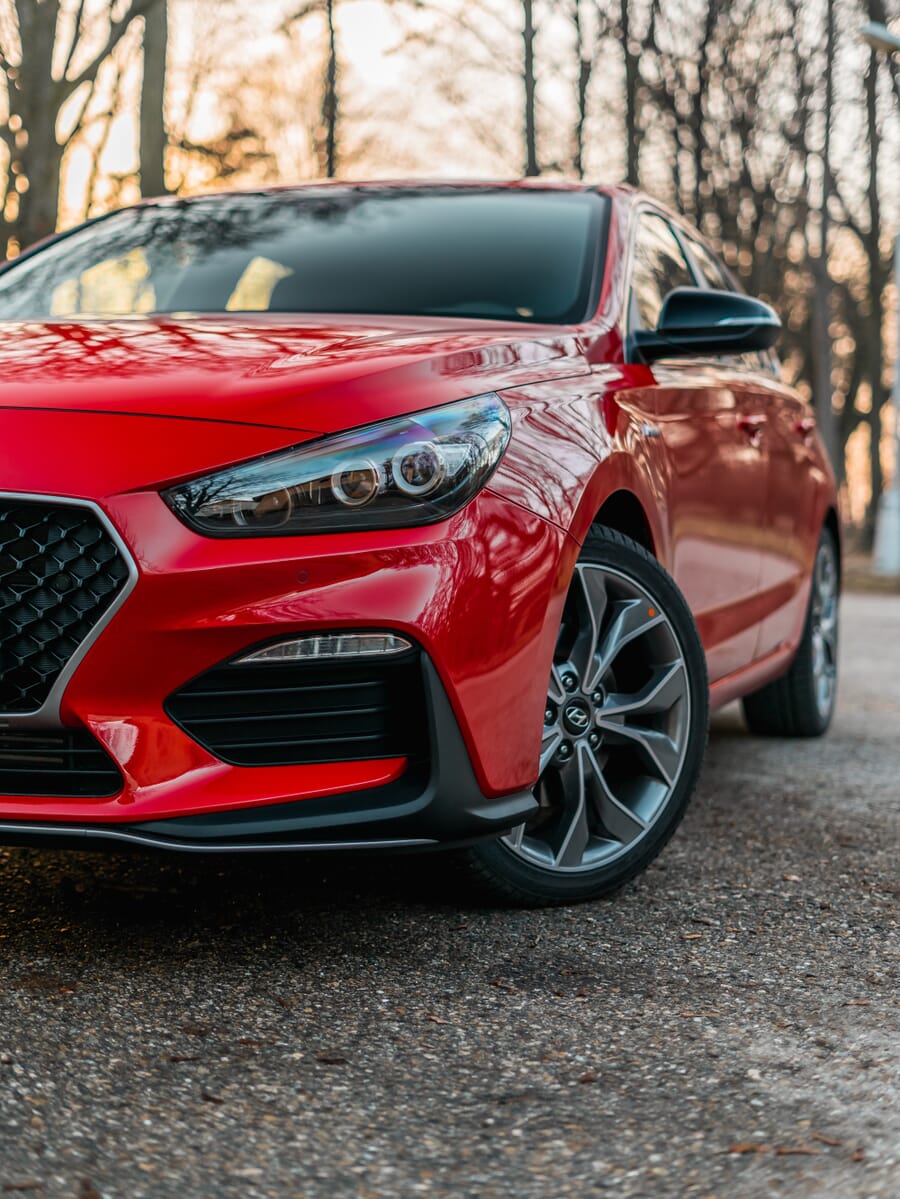
Experimenting with angles is how a series of frames become a portfolio rather than a record shot. Trends on Instagram in 2026 demand more named angles than the older static “three-quarter and profile” formula — the five below cover what dealers, magazines, and clients are actually requesting today.
Front 3/4 (the standard hero)
The front three-quarter is automotive photography’s default opening frame. Camera placed roughly 45 degrees off the front bumper, lens height at the top of the headlight. It shows the grille, both front lights, the front fender, and a flash of the side — the most information per frame of any single angle.
Low-front hero
Same composition as the front three-quarter, but with the camera dropped to grille level or below. The car looms larger than life, the road in the foreground reads dramatic, and — critically — the photographer’s reflection drops out of the bonnet entirely. This is the angle that sells sports cars and SUVs alike.
Profile / side
A pure 90-degree side view, ideally with the front wheels turned slightly out toward the camera. It is the only angle that fully reveals the silhouette — the curve of the roofline, the kick of the rear haunch, the rake of the windshield. Shoot at 50–85mm to compress and flatter the proportions.
Wheel close-up (with character)
A tight crop on the wheel and brake caliper, with the front turned to expose the hub face. The shot demands a clean wheel (see the prep checklist) and rewards a wide aperture: f/2.8 to f/4 to throw the body and background out of focus while holding sharpness across the spokes. Shoot from low and angled in, not flat-on.
Mirror drama
An emerging Instagram trend in 2026: shoot through the side mirror to capture a second car, the driver’s eye, or a slice of road in the reflection. Set the focus on the mirror itself, not what’s reflected. It works in a parking situation as well as on the move.
Interior cabin
Modern cabins have become a destination of their own. Shoot from the rear footwell looking forward, lens around 24mm, ISO 800, aperture f/4 to keep both seats and the dashboard in focus. Bracket the exposure: cabins are dim, glass is bright, and a single frame rarely holds both.
4. Get Down Low
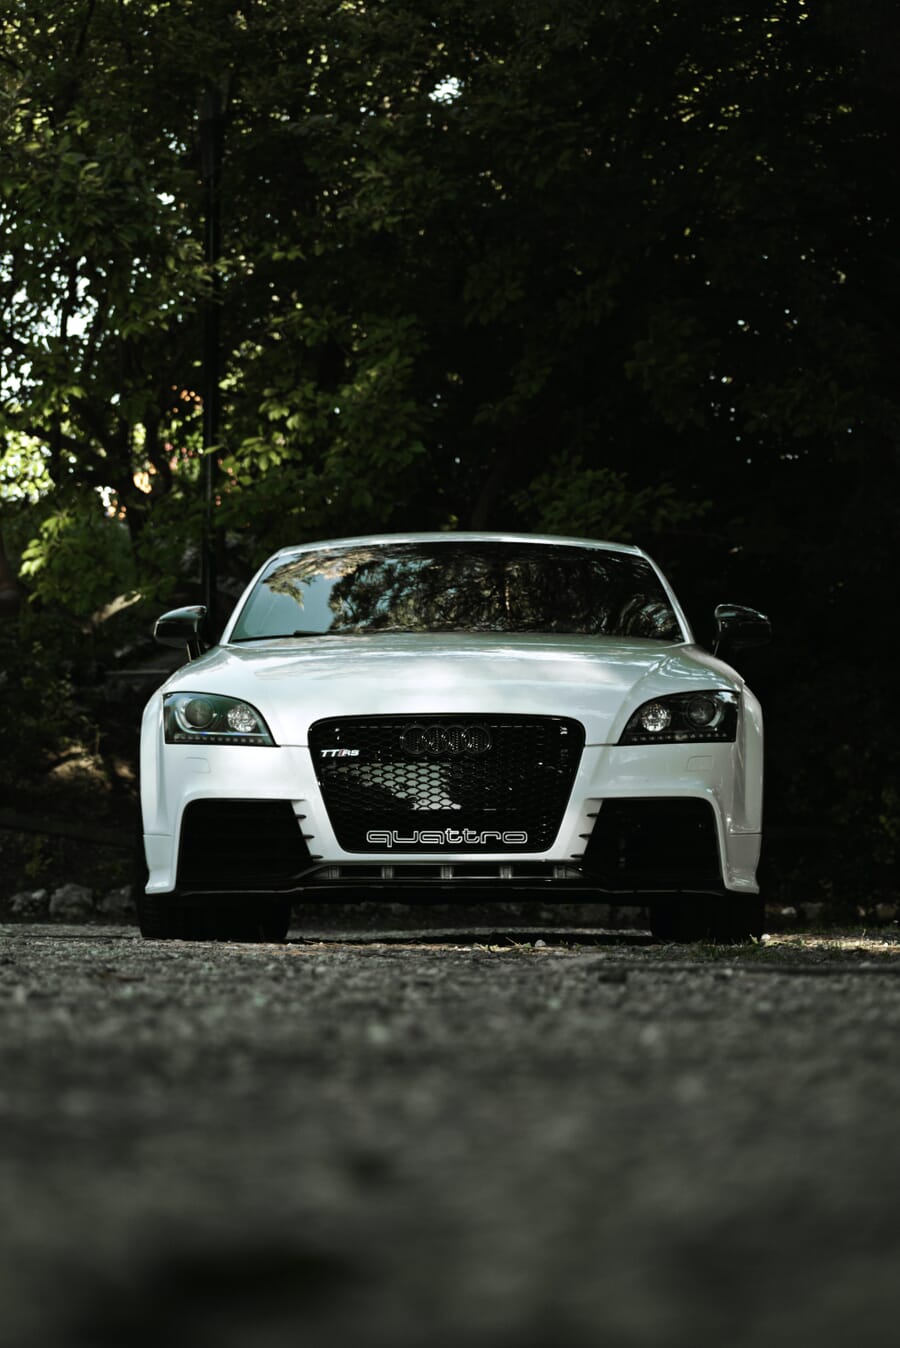
On cars with a low ground clearance — sedans, sports cars, supercars — a low camera position transforms the proportions. The car appears larger than life, the wheels become dominant, and the bonnet stretches into the frame in a way that flatters every body line.
There is a second, technical benefit. Shooting from low keeps the photographer below the horizon line of the bonnet — which means no reflection of the photographer in the paint. Combine a low position with a 24–35mm lens for the most dramatic frames.
5. Get Inside and Shoot the World Through the Front Window
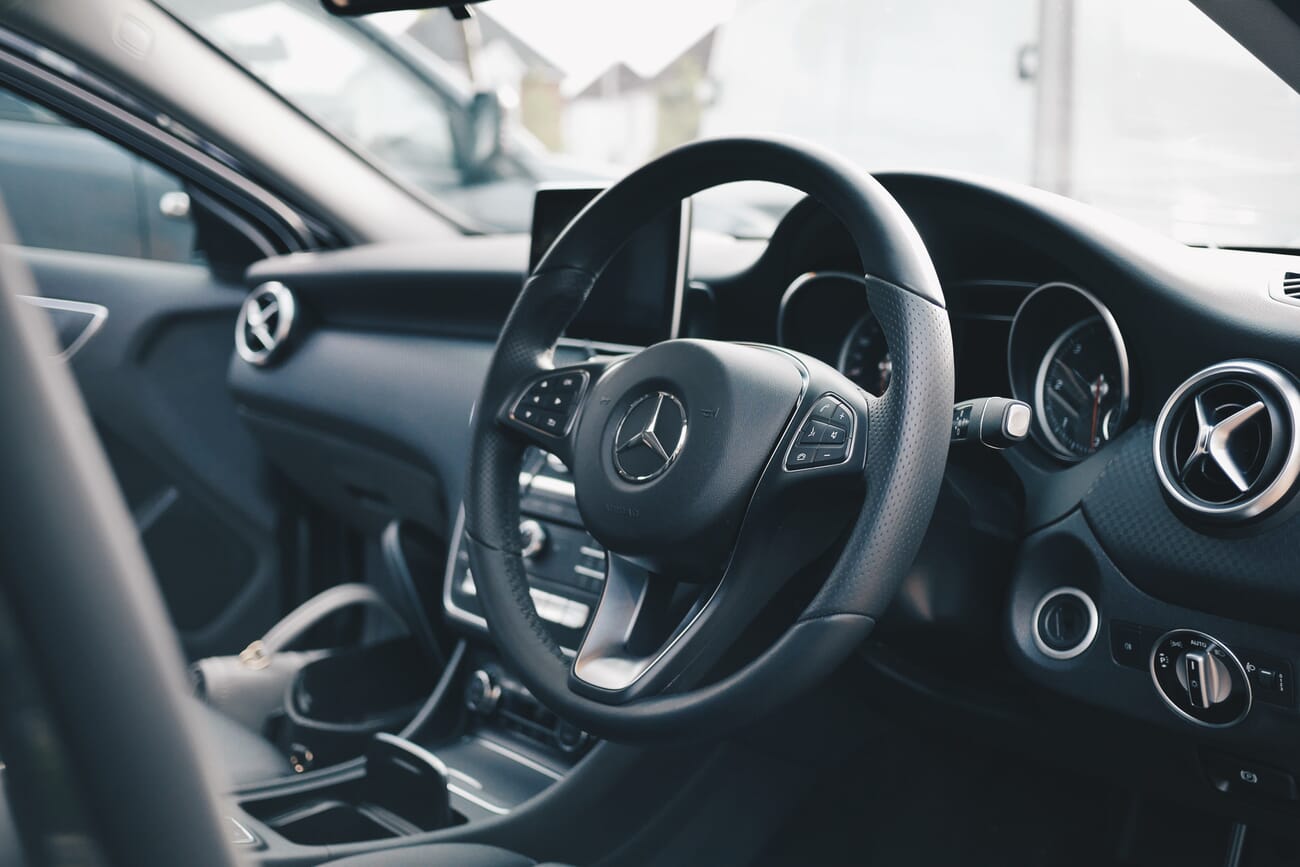
Exterior shots create the first impression. Interior shots close the deal. Buyers spend hours a day inside the cabin — that is where the lifestyle lives, and the photography needs to honour that. Modern mirrorless bodies handle the dynamic range of a bright window paired with a shadowed dashboard; older DSLRs benefit from bracketing.
Iconic American classics — a 1968 Ford Fastback Mustang GT, a 1957 Chevy Bel Air — look as compelling from the inside as the outside. Modern cars trade chrome and analogue gauges for screens, but the principle is identical: the cabin tells the story the exterior teases.
Two specific interior framings worth practising: the over-the-steering-wheel composition (shows the cluster, dash, and view through the windshield in one frame) and the rear-passenger view (captures the front seats, headliner, and the driver in context). Both demand a wide lens — 16–24mm — and a small aperture if depth is needed front-to-back.
6. Try Photographing a Car When It Is Moving
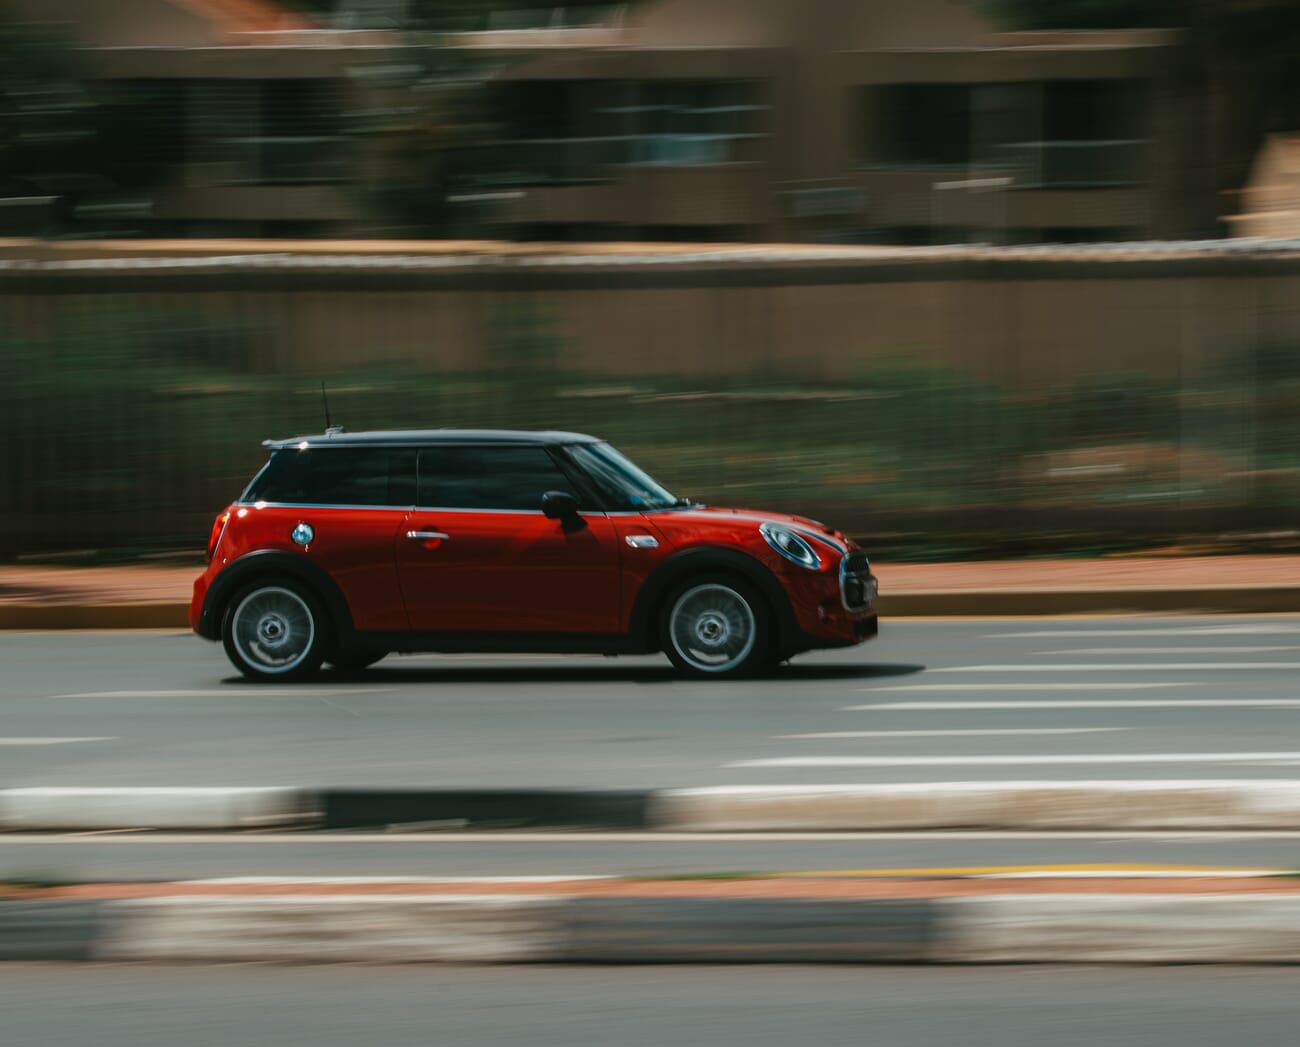
A car is built to move. Some of the best automotive frames capture that motion explicitly — but freezing motion in a still image is the technical bit. The trick is panning at the moving subject while keeping a fixed point on the car (usually the front wheel hub) sharp.
The cleanest way to photograph a moving car is from inside another moving car running parallel at the same speed. A passenger holds the camera, supported on a beanbag against the door frame to dampen vibration.
Camera settings for the panning motion-blur shot:
- Aperture priority around f/8 to f/11.
- ISO 100 to keep the shutter slow.
- Shutter speed in the 1/60s to 1/125s range — fast enough to keep the body sharp on the pan, slow enough to streak the background.
- Continuous autofocus locked on the front wheel arch.
- Continuous-burst drive mode — fire 6–10 frames per pass and pick the sharpest.
For a deeper breakdown of panning, light trails, and ICM, see our complete guide to capturing movement in photography.
Keep the wheels in frame to capture their spinning motion — a pin-sharp body with frozen wheels reads as parked, not driving.
Safety first: never lean out of a moving vehicle without a spotter, never on a public road without permits, and never at speeds where a dropped lens cap becomes a hazard. Most professional rolling shots happen on closed circuits or quiet industrial roads with a lead/follow car protocol.
7. Place the Car in a Landscape
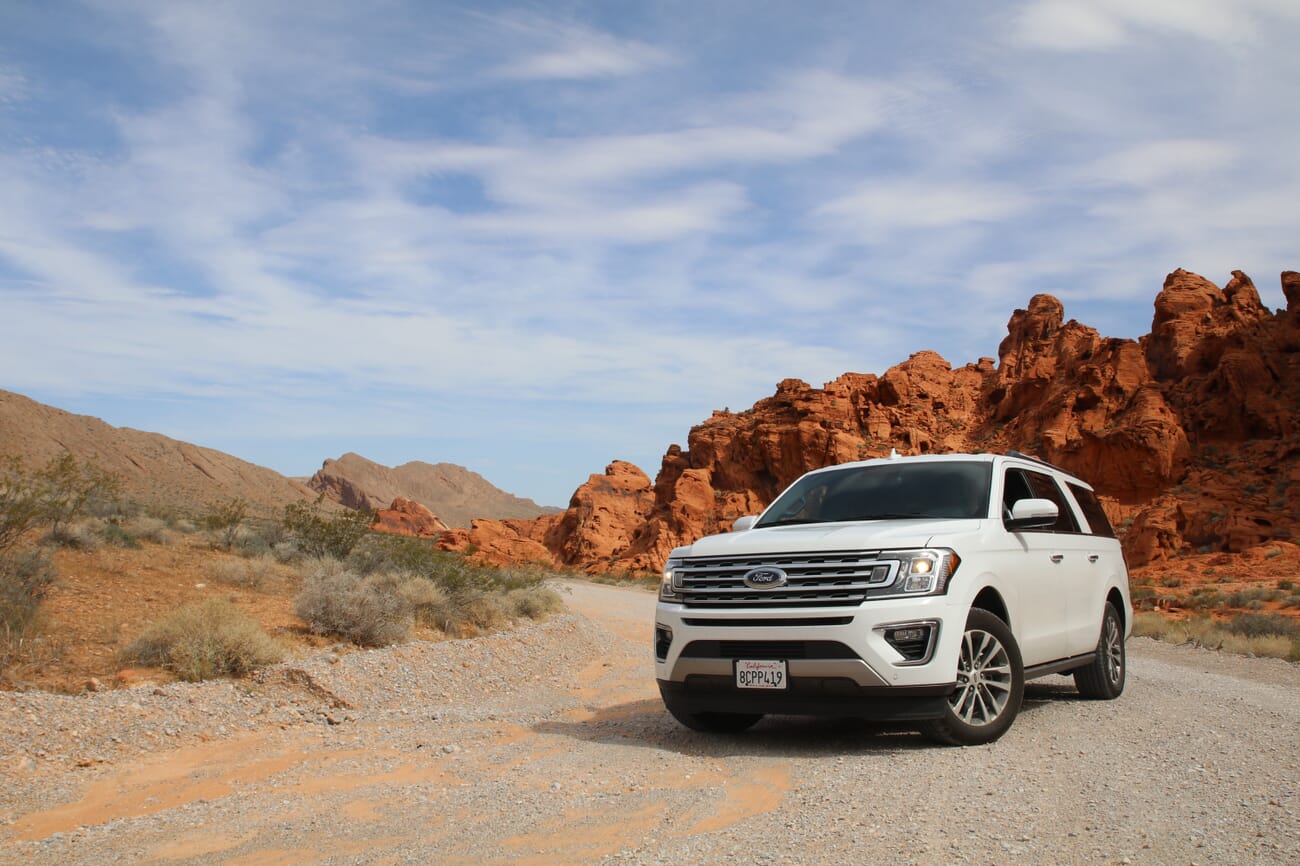
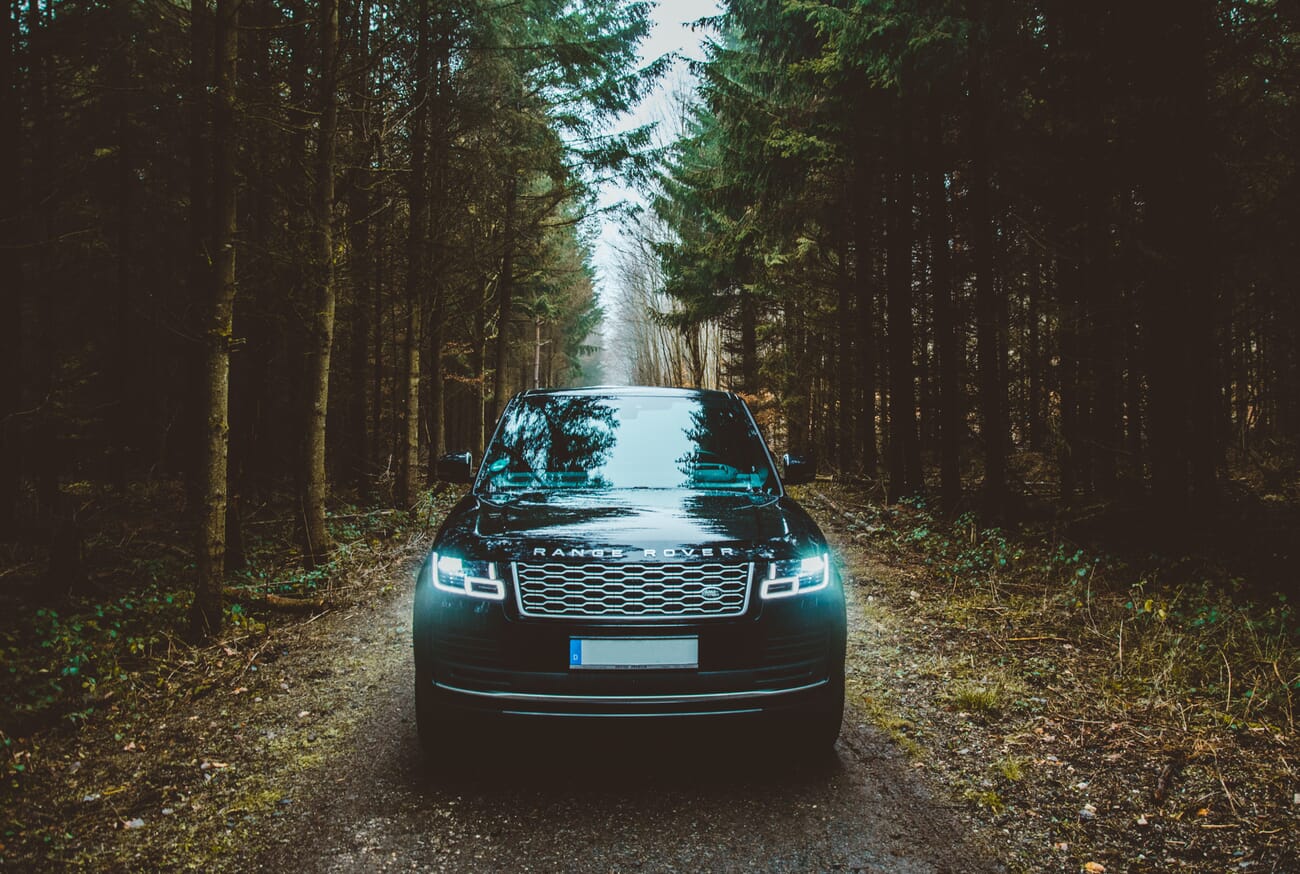
Landscape elements accentuate the personality of any vehicle. Cars are designed to be driven on open roads, and capturing the thrill of that drive depends on framing the car against a deserving backdrop — a coastal switchback, a desert plain, a riverbank, a mountain pass.
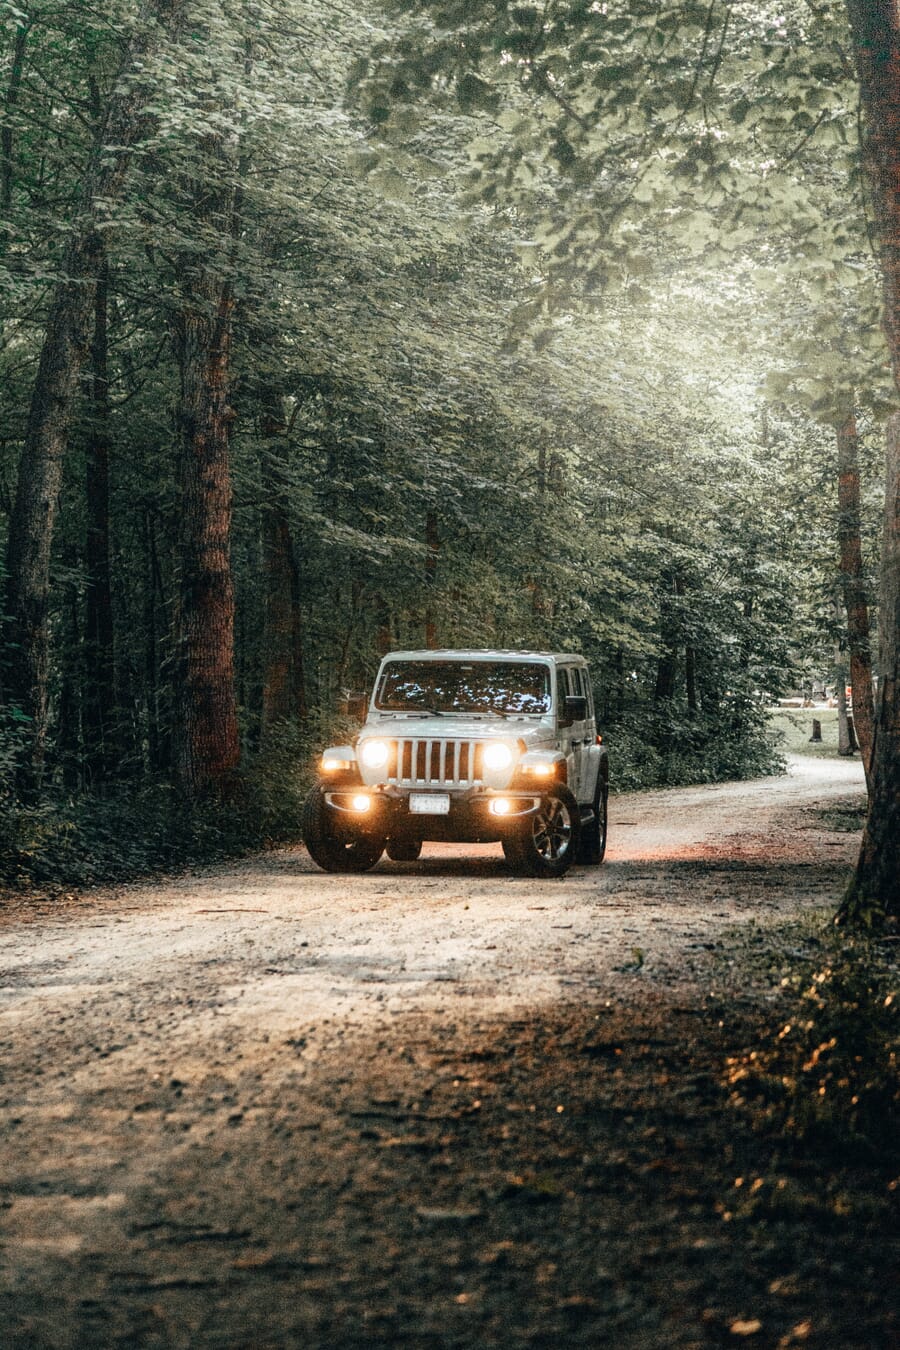
Match the landscape to the car. An off-road SUV belongs on rugged dirt tracks. A luxury sedan belongs on a curved freeway with a city skyline behind it. A classic roadster belongs on a coastal road at sunset. Mismatched backdrops feel like rental car ads, not editorial work.
Composition tips: place the car at one of the rule-of-thirds intersection points rather than dead-centre, and let the road or horizon line direct the eye toward the vehicle. A wide lens at 16–24mm exaggerates the size of the landscape; a 70‑200mm at 70mm compresses the background and makes the mountains feel closer to the car.
8. Try Shooting Indoors with Controlled Lighting
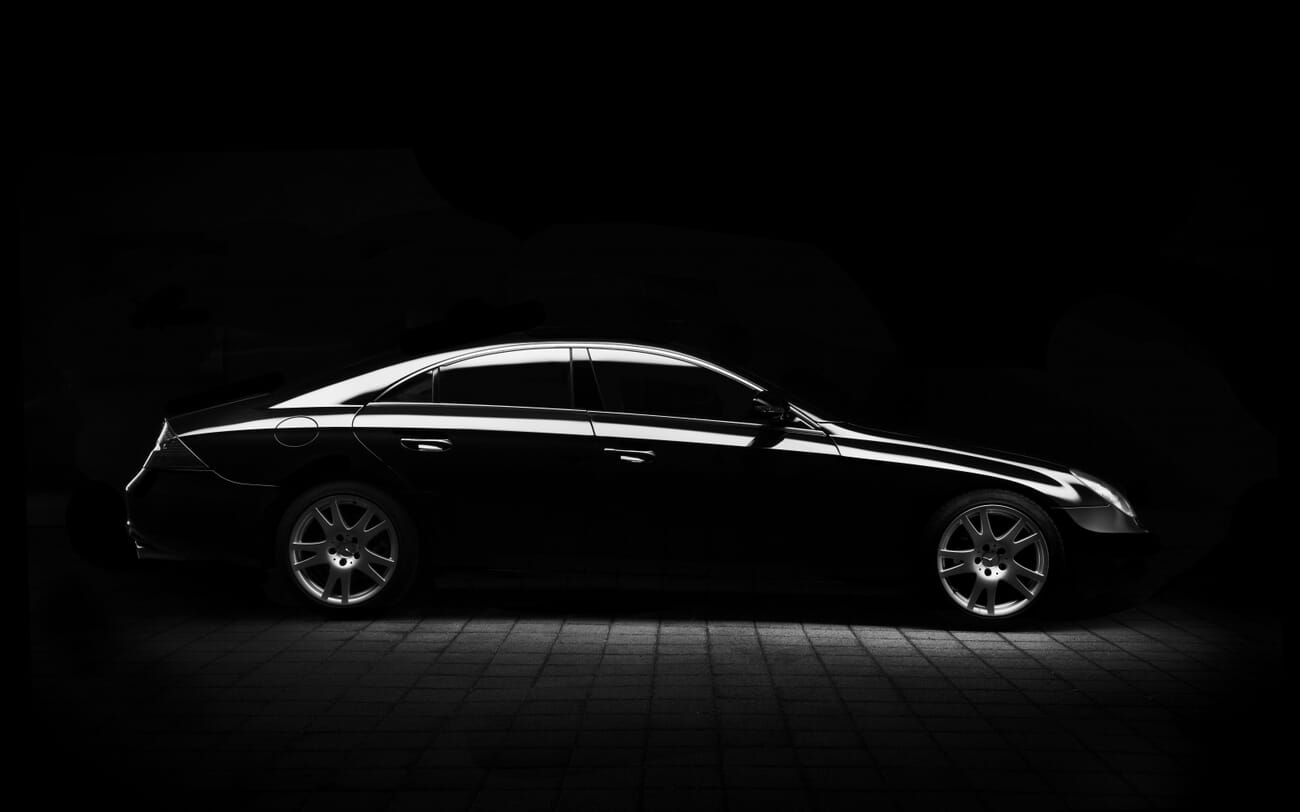
Indoor automotive photography is one of the harder disciplines in the genre. Artificial lights create reflections that have to be managed light by light. Use large, diffused sources — the larger the source, the softer the spread on a curved panel.
Indoor work demands a deliberate set: key lights overhead so reflections fall onto the body in a controlled streak, white walls to bounce a fill light into the shadows, and large white seamless or muslin backgrounds on three sides to wrap the car in a giant soft-light box. A black ceiling kills overhead bounce that creates a flat highlight.
Two essentials: a circular polariser (cuts glare on the body and glass) and a tethered laptop or tablet to verify reflection placement frame by frame. What looks fine on a small camera screen often hides a lighting stand reflected in the door.
9. Use the Technique of Light Painting
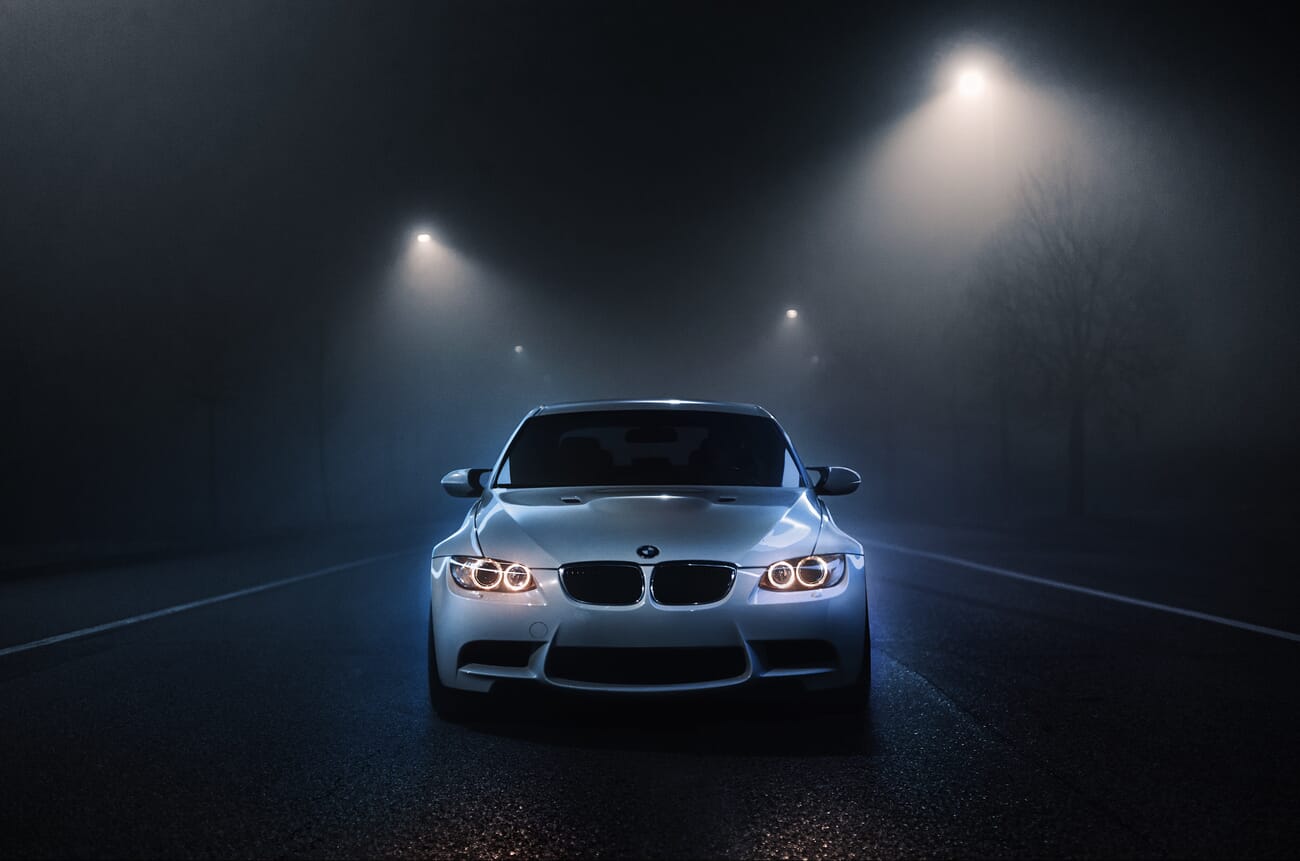
Light painting uses a small hand-held light source to selectively illuminate parts of the car during a long exposure. It is the cheapest way to produce a high-end automotive frame because the entire studio fits into a backpack.
Setup checklist:
- Tripod, locked. Any movement during the exposure ruins the frame.
- Manual mode. Aperture f/8 to f/11. ISO 100.
- Shutter 10–30 seconds — long enough to walk around the car and paint each panel.
- A small LED panel or torch with a softbox/diffusion gel.
- Wear black, head to toe. Anything reflective on the photographer ends up in the paint.
Light painting works best after dark, especially against a backdrop of city lights or a starry sky. Walk the perimeter of the car and “paint” each surface for one to three seconds. Multiple frames stacked in post-processing produce the cleanest result — light each panel on a separate exposure, then composite.
10. Highlight the Best Bits
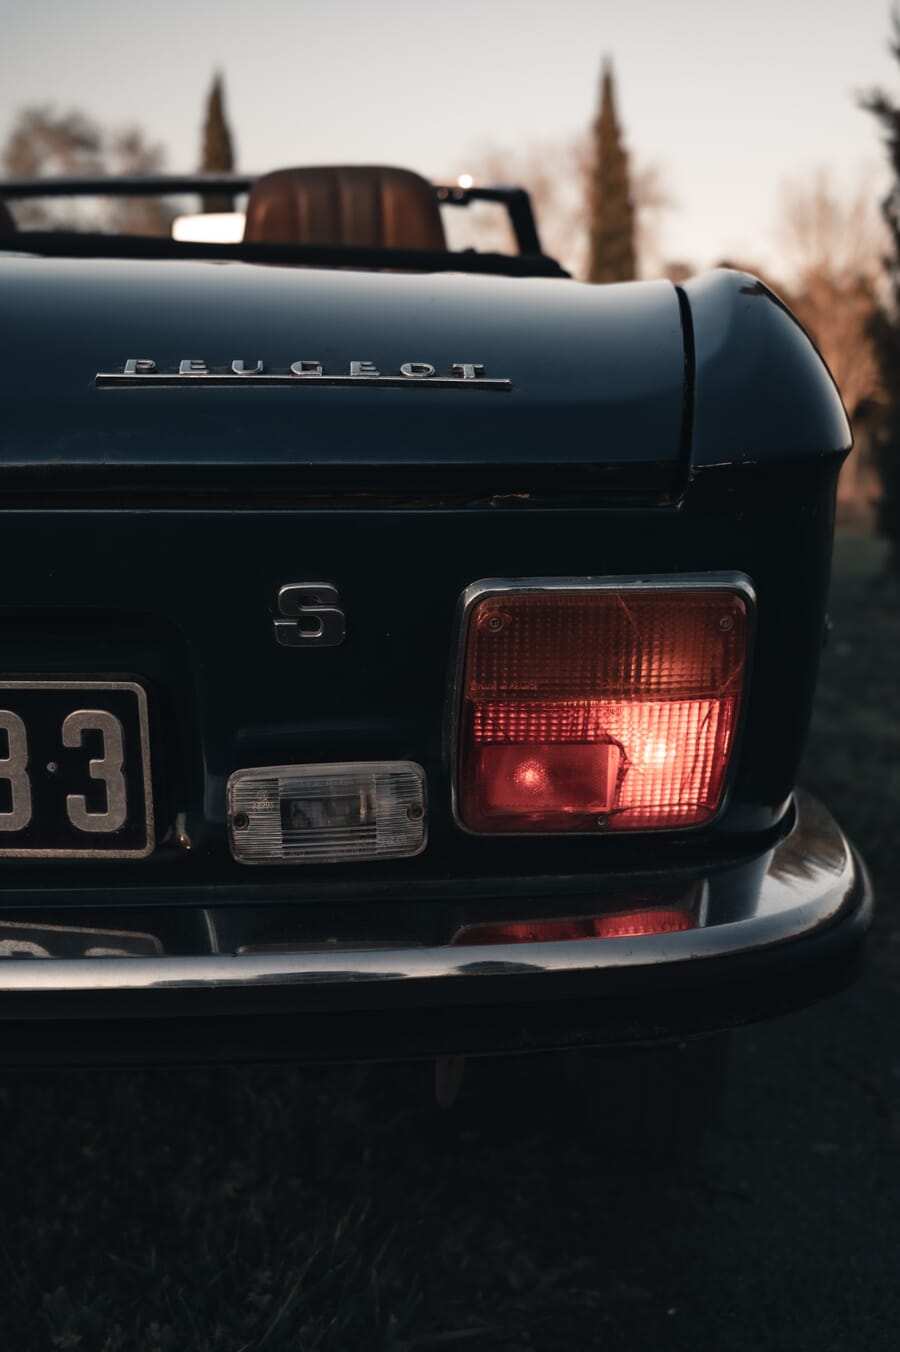
A polished new car or a well-maintained vintage car carries dozens of small details that deserve their own frames. The whole car does not have to be in shot to make a compelling image.
Strong detail subjects:
- The badge or logo on the grille, hood, or boot.
- Character lines along the fender or rocker panel.
- Headlight internals and the cut-line of the housing.
- Wheel spokes, brake calipers, and tyre wall typography.
- Stitching on leather, switchgear on the centre console, key fobs, gear shifters.
Detail shots are typically captured at a wide aperture (f/2.8 to f/4) with a 50mm or 85mm prime to throw everything else out of focus. Shot in a series, they fill the gaps between hero frames and make any post or portfolio feel deliberately edited.
11. Incorporate Motion Blur in Your Photos
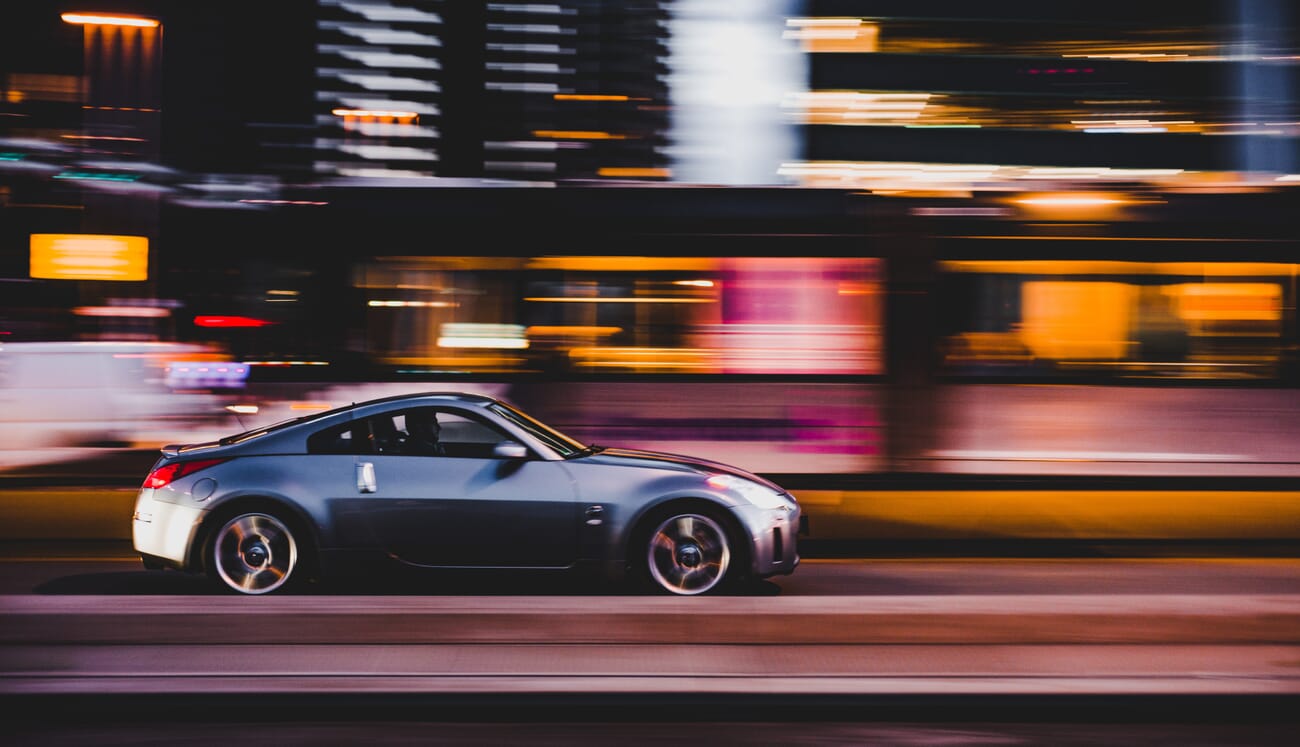
A moving car always reads as more compelling than a stationary one. Motion in the frame — spinning wheels, streaking background, blurred trees — is what separates a brochure shot from an editorial frame.
The technique is panning. Half-press the shutter to lock focus on a fixed point on the car (usually the front wheel arch), then move the camera with the subject as it passes, holding the subject sharp in the frame. Press the shutter fully when the car is at the optimal point in the composition.
Practical settings for a panning shot at 30–40 mph:
- Lens 70‑200mm at 100mm.
- Aperture f/8.
- ISO 100.
- Shutter 1/60s (slow enough to streak, fast enough to keep the body sharp on a smooth pan).
- Continuous AF, continuous burst.
Practice helps more than gear. The first 50 panning attempts are mostly throwaways; by the 200th the rhythm of the pan starts feeling natural. Choose the right autofocus area mode for tracking moving subjects — zone or wide-area beats single-point on a fast pan.
12. Apply the Portrait Rule — Avoid Distracting Backgrounds
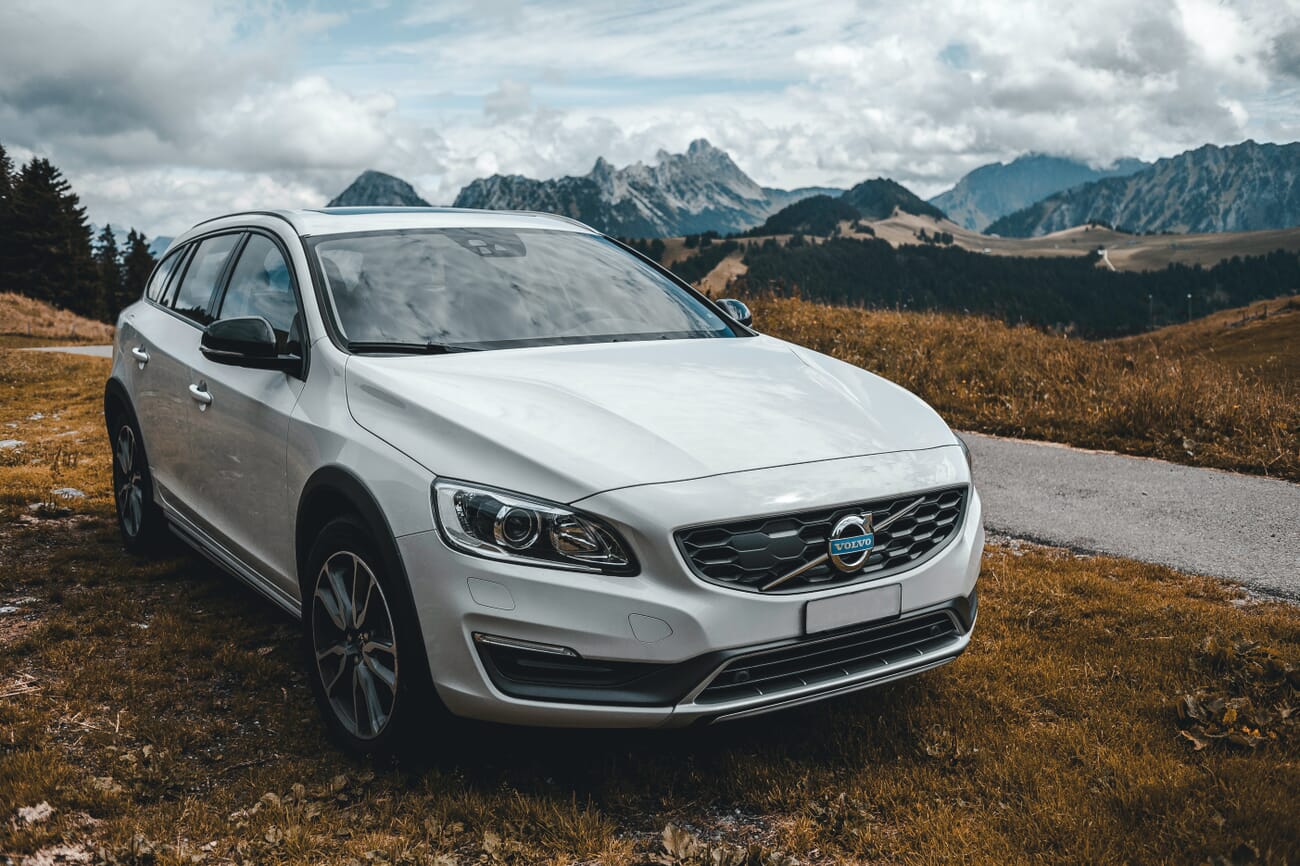
The body of any car will reflect everything around it like a mirror, so first make sure nothing around the car needs to be in the frame. Then apply the portrait rule to the background and foreground: anything that doesn’t add to the image is hurting it.
Watch for: lamp posts and signs growing out of the roof, cars and bystanders in the deep background, telephone wires cutting across the sky, trash and roadside debris in the foreground. A clean scout walk with the lens at the chosen focal length, before the car is positioned, catches all of these in five minutes.
13. Use Depth of Field in a Creative Way
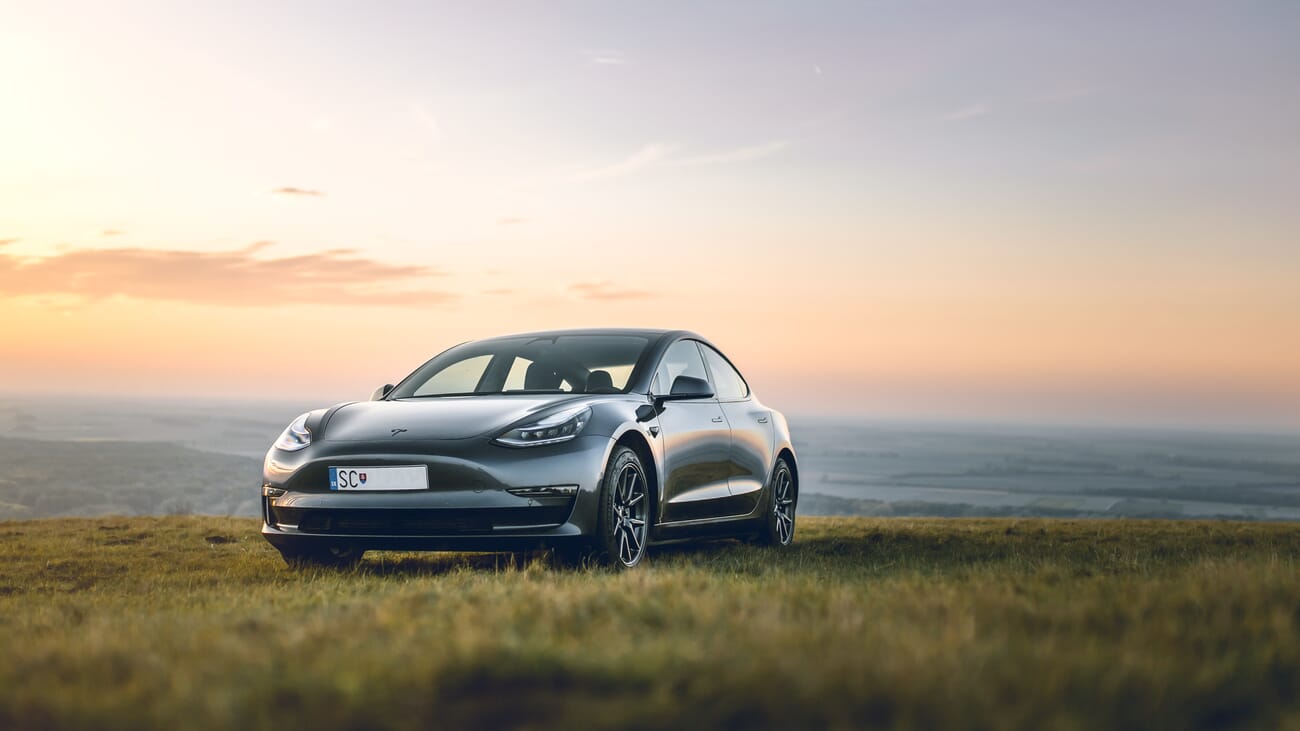
Shallow depth of field narrows the focus of the image, hiding everything not relevant and directing the viewer’s eye to one part of the car. Logos, character lines, the tip of a fender, the curve of a hood scoop — they all benefit from being pulled away from a busy background by an open aperture.
Wide apertures (f/1.8 to f/4) on a 50mm or 85mm prime are the standard. For broader frames where more of the car must stay in focus, step down to f/8 to f/11. Our complete guide to aperture and depth of field walks through the underlying maths.
14. Use a Drone for Aerial Frames
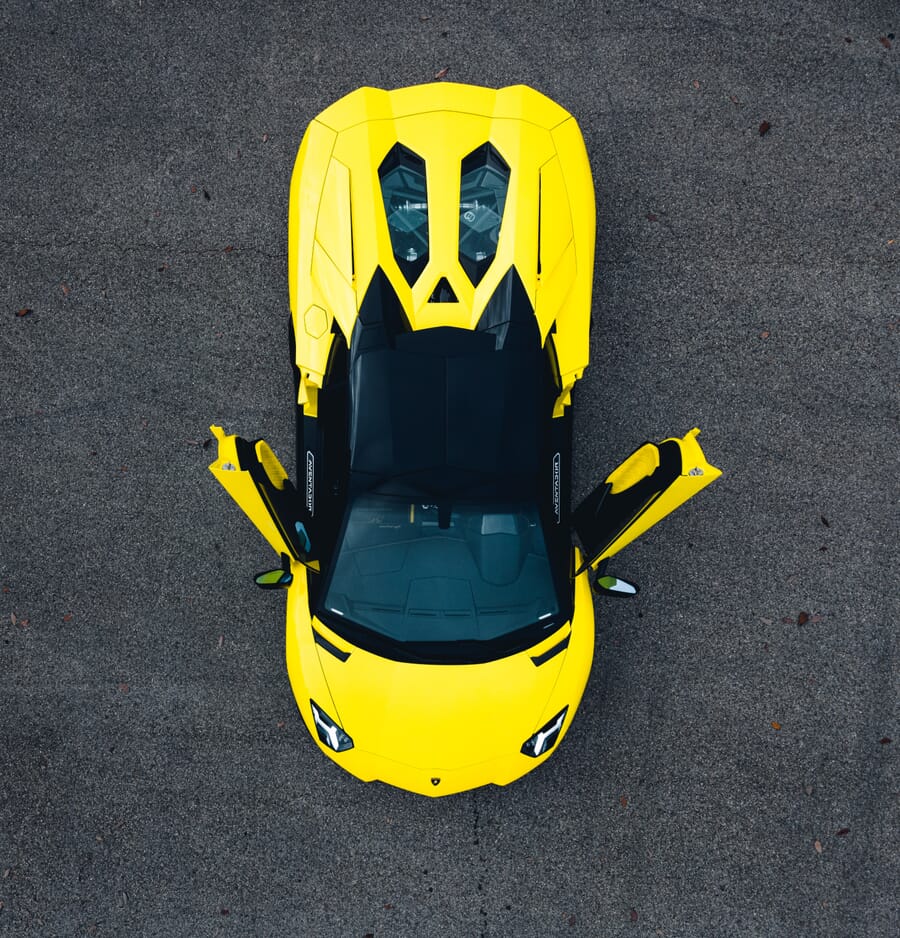
Drones are now a standard part of automotive photography kit. A drone produces angles a ground-bound camera cannot match: a top-down geometric composition, a tracking aerial shot of a moving car, or a 45-degree overhead frame with a long landscape horizon behind it.
DJI’s Mini 5 Pro and Air 3 dominate the consumer-pro space in 2026. Both shoot 50MP raw stills and 4K video, neither requires registration in most countries under 250g (Mini 5 Pro), and both deliver image quality close enough to a one-inch-sensor camera that the difference rarely shows in a final edit. YouTube creators have been using them for B-roll for years, but the still-image potential is what matters here.
15. Add the Human Element
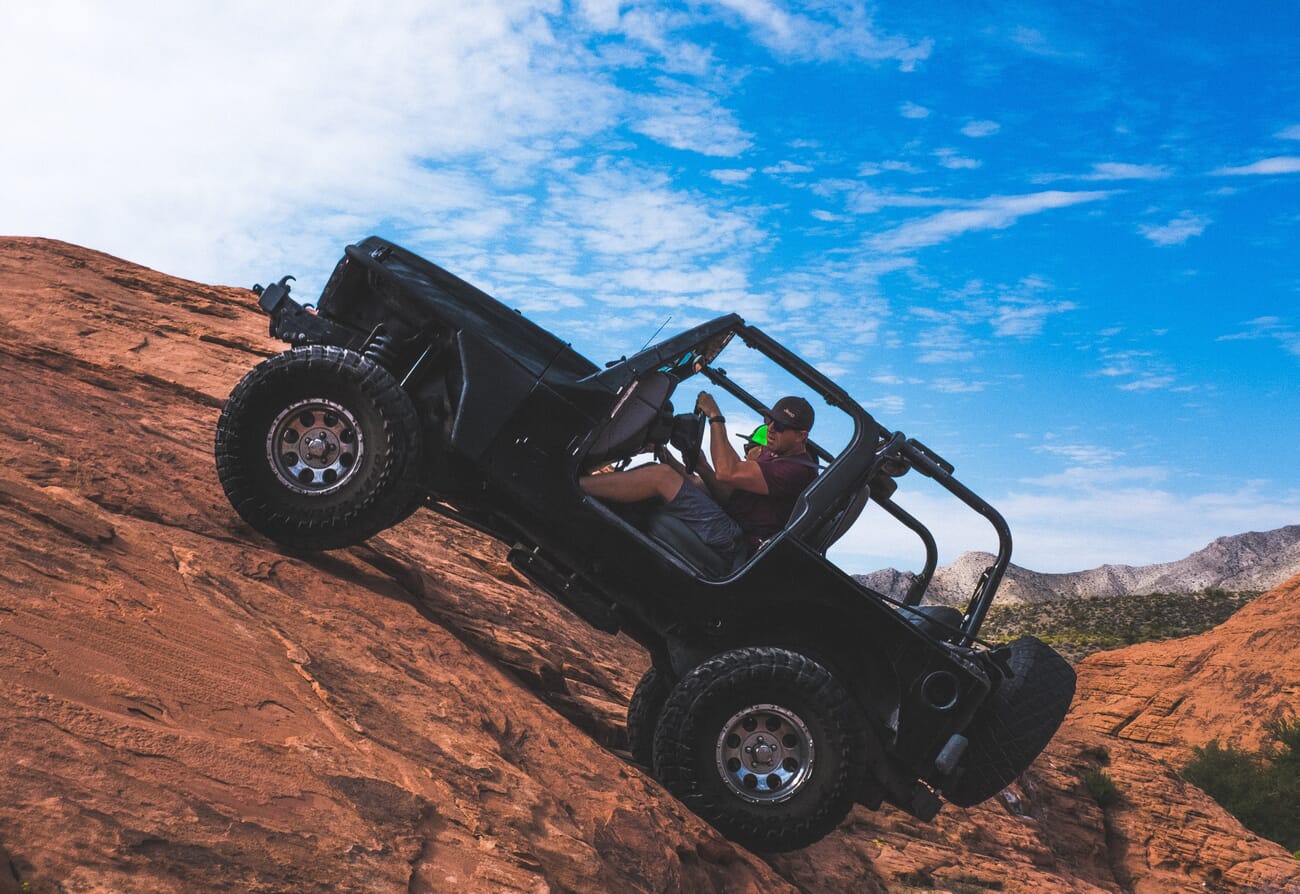
Cars are driven by people, and the human element is what most beginner shooters forget. A driver leaning against the hood, a hand on a steering wheel, a passenger laughing through a window — any of these turns a static car shot into a lifestyle frame.
Including a person also gives prospective buyers a stand-in. They can picture themselves where the model is, doing what the model is doing. That sells the lifestyle and the car together. Wardrobe matters too — colours that complement the paint job, not clash with it.
16. Capture the Car’s Personality
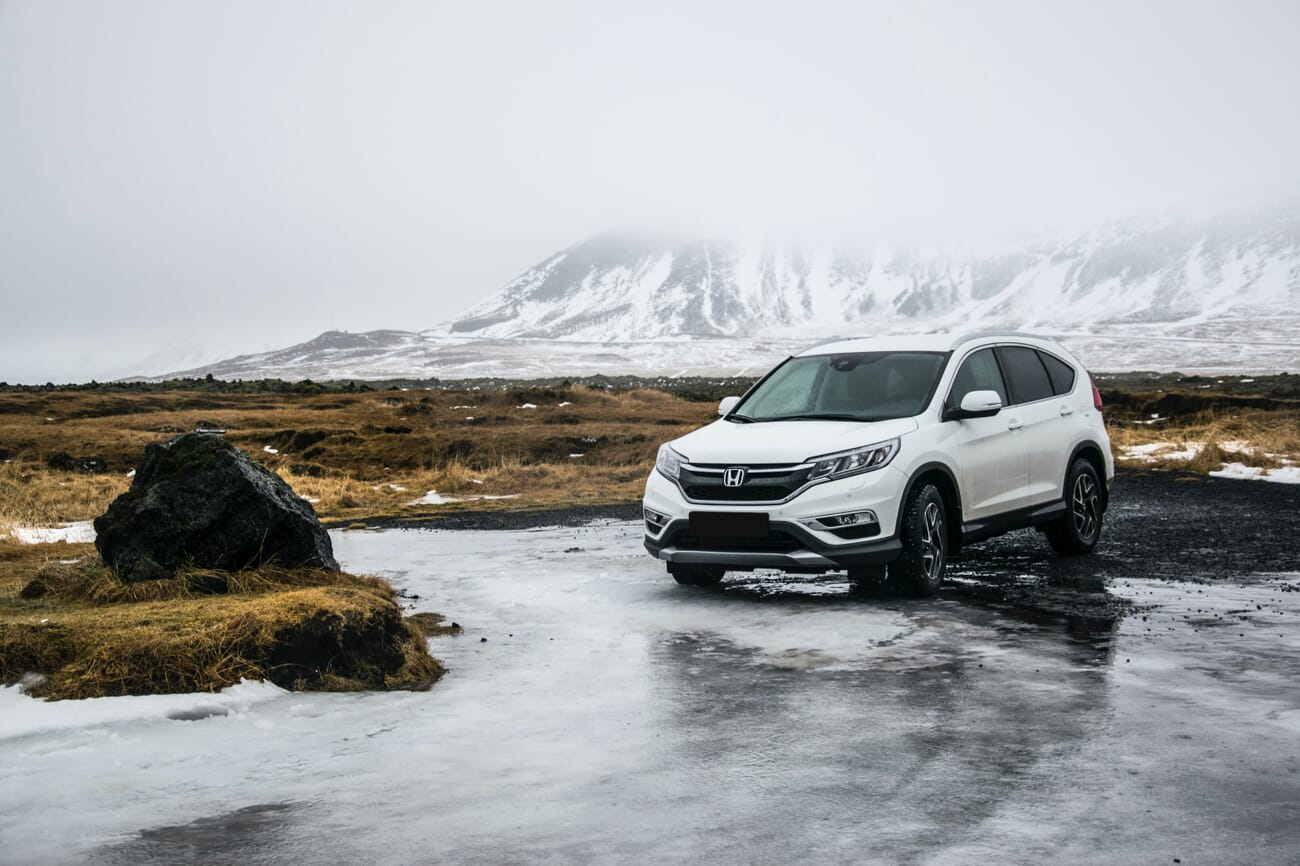
Every car has a personality. A photographer who is also an automobile enthusiast reads the chrome, the body lines, the grille treatment, the badging, and pulls a frame that captures all of it. The choice between a low angle, a shallow depth of field, a wide-angle distortion or a tight telephoto comes down to what personality the car carries and how the final frame should communicate it.
Recommended Camera Gear for Car Photography in 2026
Almost any modern mirrorless body handles automotive work today — the bottleneck is rarely sensor quality. The four picks below cover the price tiers that 90% of automotive photographers actually buy in 2026, plus the lenses that pair with them.
Sony A7R V — the resolution choice
61MP full-frame, AI-assisted autofocus with subject recognition for vehicles, in-body stabilisation rated to 8 stops. It crops to 26MP from a 1.5x APS-C area without losing detail — useful when the working distance to the car is fixed. Pair with the Sony FE 24–70mm f/2.8 GM II for general work or the FE 70‑200mm f/2.8 GM OSS II for compression shots. See our roundup of the best Sony mirrorless cameras for context across the range.
Nikon Z8 — the all-rounder
45.7MP stacked sensor, 20fps full-resolution raw, 8K video. The Z8 is built like a Z9 in a smaller body and handles low-light interior work better than most rivals thanks to dual native ISO. Pair with the Nikkor Z 24–70mm f/2.8 S or the older but excellent Z 14‑24mm f/2.8 S for environmental shots.
Nikon Z6 III — the value pick
24.5MP partially-stacked sensor, 6K full-frame raw video, 14fps stills. The Z6 III is the most capable body Nikon has ever shipped at its price tier and the obvious starting point for photographers entering the genre seriously. Pair with the Nikkor Z 24‑120mm f/4 S for a single-lens travel kit or the Z 17‑28mm f/2.8 for interiors.
Lens priorities
- 16‑ to 24‑mm wide for cabin interiors and landscape-context shots.
- 24‑70mm zoom for general-purpose exteriors and three-quarter compositions.
- 50mm or 85mm prime for detail shots, badges, and shallow-depth-of-field work — paired with the workflow in our Sony wide-angle lens guide if Sony glass is the system.
- 70‑200mm telephoto for compressed landscape backdrops and tracking shots from outside the action.
- Polariser filter on every shoot. Non-negotiable.
AI-Enhanced Post-Processing for Car Photography
AI tools have moved from gimmick to default automotive workflow over the last 18 months. Topaz Labs and Adobe Firefly are now the two pillars; Lightroom’s Generative Remove and the new AI lens corrections handle the rest. The four steps below replace what used to take an hour of manual cloning and dodging.
1. Topaz Photo AI for noise, sharpening, and detail recovery
Run the raw file through Topaz Photo AI before any local edits. The April 2026 model release — Wonder 3, Denoise Max, and Super Focus 3 — raises the recoverable detail ceiling significantly, and NeuroStream’s VRAM compression makes the workflow viable on a consumer GPU. Read our hands-on Topaz Photo AI review for the full feature breakdown.
2. Adobe Firefly Generative Fill for sky replacement and plate cleanup
Photoshop’s Firefly-powered Generative Fill replaces a blown-out or uninteresting sky in two clicks: select the sky, type a prompt (“dramatic golden-hour sky with light stratocumulus”), pick the best of three variants. For licence plates and bystanders that weren’t cleared from the frame, Generative Remove eliminates them without the manual clone-stamp work that used to consume half an hour per image.
3. Lightroom AI masking for selective edits
Lightroom’s subject and sky masks make graduated exposure adjustments on the car body, the sky, and the road surface a one-click operation. Combine with the new colour-grading panel for split-toning the highlights warm and the shadows cool — the most common automotive grade in 2026.
4. Final pass: pick a current AI editor for finishing
For photographers who want a single-tool finish rather than the four-step pipeline above, see our roundup of the best AI photo editors in 2026. Luminar Neo, Imagen AI, and Pixlr each cover the most common automotive finishing moves in fewer clicks than Photoshop, though without the precision of a dedicated Topaz + Firefly pipeline.
The honest caveat: AI tools are not a substitute for a clean capture. A poorly lit, badly framed photo will still look poorly lit and badly framed after the AI pass — just sharper. Get the in-camera shot right first; the AI tools amplify quality, they do not create it.
Car Photography Tips: Wrap Up
Automotive photography rewards photographers who care about the cars first and the camera second. The 16 tips above, paired with the pre-shoot prep checklist, modern mirrorless gear, and a pragmatic AI workflow, cover the bulk of what works in 2026. The rules will keep evolving — angles trending on Instagram in 2026 will look dated by 2028 — but the fundamentals of light, reflection, angle, and composition do not change.
Practise the panning shot until 1/60s feels comfortable. Run the prep checklist on every shoot. Build a personal library of named angles. The portfolio that opens the next gig is built one deliberate frame at a time.
Looking to broaden the foundation? Our 22 photography tips for beginners covers the exposure triangle and composition fundamentals that all automotive work depends on, and our guide to vantage point in photography expands on the named-angle thinking from Tip 3.
Frequently Asked Questions
How do you take great images of a car at night?
Light painting is the cleanest approach. Mount the camera on a tripod, set a 10–30 second shutter at f/8 and ISO 100, and walk around the car with a hand-held LED to selectively light each panel. A glittering city-light backdrop or a starry sky elevates the frame further. Long-exposure car-trail shots on a freeway overpass are a separate, simpler discipline — a 20-second shutter with the camera locked off.
How do you take panning shots of a moving car?
Use back-button focus to lock onto a fixed point on the car (usually the front wheel arch), pan with the car as it moves through frame, and fire a continuous burst. Settings: f/8, ISO 100, shutter 1/60s, continuous autofocus, continuous-burst drive mode. The first 50 attempts will mostly be soft — keep practising.
What is the best lens for car photography?
There is no single best lens — a 24‑70mm f/2.8 covers the most ground for general automotive work. For interiors, a 16‑24mm wide. For details, a 50mm or 85mm prime at f/1.8 to f/2.8. Avoid short macro lenses for tight body details — the working distance is so close that the photographer’s reflection ends up in the paint.
What camera settings work best for car photography?
Static exteriors: aperture priority, f/8 to f/11, ISO 100, with the shutter where the meter lands. Panning shots of moving cars: f/8, ISO 100, shutter 1/60s, continuous AF, burst drive. Interiors: f/4, ISO 800‑1600, with bracketing if the dynamic range between cabin and windows is wide.
Do I need a polariser filter for car photography?
Yes — a circular polariser is the single most useful filter for the genre. It cuts glass reflections, deepens sky and paint colour, and lets the camera capture the cabin through the windshield without a giant white reflection of the sky in the way. Pack one on every shoot.
How do AI tools fit into automotive photo editing in 2026?
Topaz Photo AI for noise reduction, sharpening, and detail recovery before any local edits. Adobe Firefly Generative Fill for sky replacement and clean-up of bystanders or signage. Lightroom’s subject and sky masks for selective tonal adjustments. AI tools amplify the quality of a clean capture but do not create quality where there was none — get the in-camera shot right first.
Sources and references used for this 2026 update:
Industry & Technique References
- Pedal Commander — Car Photography Tips – Frames car-to-light positioning as the most important shoot variable.
- Furoore — Automotive Photography Workflow – Detailing-kit-on-every-shoot workflow used as a reference for the prep checklist.
Gear & Body References
- Sony α 7R V Product Page – Sensor, AI autofocus, and stabilisation specs referenced in the gear section.
- Nikon Z 8 Product Page – Stacked-sensor and burst-rate specs referenced in the gear section.
- Nikon Z 6III Product Page – Partially-stacked sensor and 6K raw video specs referenced in the gear section.
AI Tools Cited
- Topaz Labs Photo AI – Noise reduction, sharpening, and detail-recovery tool used in the post-processing workflow.
- Adobe Firefly – Generative Fill model used for sky replacement and plate cleanup.