Editor’s Key Takeaways: Mastering Lightroom: Easy Photo Editing Guide
The blog post by photographer Jaymes Dempsey offers an in-depth, step-by-step guide on how to edit photos in Lightroom. Here’s a summary of the key points:
- Getting Started:
- Lightroom editing starts with importing photos through the Library module.
- Use the Source panel to locate images and make importing quick by choosing Minimal previews.
- Editing in Lightroom: Global Adjustments:
- Navigate to the Develop module for essential adjustments.
- Editing in Lightroom: Local Adjustments:
- Use tools like Graduated Filter, Radial Filter, and Adjustment Brush for fine-tuning specific areas of your photo.
- The Final Step: Exporting Your Images:
- Once edits are complete, export the photos with appropriate settings for the desired output and quality.
- How to Edit Photos in Lightroom: The Next Steps:
- Learn about advanced techniques and Lightroom secrets used by professionals to elevate your photo editing skills.
This structured approach ensures anyone can start enhancing their photos efficiently in Lightroom.
Introduction
If you want to know how to edit photos in Lightroom, then you’ve come to the right place.
In this article, I’m going to give you an easy, step-by-step process for editing your images.
I’m going to show you the major tools to be familiar with if you’re looking to take your images to the next level.
And I’m going to close by talking about a few powerful Lightroom secrets used by the pros–to seriously enhance your photos and get them looking top-notch.
So if you’re ready to become a Lightroom editing expert…
…then let’s dive right in.
How to Edit Photos in Lightroom:
How to Edit Photos in Lightroom: Getting Started
Editing your images in Lightroom isn’t hard.
But there is a bit of a learning curve. And you do have to gain a bit of knowledge before you start to see great results.
(Don’t worry; that’s what this article will provide!)
Now, Lightroom editing starts with a photo, and you won’t have a photo unless you know how to import:
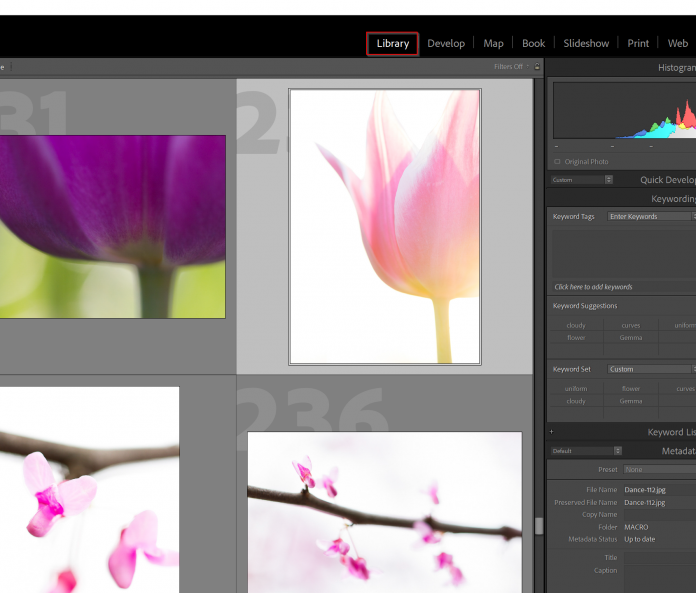
Importing Photos Into Lightroom
Importing images in Lightroom is simple.
Head to the Library module:
Then click Import:
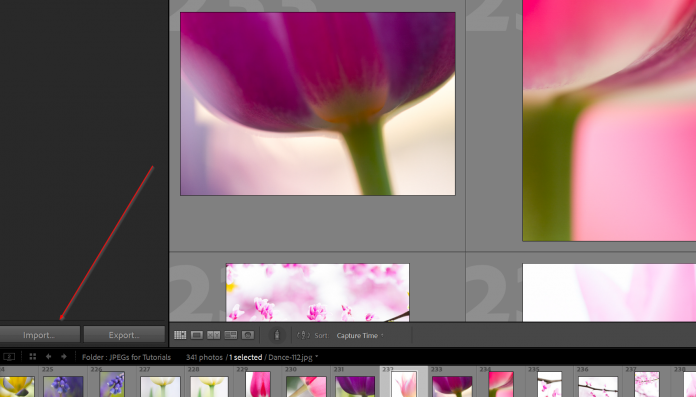
Using the Source panel on the left side of the window, find the photos that you’re looking to import.
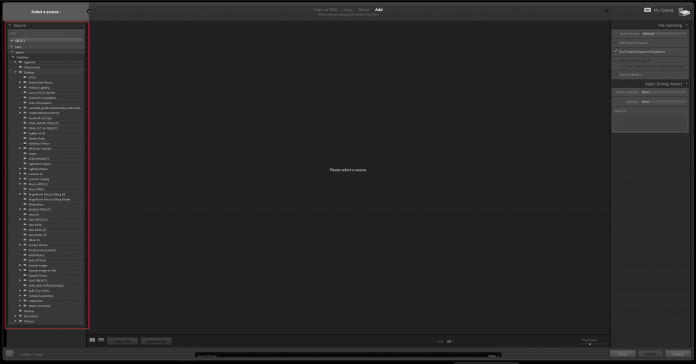
Note that you can access external hard drives and memory cards from the Source panel, so there’s no need to change up the process if you’re retrieving images off a memory card, etc.
Once you’ve selected the images you want to import, head over to the File Handling section:

I’d recommend building Minimal previews.
(Because bigger previews will slow down the importing process significantly.)
And I don’t recommend applying any settings during import, especially if you’ve never used Lightroom before.
Finally, click Done.
And your images will start to import!
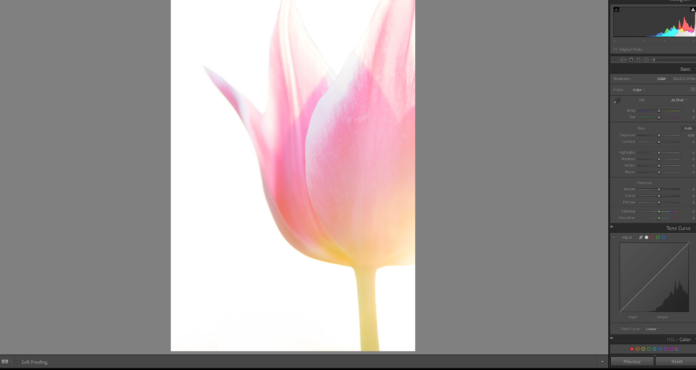
The Develop Module
The Develop module is where all of your Lightroom editing will take place.
You can access it by clicking on Develop, here:
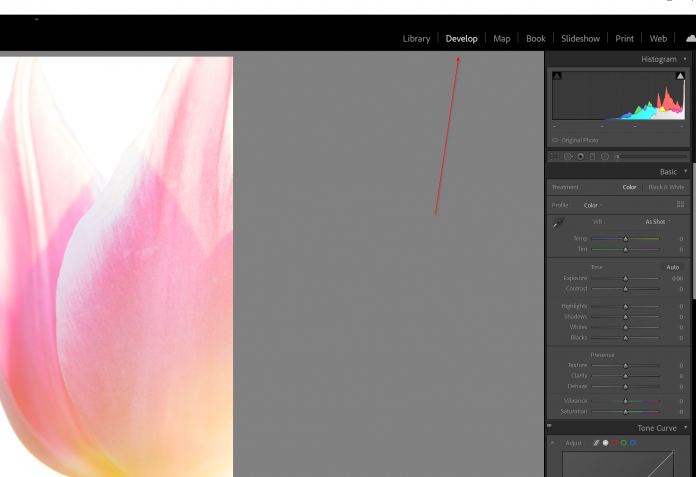
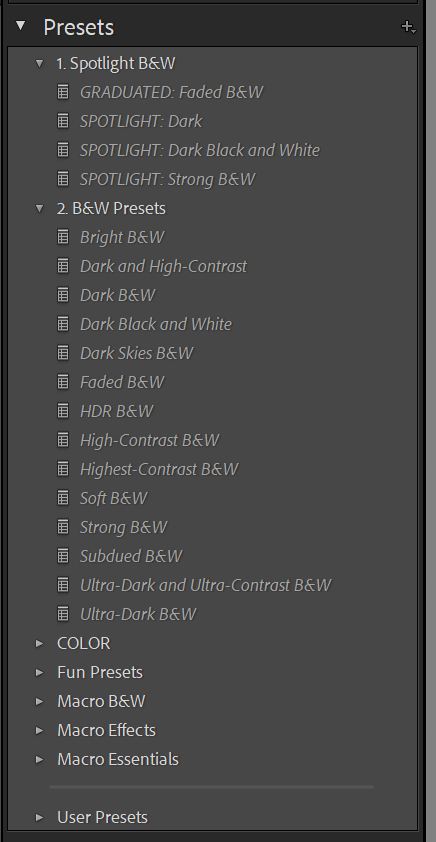
Note that you have the Preset panel on the left-hand side, which is where you’ll have access to any presets you import or create (plus, Lightroom has its own in-built presets already prepared).
And on the right-hand side, you should see the editing panels, including the Histogram panel, the Basic panel, the Tone Curve panel, and much more:

Of course, the real magic happens at the center of the window, which is where your photo will appear!
Should You Be Using Presets?
In the previous section, I mentioned the Preset panel.
And you may be wondering:
Are Lightroom presets a good idea? Should you be using presets, especially if you’re a Lightroom beginner?
Honestly, that depends.
Presets certainly can speed up your editing workflow. And they can get your photos looking very good, very fast.
However, presets can often act as a crutch. They do everything for you. They don’t teach you how to edit for yourself.
Plus, a preset–unless they’re your own presets, which are a whole different story–isn’t yours. It isn’t your edits, and it doesn’t come from your work.
So, in the long run, you’ll probably want to move away from presets, or at least limit your reliance on them.
Here’s what I recommend:
Don’t be afraid of presets. And use them to speed up your workflow and add cool stylistic looks to your images if you like.
But never use presets so frequently that you never understand how to edit.
And take the time to learn how to use each Lightroom tool to its fullest extent.
And speaking of editing…
…it’s time to discuss a very important point:
Editing in Lightroom: Global Adjustments
If you’re getting started editing photos in Lightroom, it’s important that you understand the two types of edits that Lightroom offers:
Global adjustments.
And local adjustments.
What Are Global Adjustments?
Global adjustments are applied to your image as a whole.
A global adjustment might brighten the entire photo. Or add a blue color to the shot. Or boost the sharpness across the image.
Most edits in Lightroom are global. And many photo editors never really pass beyond the global adjustment stage.
However, Lightroom also offers local adjustments.
What Are Local Adjustments?
Local adjustments refer to edits made to a part of your image.
So instead of brightening the whole shot…
…you might use a local adjustment to simply brighten your portrait subject’s face.
Or you might use a local adjustment to darken just the sky.
Or you might use a local adjustment to boost the color of the sunset.
Make sense?
Local adjustments are much less popular in Lightroom, mostly because they’re more complex and most folks don’t bother to understand how to use them.
But while global adjustments will make a big difference to your photos, local adjustments are incredible for adding those finishing touches that really make your images shine.
So don’t neglect local adjustments!
(And at the end of this article, I’ll give you a few local adjustment edits that you can use to make your images stand out.)
Now let’s take a look at a step-by-step editing workflow in Lightroom, starting with:
Step 1: Enable Profile Corrections (And Remove Chromatic Aberration)
This is a quick and easy step that I recommend you always start with when editing in Lightroom.
In truth, it doesn’t matter where you include this in your editing workflow. But it’s fast, so I’d suggest just doing it right off the bat.
Simply scroll down to the Lens Corrections panel:
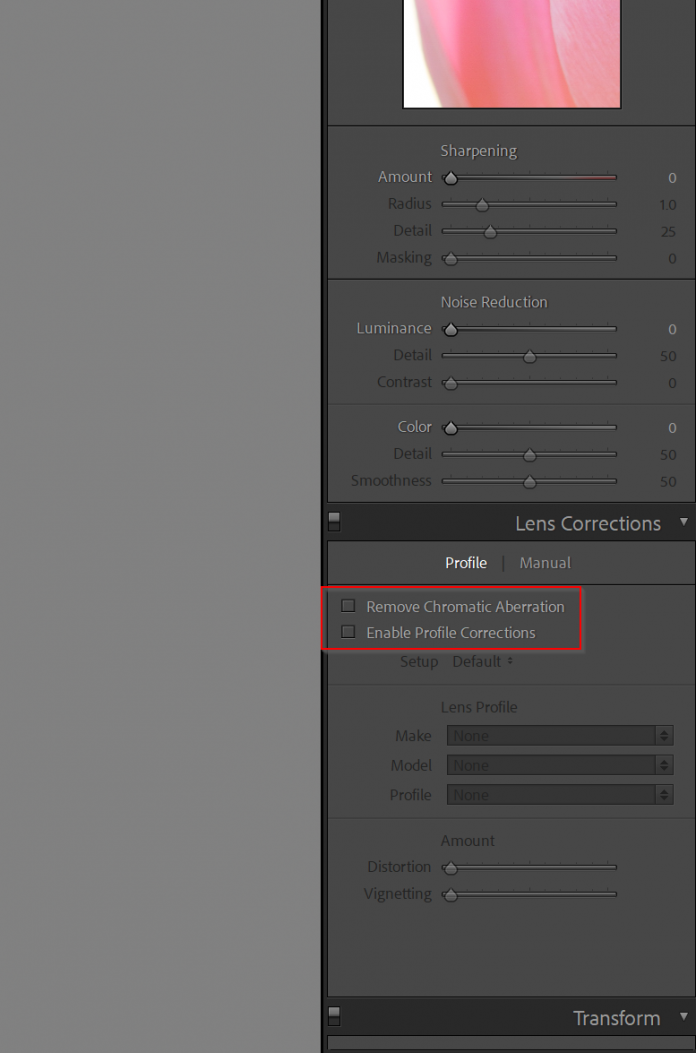
And check the Remove Chromatic Aberration box, as well as the Enable Profile Corrections box.
The chromatic aberration box will get rid of any annoying fringing that’s occurring in your images.
While the profile corrections box will get rid of most distortion and vignetting caused by imperfections in your lens.
Then proceed to Step 2:
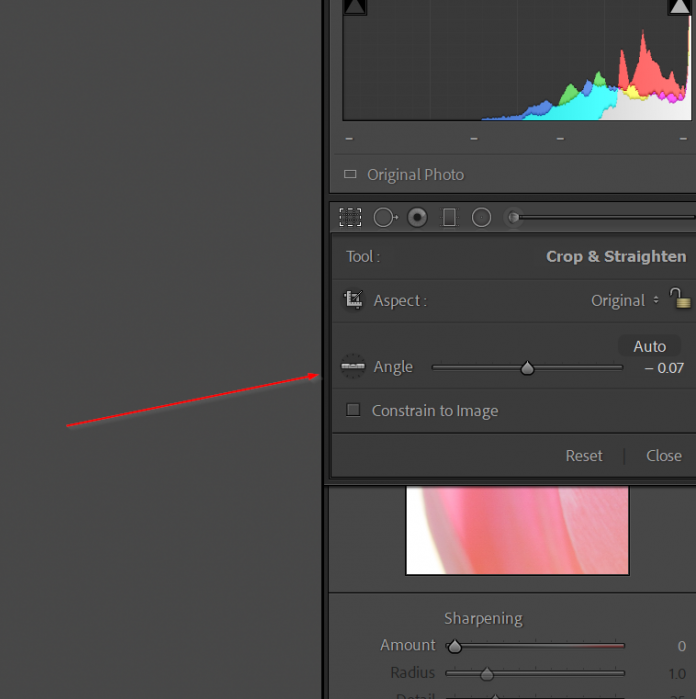
Step 2: Do Some Quick Cropping and Straightening
Composition is a key part of every image.
If your composition is off, then your whole image just feels wrong.
Now, it’s best to get the composition right in-camera.
But you can often find even better compositions if you take the time to crop your image before continuing with your edit.
So quickly inspect your photo.
Look for any distracting areas along the edges.
And if you find them, crop them out.
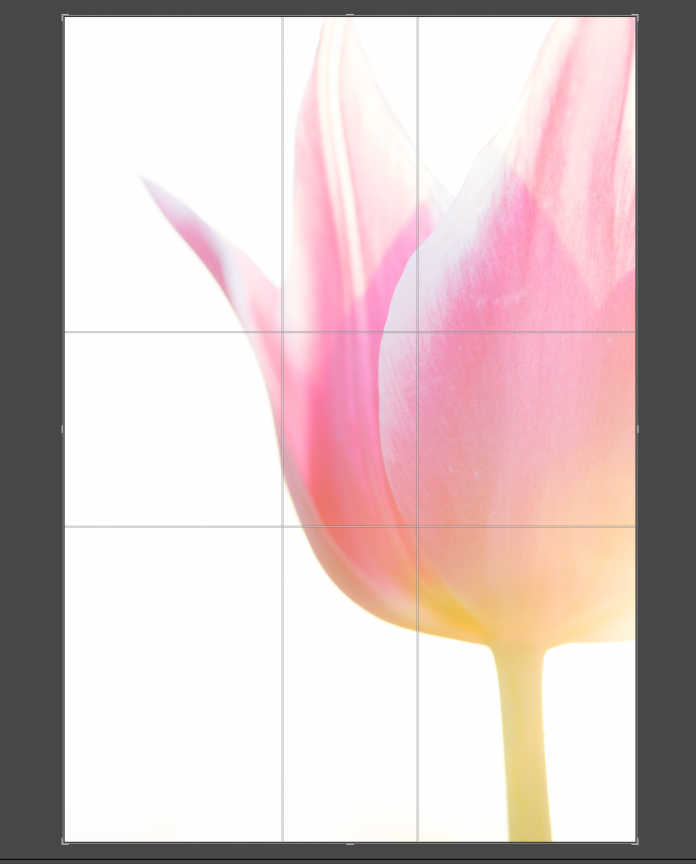
Check out your main subject. Is it well-positioned within the frame? Consider tapping on the Crop tool, then hit “O” to cycle through the different helpful overlays:
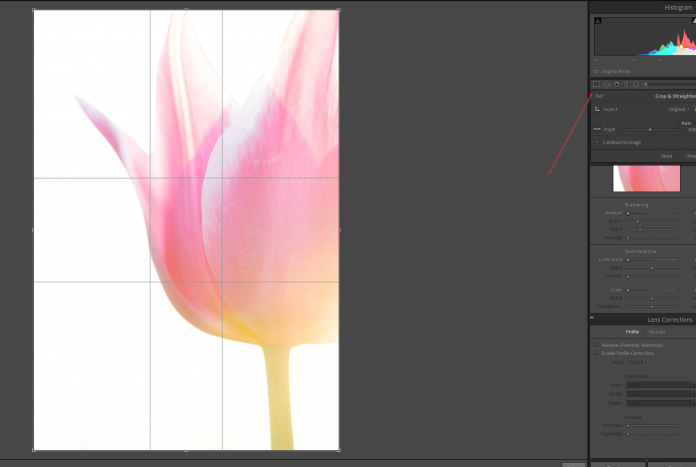
These are designed to guide you in your cropping, such as the rule of thirds gridlines:
And the golden spiral:

Anyway, once you’ve made any crops, check the lines in your image.
Do they look straight?
If not, you can always drag at the edges of the crop window to straighten.
Or you can grab the Ruler tool and drag it along a line that’s supposed to be straight, such as a simple horizon:
Then Lightroom will do the straightening for you.
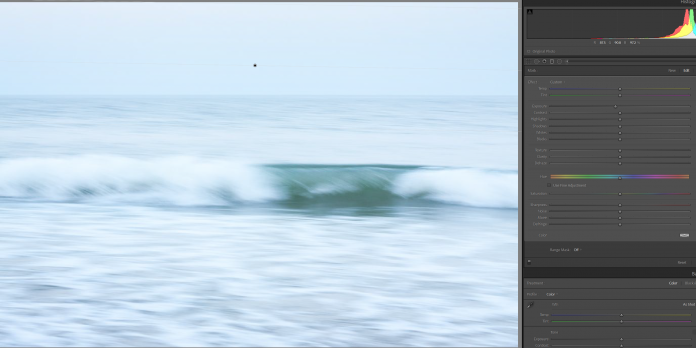
Step 3: Adjust the Exposure
Now it’s time to look at the tones of your image.
(In other words: The lights and darks and everything in between.)
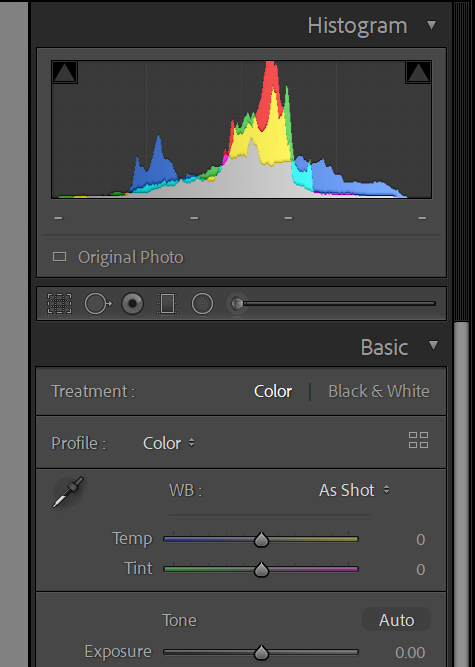
I recommend starting by looking at the overall tonal levels. Check the histogram, which gives you a graphical representation of the different parts of your photo. In general, you want it to be concentrated around the middle and stretching outward to the edges without actually touching the sides. Like this:
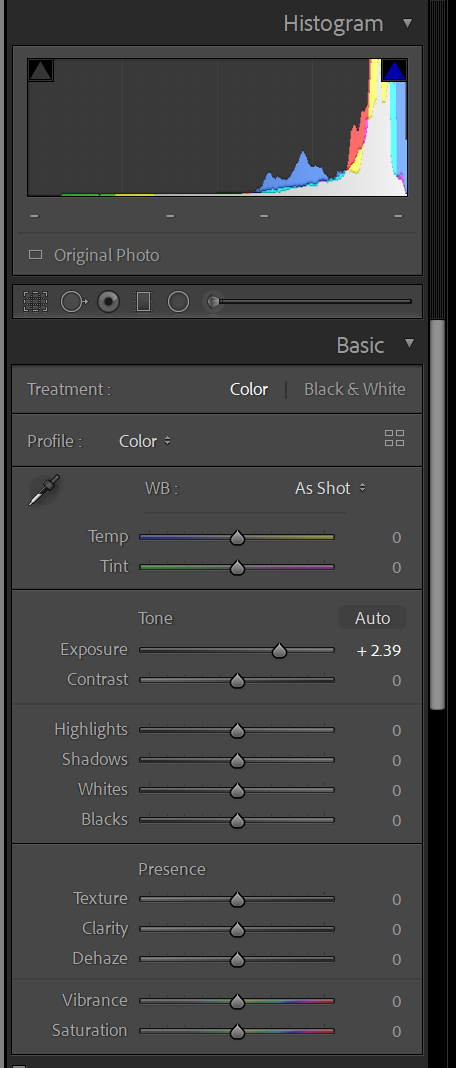
If your histogram looks like this, it’s a sign your image is too bright (i.e., overexposed):
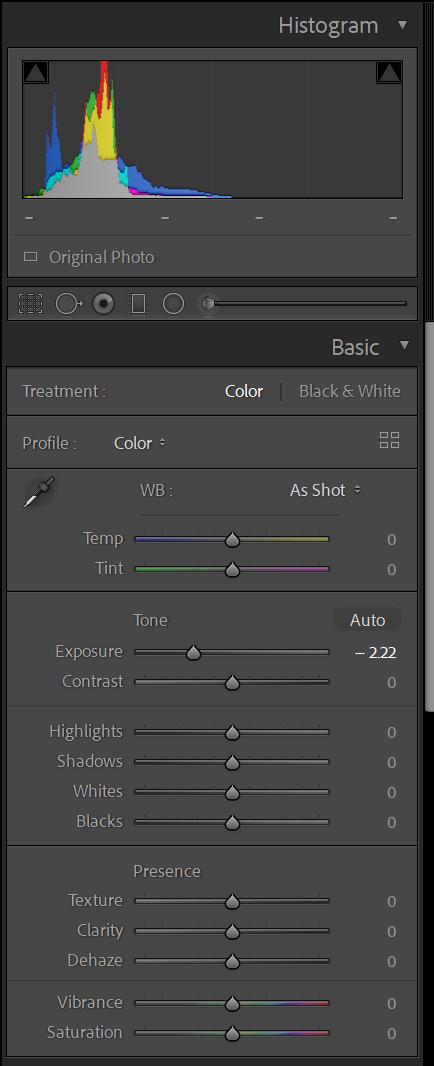
And if your histogram looks like this, it’s a sign your image is too dark (i.e., underexposed):
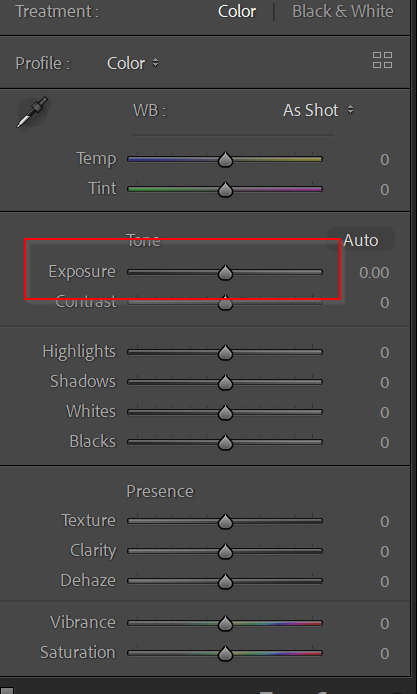
If you do have an exposure problem, then you’ll want to start by shifting your Exposure slider in the Basic panel:
I’d also recommend checking the edges of your histogram. There are little indicators that light up when your tones start to press up against the sides:
If an indicator is lit up, it means that you’re losing details in the brightest or darkest parts of your images.
To deal with this, you can either reduce the Highlights slider or lift the Shadows slider:
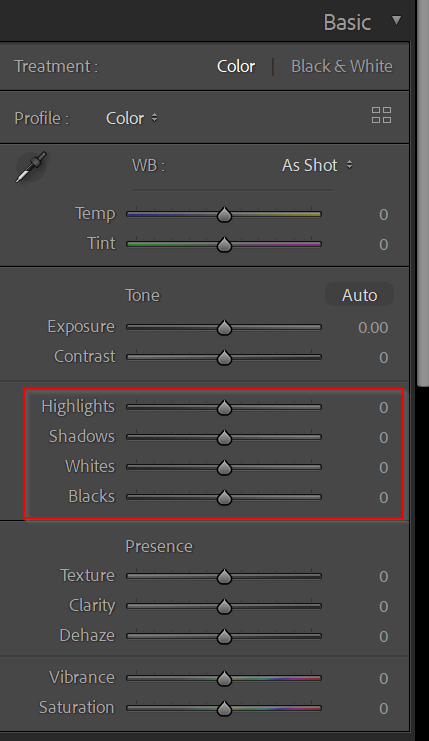
And you can also play with the Blacks slider and the Whites slider.
Note that all these sliders adjust the brightness of your image, but more selectively than the Exposure slider. Don’t be afraid to experiment; see what happens when you boost the Whites or drop the Blacks.
You might end up with a look you really enjoy!
One tip is to try to stretch the histogram so that you have the tones just touching the ends of the graph without going over. This indicates a wide tonal range, and can look really nice.
To achieve this, you’ll often want to pull the Blacks slightly downward and the Whites slightly upward–but, as with pretty much all edits, it depends on your image.
Step 4: Add Contrast and Clarity for Extra Pop
It’s time to give the tones of your image a nice finishing touch.
Head to the Contrast slider in the Basic panel and boost it upward until your image starts to look great.
Then do the same with the Clarity slider, located down below:
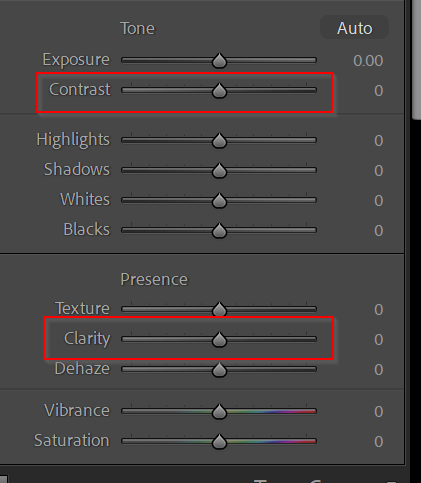
Note that, while Contrast and Clarity tend to make images look really, really good, it’s important not to add too much.
Because these sliders are very powerful. And it’s easy to overdo things.
So add Contrast. Add Clarity.
But make sure you take a step back and ask yourself, “Did I go too far? Does this really look good?” before proceeding.
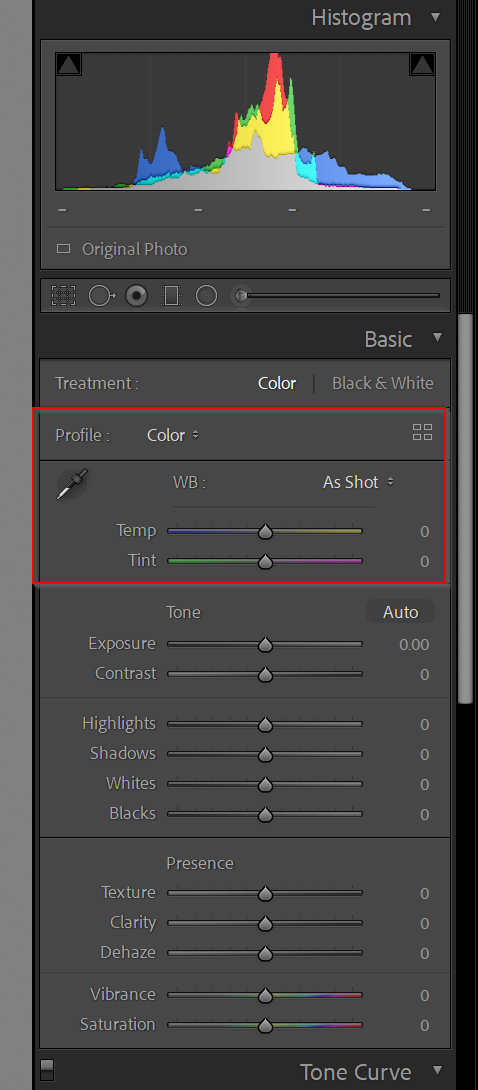
Step 5: Correct the White Balance
The white balance corrects for color casts in your image.
For instance, if the light is very yellow, it’ll skew the colors in your photo; you can use the white balance to add some blue. And if the light is very blue, it’ll also skew the colors; you can use the white balance to add some yellow.
In other words:
The white balance is key if you want accurate colors.
So how do you use it?
First, navigate over to the White Balance section in the Basic panel:
Then click on the Dropper tool:
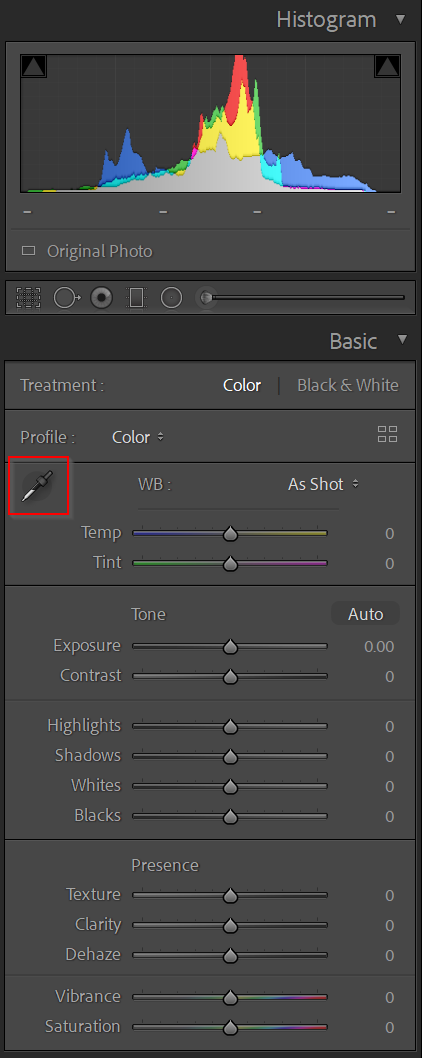
And simply click on an area of your image that’s supposed to be a pure, neutral gray or white.
Lightroom will do the rest of the work, instantly shifting your image so the colors are as accurate as possible.
And if you’re not satisfied with the results, that’s okay, too. You can always adjust the white balance manually via the Temperature and the Tint sliders.
Note that the Temperature slider adjusts the overall blue and yellow in a scene, whereas the Tint slider adjusts the greens and magentas.
The Temperature slider tends to be a lot more useful, because color casts tend toward the blue and yellow parts of the color spectrum.
But there’s one more fun use of white balance that I haven’t mentioned:
Creative color toning.
You see, colors don’t always have to be accurate. Instead, you can use the white balance sliders to create a specific mood.
For instance, you might use the Temperature slider to give a nice moody, blue tone to your image. Or you might use the Tint slider to add a lush, rich green.
Does that make sense?
However, before you start going wild with the colors, I do recommend starting with the correct, carefully white balanced colors (which should match what you saw at the scene).
And then, once you have a neutral base to work with, you can have fun.
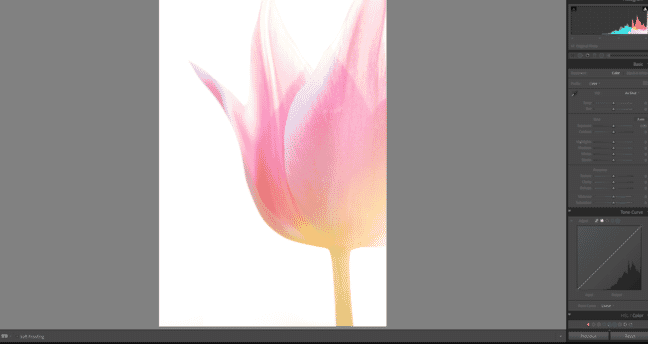
Step 6: Make Your Colors Stand Out With Saturation and Vibrance
Speaking of colors:
Most photos benefit from a bit of color enhancement.
And this is very easy to do!
Just scroll down to the Saturation and Vibrance sliders in the Basic panel:
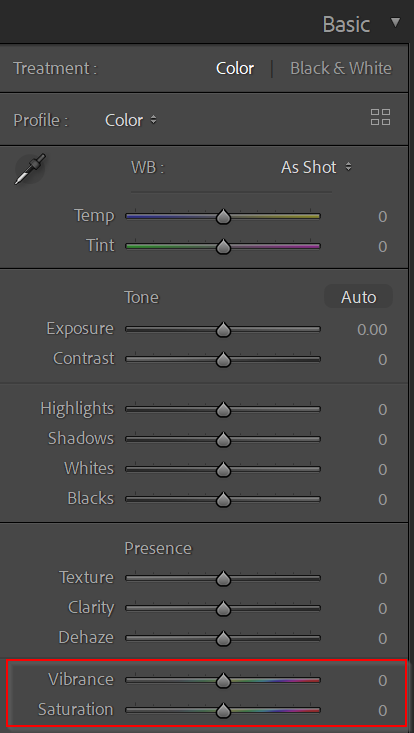
And boost them to make your colors pop.
Now, Saturation is more heavy-handed than Vibrance. Many photographers describe Vibrance as smart saturation, because it protects skin tones from oversaturation while selectively saturating the less-saturated colors.
But it can pay to experiment with both Vibrance and Saturation–potentially using Vibrance to achieve a more muted look, while using Saturation to really make those colors stand out.
However, while Vibrance and Saturation are great, there’s actually another method of enhancing your colors:
The HSL/Color panel.
Step 7: Create Artistic Looks With the HSL/Color Panel
The HSL/Color panel is located several panels below the Basic panel I was referring to earlier:

It allows you to single out specific colors and adjust their hue, their saturation, or their luminance (brightness).
Why is this useful?
Because it allows you to selectively target different colors while editing.
If your subject has an interesting red coat, you can boost the reds to make it pop, or even use the Hue option to shift it toward orange.
And if there’s a distracting blue sign in the background, you can desaturate it by reducing the blues until they’re almost unnoticeable.
The HSL/Color panel is also useful for another reason:
It allows you to stylize your photos to create a mood or a look.
This is one way that artists on image-sharing platforms, such as Instagram, create such signature styles in their photos.
For instance, by removing all the cooler colors from a photo, you can create a very gritty, hot image.
And by shifting colors toward oranges and blues, you can create a cinematic-type look.
Note that, if you’re trying to stylize your images, you don’t have to rely entirely on the HSL/Color panel.
For one, I mentioned the value of the white balance tools for achieving different looks.
But you also have another useful tool:
The Color Grading panel.
Step 8: Use the Color Grading Panel to Add Finishing Touches
The Color Grading panel is quite possibly the coolest panel in Lightroom, because it allows you to achieve all sorts of looks in your photos.
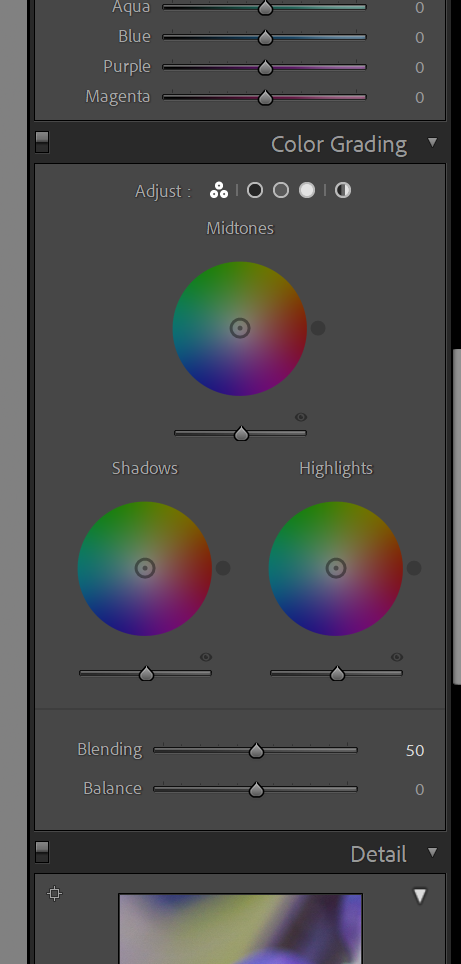
You’re given three color wheels, each corresponding to a color grading option in the highlights, midtones, and shadows of your image:
By changing the position of the circle on the color wheels, you can inject different tones and saturations into these different tonal ranges of your image.
So you can add blue into the shadows.
And you can add yellow into the highlights.
It’s a great way to add a signature look to your images, and I highly recommend experimenting with it!
Step 8: Add Sharpening in the Detail Panel
This step is somewhat optional.
You see, sharpening can enhance your image and make it look crisper.
But some images are already quite sharp from the beginning.
And, in those instances, sharpening really isn’t necessary.
However…
Try boosting the Amount slider in the Detail panel. Zoom in to 100% and see how it looks.
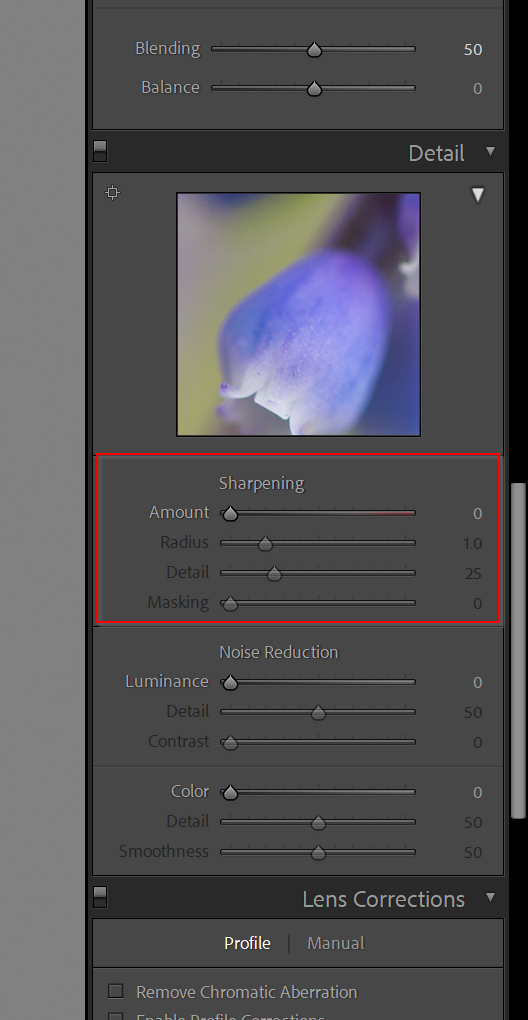
You can always fiddle with the Radius slider (which amplifies the sharpening effect) and the Detail slider (which determines whether you sharpen all the tiny details in your image or just the more obvious edges).
Finally, if you have smooth areas you don’t want sharpened, you can dial in some Masking to protect parts of the photo.
Sharpening is easy to overdo, so be careful.
But a bit of sharpening can be very helpful, so don’t be afraid to add some sharpening to your photos.
Step 9: Reduce Noise in the Detail Panel
Here’s the final basic step when editing photos in Lightroom:
Using the Noise Reduction sliders in the Detail panel.
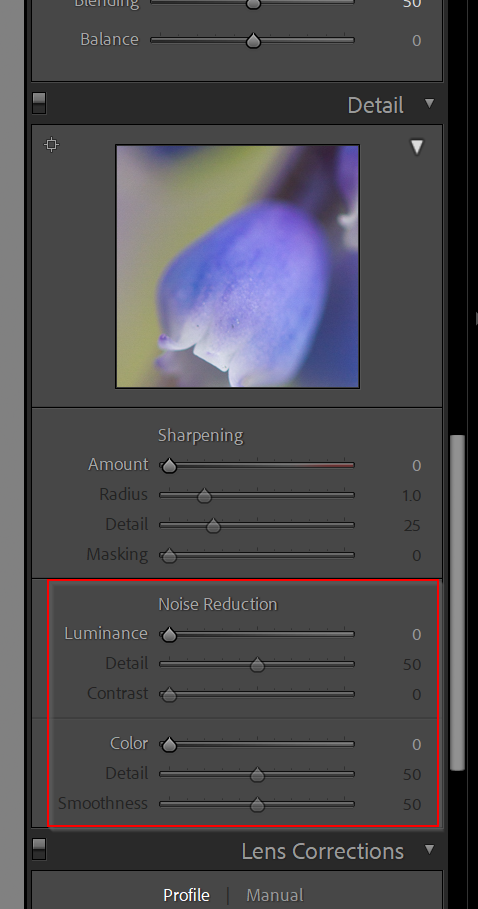
You see, some images will display noise, which looks like blotches of light and color.
And, if possible, you’ll want to remove this.
So take a look at your image. Do you see any noise? It often hides in the shadows and is brought out when you boost the exposure.
Then increase the Luminance slider.
You can also play with the Detail, Contrast, and Smoothness sliders, if you find the image is being degraded too much.
That’s an important point, by the way:
Noise reduction isn’t a get-out-of-jail-free card.
It’ll smooth the details of your image; that’s the price you pay to get rid of noise.
It’s generally worth it, assuming you have unwanted noise.
But you’ll want to keep the noise reduction to a minimum. Don’t reduce noise any more than you have to, and you’ll be just fine.
Editing in Lightroom: Local Adjustments
If you follow the steps I’ve given above, then you’ll easily be able to create beautiful edits using Lightroom.
However, it also pays to go beyond the basics and really bring out the best in your images.
It’s not hard; you just need to have a bit of local editing know-how.
Which is why, in this section, I’m going to give you three local editing tips that can make a big difference to your photos.
Add a Vignette With the Radial Filter
Vignettes darken the edges of the frame in order to draw attention to your main subject.
And while Lightroom offers a Vignette slider in the Effects panel…
…it just doesn’t allow for a very customizable result.
That’s where the Radial Filter comes in.
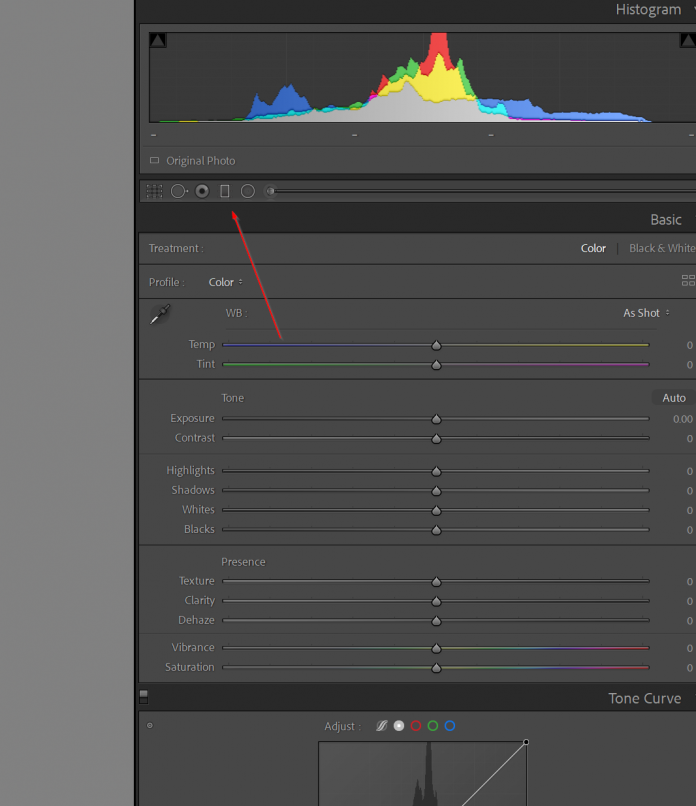
To access the Radial Filter, click on the circular icon underneath the histogram:
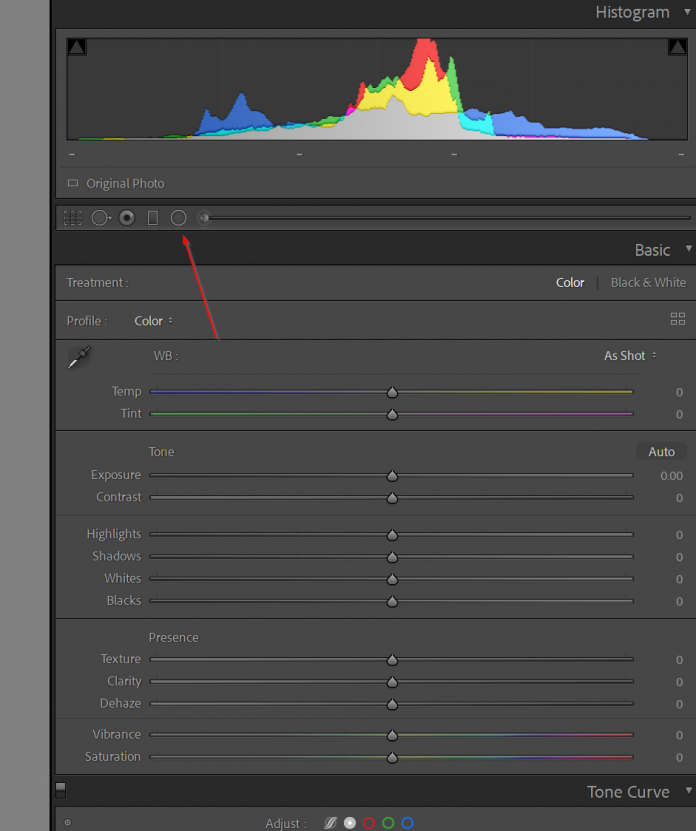
Then click and drag the Radial Filter across your image until you’ve covered most of the composition. Make sure that your subject is at or near the center of the Radial Filter; remember, your goal is to push the viewer’s eyes toward the main subject and away from the edges of the frame.
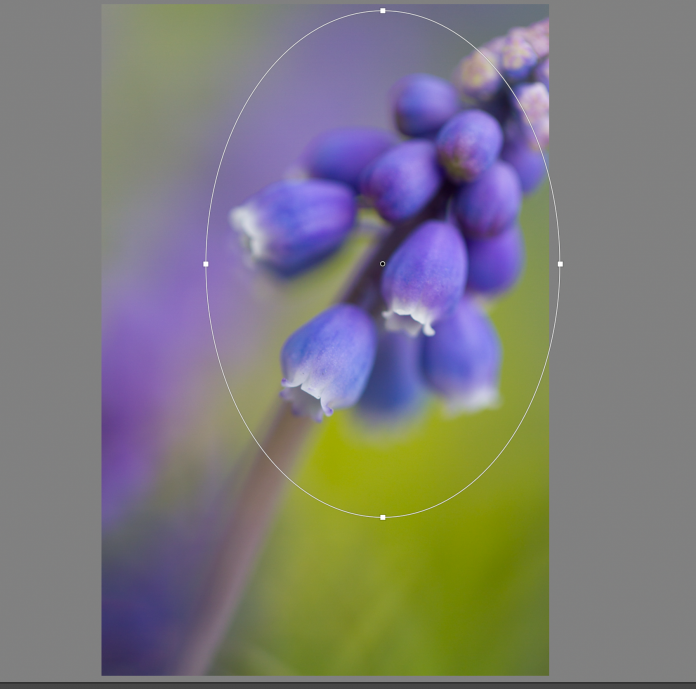
Finally, drop the Exposure slider in the panel on the right-hand side.
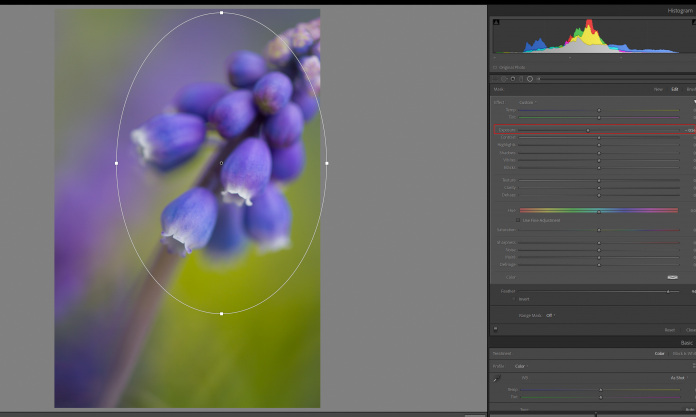
(For a subtler effect, you can drop the Shadows instead; I recommend testing this out to see whether you like the result.)
This will darken the edges of the frame and give you a slightly more powerful, focused image.
If the effect is too strong, you can always dial back the exposure adjustment.
Or you can increase the Feather to give a more gradual, subtle look.
Darken the Sky With a Graduated Filter
Here’s a local adjustment trick used all the time by landscape photography pros:
Use a Graduated Filter to darken the sky.
This helps bring out color and texture in sunsets and sunrises. And it’s very easy to do.
Simply select the Graduated Filter:
Then drag it over the sky:
And drop the exposure!
(You can also boost the contrast while you’re at it, if you like.)
You’ll get an instantly more dramatic sky, one that helps balance out the foreground for a beautiful shot.
Use the Adjustment Brush to Brighten Key Areas of Your Subject
Here’s your final tip for beautiful photo editing in Lightroom:
Access your Adjustment Brush:
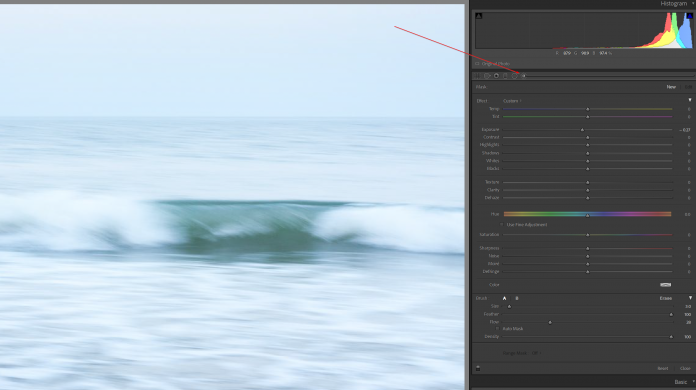
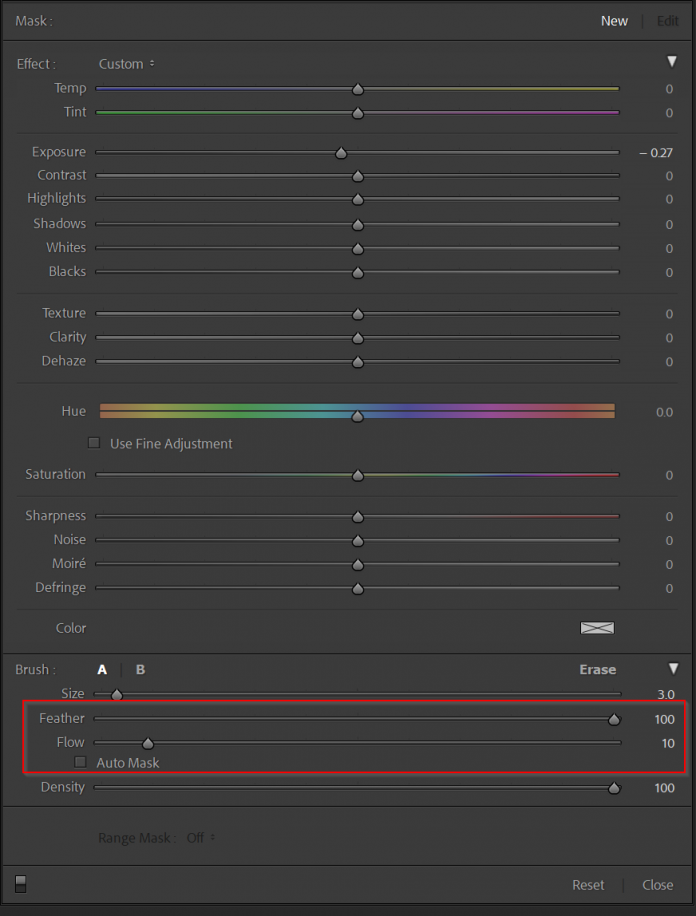
Make sure the brush has a high Feather, and a low Flow:

Then increase the Exposure slider.
And paint over the key areas of your photo.
For instance, if you’re editing a portrait image, you can paint over the subject’s face.
If you’re editing a landscape image, you can paint over the foreground interest.
If you’re editing a flower image, you can paint over the flower center.
A little bit of selective brightening can go a long way when it comes to making your photo stand out.
(And you can take this tip even further by darkening down less interesting areas of the photo, so that they fade into the background!)
The Final Step: Exporting Your Images
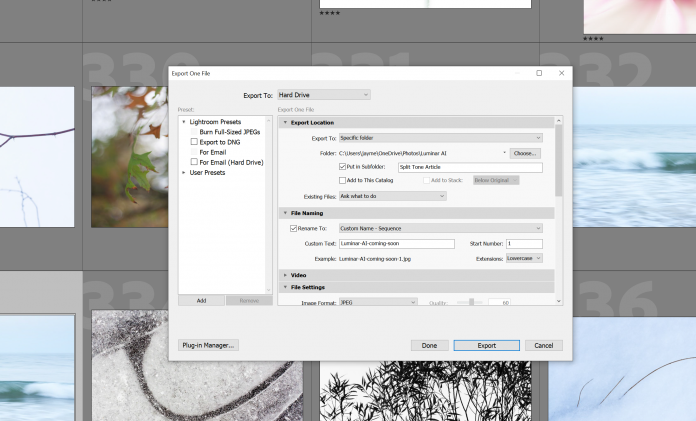
Once you’ve finished editing your photos in Lightroom, it’s time to export them for viewing.
So head to the Library module:
And tap Export:
A dialog box will come up, allowing you to select your export location, your file name(s), your image format, and more.
If you’re exporting your photo to post it on social media or on your website, I’d recommend exporting a JPEG of a reasonable size (1500 pixels on the long end or fewer). I’d also recommend sharpening the image for the screen:
Then hit Export again, and you’ll be all set!
How to Edit Photos in Lightroom: The Next Steps
Editing your photos in Lightroom doesn’t have to be hard.
And if you remember the step-by-step editing plan that I’ve given you, you’ll be creating stunning edits in no time.
So think about the key adjustments. Think about useful local adjustments.
And don’t be afraid to experiment with different edits!
Edit Photos in Lightroom FAQs
Should I edit in Lightroom CC or Lightroom Classic?
Generally, I recommend that aspiring photographers edit in Lightroom Classic. First, Lightroom Classic is more similar to other editing programs, which means that you’ll feel more comfortable if you ever decide to switch (or if you end up using Photoshop all the time and start in Adobe Camera RAW). Second, Lightroom Classic is a bit more streamlined–once you’ve opened the Develop module, you can go down the line of panels and make your edits one at a time. I also like Lightroom Classic because of its overall power; while most of the edits you can make in Lightroom Classic are also present in Lightroom CC, you have more flexibility in Lightroom Classic. That said, Lightroom CC is good if you prefer a mobile-focused editing workflow (thanks to the Lightroom CC mobile app), and Lightroom CC is very beginner friendly, so either option can work just fine!
Is Lightroom easy for a beginner?
Yes, Lightroom is carefully designed for beginners (though it’s also fully equipped with pro-level editing tools). As a beginner, you’ll do just fine in either Lightroom CC or Lightroom Classic. In fact, my guess is that you’ll be off the ground and editing in no time at all; Lightroom really is that easy to get started in.
How long does it take to get good at editing in Lightroom?
Not long at all! If you first familiarize yourself with the Lightroom interface, and then read some articles about a basic Lightroom workflow, then you should be able to produce great edits, fast. To become a Lightroom editing expert will take quite a bit longer, and to really become familiar with the Lightroom sliders and effects will take a long time as well, but getting good results is possible from almost the very beginning.
Do I need Photoshop, or can I just edit in Lightroom?
You can just edit in Lightroom. Photoshop is useful for those looking to get very granular with their edits, but it’s not necessary, and there are some professionals who only ever use Lightroom. One key area where Photoshop does perform better than Lightroom, however, is when it comes to removing unwanted objects, so if you frequently find yourself needing to clean up your subjects, then you may want to learn Photoshop as well.