
- Lightroom Classic’s Print Module handles the whole home-printing workflow — paper setup, layout, sharpening, color management, and output — from a single screen.
- For lab prints, export a 300 PPI JPEG in sRGB with standard output sharpening matched to your paper type — print labs prefer exported files over direct printing.
- Lightroom Classic has the full Print Module; cloud-based Lightroom (desktop and mobile) only offers basic printing — pick Classic for any serious print work.
- Calibrate the monitor before printing, and use Lightroom’s soft-proofing (press S in the Develop module) to preview how a print will look on the target paper.
- For 32-bit HDR files, export to 16-bit ProPhoto RGB TIFF for archival master files; convert to 8-bit sRGB JPEG before sending to most consumer and lab printers.
When you buy through links on our site, we may earn a commission at no cost to you. We evaluate products independently. Commissions do not affect our evaluations.
Introduction
Printing in Lightroom looks intimidating on the first click into the Print Module — the side panels are crowded, the jargon is dense, and it’s easy to feel like something important is about to get missed.
Here’s the reassuring part: once the workflow clicks, printing in Lightroom is genuinely fast. Adobe has tuned the Print Module specifically for photographers, and every setting you need lives on a single screen.
This guide walks through the full Lightroom Classic printing process step by step, from selecting paper to output sharpening to sizing. It also covers the newer questions photographers run into in 2026: Classic vs cloud Lightroom, print-specific export settings for labs, recommended presets for Mpix and AdoramaPix, and how to handle 32-bit HDR prints.
By the end, you’ll know exactly which workflow to use for every kind of print you make.
Lightroom Classic vs. Cloud Lightroom: Which Print Module Are You Using?
Before touching anything, confirm which version of Lightroom is actually open. Adobe ships two different apps under the Lightroom name, and only one of them has a real Print Module.
- Lightroom Classic — the desktop app with the module row across the top (Library, Develop, Map, Book, Slideshow, Print, Web). Full Print Module: Page Setup, Layout Style, Image Settings, Layout, Guides, Page, and Print Job panels. This is the version this guide is built around.
- Lightroom (cloud-based) — the simpler desktop and mobile app that syncs to Adobe’s cloud. No Print Module. Printing is limited to File > Print, which opens a stripped-down dialog with basic size, paper type, and sharpening options.
- Lightroom Mobile — similar to cloud-based Lightroom. Prints via the system print dialog only; no color management, no layout controls.
For any serious print work — home fine-art prints, soft-proofed prints to specific papers, or file export for a print lab — use Lightroom Classic. The cloud app is fine for quick casual prints to a home printer, but it cannot replace the Classic Print Module’s control over layout, sharpening, and profiles.
If the Lightroom version in use only shows a File > Print menu item and no Print Module row at the top of the window, that’s the cloud version. Install Lightroom Classic (included with the same Creative Cloud Photography plan) to follow the rest of this guide.
Print From Lightroom vs. Export to a Lab: How to Decide
Not every print should come off a home inkjet. For small runs, proofs, and portfolios where color control matters most, direct printing from Lightroom is ideal. For larger sizes, archival prints, or anything going on a wall, a professional lab almost always delivers better results at a lower per-print cost.
Use this decision table to pick the right workflow:
| Scenario | Best workflow | Why |
|---|---|---|
| Small prints (4×6 to 8×10) for proofs or gifts | Print directly from Lightroom Classic | Fastest feedback loop; fine-tune and reprint the same file in minutes. |
| Fine-art prints on specialty paper (matte, baryta, cotton rag) | Print directly from Lightroom Classic with paper ICC profile | Full control over soft proofing, rendering intent, and paper-specific sharpening. |
| Large wall prints (16×20 and up) | Export JPEG → send to pro lab | Labs own wide-format gear that most home studios do not. |
| Metal, acrylic, or canvas prints | Export JPEG → send to pro lab | Substrate-specific workflows are lab-only. |
| Client galleries, wedding albums | Export JPEG → send to pro lab | Consistent output across hundreds of images; no home-printer variability. |
| Bulk 4×6 prints for event giveaways | Export JPEG → send to consumer lab (Mpix, Shutterfly) | Cheapest per-print cost at volume. |
| 32-bit HDR merges | Export 16-bit ProPhoto TIFF → convert to 8-bit JPEG → send to lab | Most lab systems expect 8-bit sRGB; HDR range has to be tone-mapped first. |
Rule of thumb: if the print is going on a wall, send it to a lab. If it’s going on a refrigerator, print it at home.
Should You Use Lightroom to Print Your Photos?
Lightroom is not the single most powerful printing application on the market — dedicated tools like Qimage Ultimate and ImagePrint go deeper on tiling, upscaling, and specialty paper profiles. But for the vast majority of photographers, Lightroom Classic’s Print Module covers everything that actually matters.
The Print Module wins on three counts:
- Integrated workflow. The edited file, catalog metadata, develop settings, and output controls all live in one place. No round-tripping through Photoshop or exporting to a separate printing application.
- Soft proofing. Lightroom Classic has one of the cleanest soft-proofing interfaces in the industry — press S in the Develop module, load a paper ICC profile, and see a faithful preview of the final print.
- Print templates. Once a layout (paper size, margins, sharpening, color profile) is dialed in, saving it as a Print template means every future print to the same paper is a two-click job.
For the rare case where Lightroom falls short — extremely large prints requiring intelligent upscaling, or complex multi-image layouts — exporting to a dedicated printing application or sending the file to a pro lab is the right move.
Printing in Lightroom: How to Get Started
Three things are required before entering the Print Module.
A photo printer connected to the computer. Lightroom can also “print to file” (export a JPEG suitable for a printing lab), but for direct printing a connected photo printer is required. The printer’s driver must already be installed at the operating-system level — Lightroom simply talks to whatever printers the OS exposes.
Photo paper compatible with the printer. Inkjet photo papers are not interchangeable. A dye-based printer will not produce decent results on pigment-optimized baryta paper, and vice versa. Check the paper manufacturer’s printer compatibility list before ordering.
A fully edited image. Print catches every flaw that a monitor hides — dust spots, banding in skies, clone-stamp errors, and aggressive noise reduction. Before printing large, zoom to 100% and inspect the entire frame. Anything that looks questionable on screen will look worse on paper.
Two more things make a real difference to final print quality:
- Monitor calibration. An uncalibrated monitor will never match printed output. A hardware calibrator (SpyderX Pro, X-Rite i1Display Pro) solves this in about five minutes. Without one, prepare for trial-and-error test prints.
- Soft proofing. In the Develop module, press S, load the ICC profile for the target paper, and Lightroom will simulate how the print will look. Adjust exposure and contrast against the soft proof, not the native monitor view.
Finally, plan to do output sharpening — covered in Step 5 below. Prints always lose a touch of perceived sharpness in the ink-to-paper transition, and output sharpening counteracts that loss.
How to Print From Lightroom: Your Step-By-Step Plan
With an edited image selected in the Library or Develop module, the workflow looks like this:
Step 1: Open the Print Module and Select Printer and Paper
Click the Print tab in the top-right module row:
The Print Module opens, showing a preview of the selected image on a virtual sheet of paper in the center panel. If the preview is empty, pick the target image from the filmstrip across the bottom of the screen.
Click Page Setup at the bottom-left of the window:
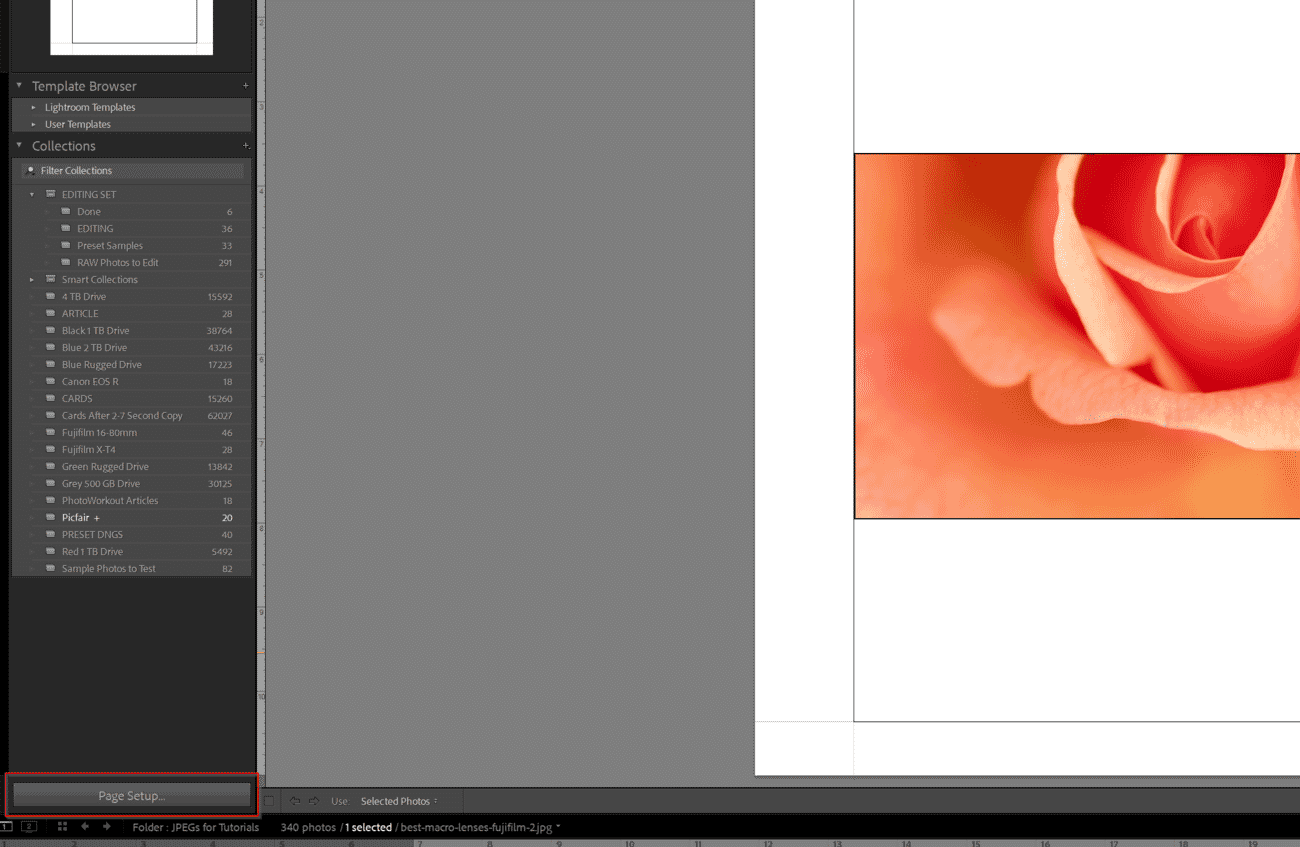
From the Format For or Printer dropdown, pick the target printer:
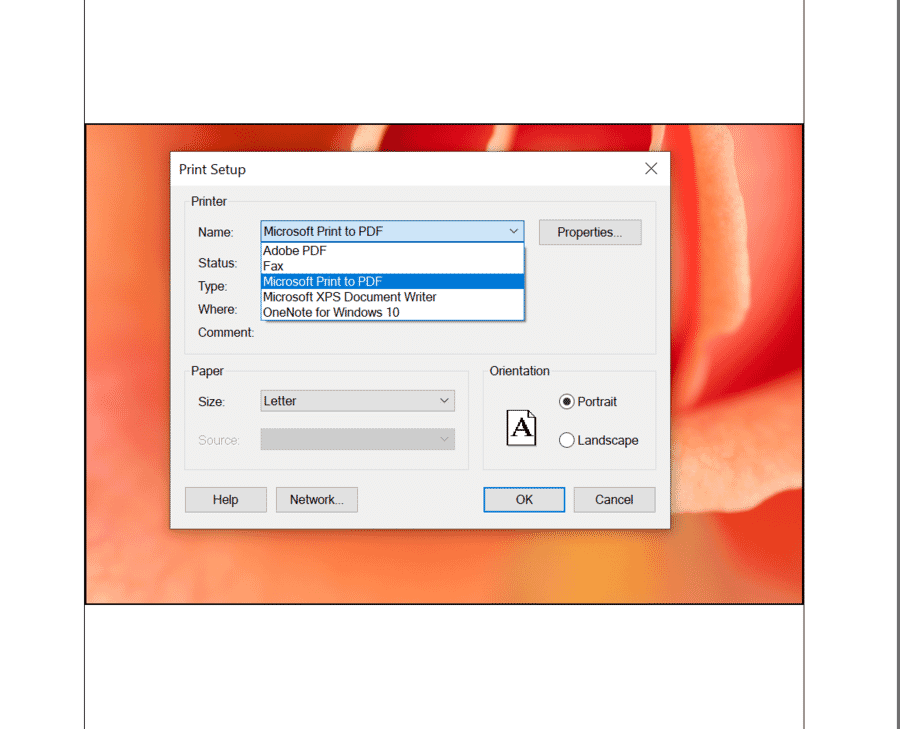
Then pick the paper size:
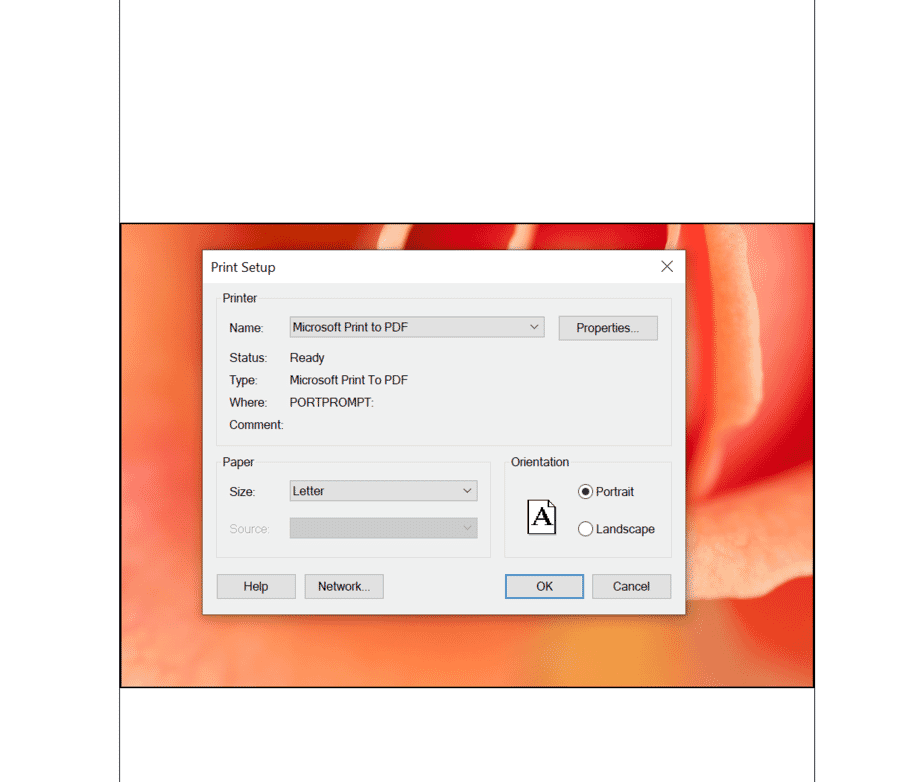
Paper size matters — it defines the canvas every later setting is measured against. Double-check that it matches the physical paper loaded in the printer. Click OK.
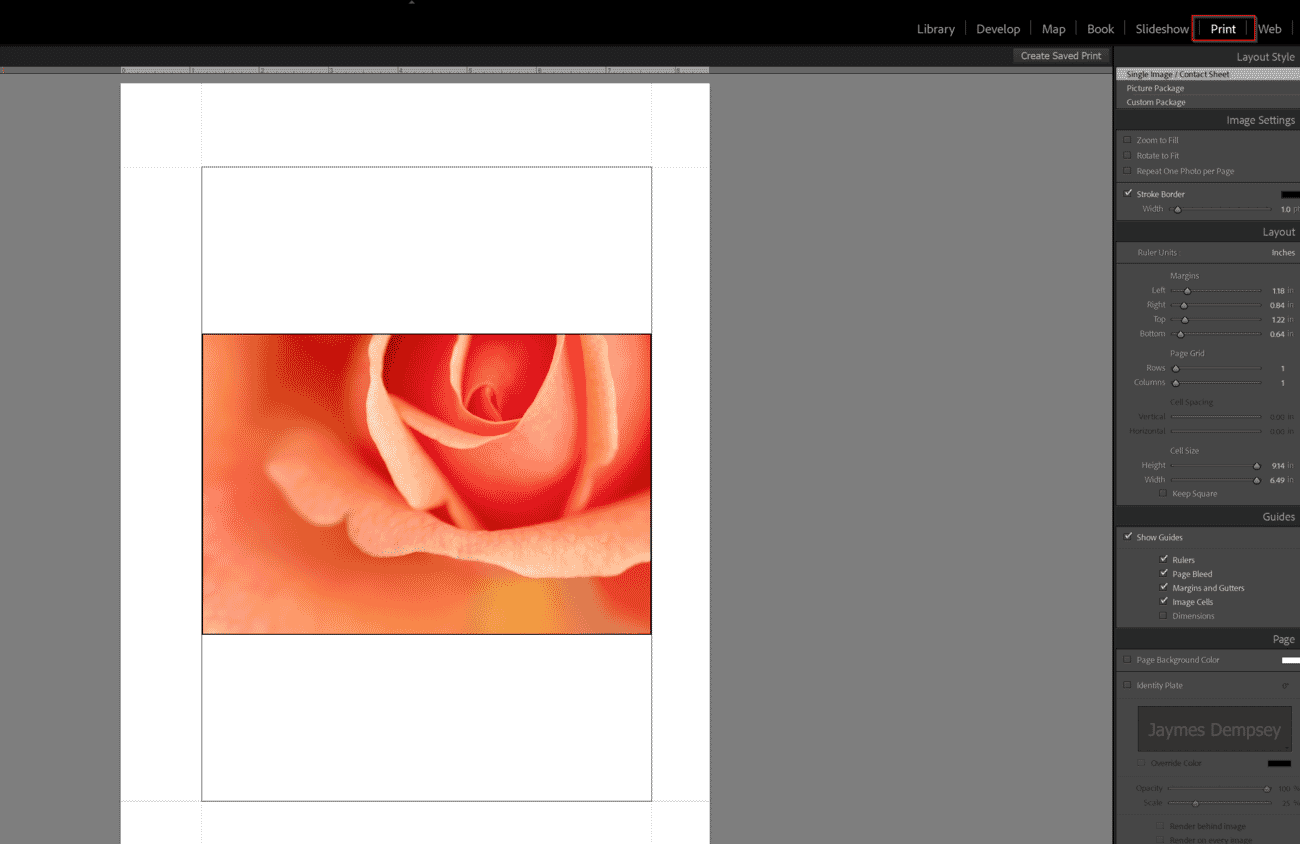
Step 2: Select Layout Style and Image Settings
On the right-hand panel, expand Layout Style and choose one of the three options:
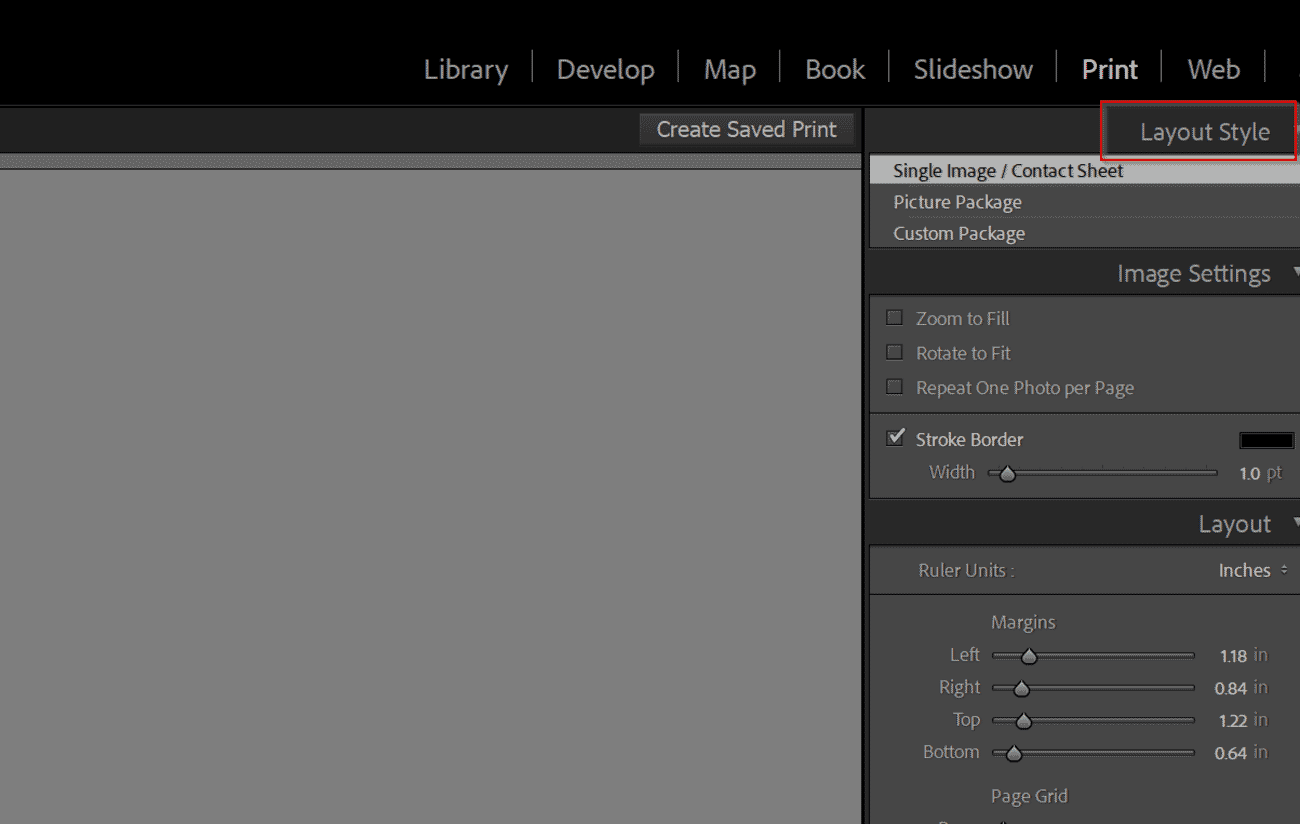
- Single Image / Contact Sheet — the default. Use this for any standard print of one image, or for a contact sheet of multiple thumbnails on a single page.
- Picture Package — multiple copies of the same image at different sizes on one page, for wallet prints, school-photo layouts, and similar.
- Custom Package — freeform layout with any combination of images, cells, and sizes.
Most photographers will stay in Single Image / Contact Sheet. The center preview now shows the image sitting inside a gray Image Cell on a white virtual page.
The rest of the Print Module is really about getting the relationship right between the image, the image cell, and the paper. If the goal is a full-bleed print with no border, the cell fills the paper and the image fills the cell. For a matted print, margins push the cell inward to leave room for the mat.
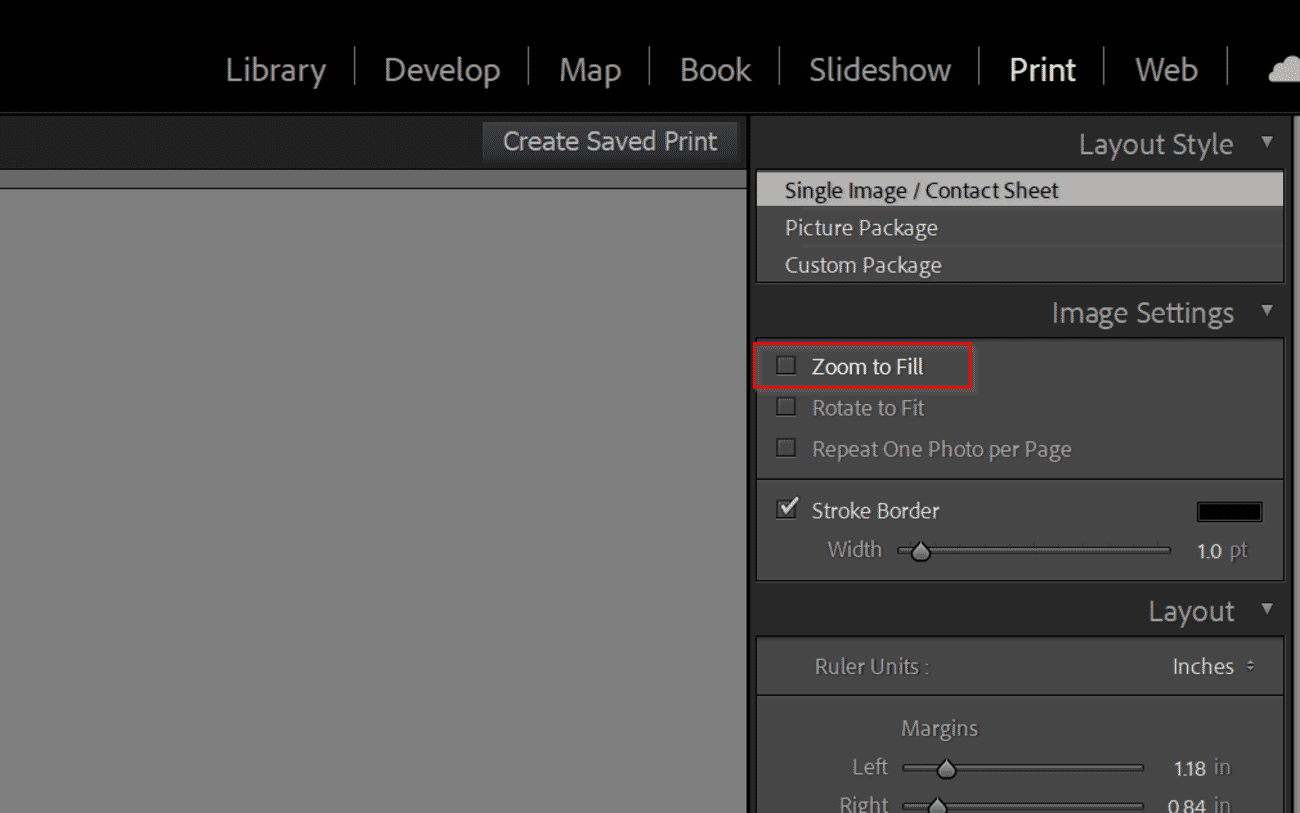
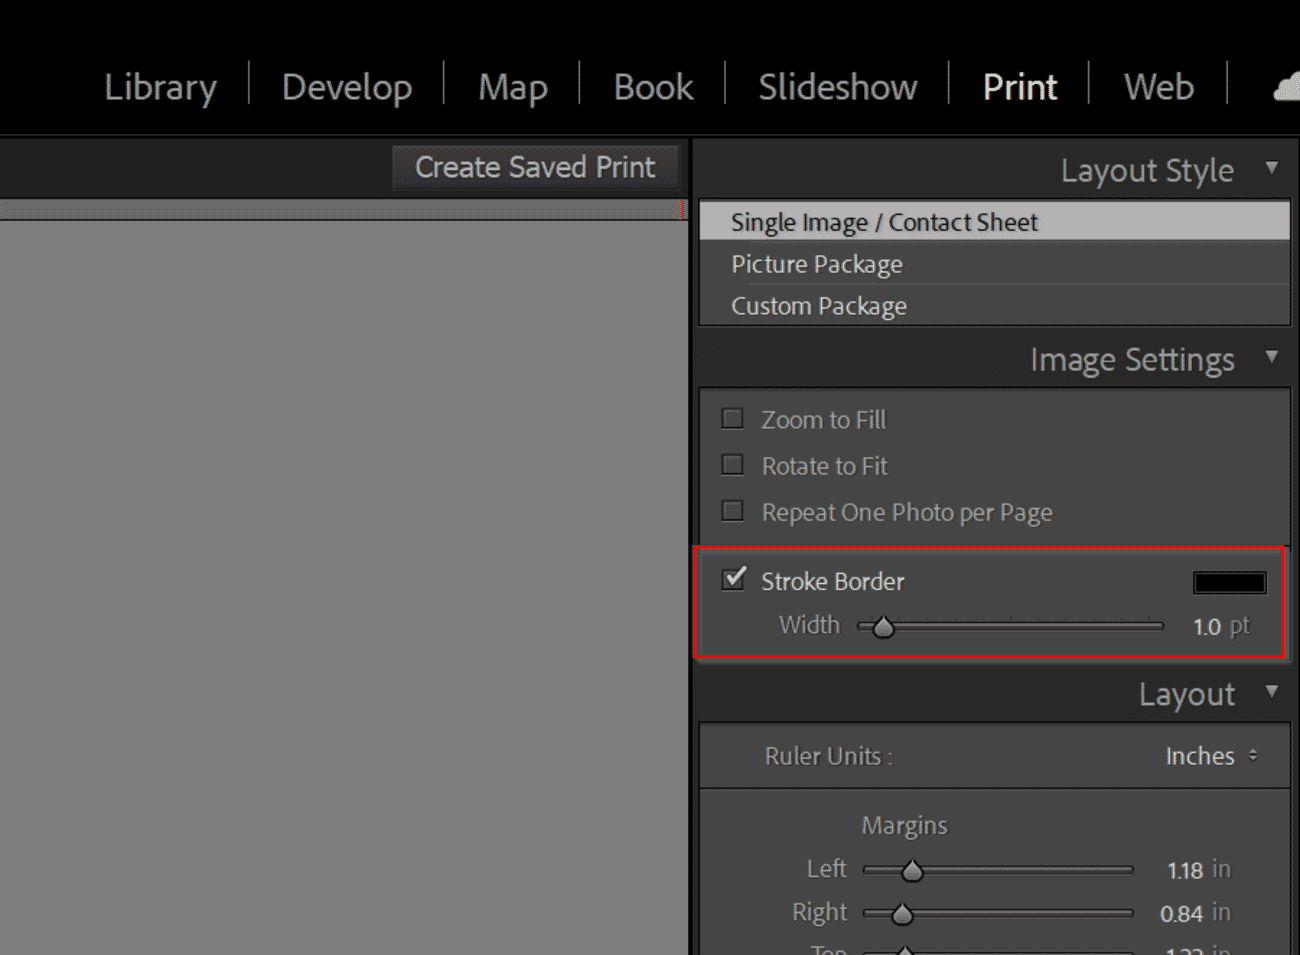
Next, open the Image Settings panel:
- Zoom to Fill — forces the image to fill the entire cell, cropping whatever doesn’t fit. Only check this if cropping is acceptable; otherwise the print will clip the edges.
- Rotate to Fit — rotates a landscape image on portrait paper (or vice versa) to maximize size without cropping. Safe to leave on.
- Stroke Border — adds a thin colored border around the image itself. Useful for white gallery borders on matte prints.
If the image aspect ratio does not match the paper — for example a 3:2 photo on 8×10 inch paper — the best approach is to go back to the Develop module and crop the image to the target print aspect ratio first. Stretching or auto-cropping in the Print Module almost always looks worse than a deliberate crop.
Step 3: Set the Photo Size
Open the Layout panel. This is where margins and cell size come together to determine exactly how much of the paper the image fills.
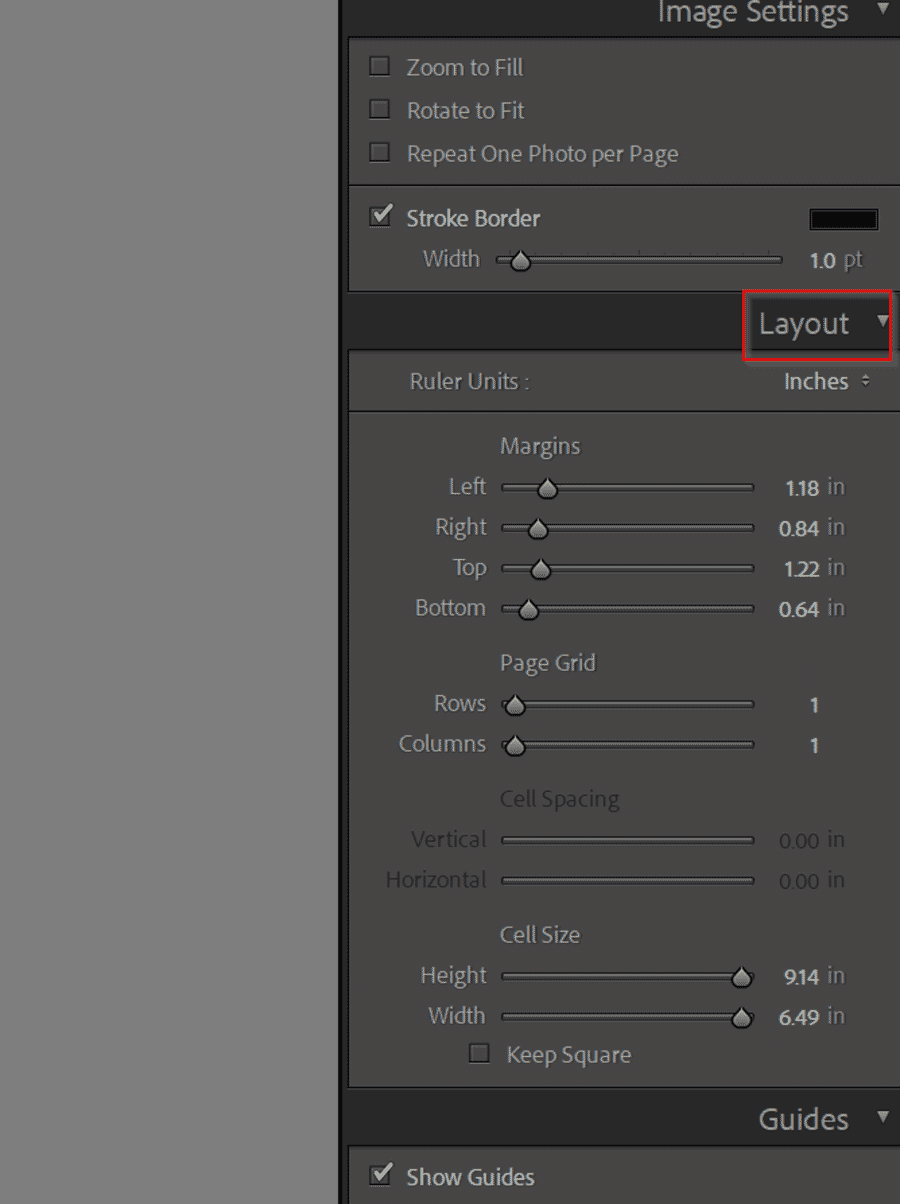
Set Ruler Units to whatever is easiest to work with — inches or centimeters are the usual picks:
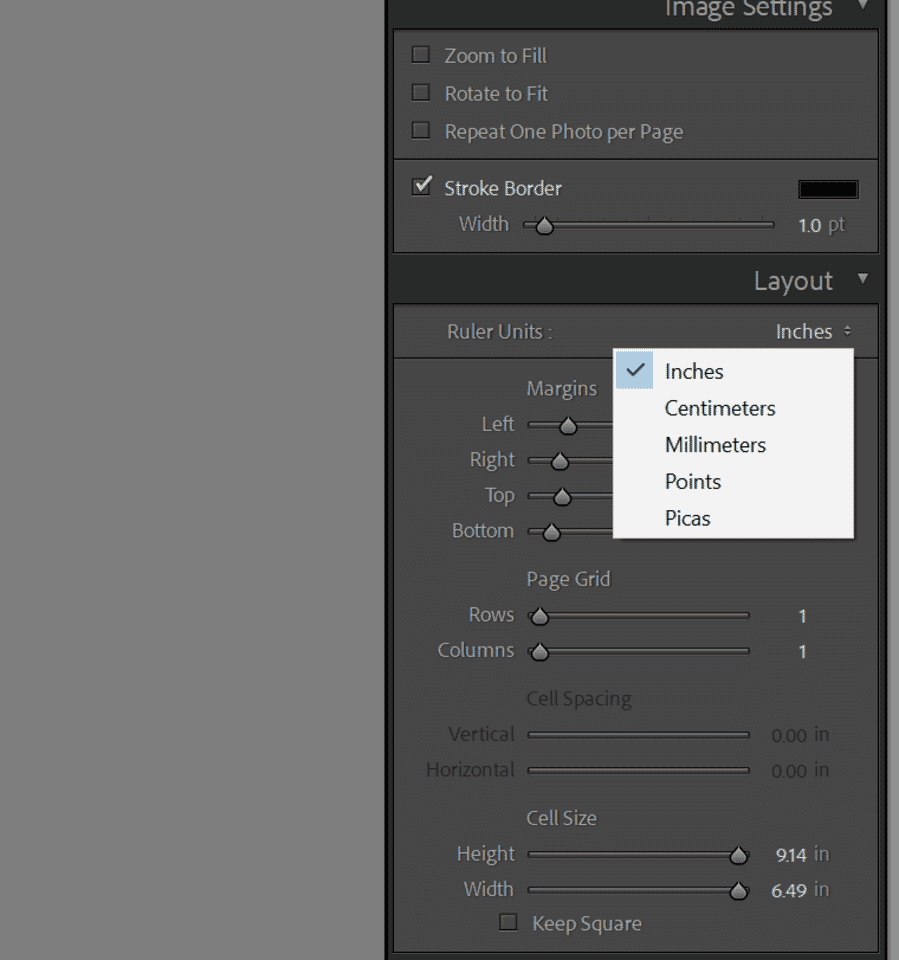
Then work the two controls together:
- Margins — set these first. Zero margins for a full-bleed print; a small uniform margin (0.25–0.5 inch) for a matted print; larger uneven margins for gallery-style prints with a wider bottom margin for a signature.
- Cell Size — drag the Height and Width sliders to their maximum to fill whatever space the margins leave. The image will auto-scale to the cell.
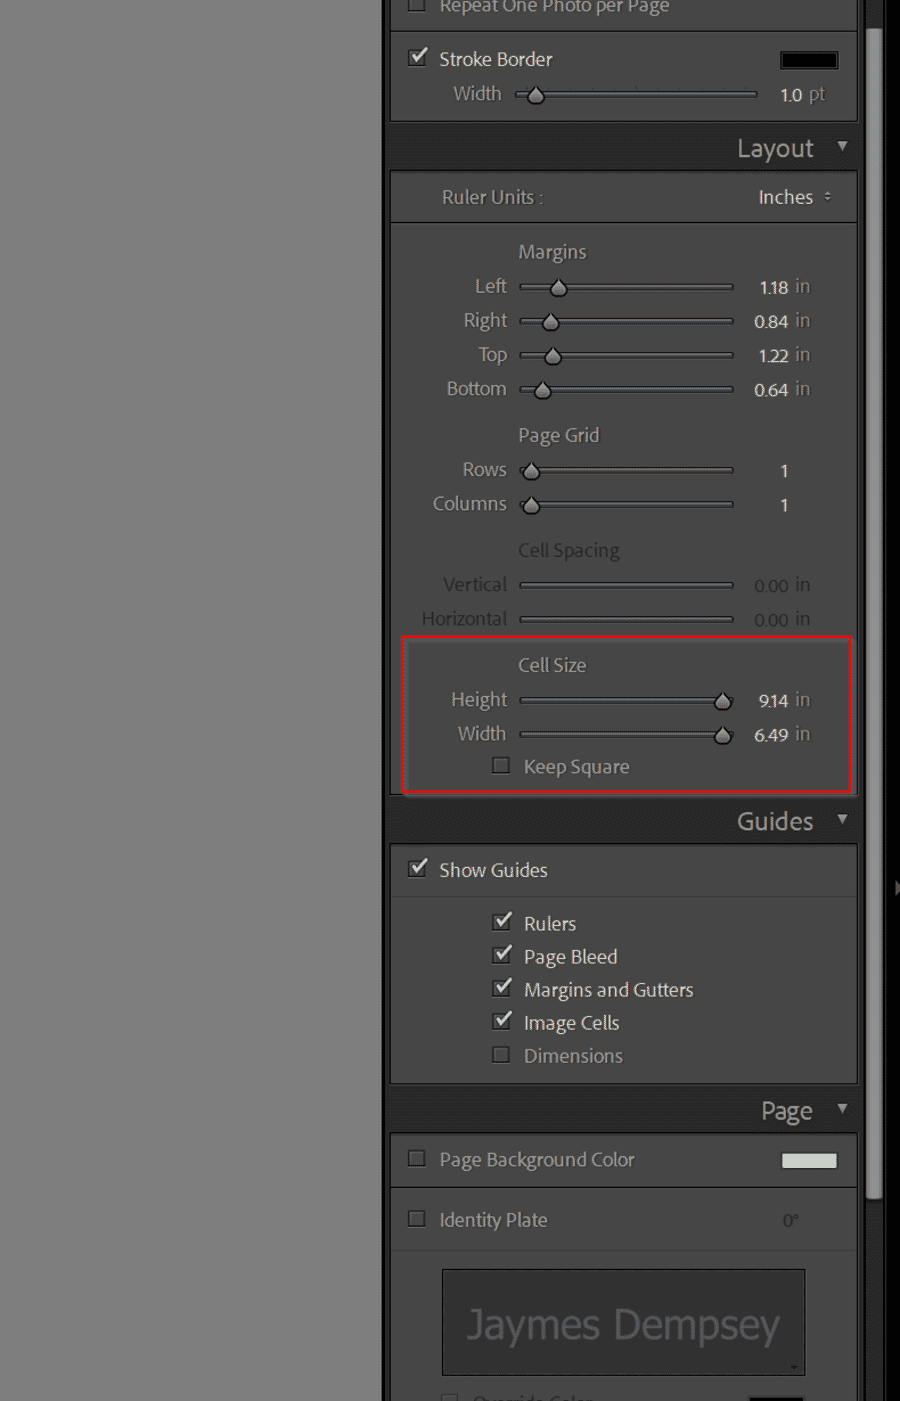
If white space shows up on one or two sides after pushing the cell to maximum, the image aspect ratio doesn’t match the paper. Head back to the Develop module, crop to the right ratio, and return to the Print Module — the crop carries through automatically.
Step 4: Page Panel Options
Open the Page panel. This is where optional extras like watermarks, page background color, and photo info annotations live:
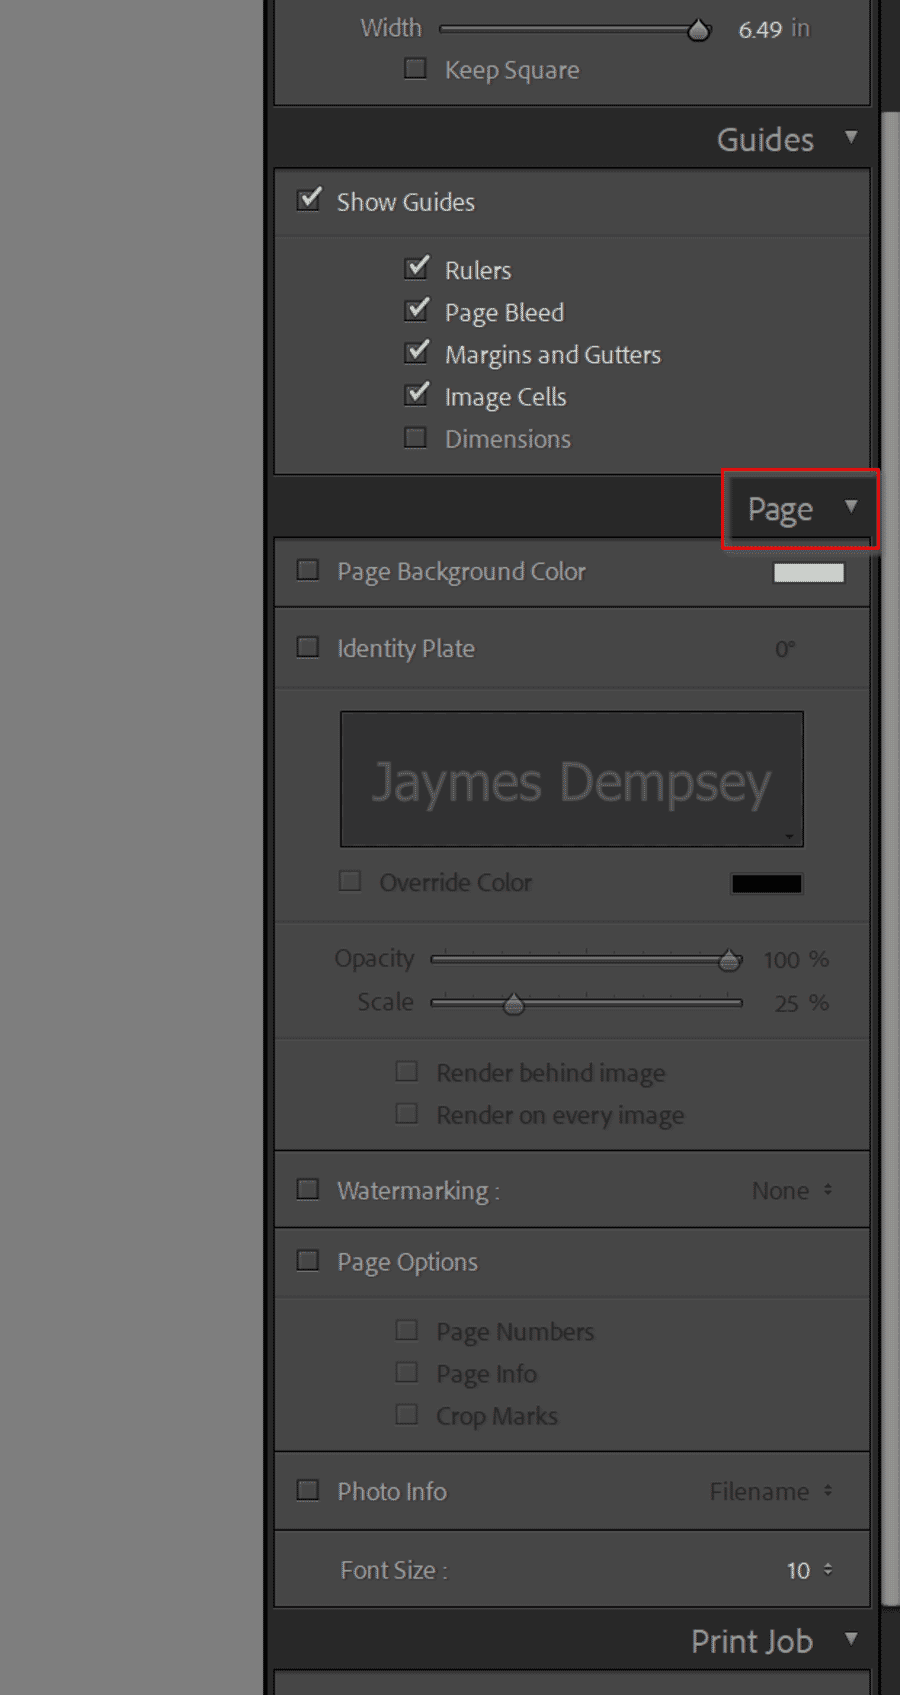
For most prints, this panel can be left alone. The main use case is adding a watermark or signature line to prints that are going to a client or being shown publicly. Check Watermarking and select a saved watermark preset to apply it.
Step 5: Set Output Sharpening and Resolution
The Print Job panel is where output sharpening, print resolution, and color management all live. Getting this panel right has more impact on print quality than any other single step.
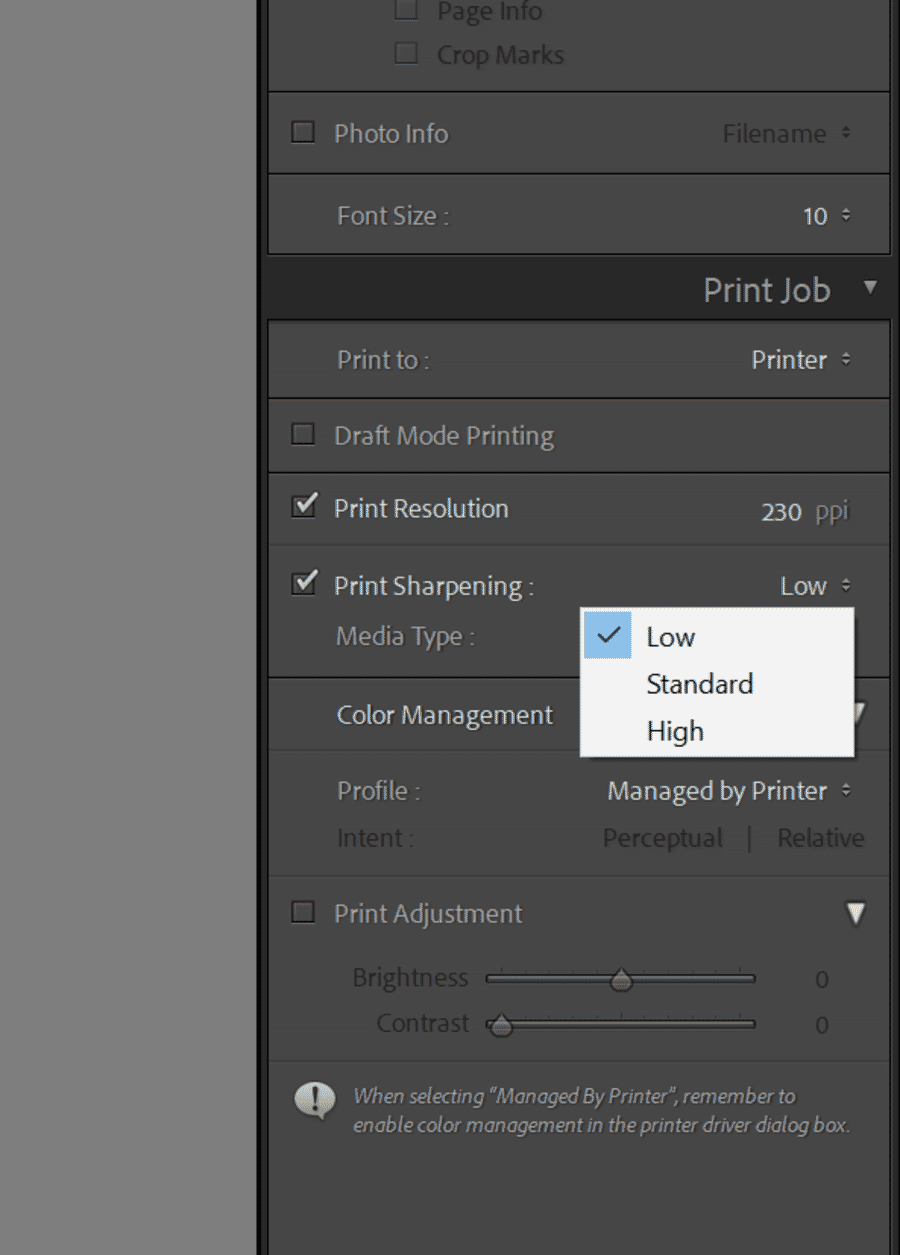
Check Print Sharpening and set the amount to Standard as a starting point. Lightroom’s output sharpening is intelligent — it applies a different sharpening curve based on whether the image is destined for matte or glossy paper, and scales the effect to the print resolution.
Select the Media Type that matches the paper:
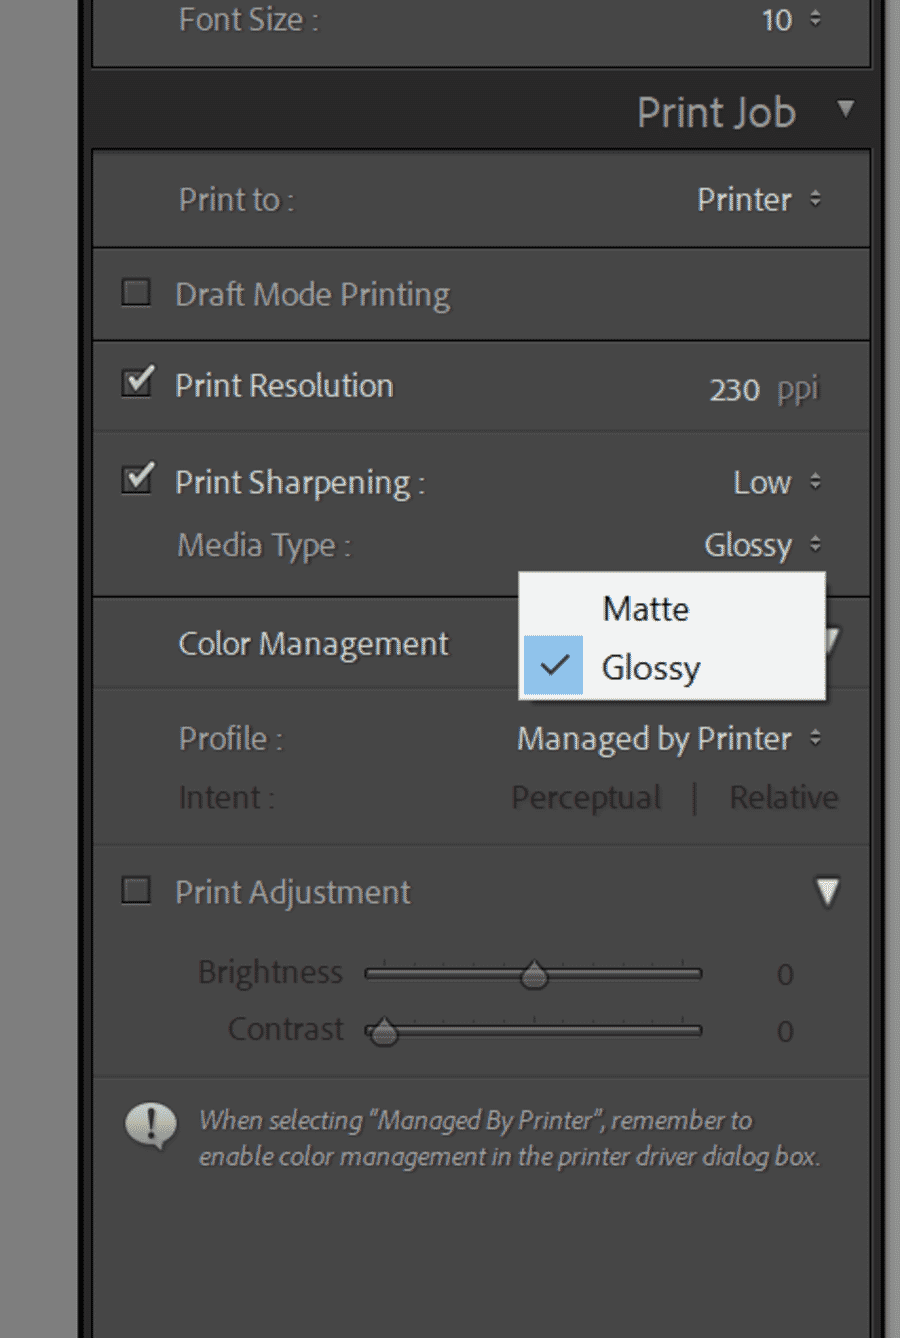
- Matte — for matte, fine-art, and textured papers. Applies a slightly stronger sharpening curve to counteract matte paper’s tendency to absorb and soften ink.
- Glossy — for glossy, semi-gloss, lustre, pearl, and baryta papers. Lighter sharpening because these surfaces naturally preserve more micro-contrast.
For the sharpening amount:
- Low — for already-sharp images, soft-focus portraits, or when fine-art paper shouldn’t look clinical.
- Standard — the reliable default for 90% of prints.
- High — for landscape and architectural work where crisp edges are the point, or for smaller prints where the sharpening gets eaten by the media.
Set Print Resolution to 300 PPI. This is the native resolution most photo printers expect to receive, and Lightroom will resample the image to 300 PPI on the fly. Higher numbers (up to 720 PPI on high-end Epson printers) can eke out slightly finer detail on premium glossy papers, but 300 PPI is the safe universal default.
Print-Specific Export Settings for Print Labs
Direct printing from the Print Module handles everything in one step. But when sending files to a print lab — Mpix, AdoramaPix, Bay Photo, WHCC, Nations Photo Lab — Lightroom becomes an export tool, and the export dialog needs different settings than web exports.
Lab-ready export recipe in Lightroom Classic (File > Export):
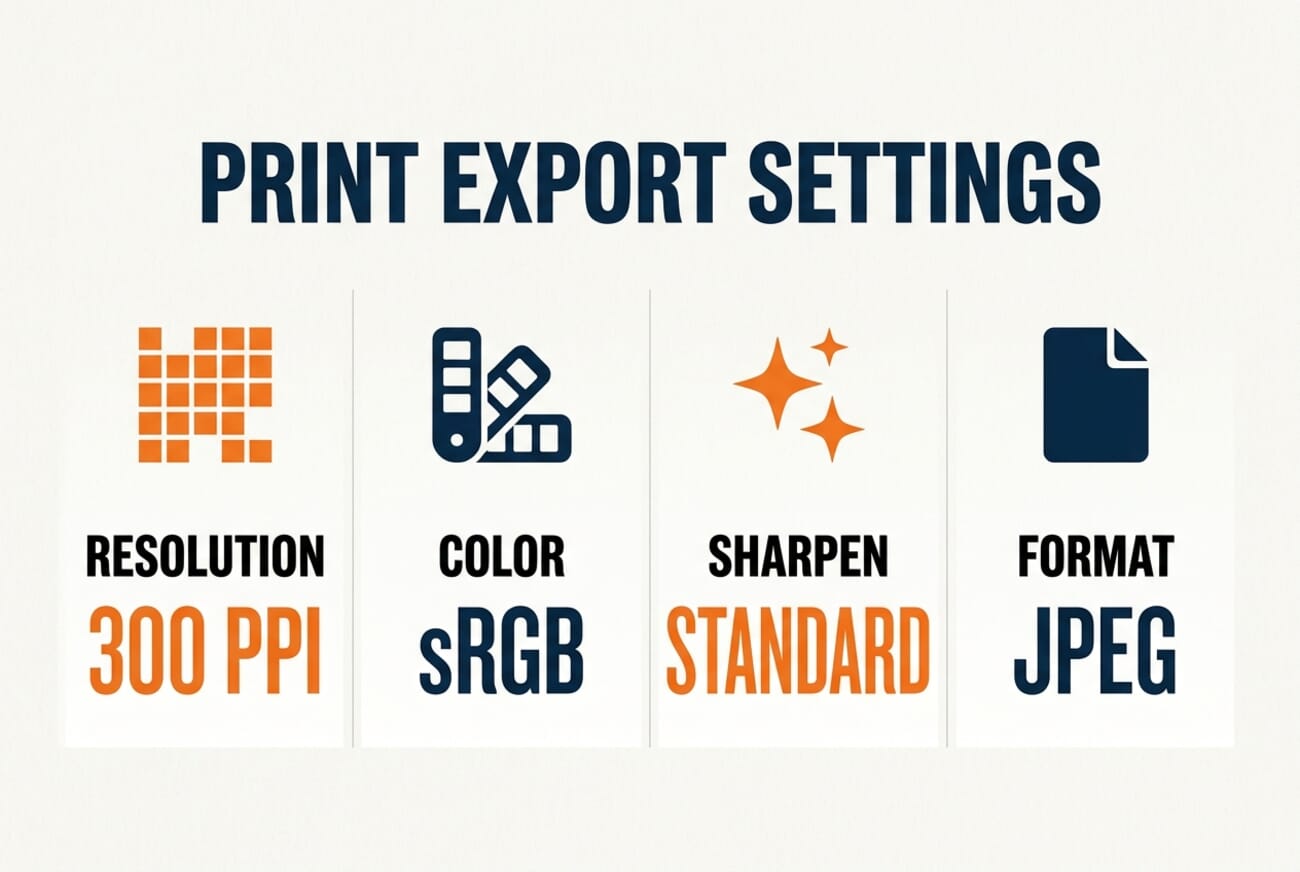
- File Settings > Image Format: JPEG.
- File Settings > Quality: 100. Print labs re-compress files anyway; start with maximum quality to avoid stacking JPEG artifacts.
- File Settings > Color Space: sRGB. Most consumer print labs expect sRGB and will silently convert anything else. Use AdobeRGB or ProPhoto only if the specific lab explicitly supports wide-gamut files (rare outside of pro-level fine-art labs).
- Image Sizing > Resize to Fit: set to the physical print dimensions at 300 pixels per inch. For an 8×10 print, that’s 2400×3000 pixels. For 16×20, that’s 4800×6000 pixels.
- Image Sizing > Don’t Enlarge: leave unchecked if the master file is large enough; leave checked if the file is small and upscaling should be handled by the lab instead.
- Output Sharpening > Sharpen For: choose Matte Paper or Glossy Paper based on the paper being ordered. Standard amount is the correct starting point.
- Metadata > Include: All metadata is fine for personal prints; strip to Copyright Only for client-facing files.
Save this as an Export preset named after the lab (for example, Mpix 8×10 Glossy) — future exports to the same lab become a single click.
Recommended Export Presets for Popular Print Labs
Every major consumer print lab publishes its own recommended file specs, and they vary more than most photographers expect. Start with these baseline presets, then adjust if the lab’s ordering interface flags anything:
| Lab | Color space | Resolution | Format | Notes |
|---|---|---|---|---|
| Mpix | sRGB | 300 PPI | JPEG @ 100 | Upload via website or desktop ROES app. Accepts files up to 20×30 at 300 PPI. |
| AdoramaPix / Adorama | sRGB | 300 PPI | JPEG @ 100 | Offers hand-coated fine-art papers — use Matte Paper output sharpening for those. |
| Bay Photo | sRGB (or AdobeRGB for pro accounts) | 300 PPI | JPEG @ 100 | Pro accounts support wider-gamut uploads; consumer accounts stay in sRGB. |
| WHCC (White House Custom Colour) | sRGB | 300 PPI | JPEG @ 100 | Pro lab. Accepts AdobeRGB via explicit ICC profile; stick to sRGB for one-off orders. |
| Nations Photo Lab | sRGB | 300 PPI | JPEG @ 100 | Free ICC profiles available per paper — soft proof in Lightroom Classic before export for best matches. |
| Shutterfly / Snapfish (bulk/consumer) | sRGB | 300 PPI | JPEG @ 90-100 | Heavy server-side processing. Don’t bother with wide-gamut exports; the pipeline discards them. |
Two things to verify on any first order with a new lab:
- Does the lab apply auto-correction by default? Most do, and auto-correction will override careful color work. Look for a checkbox in the ordering interface labeled something like No Color Correction, No Auto Correct, or Use my file as-is, and turn it on.
- Does the lab publish ICC profiles for soft proofing? Pro labs (WHCC, Bay Photo, Nations) do. Download the profile for the specific paper being ordered, load it in Lightroom Classic’s soft-proofing view (press S in Develop), and adjust the file against the preview.
Step 6: Color Management and Print Adjustments
Still in the Print Job panel, scroll to the Color Management section and pick a Profile:
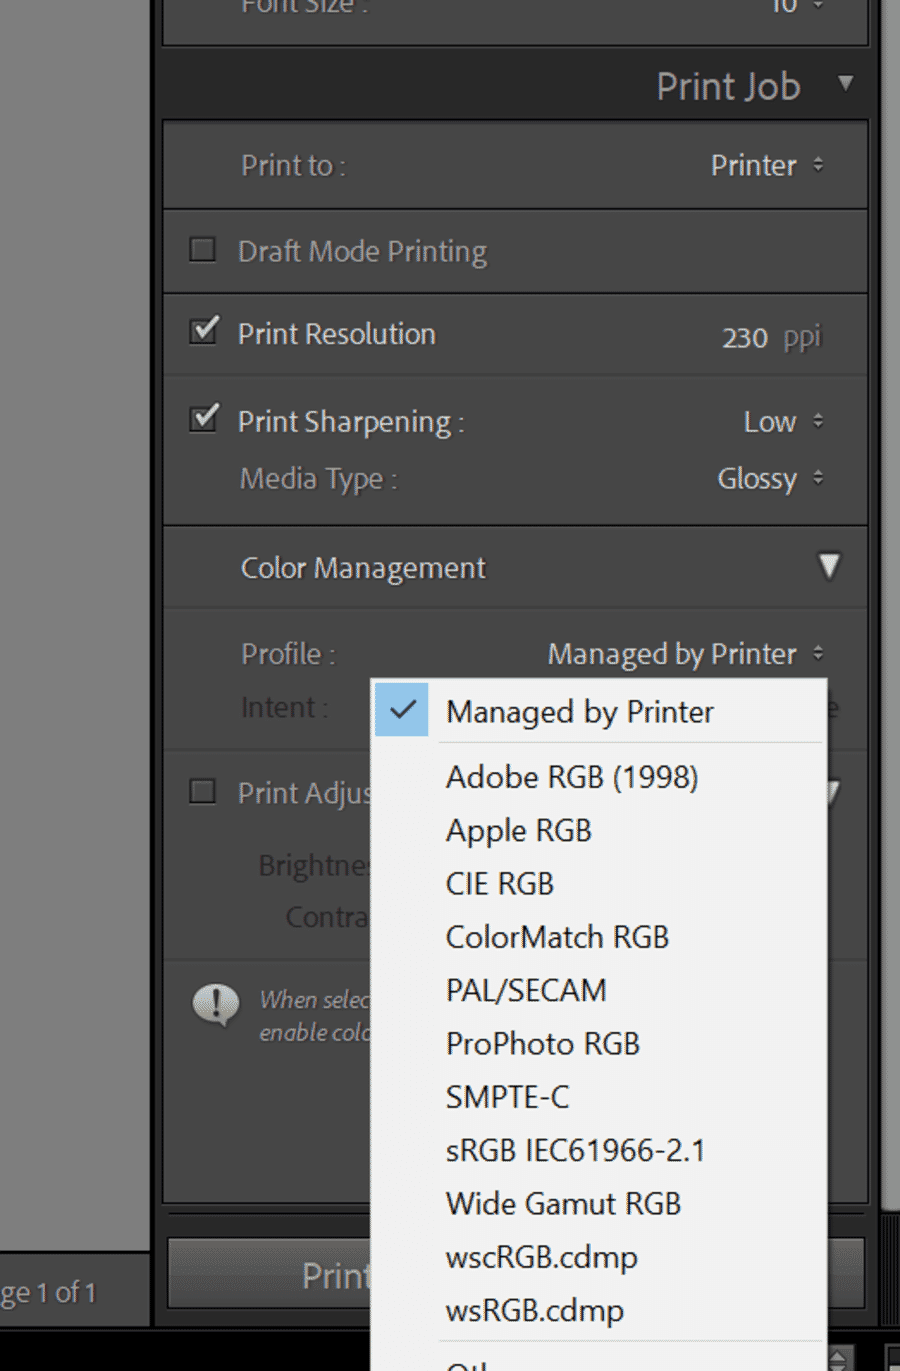
- Managed by Printer — Lightroom hands off color management to the printer driver. The simplest starting point, and often good enough for consumer inkjets and standard OEM paper.
- Other (custom ICC profile) — Lightroom performs the color conversion itself using a specific paper profile. Required for accurate color on third-party fine-art papers (Hahnemühle, Canson, Red River, Moab). Download the paper manufacturer’s ICC profile for the specific printer, install it at the OS level, then select it from the Other… dialog.
When using a custom ICC profile, set Rendering Intent to Perceptual for photographs. Perceptual compresses out-of-gamut colors smoothly across the entire image; Relative Colorimetric is slightly more accurate for in-gamut colors but clips saturated highlights. Color management is its own rabbit hole — perceptual rendering is the safest default.
Finally, the Print Adjustment box:
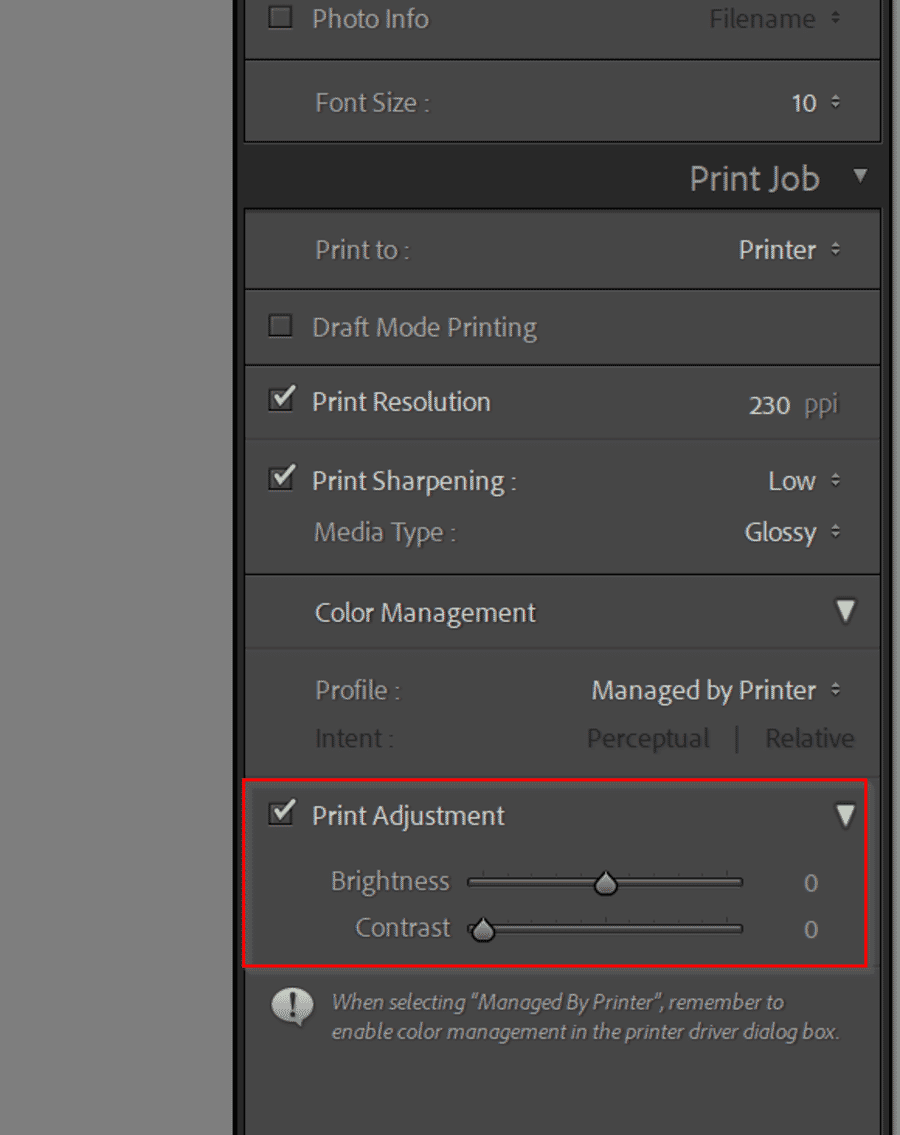
Print Adjustment applies an extra brightness and contrast bump at print time only — the file on disk is untouched. Most home prints come out slightly darker than the monitor preview because paper reflects less light than a backlit display. A Brightness bump of +10 to +15 on the first print and iterating from there is a reliable starting point.
32-bit HDR Print Workflow in Lightroom Classic
HDR merges in Lightroom Classic produce 32-bit floating-point DNG files that hold an enormous dynamic range — far more than any printer can physically reproduce. Getting a 32-bit HDR file onto paper means tone-mapping that range down to something a printer can handle, without crushing highlights or flattening contrast.
The Lightroom Classic HDR print workflow:
- Edit the 32-bit HDR DNG in the Develop module. All of Lightroom’s normal sliders work on 32-bit files. The key tools are Highlights (pull recovered highlight detail back from extreme values), Shadows (lift shadows without introducing noise), and Whites/Blacks (set the final print endpoints).
- Soft proof against the target paper profile. Press S in Develop, load the paper ICC profile, and turn on Show Destination Gamut Warning. Any color that exceeds the paper’s gamut gets flagged — usually deep reds, saturated blues, and extreme shadows. Desaturate those areas locally before exporting.
- Export as 16-bit TIFF for the master file. In File > Export, choose TIFF / 16 bits / ProPhoto RGB / no compression or ZIP. This is the archival master — keep it as the source of truth for any future reprints.
- Convert to 8-bit JPEG for the print itself. Re-export (or open the 16-bit TIFF and re-export from there) as JPEG / sRGB / 300 PPI at the physical print dimensions. This version is what gets sent to a consumer lab or loaded into the Print Module for a direct print.
- Skip the Print Module for wide-format HDR prints. Home photo printers rarely do justice to HDR tone-mapping above 11×14. Send anything larger to a pro lab that has ink-and-paper combinations specifically tuned for high dynamic range (Canvas on Demand, WHCC’s pro fine-art, or Bay Photo’s MetalPrints).
A common mistake with HDR files: exporting directly to 8-bit sRGB in one step. This works, but tone-mapping decisions happen implicitly and the file on disk loses all of its headroom. Always keep a 16-bit master — 32-bit HDR edits are expensive to redo from scratch.
Step 7: Verify Printer Settings
Click the Printer… button at the bottom of the right panel. This opens the OS-level print dialog, where the driver’s own settings live.
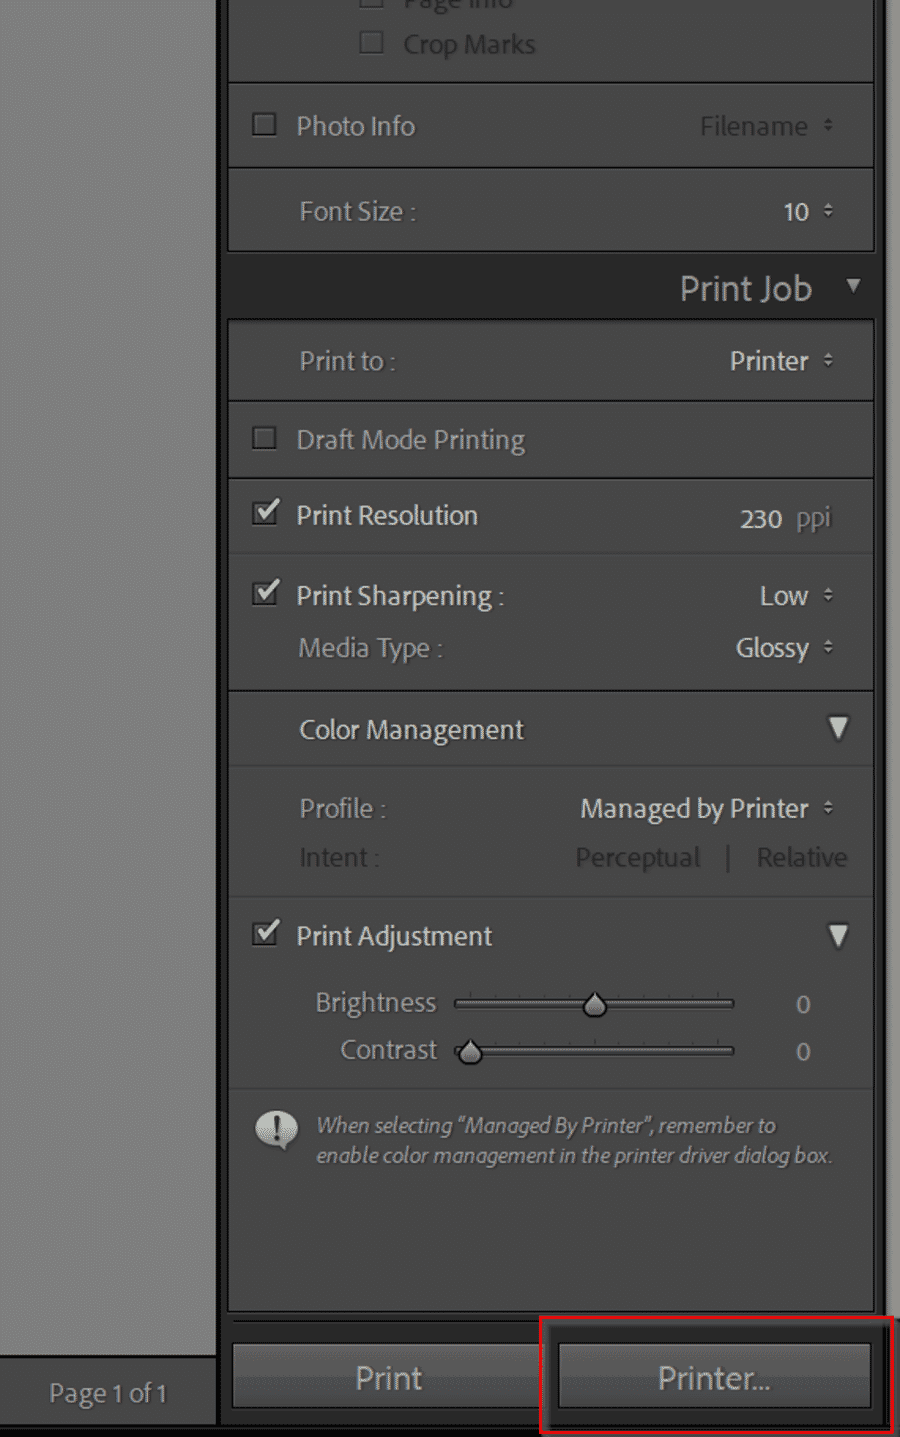
This step matters because the printer driver has its own paper-type and quality settings that exist entirely outside Lightroom. Set Media Type (in the driver) to match the paper being used, set Print Quality to the highest option, and — critically — if Lightroom is handling color with a custom ICC profile, turn the driver’s color management OFF to avoid double-management.
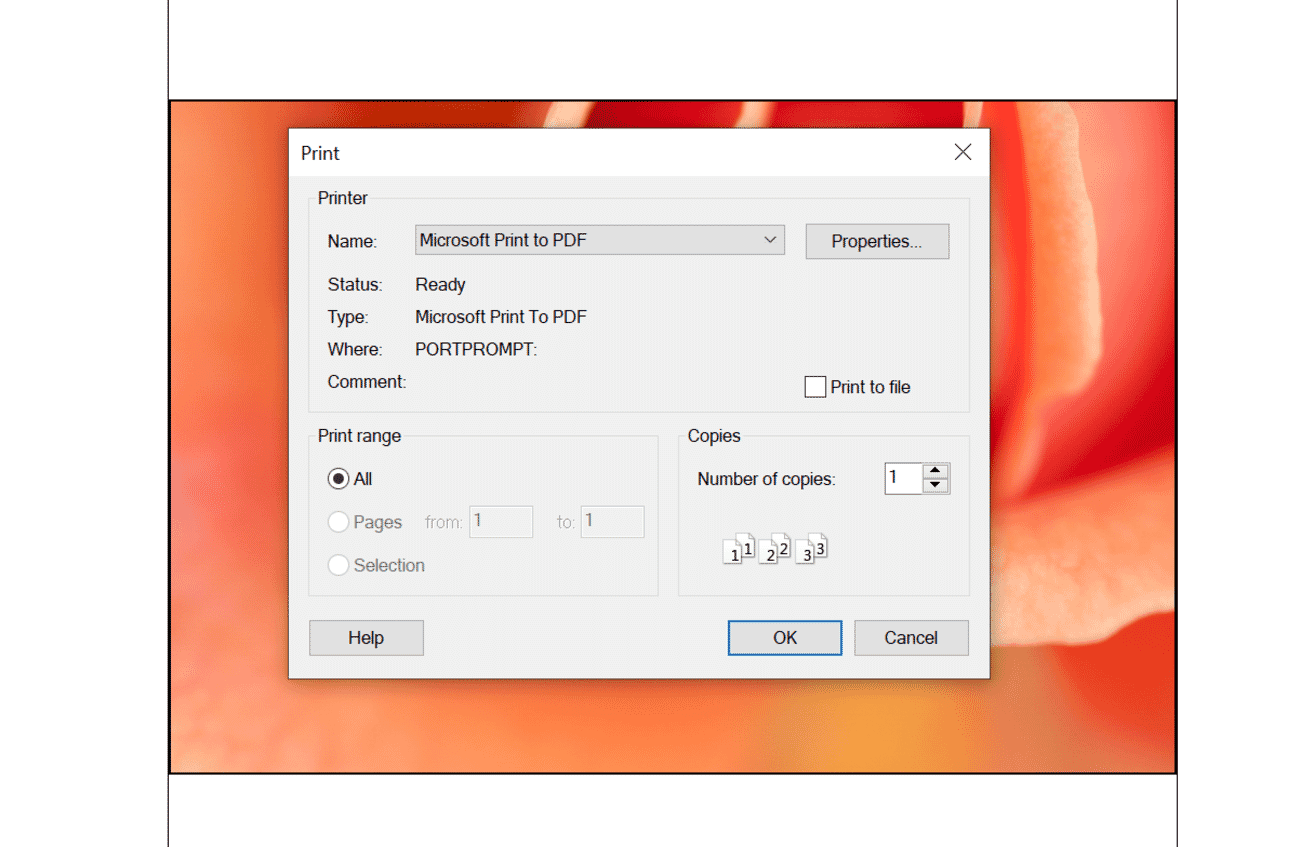
Number of copies can also be set here. Click OK to return to Lightroom.
Step 8: Click Print
With every panel dialed in, click the Print button at the bottom-right of the Print Module. Lightroom hands the file to the printer driver with output sharpening, color management, and sizing applied.
Before printing a second copy, save the layout as a Print template: Template Browser > + (New Template). Every setting in the right-hand panel — paper size, margins, sharpening, color profile, print adjustments — is baked into the template. Future prints to the same paper reduce to: pick the image, click the template, click Print.
Print in Lightroom: The Next Step
Lightroom Classic’s Print Module looks dense, but most of its complexity is optional. The core workflow — pick paper, set layout, enable output sharpening, pick a color profile, click Print — is something a photographer can get through in under two minutes once the settings become familiar.
For home printing, direct from the Print Module is almost always the right answer. For lab printing, the export recipe above (300 PPI sRGB JPEG at 100 quality with matched output sharpening) covers every major consumer and pro lab. For 32-bit HDR files, always keep a 16-bit TIFF master and convert down to 8-bit JPEG for the actual print.
Save a Print template per paper, save an Export preset per lab, and every future print becomes a two-click operation.
Frequently Asked Questions
Can you print from Lightroom?
Yes. Lightroom Classic includes a dedicated Print Module with layout, sharpening, color management, and output controls — it’s one of the most capable print workflows built into any photo editor. Cloud-based Lightroom (the non-Classic app) only has a basic File > Print dialog.
Where is the Print Module in Lightroom?
In Lightroom Classic, the Print Module is in the module row across the top-right of the main window, between Slideshow and Web. Click Print to open it. Cloud-based Lightroom does not have a Print Module — it only offers File > Print with a stripped-down system dialog.
Is it better to print from Lightroom or Photoshop?
For most photographers, Lightroom Classic is the better choice. The Print Module is faster, the soft proofing is cleaner, and print templates make repeat prints trivial. Photoshop wins for complex layouts (magazine-style spreads, text and graphic overlays) and for tiling very large prints across multiple sheets. For single-image fine-art prints, Lightroom Classic is more than enough.
Can Lightroom do color management for printing?
Yes. Lightroom Classic supports full ICC-profile-based color management in the Print Job panel. Select Other… under the Color Management Profile dropdown to load a paper-specific ICC profile, set Rendering Intent to Perceptual for photographs, and disable color management in the printer driver to avoid double conversion.
Can you do soft proofing in Lightroom?
Yes. In the Develop module, press S to enter Soft Proofing mode. Load the paper’s ICC profile from the Profile dropdown, enable Show Destination Gamut Warning to see any out-of-gamut colors, and make a soft-proof copy of the file with adjustments tuned for that paper. The soft proof is the best preview available short of actually making a test print.
What resolution should I export for printing?
300 pixels per inch at the physical print dimensions. For an 8×10 print, that’s 2400×3000 pixels. For a 16×20 print, 4800×6000 pixels. In Lightroom Classic’s Export dialog, set Resize to Fit > Dimensions, enter the target size in inches, and set resolution to 300 pixels per inch. Some fine-art labs accept up to 360 or 720 PPI, but 300 is the universal safe default.
What color space should I use for print exports?
sRGB for every consumer print lab (Mpix, AdoramaPix, Shutterfly, Snapfish, Nations Photo Lab) and for most pro labs on consumer accounts. Use AdobeRGB or ProPhoto RGB only when the lab explicitly documents support for wider-gamut uploads and a soft-proof profile is in use. Anything else will be silently converted to sRGB on the lab’s server.
Sources used for this article:
Some links may be affiliate links. PhotoWorkout may earn a small commission at no extra cost to the reader.


