Key Takeaways: Mastering Camera Gear: The Ultimate Packing Guide
This guide provides comprehensive guidance on how to pack, choose, and travel with a camera bag effectively. It breaks down the topic into manageable sections, ensuring clarity and practical advice for photographers.
What Is a Camera Bag?
A camera bag is designed to carry camera gear safely and comfortably. It prevents damage and facilitates ease of transport over long distances.
Do You Need a Dedicated Camera Bag?
Yes, using a dedicated camera bag is crucial as it’s specifically designed to protect and secure camera equipment, unlike regular backpacks or suitcases.
What Does a Good Everyday Camera Bag Look Like?
It should be protective, comfortable, and easy to carry, allowing photographers to transport their gear without strain or risk of damage.
The Best Way to Carry a Camera: Types of Camera Bags to Consider
- Backpacks
- Sling Bags
- Shoulder Bags
- Hard Cases
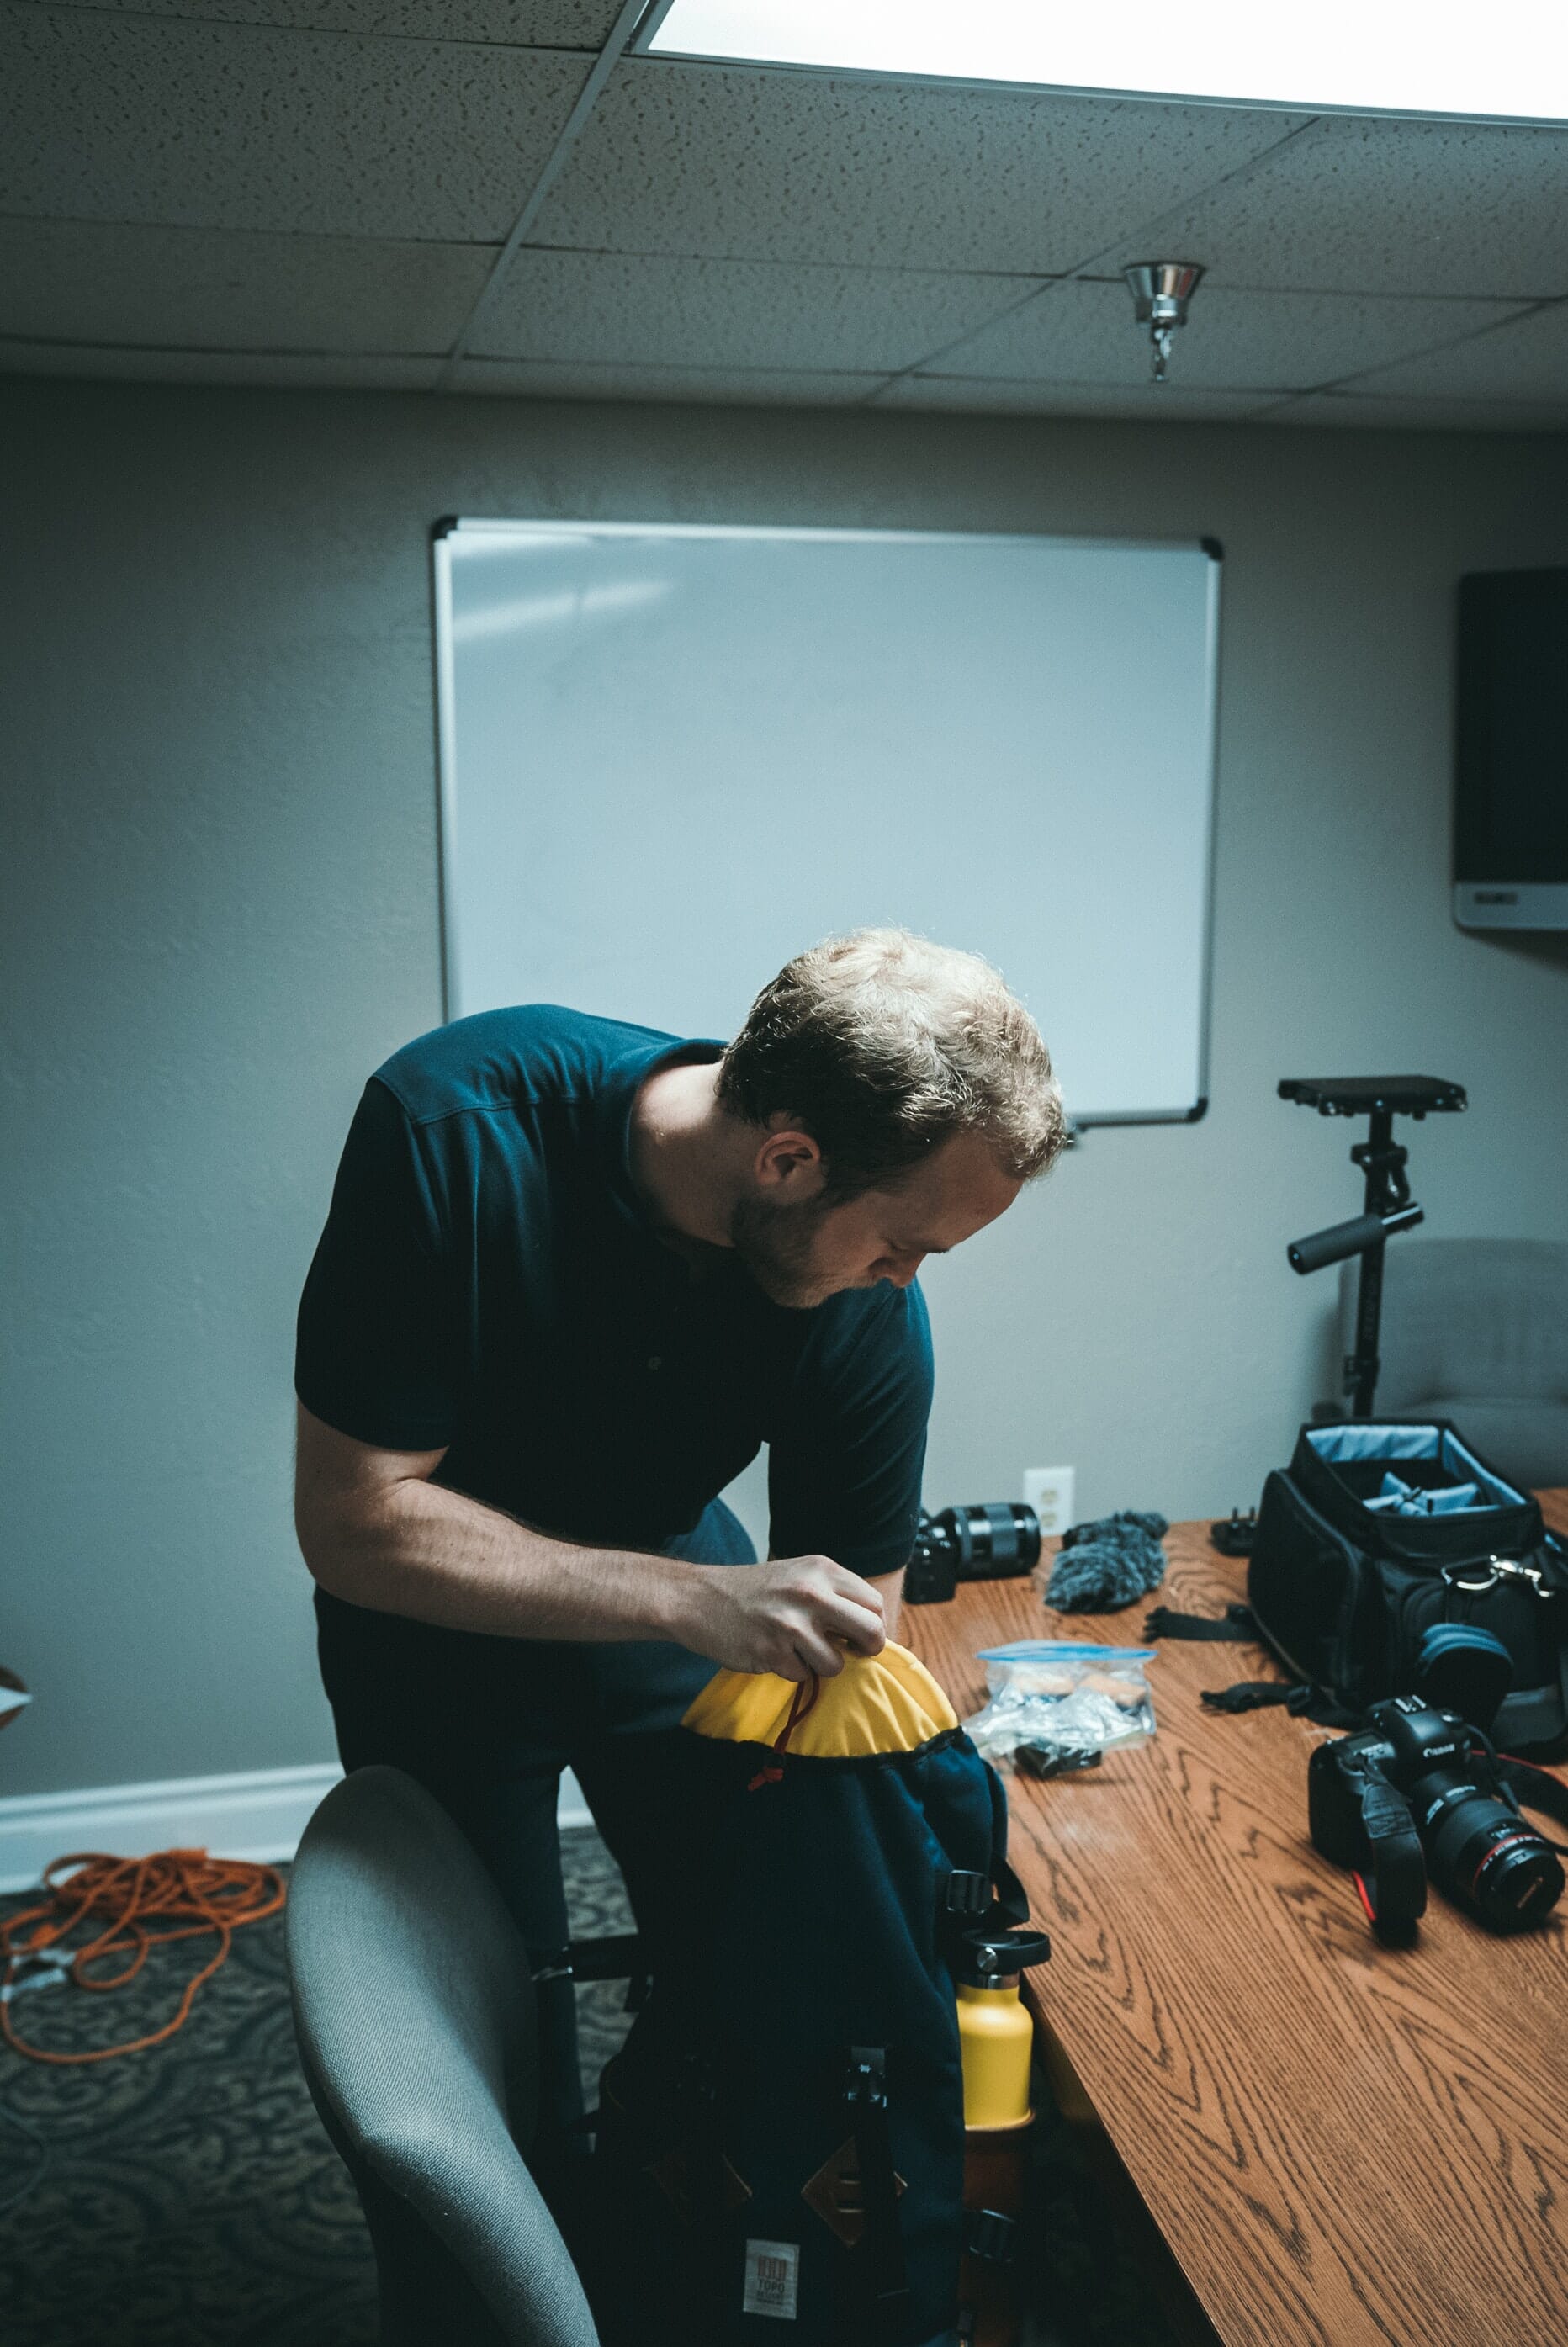
How to Pack a Camera Bag: Tips and Tricks
- Prioritize frequently used items
- Use dividers to secure your gear
- Employ ziplock bags for small accessories
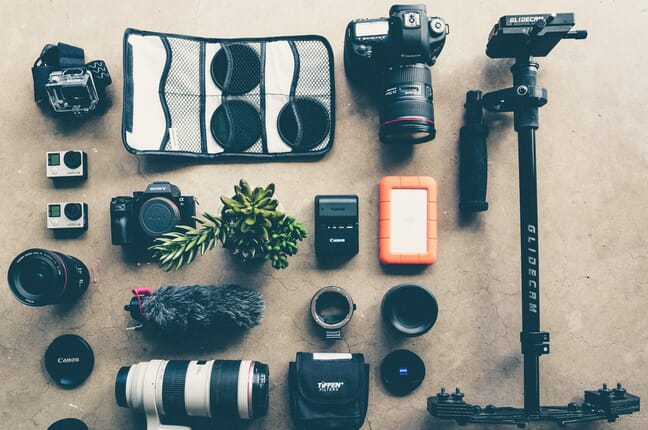
What Gear Should You Include in Your Camera Bag?
- Camera body
- Primary and backup lenses
- Memory cards and batteries
- Cleaning tools
Flying With Camera Gear: Dos and Don’ts
- Do carry your camera gear as hand luggage
- Don’t pack batteries in checked luggage
In conclusion, a dedicated camera bag is indispensable for photographers aiming to protect their gear. Choosing the right type and packing smartly ensures your equipment remains safe, especially during travel.
Introduction
Do you want to know how to pack a camera bag? Are you looking to carry your camera equipment with you on a long trip, a day hike, or even just to and from your local shooting spots?
Don’t worry.
Because in this article, I’m going to share with you everything you need to know about choosing, packing, and traveling with a camera bag.
I’ve been traveling with camera gear for over a decade now, including quite a few international flights, hikes through the wilderness, and more.
Which is why, by the time you’re finished reading this article, you’ll know exactly what you need to do to keep your gear safe and secure when not in use.
Are you ready to discover how to use a camera bag with great results?
Let’s get started.
What Is a Camera Bag?
First things first:
A camera bag is any camera-carrying device.
A camera bag should allow you to travel some distance without worrying about your gear getting broken, bumped, or stolen.
It should also help you comfortably carry your gear (so that you don’t finish a long walk with a sore neck, shoulder, or hip).
Related Posts
Now, there are quite a few different camera bag designs, and I’m going to discuss those in a moment.
But first, there’s a key question that I need to answer:
Do You Need a Dedicated Camera Bag?
If you’re first getting started with photography, you’re probably wondering:
Do you have to buy a camera bag that’s actually made for photography equipment?
Or can you just use a regular old backpack, shoulder bag, or suitcase?
In my experience, you absolutely, one-hundred percent need a dedicated camera bag.
And here’s why:
Camera bags are designed specifically for cameras. They ensure that your camera equipment stays safe and secure while traveling. And they also make sure that the camera gear is distributed in such a way that you end up with minimal discomfort.
Whereas standard bags and backpacks just aren’t designed to handle cameras. With a standard backpack, for instance, your gear will bump and grind together, resulting in superficial (or more serious) damage.
Plus, a standard backpack won’t be able to protect your equipment if it gets dropped (which will happen on occasion; that’s just how these things go).
And standard backpacks will result in a lot of frustration over time, because you often won’t be able to access your equipment quickly.
For instance, you might pack your macro lens at the bottom of the bag. Then, while hiking, you notice an interesting dragonfly. By the time you’ve managed to extract the macro lens, the dragonfly will almost certainly have disappeared.
I get it:
Dedicated camera bags can be expensive.
But they’re a great investment, especially if you’re planning on doing any form of long travel.
And it’s important to note:
A good camera bag can last you a fair few years.
(I’ve been shooting for over a decade, and I’ve only ever used two bags. Both are still in great working condition, but I ran out of space in the old one and was forced to upgrade for an international flight.)
What Does a Good Everyday Camera Bag Look Like?
Let’s take a look at the key features in any good camera bag, starting with:
Made Specifically for Photography Equipment
I’ve already discussed this one in the previous section, but it bears repeating:
You need to make sure your camera bag is designed specifically for cameras.
There should be camera-sized compartments. Lens-sized compartments. And dividers.
There should also be a lot of padding, in case the bag gets dropped or jostled around.
Note that this does not mean that the bag should be for camera gear only. Many dedicated camera bags include laptop compartments and other pouches, which is perfectly fine.
What matters is that the bag is designed to take care of your camera.
Flexible Dividers
If you choose a camera bag that holds more than one camera and one lens, then dividers are essential.
These are what keeps your camera equipment from banging around as you travel.
Now, fixed dividers can work, as long as you know that your camera equipment will actually fit between them.
But I’m a huge fan of flexible dividers, and I recommend you use flexible dividers if at all possible.
Flexible dividers can be rearranged depending on the equipment you put in the bag. They tend to work by way of a velcro system.
And while flexible dividers can be a bit finicky to work with, they’re also a perfect way of ensuring that your camera bag can handle different setups.
For instance, you might have a landscape photography setup that includes a full-frame mirrorless camera, an ultra-wide lens, and a telephoto lens.
Most camera bags can handle this just fine.
But if you also shoot wildlife on long camping trips, you may need a bag that can also fit an alternative setup, one with multiple APS-C cameras, two super-telephoto lenses, and some teleconverters.
This is not something that the average camera bag is designed to accommodate. So unless you have flexible dividers, you won’t have compartments big enough for your 300mm and 400mm lenses.
Make sense?
Just Big Enough for All Your Equipment
There are two common mistakes made by photographers purchasing their first camera bag:
They grab a bag that’s too small, so that it can fit their casual camera setup but can’t handle the kit they need for a long trip.
And so they’re forced to purchase a second camera bag, one that’s much bigger, for traveling.
Here’s the second mistake:
Purchasing a camera bag that’s too big.
This happens when photographers expect to get more gear over time, but end up not using the extra space for whatever reason.
Which means that they’re always walking around with extra space (and weight).
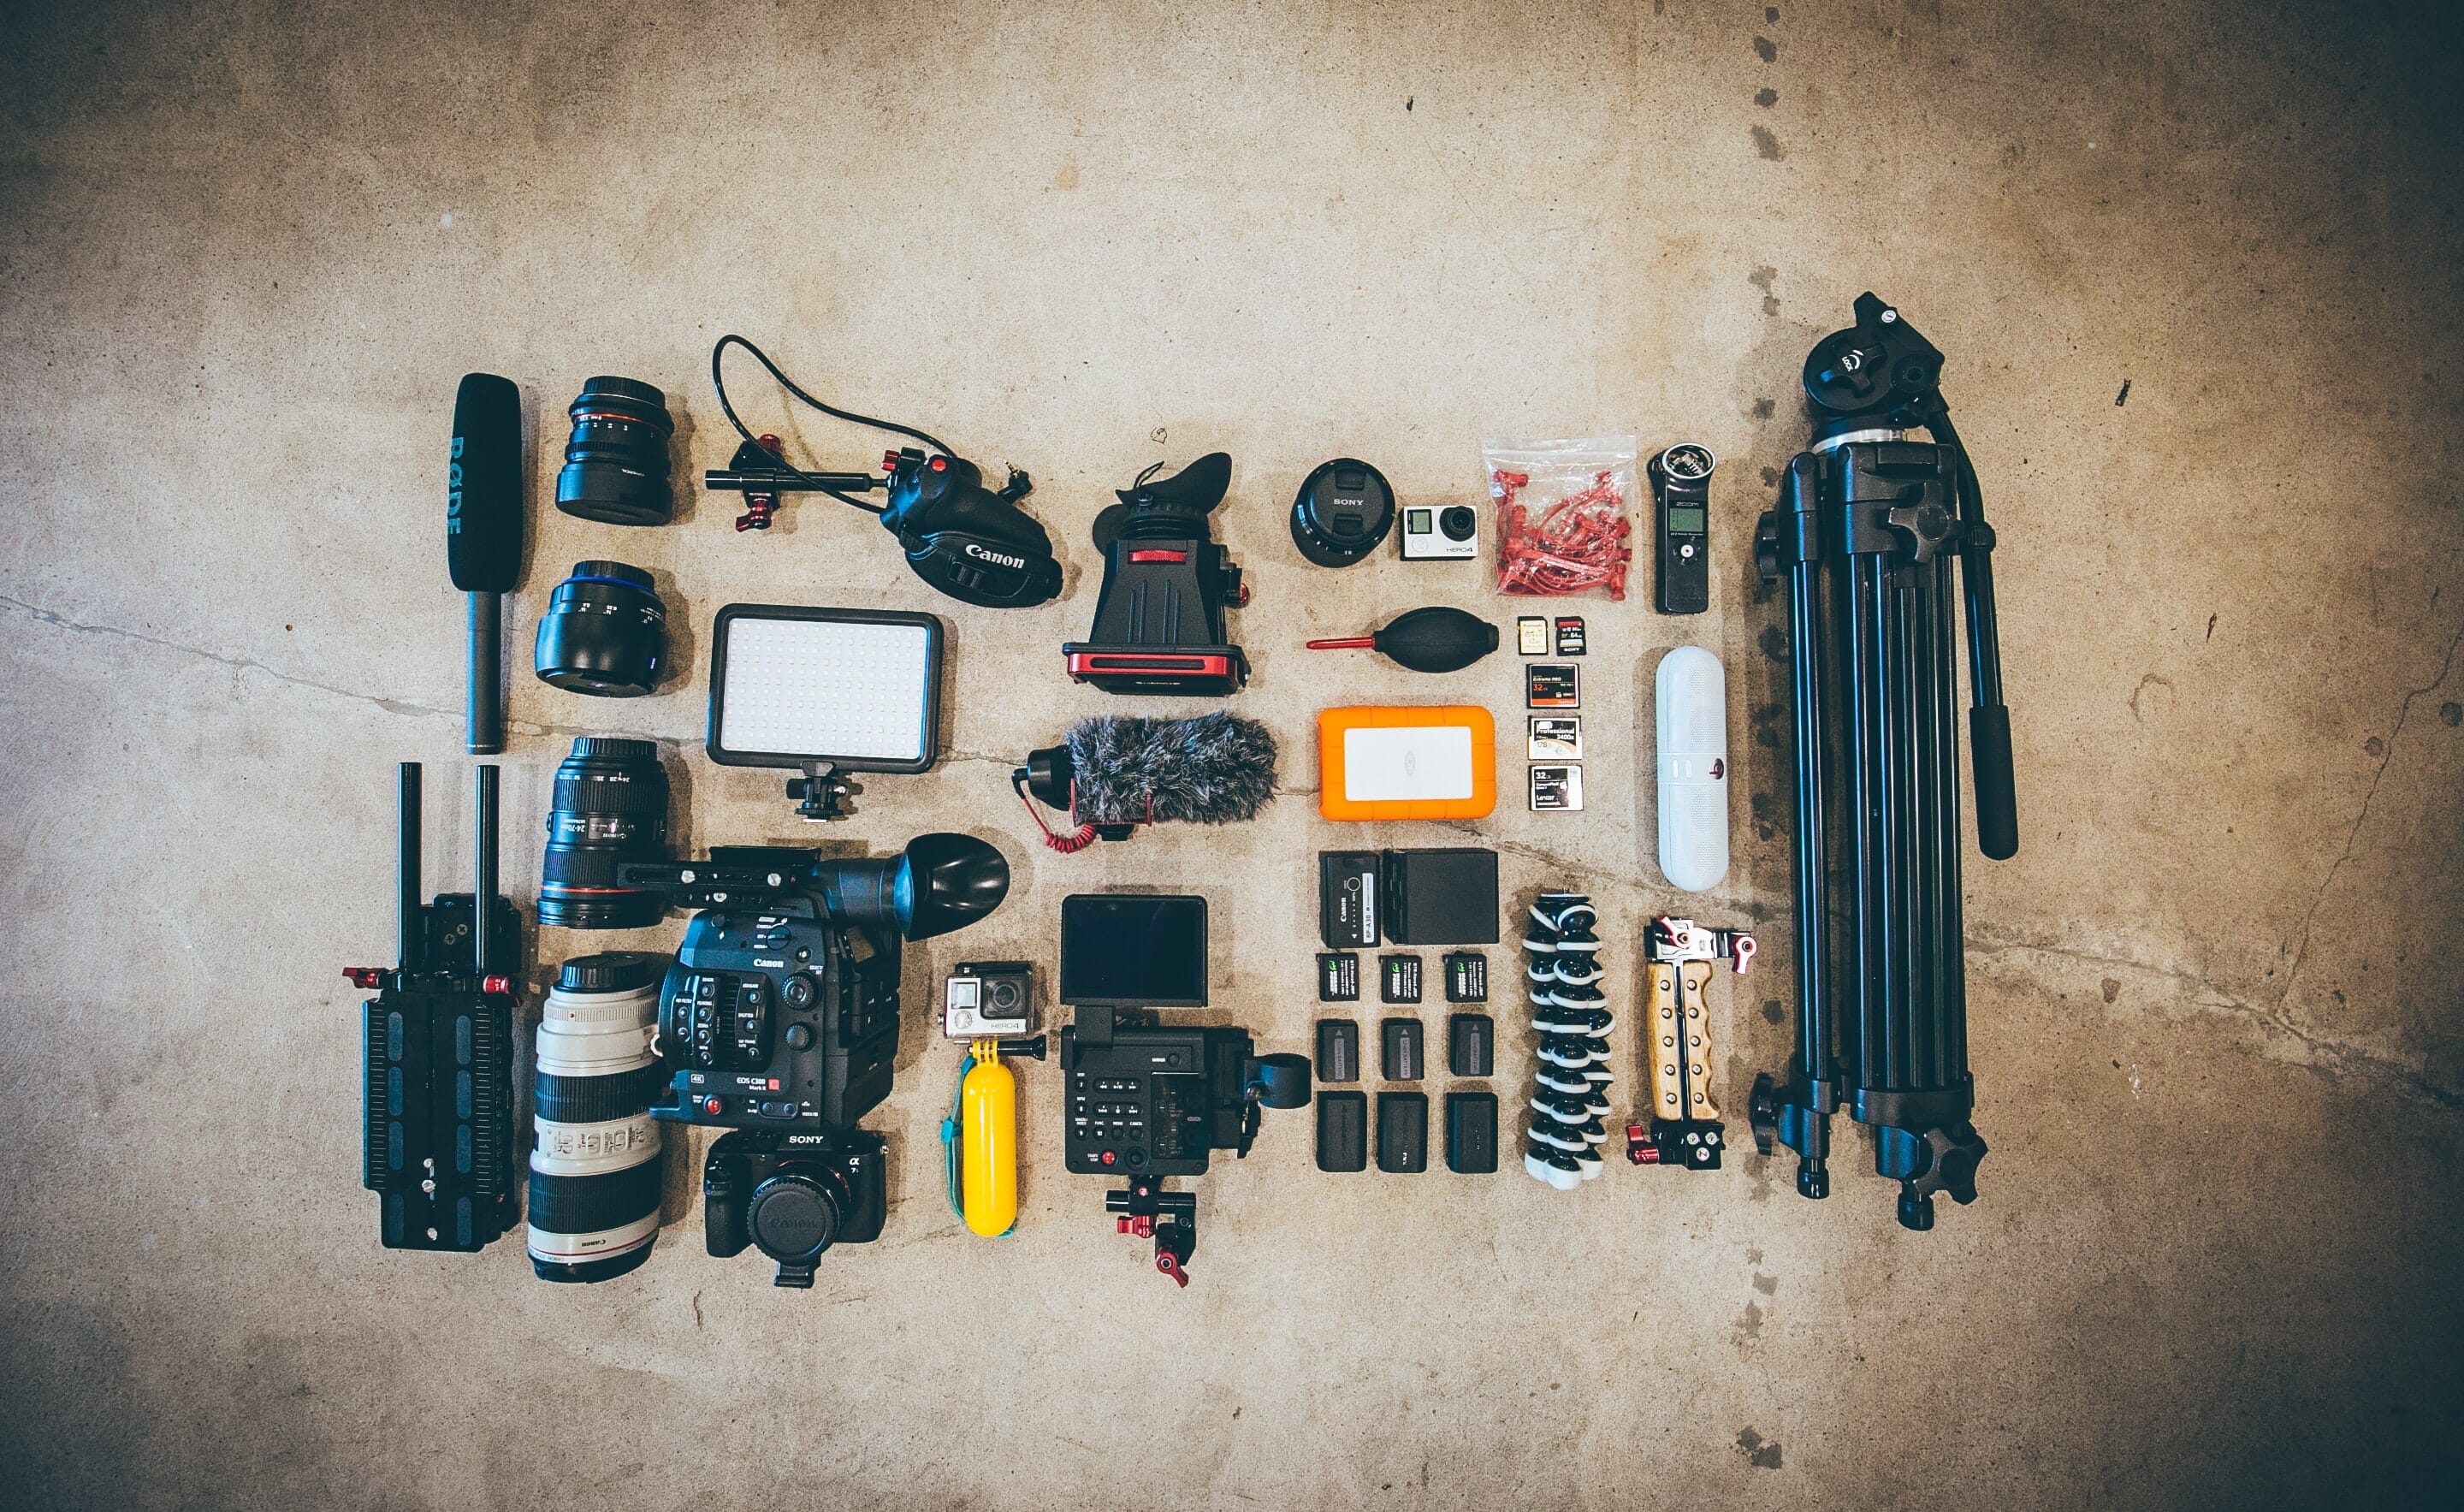
So instead of picking a bag based on your standard kit, or based on what you expect your kit will be, I’d suggest laying out all of your camera equipment.
Then ask yourself:
Realistically, what’s the most equipment I’d ever need?
And pick a bag based on that.
Snug on the Inside
Some camera bags are designed for bigger camera systems (such as full-frame DSLRs or even medium format cameras).
Whereas other camera bags are designed for point and shoot or mirrorless cameras.
Here’s the problem:
If you purchase a camera bag that’s designed for full-frame DSLRs and you actually use a compact mirrorless model, your camera and lenses will be sliding all around.
This results in a far greater chance of damage. Plus, you’ll end up with more space than you need, which makes for extra weight.
And if you purchase a camera bag that’s designed for point and shoot cameras but you actually use a DSLR, then you’ll struggle to fit any of your gear in the bag at all.
That’s why you need to make sure the bag you buy is snug on the inside–without being overly tight.
Comfortable
An uncomfortable camera bag isn’t worth buying.
Because while you might think that you can handle a bit of discomfort…
…over time you’ll get more and more frustrated.
Until, eventually, you don’t want to go out with your camera gear at all, because your camera bag is just too darn painful.
And, in the end, you’ll probably end up buying a second, more-comfortable camera bag.
So start out with a comfortable camera bag right off the bat.
That way, you’ll never have to go through any pain at all.
Make sense?
Difficult to Open While Walking
This final criterion depends on the type of photography you do, and the type of camera bag you’re after.
You see, if you do a lot of traveling, then you’ll probably be faced with the possibility of theft. This often comes in the form of grab-and-run type stealing.
Now, if your bag is secure, nobody will yank it off your back, your hip, or your shoulder.
But if it’s easy to open from the outside, you face the possibility of someone quickly unzipping it, grabbing your camera, and flitting away.
Which is why I prefer my camera bags to be relatively difficult to open from the outside (e.g., with small zippers that must travel significantly to reveal the camera).
Plus, a bag that’s more difficult to open will prevent any accidental unzippings, which can be truly catastrophic.
The Best Way to Carry a Camera: Types of Camera Bags to Consider
Now that you’re familiar with the key features of a good camera bag, let’s take a look at most of the options on the market today:
Pouches
Camera pouches are designed for everyday-type photography.
They’re cheap, but they’re also very small, which means that you won’t be able to fit more than a camera and two lenses at most.
You can carry a camera pouch via the top strap, or you can clip it to your belt and wear it.
Camera pouches are for walking. For street photography. And for family photo outings. They’re great at offering a lightweight, easy-to-access camera-carry solution. But I don’t recommend a pouch if you’re planning on doing any extensive traveling or hiking.
Holsters
Holsters are like pouches, except designed for slightly easier access.
They generally house a camera and a single (attached) lens. While holsters often close up completely (so that your camera equipment is protected from rain and theft), they can also be left open–so that you can grab your camera and take a shot in one smooth motion.
As with pouches, I’d recommend holsters for everyday situations and other scenarios where you’re not going to be traveling long distances and don’t need much equipment. You might use a holster for sports photography, portrait photography, or street photography, but I don’t suggest it for landscape, wildlife, or travel work.
Backpacks
Backpacks are my personal favorite method of carrying your camera equipment, and here’s why:
They’re versatile.
Backpacks offer a lot of space, which means that you can carry pretty much all of your camera equipment if you need to. They’re also very padded, so you can confidently travel with gear on planes and buses.
Plus, backpacks are just comfortable, especially if you have a lot of equipment that you frequently carry around.
I’ve used camera bags of all types, but backpacks are the only one that’s really stuck–which is why I almost exclusively use backpacks these days.
If you’re a landscape photographer, wildlife photographer, or travel photographer, then a good backpack is pretty much essential. You’re not going to be able to go on long hikes or bumpy flights with a pouch or a holster (and while hard cases can do the job in the latter case, they’re not ideal for carrying while walking).
The biggest downside to a backpack is the lack of access; in most cases, you have to swing it off your shoulder and put it on the ground before you can grab any equipment. But, for many photographers (myself included!), the sacrifice is worth it.
Related Posts
Sling Bags
Sling bags are essentially one-armed camera backpacks, designed to go over your shoulder.
They tend to offer an intermediate amount of space: not quite as much as a camera backpack, but more than a pouch or a holster. And they offer a lot of padding, plus they’re solid and secure enough that you can take them on planes.
Personally, I find the one-armed carry method to be less comfortable than a backpack, but that will depend somewhat on what you’re used to.
If you’re after a backpack-like solution with easy access, then a sling bag is probably the way to go.
Shoulder Bags
Shoulder bags are generally a step down from the security or padding offered by a backpack or sling bag–but they offer fast access to your camera gear while including a lot of space. You can often fit one or two cameras, plus a trio of lenses, into a shoulder bag (though this will depend on the bag you purchase; there are plenty of smaller or larger models).
As with sling bags, I find the one-shoulder method of camera-carry to be less comfortable than a backpack. But if you’ve used a messenger-type bag before, you may feel differently.
So if you’re after a fast-access bag with decent space, a shoulder bag is worth considering.
Hard Cases
Hard cases are the safest and sturdiest of all cases.
They look like what you’d expect:
A hard exterior, with a soft, padded interior.
Generally, hard cases are used for long trips, and are especially useful if you plan on checking your luggage (rather than carrying it on).
But hard cases are very heavy, which means that you’re not going to want to use them for any type of walkaround photography or hiking-type photography.
Really, if you’re going to use a hard case, I’d highly recommend also purchasing one of the other options on this list to go along with it. That way, you can travel safely with your hard case, then transfer your key equipment into a backpack, a sling bag, or a pouch before heading out to do photography.
(The exception, of course, is if you’re simply traveling to a studio, where you won’t need any of these additional carry options.)
How to Pack a Camera Bag: Tips and Tricks
Now let’s take a look at how to pack a camera bag to ensure maximum security and comfort while out shooting.
Give Every Item Its Own Pocket
Rule one of packing camera equipment:
Don’t double up pockets.
In other words:
Don’t stack lenses or cameras on top of one another.
Instead, use the dividers that are available to house every camera and every lens individually.
While it can be tempting to take a couple of small lenses and put them in the same pouch, they may bang into one another.
This might end up completely fine.
But it also might end up scratching, denting, or otherwise damaging either one of the two lenses.
So keep each piece of equipment separate!
By the way, if you have the space for certain lenses but you don’t have enough pockets, then I’d recommend grabbing some dividers.
You can quickly install these into your bag, and–voila!–you’ll be able to keep all of your items safe and sound in their own compartments.
Make Sure There’s Plenty of Padding
Padding, padding, and more padding.
That’s what you must have if you care about your camera equipment.
Because most camera equipment is delicate. It’s prone to breaking.
In fact, you can break a lens simply by dropping an unpadded camera bag.
Not good, right?
That’s why it’s essential that you keep your camera bag as padded as possible. No equipment should end up in any hard impacts with the ground. And no equipment should end up in any hard collisions with one another.
Point Your Lenses Up (or Sideways)
This is a quick tip, but one that can save you from a ton of damage:
When you pack your bag, instead of positioning your lenses face down, angle them so that they’re face up or sideways.
You see, while face down lenses won’t normally present a problem, there will be times when you drop your bag (or simply set it down quickly).
If your lenses are face down, the front element (or the front filter, if you have one) can shatter.
Whereas if your lenses are positioned sideways or face up, this won’t be a problem.
Move Around Dividers to Fit Your Current Setup
If your camera bag includes flexible dividers–that is, dividers that you can rearrange–use them.
Figure out in advance what equipment you’ll be taking.
And before you put a single piece of kit in your backpack, make sure you set up your dividers so as to perfectly fit all your equipment.
As I emphasized in a previous section, the best camera bag is one that’s snug, but not too tight. When you’re rearranging your dividers, aim for this.
That way, your camera gear won’t jostle around. Instead, it’ll stay safe and secure, no matter the situation.
Only Take What You Need
Here’s a common beginner mistake:
Taking every piece of gear out on every outing, even though some of the cameras and lenses probably won’t get used.
So if you own a tripod, four lenses, and two cameras, you’d pack all of it in your camera bag–even though it’s highly unlikely you’ll use the second camera, and it’s highly unlikely that you’ll use two of the four lenses.
Make sense?
Obviously, what constitutes too much equipment will depend on you, how far you’ll be traveling, and what you’ll be shooting.
But I’d recommend erring on the side of bringing too little, not too much, especially if you’re going on a more casual trip.
(If you’re planning on going on a long international trip, on the other hand, then I’d recommend erring on the side of bringing too much.)
Worst case scenario, your camera stops working and you don’t have a backup. Or you need to shoot a bird in the distance but only have your wide-angle lens.
And while it’s frustrating to have such a thing happen, you’ll recover. Plus, it’s better to have fun with just a few pieces of equipment than to be weighted down by far too much gear.
(Also, taking just one lens and one camera is a good exercise for improving your photography and your creativity. So if you do end up in a situation where you wish you had a longer or shorter lens, etc., being limited can actually help you get a more interesting shot!)
Ensure Every Camera and Lens Has a Cap
Here’s another quick tip:
Make sure that every lens and camera you pack away has all its caps.
I’m talking about lens caps, rear lens caps, and camera body caps.
Now, it’s easy to forget this. It’s easy to grab your lens, note that the lens cap isn’t there, and just throw it in your camera bag anyway.
But this opens you up to all sorts of possible damage. The front element could get scratched. It could get chipped. Or it could get broken.
Taking cameras without a body cap or lenses without a rear lens cap is even worse; you could damage the back of your lens–or your camera sensor, which is ultra-delicate and costs a huge amount of money to repair.
So make sure you always use your caps!
Throw in a Couple of Silica Gel Packets
Here’s your final tip for packing your camera equipment:
Take some silica gel packets.
And keep them in your camera bag at all times.
Silica gel sucks the moisture out of the surrounding area, which is great for situations when your camera equipment got wet (such as during a rainstorm or a shoot near the waves).
Silica gel is also helpful in humid environments, where you always want to keep the air dry to prevent mold spores from growing.
You don’t need a lot of silica gel; a packet or two should do the trick (and too much silica gel is bad for your gear, so don’t go overboard).
You can purchase silica gel online, but you also have the option of asking your local shoe store if they have any leftover packets (pretty much every shoebox has some silica gel, so this is a great way to get your hands on a lot of it!).
What Gear Should You Include in Your Camera Bag?
You know how to choose a camera bag.
And you know how to pack your camera bag for great results.
But what should you actually include in your camera bag? What do you need to ensure you have a successful photo outing?
That’s what this section is all about.
Two Cameras
Every photographer needs a camera.
But I’d really recommend you go with two.
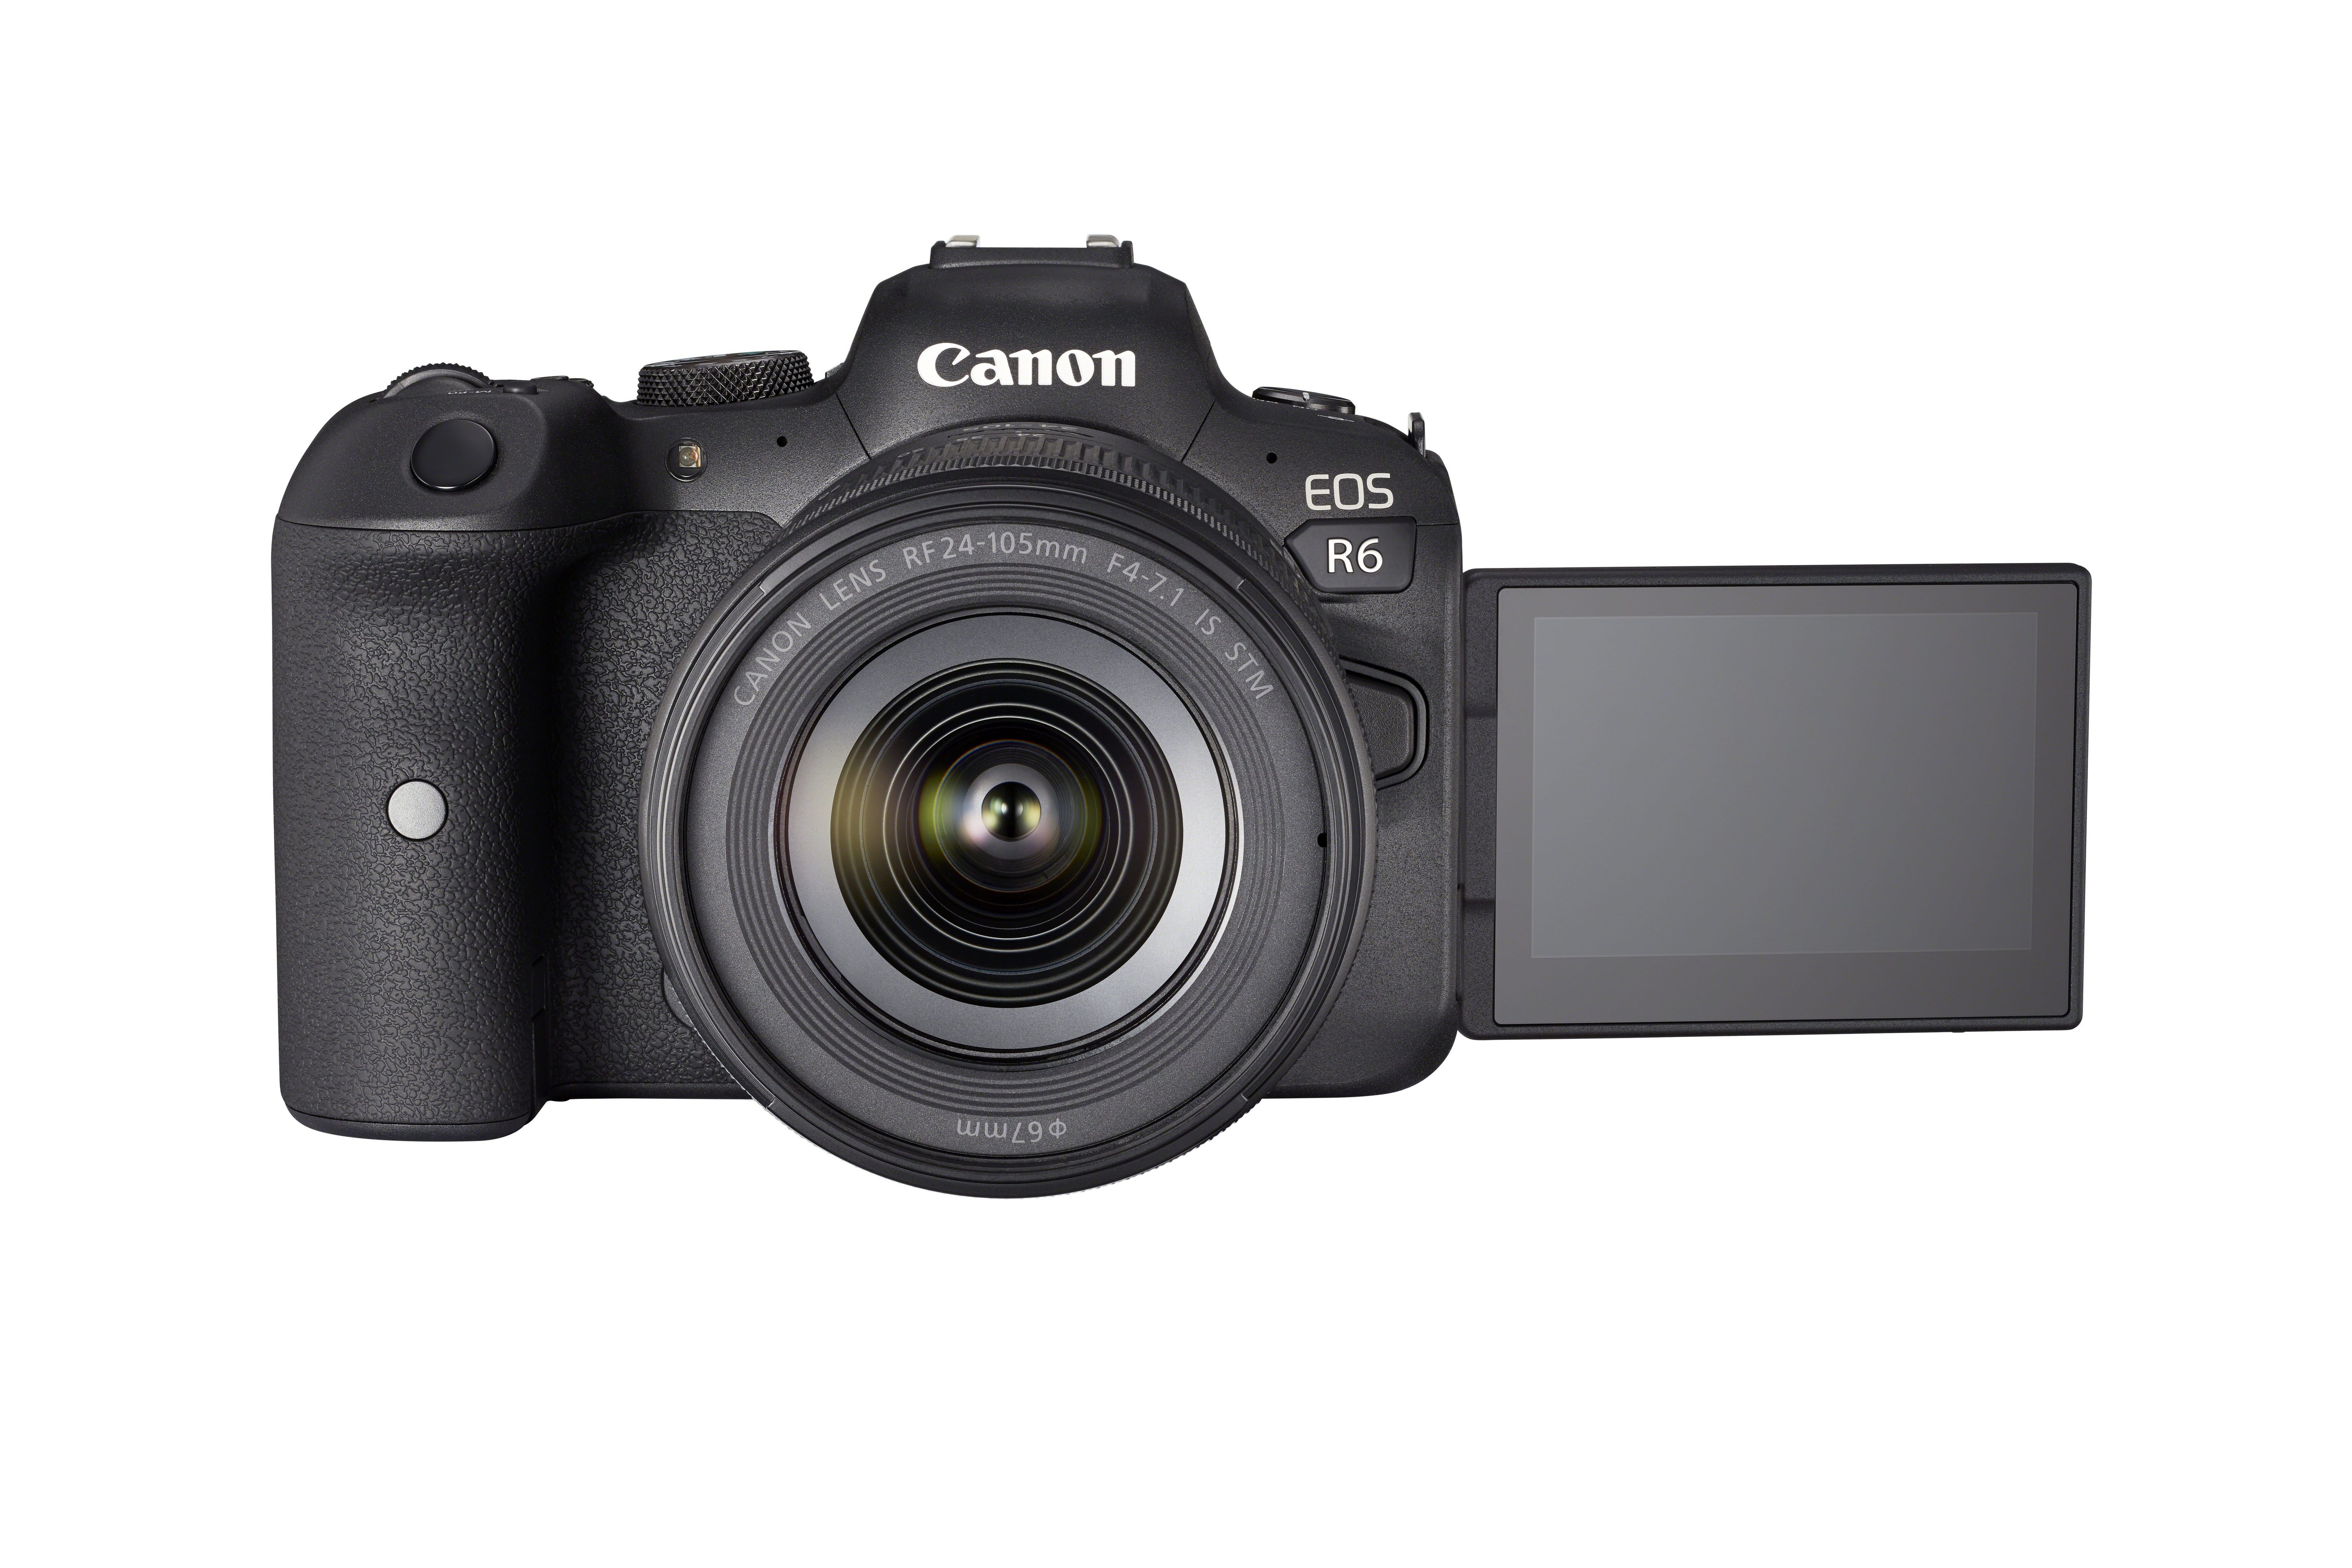
The first should be your primary camera, which you use most of the time.
And the second should be your backup camera, which you might use for another (rarer) purpose, such as for the occasional snapshot.
What’s important is that you have a second camera on hand in case your first camera fails.
After all, what if you’re traveling overseas and you don’t have access to a camera shop? Are you just going to go the rest of the trip without taking photos?
If you have a second camera body, that won’t even be a question.
Of course, if you’re only going out for the day, you may be able to get away with a single camera, especially if the shoot isn’t one that has any expectations riding on it.
(In other words: Don’t take a single camera to a wedding shoot. Always have two!)
Only the Lenses You Need
As I’ve emphasized above, you should only pack the camera equipment you need.
Every extra lens adds weight to your bag, and makes it more uncomfortable to carry your equipment.
Note that keeping your lens count to a minimum starts during the lens buying process; instead of getting ten different prime lenses, you might want to find a couple of zooms that cover the entire range, especially if you find yourself frequently traveling with your equipment.
Always ask yourself:
Am I really going to use this lens?
And, if the answer is “Probably not,” then leave it at home.
In fact, you’ll often find that you’re a more decisive photographer without all your equipment. Which ultimately results in more successful images!
A Camera Cleaning Kit
Cameras get dirty, no matter how well you take care of them.
(Lenses get dirty, too. As do tripods.)
Which is why you should always, always carry a lens cleaning kit in your camera bag.
At minimum, this should include a rocket blower and a brush. But I’d also recommend you take a LensPen, as well as a special microfiber cloth and some lens cleaning solution.
That way, you can get rid of any sand, dirt, dust, or other debris that makes its way onto or into your camera equipment while you’re out.
By the way, it’s important that you know how to clean your camera properly; you definitely don’t want to end up damaging your camera or lens on accident.
A Waterproof Cover
Bad weather can come at the most unexpected times.
That’s why you should always carry a waterproof cover with you.
After all, you don’t want to get caught in a downpour and have no way of keeping your camera dry.
(This is an especially big problem if you don’t have a water-resistant bag.)
Now, waterproof covers don’t cost much. And you can even keep shooting with them on.
But if you don’t want to purchase a waterproof cover, you can always make one out of a trash bag and a couple of rubber bands.
Just make sure you have some method of protecting your equipment from the elements, and you’ll be okay.
(Extra) Memory Cards
If you’re going on a long trip, you’re going to need lots of memory cards.
The particular amount depends on your shooting style and the genre of photography you focus on. But I’d recommend at least taking ten medium-sized memory cards, if not more.
The idea isn’t to take the exact right amount of space.
Instead, take far more storage space than you need–so that, if you happen upon a crazy, award-winning scene, you still have the memory card space to capture it.
By the way, this applies to shorter trips, too. While you won’t need 10+ memory cards, you’ll want to take at least a few, just in case you take too many pictures or your primary card fails.
(Extra) Batteries
Camera batteries don’t last very long.
This is especially true of mirrorless cameras, which often don’t last for more than 400 shots or so.
Oh, and if you’re shooting in the cold, the battery will drain even faster.
That’s why I always recommend you take at least one extra camera battery (and two, three, or even four extras is even better).
Because there’s no worse feeling than having all of your camera batteries die in the middle of a shoot.
Unfortunately, batteries can be pretty expensive.
But they’re absolutely worth it.
Optional: A Charger
If I’m just going on a day trip, I generally don’t bring a charger with me. Instead, I just make sure I have plenty of batteries.
But if I’m going on any sort of extended trip, carrying a charger is key. They’re not big and they’re not bulky, but they can make a big difference to your shooting.
Oh, and I recommend you use the charger every chance you get. Always be charging your recently-depleted batteries, instead of waiting until they all go down to zero.
Optional: A Remote Release
Remote releases are designed for long exposure photography, as well as photography from a distance.
With a remote release, you can trigger your camera’s shutter button without actually touching the camera. This is essential if you wish to avoid camera shake.
However, if you shoot any type of photos that don’t require a tripod, then a remote release is going to be pretty pointless.
And even if you do shoot long exposure, tripod-based photos, there is a workaround:
The self-timer function.
Instead of carrying around a remote release, you can simply use a two-second or ten-second self-timer.
That way, when you press your camera’s shutter button, the camera has several moments to stabilize before actually firing off the shot.
Personally, I far prefer a remote release; I hate waiting for the shutter to actually fire.
Plus, this can negatively impact your photos. If you’re photographing long exposures of car trails, and you use a ten second timer (which is sometimes required if your tripod isn’t ultra-stsable or is positioned on difficult terrain)…
…then by the time your camera has started firing, the car might have driven out of the frame!
That’s why I recommend remote releases for any long exposure photographer.
By the way, remote releases also have another purpose:
They allow you to capture self-portraits!
Simply hide your remote release behind you, stand in front of the camera, and trigger it from a distance.
Cool, right?
Related Posts
Optional: Flashes
Flashes are useful in all sorts of photography, which is why you’ll want to make sure you don’t leave them behind.
Of course, if you’re a natural light photographer, carrying flashes is a waste of time.
But if you’re a portrait photographer or an event photographer, your flashes are essential. So make sure you add a flash or two to your camera bag.
You’ll also want to include extra batteries, in case the flashes run out of juice partway through your photoshoot.
Oh, and you may need a couple of light stands and a flash trigger, depending on your style of flash photography.
Optional: Two Backup Hard Drives
For short trips (e.g., an evening outing), I never carry hard drives.
But if I’m going to be gone for more than a few days, I want daily access to my hard drives.
Why?
Because things happen. Memory cards get lost. They fail.
And when that time comes, you want to make absolutely certain that you have a backup.
Fortunately, external hard drives aren’t expensive, and they’re not large, either. You can fit two hard drives into the front pocket of a backpack, no problem.
(If you’re the type of photographer that takes your camera gear on long flights or hikes, I’d recommend grabbing rugged hard drives, by the way.)
Now, you can get away with just using one hard drive.
But my philosophy is that you should consistently back up your images, and when traveling you should always have two copies of every image.
So if you plan on transferring photos to your backup hard drive and then deleting the files off your memory card, I recommend putting the images on a second hard drive, as well.
In other words:
When you’re done for the day, put your images on the two hard drives, then wipe the memory cards.
Ultimately, it’s up to you and your comfort level.
But more backups are cheap and can save you a lot of pain later on.
Optional: A Laptop
A laptop is useful for overnight trips.
You can use it to upload images to social media, check the quality of your photos, and transfer images to your external hard drives.
But if you’re going on a day trip, I don’t recommend bringing one. Even though laptops aren’t especially heavy, a little weight can make a big difference. And why carry more equipment than you have to?
Optional: A Tripod
Here’s the final piece of equipment I recommend you include in (or on) your camera bag:
A tripod.
Tripods are essential if you’re after sharp photos while using long exposure techniques.
You’re not going to be able to get a beautiful image of the Milky Way while casually handholding your camera.
Instead, you need a tripod (and you need it to be sturdy!).
In terms of packing a tripod in your bag, you have a few options.
Some small tripods may fit directly into a bag. For instance, a tabletop tripod can slide into a side pocket.
Other tripods will strap onto the side of your bag, so that you can carry all your gear in a single bundle.
Though if your tripod is very big, you may prefer to get a separate tripod bag, which generally goes over one shoulder and allows you to comfortably carry a tripod in the field.
Of course, not all photographers need a tripod, and if you’re after increased stability you should consider monopods as an easier-to-carry alternative.
Related Posts
Flying With Camera Gear: Dos and Don’ts
Flying with camera gear can be an absolute nightmare.
I know this from experience–which is why I’ve put together a list of helpful tips for taking your camera on planes.
Use a Checklist
You may think that you’ll remember all of your equipment.
And maybe you will.
But there’s always a chance that you’ll forget something.
For instance, what if you leave without your camera battery? Your memory cards? Your most important lens?
That’s why I highly recommend that you use a checklist.
Camera gear checklists are easy to put together (and you can use the items I’ve listed in the previous section for inspiration, though you should of course tailor the list to your own set of gear).
I’d recommend you print it off, because this forces you to take it more seriously. And then, the night before you leave, just go down the list. Carefully check off every item.
That way, when you arrive at your destination, you aren’t missing any critical equipment!
Batteries Go on the Plane
This is a quick one, but it’s always good to keep in mind:
Don’t pack any lithium-ion batteries in luggage that you plan to check. It is airline policy to keep such batteries out of checked baggage–so simply keep any batteries in your camera bag.
Plus, I don’t recommend allowing any of your camera equipment to travel separate from your person, which brings me to my next tip:
Keep Your Camera Equipment With You at All Times
When you fly with your camera equipment, don’t let it out of your sight unless you have a really, really good reason.
So take your camera bag as carry-on luggage. And definitely don’t get it checked for the hold.
Why?
Because you always run the risk of your bag getting lost.
In some cases, the bag will be delivered to you the next day. Other times, it might take a week. And other times, you’ll never get the bag, no matter how much you call and complain.
As you can see, the best case scenario involves you getting your bag late, and potentially missing out on a whole day of shooting.
And the worst-case scenario means that you never take a single shot on your trip, even if you manage to get the cost of your equipment covered (which is far from a certainty, by the way).
So keep your camera bag with you!
(I generally take it as my personal item, and just stick it under the plane seat; you’d be surprised how big a bag can fit under there if you really push it in!)
Pack Your Equipment With Easy Access
When you go through the security line at airports, the level of scrutiny varies.
In some airports, you don’t have to take out small electronics, such as cameras.
But in other airports, everything electronic must come out of your bags and be placed into a separate bin for the x-ray machine.
Now, going through the security line is stressful enough as it is. People are always in a hurry or impatient for whatever reason.
So I recommend you make this process as easy and painless as possible.
That starts by ensuring that your cameras are ready to be taken out of your camera bag as soon as you open it.
Ideally, you can reach the security tables, open your camera bag, pull out your cameras, and place them in a bin. All in a few seconds.
Keep this in mind when you’re packing. You don’t want to cover your cameras with accessories, then have to dig through your bag upon entering the security line.
Make sense?
Also, try to keep an eye on your camera equipment once you’ve put it in a bin and sent it off through the machine. Grab it as soon as you can, and carefully repack it into your camera bag.
Don’t Be Afraid to Add Extras to Your Suitcase
If you’re going on a long trip or you’ve got a lot of camera equipment, you may find that your bag can’t hold everything you need.
So what do you do?
I’d recommend you take any durable items, such as tripods or lightstands, and stick them in a different suitcase. Ideally, this suitcase will go in an overhead compartment, especially if the suitcase equipment is an essential part of your camera setup.
And if you’re worried about something breaking, you can always wrap it in clothes.
In fact, years ago I couldn’t get my 400mm lens to fit in my camera backpack…
…so I put it in a special lens bag (like a holster) and stuck it in my suitcase. Everything went fine, and it still works to this day!
Keep the Bag as Light and Small as Possible
The smaller and lighter your camera bag, the better.
This is especially true when you’re traveling through airports and on planes, and you’re walking long distances with all your equipment, plus additional suitcases.
Don’t sacrifice on equipment just so you can keep things light.
But do make sure that every piece of equipment is necessary, and never take more than you need. Go with one zoom lens rather than three prime lenses. Don’t take every camera you own. And don’t take all four of your tripods, no matter how much you like each one.
Got it?
Separate Your Lenses From Your Cameras
Here’s a final tip for flying with your camera gear:
Make sure that you pack lenses and cameras separately.
Oftentimes, if you’re just heading out for a day trip, you might attach a lens to your camera without worrying. And that’s completely fine.
But if you’re going to be packing a lot of gear and carrying it around airports, I’d really recommend you detach your lenses from your camera bodies and pack them separately.
You see, if your camera-lens combination ends up positioned badly, it can put stress on the lens and camera mount, which is exactly what you don’t want.
Plus, it’s often easier to snugly pack camera equipment when everything is separate.
So it’s just an all-around good idea to break everything down.
How to Pack a Camera Bag: The Next Step
Now that you’ve finished this article, you should be able to comfortably pack your camera bag.
You should also know about the types of camera bags out there, and how you can choose the perfect camera bag for your needs.
So grab a camera bag. And practice packing it!
It may seem like a trivial thing…
…but it’ll make a huge difference!

Can I take my camera bag on the plane?
Yes, absolutely! I recommend you always take your camera bag on the plane with you; don’t check it, and don’t let it out of your site! Once you bring your camera bag on the plane, you can put it in the overhead compartment or, if it’s small enough, you can store it under the seat as a personal item.
Can you carry on camera equipment?
Yes, you can! In fact, I’d recommend that you do this; you don’t want to end up checking your camera equipment. You see, checked bags can get banged around, they can arrive late, or they can get lost forever. So, if at all possible, keep your camera equipment by your side at all times.
Do I need a hard case for carrying my camera equipment?
No, definitely not! Most photographers don’t even own a hard case, because they’re big, bulky, and expensive. That said, hard cases are useful if you’re frequently traveling with your equipment and you worry about it getting banged up; sure, they’re inconvenient, but they can be absolutely worth it.
Do I need a backpack for carrying my camera equipment?
No, you don’t need a backpack for carrying your equipment. Many photographers do use camera backpacks, especially if they frequently travel or go on hikes with their gear, but other photographers prefer different solutions. Personally, I like camera backpacks, but there are plenty of other options, such as pouches and holsters, for photographers who don’t need to carry lots of gear and want fast access at all times.
What’s the best type of camera bag?
That really depends on your needs. Hard cases are good if you’re traveling frequently and need to keep your gear as safe as possible; pouches are good if you’re a casual photographer who needs quick access to your camera; backpacks are good if you do a mix of travel and walkaround photography but don’t require lightning-fast access. And, of course, there are many other types of camera bags, such as shoulder bags, sling bags, and camera holsters. Honestly, if I had to recommend the camera bag type that tends to be the most useful for the most photographers, I’d go with a camera backpack. They’re very versatile, and can pack lots of gear or very little gear, depending on what you’re after.
