Photography Tips
Our Photography Tips Category shares practical and simple photography tips every beginner can implement.
Latest Photography Tips Posts
 Make Boring Photos Burst with Life: A Step-by-Step Guide Using Luminar Neo Learn how to transform dull photos into vibrant masterpieces using Luminar Neo's powerful editing tools with this step-by-step guide.
 Capturing Candid Moments and Genuine Emotions in Event Photography Seasoned photographer Paul Fox reveals his secrets for capturing emotions in event photography – the raw, genuine moments that tell a story.
  Headshot Photography Posing Tips for a Natural and Flattering Look Improve your headshot photography with advanced tips on posing, camera setup, and capturing authentic, natural expressions with Joshua Gharis.
 Choosing the Right Camera Gear and Settings for Sports Photography Navigate the dynamic world of sports photography camera gear! From the fast-paced Sony a9 III to Nikon's D850 powerhouse, seize every moment with precision.
 Through My Lens: My Approach to Camera Gear and Settings for Stunning Headshots Learn how to shoot professional headshots that truly stand out with these insider tips on camera gear and settings.
 Capturing the Essence of Urban Life: Advanced Street Photography Techniques Elevate your street photography game with techniques for lighting, composition, and storytelling. Uncover the beauty of urban life through your lens.
 20 Photography Goals to Strengthen Your Photography Skills Photography Goals for 2024 – we look at easy ways to expand your photography skills and broaden your horizons.
 Exif Data Basics: Understanding the Fundamentals of Image Metadata Exif Data Explained: Mastering Image Metadata for Better Photography
 11 Basic Food Photography Tips for Beginners Beginner-friendly food photography tips to capture appetizing images with effective settings, lighting, composition techniques, and more.
Photography Tips Posts Ranked by Popularity
 52 Tips to Improve Your Photography Skills (Fast!) Do you want to improve your photography as fast as possible? Discover 52 ways to instantly improve your photo skills!
 The 30 Most Famous Photographers (And What We Can Learn from Them) Who are the 30 most famous photographers of all time? And what can we learn from them? We give you a curated list of 30 famous photographers!
 The Psychology of Camera Angles Discover the psyology of various photography angles. See sample images of 7 most common camera angles. Learn, get inspired, and shoot better.
 High Key Photography: An Ultimate Guide to High Key Images If you're looking to capture stunning high-key photos, you've come to the right place. Discover the secrets for beautiful bright portraits!
 15 Fun Photography Lessons for Kids Do you want to get your child started in photography? These 15 photography lessons for kids are a great way of showing them the ropes!
 The 4 Best Camera Settings for Indoor Photography The best shutter speed, aperture, ISO, and focusing mode for indoor photos. Capture crisp, clean, well-exposed images indoors.
 The Ultimate Guide to External Flash in Photography Do you want to capture stunning photos using external flash? This guide will tell you everything you need to know for pro-level external lighting!
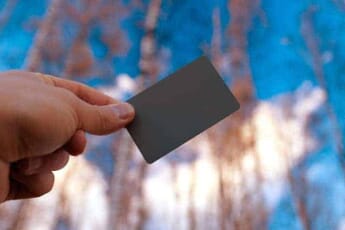 Understanding White Balance White balance refers to the process of correcting color casts in your photos. You can set the white balance yourself using a gray card.
 Vantage Point in Photography: A Guide (Plus 22 Examples) Discover everything you need to know about vantage points in photography for amazing results. And see plenty of inspiring examples!
 Photography Aesthetic: A Simple Guide to Creating Beautiful Photos What is a photography aesthetic, and how can you use it for amazing results? We share plenty of techniques for beautiful photos.
 The Best Time to Take Pictures Outside: An Essential Guide When's the best time to take pictures outside for stunning results? Discover our favorite types of natural light for amazing photos!
 What Is Urban Photography? The Essential Guide What is urban photography? Take stunning urban photos like a pro with these tips, style examples, and gear recommendations.
 15 Indoor Photography Tips for Stunning Results Struggling to capture gorgeous photos indoors? Fear not; we share fifteen tips to make your indoor photography shine!
 Headshot Photography Tips There is a fine line of difference between headshot photography & portraitures. Discover 10 easy to implement headshot photography tips.
 Corporate Portrait Photography Tips 6 Amazing Tips on How to Shoot the Perfect Corporate Portrait Photo. Learn How to make that Pro Headshot for your New Professional Profile.
 Cute Poses for Instagram: 20 Flattering Shots for Every Woman’s IG Feed Discover our top 20 cute poses for Instagram so you can get share-worthy pics in seconds. These poses are sure to satisfy!
 Levitation Photography Tips and Tricks: 20 Ideas to Spark Your Creativity! Levitation photography can be an exciting learning experience that pushes creative boundaries. Read on for some levitation photography tips to inspire you!
 20 Most Famous Fashion Photographers (and What We Can Learn from Them) To be a better photographer, we need to look to the greats. Here are the best famous fashion photographers and what we can learn from them!
 The 20 Best US Photography Print Magazines Here are the 20 best photography magazines available in the U.S. giving you industry insight, professional reviews, and top tips.
  Light and Exposure in Smartphone Photography: A Complete Guide Discover the secrets to smartphone exposure and lighting. Tips and tricks to take incredible photos--with only your smartphone!
 16 Car Photography Tips to Take Compelling Car Photos What's the secret behind those jaw-dropping car photos? We share the best car photography tips to help you capture compelling images.
 The DIY Photo Studio Ultimate Guide: Make a Studio in Your Home Discover how to make a DIY photo studio in your own home. Step-by-step, budget-friendly directions. For portrait and product photography!
 Antarctic Photography Tips (the Ultimate Guide with Sample Photos) Antarctic photo tips about gear, camera settings, how & where. Capture the best of Antarctica and its' animals.
 Best Camera Settings for Sunset Portraits (Plus 10 Sunset Poses) Learn the best camera settings for your next sunset portrait photoshoot. Includes exposure, metering, flash, and 10 bonus pose ideas.
 HDR Night Photography: 11 Tips for Stunning Night Photos Want to do stunning HDR night photography? We share 12 tips and techniques to take your night HDR skills to the next level!
 High-Speed Sync Flash: What Is It and When Should You Use It? High speed sync is a useful flash photography technique - but when should you apply it? And what does it actually do? It's all in this article!
 Best Camera Settings for Portraits: 4 Essential Tips We share the best camera settings for portraits! Keep your portraits sharp, detailed, and artistic with these fundamental settings tips.
 10 Photography Exercises to Boost Your Skills Learn 10 photography exercises for beginners. Boost your skills and develop as a photographer, fast!
 The Best Camera Settings for Outdoor Portraits – In Rain or Shine! Discover the best camera settings for outdoor portraits so you can nail that exposure and get stunning shots no matter the weather!
 The Best Instagram Photographers Using Their Smartphone: 10 Top Picks Who are the best Instagram photographers using their smartphone? Discover the top smartphone photographers on Instagram. Be inspired!
 10 Best Photography YouTube Channels to Follow in 2024 We narrow down the best YouTube channels to learn photography, offering tutorials for beginners to advanced Photoshop editing tricks.
 The Best Macro Photography Settings (for Stunning Close-Up Shots) What are the best settings for macro photography? Discover six key settings for jaw-dropping close-up shots!
 5 Simple DSLR Settings Every Photographer Should Know (For Stunning Photos) Discover the 5 key DSLR settings that you should know as a photographer. Take your photos to the next level, right now!
 Flower Macro Photography: Tips for Amazing Flower Photos Do you want to capture stunning flower macro photography? Discover the secrets to incredible flower photos. Level up your photography!
 Exposure Bracketing for High Dynamic Range (HDR) Photos: A Complete Guide Do you want to know how exposure bracketing works? If you're looking to create gorgeous HDR images, then you've come to the right place.
 Understanding the Key Differences of Landscape vs Portrait in Photography Discover how landscape vs portrait can enhance your photography technique. From camera settings and styles to photographic orientation. Become an expert!
 Best Camera Settings for Night Photography: Useful Tips and Ideas Discover the best camera settings for night photography. Take a wide variety of amazing shots in low-light situations!
 20 Tips for Photography Beginners How do you capture stunning photos? Discover the secrets to amazing photography with these 20 photography tips for beginners!
 Wide vs Narrow Aperture: A Guide to Choosing the Perfect Aperture Setting Learn the difference between wide vs narrow apertures. Pick the perfect settings for beautiful results.
 High Key vs Low Key Lighting in Photography: A Complete Guide What's the difference between high key vs low key lighting? Discover everything you need to know about these two photography styles!
 7 Tips for Better Indoor Portrait Photography 7 tips for creating better indoor portrait photography including choosing the right gear, balancing natural and artificial light, and creating an organized and interesting background to frame your subject.
 Blue Hour Photography: A Comprehensive Guide (With 7 Tips) What's blue hour? And how can you use it to capture amazing photos? Discover everything you need to know for great blue hour photography!
 Interior Photography Tips: 12 Essentials for Getting Stunning Interior Shots Do you want to take stunning interior photos? If the answer is yes, you need to know these twelve essential interior photography tips.
  14 Event Photography Tips to Make Your Images Shine Level up your event photography with these must-know tips. Learn how to choose the right settings, elevate your compositions, and more.
 The Importance of Lighting in Photography Why is seeing the light in photography is so important? It matters! Different types of natural/artificial light produce soft or hard light.
 Low Light Photography: The Ultimate Guide to Shooting in Low Light How do you capture amazing low light photography? Discover the secrets to gorgeous photos in low light situations. An ultimate guide!
 5 Landscape Photography Settings Every Photographer Should Know Discover 5 landscape photography settings that will take your images to the next level. Capture amazing landscape photos, consistently!
 The Best Colors for Family Pictures Outside: Picking the Right Outfit Learn what to wear for your next family photoshoot! A complete guide to the best colors for family pictures outside.
 20 Cherry Blossom Photography Tips (Including Best Locations) Capture beautiful photos of cherry blossoms. We share plenty of tips and tricks for cherry blossom portraits, nature shots, and more.
Discover Photography Tips on PhotoWorkout
Welcome to the Photography Tips category of PhotoWorkout.com, your ultimate resource for comprehensive, actionable, and expert advice on a wide array of photography topics. Our mission is to make photography more accessible, whether you’re a beginner learning the ropes, an amateur honing your skills, or a professional looking to enhance your portfolio.
Dive into our extensive library of articles to improve your skills across various photography genres. Learn how to master Corporate Portrait Photography with our detailed guides, whether you’re capturing headshots, shooting indoors, or aiming for that perfect outdoor portrait.
Uncover the secrets of Macro Photography, exploring techniques from capturing exquisite flower macros to detailed indoor macro shots. Navigate the enchanting world of Urban Photography and understand the art of telling compelling stories through your lens.
Explore tips on capturing stunning images in specific conditions like Night Photography or during the Blue Hour. Master the challenging art of Car Photography and bring your creative vision to life.
Our articles also cover key technical aspects of photography, from understanding camera settings for various scenes, such as Sunset Portraits or Outdoor Portraits, to mastering Wide vs. Narrow Aperture, and demystifying Exposure Bracketing.
Apart from these, check out our posts on utilizing various photographic equipment and technology, like Off-camera Flash and External Lights for High Key Lighting.
Whether you’re just starting out and need Beginner Photography Tips or are looking to push your creative boundaries with something unique like Levitation Photography, PhotoWorkout.com has got you covered.
Keep browsing, keep learning, and keep shooting!
